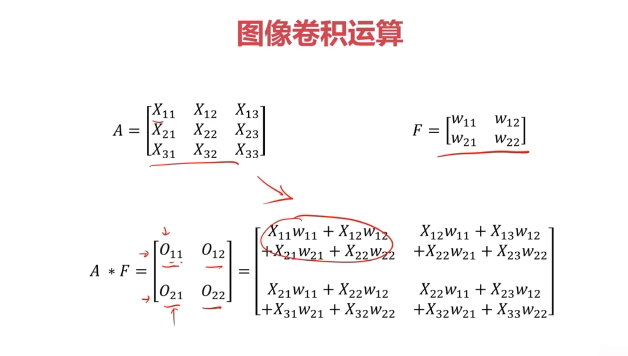
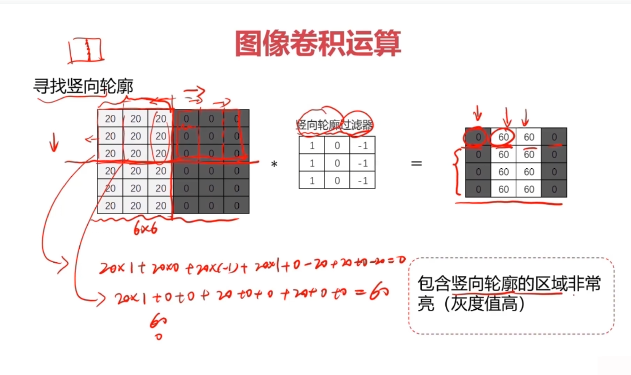
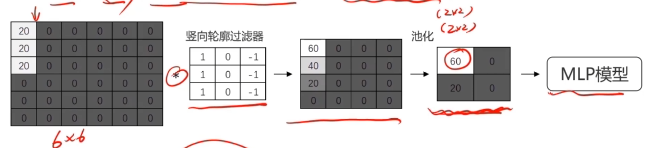
一、圖像卷積運算
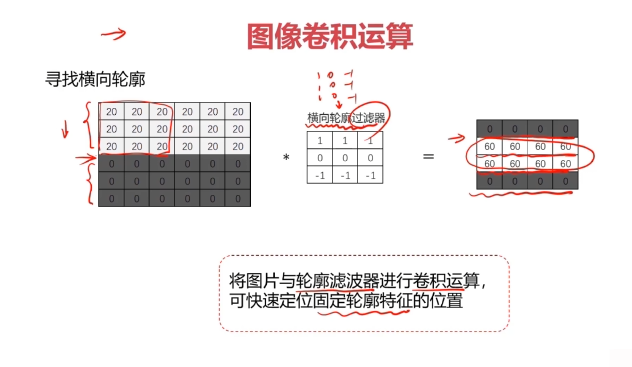
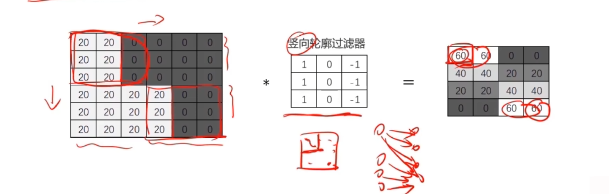
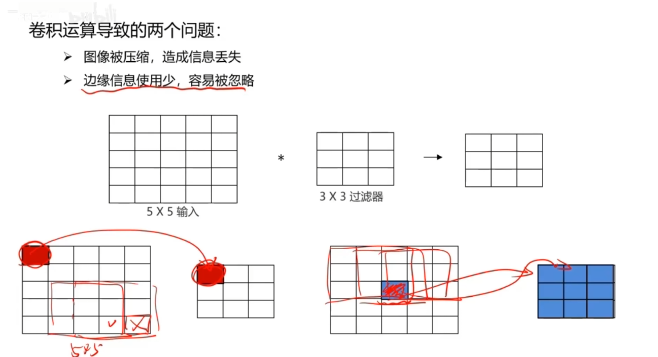
對圖像矩陣與濾波器矩陣進行對應相乘再求和運算,轉化得到新的矩陣。
作用:快速定位圖像中某些邊緣特征
英文:convolution(CNN)


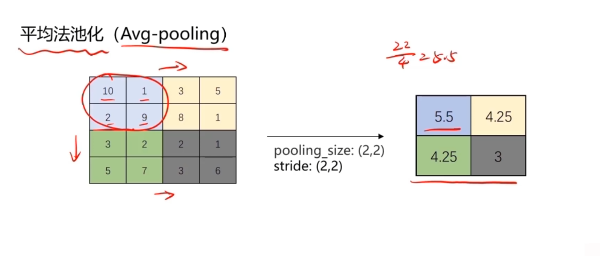
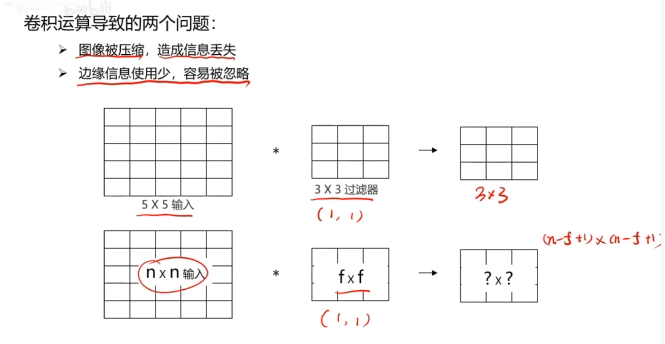
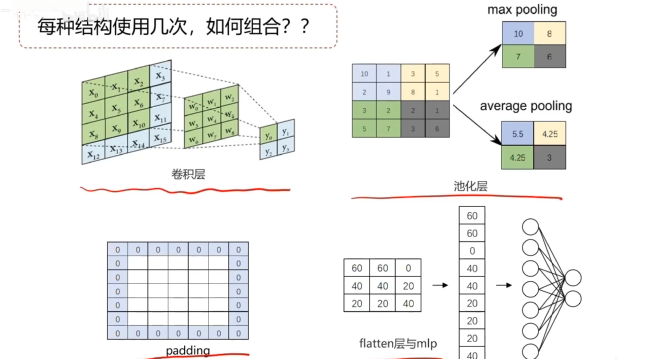
池化層實現維度縮減
池化:按照一個固定規則對圖像矩陣進行處理,將其轉換為更低維度的矩陣

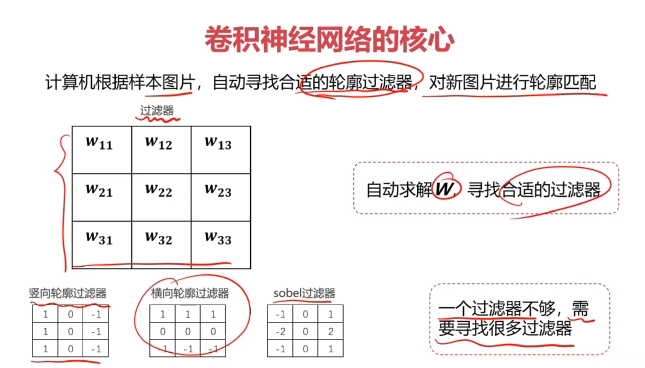
卷積神經網絡
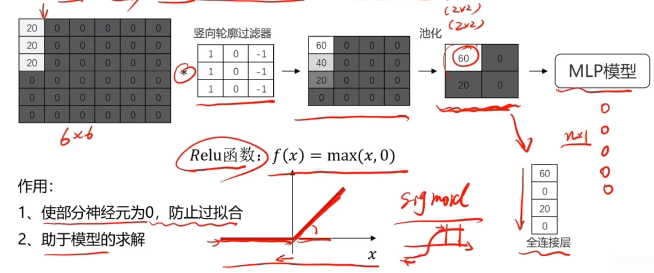
把卷積、池化、mlp先后連接在一起,組成卷積神經網絡。
激活函數:Relu
卷積神經網絡兩大特點
-
參數共享(parameter sharing):同一個特征過濾器可用于整張圖片
-
稀疏連接(sparsity of connections):生成的特征圖片每個節點只與原圖片中特定節點連接
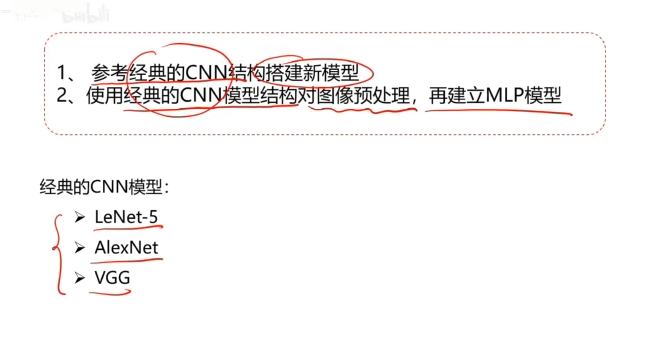
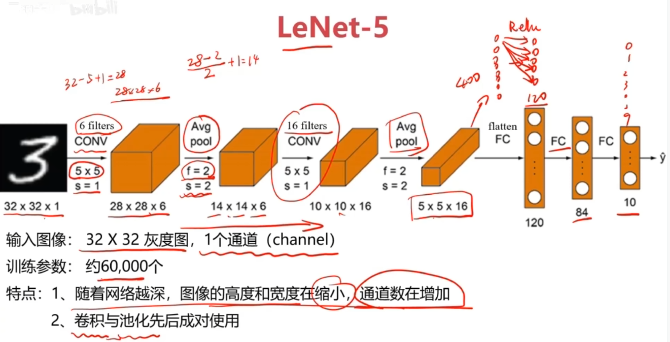
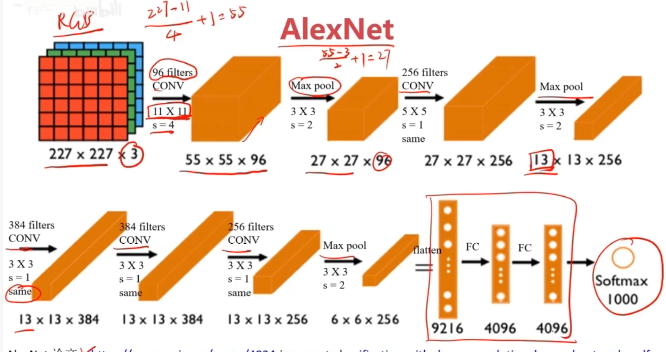
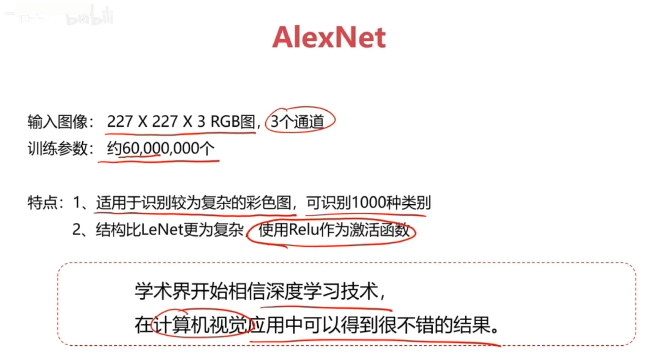
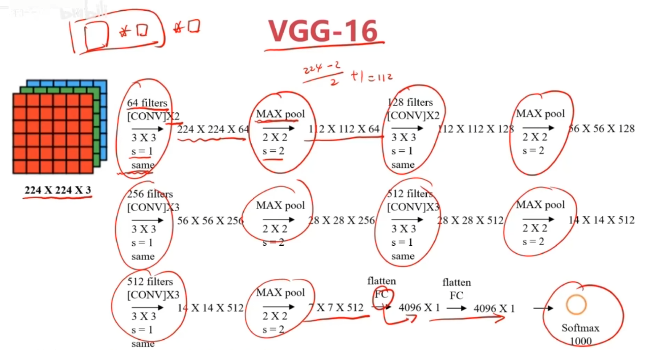
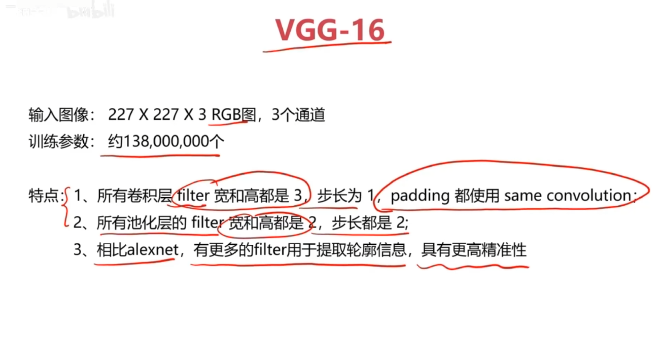
經典的CNN模型


二、實戰準備
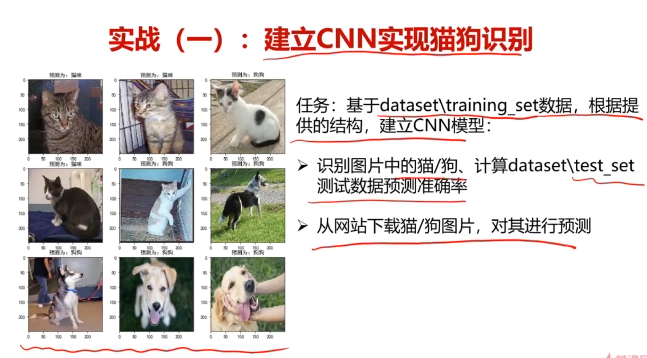
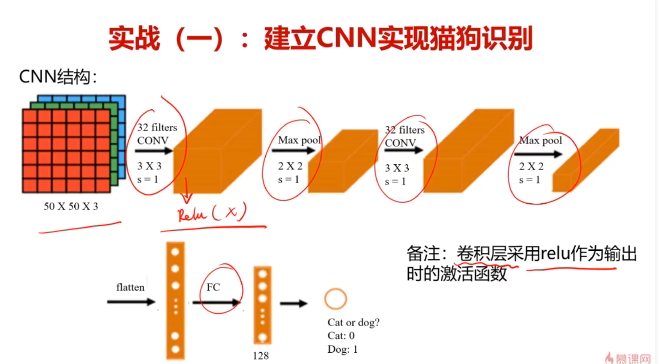
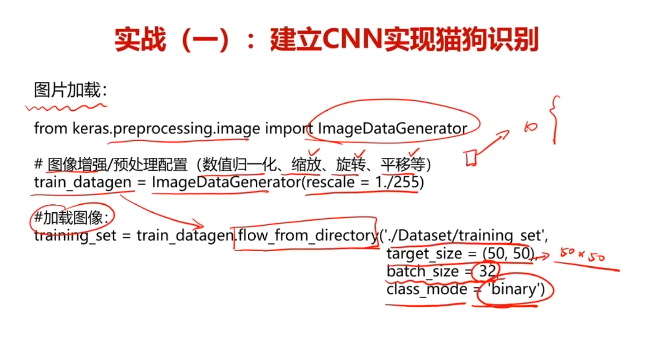
三、實戰:建立CNN模型,識別圖片中的貓/狗
#加載數據
from tensorflow.keras.preprocessing.image import ImageDataGenerator
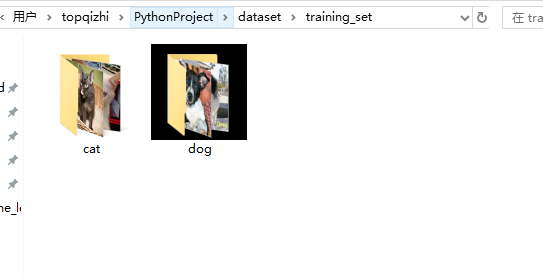
train_datagen = ImageDataGenerator(rescale=1./255)training_set = train_datagen.flow_from_directory('./dataset/training_set',target_size=(50,50),batch_size=32,class_mode='binary')

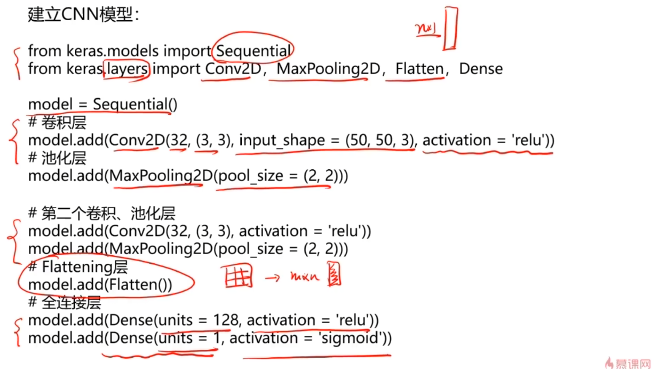
#創建cnn模型
from keras.models import Sequential
from keras.layers import Conv2D,MaxPool2D,Flatten,Dense
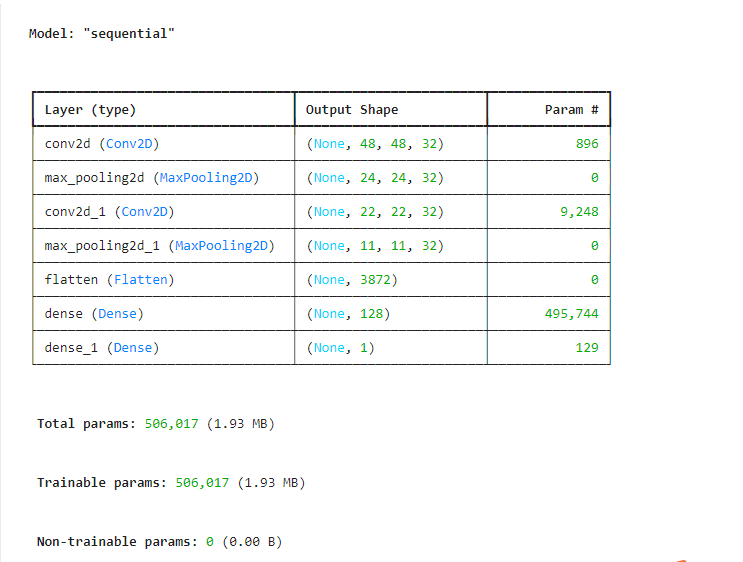
model = Sequential()#卷積層
model.add(Conv2D(32,(3,3),input_shape=(50,50,3),activation='relu'))
#池化層
model.add(MaxPool2D(pool_size=(2,2)))#卷積層
model.add(Conv2D(32,(3,3),activation='relu'))
#池化層
model.add(MaxPool2D(pool_size=(2,2)))#展開
model.add(Flatten())#全連接層
model.add(Dense(units=128,activation='relu'))#輸出層
model.add(Dense(units=1,activation='sigmoid'))
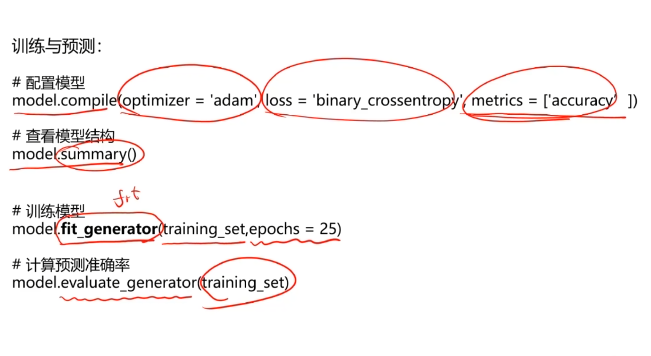
#配置模型 (優化器,損失函數)
model.compile(optimizer='adam',loss='binary_crossentropy',metrics=['accuracy'])
#查看模型結構
model.summary()
#模型訓練
model.fit(training_set,epochs=25)

#訓練集模型準確率
accuracy_train = model.evaluate(training_set)
print(accuracy_train)

#測試集模型準確率
test_set = train_datagen.flow_from_directory('./dataset/test_set',target_size=(50,50),batch_size=32,class_mode='binary')
accuracy_test = model.evaluate(test_set)
print(accuracy_test)

#預測單張測試圖片
from keras.preprocessing.image import load_img,img_to_array
import numpy as np
pic_dog = 'dog_test.jpg'
pic_dog = load_img(pic_dog,target_size=(50,50))
pic_dog = img_to_array(pic_dog)
pic_dog = pic_dog/255
pic_dog = pic_dog.reshape(1,50,50,3)
predictions = model.predict(pic_dog)
result = '預測為:狗狗' if predictions[0] >= 0.5 else '預測為:貓咪'
print(result)

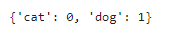
training_set.class_indices
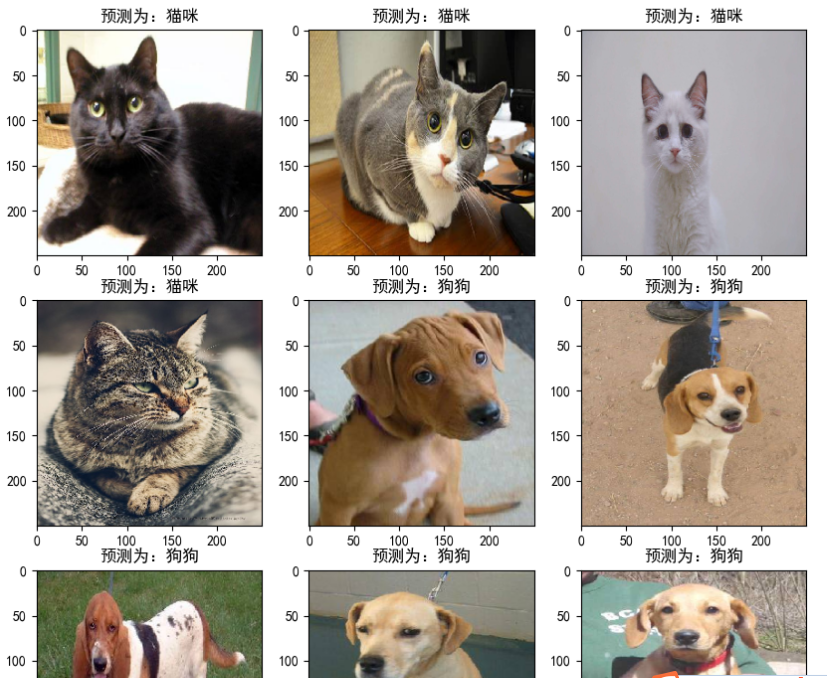
#測試多張圖片,驗證準確率
import matplotlib as mlp
font2 = {'family' :'SimHei','weight':'normal','size':20,}mlp.rcParams['font.family'] = 'SimHei'
mlp.rcParams['axes.unicode_minus'] = Falsefrom matplotlib import pyplot as plt
from matplotlib.image import imread
from keras.preprocessing.image import load_img
from keras.preprocessing.image import img_to_array
from keras.models import load_model
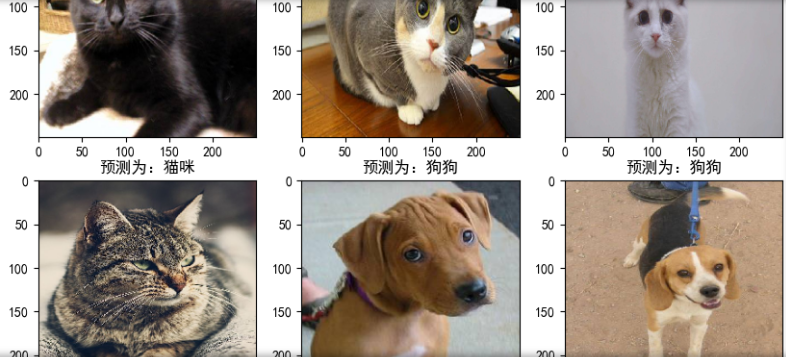
a = [i for i in range(1,10)]
fig = plt.figure(figsize=(10,10))
for i in a:img_name = str(i)+'.jpg'img_ori = load_img(img_name,target_size=(50,50))img = img_to_array(img_ori)img = img.astype('float32')/255img = img.reshape(1,50,50,3)predictions = model.predict(img)img_ori = load_img(img_name,target_size=(250,250))plt.subplot(3,3,i)plt.imshow(img_ori)plt.title('預測為:狗狗' if predictions[0] >= 0.5 else '預測為:貓咪')
plt.show()
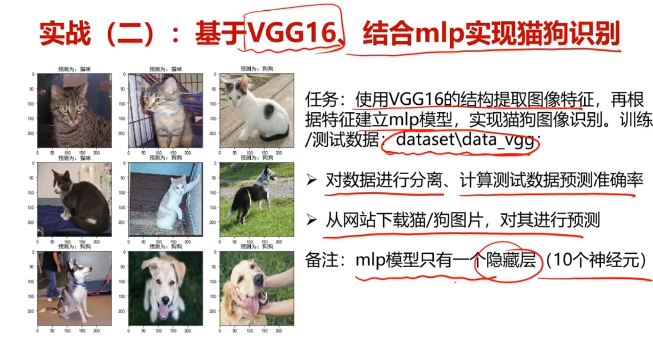
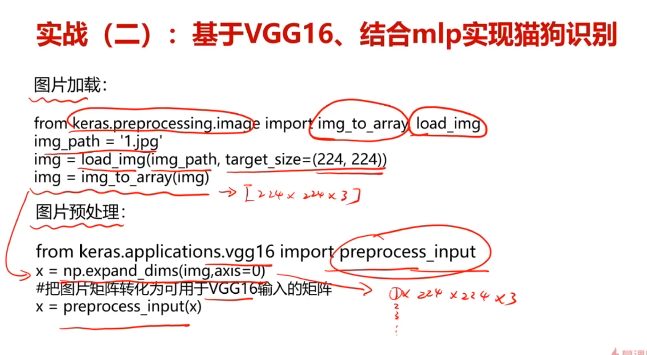
四、實戰:使用VGG16模型提取圖像特征,再根據特征建立mlp模型,實現貓狗圖像識別
#加載數據
from keras.preprocessing.image import load_img,img_to_array
img_path = '1.jpg'
img = load_img(img_path,target_size=(224,224))
img = img_to_array(img)
print(type(img))

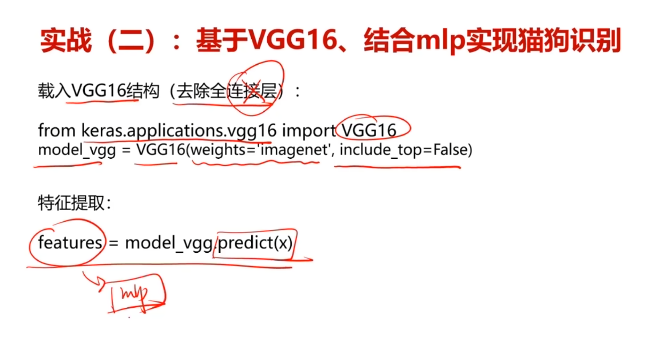
#導入VGG16模型
from keras.applications.vgg16 import VGG16
from keras.applications.vgg16 import preprocess_input
import numpy as np
model_vgg = VGG16(weights='imagenet',include_top=False)
x = np.expand_dims(img,axis=0)
x = preprocess_input(x)#圖像預處理
print(x.shape)

#特征輪廓提取
features = model_vgg.predict(x)
print(features.shape)

features = features.reshape(1,7*7*512)
print(features.shape)

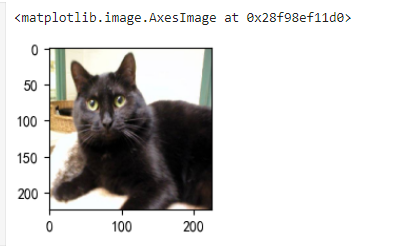
#可視化圖片
from matplotlib import pyplot as plt
fig = plt.figure(figsize=(2,2))
img = load_img(img_path,target_size=(224,224))
plt.imshow(img)
#批量處理圖片
from keras.preprocessing.image import img_to_array,load_img
from keras.applications.vgg16 import VGG16
from keras.applications.vgg16 import preprocess_input
import numpy as npmodel_vgg = VGG16(weights='imagenet',include_top=False)def modelProcess(img_path,model):img = load_img(img_path,target_size=(224,224))img = img_to_array(img)x = np.expand_dims(img,axis=0)x = preprocess_input(x)x_vgg = model.predict(x)x_vgg = x_vgg.reshape(1,25088)return x_vggimport os
folder = 'dataset/vgg16_set/cat'
# folder = 'dataset/test_set/cat'
dirs = os.listdir(folder)
img_path = []
for i in dirs:if os.path.splitext(i)[1] == '.jpg':img_path.append(i)
img_path = [folder+'//'+i for i in img_path]features1 = np.zeros([len(img_path),25088])
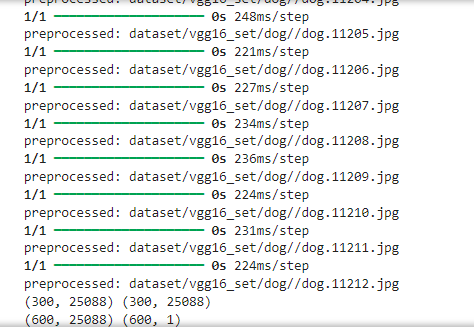
for i in range(len(img_path)):feature_i = modelProcess(img_path[i],model_vgg)print('preprocessed:',img_path[i])features1[i] = feature_ifolder = 'dataset/vgg16_set/dog'
# folder = 'dataset/test_set/dog'
dirs = os.listdir(folder)
img_path = []
for i in dirs:if os.path.splitext(i)[1] == '.jpg':img_path.append(i)
img_path = [folder+'//'+i for i in img_path]features2 = np.zeros([len(img_path),25088])
for i in range(len(img_path)):feature_i = modelProcess(img_path[i],model_vgg)print('preprocessed:',img_path[i])features2[i] = feature_iprint(features1.shape,features2.shape)
y1 = np.zeros(300)
y2 = np.ones(300)
# y1 = np.zeros(3)
# y2 = np.ones(1)x = np.concatenate((features1,features2),axis=0)
y = np.concatenate((y1,y2),axis=0)
y = y.reshape(-1,1)
print(x.shape,y.shape)
#數據分離
from sklearn.model_selection import train_test_split
x_train,x_test,y_train,y_test = train_test_split(x,y,test_size=0.3,random_state=50)
print(x_train.shape,x_test.shape,x.shape)

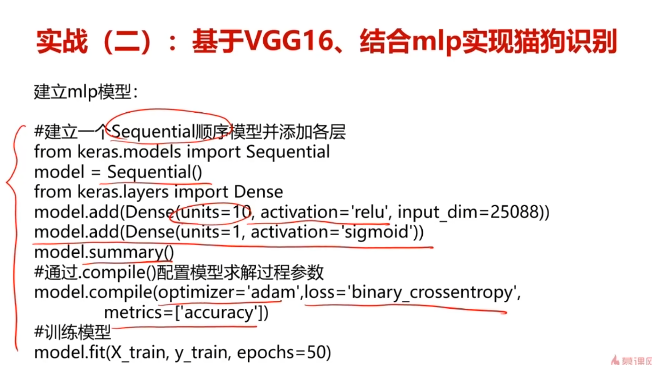
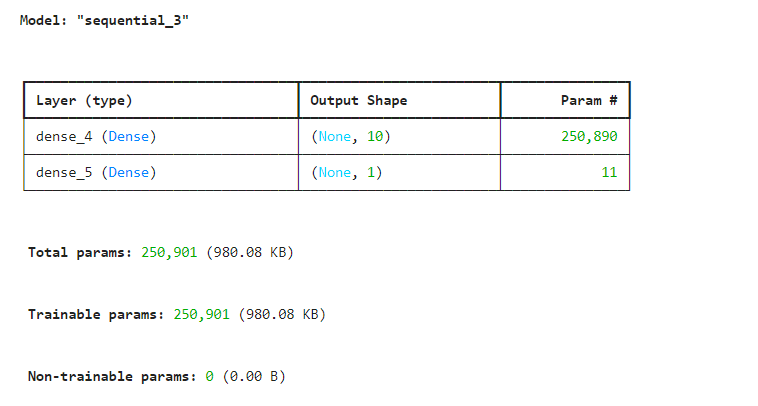
#建立mlp模型
from keras.models import Sequential
from keras.layers import Dense
model = Sequential()
model.add(Dense(units=10,activation='relu',input_dim=25088))
model.add(Dense(units=1,activation='sigmoid'))
model.summary()
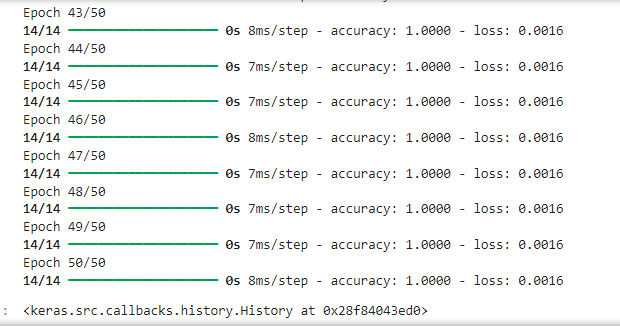
#配置模型,訓練模型
model.compile(optimizer='adam',loss='binary_crossentropy',metrics=['accuracy'])
model.fit(x_train,y_train,epochs=50)
#預測
from sklearn.metrics import accuracy_score
# 獲取預測概率
y_train_pred_prob = model.predict(x_train)
# 二分類:sigmoid輸出,使用0.5作為閾值
y_train_predict = (y_train_pred_prob > 0.5).astype("int32").flatten()accuracy_train = accuracy_score(y_train,y_train_predict)
print(accuracy_train)

# 獲取預測概率
y_test_pred_prob = model.predict(x_test)
# 二分類:sigmoid輸出,使用0.5作為閾值
y_test_predict = (y_test_pred_prob > 0.5).astype("int32").flatten()accuracy_test = accuracy_score(y_test,y_test_predict)
print(accuracy_test)

#測試多張圖片,驗證準確率
import matplotlib as mlp
font2 = {'family' :'SimHei','weight':'normal','size':20,}mlp.rcParams['font.family'] = 'SimHei'
mlp.rcParams['axes.unicode_minus'] = Falsefrom matplotlib import pyplot as plt
from matplotlib.image import imread
from keras.preprocessing.image import load_img
from keras.preprocessing.image import img_to_array
from keras.models import load_model
a = [i for i in range(1,10)]
fig = plt.figure(figsize=(10,10))
for i in a:img_name = str(i)+'.jpg'img_ori = load_img(img_name,target_size=(224,224))img = img_to_array(img_ori)x = np.expand_dims(img,axis=0)x = preprocess_input(x)#vgg16提取特征x_vgg = model_vgg.predict(x)x_vgg = x_vgg.reshape(1,25088)# 獲取預測概率predictions = model.predict(x_vgg)# 二分類:sigmoid輸出,使用0.5作為閾值y_train_predict = (y_train_pred_prob > 0.5).astype("int32").flatten()img_ori = load_img(img_name,target_size=(250,250))plt.subplot(3,3,i)plt.imshow(img_ori)plt.title('預測為:狗狗' if predictions >= 0.5 else '預測為:貓咪')
plt.show()


:讓大模型能夠回答私域知識問題)


有狀態AI代理的開源框架)

