數據預處理 泰坦尼克號
什么是數據預處理? (What is Data Pre-Processing?)
We know from my last blog that data preprocessing is a data mining technique that involves transforming raw data into an understandable format. Real-world data is often incomplete, inconsistent, and/or lacking in certain behaviors or trends, and is likely to contain many errors. Data preprocessing is a proven method of resolving such issues. Data preprocessing prepares raw data for further processing.
從我的上一篇博客中我們知道,數據預處理是一種數據挖掘技術,它涉及將原始數據轉換為可理解的格式。 實際數據通常不完整,不一致和/或缺少某些行為或趨勢,并且可能包含許多錯誤。 數據預處理是解決此類問題的一種行之有效的方法。 數據預處理將準備原始數據以進行進一步處理。
So in this blog we will learn about the implementation of data pre-processing on a data set. I have decided to do my implementation using the Titanic data set, which I have downloaded from Kaggle. Here is the link to get this dataset- https://www.kaggle.com/c/titanic-gettingStarted/data
因此,在本博客中,我們將學習在數據集上實施數據預處理的方法。 我決定使用我從Kaggle下載的Titanic數據集進行實施。 這是獲取此數據集的鏈接-https : //www.kaggle.com/c/titanic-gettingStarted/data
Note- Kaggle gives 2 datasets, the train and the test dataset, so we will use both of them in this process.
注意 -Kaggle提供了2個數據集,即訓練和測試數據集,因此在此過程中我們將同時使用它們。
預期的結果是什么? (What is the expected outcome?)
The Titanic shipwreck was a massive disaster, so we will implement data pre- processing on this data set to know the number of survivors and their details.
泰坦尼克號沉船事故是一場巨大的災難,因此我們將對該數據集進行數據預處理,以了解幸存者的人數及其詳細信息。
I will show you how to apply data preprocessing techniques on the Titanic dataset, with a tinge of my own ideas into this.
我將向您展示如何在Titanic數據集上應用數據預處理技術,并結合我自己的想法。
So let’s get started…
因此,讓我們開始吧...

導入所有重要的庫 (Importing all the important libraries)
Firstly after loading the data sets in our system, we will import the libraries that are needed to perform the functions. In my case I imported NumPy, Pandas and Matplot libraries.
首先,在將數據集加載到我們的系統中之后,我們將導入執行功能所需的庫。 就我而言,我導入了NumPy,Pandas和Matplot庫。
#importing librariesimport numpy as npimport matplotlib.pyplot as pltimport pandas as pd
#importing librarys將numpy導入為npimport matplotlib.pyplot作為pltimport熊貓作為pd
使用Pandas導入數據集 (Importing dataset using Pandas)
To work on the data, you can either load the CSV in excel software or in pandas. So I will load the CSV data in pandas. Then we will also use a function to view that data in the Jupyter notebook.
要處理數據,可以在excel軟件或熊貓中加載CSV。 因此,我將在熊貓中加載CSV數據。 然后,我們還將使用一個函數在Jupyter筆記本中查看該數據。
#importing dataset using pandasdf = pd.read_csv(r’C:\Users\KIIT\Desktop\Internity Internship\Day 4 task\train.csv’)df.shapedf.head()
#使用pandasdf = pd.read_csv(r'C:\ Users \ KIIT \ Desktop \ Internal Internship \ Day 4 task \ train.csv')df.shapedf.head()導入數據集

#Taking a look at the data format belowdf.info()
#看看下面的數據格式df.info()
Let’s take a look at the data output that we get from the above code snippets :
讓我們看一下從以上代碼片段獲得的數據輸出:

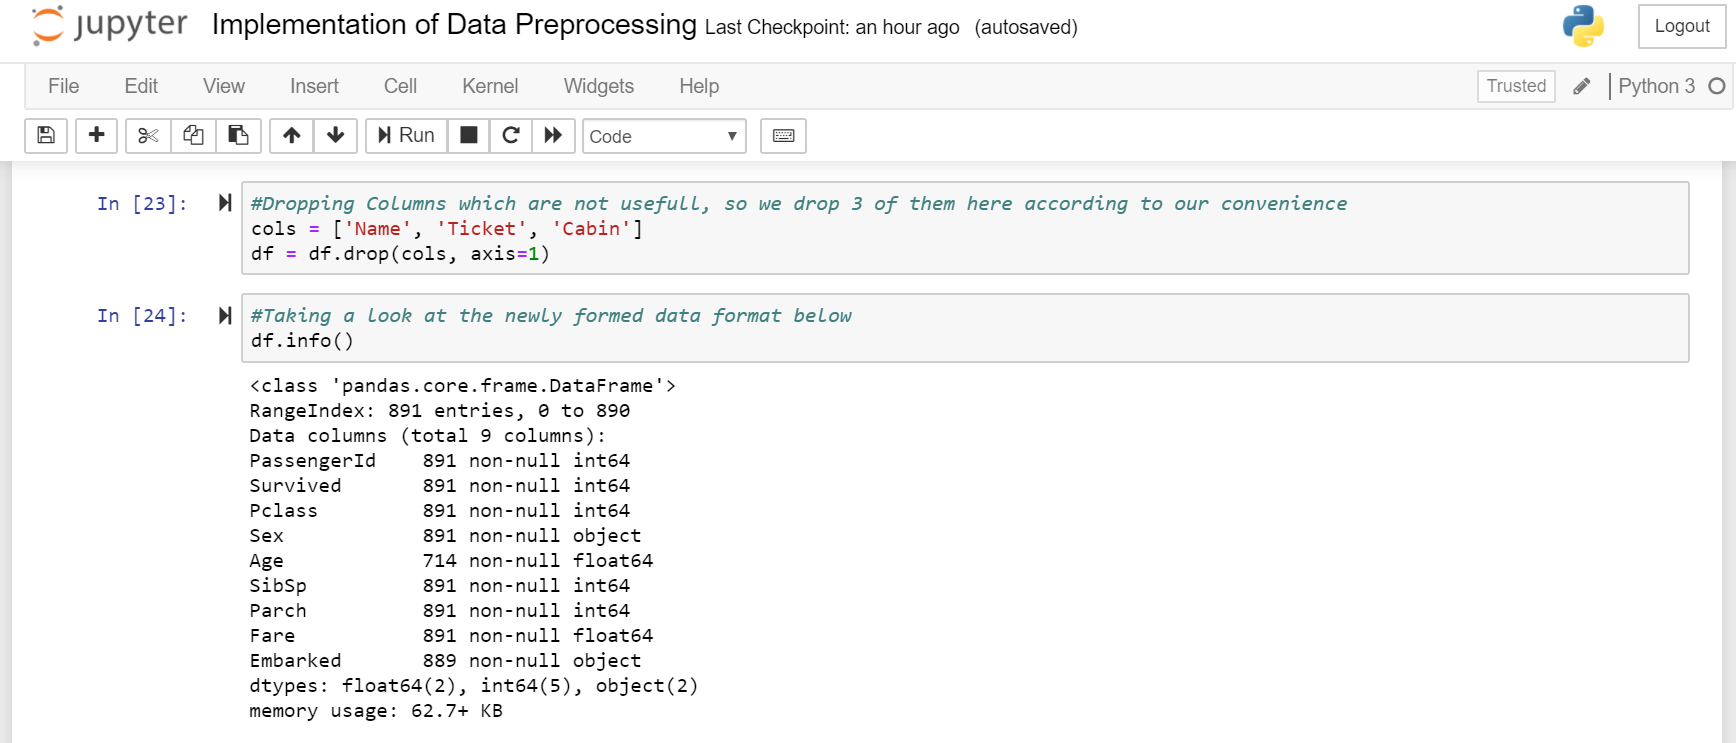
If you carefully observe the above summary of pandas, there are total 891 rows, Age shows only 714 (means missing), Embarked (2 missing) and Cabin missing a lot as well. Object data types are non-numeric so we have to find a way to encode them to numerical values.
如果您仔細觀察以上熊貓的摘要,則總共有891行,“年齡”僅顯示714行(均值缺失),上船(缺失2幅)以及機艙缺失很多。 對象數據類型是非數字的,因此我們必須找到一種將其編碼為數值的方法。
查看特定數據集中的列 (Viewing the columns in the particular dataset)
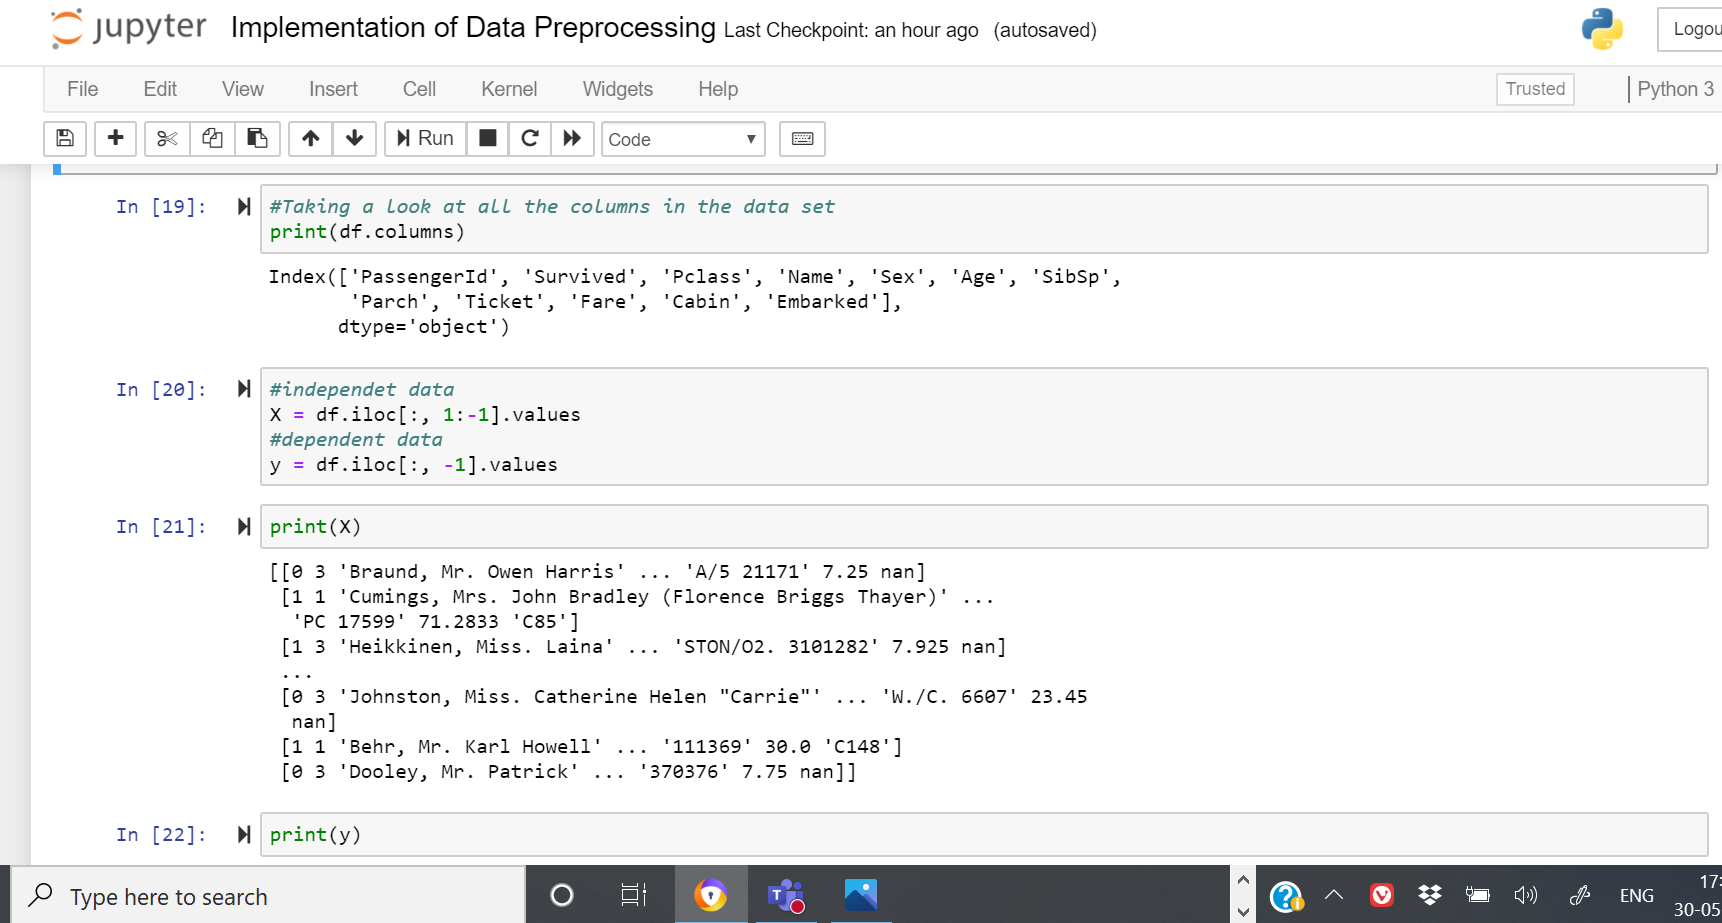
We use a function to view all the columns that are being used in this dataset for a better reference of the kind of data that we are working on.
我們使用一個函數來查看此數據集中正在使用的所有列,以更好地參考我們正在處理的數據類型。
#Taking a look at all the columns in the data setprint(df.columns)
#查看數據setprint(df.columns)中的所有列
定義獨立和相關數據的值 (Defining values for independent and dependent data)
Here we will declare the values of X and y for our independent and dependent data.
在這里,我們將為我們的獨立數據和相關數據聲明X和y的值。
#independet dataX = df.iloc[:, 1:-1].values#dependent datay = df.iloc[:, -1].values
#independet dataX = df.iloc [:, 1:-1] .values#dependent datay = df.iloc [:, -1] .values

刪除無用的列 (Dropping Columns which are not useful)
Lets try to drop some of the columns which many not contribute much to our machine learning model such as Name, Ticket, Cabin etc.
讓我們嘗試刪除一些對我們的機器學習模型貢獻不大的列,例如名稱,票務,機艙等。
So we will drop 3 columns and then we will take a look at the newly generated data.
因此,我們將刪除3列,然后看一下新生成的數據。
#Dropping Columns which are not usefull, so we drop 3 of them here according to our conveniencecols = [‘Name’, ‘Ticket’, ‘Cabin’]df = df.drop(cols, axis=1)
#刪除沒有用的列,因此我們根據我們的便便性將其中的3個放置在此處colcols = ['Name','Ticket','Cabin'] df = df.drop(cols,axis = 1)
#Taking a look at the newly formed data format belowdf.info()
#在下面的df.info()中查看新形成的數據格式
刪除缺少值的行 (Dropping rows having missing values)
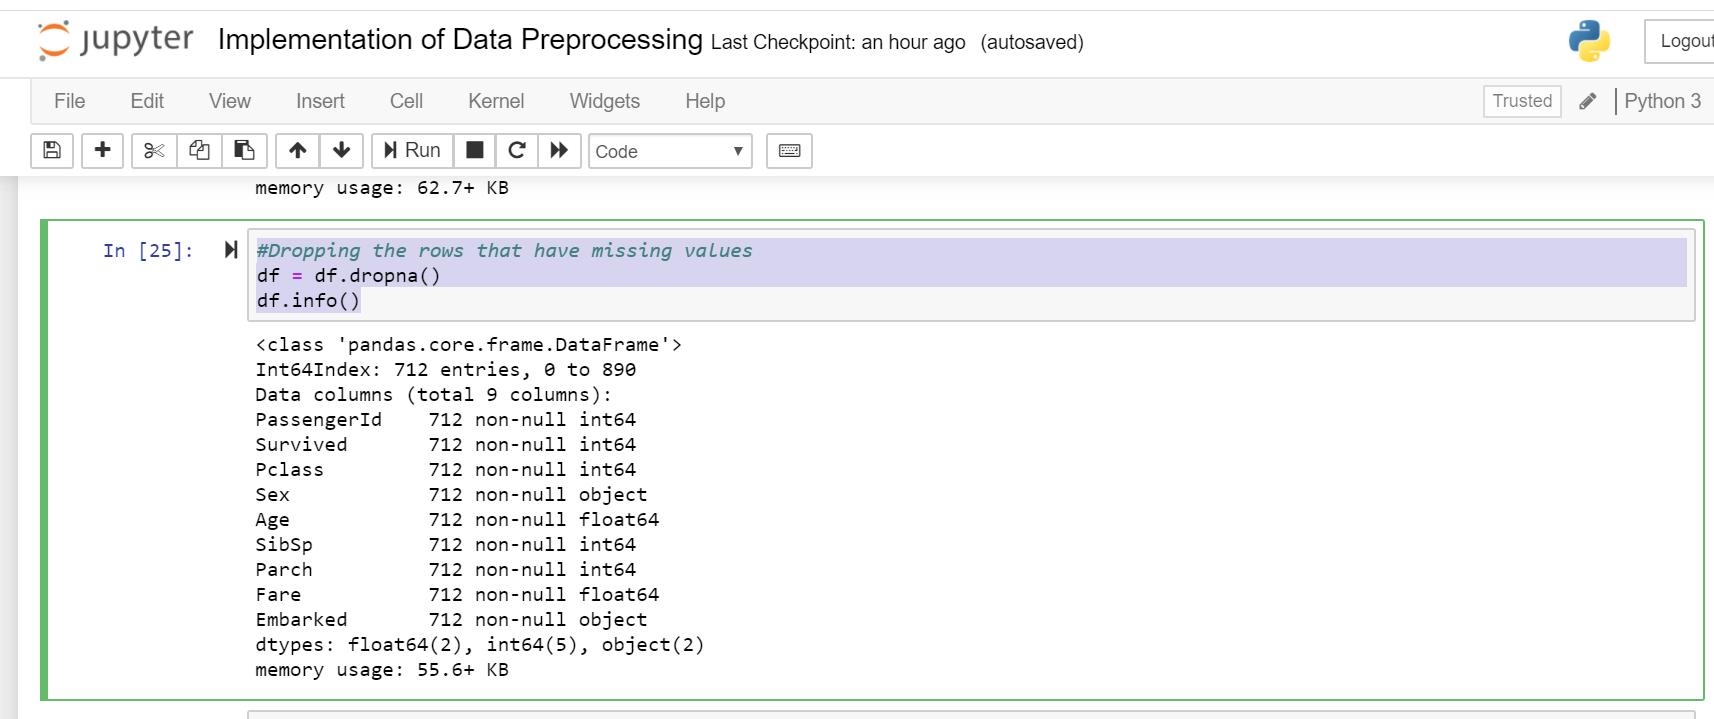
Next if we want we can drop all rows in the data that has missing values (NaN). You can do it like the code shows-
接下來,如果需要,我們可以刪除數據中所有缺少值(NaN)的行。 您可以像代碼所示那樣進行操作-
#Dropping the rows that have missing valuesdf = df.dropna()df.info()
#刪除缺少值的行df = df.dropna()df.info()
刪除缺少值的行的問題 (Problem with dropping rows having missing values)
After dropping rows with missing values we find that the dataset is reduced to 712 rows from 891, which means we are wasting data. Machine learning models need data for training to perform well. So we preserve the data and make use of it as much as we can. We will see it later.
刪除缺少值的行后,我們發現數據集從891減少到712行,這意味著我們在浪費數據 。 機器學習模型需要用于訓練的數據才能表現良好。 因此,我們保留并盡可能多地利用數據。 我們稍后會看到。
創建虛擬變量 (Creating Dummy Variables)
Now we convert the Pclass, Sex, Embarked to columns in pandas and drop them after conversion.
現在,我們將Pclass,Sex,Embeded轉換為熊貓中的列,并在轉換后將其刪除。
#Creating Dummy Variablesdummies = []cols = [‘Pclass’, ‘Sex’, ‘Embarked’]for col in cols:dummies.append(pd.get_dummies(df[col]))titanic_dummies = pd.concat(dummies, axis=1)
#為col中的col創建虛擬變量dummies = [] cols = ['Pclass','Sex','Embarked'] cols:dummies.append(pd.get_dummies(df [col]))titanic_dummies = pd.concat(Dummies,axis = 1)
So on seeing the information we know we have 8 columns transformed to columns where 1,2,3 represents passenger class.
因此,在查看信息后,我們知道我們將8列轉換為其中1,2,3代表乘客艙位的列。
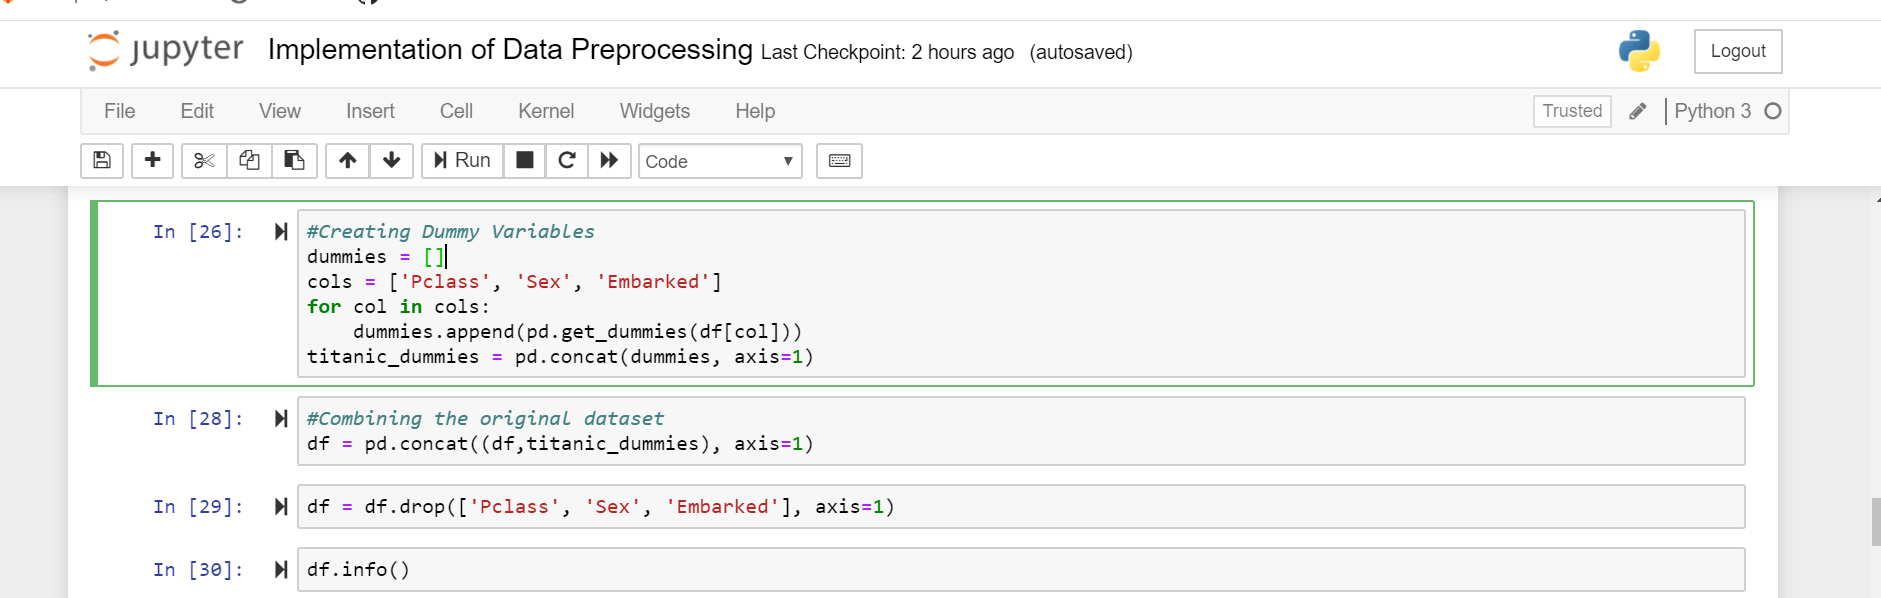
And finally we concatenate to the original data frame column wise.
最后,我們將原始數據幀按列連接。
#Combining the original datasetdf = pd.concat((df,titanic_dummies), axis=1)
#合并原始數據集df = pd.concat((df,titanic_dummies),axis = 1)
Now that we converted Pclass, Sex, Embarked values into columns, we drop the redundant same columns from the data frame and now take a look at the new data set.
現在,我們將Pclass,Sex,Embarked值轉換為列,然后從數據框中刪除了冗余的相同列,現在來看一下新的數據集。
df = df.drop([‘Pclass’, ‘Sex’, ‘Embarked’], axis=1)
df = df.drop(['Pclass','Sex','Embarked'],axis = 1)
df.info()
df.info()

照顧丟失的數據 (Taking Care of Missing Data)
All is good, except age which has lots of missing values. Lets compute a median or interpolate() all the ages and fill those missing age values. Pandas has a interpolate() function that will replace all the missing NaNs to interpolated values.
一切都很好,除了年齡,它有很多缺失的值。 讓我們計算所有年齡的中位數或interpolate()并填充那些缺失的年齡值。 熊貓有一個interpolate()函數,它將所有缺少的NaN替換為插值。
#Taking care of the missing data by interpolate functiondf[‘Age’] = df[‘Age’].interpolate()
#通過插值函數df ['Age'] = df ['Age']。interpolate()處理丟失的數據
df.info()
df.info()

Now lets observe the data columns. Notice age which is interpolated now with imputed new values.
現在讓我們觀察數據列。 注意使用新的插值插入的年齡。

將數據幀轉換為NumPy (Converting the data frame to NumPy)
Now that we have converted all the data to numeric, its time for preparing the data for machine learning models. This is where scikit and numpy come into play:
現在,我們已將所有數據轉換為數字,這是為機器學習模型準備數據的時間。 這是scikit和numpy發揮作用的地方:
X = Input set with 14 attributesy = Small y Output, in this case ‘Survived’
X =具有14個屬性的輸入集y =小y輸出,在這種情況下為“生存”
Now we convert our dataframe from pandas to numpy and we assign input and output.
現在,我們將數據幀從熊貓轉換為numpy,并分配輸入和輸出。
#using the concept of survived vlues, we conver and view the dataframe to NumPyX = df.valuesy = df[‘Survived’].values
#使用幸存的虛擬詞的概念,我們將數據幀收斂并查看為NumPyX = df.valuesy = df ['Survived']。values
X = np.delete(X, 1, axis=1)
X = np.delete(X,1,軸= 1)

將數據集分為訓練集和測試集 (Dividing data set into training set and test set)
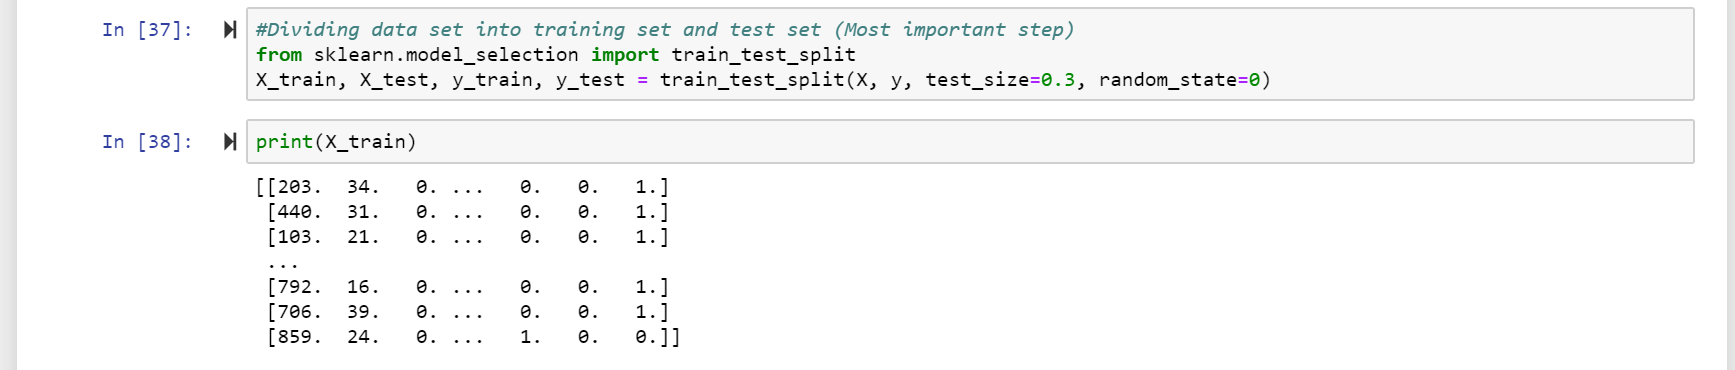
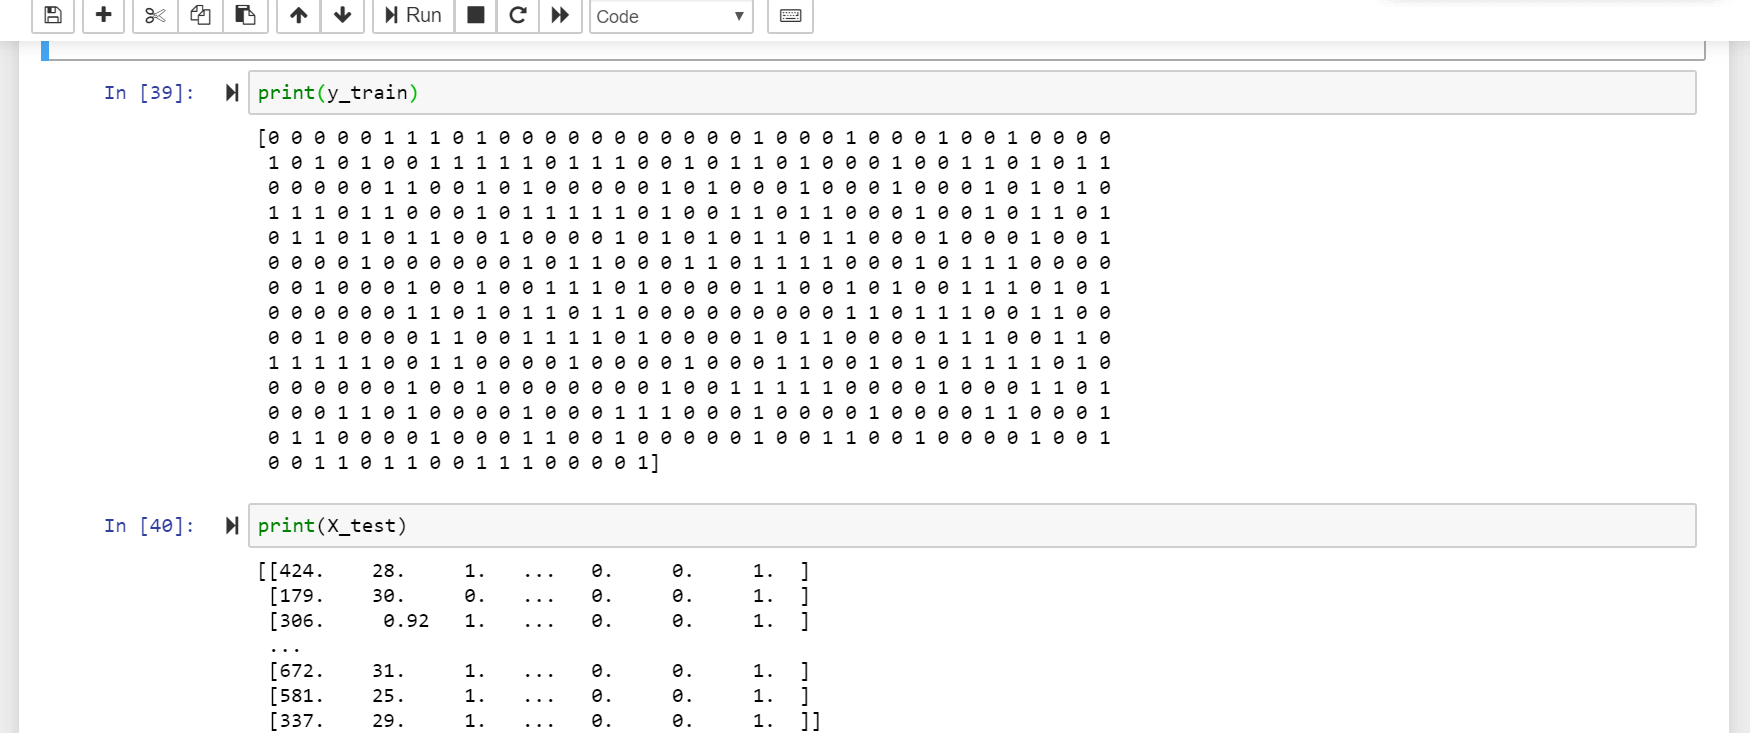
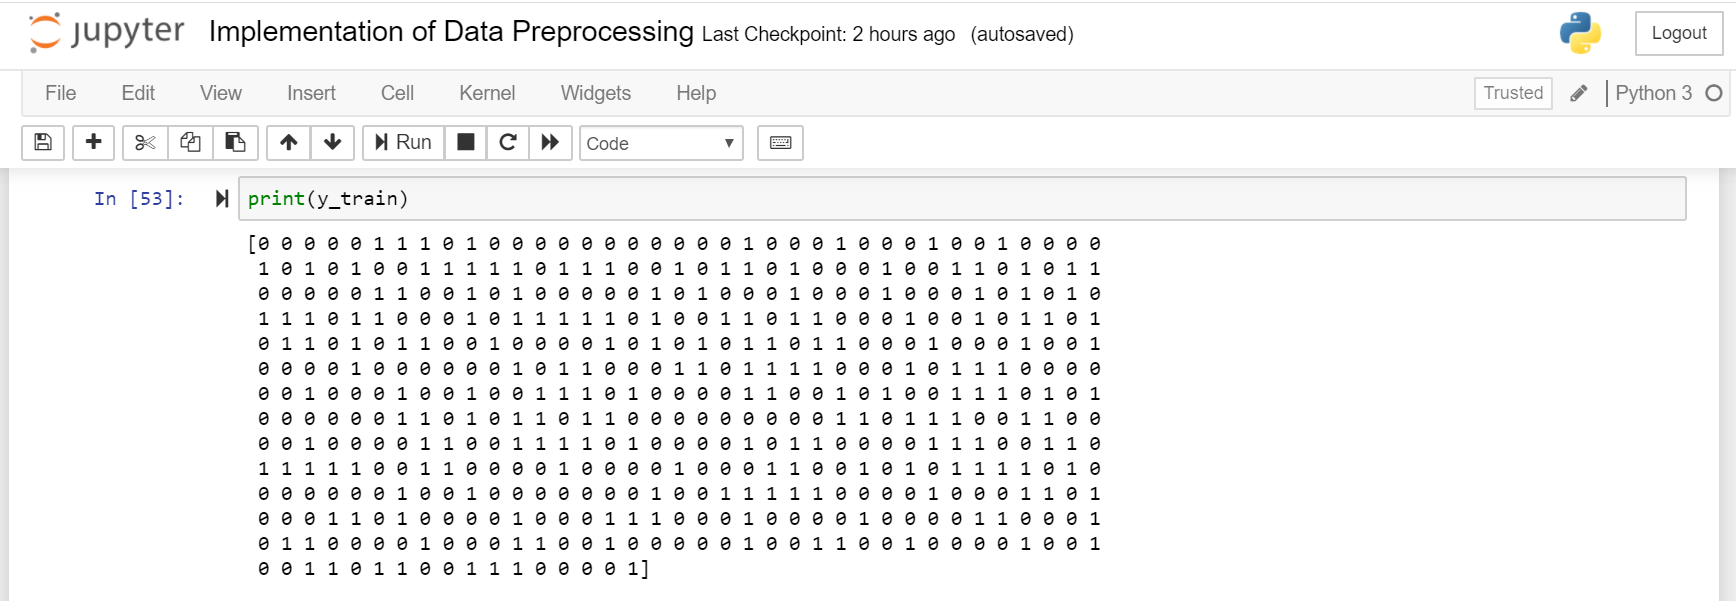
Now that we are ready with X and y, lets split the dataset for 70% Training and 30% test set using scikit model_selection like in code and the 4 print functions after that-
現在我們已經準備好使用X和y,讓我們使用scikit model_selection像代碼中那樣拆分70%Training和30%Test Set的數據集,然后使用4個打印功能-
#Dividing data set into training set and test set (Most important step)from sklearn.model_selection import train_test_splitX_train, X_test, y_train, y_test = train_test_split(X, y, test_size=0.3, random_state=0)
#從sklearn.model_selection導入數據集分為訓練集和測試集(最重要的步驟)import train_test_splitX_train,X_test,y_train,y_test = train_test_split(X,y,test_size = 0.3,random_state = 0)

功能縮放 (Feature Scaling)
Feature Scaling is an important step of data preprocessing. Feature Scaling makes all data in such way that they lie in same scale usually -3 to +3.
特征縮放是數據預處理的重要步驟。 Feature Scaling使所有數據處于相同的比例,通常為-3至+3。
In out data set some field have small value and some field have large value. If we apply out machine learning model without feature scaling then prediction our model have high cost(It does because small value are dominated by large value). So before apply model we have to perform feature scaling.
在輸出數據集中,某些字段的值較小,而某些字段的值較大。 如果我們在沒有特征縮放的情況下應用機器學習模型,那么預測我們的模型將具有較高的成本(這是因為小值由大值主導)。 因此,在應用模型之前,我們必須執行特征縮放。
We can perform feature scaling in two ways.
我們可以通過兩種方式執行特征縮放。
I-:Standardizaion x=(x-mean(X))/standard deviation(X)
I-:標準化x =(x均值(X))/標準差(X)
II-:Normalization-: x=(x-min(X))/(max(X)-min(X))
II-:歸一化-:x =(x-min(X))/(max(X)-min(X))
#Using the concept of feature scalingfrom sklearn.preprocessing import StandardScalersc = StandardScaler()X_train[:,3:] = sc.fit_transform(X_train[:,3:])X_test[:,3:] = sc.transform(X_test[:,3:])
#使用sklearn.preprocessing import的特征縮放概念,StandardScalersc = StandardScaler()X_train [:,3:] = sc.fit_transform(X_train [:,3:])X_test [:,3:] = sc.transform(X_test [ :,3:])

That’s all for today guys!
今天就這些了!
This is the final outcome of the whole process. For more of such blogs, stay tuned!
這是整個過程的最終結果。 有關此類博客的更多信息,請繼續關注!
翻譯自: https://medium.com/all-about-machine-learning/understanding-data-preprocessing-taking-the-titanic-dataset-ebb78de162e0
數據預處理 泰坦尼克號
本文來自互聯網用戶投稿,該文觀點僅代表作者本人,不代表本站立場。本站僅提供信息存儲空間服務,不擁有所有權,不承擔相關法律責任。 如若轉載,請注明出處:http://www.pswp.cn/news/389590.shtml 繁體地址,請注明出處:http://hk.pswp.cn/news/389590.shtml 英文地址,請注明出處:http://en.pswp.cn/news/389590.shtml
如若內容造成侵權/違法違規/事實不符,請聯系多彩編程網進行投訴反饋email:809451989@qq.com,一經查實,立即刪除!相關文章

Pytorch中DNN入門思想及實現

IDEA去除mapper.xml文件中的sql語句的背景色

vc6.0 繪制散點圖_vc有關散點圖的一切

sudo配置臨時取得root權限

Pytorch中RNN入門思想及實現

小扎不哭!FB又陷數據泄露風波,9000萬用戶受影響

在衡量歐洲的政治意識形態時,調查規模的微小變化可能會很重要

Pytorch中CNN入門思想及實現

java常用設計模式一:單例模式

SDUT-2121_數據結構實驗之鏈表六:有序鏈表的建立

事件映射 消息映射_映射幻影收費站


Pytorch中BN層入門思想及實現

JDK源碼學習筆記——TreeMap及紅黑樹

匿名內部類和匿名類_匿名schanonymous

Pytorch框架中SGD&Adam優化器以及BP反向傳播入門思想及實現

朱曄和你聊Spring系列S1E3:Spring咖啡罐里的豆子

ab實驗置信度_為什么您的Ab測試需要置信區間

基于Pytorch的NLP入門任務思想及代碼實現:判斷文本中是否出現指定字
方法源碼解析(二))