一.參數化實現數據驅動
上一篇介紹了參數化,這篇 說說用參數化實現數據驅動。在有很多測試用例的時候,可以將測試用例都存儲在文件里,進行讀寫調用。本篇主要介紹 csv 文件和 json 文件。
1.讀取 csv 文件數據
首先創建 csv 文件,將數據 放在csv文件中。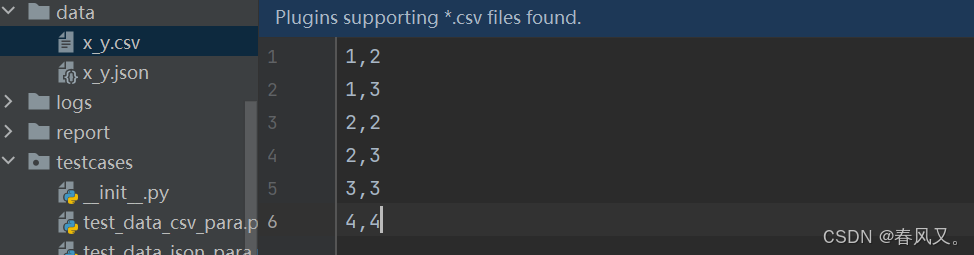 然后讀取csv?文件的內容,并將讀取的 內容返回
import csv# 讀取csv 函數
def get_csv_data():list1 = []# 輸入存儲csv 文件 的目錄file = csv.reader(open(r"D:\python_project\API_Auto\API2\data\x_y.csv", encoding="utf-8"))# 輸出 csv 文件對象,需要獲取文件對象中的內容,使用for 循環進行遍歷# print(file)for i in file:# print(i)list1.append(i)else:#  print(list1)return list1
?再在測試用例中進行調用上面的函數,得到返回的參數,作為參數?
import pytestfrom commons.tools import get_csv_data@pytest.mark.parametrize(["x", "y"], get_csv_data())
def test_001(x, y):print(f"x: {x}")print(f"y: {y}")assert x == y
?2.讀取json文件數據?
思路還是一樣,先 創建json文件,將數據放進去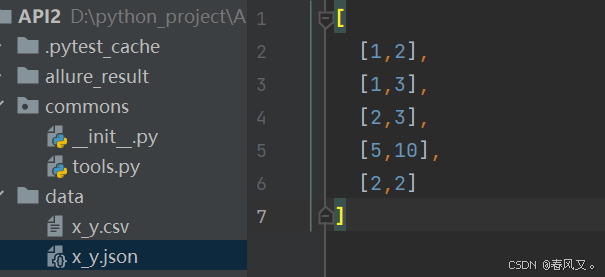
再讀取json文件中的數據,并將 讀取后的數據作為返回值
# 讀取json 數據
def get_json_data():# json 數據可以直接讀取file = open(r"D:\python_project\API_Auto\API2\data\x_y.json", encoding="utf-8")content = file.read()print(content)  # 類型是字符串 “[[1,2],[1,3],[2,3],[5,10],[2,2]]”,有引號不能直接用,需要去掉引號:eval()l = eval(content)# print(l)# print(type(l))  # <class 'list'>return l
在 調用這個方法來得到返回值
# 讀取data 目錄下的x_y json數據格式的測試用例import pytestfrom commons.tools import get_json_data@pytest.mark.parametrize(["x", "y"], get_json_data())
def test_002(x, y):print(f"x: {x}")print(f"y: {y}")assert x == y
二.fixture
fixture 的主要作用是固定測試環境。在執行用例時,執行 用例之前,執行完用例之后的操作就可以用fixture
1.fixture 創建
定義一個函數,然后加上yield 關鍵字,再加上pytest 框架裝飾器就成了fixture,下面的func,func1都是fixture,func比func1多了一個返回值666
@pytest.fixture()
def func():print("用例執行之前")yield 666print("用例執行之后")@pytest.fixture()
def func1():print("用例執行之前")yield print("用例執行之后")
2.fixture調用
fixture默認是不會自動調用的 ,需要在形參處調用fixture名
# 調用fixture
def test_001(func):print(f"獲取fixture:{func}")assert 1 == 1def test_002():assert 1 == 2class TestAAA:# 調用fixturedef test_003(self, func):assert 1 == 1# 獲取func 的返回值666print(f"獲取fixture:{func}")def test_004(self):assert 1 == 2
輸出結果為:
PS D:\python_project\API_Auto\API2> pytest  -k test_z1_fixture定義和使用.py
================================================================= test session starts =================================================================
platform win32 -- Python 3.10.6, pytest-8.3.5, pluggy-1.5.0 -- C:\Users\18481\AppData\Local\Programs\Python\Python310\python.exe
cachedir: .pytest_cache
rootdir: D:\python_project\API_Auto\API2
configfile: pytest.ini
plugins: allure-pytest-2.13.5, result-log-1.2.2
collecting ... [[1,2],[1,3],[2,3],[5,10],[2,2]
]
collected 27 items / 23 deselected / 4 selected                                                                                                        testcases/test_z1_fixture定義和使用.py::test_001 用例執行之前
獲取fixture:666
PASSED用例執行之后testcases/test_z1_fixture定義和使用.py::test_002 FAILED
testcases/test_z1_fixture定義和使用.py::TestAAA::test_003 用例執行之前
獲取fixture:666
PASSED用例執行之后testcases/test_z1_fixture定義和使用.py::TestAAA::test_004 FAILED====================================================================== FAILURES =======================================================================
______________________________________________________________________ test_002 _______________________________________________________________________ def test_002():
>       assert 1 == 2
E       assert 1 == 2testcases\test_z1_fixture定義和使用.py:26: AssertionError
----------------------------------------------------------------- Captured log setup ------------------------------------------------------------------
WARNING  pytest_result_log:plugin.py:122 ---------------Start: testcases/test_z1_fixture定義和使用.py::test_002---------------
---------------------------------------------------------------- Captured log teardown ----------------------------------------------------------------
WARNING  pytest_result_log:plugin.py:128 ----------------End: testcases/test_z1_fixture定義和使用.py::test_002----------------
__________________________________________________________________ TestAAA.test_004 ___________________________________________________________________ self = <testcases.test_z1_fixture定義和使用.TestAAA object at 0x000002AB6C7CA170>def test_004(self):
>       assert 1 == 2
E       assert 1 == 2testcases\test_z1_fixture定義和使用.py:35: AssertionError
----------------------------------------------------------------- Captured log setup ------------------------------------------------------------------
WARNING  pytest_result_log:plugin.py:122 ----------Start: testcases/test_z1_fixture定義和使用.py::TestAAA::test_004-----------
---------------------------------------------------------------- Captured log teardown ----------------------------------------------------------------
WARNING  pytest_result_log:plugin.py:128 -----------End: testcases/test_z1_fixture定義和使用.py::TestAAA::test_004------------
=============================================================== short test summary info ===============================================================
FAILED testcases/test_z1_fixture定義和使用.py::test_002 - assert 1 == 2
FAILED testcases/test_z1_fixture定義和使用.py::TestAAA::test_004 - assert 1 == 2
===================================================== 2 failed, 2 passed, 23 deselected in 0.19s ======================================================
從結果 可以看到,只有test_001和 test_003調用了fixture.
fixture 默認不會自動調用,但是我們也可以通過參數來讓他 自動調用 ,就不需要在往形參里傳了。只需要將 對應的參數 autouse 的值修改為 True:
@pytest.fixture(autouse=True)
def func():print("用例執行之前")yield 666print("用例執行之后")
def test_001():assert 1 == 1def test_002():assert 1 == 2class TestAAA:def test_003(self):assert 1 == 1def test_004(self):assert 1 == 2
輸出結果 為:
PS D:\python_project\API_Auto\API2> pytest  -k test_z1_fixture定義和使用.py
================================================================= test session starts =================================================================
platform win32 -- Python 3.10.6, pytest-8.3.5, pluggy-1.5.0 -- C:\Users\18481\AppData\Local\Programs\Python\Python310\python.exe
cachedir: .pytest_cache
rootdir: D:\python_project\API_Auto\API2
configfile: pytest.ini
plugins: allure-pytest-2.13.5, result-log-1.2.2
collecting ... [[1,2],[1,3],[2,3],[5,10],[2,2]
]
collected 27 items / 23 deselected / 4 selected                                                                                                        testcases/test_z1_fixture定義和使用.py::test_001 用例執行之前
PASSED用例執行之后testcases/test_z1_fixture定義和使用.py::test_002 用例執行之前
FAILED用例執行之后testcases/test_z1_fixture定義和使用.py::TestAAA::test_003 用例執行之前
PASSED用例執行之后testcases/test_z1_fixture定義和使用.py::TestAAA::test_004 用例執行之前
FAILED用例執行之后====================================================================== FAILURES =======================================================================
______________________________________________________________________ test_002 _______________________________________________________________________ def test_002():
>       assert 1 == 2
E       assert 1 == 2testcases\test_z1_fixture定義和使用.py:26: AssertionError
----------------------------------------------------------------- Captured log setup ------------------------------------------------------------------
WARNING  pytest_result_log:plugin.py:122 ---------------Start: testcases/test_z1_fixture定義和使用.py::test_002---------------
---------------------------------------------------------------- Captured log teardown ----------------------------------------------------------------
WARNING  pytest_result_log:plugin.py:128 ----------------End: testcases/test_z1_fixture定義和使用.py::test_002----------------
__________________________________________________________________ TestAAA.test_004 ___________________________________________________________________ self = <testcases.test_z1_fixture定義和使用.TestAAA object at 0x0000017278D0B760>def test_004(self):
>       assert 1 == 2
E       assert 1 == 2testcases\test_z1_fixture定義和使用.py:35: AssertionError
----------------------------------------------------------------- Captured log setup ------------------------------------------------------------------
WARNING  pytest_result_log:plugin.py:122 ----------Start: testcases/test_z1_fixture定義和使用.py::TestAAA::test_004-----------
---------------------------------------------------------------- Captured log teardown ----------------------------------------------------------------
WARNING  pytest_result_log:plugin.py:128 -----------End: testcases/test_z1_fixture定義和使用.py::TestAAA::test_004------------
=============================================================== short test summary info ===============================================================
FAILED testcases/test_z1_fixture定義和使用.py::test_002 - assert 1 == 2
FAILED testcases/test_z1_fixture定義和使用.py::TestAAA::test_004 - assert 1 == 2
===================================================== 2 failed, 2 passed, 23 deselected in 0.22s ======================================================
可以看到,這次沒有將fixture名放在形參處,所有的測試用例都調用了fixture
3.fixture作用域
fixture 支持五級作用域
- function:函數,方法級別(默認)
像上面未設置作用域,就是默認的function級別,在每個函數執行前觸發fixture前置,在每個函數執行后觸發fixture后置。
- class:類
- 當類中第一個用例開始執行之前,會觸發fixture前置
- 當類中最后一個用例開始執行之后,會觸發fixture后置
import pytest@pytest.fixture(scope='class', autouse=True)
def func():print("用例執行之前")yield 666print("用例執行之后")def test_001():# print(f"獲取fixture:{func}")assert 1 == 1def test_002():assert 1 == 2class TestAAA:def test_003(self):assert 1 == 1# print(f"獲取fixture:{func}")def test_004(self):assert 1 == 2
執行結果為:
PS D:\python_project\API_Auto\API2> pytest -k test_z2_fixture的作用域.py
================================================================= test session starts =================================================================
platform win32 -- Python 3.10.6, pytest-8.3.5, pluggy-1.5.0 -- C:\Users\18481\AppData\Local\Programs\Python\Python310\python.exe
cachedir: .pytest_cache
rootdir: D:\python_project\API_Auto\API2
configfile: pytest.ini
plugins: allure-pytest-2.13.5, result-log-1.2.2
collecting ... [[1,2],[1,3],[2,3],[5,10],[2,2]
]
collected 27 items / 23 deselected / 4 selected                                                                                                        testcases/test_z2_fixture的作用域.py::test_001 用例執行之前
PASSED用例執行之后testcases/test_z2_fixture的作用域.py::test_002 用例執行之前
FAILED用例執行之后testcases/test_z2_fixture的作用域.py::TestAAA::test_003 用例執行之前
PASSED
testcases/test_z2_fixture的作用域.py::TestAAA::test_004 FAILED用例執行之后====================================================================== FAILURES =======================================================================
______________________________________________________________________ test_002 _______________________________________________________________________ def test_002():
>       assert 1 == 2
E       assert 1 == 2testcases\test_z2_fixture的作用域.py:25: AssertionError
----------------------------------------------------------------- Captured log setup ------------------------------------------------------------------
WARNING  pytest_result_log:plugin.py:122 ---------------Start: testcases/test_z2_fixture的作用域.py::test_002----------------
---------------------------------------------------------------- Captured log teardown ----------------------------------------------------------------
WARNING  pytest_result_log:plugin.py:128 ----------------End: testcases/test_z2_fixture的作用域.py::test_002-----------------
__________________________________________________________________ TestAAA.test_004 ___________________________________________________________________ self = <testcases.test_z2_fixture的作用域.TestAAA object at 0x000001F49CA9A770>def test_004(self):
>       assert 1 == 2
E       assert 1 == 2testcases\test_z2_fixture的作用域.py:34: AssertionError
----------------------------------------------------------------- Captured log setup ------------------------------------------------------------------
WARNING  pytest_result_log:plugin.py:122 -----------Start: testcases/test_z2_fixture的作用域.py::TestAAA::test_004-----------
---------------------------------------------------------------- Captured log teardown ----------------------------------------------------------------
WARNING  pytest_result_log:plugin.py:128 ------------End: testcases/test_z2_fixture的作用域.py::TestAAA::test_004------------
=============================================================== short test summary info ===============================================================
FAILED testcases/test_z2_fixture的作用域.py::test_002 - assert 1 == 2
FAILED testcases/test_z2_fixture的作用域.py::TestAAA::test_004 - assert 1 == 2
===================================================== 2 failed, 2 passed, 23 deselected in 0.21s ======================================================
可以看到,對于TestAAA這個類,第一個用例開始執行之前,觸發了fixture前置,在、最后一個用例執行之后,觸發了fixture后置。而不是想之前每個函數都觸發了fixture前置和后置

- module:模塊(文件)
- 當模塊中第一個用例開始執行之前,會觸發fixture前置
- 當模塊中最后一個用例開始執行之后,會觸發fixture后置
import pytest@pytest.fixture(scope='module', autouse=True)
def func():print("用例執行之前")yield 666print("用例執行之后")def test_001():# print(f"獲取fixture:{func}")assert 1 == 1def test_002():assert 1 == 2class TestAAA:def test_003(self):assert 1 == 1# print(f"獲取fixture:{func}")def test_004(self):assert 1 == 2
執行結果為:
PS D:\python_project\API_Auto\API2> pytest -k test_z2_fixture的作用域.py
================================================================= test session starts =================================================================
platform win32 -- Python 3.10.6, pytest-8.3.5, pluggy-1.5.0 -- C:\Users\18481\AppData\Local\Programs\Python\Python310\python.exe
cachedir: .pytest_cache
rootdir: D:\python_project\API_Auto\API2
configfile: pytest.ini
plugins: allure-pytest-2.13.5, result-log-1.2.2
collecting ... [[1,2],[1,3],[2,3],[5,10],[2,2]
]
collected 27 items / 23 deselected / 4 selected                                                                                                        testcases/test_z2_fixture的作用域.py::test_001 用例執行之前
PASSED
testcases/test_z2_fixture的作用域.py::test_002 FAILED
testcases/test_z2_fixture的作用域.py::TestAAA::test_003 PASSED
testcases/test_z2_fixture的作用域.py::TestAAA::test_004 FAILED用例執行之后====================================================================== FAILURES =======================================================================
______________________________________________________________________ test_002 _______________________________________________________________________ def test_002():
>       assert 1 == 2
E       assert 1 == 2testcases\test_z2_fixture的作用域.py:25: AssertionError
----------------------------------------------------------------- Captured log setup ------------------------------------------------------------------
WARNING  pytest_result_log:plugin.py:122 ---------------Start: testcases/test_z2_fixture的作用域.py::test_002----------------
---------------------------------------------------------------- Captured log teardown ----------------------------------------------------------------
WARNING  pytest_result_log:plugin.py:128 ----------------End: testcases/test_z2_fixture的作用域.py::test_002-----------------
__________________________________________________________________ TestAAA.test_004 ___________________________________________________________________ self = <testcases.test_z2_fixture的作用域.TestAAA object at 0x0000022EF0DEA8C0>def test_004(self):
>       assert 1 == 2
E       assert 1 == 2testcases\test_z2_fixture的作用域.py:34: AssertionError
----------------------------------------------------------------- Captured log setup ------------------------------------------------------------------
WARNING  pytest_result_log:plugin.py:122 -----------Start: testcases/test_z2_fixture的作用域.py::TestAAA::test_004-----------
---------------------------------------------------------------- Captured log teardown ----------------------------------------------------------------
WARNING  pytest_result_log:plugin.py:128 ------------End: testcases/test_z2_fixture的作用域.py::TestAAA::test_004------------
=============================================================== short test summary info ===============================================================
FAILED testcases/test_z2_fixture的作用域.py::test_002 - assert 1 == 2
FAILED testcases/test_z2_fixture的作用域.py::TestAAA::test_004 - assert 1 == 2
===================================================== 2 failed, 2 passed, 23 deselected in 0.21s ======================================================
可以看到,在這個文件的第一個用例執行前觸發了fixture前置,最后一個用例執行后觸發了fixture后置

- 以下2種級別只能在conftest.py文件生效(暫不介紹)
- session:整個項目級別
- package:包級別
4.fixture結合conftest.py文件使用
conftest.py文件在項目中專門用來管理fixture的文件 模塊名字是固定不能修改,而且使用fixture不需要導包,會自動檢測
首先創建conftest.py文件 ,在文件中創建fixture
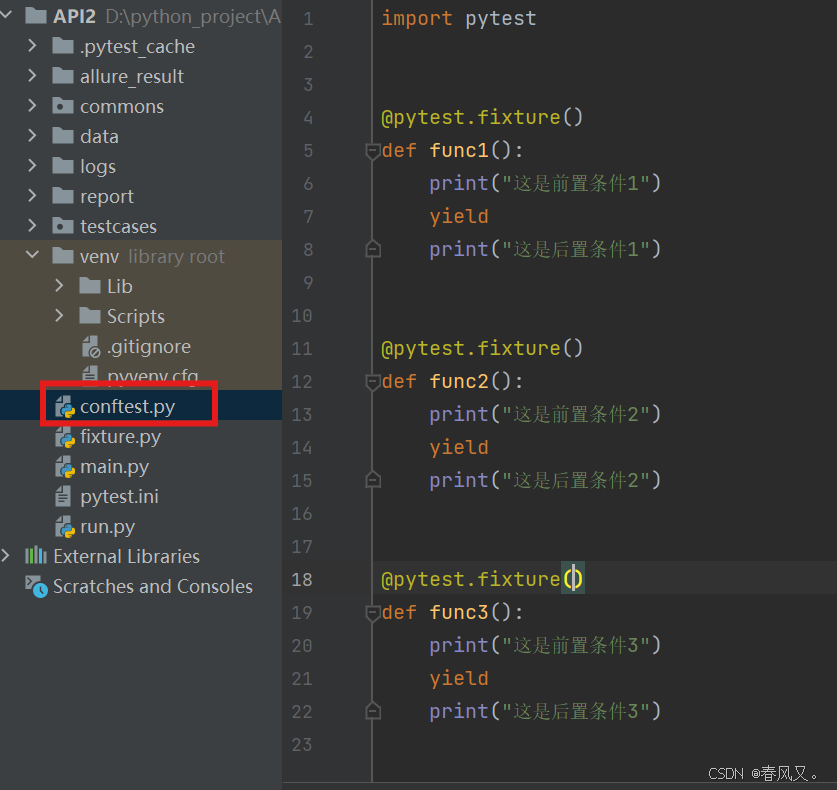
然后 就可以在其他文件中調用fixture,并且不需要導包
# conftest.py 文件下的 fixture 可以 直接使用
def test_001(func1):print("測試用例001")def test_002(func2):print("測試用例002")def test_003(func3):print("測試用例003")
測試結果為 :
PS D:\python_project\API_Auto\API2> pytest -k test_z3_fixture結合conftestpy文件使用.py
================================================================= test session starts =================================================================
platform win32 -- Python 3.10.6, pytest-8.3.5, pluggy-1.5.0 -- C:\Users\18481\AppData\Local\Programs\Python\Python310\python.exe
cachedir: .pytest_cache
rootdir: D:\python_project\API_Auto\API2
configfile: pytest.ini
plugins: allure-pytest-2.13.5, result-log-1.2.2
collecting ... [[1,2],[1,3],[2,3],[5,10],[2,2]
]
collected 27 items / 24 deselected / 3 selected                                                                                                        testcases/test_z3_fixture結合conftestpy文件使用.py::test_001 這是前置條件1
測試用例001
PASSED這是后置條件1testcases/test_z3_fixture結合conftestpy文件使用.py::test_002 這是前置條件2
測試用例002
PASSED這是后置條件2testcases/test_z3_fixture結合conftestpy文件使用.py::test_003 這是前置條件3
測試用例003
PASSED這是后置條件3========================================================== 3 passed, 24 deselected in 0.13s ===========================================================
三.日志記錄Log
記錄日志信息主要的作用是,更好的調試監控和排查測試過程中的問題
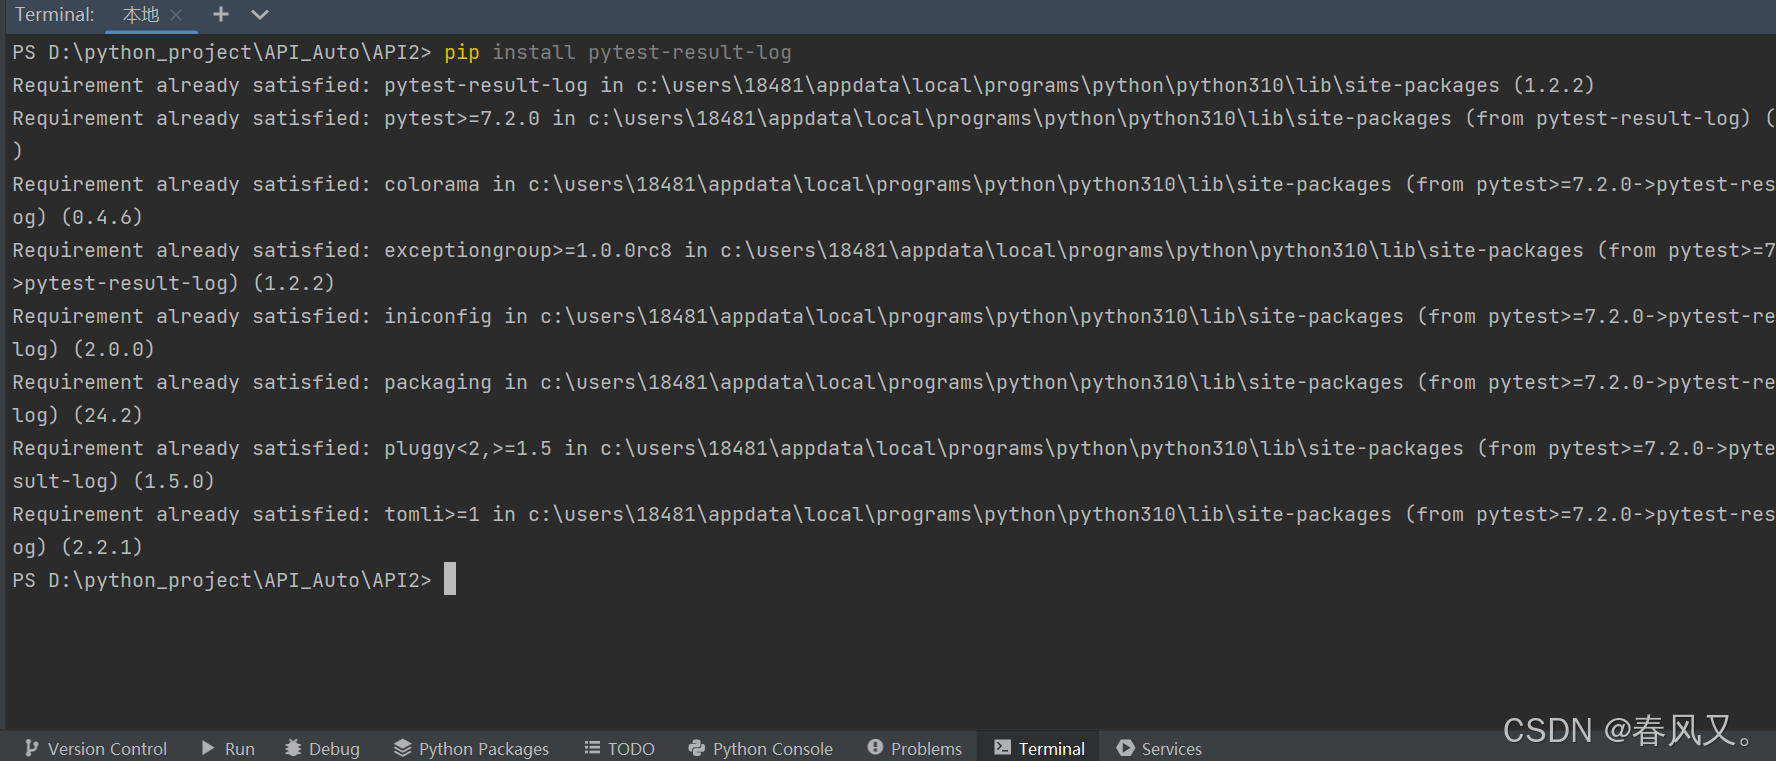
1.安裝日志記錄插件
pip install pytest-result-log
2.在pytest.ini配置文件中進行配置
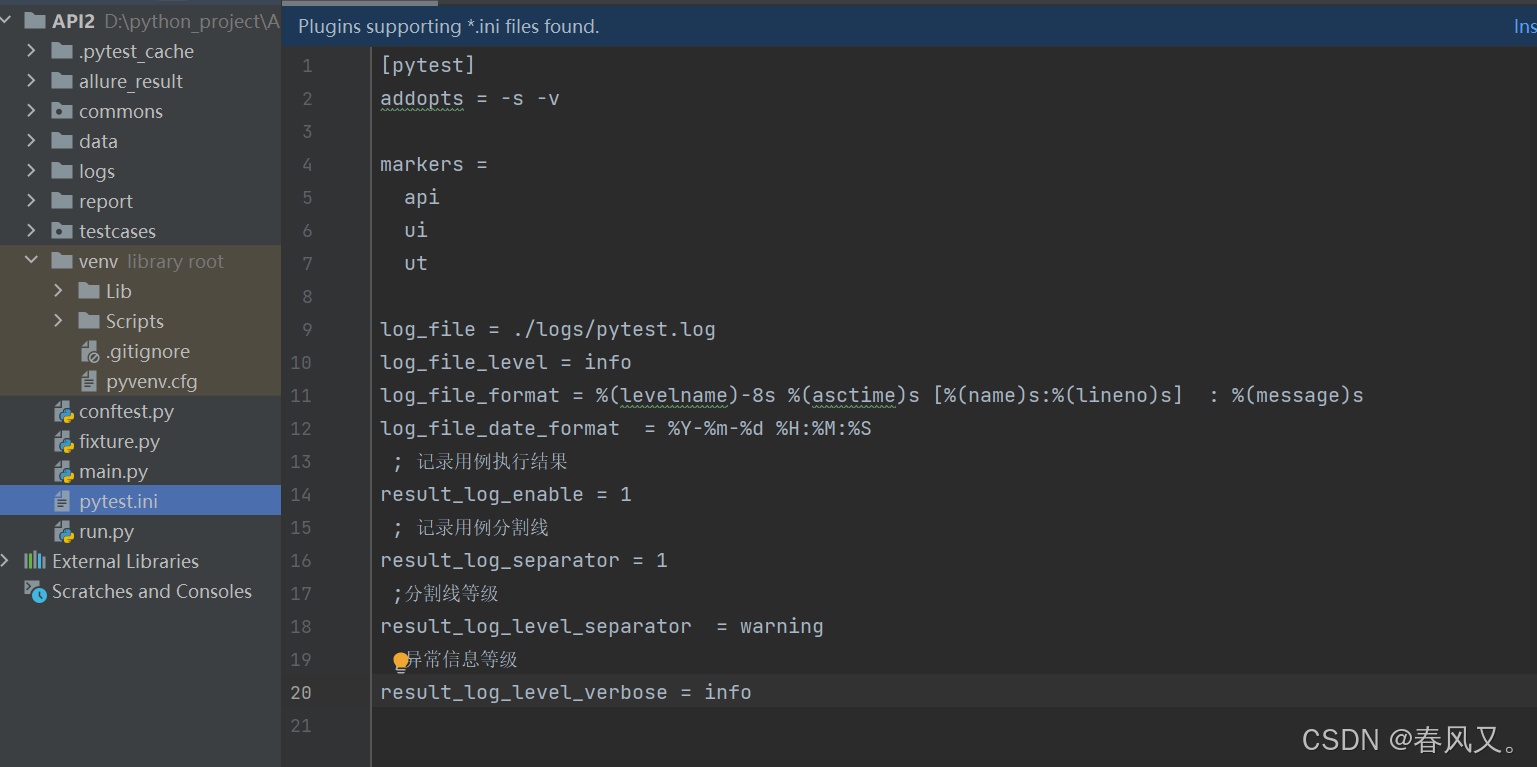
log_file = ./logs/pytest.log
log_file_level = info
log_file_format = %(levelname)-8s %(asctime)s [%(name)s:%(lineno)s]  : %(message)s
log_file_date_format  = %Y-%m-%d %H:%M:%S; 記錄用例執行結果
result_log_enable = 1; 記錄用例分割線
result_log_separator = 1;分割線等級
result_log_level_separator  = warning;異常信息等級
result_log_level_verbose = info
然后執行 測試用例,就會在目錄下生成 logs 目錄,打開目錄中的文件就可以 查看 log了
WARNING  2025-04-19 18:39:32 [pytest_result_log:122]  : ---------Start: testcases/test_z3_fixture結合conftestpy文件使用.py::test_001----------
INFO     2025-04-19 18:39:32 [pytest_result_log:190]  : test status is PASSED (testcases/test_z3_fixture結合conftestpy文件使用.py::test_001):
WARNING  2025-04-19 18:39:32 [pytest_result_log:128]  : ----------End: testcases/test_z3_fixture結合conftestpy文件使用.py::test_001-----------
WARNING  2025-04-19 18:39:32 [pytest_result_log:122]  : ---------Start: testcases/test_z3_fixture結合conftestpy文件使用.py::test_002----------
INFO     2025-04-19 18:39:32 [pytest_result_log:190]  : test status is PASSED (testcases/test_z3_fixture結合conftestpy文件使用.py::test_002):
WARNING  2025-04-19 18:39:32 [pytest_result_log:128]  : ----------End: testcases/test_z3_fixture結合conftestpy文件使用.py::test_002-----------
WARNING  2025-04-19 18:39:32 [pytest_result_log:122]  : ---------Start: testcases/test_z3_fixture結合conftestpy文件使用.py::test_003----------
INFO     2025-04-19 18:39:32 [pytest_result_log:190]  : test status is PASSED (testcases/test_z3_fixture結合conftestpy文件使用.py::test_003):
WARNING  2025-04-19 18:39:32 [pytest_result_log:128]  : ----------End: testcases/test_z3_fixture結合conftestpy文件使用.py::test_003-----------
四.測試報告 allure
allure報告是一種非常流行的測試報告工具,可以結合多種測試框架集成使用,它提供了一個直觀界面,幫助開發人員和測試人員分析測試結果
1.安裝 allure
大家可以搜一搜哈,將這個的很多,這里就不多說了。安裝完allure后,記得安裝第三方 庫
pip install allure-pytest
2.使用allure
需要在main.py模塊中配置測試報告相關參數
import os
import pytest# 放測試用例的目錄
pytest.main(['-sv', r'D:\python_project\API_Auto\API2\testcases', '--clean-alluredir', '--alluredir', './allure_result'])
# 清理舊的測試報告,將allure的測試結果分析生成HTML報告
os.system('allure generate ./allure_result -o ./report --clean')
配置好后右鍵運行右鍵main.py模塊運行測試用例,然后 找到生成的report目錄下的 index.html文件,選一個瀏覽器打開 就能看到allure報告了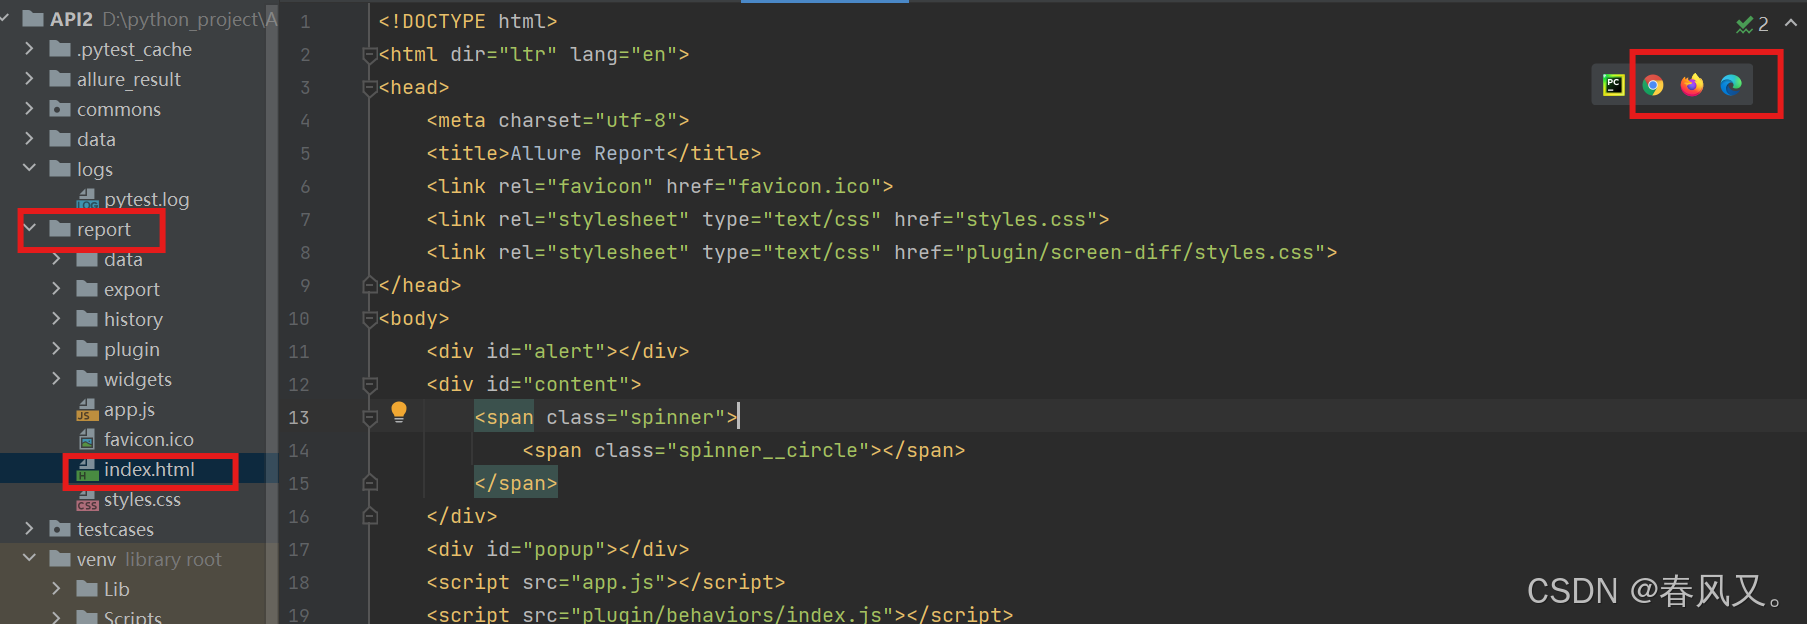
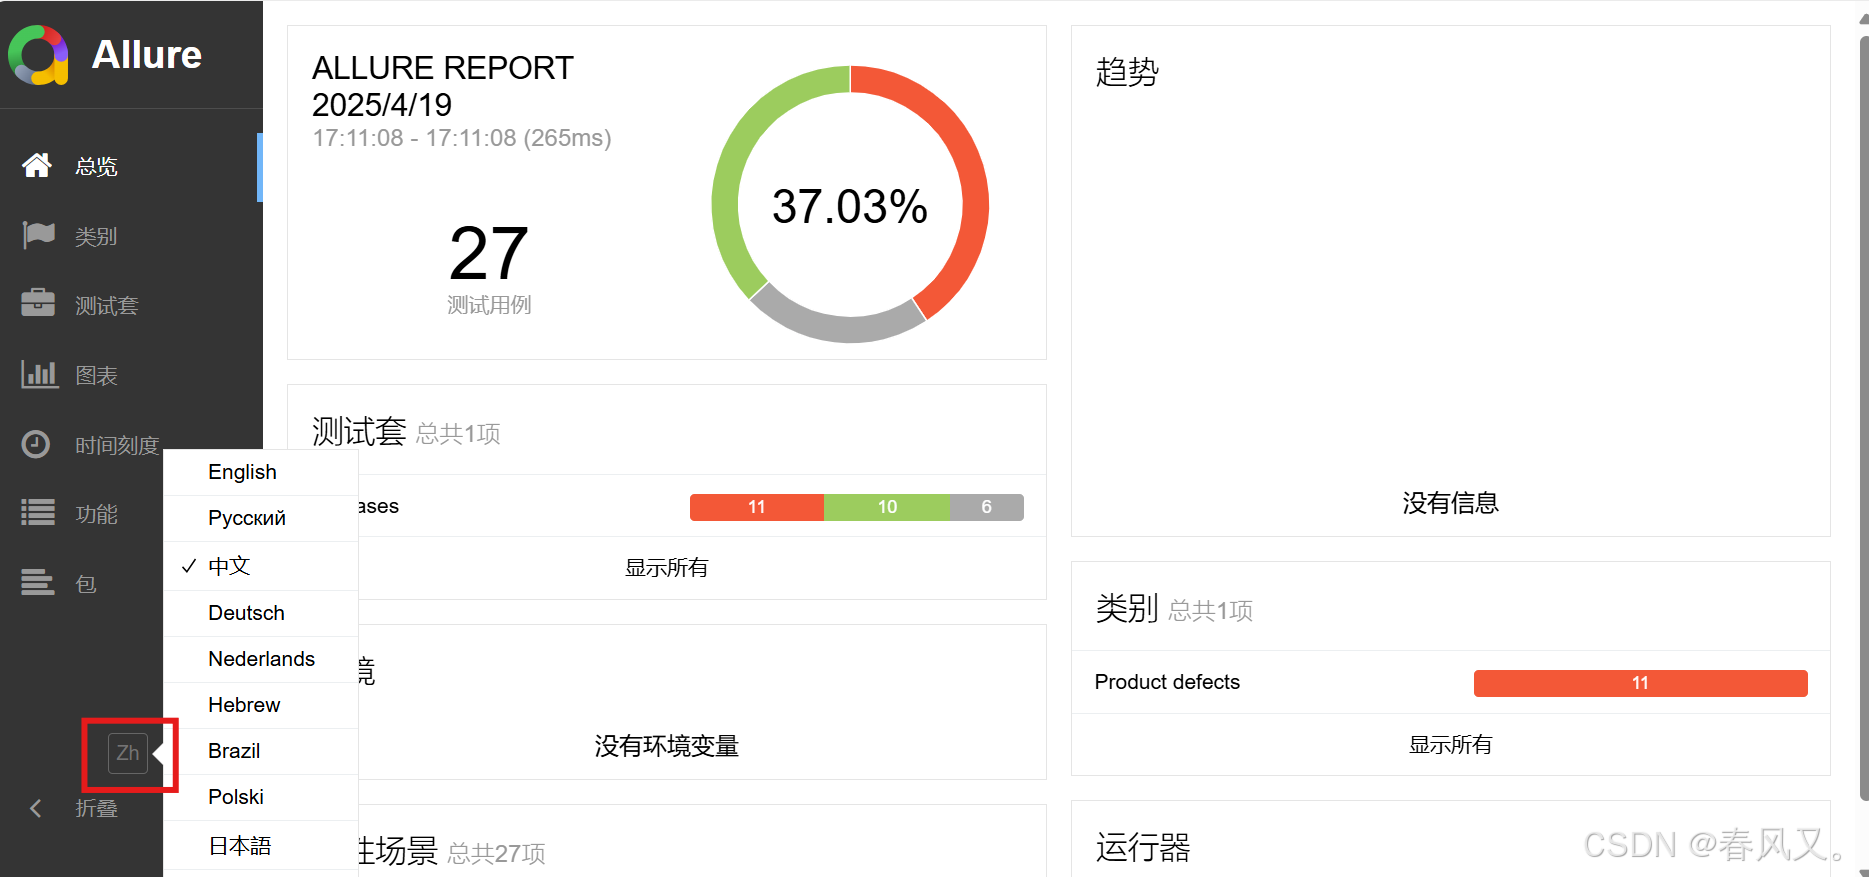
點擊 左下角可以切換語言
3.編輯allure
3.1.添加測試步驟
在測試用例上添加 @allure.step(),還可以與參數化之類一起使用
# a.添加測試步驟 @allure.step("test_0001")
@allure.step("test_0001")
@pytest.mark.parametrize(("x", "y"),[[1, 2],[3, 3],[2, 5]]
)
def test_001(x, y):print("AAABBBB")assert x == y
使用后結果為: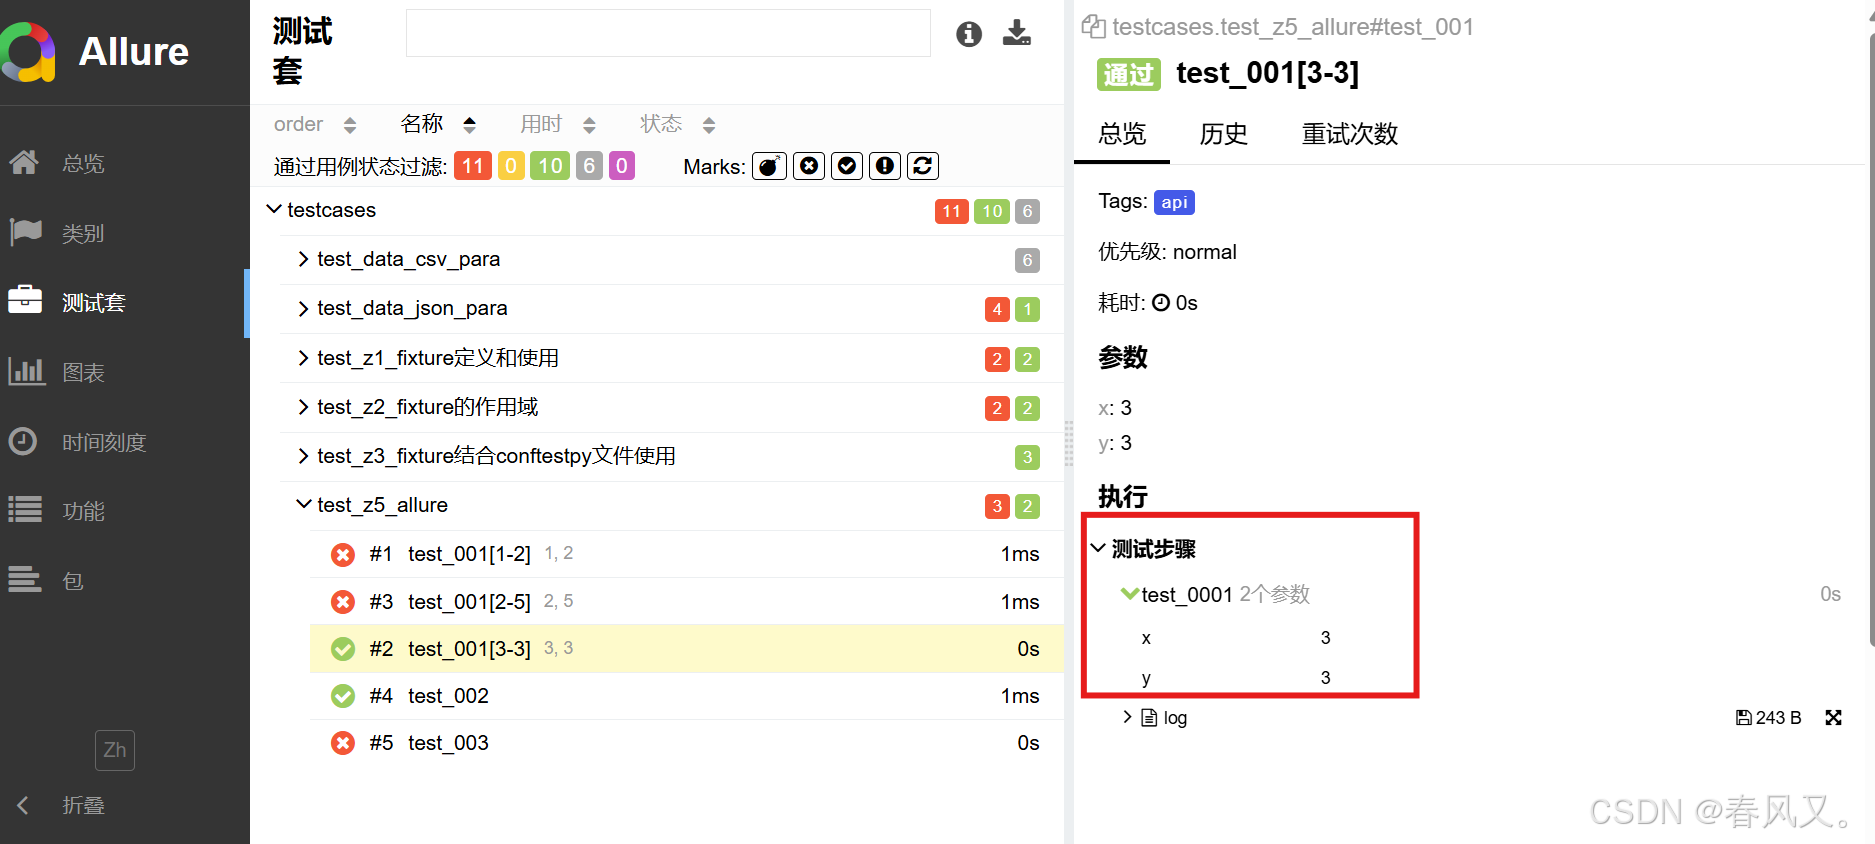
3.2.添加測試描述信息
能夠給測試用例在報告中記錄每一步執行信息
allure.attach()
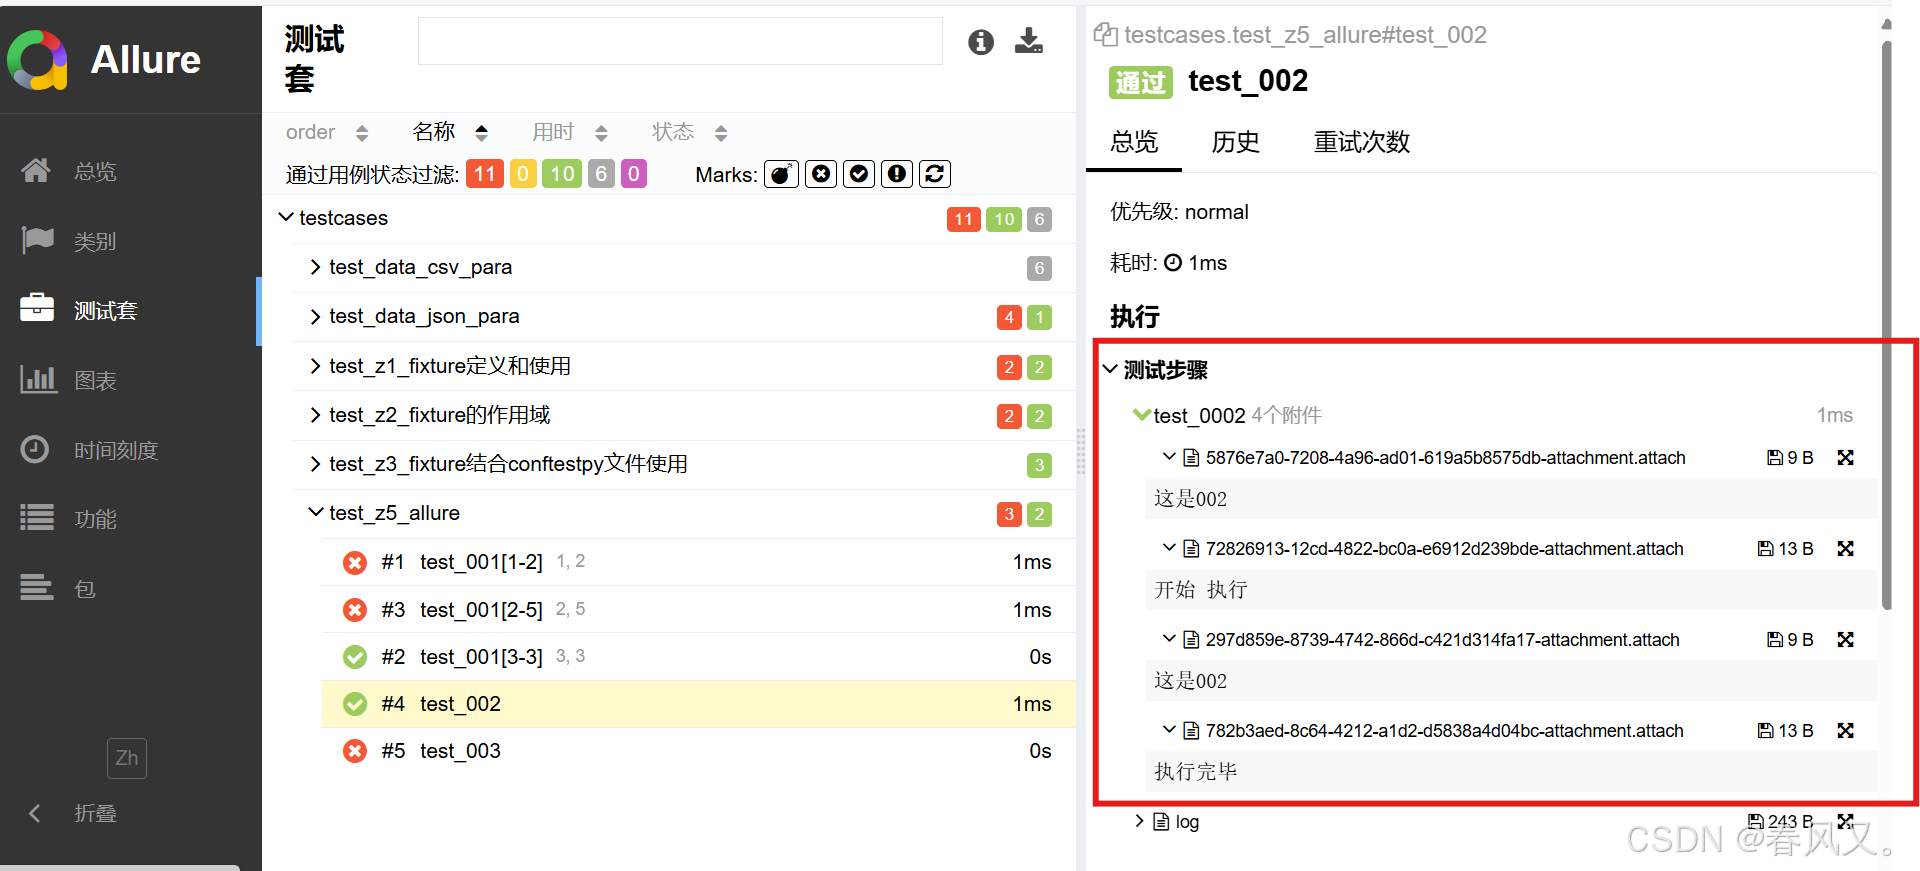
# b.添加測試描述信息,給測試用例再報告中輸出每一步的執行信息 allure.attach()
@allure.step("test_0002")
def test_002():allure.attach("這是002")allure.attach("開始 執行")print("AAABBBB")allure.attach("這是002")allure.attach("執行完畢 ")assert 1 == 1
結果為:
3.3添加嚴重程度?
bug有不同的嚴重等級:
- blocker ? ? ? ?阻塞缺陷(功能未實現,無法下一步)
- critical ? ? ? 嚴重缺陷(功能點缺失)
- normal ? ? ? ? 一般缺陷(邊界情況,格式錯誤,默認bug等級)
- minor ? ? ? ? ?次要缺陷(界面錯誤與ui需求不符)
- trivial ? ? ? ?輕微缺陷(必須項無提示,或者提示不規范)
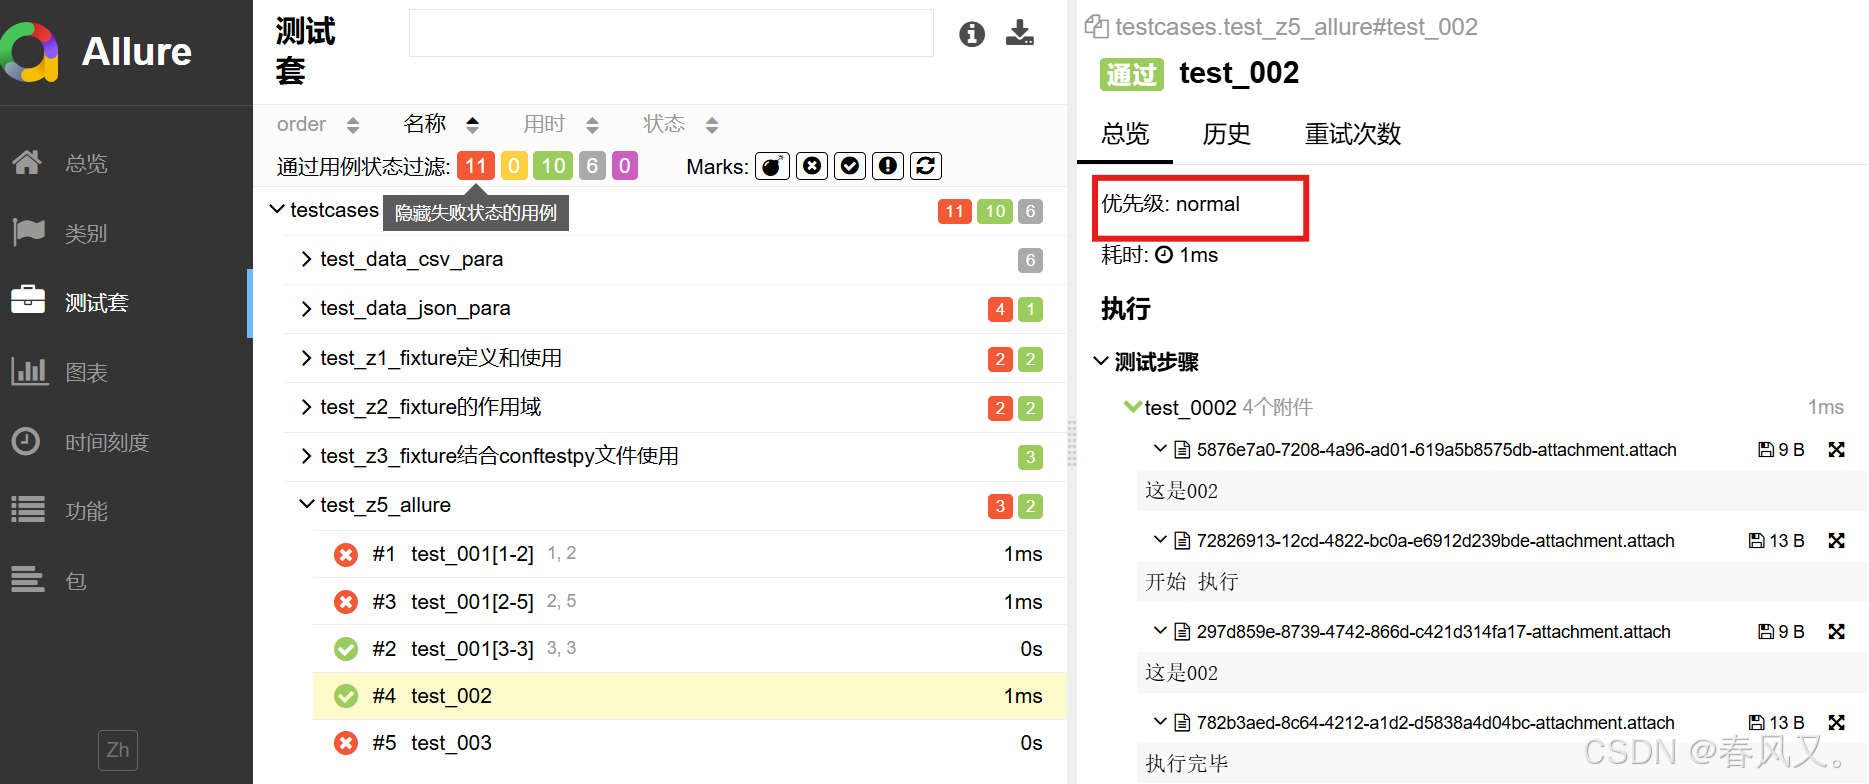
可以在報告中 看到,如果沒有特別說明,優先級默認都是normal?
@allure.severity(allure.severity_level.CRITICAL)
@allure.severity(allure.severity_level.CRITICAL)
def test_003():print("AAABBBB")assert 1 == 2
測試結果 為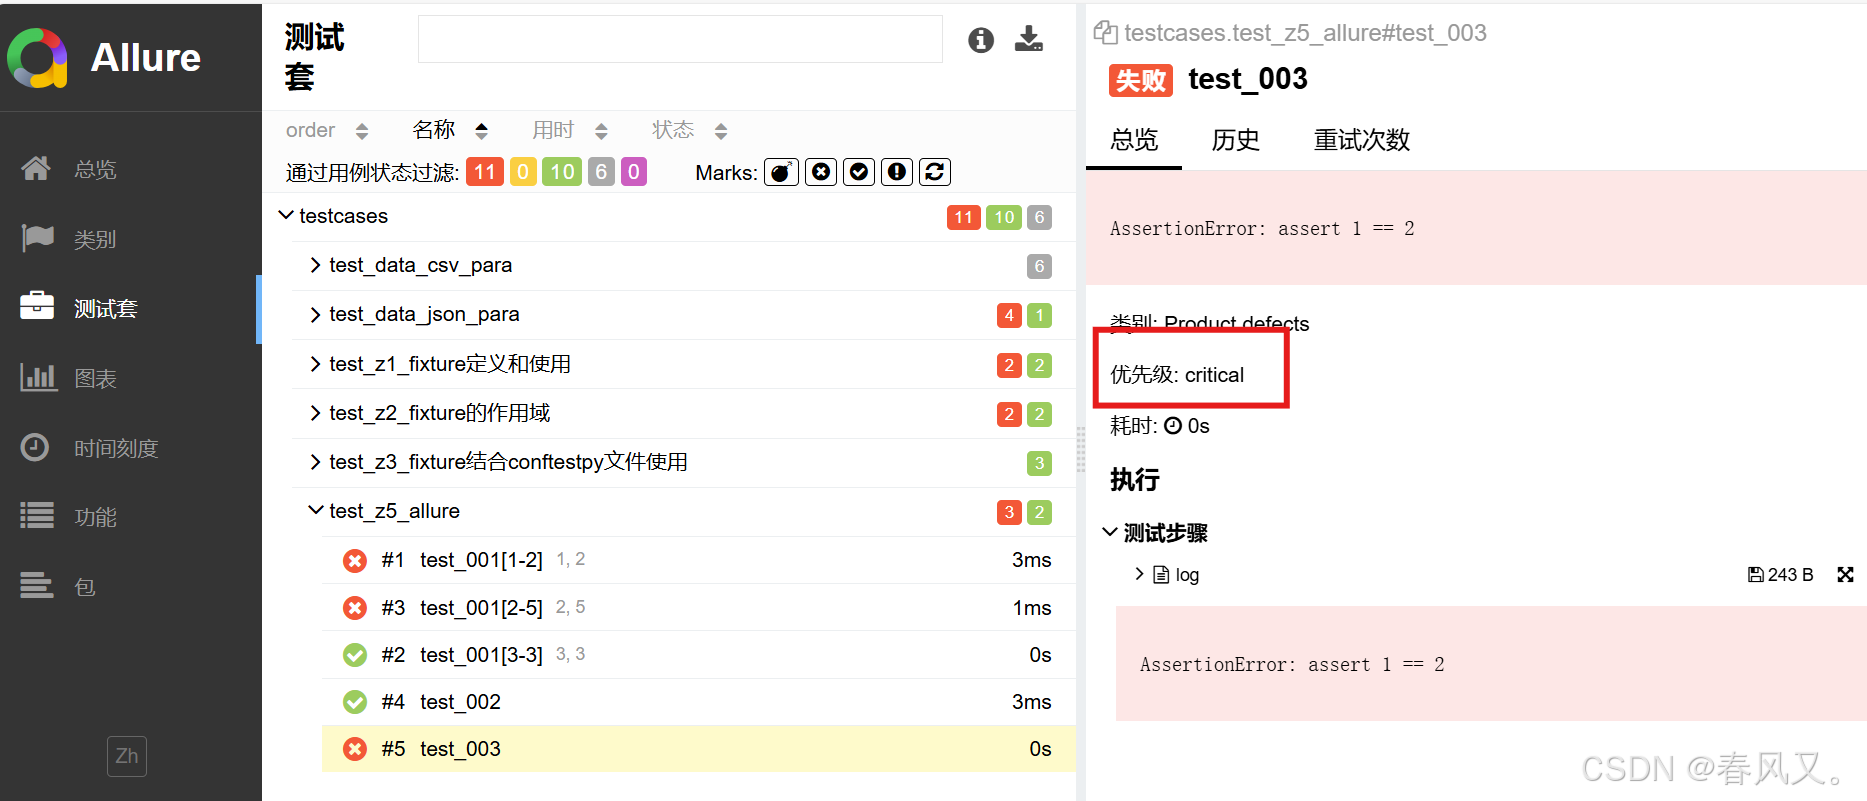
可以看到,優先級變為了設置的?
是什么)


)


Java/python/JavaScript/C++/C語言/GO六種最佳實現)

