Spring Security概述
1.什么是Spring Security?
Spring Security是一個Java框架,用于保護應用程序的安全性。它提供了一套全面的安全解決方案,包括身份驗證、授權、防止攻擊等功能。Spring Security基于過濾器鏈的概念,可以輕松地集成到任何基于Spring的應用程序中。它支持多種身份驗證選項和授權策略,開發人員可以根據需要選擇適合的方式。此外,Spring Security還提供了一些附加功能,如集成第三方身份驗證提供商和單點登錄,以及會話管理和密碼編碼等。總之,Spring Security是一個強大且易于使用的框架,可以幫助開發人員提高應用程序的安全性和可靠性。
什么是授權
這個根據用戶的權限來控制用戶使用資源的過程就是授權。
為什么要授權
認證是為了保護用戶身份的合法性,授權則是為了更細的粒度的對隱私數據經行劃分,授權是在認證通過后發生的,控制不同的用戶能夠訪問不同的資源;
授權:授權是用戶認證通過根據用戶的權限來控制用戶訪問資源的過程,擁有資源的訪問權限則正常訪問,沒有權限則拒絕訪問;
Spring Security入門體驗
一.快速搭建Spring Security安全框架項目;
1.1--創建一個SpringBoot項目;
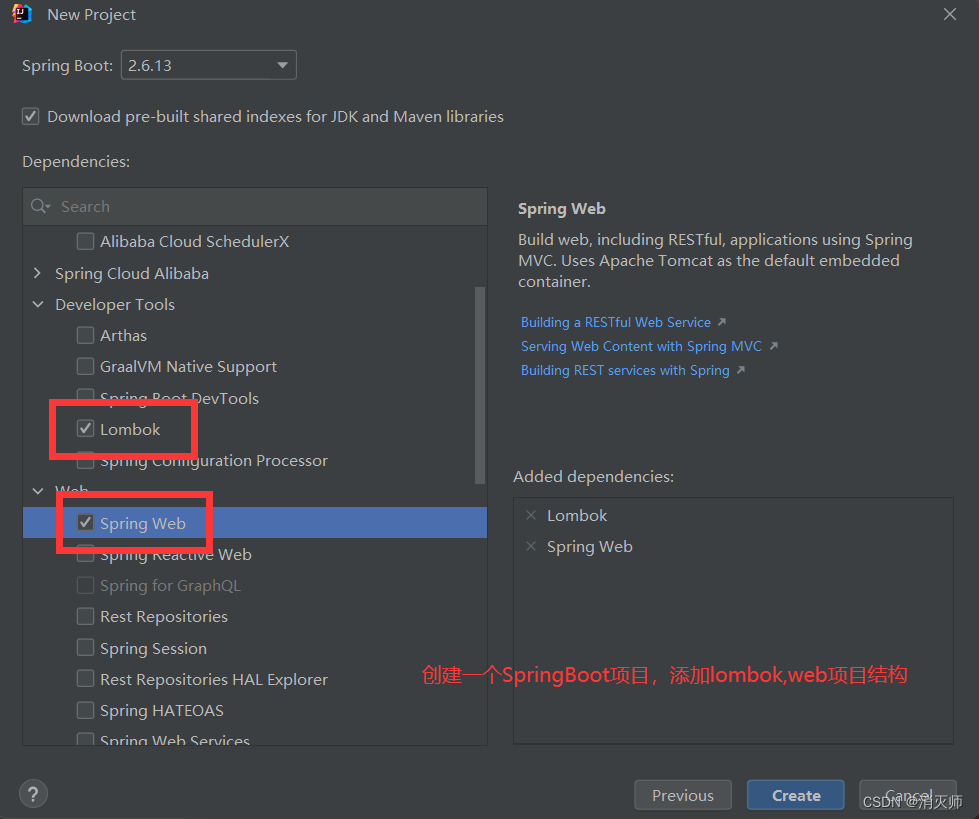
1.2--修改SpringBoot的版本號,并修改jdk版本號;
<?xml version="1.0" encoding="UTF-8"?>
<project xmlns="http://maven.apache.org/POM/4.0.0" xmlns:xsi="http://www.w3.org/2001/XMLSchema-instance"xsi:schemaLocation="http://maven.apache.org/POM/4.0.0 https://maven.apache.org/xsd/maven-4.0.0.xsd"><modelVersion>4.0.0</modelVersion><groupId>com.example</groupId><artifactId>SpringSecurity001</artifactId><version>0.0.1-SNAPSHOT</version><name>SpringSecurity001</name><description>SpringSecurity001</description><properties><java.version>1.8</java.version><project.build.sourceEncoding>UTF-8</project.build.sourceEncoding><project.reporting.outputEncoding>UTF-8</project.reporting.outputEncoding><spring-boot.version>2.6.13</spring-boot.version><!--SpringBoot版本號   這里使用的JDK版本為8--></properties><dependencies><!--引入Spring Security安全框架依賴--><dependency><groupId>org.springframework.boot</groupId><artifactId>spring-boot-starter-security</artifactId></dependency><dependency><groupId>org.springframework.boot</groupId><artifactId>spring-boot-starter-web</artifactId></dependency><!--添加lombok依賴  實體類的get set方法生成--><dependency><groupId>org.projectlombok</groupId><artifactId>lombok</artifactId><optional>true</optional></dependency><!--測試依賴--><dependency><groupId>org.springframework.boot</groupId><artifactId>spring-boot-starter-test</artifactId><scope>test</scope></dependency></dependencies><dependencyManagement><dependencies><dependency><groupId>org.springframework.boot</groupId><artifactId>spring-boot-dependencies</artifactId><version>${spring-boot.version}</version><type>pom</type><scope>import</scope></dependency></dependencies></dependencyManagement><build><plugins><plugin><groupId>org.apache.maven.plugins</groupId><artifactId>maven-compiler-plugin</artifactId><version>3.8.1</version><configuration><source>1.8</source><target>1.8</target><encoding>UTF-8</encoding></configuration></plugin><plugin><groupId>org.springframework.boot</groupId><artifactId>spring-boot-maven-plugin</artifactId><version>${spring-boot.version}</version><configuration><mainClass>com.aaa.SpringSecurity001Application</mainClass><skip>true</skip></configuration><executions><execution><id>repackage</id><goals><goal>repackage</goal></goals></execution></executions></plugin></plugins></build></project>
1.3--引入SPringleSecurity依賴;
<!--引入Spring Security安全框架依賴--><dependency><groupId>org.springframework.boot</groupId><artifactId>spring-boot-starter-security</artifactId></dependency>1.4--創建一個HelloController,Controller層定義一個資源;

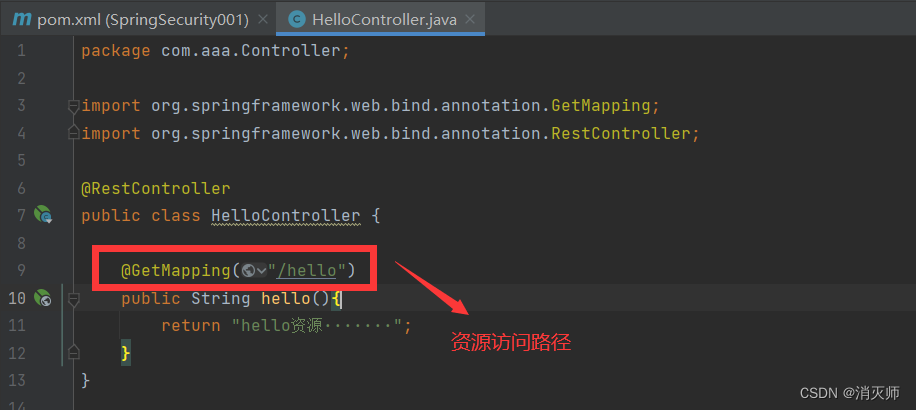
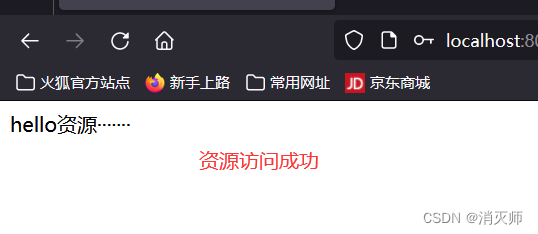
1.5--啟動項目并訪問資源路徑;
訪問路徑:http://localhost:8080/hello
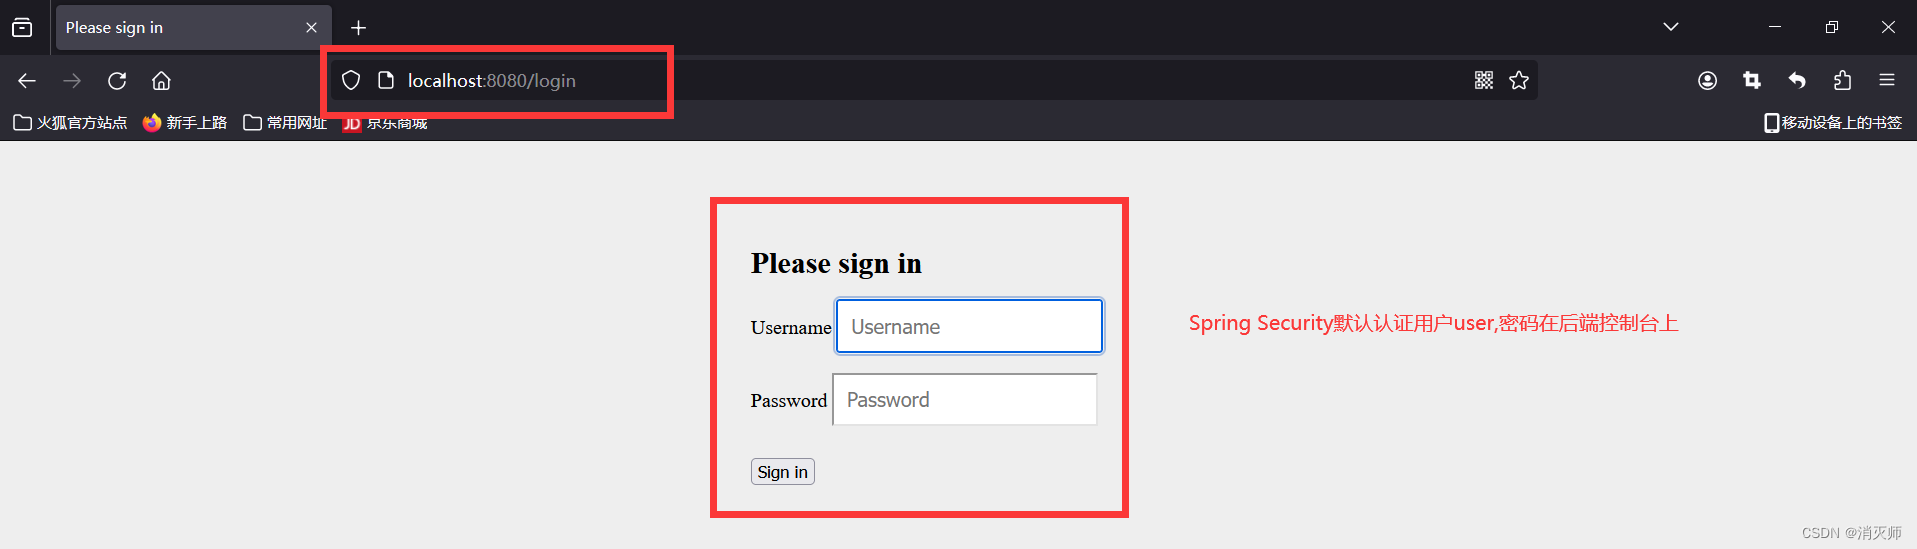
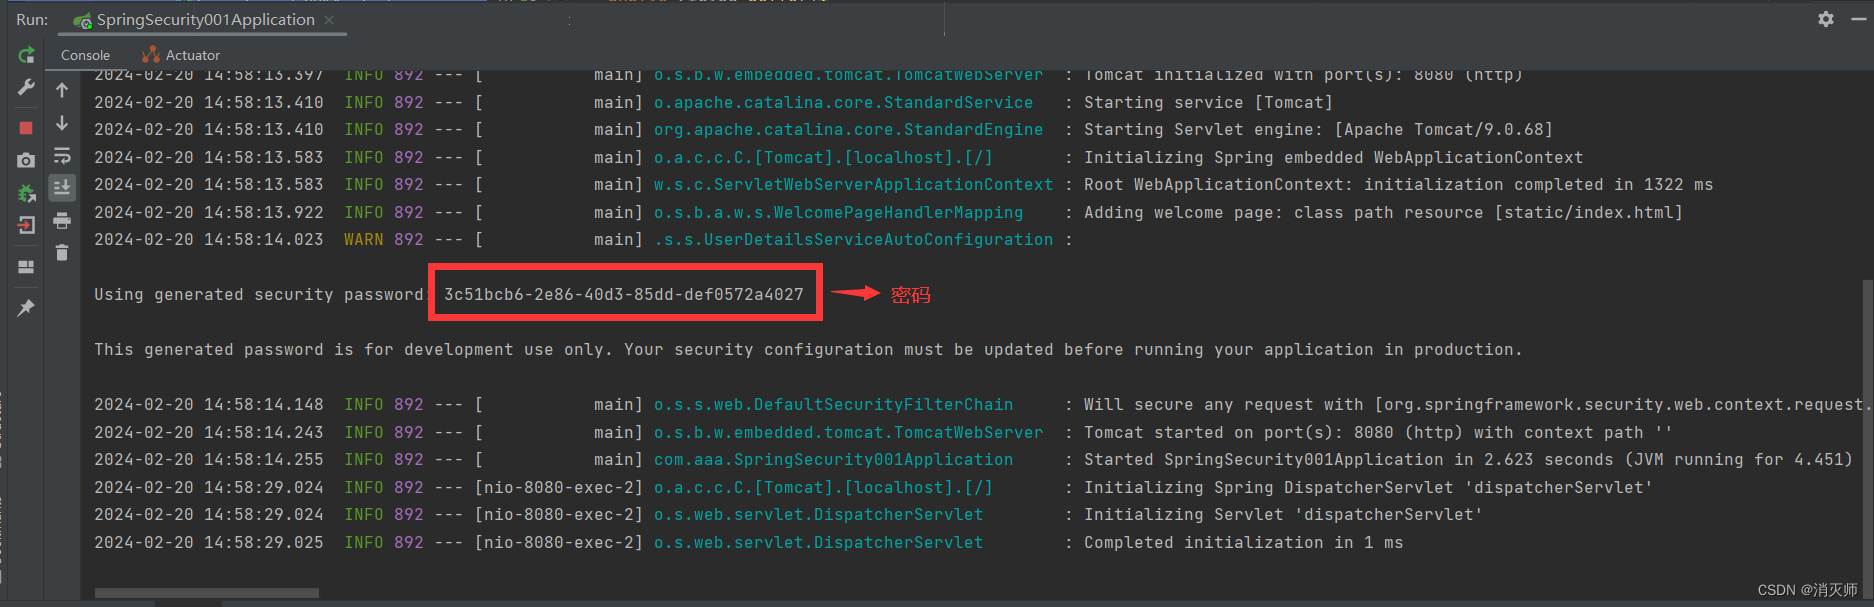
注:我們發現使用了security后在訪問我們自己的接口,security會攔截并跳轉到認證頁面,認證后才可以訪問。默認認證的賬號uer密碼在控制臺;

二.創建Spring Security自定義賬戶和密碼;
我們剛才使用的是security自帶的賬戶和密碼,我們自己也可以自定義賬戶和密碼;
2.1--在application.properties配置文件中定義一個賬戶和密碼;
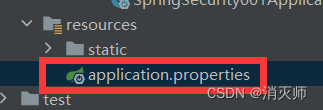
自定義賬戶和密碼文件如下:
#創建Spring Security自定義賬戶和密碼#賬戶
spring.security.user.name=admin
#密碼
spring.security.user.password=123456
server.port=8080
注:配置完自定義文件和密碼,重啟運行,這是控制臺中沒有密碼(控制臺不會生成密碼);


注:這種方式只能定義一個賬戶和密碼,無法定義多個賬戶和密碼;
三.自定義多個賬戶和密碼
在配置文件中,只能定義一個賬戶和密碼。我們可以定義一個配置類,完成多個賬號和密碼的定義;
1.創建Config層 MysecurityConfig;
配置類內容
package com.aaa.config;import org.springframework.context.annotation.Configuration;
import org.springframework.security.config.annotation.authentication.builders.AuthenticationManagerBuilder;
import org.springframework.security.config.annotation.web.configuration.WebSecurityConfigurerAdapter;@Configuration
public class MySecurityConfig extends WebSecurityConfigurerAdapter {@Overrideprotected void configure(AuthenticationManagerBuilder auth) throws Exception {auth.inMemoryAuthentication() //基于內存創建的賬戶和密碼  未來可以用來連接數據庫//賬戶.withUser("zhangsan")//密碼.password("123456")//用戶具備的角色.roles("admin").and() //連接符.withUser("lisi").password("012345").roles("test").and().withUser("wangwu").password("567890").roles("group");}
}
注:如果使用了配置類,那么之前在配置文件中定義的賬戶和密碼不在生效;
控制臺錯誤提示:需要給它指定的加密器;

解決方式:添加加密器
//可以把該方法返回的對象交于Spring容器管理@Beanpublic PasswordEncoder passwordEncoder(){return new BCryptPasswordEncoder();}package com.aaa.config;import org.springframework.context.annotation.Bean;
import org.springframework.context.annotation.Configuration;
import org.springframework.security.config.annotation.authentication.builders.AuthenticationManagerBuilder;
import org.springframework.security.config.annotation.web.configuration.WebSecurityConfigurerAdapter;
import org.springframework.security.crypto.bcrypt.BCryptPasswordEncoder;
import org.springframework.security.crypto.password.PasswordEncoder;@Configuration
public class MySecurityConfig extends WebSecurityConfigurerAdapter {//可以把該方法返回的對象交于Spring容器管理@Beanpublic PasswordEncoder passwordEncoder(){return new BCryptPasswordEncoder();}@Overrideprotected void configure(AuthenticationManagerBuilder auth) throws Exception {auth.inMemoryAuthentication() //基于內存創建的賬戶和密碼 未來可以用來連接數據庫//賬戶.withUser("zhangsan")//密碼.password(passwordEncoder().encode("123456"))//用戶具備的角色.roles("admin").and() //連接符.withUser("lisi").password(passwordEncoder().encode("012345")).roles("test").and().withUser("wangwu").password(passwordEncoder().encode("567890")).roles("group");}
}
注:把明文密碼通過加密器經行加密;
再次訪問資源

四.密碼加密器
密碼加密器,可以把把明文轉換為密文 encode
同時也可以匹配密碼 matches;
package com.aaa.Test;import org.springframework.security.crypto.bcrypt.BCryptPasswordEncoder;
import org.springframework.security.crypto.password.PasswordEncoder;public class test {public static void main(String[] args) {//創建加密器對象PasswordEncoder passwordEncoder = new BCryptPasswordEncoder();//使用加密器String encode = passwordEncoder.encode("123456");System.out.println(encode);//匹配密碼  第一個參數是客戶輸得密碼   第二個參數是加密器密文//把客戶輸得密碼和加密過的密碼經行比對是否一致,一致返回true,不一致返回flase;boolean matches = passwordEncoder.matches("123456", encode);//結果為trueSystem.out.println(matches);   }
}
?
問題:對稱加密和非對稱加密
答:對稱加密:加密和解密使用的密鑰是同一個; --這種加密的方式可以破解
??????非對稱加密: 加密和解密使用的密鑰不是同一個;--這種加密的方式無法破解
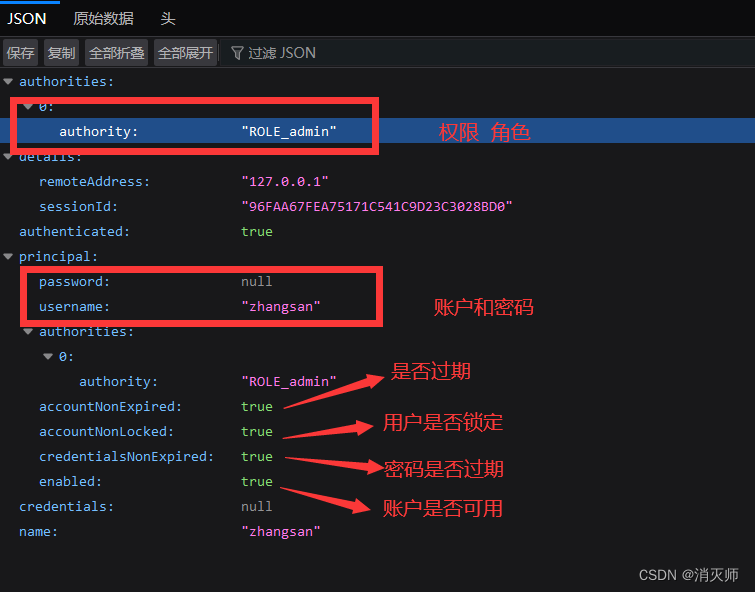
五.獲取當前用戶的信息
獲取登錄成功者的信息
package com.aaa.Controller;import org.springframework.security.core.Authentication;
import org.springframework.security.core.context.SecurityContext;
import org.springframework.security.core.context.SecurityContextHolder;
import org.springframework.web.bind.annotation.GetMapping;
import org.springframework.web.bind.annotation.RestController;@RestController
public class HelloController {@GetMapping("/hello")public String hello(){return "hello資源·······";}@GetMapping("/info")public Authentication info(){//把當前信息保存到SecurityContext類中;SecurityContext securityContext = SecurityContextHolder.getContext();//把當前用戶封裝到Authentication類中  賬戶  密碼 權限 角色等信息Authentication authentication = securityContext.getAuthentication();return authentication;}
}
Security框架會把當前用戶信息封裝到Authentication中,并把該類對象存放到SecurityContext中;
訪問資源路徑http://localhost:8080/info
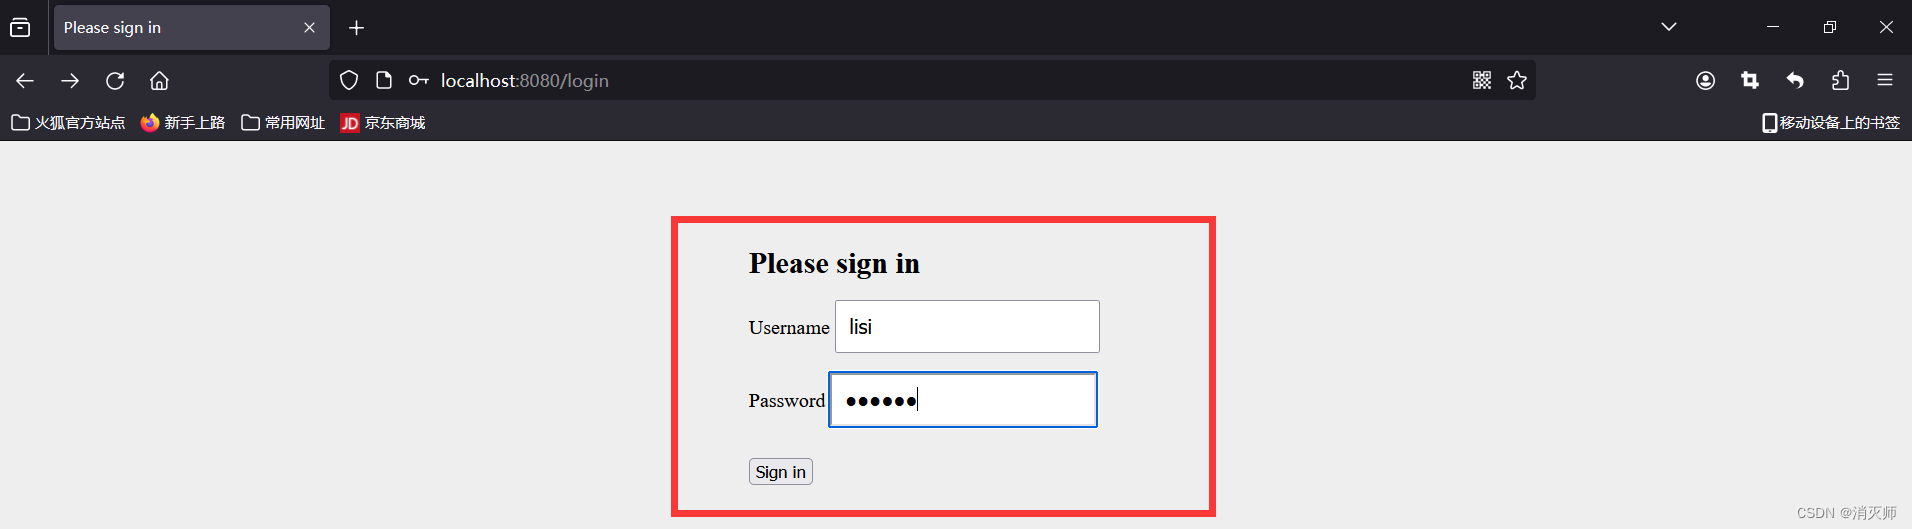
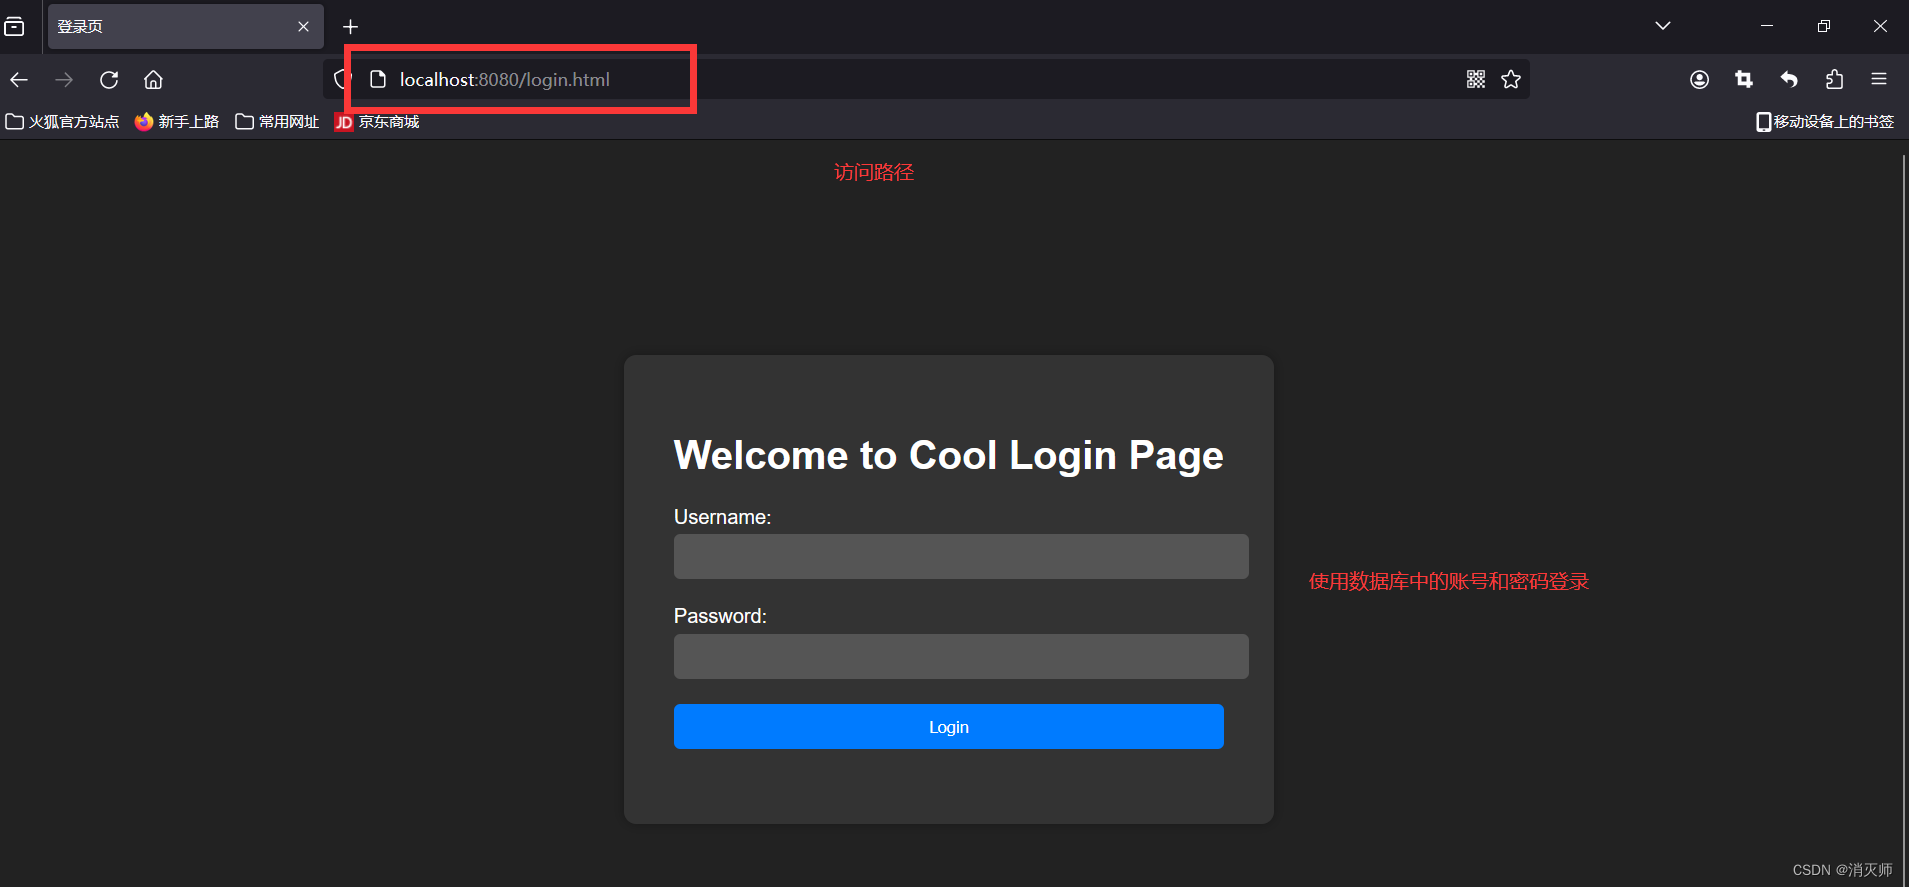
六.修改它的登錄頁面
默認security提供了一個登錄頁面,如果不想使用它提供的頁面,我們可以指定我們自己的登錄頁面;
1.自己在static靜態資源文件下創建一個登錄頁面;
<!DOCTYPE html>
<html lang="en">
<head><meta charset="UTF-8"><title>登錄頁</title><style>body {background-color: #222;font-family: Arial, sans-serif;color: #fff;display: flex;align-items: center;justify-content: center;height: 100vh;}.login-container {background-color: #333;padding: 40px;border-radius: 10px;box-shadow: 0 0 10px rgba(0, 0, 0, 0.3);}h1 {text-align: center;}.form-group {margin-bottom: 20px;}.form-group label {display: block;margin-bottom: 5px;}.form-group input[type="text"],.form-group input[type="password"] {width: 100%;padding: 10px;border-radius: 5px;border: none;background-color: #555;color: #fff;}.form-group input[type="submit"] {width: 100%;padding: 10px;border-radius: 5px;border: none;background-color: #007bff;color: #fff;cursor: pointer;transition: background-color 0.3s ease;}.form-group input[type="submit"]:hover {background-color: #0056b3;}</style>
</head>
<body>
<div class="login-container"><h1>Welcome to Cool Login Page</h1><form action="login" method="post"><div class="form-group"><label for="username">Username:</label><!--賬戶--><input type="text" id="username" name="username" required></div><div class="form-group"><label for="password">Password:</label><!--密碼--><input type="password" id="password" name="password" required></div><div class="form-group"><input type="submit" value="Login"></div></form>
</div>
</body>
</html>
2.修改security配置類;在config層 HelloConfig文件中重寫configure方法;
@Overrideprotected void configure(HttpSecurity http) throws Exception {//設置表單登錄信息http.formLogin()//設置自己的登錄頁面.loginPage("/login.html")//設置登錄表單的提交路徑 要和login.html中的action一致.loginProcessingUrl("/login")//這個頁面允許放行.permitAll();//禁止跨域偽造請求驗證http.csrf().disable();//其他請求路徑都要認證http.authorizeRequests().anyRequest().authenticated();}訪問路徑訪問info或者hello都可以進入到自己的登錄頁面;


七.設置跳轉登錄成功頁面
默認登錄成功 / 或原來的訪問路徑
創建SuccessController
package com.aaa.Controller;import org.springframework.stereotype.Controller;
import org.springframework.web.bind.annotation.PostMapping;
import org.springframework.web.bind.annotation.RestController;@Controller
public class SuccessController {@PostMapping("/success")public String success(){return "redirect:/success.html";}
}
創建一個success.html登錄成功頁面
<!DOCTYPE html>
<html lang="en">
<head><meta charset="UTF-8"><title>Title</title>
</head>
<body>
<h1>登錄成功</h1>
</body>
</html>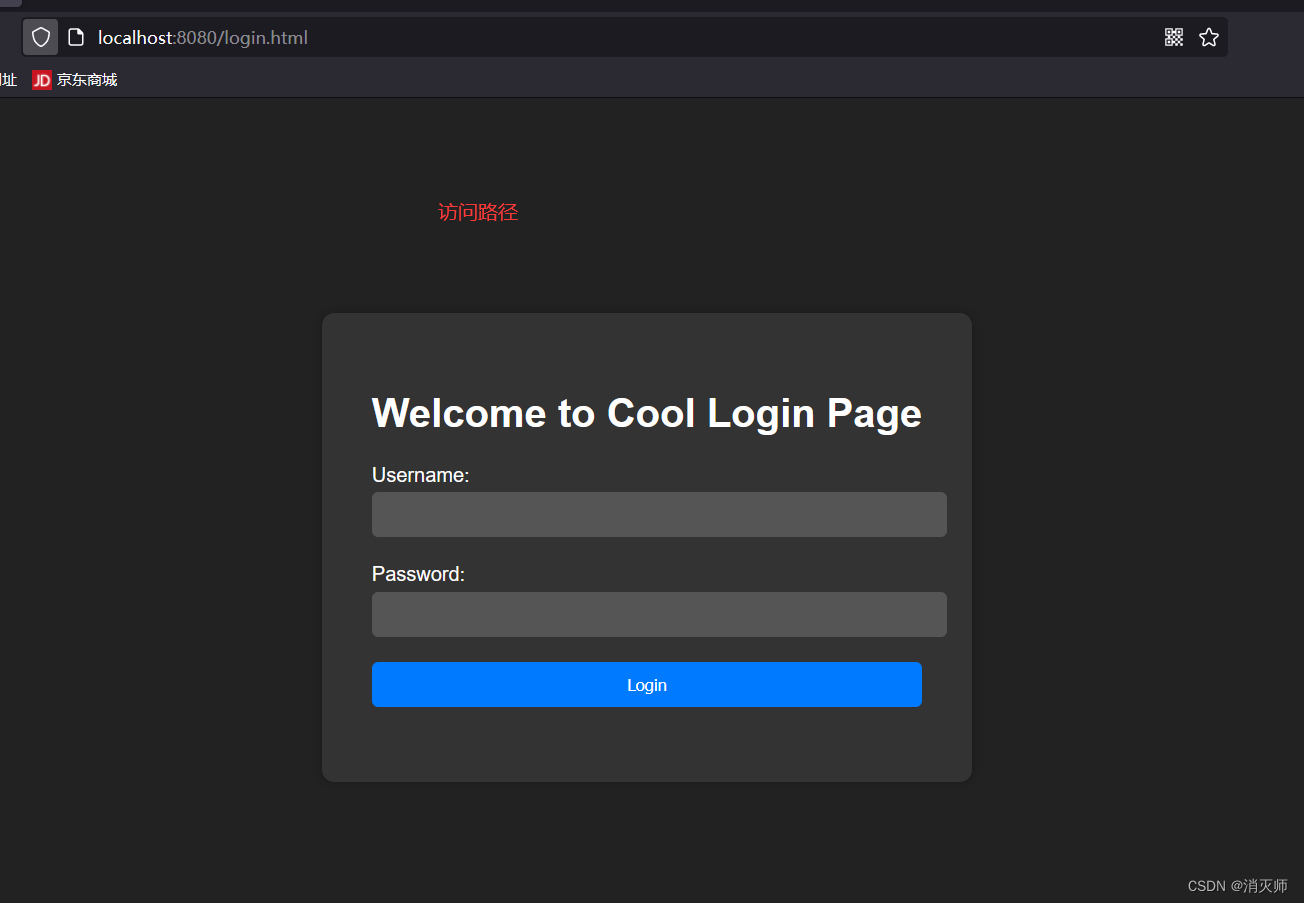
輸入賬號和密碼
 登錄成功
登錄成功
授權的實現
授權:用戶具有的權限和資源綁定的過程就是授權;
第一步:修改config? MySecurityConfig配置文件

?第二步:創建自定義資源訪問? controller層??AuthController資源文件
package com.aaa.Controller;import org.springframework.security.access.prepost.PreAuthorize;
import org.springframework.web.bind.annotation.GetMapping;
import org.springframework.web.bind.annotation.RestController;//資源
@RestController
public class AuthController {@GetMapping("select")public String select(){System.out.println("查詢資源");return "查詢資源";}@GetMapping("update")public String update(){System.out.println("修改資源");return "修改資源";}@GetMapping("delete")public String delete(){System.out.println("刪除資源");return "刪除資源";}@GetMapping("xxx")public String xxx(){System.out.println("共享資源");return "共享資源";}
}
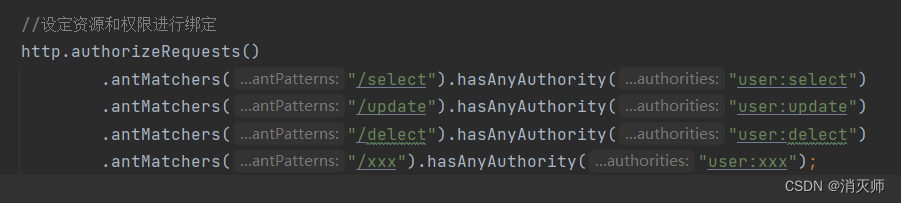
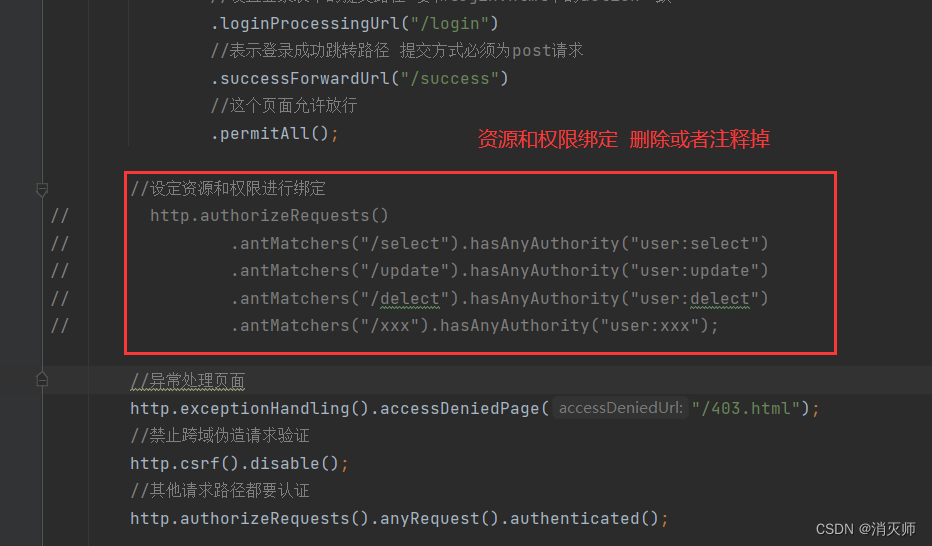
第三步:?權限和資源進行綁定? ?config? MySecurityConfig配置文件
package com.aaa.config;import org.springframework.context.annotation.Bean;
import org.springframework.context.annotation.Configuration;
import org.springframework.security.config.annotation.authentication.builders.AuthenticationManagerBuilder;
import org.springframework.security.config.annotation.web.builders.HttpSecurity;
import org.springframework.security.config.annotation.web.configuration.WebSecurityConfigurerAdapter;
import org.springframework.security.crypto.bcrypt.BCryptPasswordEncoder;
import org.springframework.security.crypto.password.PasswordEncoder;@Configuration
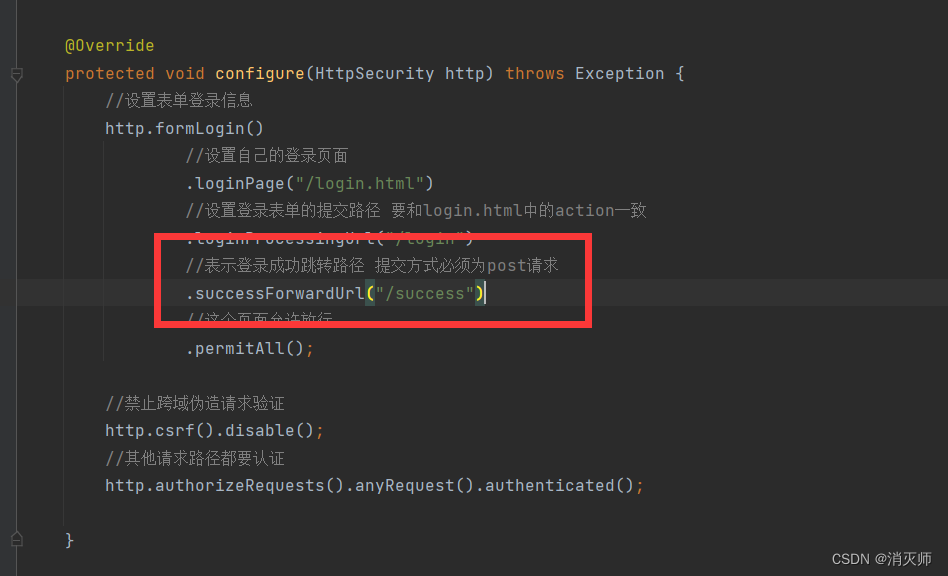
public class MySecurityConfig extends WebSecurityConfigurerAdapter {//可以把該方法返回的對象交于Spring容器管理@Beanpublic PasswordEncoder passwordEncoder(){return new BCryptPasswordEncoder();}@Overrideprotected void configure(HttpSecurity http) throws Exception {//設置表單登錄信息http.formLogin()//設置自己的登錄頁面.loginPage("/login.html")//設置登錄表單的提交路徑 要和login.html中的action一致.loginProcessingUrl("/login")//表示登錄成功跳轉路徑 提交方式必須為post請求.successForwardUrl("/success")//這個頁面允許放行.permitAll();//設定資源和權限進行綁定http.authorizeRequests().antMatchers("/select").hasAnyAuthority("user:select").antMatchers("/update").hasAnyAuthority("user:update").antMatchers("/delect").hasAnyAuthority("user:delect").antMatchers("/xxx").hasAnyAuthority("user:xxx");//異常處理頁面http.exceptionHandling().accessDeniedPage("/403.html");//禁止跨域偽造請求驗證http.csrf().disable();//其他請求路徑都要認證http.authorizeRequests().anyRequest().authenticated();}@Overrideprotected void configure(AuthenticationManagerBuilder auth) throws Exception {auth.inMemoryAuthentication() //基于內存創建的賬戶和密碼 未來可以用來連接數據庫//賬戶.withUser("zhangsan")//密碼.password(passwordEncoder().encode("123456"))//用戶具備的角色.roles("admin")//設定用戶權限.authorities("user:select","user:update","user:delete").and() //連接符.withUser("lisi").password(passwordEncoder().encode("012345")).roles("test").authorities("user:xxx").and().withUser("wangwu").password(passwordEncoder().encode("567890")).roles("group");}
}
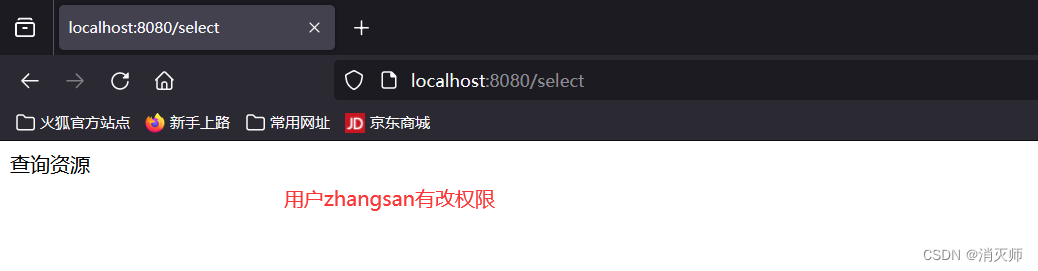
第四步:訪問資源
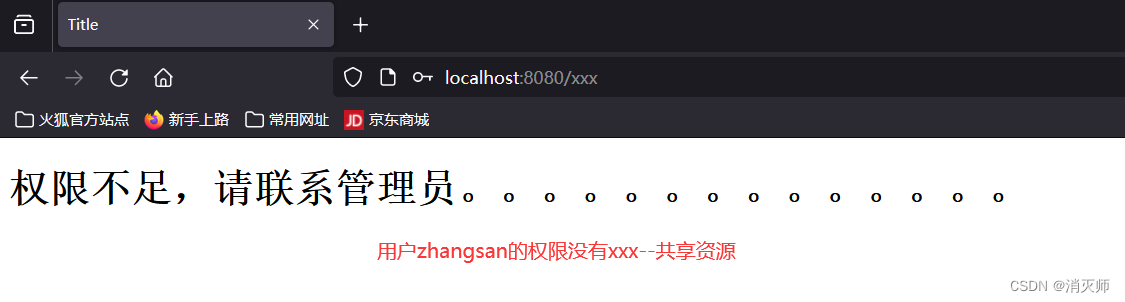
上面再訪問沒有的權限資源時,出現上面的錯誤界面,這種界面對客戶友好。跳轉到一個權限不足的界面; ?
使用security注解完成授權
(思考: 上面權限和資源得到綁定 需要手動一一綁定。真正再開發中我們具有的權限和資源是非常多的。如果手動一一綁定是很麻煩的。)
第一步:開啟security權限注解驅動

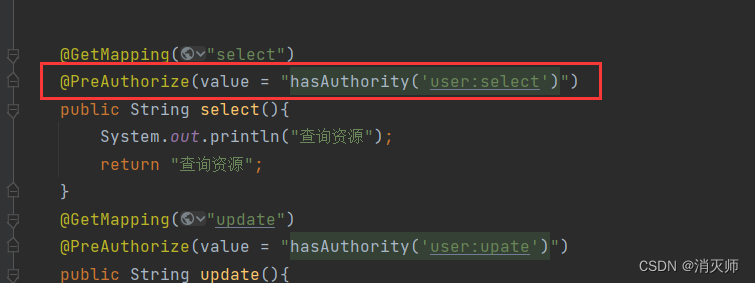
第二步:再相應的資源上使用注解??
controller層??AuthController資源文件
package com.aaa.Controller;import org.springframework.security.access.prepost.PreAuthorize;
import org.springframework.web.bind.annotation.GetMapping;
import org.springframework.web.bind.annotation.RestController;//資源
@RestController
public class AuthController {@GetMapping("select")@PreAuthorize(value = "hasAuthority('user:select')")public String select(){System.out.println("查詢資源");return "查詢資源";}@GetMapping("update")@PreAuthorize(value = "hasAuthority('user:upate')")public String update(){System.out.println("修改資源");return "修改資源";}@GetMapping("delete")@PreAuthorize(value = "hasAuthority('user:delete')")public String delete(){System.out.println("刪除資源");return "刪除資源";}@GetMapping("xxx")@PreAuthorize(value = "hasAuthority('user:xxx')")public String xxx(){System.out.println("共享資源");return "共享資源";}
}
第三步:修改security配置
第四步:訪問資源,流程是一樣的? 略
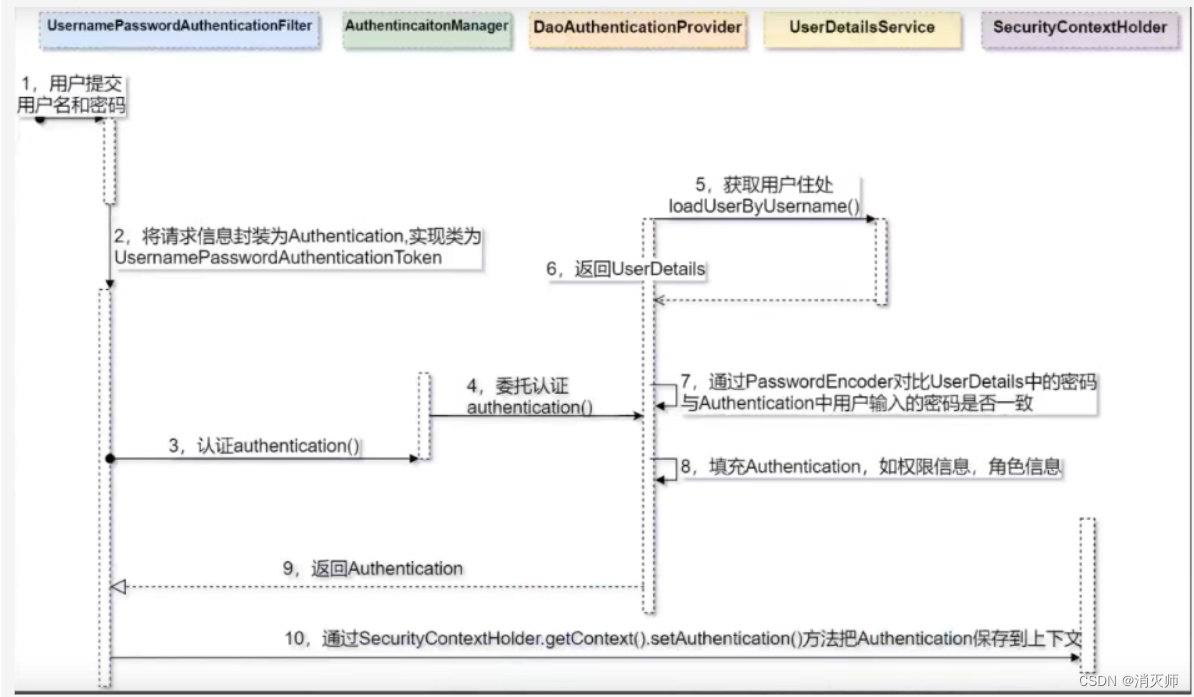
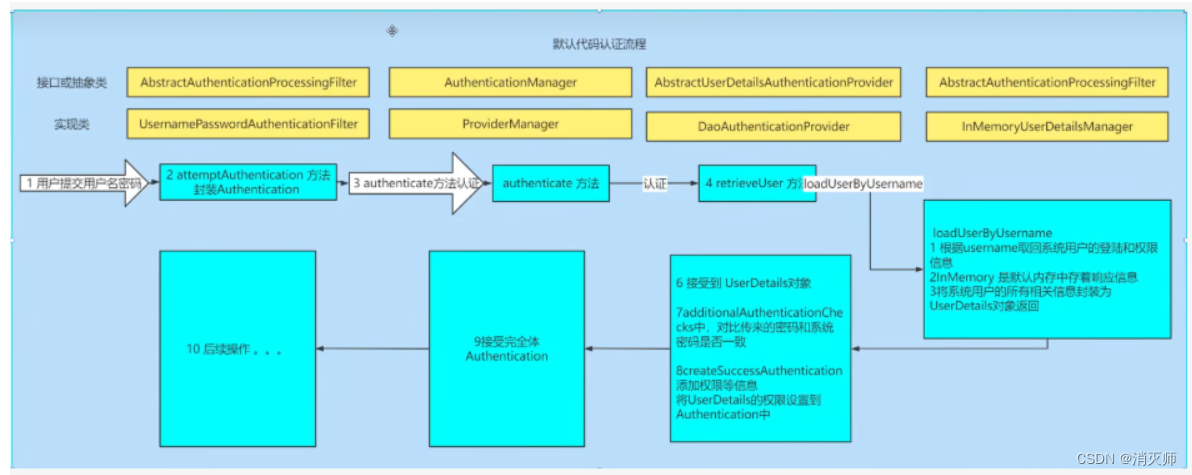
了解security認證的流程(源碼)
核心過濾器:UsernamePasswordAuthenticationFilter
使用Spring Security連接數據庫(自定義認證--需要連接數據庫)
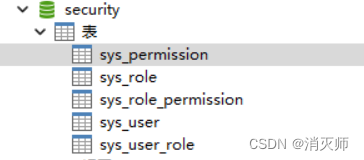
第一步:創建securtiy數據庫
DROP TABLE IF EXISTS `sys_permission`;
CREATE TABLE `sys_permission`  (`perid` int(0) NOT NULL AUTO_INCREMENT,`pername` varchar(255) CHARACTER SET utf8mb3 COLLATE utf8mb3_general_ci NULL DEFAULT NULL,`percode` varchar(255) CHARACTER SET utf8mb3 COLLATE utf8mb3_general_ci NULL DEFAULT NULL,PRIMARY KEY (`perid`) USING BTREE
) ENGINE = InnoDB AUTO_INCREMENT = 5 CHARACTER SET = utf8mb3 COLLATE = utf8mb3_general_ci ROW_FORMAT = Dynamic;-- ----------------------------
-- Records of sys_permission
-- ----------------------------
INSERT INTO `sys_permission` VALUES (1, '用戶查詢', 'user:query');
INSERT INTO `sys_permission` VALUES (2, '用戶添加', 'user:add');
INSERT INTO `sys_permission` VALUES (3, '用戶修改', 'user:update');
INSERT INTO `sys_permission` VALUES (4, '用戶刪除', 'user:delete');
INSERT INTO `sys_permission` VALUES (5, '用戶導出', 'user:export');-- ----------------------------
-- Table structure for sys_role
-- ----------------------------
DROP TABLE IF EXISTS `sys_role`;
CREATE TABLE `sys_role`  (`roleid` int(0) NOT NULL AUTO_INCREMENT,`rolename` varchar(255) CHARACTER SET utf8mb3 COLLATE utf8mb3_general_ci NULL DEFAULT NULL,PRIMARY KEY (`roleid`) USING BTREE
) ENGINE = InnoDB AUTO_INCREMENT = 3 CHARACTER SET = utf8mb3 COLLATE = utf8mb3_general_ci ROW_FORMAT = Dynamic;-- ----------------------------
-- Records of sys_role
-- ----------------------------
INSERT INTO `sys_role` VALUES (1, '管理員');
INSERT INTO `sys_role` VALUES (2, '測試人員');
INSERT INTO `sys_role` VALUES (3, '普通用戶');-- ----------------------------
-- Table structure for sys_role_permission
-- ----------------------------
DROP TABLE IF EXISTS `sys_role_permission`;
CREATE TABLE `sys_role_permission`  (`perid` int(0) NULL DEFAULT NULL,`roleid` int(0) NULL DEFAULT NULL
) ENGINE = InnoDB CHARACTER SET = utf8mb3 COLLATE = utf8mb3_general_ci ROW_FORMAT = Dynamic;-- ----------------------------
-- Records of sys_role_permission
-- ----------------------------
INSERT INTO `sys_role_permission` VALUES (2, 1);
INSERT INTO `sys_role_permission` VALUES (1, 1);
INSERT INTO `sys_role_permission` VALUES (3, 1);
INSERT INTO `sys_role_permission` VALUES (4, 1);
INSERT INTO `sys_role_permission` VALUES (2, 2);
INSERT INTO `sys_role_permission` VALUES (1, 2);
INSERT INTO `sys_role_permission` VALUES (3, 2);
INSERT INTO `sys_role_permission` VALUES (1, 3);
INSERT INTO `sys_role_permission` VALUES (5, 3);-- ----------------------------
-- Table structure for sys_user
-- ----------------------------
DROP TABLE IF EXISTS `sys_user`;
CREATE TABLE `sys_user`  (`userid` int(0) NOT NULL AUTO_INCREMENT,`username` varchar(255) CHARACTER SET utf8mb3 COLLATE utf8mb3_general_ci NULL DEFAULT NULL,`userpwd` varchar(255) CHARACTER SET utf8mb3 COLLATE utf8mb3_general_ci NULL DEFAULT NULL,`sex` varchar(255) CHARACTER SET utf8mb3 COLLATE utf8mb3_general_ci NULL DEFAULT NULL,`address` varchar(255) CHARACTER SET utf8mb3 COLLATE utf8mb3_general_ci NULL DEFAULT NULL,PRIMARY KEY (`userid`) USING BTREE
) ENGINE = InnoDB AUTO_INCREMENT = 3 CHARACTER SET = utf8mb3 COLLATE = utf8mb3_general_ci ROW_FORMAT = Dynamic;-- ----------------------------
-- Records of sys_user
-- ----------------------------
INSERT INTO `sys_user` VALUES (1, '張三', '$2a$10$cI7e7bgSs9.9nNHhxKO9LuK/Ll.AeZwgUyZb77oD2y3UwwZyZhWG6', '男', '鄭州');
INSERT INTO `sys_user` VALUES (2, '李四', '$2a$10$cI7e7bgSs9.9nNHhxKO9LuK/Ll.AeZwgUyZb77oD2y3UwwZyZhWG6', '男', '北京');
INSERT INTO `sys_user` VALUES (3, '王五', '$2a$10$cI7e7bgSs9.9nNHhxKO9LuK/Ll.AeZwgUyZb77oD2y3UwwZyZhWG6', '女', '杭州');-- ----------------------------
-- Table structure for sys_user_role
-- ----------------------------
DROP TABLE IF EXISTS `sys_user_role`;
CREATE TABLE `sys_user_role`  (`userid` int(0) NOT NULL,`roleid` int(0) NULL DEFAULT NULL
) ENGINE = InnoDB CHARACTER SET = utf8mb3 COLLATE = utf8mb3_general_ci ROW_FORMAT = Dynamic;-- ----------------------------
-- Records of sys_user_role
-- ----------------------------
INSERT INTO `sys_user_role` VALUES (1, 1);
INSERT INTO `sys_user_role` VALUES (2, 2);
INSERT INTO `sys_user_role` VALUES (3, 3);
INSERT INTO `sys_user_role` VALUES (1, 2);SET FOREIGN_KEY_CHECKS = 1;
第二步:創建一個SpringBoot項目--------引入相關的依賴(lombok依賴? ?mysql驅動依賴? mybatis-plus依賴,security啟動依賴)
<dependencies><!--加入security安全框架依賴--><dependency><groupId>org.springframework.boot</groupId><artifactId>spring-boot-starter-security</artifactId></dependency><!--lombok依賴--><dependency><groupId>org.projectlombok</groupId><artifactId>lombok</artifactId></dependency><!--mysql驅動依賴--><dependency><groupId>mysql</groupId><artifactId>mysql-connector-java</artifactId></dependency><!--mybatis-plus依賴--><dependency><groupId>com.baomidou</groupId><artifactId>mybatis-plus-boot-starter</artifactId><version>3.5.4</version></dependency><dependency><groupId>org.springframework.boot</groupId><artifactId>spring-boot-starter-security</artifactId></dependency><dependency><groupId>org.springframework.boot</groupId><artifactId>spring-boot-starter-web</artifactId></dependency></dependencies>第三步:創建實體類? ?entity層 (User? Role? Permission)
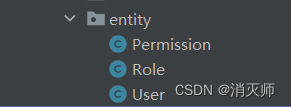
User實體類
package com.aaa.entity;import com.baomidou.mybatisplus.annotation.IdType;
import com.baomidou.mybatisplus.annotation.TableId;
import com.baomidou.mybatisplus.annotation.TableName;
import lombok.Data;@Data
@TableName("sys_user")   //實體類和數據庫表名不一致時,使用該注解進行映射
public class User {@TableId(type = IdType.AUTO)    //主鍵自增private Integer userid;private String username;private String userpwd;private String sex;private String address;
}
Role實體類
package com.aaa.entity;import com.baomidou.mybatisplus.annotation.IdType;
import com.baomidou.mybatisplus.annotation.TableId;
import com.baomidou.mybatisplus.annotation.TableName;
import lombok.Data;@Data
@TableName("sys_role")    //實體類和數據庫表名不一致時,使用該注解進行映射
public class Role {@TableId(type = IdType.AUTO)    //主鍵自增private Integer roleid;private  String rolename;
}
Permission實體類
package com.aaa.entity;import com.baomidou.mybatisplus.annotation.IdType;
import com.baomidou.mybatisplus.annotation.TableId;
import com.baomidou.mybatisplus.annotation.TableName;
import lombok.Data;@Data
@TableName("sys_permission")    //實體類和數據庫表名不一致時,使用該注解進行映射
public class Permission {@TableId(type = IdType.AUTO)    //主鍵自增private Integer perid;private String pername;private String percode;
}
第四步:創建相應的Dao接口? ?Dao層? (UserDao? RoleDao? PermissionDao)
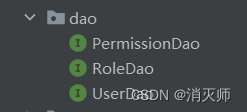
UserDao接口
package com.aaa.dao;import com.aaa.entity.User;
import com.baomidou.mybatisplus.core.mapper.BaseMapper;public interface UserDao extends BaseMapper<User> {}
ReloDao接口
package com.aaa.dao;import com.aaa.entity.Role;
import com.baomidou.mybatisplus.core.mapper.BaseMapper;public interface RoleDao extends BaseMapper<Role> {
}
PermissionDao接口
package com.aaa.dao;import com.aaa.entity.Permission;
import com.baomidou.mybatisplus.core.mapper.BaseMapper;
import org.apache.ibatis.annotations.Select;import java.util.List;public interface PermissionDao extends BaseMapper<Permission> {//查找用戶的權限@Select("select distinct p.* from sys_user_role u join sys_role_permission r on u.roleid=r.roleid join sys_permission p on r.perid=p.perid where userid=#{userId}")public List<Permission> selectByUserId(Integer userId);}
第五步:創建業務層 Service? ???MyUserDetailService代碼
package com.aaa.service;import com.aaa.dao.PermissionDao;
import com.aaa.dao.UserDao;
import com.aaa.entity.Permission;
import com.aaa.entity.User;
import com.baomidou.mybatisplus.core.conditions.query.QueryWrapper;
import org.springframework.beans.factory.annotation.Autowired;
import org.springframework.security.core.authority.SimpleGrantedAuthority;
import org.springframework.security.core.userdetails.UserDetails;
import org.springframework.security.core.userdetails.UserDetailsService;
import org.springframework.security.core.userdetails.UsernameNotFoundException;
import org.springframework.stereotype.Service;import java.util.ArrayList;
import java.util.Collection;
import java.util.List;@Service
public class MyUserDetailService implements UserDetailsService {@Autowiredprivate UserDao userDao;@Autowiredprivate PermissionDao permissionDao;@Overridepublic UserDetails loadUserByUsername(String username) throws UsernameNotFoundException {//1. 根據賬戶查找用戶信息QueryWrapper<User> queryWrapper = new QueryWrapper<>();queryWrapper.eq("username",username);User user = userDao.selectOne(queryWrapper);//2.判斷用戶是否為nullif(user!=null){//3.查找用戶的具體權限List<Permission> permissions = permissionDao.selectByUserId(user.getUserid());/*** String username, 賬戶* String password, 密碼-->而是數據庫中存在的密碼* Collection<? extends GrantedAuthority> authorities 當前用戶具有的權限*/Collection<SimpleGrantedAuthority> authorities = new ArrayList<>();//把List<Permission>轉化為Collection<SimpleGrantedAuthority>for(Permission per:permissions){SimpleGrantedAuthority simpleGrantedAuthority=new SimpleGrantedAuthority(per.getPercode());authorities.add(simpleGrantedAuthority);}org.springframework.security.core.userdetails.User userDetail=new org.springframework.security.core.userdetails.User(user.getUsername(),user.getUserpwd(),authorities);return userDetail;}return null;}
}
第六步:創建Security配置文件? ?config層? ?mySecurityConfig文件
package com.aaa.config;import com.aaa.service.MyUserDetailService;
import org.springframework.beans.factory.annotation.Autowired;
import org.springframework.context.annotation.Bean;
import org.springframework.context.annotation.Configuration;
import org.springframework.security.config.annotation.authentication.builders.AuthenticationManagerBuilder;
import org.springframework.security.config.annotation.web.builders.HttpSecurity;
import org.springframework.security.config.annotation.web.configuration.WebSecurityConfigurerAdapter;
import org.springframework.security.crypto.bcrypt.BCryptPasswordEncoder;
import org.springframework.security.crypto.password.PasswordEncoder;@Configuration
public class MySecurityConfig extends WebSecurityConfigurerAdapter {@Autowiredprivate MyUserDetailService userDetailService;//添加加密器@Beanpublic PasswordEncoder passwordEncoder(){return new BCryptPasswordEncoder();}@Overrideprotected void configure(AuthenticationManagerBuilder auth) throws Exception {//使用數據庫賬號和密碼auth.userDetailsService(userDetailService);}@Overrideprotected void configure(HttpSecurity http) throws Exception {//設置表單信息//使用自己的前端登錄頁面http.formLogin().loginPage("/login.html").loginProcessingUrl("/login").successForwardUrl("/success").permitAll();//異常處理頁面http.exceptionHandling().accessDeniedPage("/403.html");//禁用跨域偽造響應http.csrf().disable();//其他所有路徑通過都需要認證http.authorizeRequests().anyRequest().authenticated();}
}
第七步:配置application.properties文件,連接數據庫
server.port=8080
spring.datasource.url=jdbc:mysql://localhost:3306/security
spring.datasource.driver-class-name=com.mysql.cj.jdbc.Driver
spring.datasource.username=root
spring.datasource.password=root
第八步:在SpringSecurity002Application? 啟動類中添加注解讓其掃描到com.aaa.dao層
package com;import org.mybatis.spring.annotation.MapperScan;
import org.springframework.boot.SpringApplication;
import org.springframework.boot.autoconfigure.SpringBootApplication;@SpringBootApplication
//添加注解  包掃描到dao層@MapperScan(basePackages = "com.aaa.dao")
public class SpringSecurity002Application {public static void main(String[] args) {SpringApplication.run(SpringSecurity002Application.class, args);}}
第九步:訪問資源

使用security認證授權----完成前后端分離的模式
熟悉前后端分離
JWT概述?
1.什么是JWT?
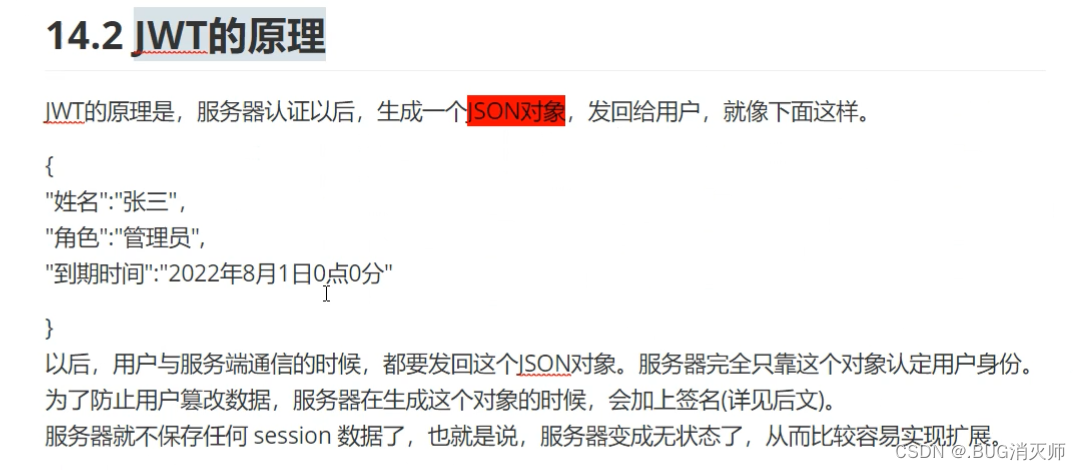
json web token(JWT)是一個開放標準(rfc7519),它定義了一種緊湊的、自包含的方式,用于在各方之間以JSON對象安全地傳輸信息。它是以JSON形式作為Web應用中的令牌,用于在各方之間安全地將信息作為JSON對象傳輸。在數據傳輸過程中還可以完成數據加密、簽名等相關處理。
2.JWT能做什么?
授權
這是使用JWT的最常見方案。一旦用戶登錄,每個后續請求將包括JWT,從而允許用戶訪問該令牌允許的路由,服務和資源。單點登錄是當今廣泛使用JWT的一項功能,因為它的開銷很小并且可以在不同的域中輕松使用。
信息交換
JSON Web Token是在各方之間安全地傳輸信息的好方法。因為可以對JWT進行簽名(例如,使用公鑰/私鑰對),所以您可以確保發件人是他們所說的人。此外,由于簽名是使用標頭和有效負載計算的,因此您還可驗證內容是否遭到篡改。
3.Session認證與JWT認證的區別?
基于傳統的Session認證策略#
a.認證方式#
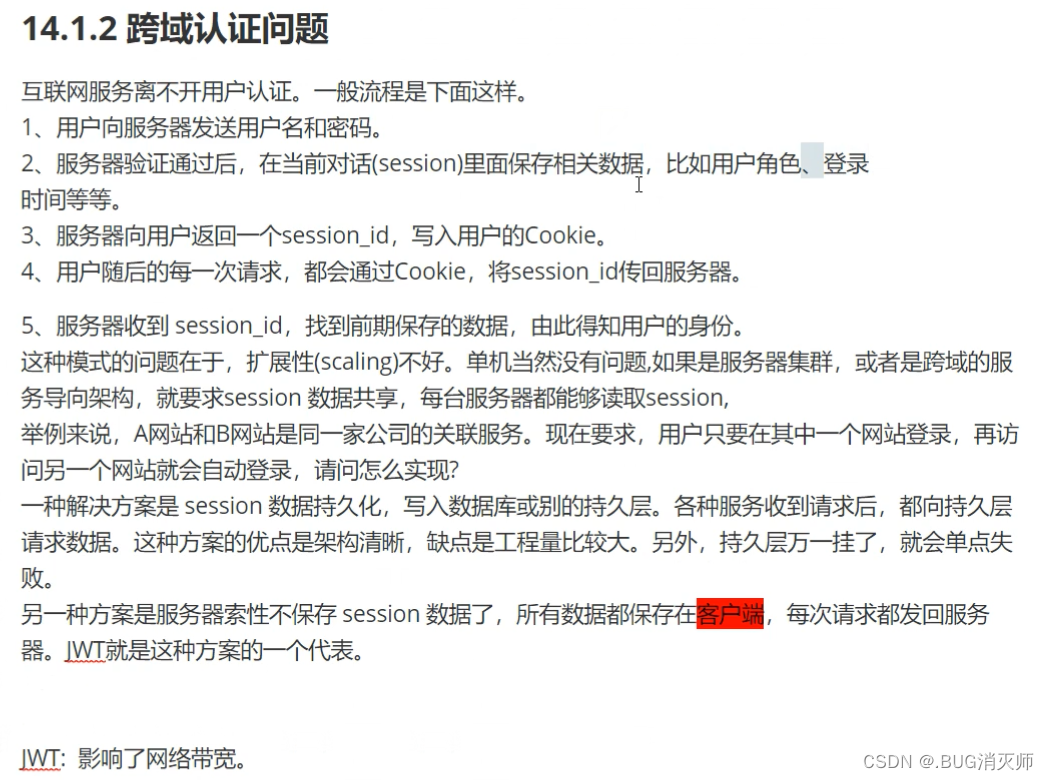
http協議本身是一種無狀態的協議,而這就意味著如果用戶向我們的應用提供了用戶名和密碼來進行用戶認證,那么下一次請求時,用戶還要再一次進行用戶認證才行。
因為根據http協議,我們并不能知道是哪個用戶發出的請求,所以為了讓我們的應用能識別是哪個用戶發出的請求,我們只能在服務器存儲一份用戶登錄的信息,這份登錄信息(sessionId)會在響應時傳遞給瀏覽器,告訴其保存為cookie,以便下次請求時發送給我們的應用,這樣我們的應用就能識別請求來自哪個用戶了,這就是傳統的基于session認證。
b.Session認證的問題
-
每個用戶經過我們的應用認證之后,我們的應用都要在服務端做一次記錄,以方便用戶下次請求的鑒別,通常而言session都是保存在內存中,而隨著認證用戶的增多,服務端的開銷會明顯增大
-
用戶認證之后,服務端做認證記錄,如果認證的記錄被保存在內存中的話,這意味著用戶下次請求還必須要請求在這臺服務器上,這樣才能拿到授權的資源,這樣在分布式的應用上,相應的限制了負載均衡器的能力。這也意味著限制了應用的擴展能力。
-
因為是基于cookie來進行用戶識別的, cookie如果被截獲,用戶就會很容易受到跨站請求偽造的攻擊。
-
在前后端分離系統中就更加痛苦!也就是說前后端分離在應用解耦后增加了部署的復雜性。
-
通常用戶一次請求就要轉發多次。如果用session 每次攜帶sessionid 到服務器,服務器還要查詢用戶信息。同時如果用戶很多。這些信息存儲在服務器內存中,給服務器增加負擔。
-
CSRF(跨站偽造請求攻擊)攻擊,session是基于cookie進行用戶識別的, cookie如果被截獲,用戶就會很容易受到跨站請求偽造的攻擊。
-
sessionid 就是一個特征值,表達的信息不夠豐富。不容易擴展。而且如果你后端應用是多節點部署。那么就需要實現session共享機制。 不方便集群應用。
-
基于JWT認證的策略#
認證流程#
-
首先,前端通過Web表單將自己的用戶名和密碼發送到后端的接口。這一過程一般是一個HTTP POST請求。建議的方式是通過SSL加密的傳輸(https協議),從而避免敏感信息被嗅探。
-
后端核對用戶名和密碼成功后,將用戶的id等其他信息作為JWT Payload(負載),將其與頭部分別進行Base64編碼拼接后簽名,形成一個JWT(Token)。形成的JWT就是一個形同xxx.yyy.zzz的字符串。
即token = head.payload.singurater -
后端將JWT字符串作為登錄成功的返回結果返回給前端。前端可以將返回的結果保存在localStorage或sessionStorage上,退出登錄時前端刪除保存的JWT即可。
-
前端在每次請求時將JWT放入HTTP Header中的Authorization位。(解決XSS和XSRF問題) HEADER
-
后端檢查是否存在,如存在驗證JWT的有效性。例如,檢查簽名是否正確;檢查Token是否過期;檢查Token的接收方是否是自己(可選)。
-
驗證通過后后端使用JWT中包含的用戶信息進行其他邏輯操作,返回相應結果。
4.jwt優勢#
-
簡潔(Compact): 可以通過URL,POST參數或者在HTTP header發送,因為數據量小,傳輸速度也很快
-
自包含(Self-contained):負載中包含了所有用戶所需要的信息,避免了多次查詢數據庫
-
因為Token是以JSON加密的形式保存在客戶端的,所以JWT是跨語言的,原則上任何web形式都支持。
-
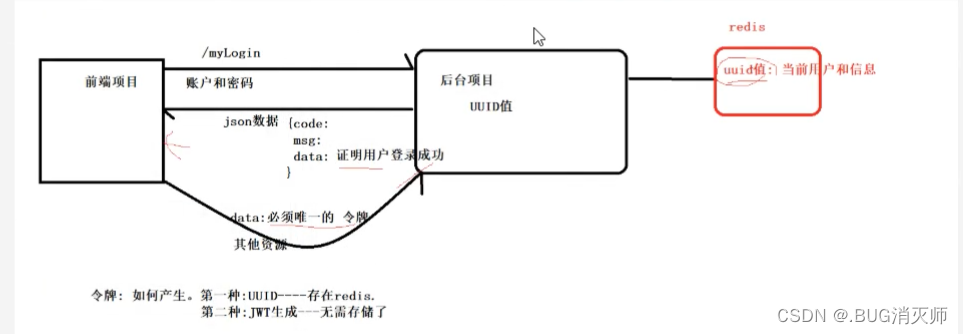
不需要在服務端保存會話信息,特別適用于分布式微服務。1.登錄成功----返回json數據
5.JWT的結構#
令牌組成#
-
1.標頭(Header)
-
2.有效載荷(Payload)
-
3.簽名(Signature)
因此,JWT通常如下所示:xxxxx.yyyyy.zzzzz 也就是 Header.Payload.Signature
Header的組成信息#
-
標頭通常由兩部分組成:
令牌的類型(即JWT)和所使用的簽名算法,例如HMAC SHA256或RSA。它會使用 Base64 編碼組成 JWT 結構的第一部分。 -
注意:Base64是一種編碼,也就是說,它是可以被翻譯回原來的樣子來的。它并不是一種加密過程。
// header的組成信息
{"alg": "HS256","typ": "JWT"
}
Payload組成信息#
令牌的第二部分是有效負載,其中包含聲明。聲明是有關實體(通常是用戶信息)和其他數據的聲明。同樣的,它會使用 Base64 編碼組成 JWT 結構的第二部分
// payload組成信息
{"id": "823","name": "Code Duck","role": "admin"
}
Signature的組成信息#
header和payload都是使用 Base64 進行編碼的,即前端可以解開知道里面的信息。Signature 需要使用編碼后的 header 和 payload 以及我們自己的一個密鑰,然后使用 header 中指定的簽名算法(HS256)進行簽名。簽名的作用是保證 JWT 沒有被篡改過。
例如:HMACSHA256( base64UrlEncode(header) + "." + base64UrlEncode(payload), secret );
# 簽名目的
- 最后一步簽名的過程,實際上是對頭部以及負載內容進行簽名,防止內容被竄改。如果有人對頭部以及負載的內容解碼之后進行修改,再進行編碼,最后加上之前的簽名組合形成新的JWT的話,那么服務器端會判斷出新的頭部和負載形成的簽名和JWT附帶上的簽名是不一樣的。如果要對新的頭部和負載進行簽名,在不知道服務器加密時用的密鑰的話,得出來的簽名也是不一樣的。# 信息安全問題
- 在這里大家一定會問一個問題:Base64是一種編碼,是可逆的,那么我的信息不就被暴露了嗎?- 是的。所以,在JWT中,不應該在負載里面加入任何敏感的數據。在上面的例子中,我們傳輸的是用戶的User ID。這個值實際上不是什么敏感內容,一般情況下被知道也是安全的。但是像密碼這樣的內容就不能被放在JWT中了。如果將用戶的密碼放在了JWT中,那么懷有惡意的第三方通過Base64解碼就能很快地知道你的密碼了。因此JWT適合用于向Web應用傳遞一些非敏感信息。JWT還經常用于設計用戶認證和授權系統,甚至實現Web應用的單點登錄。
以上三部分進行整合#
JWT的真實面目:
(Header)eyJ0eXAiOiJKV1QiLCJhbGciOiJIUzI1NiJ9.
(payLoad)eyJyb2xlIjoiZW1wbG95ZWUiLCJpZCI6IjQiLCJleHAiOjE1OTcxMjc3NjUsInVzZXJuYW1lIjoiamFzb24ifQ.
(Signature)WxIiTf7V4UaboMONu0UpPu-uQSuDQFZqepKKxLstnaU
)


)


)


