目錄
?一、串口通信
1、概念
2、原理圖
3、使用步驟
(1)尋找串口位置
(2)確定引腳編號
(3)編寫代碼
4、實驗結果
實驗代碼
main.c
usart.c
usart.h
?一、串口通信
1、概念
串行接口是一種可以將接收來自CPU的并行數據字符轉換為連續的串行數據流發送出去,同時可將接收的串行數據流轉換為并行的數據字符供給CPU的器件。一般完成這種功能的電路,我們稱為串行接口電路。
串口通信(Serial Communications)的概念非常簡單,串口按位(bit)發送和接收字節的通信方式。
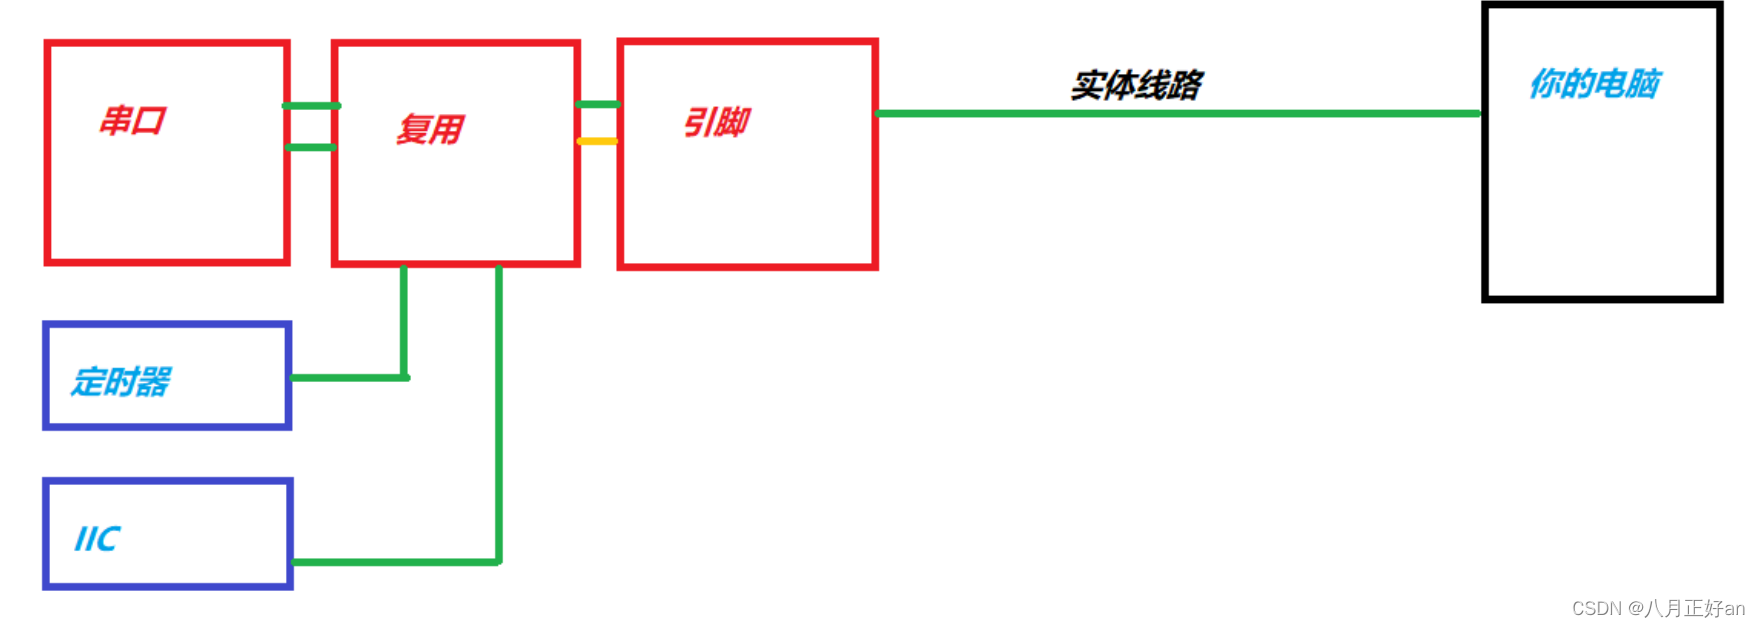
2、原理圖
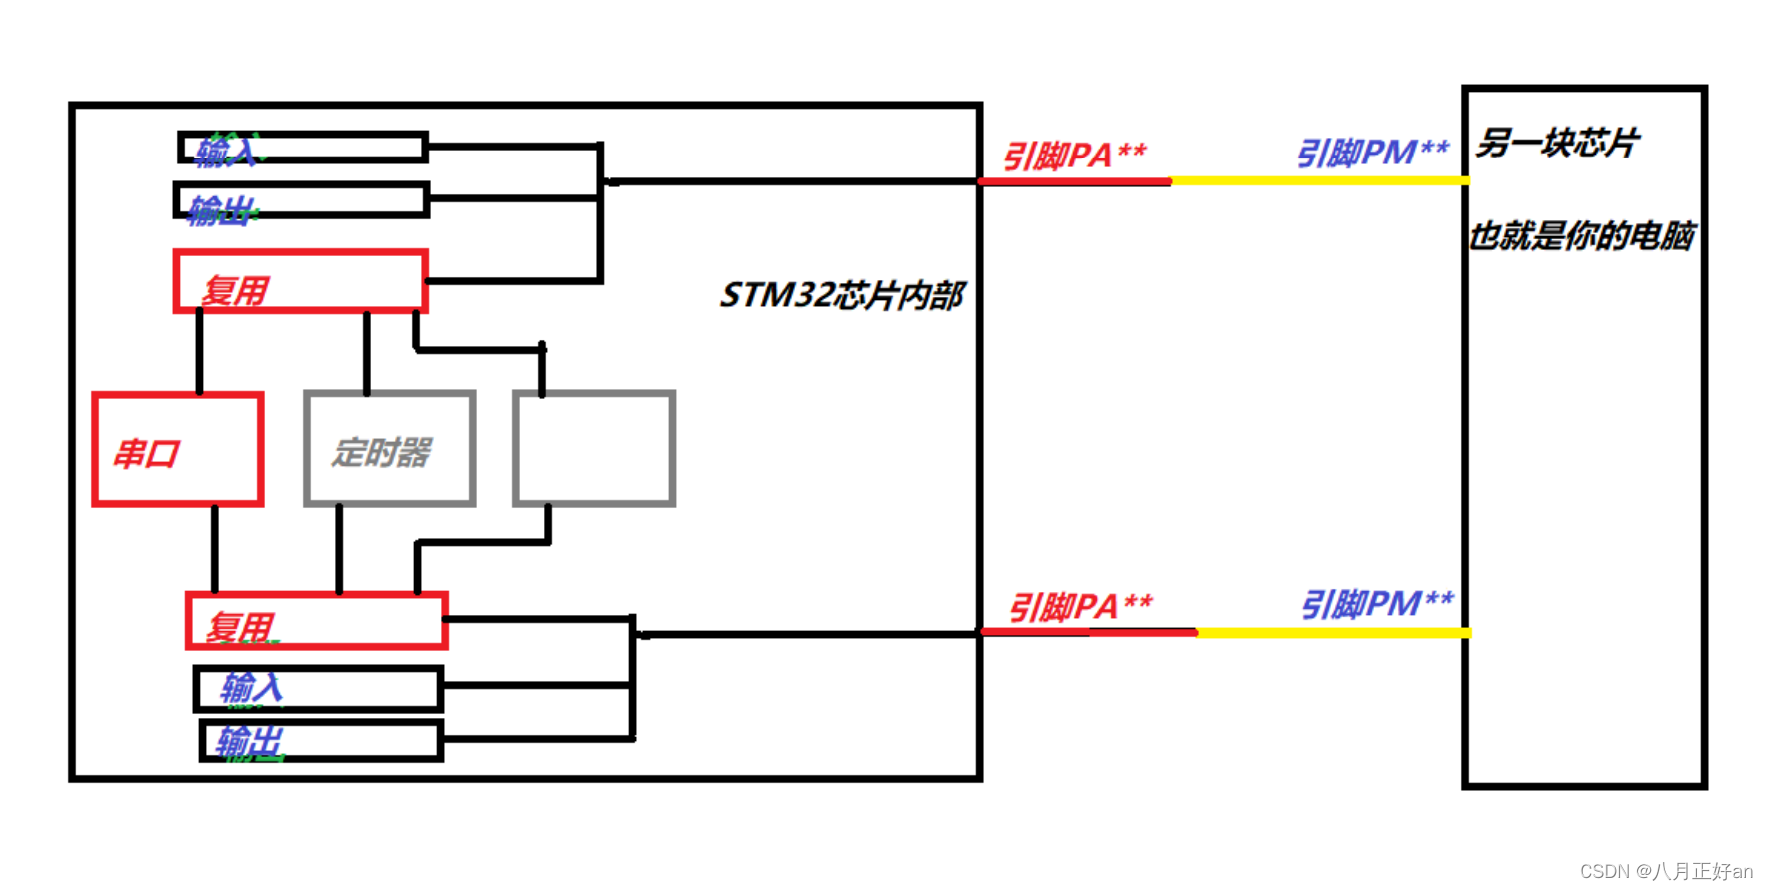
串口本身也是通過引腳與外界通信的。通信過程如下:
3、使用步驟
串口不屬于輸入輸出部分,屬于復用部分,那么參數的配置也就和之前學習GPIO的不同了,大致思路:1.告訴引腳如何工作。2.告訴復用選擇哪一個。3.告訴串口如何工作。4.用一根實體線路(串口)連接兩臺設備。就完成啦

(1)尋找串口位置
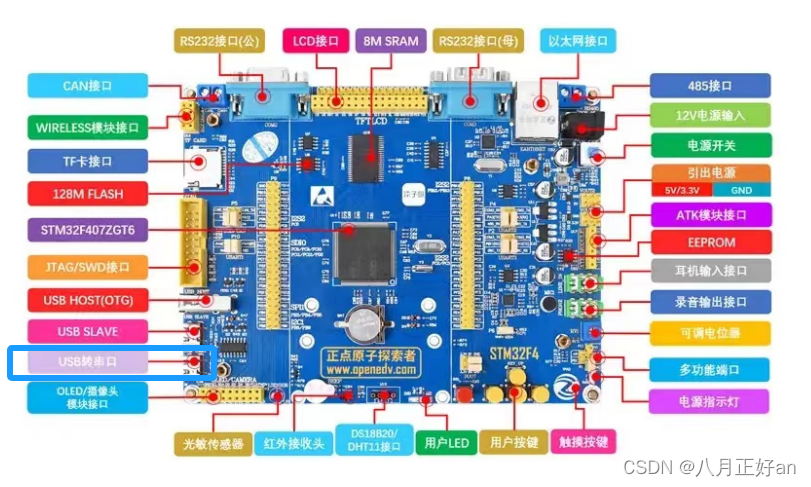
(2)確定引腳編號


最終得到數據:PA9 :GPIOA組第9個成員。 PA10:GPIOA組第10個成員 USART1:串口第一個成員 組號:GPIOA 成員號:GPIO_Pin_9
(3)編寫代碼
a、時鐘使能GPIOA組,讓USART1工作
RCC_AHB1PeriphClockCmd(RCC_AHB1Periph_GPIOA,ENABLE);//時鐘使能A組,需要PA10和PA9工作RCC_APB2PeriphClockCmd(RCC_APB2Periph_USART1,ENABLE);//使能usart1b、GPIO五大參數配置
//GPIO參數配置,告訴GPIO PA9和PA10 如何工作GPIO_InitTypeDef gpio_struct;gpio_struct.GPIO_Mode=GPIO_Mode_AF;//復用模式gpio_struct.GPIO_OType=GPIO_OType_PP;//不影響,但是一般配推挽gpio_struct.GPIO_Pin=GPIO_Pin_9|GPIO_Pin_10;gpio_struct.GPIO_PuPd=GPIO_PuPd_NOPULL;gpio_struct.GPIO_Speed=GPIO_High_Speed;GPIO_Init(GPIOA,&gpio_struct);//讓PA9和PA10知道以復用模式工作c、告訴復用模塊我的選擇
//告訴復用模塊,到底想要復用哪一個功能,我們選擇了usartGPIO_PinAFConfig(GPIOA, GPIO_PinSource9, GPIO_AF_USART1);GPIO_PinAFConfig(GPIOA, GPIO_PinSource10, GPIO_AF_USART1);d、USART1參數配置,此處![]() 程序要與代碼和串口接口參數設置一致
程序要與代碼和串口接口參數設置一致
代碼參數
//usart1參數配置,告訴它如何工作USART_InitTypeDef usart_struct;usart_struct.USART_BaudRate= 9600; //速率usart_struct.USART_HardwareFlowControl= USART_HardwareFlowControl_None; //流控,目前不啟用這塊//usart也是控制協議usart_struct.USART_Mode=USART_Mode_Rx|USART_Mode_Tx; //既接收又發送usart_struct.USART_Parity= USART_Parity_No; //校驗位,深化協議的時候弄usart_struct.USART_StopBits= USART_StopBits_1; //停止位usart_struct.USART_WordLength= USART_WordLength_8b; //有效負載?![]() 程序參數
程序參數
e、初始化和使能USART
USART_Init(USART1,&usart_struct);USART_Cmd(USART1, ENABLE);//讓usart工作f、發送和接收串口數據
//接收數據函數
USART_ReceiveData(USART1);
//數據發送函數
USART_SendData(USART1, j);
g、寫入運行代碼
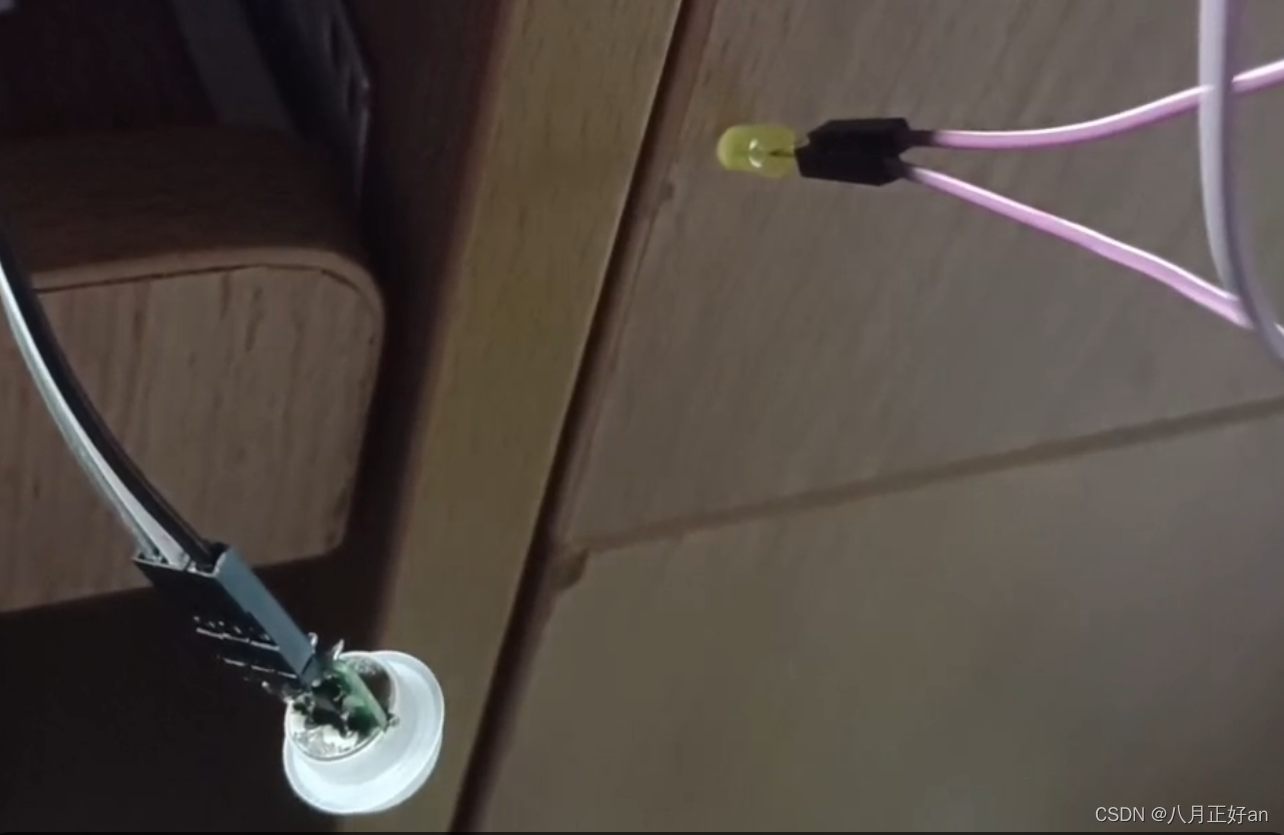
接入傳感器(詳見上篇文章),燒錄檢查
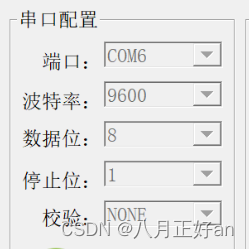
4、實驗結果
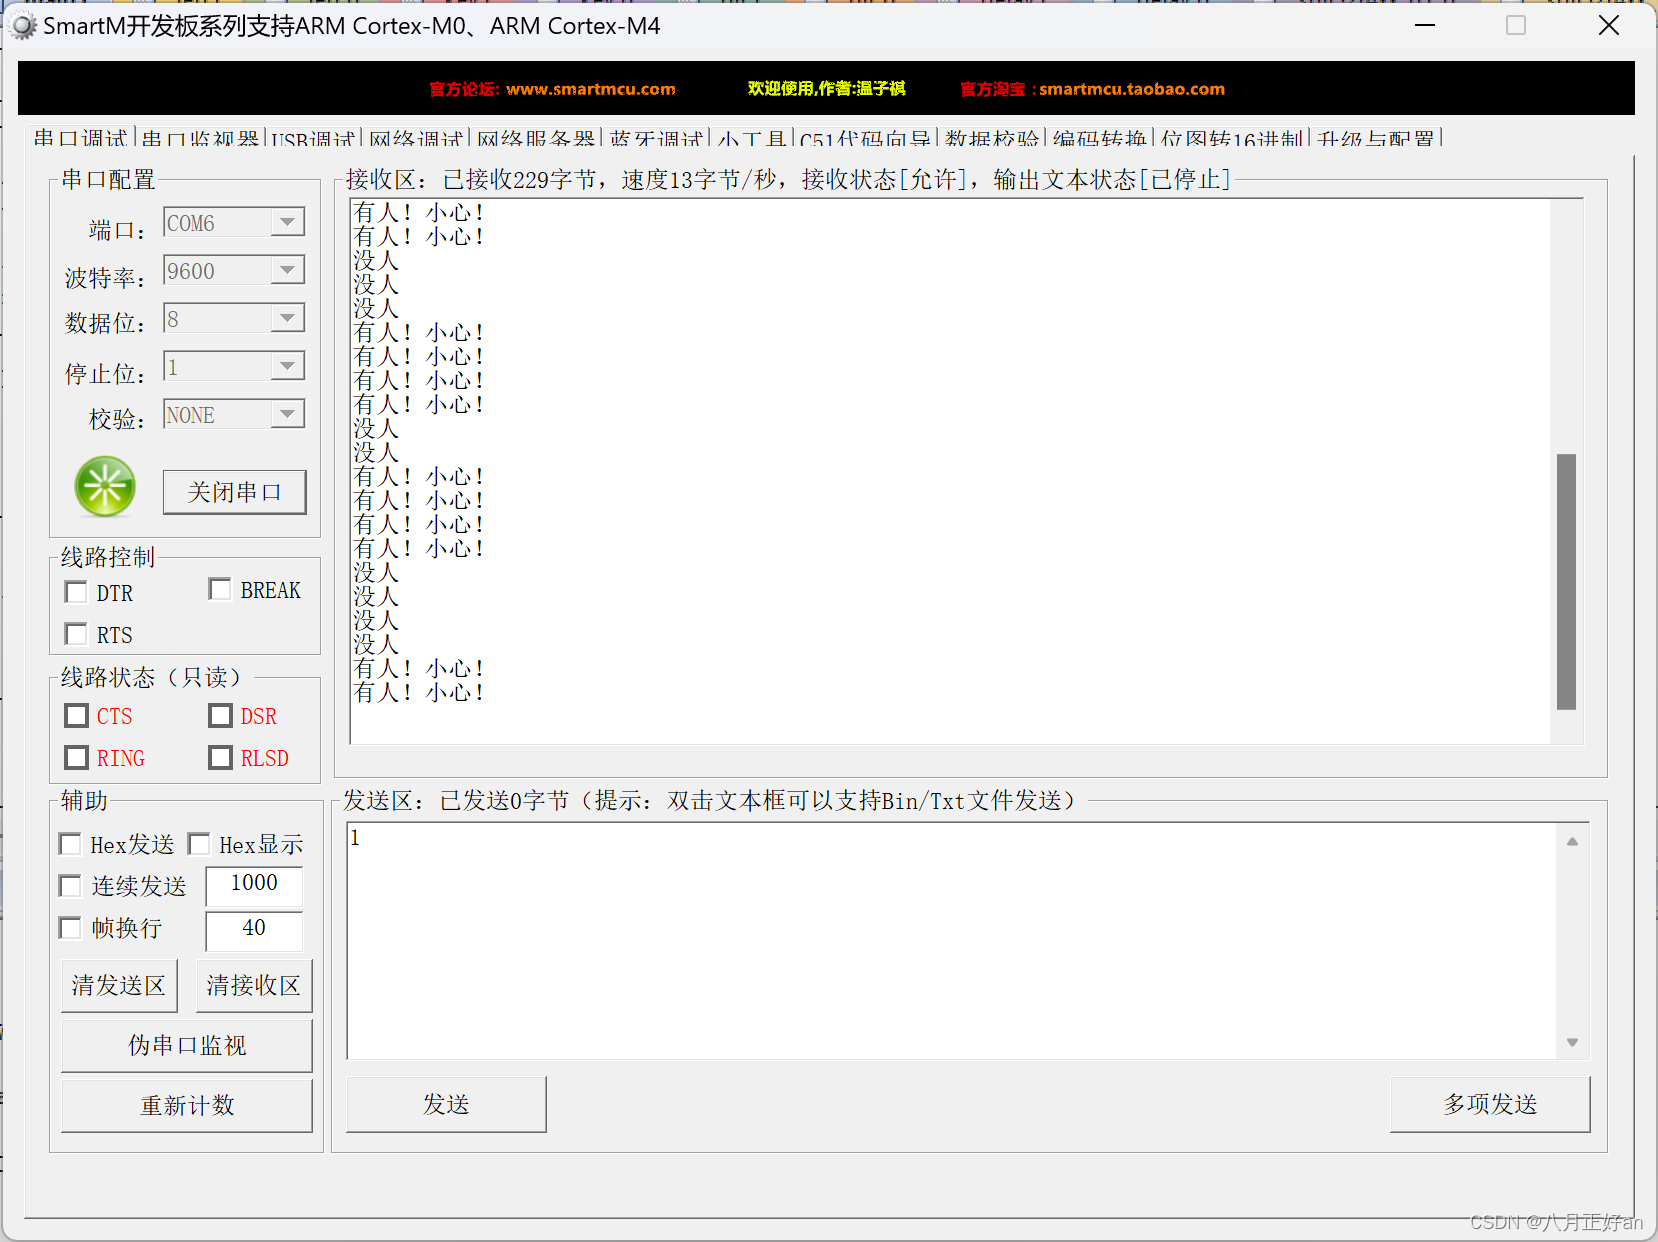
實驗結果

實驗代碼
main.c
#include "stm32f4xx.h"                  // Device header
#include "led.h"
#include "key.h"
#include "BitBand.h"
#include "pir.h"
#include "delay.h"
#include <stdio.h>
#include "usart.h"//此函數可以讓printf打印字符串
int fputc(int ch,FILE* pf)
{USART_SendData(USART1,ch);while(USART_GetFlagStatus(USART1,USART_FLAG_TXE) == RESET);	return ch;
}int main()
{Led_Init();Pir_Init();Usart_Init();uint16_t j='1';uint32_t key=0;while(1){//數據發送函數USART_SendData(USART1, j);key=PFin(14);if(key==1)//有人{PFout(12)=0;j='1';USART_SendData(USART1, j);printf("有人!小心!\n");}else//否則周邊沒有人{PFout(12)=1;j='0';USART_SendData(USART1, j);printf("沒人\n");}delay_ms(1000);}
}
usart.c
#include "stm32f4xx.h"                  // Device headervoid Usart_Init()
{RCC_AHB1PeriphClockCmd(RCC_AHB1Periph_GPIOA,ENABLE);//時鐘使能A組,需要PA10和PA9工作RCC_APB2PeriphClockCmd(RCC_APB2Periph_USART1,ENABLE);//使能usart1//GPIO參數配置,告訴GPIO PA9和PA10 如何工作GPIO_InitTypeDef gpio_struct;gpio_struct.GPIO_Mode=GPIO_Mode_AF;//復用模式gpio_struct.GPIO_OType=GPIO_OType_PP;//不影響,但是一般配推挽gpio_struct.GPIO_Pin=GPIO_Pin_9|GPIO_Pin_10;gpio_struct.GPIO_PuPd=GPIO_PuPd_NOPULL;gpio_struct.GPIO_Speed=GPIO_High_Speed;GPIO_Init(GPIOA,&gpio_struct);//讓PA9和PA10知道以復用模式工作//告訴復用模塊,到底想要復用哪一個功能,我們選擇了usartGPIO_PinAFConfig(GPIOA, GPIO_PinSource9, GPIO_AF_USART1);GPIO_PinAFConfig(GPIOA, GPIO_PinSource10, GPIO_AF_USART1);//usart1參數配置,告訴它如何工作USART_InitTypeDef usart_struct;usart_struct.USART_BaudRate= 9600;  //速率usart_struct.USART_HardwareFlowControl= USART_HardwareFlowControl_None;  //流控,目前不啟用這塊//usart也是控制協議usart_struct.USART_Mode=USART_Mode_Rx|USART_Mode_Tx;  //既接收又發送usart_struct.USART_Parity= USART_Parity_No;  //校驗位,深化協議的時候弄usart_struct.USART_StopBits= USART_StopBits_1;  //停止位usart_struct.USART_WordLength= USART_WordLength_8b;  //有效負載USART_Init(USART1,&usart_struct);USART_Cmd(USART1, ENABLE);//讓usart工作}
usart.h
void Usart_Init(void);

)


頂一個諸葛亮(docker))


)


)

