rsync + inotify 數據實時同步
一、rsync簡介
rsync是linux系統下的數據鏡像備份工具。使用快速增量備份工具Remote Sync可以遠程同步,
支持本地復制,或者與其他SSH、rsync主機同步
二、rsync三種命令
Rsync的命令格式常用的有以下三種:(與ssh類似)
rsync [OPTION]… SRC DEST (本地服務器之間:復制)
rsync [OPTION]… SRC [USER@]HOST:DEST (上傳)
rsync [OPTION]… [USER@]HOST:SRC DEST (下載)
1、 rsync [OPTION]… SRC DEST (本地服務器之間:復制)
服務器(源):
[root@server tmp]# touch a
[root@server tmp]# ls
a
[root@server tmp]# rsync -a a filea
[root@server tmp]# ls
a  filea
2、 rsync [OPTION]… SRC [USER@]HOST:DEST (上傳)
服務器(源):
[root@server tmp]# rsync -avz a root@192.168.100.30:/tmp
The authenticity of host '192.168.100.30 (192.168.100.30)' can't be established.
ECDSA key fingerprint is SHA256:R7/1dpul7cu8SnefsN2wQw5hKDL+xekk0ffasLS6OGI.
ECDSA key fingerprint is MD5:81:88:a1:16:52:83:c0:d5:59:ad:2b:3a:d5:52:02:bc.
Are you sure you want to continue connecting (yes/no)? yes
Warning: Permanently added '192.168.100.30' (ECDSA) to the list of known hosts.
root@192.168.100.30's password:
sending incremental file list
asent 80 bytes  received 35 bytes  6.57 bytes/sec
total size is 0  speedup is 0.00
客戶端(目標):
[root@stw3 tmp]# ls
a
3、 rsync [OPTION]… [USER@]HOST:SRC DEST (下載)
目標:
[root@stw3 tmp]# touch b
[root@stw3 tmp]# ls
a  b
源:
[root@server tmp]# rsync -avz root@192.168.100.30:/tmp/b .
root@192.168.100.30's password:
receiving incremental file list
bsent 43 bytes  received 80 bytes  7.45 bytes/sec
total size is 0  speedup is 0.00
[root@server tmp]# ls
a  b  filea
三、rsync+inotify
1、rsync的優點和缺點
優點:rsync與傳統的cp、tar備份方式相比,rsync具有安全性高、備份迅速、支持增量備份等優點,
通過rsync可以解決對實時性要求不高的數據備份需求,例如定期的備份文件服務器數據到遠端服務器,
對本地磁盤定期做數據鏡像等。
缺點:首先,rsync同步數據時,需要掃描所有文件后進行比對,進行差量傳輸。如果文件數量達到了百萬甚至千 萬量級,掃描所有文件將是非常耗時的。而且正在發生變化的往往是其中很少的一部分,這是非常低效的方式。
其次,rsync不能實時的去監測、同步數據,雖然它可以通過linux守護進程的方式進行觸發同步,但是兩次觸發動作一定會有時間差,這樣就導致了服務端和客戶端數據可能出現不一致,無法在應用故障時完全的恢復數據。
2、inotify
inotify是一種強大的、細粒度的、異步的文件系統事件監控機制,linux內核從2.6.13起,加入了inotify支持,通過inotify可以監控文件系統中添加、刪除,修改、移動等各種細微事件,利用這個內核接口,第三方軟件就可以監控文件系統下文件的各種變化情況,而inotify-tools就是這樣的一個第三方軟件。在前面有講到,rsync可以實現觸發式的文件同步,但是通過crontab守護進程方式進行觸發,同步的數據和實際數據會有差異,而inotify可以監控文件系統的各種變化,當文件有任何變動時,就觸發rsync同步,這樣剛好解決了同步數據的實時性問題。
基于以上原因,rsync+inotify(數據實時同步)組合出現了!
四、配置
(把源服務器上/root/etc目錄實時同步到目標服務器的/tmp下)
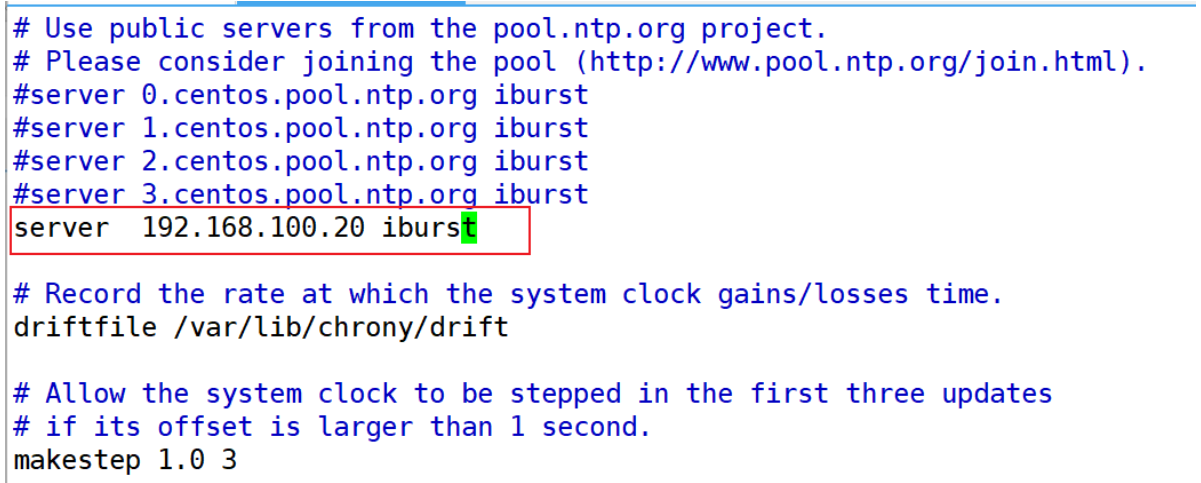
1、源服務器和目標服務器要進行時鐘同步
源:
[root@server ~]# vim /etc/chrony.conf
[root@server ~]# systemctl restart chronyd
[root@server ~]# systemctl enable chronyd
Created symlink from /etc/systemd/system/multi-user.target.wants/chronyd.service to /usr/lib/systemd/system/chronyd.service.
[root@server ~]# timedatectl Local time: Wed 2025-08-20 11:15:45 CSTUniversal time: Wed 2025-08-20 03:15:45 UTCRTC time: Wed 2025-08-20 03:15:45Time zone: Asia/Shanghai (CST, +0800)NTP enabled: yes
NTP synchronized: yesRTC in local TZ: noDST active: n/a
[root@server ~]# hwclock -w

目標:
[root@stw3 ~]# vim /etc/chrony.conf
[root@stw3 ~]# systemctl restart chronyd
[root@stw3 ~]# systemctl enable chronyd
Created symlink from /etc/systemd/system/multi-user.target.wants/chronyd.service to /usr/lib/systemd/system/chronyd.service.
[root@stw3 ~]# hwclock -w
[root@stw3 ~]# chrony
chronyc  chronyd
[root@stw3 ~]# chronyc sources
210 Number of sources = 1
MS Name/IP address         Stratum Poll Reach LastRx Last sample
===============================================================================
^? 192.168.100.20                0   7     0     -     +0ns[   +0ns] +/-    0ns
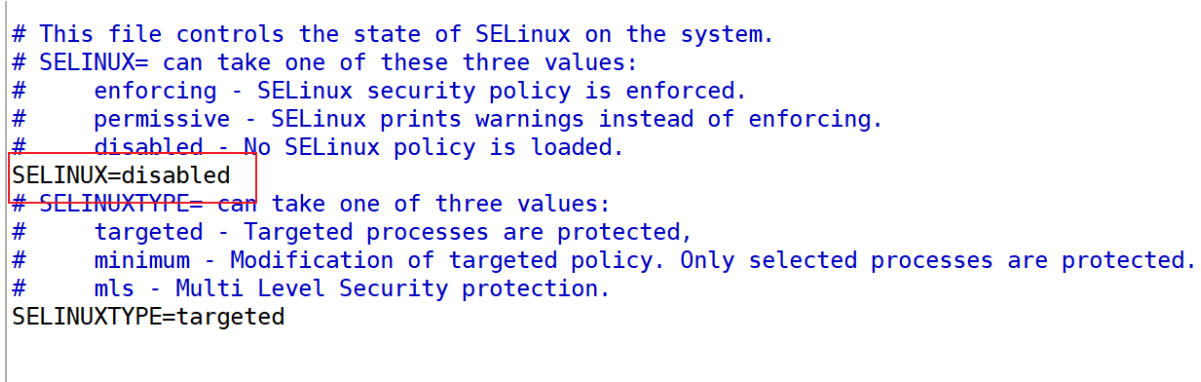
2、關閉防火墻和selinux(源和目標主機都要關閉,操作一致)
[root@server ~]# systemctl stop firewalld.service
[root@server ~]# systemctl disable firewalld.service
Removed symlink /etc/systemd/system/multi-user.target.wants/firewalld.service.
Removed symlink /etc/systemd/system/dbus-org.fedoraproject.FirewallD1.service.
[root@server ~]# setenforce 0
[root@server ~]# vim /etc/selinux/config
[root@server ~]# reboot
3、目標服務器:
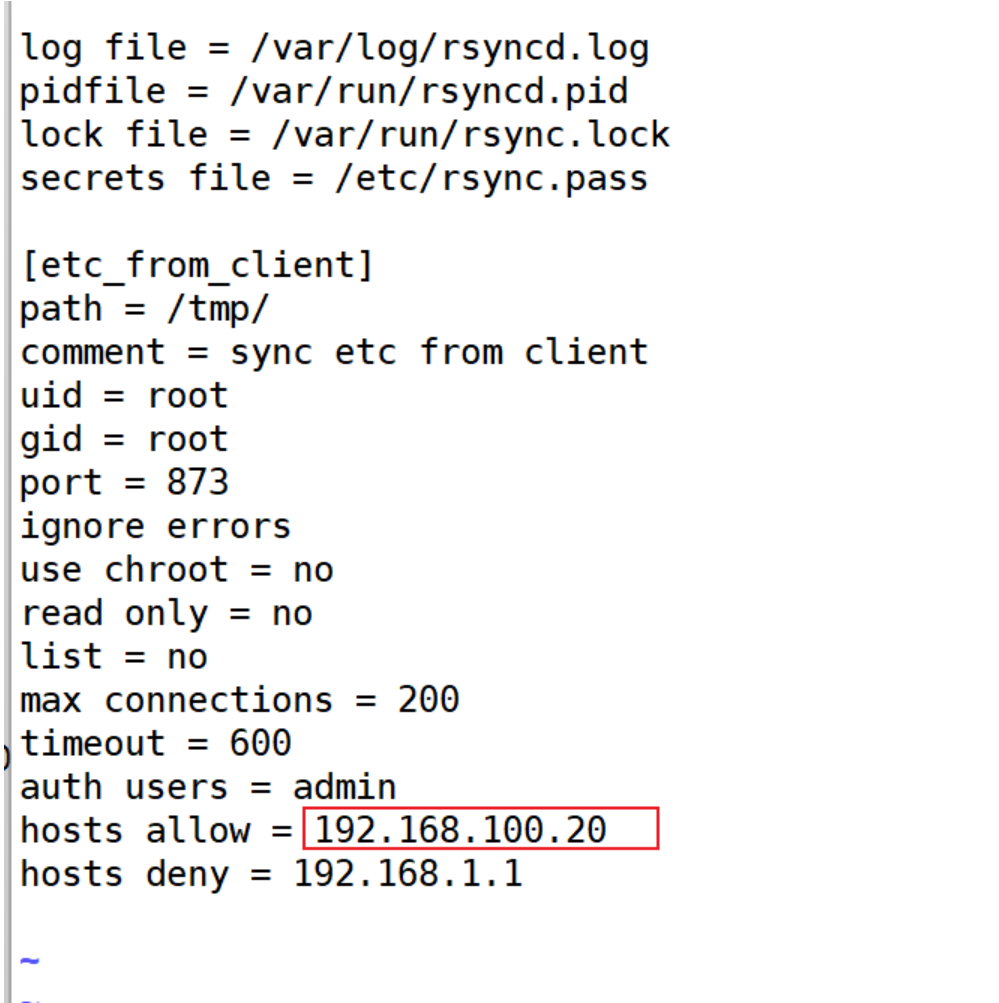
(1)修改配置文件
log file = /var/log/rsyncd.log # 日志文件位置,啟動rsync后自動產生這個文件,無需提前創建
pidfile = /var/run/rsyncd.pid # pid文件的存放位置
lock file = /var/run/rsync.lock # 支持max connections參數的鎖文件
secrets file = /etc/rsync.pass # 用戶認證配置文件,里面保存用戶名稱和密碼,必須手動創建這個文件
[etc_from_client] # 自定義同步名稱
path = /tmp/ # rsync服務端數據存放路徑,客戶端的數據將同步至此目錄
comment = sync etc from client
uid = root # 設置rsync運行權限為root
gid = root # 設置rsync運行權限為root
port = 873 # 默認端口
ignore errors # 表示出現錯誤忽略錯誤
use chroot = no # 默認為true,修改為no,增加對目錄文件軟連接的備份
read only = no # 設置rsync服務端為讀寫權限
list = no # 不顯示rsync服務端資源列表
max connections = 200 # 最大連接數
timeout = 600 # 設置超時時間
auth users = admin # 執行數據同步的用戶名,可以設置多個,用英文狀態下逗號隔開
hosts allow = 192.168.100.10 # 允許進行數據同步的客戶端IP地址,可以設置多個,用英文狀態下逗號隔開
hosts deny = 192.168.1.1 # 禁止數據同步的客戶端IP地址,可以設置多個,用英文狀態下逗號隔開
[root@stw3 ~]# vim /etc/rsyncd.conf
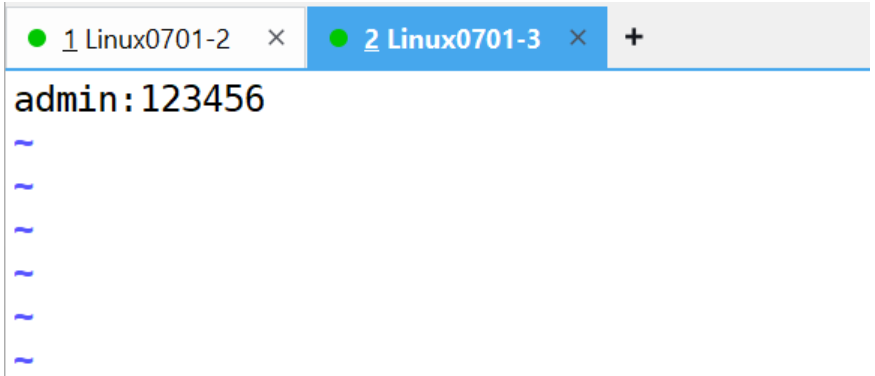
(2)創建用戶認證文件
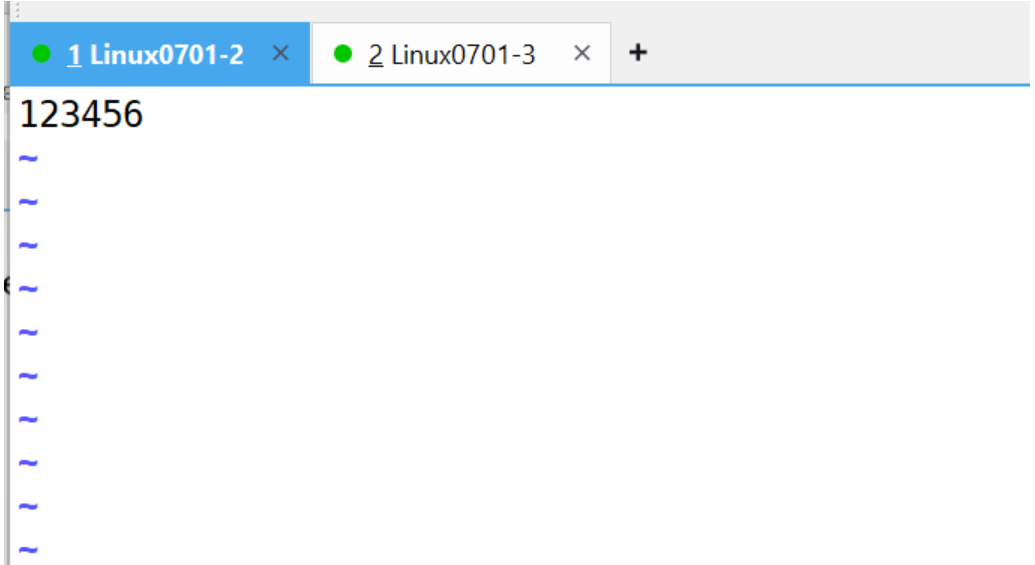
[root@stw3 ~]# vim /etc/rsync.pass
[root@stw3 ~]# cat /etc/rsync.pass
admin:123456
(3)設置文件權限
[root@stw3 ~]# chmod 600 /etc/rsync*
[root@stw3 ~]# ll /etc/rsync*
-rw------- 1 root root 914 Aug 20 11:30 /etc/rsyncd.conf
-rw------- 1 root root  13 Aug 20 11:32 /etc/rsync.pass
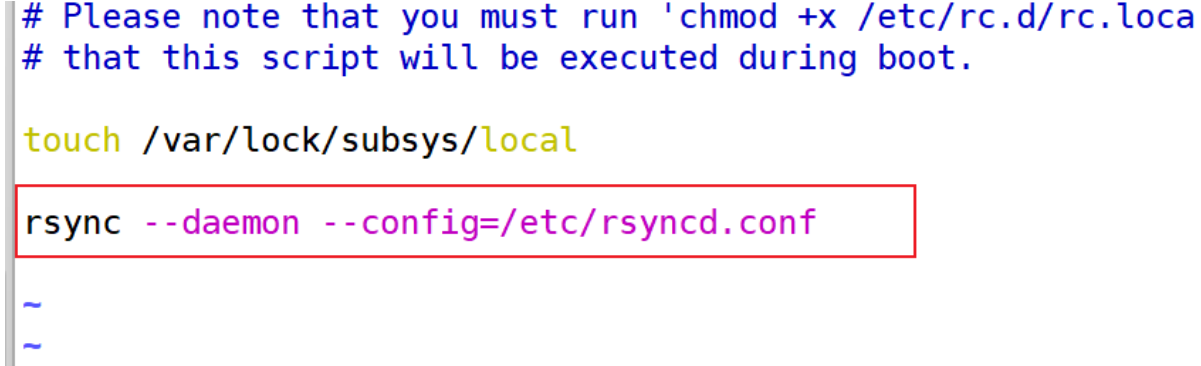
(4)啟動rsync服務并設置開機自啟
[root@stw3 ~]# rsync --daemon
[root@stw3 ~]# vim /etc/rc.d/rc.local
[root@stw3 ~]# netstat -tulnp | grep 873
tcp        0      0 0.0.0.0:873             0.0.0.0:*               LISTEN      9993/rsync
tcp6       0      0 :::873                  :::*                    LISTEN      9993/rsync
4、源服務器:
(1)配置網絡源和epel-release
[root@server ~]# cd /etc/yum.repos.d/
[root@server yum.repos.d]# ls
CentOS-Base.repo  CentOS-Debuginfo.repo  CentOS-Media.repo    CentOS-Vault.repo
CentOS-CR.repo    CentOS-fasttrack.repo  CentOS-Sources.repo
[root@server yum.repos.d]# rm -rf *
[root@server yum.repos.d]# wget -O /etc/yum.repos.d/CentOS-Base.repo https://mirrors.aliyun.com/repo/Centos-7.repo
--2025-08-20 11:43:00--  https://mirrors.aliyun.com/repo/Centos-7.repo
Resolving mirrors.aliyun.com (mirrors.aliyun.com)... 117.92.155.17, 150.139.241.204, 111.77.199.29
Connecting to mirrors.aliyun.com (mirrors.aliyun.com)|117.92.155.17|:443... connected.
HTTP request sent, awaiting response... 200 OK
Length: 2523 (2.5K) [application/octet-stream]
Saving to: ‘/etc/yum.repos.d/CentOS-Base.repo’100%[===================================================================>] 2,523       --.-K/s   in 0s      2025-08-20 11:43:00 (10.5 MB/s) - ‘/etc/yum.repos.d/CentOS-Base.repo’ saved [2523/2523][root@server yum.repos.d]# yum -y install epel-release
(2)安裝rsync服務端軟件,只需要安裝,不要啟動,不需要配置(可忽略,rsync默認已經安裝)
[root@server ~]# yum -y install rsync
(3)創建認證密碼文件
[root@server ~]# vim /etc/rsync.pass
[root@server ~]# cat /etc/rsync.pass
123456
(4)設置文件權限,只設置文件所有者具有讀取、寫入權限即可
[root@server ~]# chmod 600 /etc/rsync.pass
(5)在源服務器上創建測試目錄,然后在源服務器運行以下命令
[root@server ~]# mkdir /root/etc
[root@server ~]# cd /root/etc
[root@server etc]# ls
[root@server etc]# mkdir test
[root@server etc]# cd test
[root@server test]# pwd
/root/etc/test
[root@server test]# rsync -avH --port 873 --progress --delete /root/etc/ admin@192.168.100.30::etc_from_client --password-file=/etc/rsync.pass
sending incremental file list
deleting vmware-root_8623-1990534217/
deleting systemd-private-587fbc66687344f9bed799a3b4ad760a-rtkit-daemon.service-V88iF7/tmp/
deleting systemd-private-587fbc66687344f9bed799a3b4ad760a-rtkit-daemon.service-V88iF7/
deleting systemd-private-587fbc66687344f9bed799a3b4ad760a-cups.service-I0Q073/tmp/
deleting systemd-private-587fbc66687344f9bed799a3b4ad760a-cups.service-I0Q073/
deleting systemd-private-587fbc66687344f9bed799a3b4ad760a-colord.service-9TD9Zd/tmp/
deleting systemd-private-587fbc66687344f9bed799a3b4ad760a-colord.service-9TD9Zd/
deleting systemd-private-587fbc66687344f9bed799a3b4ad760a-chronyd.service-fc3OEy/tmp/
deleting systemd-private-587fbc66687344f9bed799a3b4ad760a-chronyd.service-fc3OEy/
deleting systemd-private-587fbc66687344f9bed799a3b4ad760a-bolt.service-ZCd3B8/tmp/
deleting systemd-private-587fbc66687344f9bed799a3b4ad760a-bolt.service-ZCd3B8/
deleting .font-unix/
deleting .esd-0/
deleting .XIM-unix/
deleting .X11-unix/X0
deleting .X11-unix/
deleting .Test-unix/
deleting .ICE-unix/9983
deleting .ICE-unix/9630
deleting .ICE-unix/9469
deleting .ICE-unix/9446
deleting .ICE-unix/
deleting .X0-lock
./
test/sent 77 bytes  received 1,018 bytes  104.29 bytes/sec
total size is 0  speedup is 0.00
(6)在目標服務器上查看,在/tmp目錄下有test目錄,說明數據同步成功
[root@stw3 ~]# cd /tmp
[root@stw3 tmp]# ls
systemd-private-587fbc66687344f9bed799a3b4ad760a-bolt.service-ZCd3B8
systemd-private-587fbc66687344f9bed799a3b4ad760a-chronyd.service-fc3OEy
systemd-private-587fbc66687344f9bed799a3b4ad760a-colord.service-9TD9Zd
systemd-private-587fbc66687344f9bed799a3b4ad760a-cups.service-I0Q073
systemd-private-587fbc66687344f9bed799a3b4ad760a-rtkit-daemon.service-V88iF7
vmware-root_8623-1990534217
[root@stw3 tmp]# ls
test
測試:源服務器中創建文件,可以傳輸到目標服務器中
源:
[root@server test]# ls
[root@server test]#
[root@server test]# touch file1 file2
[root@server test]# ls
file1  file2
[root@server test]# rsync -avH --port 873 --progress --delete /root/etc/ admin@192.168.100.30::etc_from_client --password-file=/etc/rsync.pass
sending incremental file list
test/
test/file10 100%    0.00kB/s    0:00:00 (xfr#1, to-chk=1/4)
test/file20 100%    0.00kB/s    0:00:00 (xfr#2, to-chk=0/4)sent 195 bytes  received 66 bytes  24.86 bytes/sec
total size is 0  speedup is 0.00
目標:
[root@stw3 tmp]# cd test
[root@stw3 test]# ls
file1  file2
實現實時同步(rsync+inotify)
源:
(1)安裝inotify-tools工具(make、gcc、gcc-c++、inotify-tools)
[root@server ~]# yum -y install make gcc gcc-c++ inotify-tools
(2)寫同步腳本,讓腳本自動去檢測我們制定的目錄下 文件發生的變化,然后再執行rsync的命令把它同步到我們的目標服務器端去
[root@server ~]# mkdir /tbjiaoben
[root@server ~]# cd /tbjiaoben
[root@server tbjiaoben]# ls
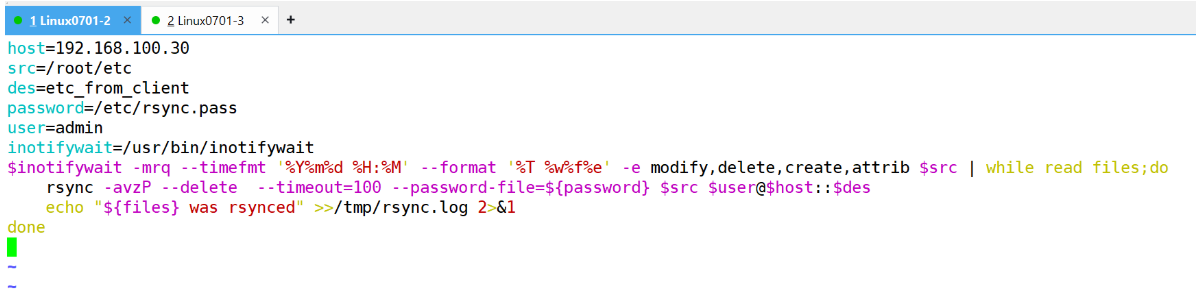
[root@server tbjiaoben]# vim inotify.sh
host=192.168.100.20 # 目標服務器的ip(備份服務器)
src=/root/etc # 在源服務器上所要監控的備份目錄(此處可以自定義,但是要保證存在)
des=etc_from_client # 自定義的模塊名,需要與目標服務器上定義的同步名稱一致
password=/etc/rsync.pass # 執行數據同步的密碼文件
user=admin # 執行數據同步的用戶名
inotifywait=/usr/bin/inotifywait
$inotifywait -mrq --timefmt ‘%Y%m%d %H:%M’ --format ‘%T %w%f%e’ -e modify,delete,create,attrib src∣whilereadfiles;dorsync?avzP??delete??timeout=100??password?file=src | while read files;dorsync -avzP --delete --timeout=100 --password-file=src∣whilereadfiles;dorsync?avzP??delete??timeout=100??password?file={password} $src user@user@user@host::desecho"desecho "desecho"{files} was rsynced" >>/tmp/rsync.log 2>&1
done
(3)啟動腳本
[root@server ~]# nohup bash /tbjiaoben/inotify.sh &
[2] 11411
[root@server ~]# nohup: ignoring input and appending output to ‘nohup.out’
[root@server ~]# ps -ef | grep inotify
root      11401      1  0 15:48 pts/0    00:00:00 /usr/bin/inotifywait -mrq --timefmt %Y%m%d %H:%M --format %T %w%f%e -e modify,delete,create,attrib /root/etc
root      11402      1  0 15:48 pts/0    00:00:00 bash /tbjiaoben/inotify.sh
root      11411   9783  0 15:48 pts/0    00:00:00 bash /tbjiaoben/inotify.sh
root      11412  11411  0 15:48 pts/0    00:00:00 /usr/bin/inotifywait -mrq --timefmt %Y%m%d %H:%M --format %T %w%f%e -e modify,delete,create,attrib /root/etc
root      11413  11411  0 15:48 pts/0    00:00:00 bash /tbjiaoben/inotify.sh
root      11436   9783  0 15:50 pts/0    00:00:00 grep --color=auto inotify
(wd now: ~)
(4)在源服務器上生成一個新文件,查看inotify生成的日志
從日志上可以看到,我們生成了一個test文件,并且添加了內容到其里面
[root@server ~]# cd /root/etc
[root@server etc]# ls
test
[root@server etc]# touch file111
[root@server etc]# ls
file111  test
[root@server etc]# cd
[root@server ~]# tail /tmp/rsync.log
20250820 15:52 /root/etc/file111CREATE was rsynced
20250820 15:52 /root/etc/file111CREATE was rsynced
20250820 15:52 /root/etc/file111ATTRIB was rsynced
20250820 15:52 /root/etc/file111ATTRIB was rsynced
(5)目標服務器驗證
[root@stw3 ~]# cd /tmp
[root@stw3 tmp]# ls
etc  test
[root@stw3 tmp]# cd etc
[root@stw3 etc]# ls
file111  test
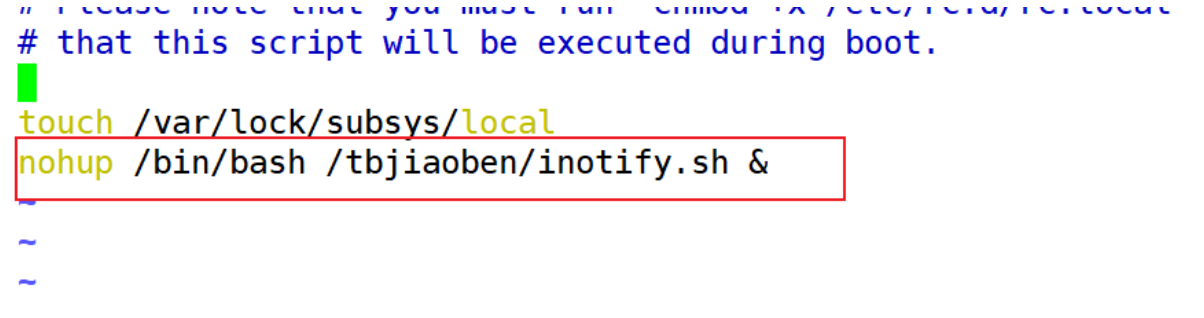
5、設置腳本開機自啟
(1)把nohup /bin/bash /tbjiaoben/inotify.sh &寫到配置文件(/etc/rc.d/rc.local)中
[root@server ~]# vim /etc/rc.d/rc.local


)


 114. 二叉樹展開為鏈表 (深度優先搜索dfs+鏈表))


![[Android] 顯示的內容被導航欄這擋住](http://pic.xiahunao.cn/[Android] 顯示的內容被導航欄這擋住)


軟件包管理器 yum | Vim 編輯器 | Vim 文本批量化操作 | 配置 Vim)
:基于Cross Attention的VGG16增強方案)