nginx的一些高級配置
nginx狀態頁
基于nginx 模塊 ngx_http_stub_status_module 實現, 在編譯安裝nginx的時候需要添加編譯參數 --with-http_stub_status_module 否則配置完成之后監測會是提示語法錯誤
#檢查模塊是否配置 如果不存在需要添加模塊重新編譯
nginx -V 2>&1 | grep stub
#配置文件
vim /usr/local/nginx/conf.d/vhosts.conf
location /status {stub_status; auth_basic "status page"; auth_basic_user_file "/usr/local/nginx/.htpasswd";
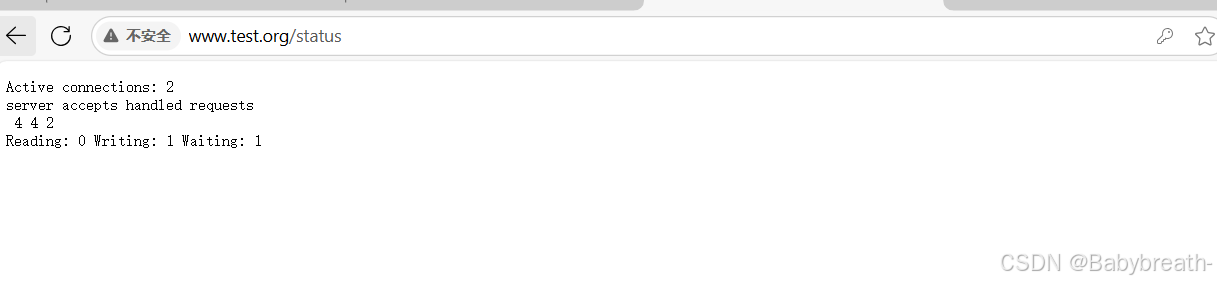
#stub_status; 啟動狀態頁
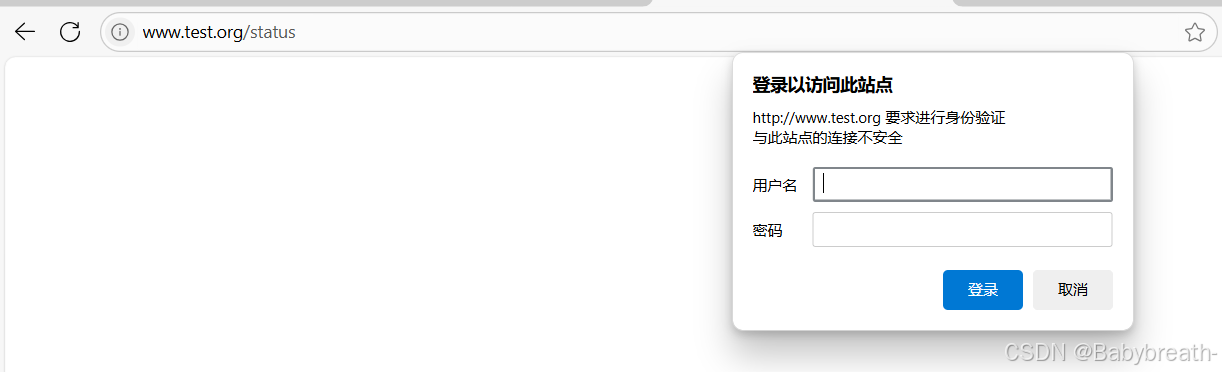
# auth_basic "status page"; 啟用了 HTTP 基本認證(Basic Authentication),用于保護 /status 頁面,防止未經授權的訪問。
"status page" 是認證提示信息,當用戶訪問 /status 頁面時,瀏覽器會彈出一個認證框,提示用戶輸入用戶名和密碼。
#auth_basic_user_file "/usr/local/nginx/.htpasswd"; 指定了存儲用戶認證信息的文件路徑為 /usr/local/nginx/.htpasswd#本地解析 在windows中 找到C:\Windows\System32\drivers\etc 此路徑下的hosts文件,以記事本方式打開 加入虛擬機ip和自定義域名?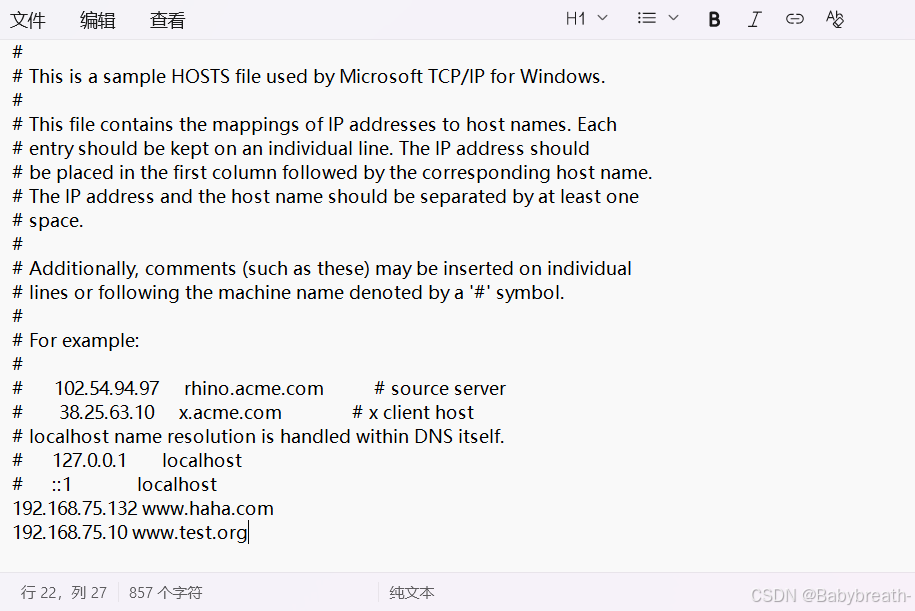
?測試:在瀏覽器輸入自定義域名 www.test.org/status
nginx壓縮功能
#參數說明
#啟用或禁用gzip壓縮,默認關閉
gzip on | off;
#壓縮比由低到高從1到9,默認為1,值越高壓縮后文件越小,但是消耗cpu比較高。基本設定未4或者5gzip_comp_level 4;#禁用IE6 gzip功能,早期的IE6之前的版本不支持壓縮
gzip_disable "MSIE [1-6]\.";
#gzip壓縮的最小文件,小于設置值的文件將不會壓縮
gzip_min_length 1k;
#啟用壓縮功能時,協議的最小版本,默認HTTP/1.1gzip_http_version 1.0 | 1.1;
#指定Nginx服務需要向服務器申請的緩存空間的個數和大小,平臺不同,默認:32 4k或者16 8k;gzip_buffers number size;
#指明僅對哪些類型的資源執行壓縮操作;默認為gzip_types text/html,不用顯示指定,否則出錯
gzip_types mime-type ...;
#如果啟用壓縮,是否在響應報文首部插入“Vary: Accept-Encoding”,一般建議打開
gzip_vary on | off;
#預壓縮,即直接從磁盤找到對應文件的gz后綴的式的壓縮文件返回給用戶,無需消耗服務器CPU#注意: 來自于ngx_http_gzip_static_module模塊
gzip_static on | off;
#配置
[root@webserver ~]# vim /usr/local/nginx/conf/nginx.conf
gzip on;gzip_comp_level 4;gzip_disable "MSIE [1-6]\.";gzip_min_length 1024k;gzip_types mime-type;gzip_vary on;gzip_static on;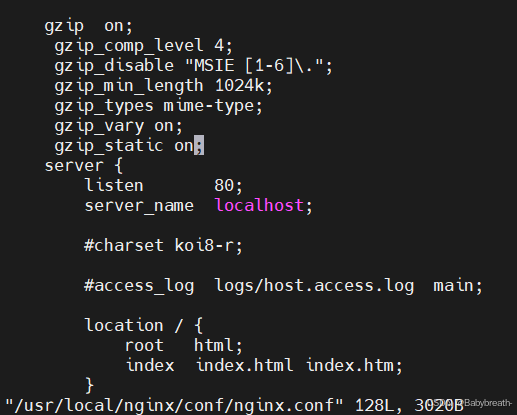
常用內置變量
#$remote_addr;
#存放了客戶端的地址,注意是客戶端的公網IP$args;
#變量中存放了URL中的所有參數
#例如:https://search.jd.com/Search?keyword=手機&enc=utf-8#返回結果為: keyword=手機&enc=utf-8$is_args#如果有參數為? 否則為空
$document_root;
#保存了針對當前資源的請求的系統根目錄,例如:/webdata/nginx/timinglee.org/lee。
$document_uri;#保存了當前請求中不包含參數的URI,注意是不包含請求的指令
#比如:http://lee.timinglee.org/var?\id=11111會被定義為/var
#返回結果為:/var$host;
#存放了請求的host名稱
limit_rate 10240;echo $limit_rate;#如果nginx服務器使用limit_rate配置了顯示網絡速率,則會顯示,如果沒有設置, 則顯示0$remote_port;#客戶端請求Nginx服務器時隨機打開的端口,這是每個客戶端自己的端口
$remote_user;#已經經過Auth Basic Module驗證的用戶名
$request_body_file;#做反向代理時發給后端服務器的本地資源的名稱
$request_method;#請求資源的方式,GET/PUT/DELETE等
$request_filename;#當前請求的資源文件的磁盤路徑,由root或alias指令與URI請求生成的文件絕對路徑,
#如:webdata/nginx/timinglee.org/lee/var/index.html$request_uri;#包含請求參數的原始URI,不包含主機名,相當于:$document_uri?$args,#例如:/main/index.do?id=20190221&partner=search
$scheme;#請求的協議,例如:http,https,ftp等
$server_protocol;#保存了客戶端請求資源使用的協議的版本,例如:HTTP/1.0,HTTP/1.1,HTTP/2.0等
$server_addr;#保存了服務器的IP地址
$server_name;#虛擬主機的主機名
$server_port;#虛擬主機的端口號
$http_user_agent;#客戶端瀏覽器的詳細信息
$http_cookie;#客戶端的所有cookie信息
$cookie_<name>#name為任意請求報文首部字部cookie的key名
$http_<name>#name為任意請求報文首部字段,表示記錄請求報文的首部字段,name的對應的首部字段名需要為小寫,如果有
橫線需要替換為下劃線
#示例:
echo $http_user_agent;
echo $http_host;$sent_http_<name>#name為響應報文的首部字段,name的對應的首部字段名需要為小寫,如果有橫線需要替換為下劃線,此變量有
問題
echo $sent_http_server;$arg_<name>#此變量存放了URL中的指定參數,name為請求url中指定的參數
echo $arg_id;
添加echo工具
#首先需要下載echo的壓縮包傳入虛擬機中
[root@webserver ~]# ls
anaconda-ks.cfg  Downloads                      Music                Pictures    Templates
Desktop          echo-nginx-module-0.63         nginx-1.26.1         Public      Videos
Documents        echo-nginx-module-0.63.tar.gz  nginx-1.26.1.tar.gz  rh9.3.repo
相關配置
#解壓到/root目錄下
tar zxf echo-nginx-module-0.63.tar.gz#查看當前編譯環境的模塊,在最后加上解壓后的echo模塊并編譯
nginx -V
nginx version: nginx/1.26.1
built by gcc 11.4.1 20230605 (Red Hat 11.4.1-2) (GCC)
built with OpenSSL 3.0.7 1 Nov 2022
TLS SNI support enabled
configure arguments: --prefix=/usr/local/nginx --user=nginx --group=nginx --with-http_ssl_module --with-http_v2_module --with-http_realip_module --with-http_stub_status_module --with-http_gzip_static_module --with-pcre --with-stream --with-stream_ssl_module --with-stream_realip_module --add-module=/root/echo-nginx-module-0.63#添加echo模塊并驗證./configure --prefix=/usr/local/nginx --user=nginx --group=nginx --with-http_ssl_module --with-http_v2_module --with-http_realip_module --with-http_stub_status_module --with-http_gzip_static_module --with-pcre --with-stream --with-stream_ssl_module --with-stream_realip_module --add-module=/root/echo-nginx-module-0.63make 	#編譯#編譯完成后進入到objs下 用新的nginx文件替換掉舊的
cd nginx-1.26.1/
cd objs/
cp nginx /usr/local/nginx/sbin/nginx#驗證是否成功添加
nginx -V 2>&1 | grep echo
#在配置文件中開啟模塊并配置對應選項即可使用
vim /usr/local/nginx/conf.d/vhosts.conflocation /vars {default_type test/html;echo $uri;echo $server_addr;#驗證語法并重啟服務
nginx -t
systemctl restart nginx 或者 nginx -s reload#輸出效果
curl www.test.org/vars
/vars
192.168.75.10

自動跳轉https
基于通信安全考慮公司網站要求全站 https,因此要求將在不影響用戶請求的情況下將http請求全 部自動跳轉至 https,另外也可以實現部分 location 跳轉
vim /usr/local/nginx/conf.d/vhosts.conflocation / {	#匹配所有以/開頭的路徑if ($scheme = http){	#$scheme 是 Nginx 的內置變量,表示當前請求的協議,通常是 http 或 https。rewrite /(.*) https://$host/$1;	#將http請求重定向到對應的https地址}}#重啟并訪問
nginx -s reloadcurl -vL www.test.org
*   Trying 192.168.75.10:80...
* Connected to www.test.org (192.168.75.10) port 80 (#0)
> GET / HTTP/1.1
> Host: www.test.org
> User-Agent: curl/7.76.1
> Accept: */*
>
* Mark bundle as not supporting multiuse
< HTTP/1.1 302 Moved Temporarily
< Server: nginx/1.26.1
< Date: Sun, 27 Jul 2025 03:04:48 GMT
< Content-Type: text/html
< Content-Length: 145
< Connection: keep-alive
< Keep-Alive: timeout=50
< Location: https://www.test.org/	#可見已經被替換成https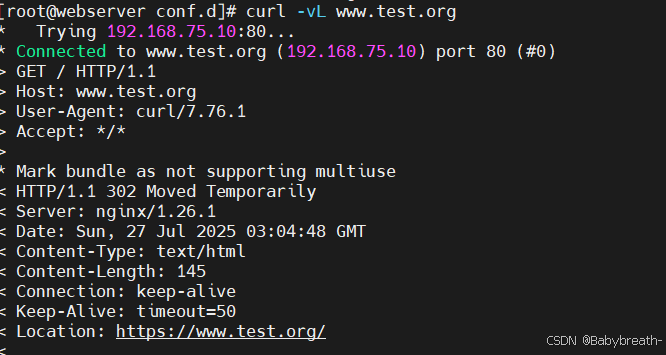
判斷文件是否存在
當用戶訪問到公司網站的時輸入了一個錯誤的URL,可以將用戶重定向至官網首頁
vim /usr/local/nginx/conf.d/vhosts.conflocation / {if (!-e $request_filename){rewrite /(.*) http://$host/index.html;	}	[root@webserver conf.d]# curl -L www.test.org/1	#訪問一個不存在的地址,自動跳轉到主界面
web_html
防盜鏈
防盜鏈基于客戶端攜帶的referer實現,referer是記錄打開一個頁面之前記錄是從哪個頁面跳轉過來的標 記信息,如果別人只鏈接了自己網站圖片或某個單獨的資源,而不是打開了網站的整個頁面,這就是盜 鏈,referer就是之前的那個網站域名,正常的referer信息有以下幾種:
none:   #請求報文首部沒有referer首部,            #比如用戶直接在瀏覽器輸入域名訪問web網站,就沒有referer信息。
blocked:      #請求報文有referer首部,但無有效值,比如為空。
server_names:       #referer首部中包含本主機名及即nginx 監聽的server_name。arbitrary_string:   #自定義指定字符串,但可使用*作通配符。示例: *.test.org
www.test.*regular expression: #被指定的正則表達式模式匹配到的字符串,要使用~開頭,例如:
~.*\.test\.com
實現盜鏈
#新建一個主機192.168.75.20,盜取另一臺主機www.test.org的信息
yum install httpd -y	#下載httpd
vim /var/www/html/index.html	#寫入盜鏈web頁面
<html><head><meta http-equiv=Content-Type content="text/html;charset=utf-8"><title>盜鏈</title></head><body><h1 style="color:red">Y</h1><p><a href=http://www.test.org>N</a>A</p></body></html>vim /etc/hosts	#本地解析
192.168.75.20   rs1 www.test.orgsystemctl enable --now httpd	#重啟服務參數解釋:
none:允許沒有 referer 的請求(比如直接輸入地址訪問)。
blocked:允許 referer 被防火墻或代理隱藏的請求。
server_names:允許當前 server_name 下的所有域名。
*.test.org:允許所有以 .test.org 結尾的子域名。
~/.baidu/.:正則匹配,允許 referer 中包含 baidu 的請求(如 www.baidu.com、map.baidu.com 等)。
此時在瀏覽器中發現可以正常獲取信息
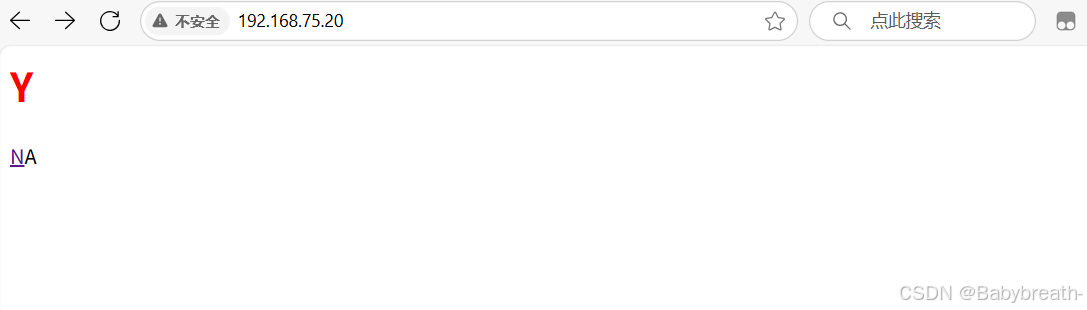
點擊字母n可以正常訪問
防止盜鏈
#在nginx配置文件中寫入location / {valid_referers none blocked server_names *.test.org ~/.baidu/.;if ($invalid_referer){return 404;}}#重啟服務再次訪問發現無法獲取

nginx實現動靜分離
需要三臺主機
192.168.75.10 #nginx
192.168.75.20 #rs1 httpd,作為靜態服務器
192.168.75.30 #rs2 php,作為動態服務器
配置
nginx:
#編輯配置文件
[root@webserver conf.d]# vim vhosts.conf
server{listen 80;server_name www.test.org;location / {proxy_pass http://192.168.75.20:80;}location ~\.(php|jsp|js)$ {proxy_pass http://192.168.75.30:80;}
}rs1
#下載httpd
yum install httpd -y
#關閉防火墻
systemctl disable --now firewalld.service
#啟動httpd服務
systemctl enable --now httpd
#寫入默認發布信息
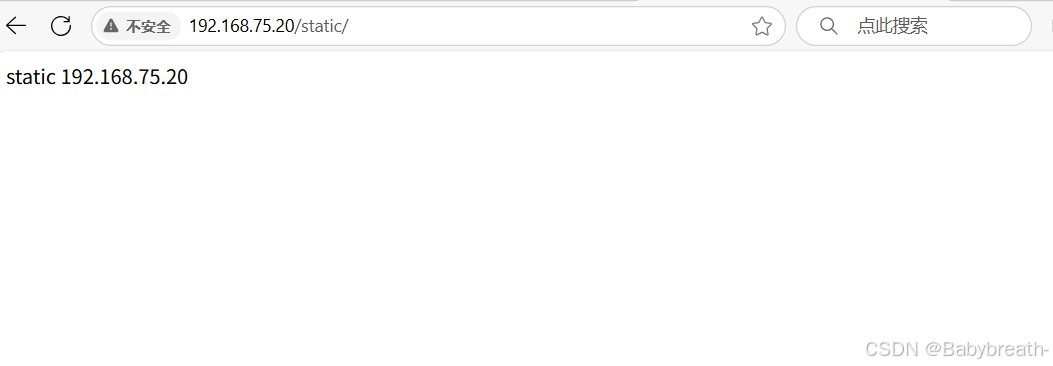
mkdir /var/www/html/static
echo static 192.168.75.20 >/var/www/html/static/index.htmlrs2:
yum install httpd -y
yum install php -y
systemctl restart httpd.service
mkdir /var/www/html/php
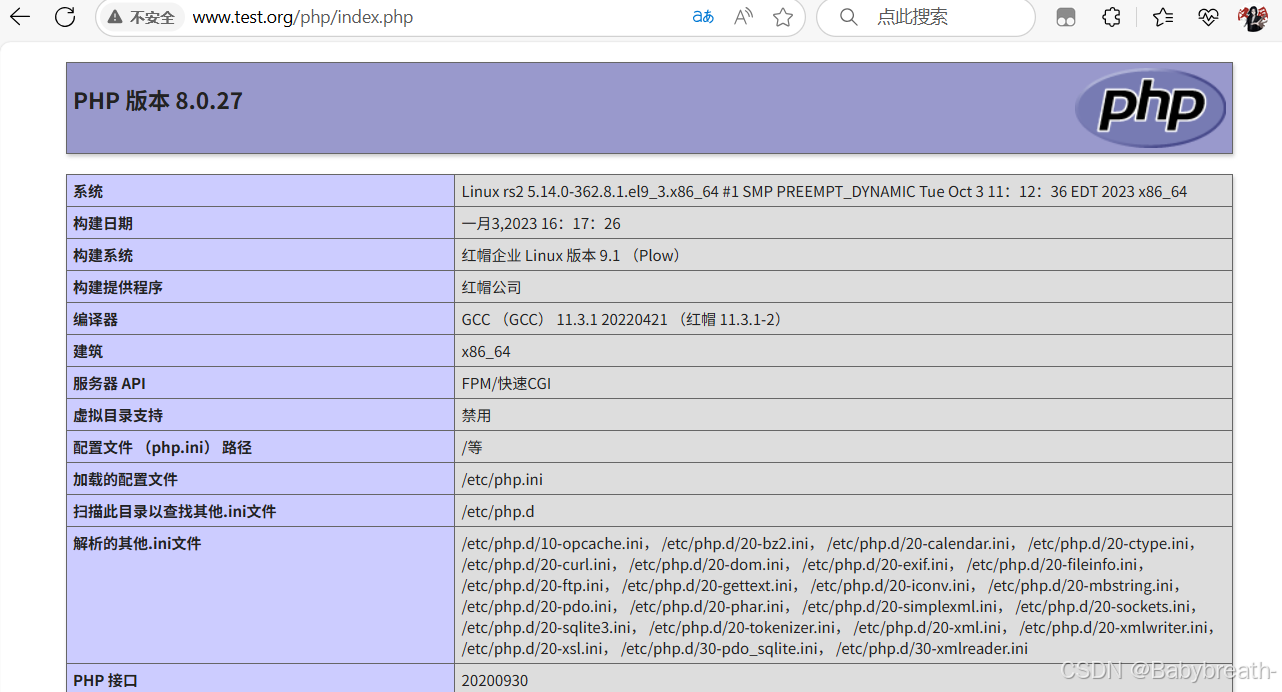
vim /var/www/html/php/index.php
[root@rs2 ~]# cat /var/www/html/php/index.php
<?phpphpinfo();
?>
systemctl status firewalld.service測試:在瀏覽器中輸入www.test.org/php/index.php
輸入www.test.org/static 自動跳轉到如下圖所示:
緩存功能
緩存功能默認關閉狀態,需要先動配置才能啟用
參數解釋:
proxy_cache zone_name | off; 默認off#指明調用的緩存,或關閉緩存機制;Context:http, server, location#zone_name 表示緩存的名稱.需要由proxy_cache_path事先定義proxy_cache_key string;#緩存中用于“鍵”的內容,默認值:proxy_cache_key $scheme$proxy_host$request_uri;proxy_cache_valid [code ...] time;#定義對特定響應碼的響應內容的緩存時長,定義在http{...}中
示例:proxy_cache_valid 200 302 10m;proxy_cache_valid 404 1m;proxy_cache_path;#定義可用于proxy功能的緩存;Context:http
proxy_cache_path path [levels=levels] [use_temp_path=on|off]
keys_zone=zone_name:size [inactive=time] [max_size=size] [manager_files=number]
[manager_sleep=time] [manager_threshold=time] [loader_files=number]
[loader_sleep=time] [loader_threshold=time] [purger=on|off]
[purger_files=number] [purger_sleep=time] [purger_threshold=time];#示例:在http配置定義緩存信息
proxy_cache_path /var/cache/nginx/proxy_cache #定義緩存保存路徑,proxy_cache會自動創建
levels=1:2:2    #定義緩存目錄結構層次 #1:2:2可以生成
2^4x2^8x2^8=2^20=1048576個目錄
keys_zone=proxycache:20m   #指內存中緩存的大小,主要用于存放key和metadata
(如:使用次數)		#一般1M可存放8000個左右的keyinactive=120s     #緩存有效時間
max_size=10g;        #最大磁盤占用空間,磁盤存入文件內容的緩存空間最大#調用緩存功能,需要定義在相應的配置段,如server{...};或者location等
proxy_cache proxycache;proxy_cache_key $request_uri;       #對指定的數據進行MD5的運算做為緩存的keyproxy_cache_valid 200 302 301 10m;  #指定的狀態碼返回的數據緩存多長時間
proxy_cache_valid any 1m;           #除指定的狀態碼返回的數據以外的緩存多長時間,必須設置,否則不會緩存proxy_cache_use_stale error | timeout | invalid_header | updating | http_500 |
http_502 | http_503 | http_504 | http_403 | http_404 | off ;      #默認是off
#在被代理的后端服務器出現哪種情況下,可直接使用過期的緩存響應客戶端
#示例
proxy_cache_use_stale error http_502 http_503;proxy_cache_methods GET | HEAD | POST ...;#對哪些客戶端請求方法對應的響應進行緩存,GET和HEAD方法總是被緩存
配置
#全局配置
[root@webserver conf.d]# vim /usr/local/nginx/conf/nginx.conf# gzip_static on;proxy_cache_path /usr/local/nginx/cache levels=1:2:2 keys_zone=proxycache:20m inactive=120s max_size=1g;#子配置文件
[root@webserver conf.d]# vim /usr/local/nginx/conf.d/vhosts.confserver{listen 80;server_name www.test.org;location / {proxy_pass http://192.168.75.20:80;proxy_cache proxycache;proxy_cache_key $request_uri;proxy_cache_valid 200 302 10m;proxy_cache_valid 404 1m;}location ~\.(php|jsp|js)$ {proxy_pass http://192.168.75.30:80;}
}#無緩存環境壓測
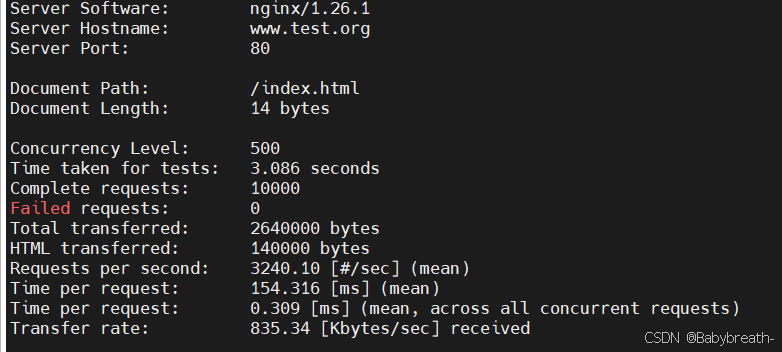
[root@webserver conf.d]# ab -n 10000 -c 500 http://www.test.org/index.htmlConcurrency Level: 500
Time taken for tests: 3.086 seconds
Complete requests: 10000
Failed requests: 0
Total transferred: 2640000 bytes
HTML transferred: 140000 bytes
Requests per second: 3240.10 [#/sec] (mean)
Time per request: 154.316 [ms] (mean)
Time per request: 0.309 [ms] (mean, across all concurrent requests)
Transfer rate: 835.34 [Kbytes/sec] received#有緩存環境壓測
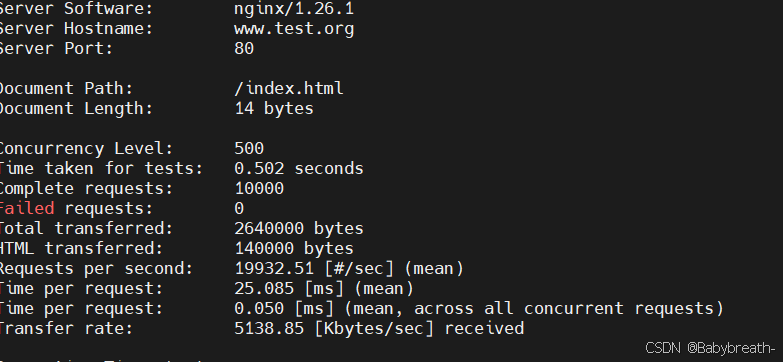
[root@webserver conf.d]# ab -n 10000 -c 500 http://www.test.org/index.htmlConcurrency Level: 500
Time taken for tests: 0.502 seconds
Complete requests: 10000
Failed requests: 0
Total transferred: 2640000 bytes
HTML transferred: 140000 bytes
Requests per second: 19932.51 [#/sec] (mean)
Time per request: 25.085 [ms] (mean)
Time per request: 0.050 [ms] (mean, across all concurrent requests)
Transfer rate: 5138.85 [Kbytes/sec] received #通過此條對比發現快了不少配置前?
配置后
負載均衡實例: MySQL
mysql準備
#準備兩臺后端服務器 并安裝mysql
yum install mariadb -y#更改mysql的id方便測試
[root@rs1 ~]# vim /etc/my.cnf.d/mariadb-server.cnf
[mysqld]
server-id=20rs2同理,將server-id改為30
#啟動mariadbsystemctl start mariadb#創建用戶mysql -e "grant all on *.* to yna@'%' identified by 'yna';"#遠程登陸測試,在rs1上測試rs2,在rs2上測試rs1
[root@rs1 ~]# mysql -uyna -pyna -h 192.168.75.30 -e "select @@server_id"
+-------------+
| @@server_id |
+-------------+
|          30 |
+-------------+[root@rs2 ~]# mysql -uyna -pyna -h 192.168.75.20 -e "select @@server_id"
+-------------+
| @@server_id |
+-------------+
|          20 |
+-------------+

nginx配置
#創建一個目錄,存放有關mysql的負載均衡配置文件
[root@webserver conf.d]# mkdir /usr/local/nginx/tcp.d#編輯配置文件
[root@webserver tcp.d]# vim my.confstream {upstream mysql_server{server 192.168.75.20:3306 max_fails=3 fail_timeout=30s;server 192.168.75.30:3306 max_fails=3 fail_timeout=30s;}server{listen 192.168.75.10:3306;proxy_pass mysql_server;proxy_connect_timeout 30s;proxy_timeout 300s;}
}#將子配置文件的位置寫入主配置文件當中,注意不要寫到http{}模塊中
vim /usr/local/nginx/conf/nginx.service

驗證?
#驗證語法無錯誤后重啟
[root@webserver tcp.d]# nginx -t
nginx: the configuration file /usr/local/nginx/conf/nginx.conf syntax is ok
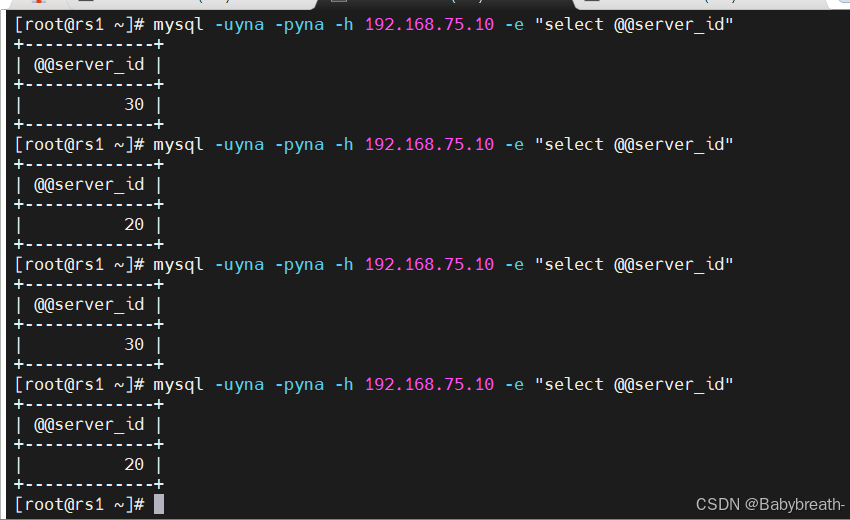
nginx: configuration file /usr/local/nginx/conf/nginx.conf test is successful[root@webserver tcp.d]# systemctl restart nginx.service在rs中通過nginx負載ip連接mysql[root@rs1 ~]# mysql -uyna -pyna -h 192.168.75.10 -e "select @@server_id"
+-------------+
| @@server_id |
+-------------+
| 20 |
+-------------+
[root@rs1 ~]# mysql -uyna -pyna -h 192.168.75.10 -e "select @@server_id"
+-------------+
| @@server_id |
+-------------+
| 30 |
+-------------+
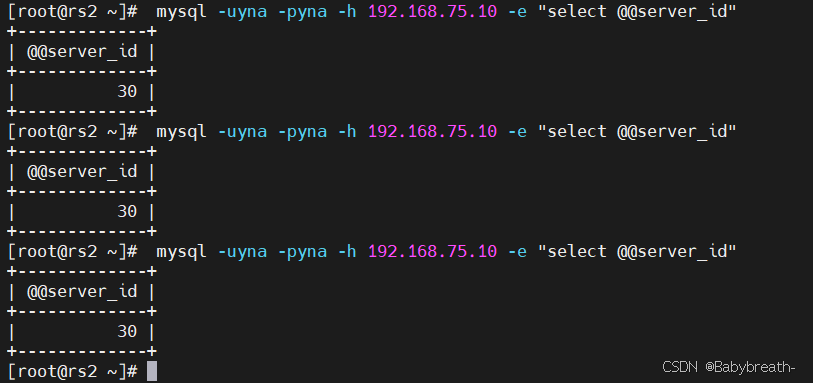
#停止rs1上的mysql服務,就只會看到rs2響應
[root@rs1 ~]# systemctl stop mariadb.service[root@rs2 ~]#  mysql -uyna -pyna -h 192.168.75.10 -e "select @@server_id"
+-------------+
| @@server_id |
+-------------+
|          30 |
+-------------+
[root@rs2 ~]#  mysql -uyna -pyna -h 192.168.75.10 -e "select @@server_id"
+-------------+
| @@server_id |
+-------------+
|          30 |
+-------------+
nginx代理dns做負載均衡
實驗需要三臺主機,一臺nginx,兩臺dns
nginx:192.168.75.10
rs1:192.168.75.20 rs2:192.168.75.30
dns配置
#在rs1和rs2上安裝dns
yum install bind -y#編輯dns配置文件
vim /etc/named.conf1. `// listen-on port 53 { 127.0.0.1; };`  當前被注釋掉(行首 `//`)。若取消注釋,表示讓 named 只在 IPv4 的 127.0.0.1:53 上監聽,不對其他網卡開放。2. `// listen-on-v6 port 53 { ::1; };`  同樣被注釋。若取消,表示讓 named 只在 IPv6 的 ::1(本地環回):53 上監聽。3. `// allow-query { localhost; };`  被注釋時,默認允許所有客戶端查詢;若取消注釋,則只允許來自 localhost(127.0.0.1/::1)的查詢,其他地址將被拒絕。4. `dnssec-validation no;`  關閉 DNSSEC 簽名校驗。named 不會對收到的應答做 DNSSEC 驗證,可減少計算量,但也會失去對偽造應答的防護。若需安全,應設為 `yes` 并配置信任錨(trust-anchors)。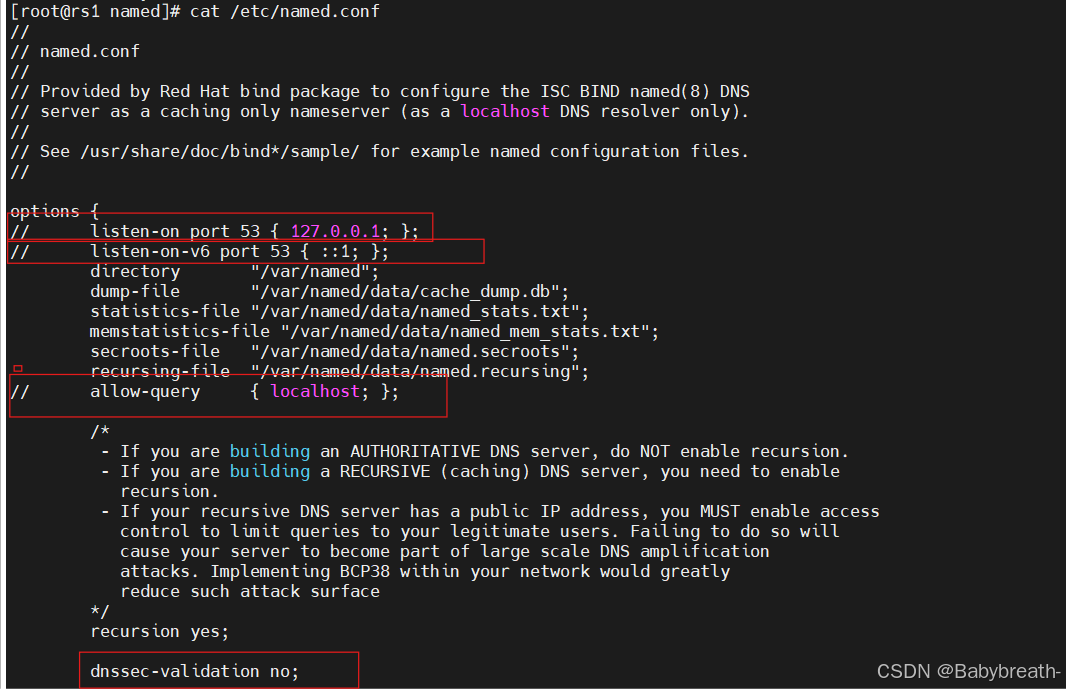
將框選出的選項注釋掉,最后一個由yes改為no
vim /etc/named.rfc1912.zones
#加入下面這段代碼,其中域名可以自定義
zone "test.org" IN {	type master;file "test.org.zone";allow-update { none; };- zone "test.org" IN  聲明一個 DNS 區域(zone),負責解析的域名是 `test.org`,`IN` 表示 Internet 類別(也是最常用的類別)。- type master;  指定本機是該區域的主服務器(master),即權威數據源在本機。- file "test.org.zone"; 區域數據文件存放路徑(相對于 `options` 中 `directory` 指定的目錄),文件里保存了所有 `test.org` 的記錄(如 A、MX、NS 等)。- allow-update { none; };禁止任何人通過動態 DNS(DDNS)更新該區域,提高安全性。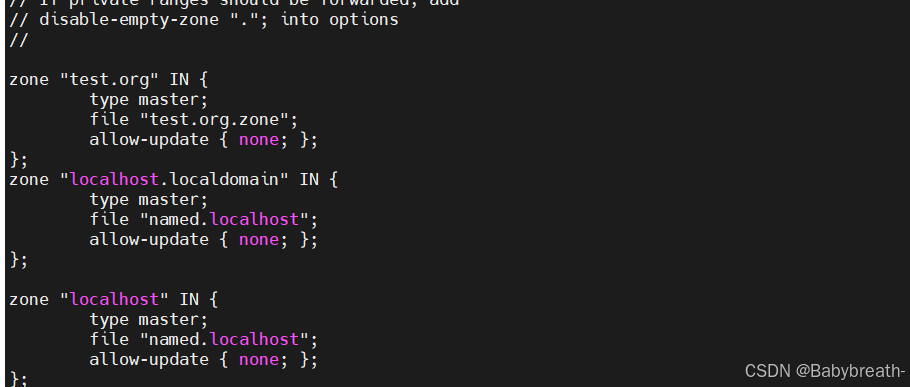
#編輯文件test.org.zone
[root@rs1 named]# vim /etc/named/test.org.zone
$TTL 1D
@       IN SOA  dns.test.org  root.test.org. (0       ; serial1D      ; refresh1H      ; retry1W      ; expire3H )    ; minimumNS      dns.test.org.dns     A       192.168.75.20	#本機IP#rs2同樣配置即可
測試配置是否生效
#重啟服務
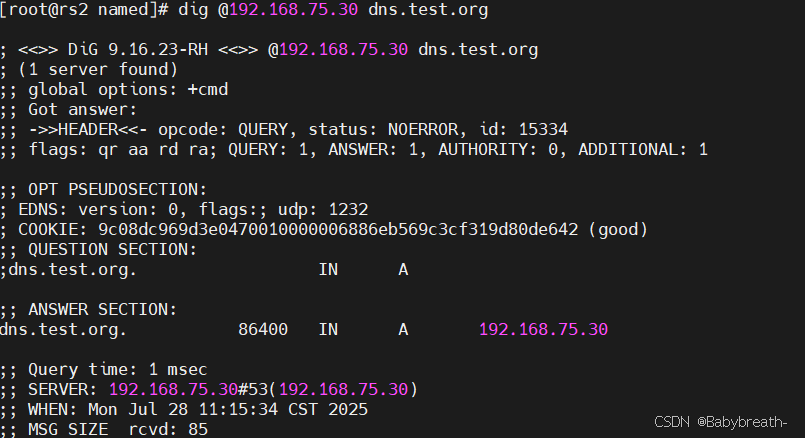
systemctl restart named[root@rs1 named]# dig @192.168.75.20 dns.test.org[root@rs2 named]# dig @192.168.75.30 dns.test.org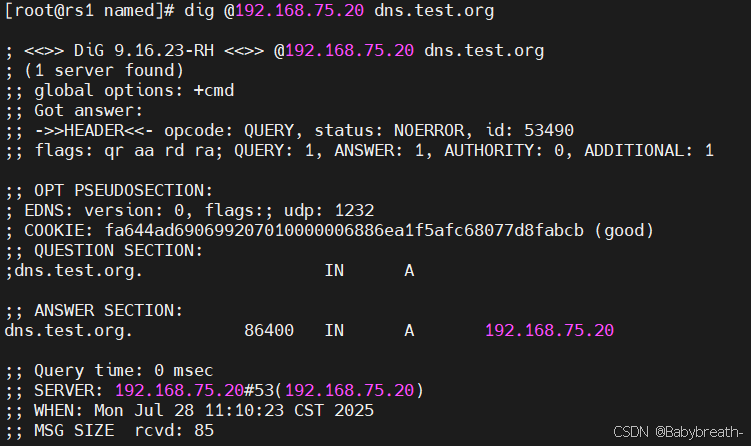
nginx配置
#創建一個目錄,存放有關dns的負載均衡配置文件
[root@webserver conf.d]# mkdir /usr/local/nginx/tcp.d#編輯配置文件
[root@webserver tcp.d]# vim my.conf
stream {
upstream dns_server{server 192.168.75.20:53 max_fails=3 fail_timeout=30s;server 192.168.75.30:53 max_fails=3 fail_timeout=30s;}server{listen 53 udp;proxy_pass dns_server;}server{listen 53;proxy_pass dns_server;}
}
#將創建的子配置文件寫入主配置文件中#檢驗語法無誤后重啟服務
[root@webserver tcp.d]# nginx -t
nginx: the configuration file /usr/local/nginx/conf/nginx.conf syntax is ok
nginx: configuration file /usr/local/nginx/conf/nginx.conf test is successful[root@webserver tcp.d]# systemctl restart nginx.service
驗證結果
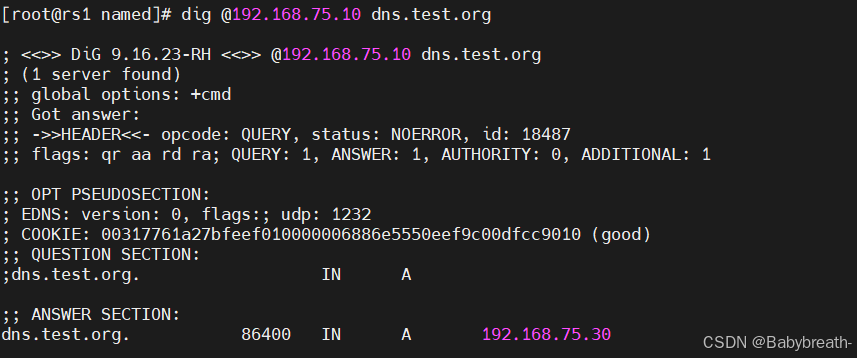
#在后端服務器上通過訪問域名查看訪問是否輪詢
[root@rs1 named]# dig @192.168.75.10 dns.test.org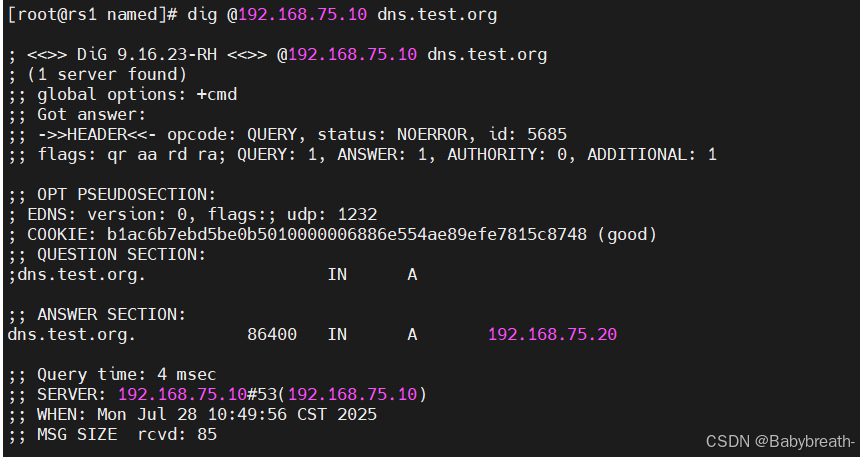
?FastCGI
-
本質:FastCGI 不是軟件,而是一個 常駐型(long-lived)通信協議,位于 Web 服務器與后端解釋器(PHP、Python、Ruby…)之間。
-
解決的問題:傳統 CGI 每次請求都要“fork-執行-退出”,高并發時 CPU 和內存開銷極大;FastCGI 通過 進程池復用 避免頻繁創建銷毀進程,從而提高吞吐、降低延遲。
-
常見實現: ? PHP:php-fpm(內置 FastCGI 管理器) ? Python:flup、uWSGI(兼容 FastCGI) ? 通用:spawn-fcgi、fcgiwrap
源碼編譯安裝php
#首先需要準備好php的壓縮包
php-8.3.9.tar.gz#解壓
tar zxf php-8.3.9.tar.gz#安裝依賴
yum install -y bzip2 systemd-devel libxml2-devel sqlite-devel libcurl-devel.x86_64 libpng-devel.x86_64 #準備好oniguruma-6.9.6-1.el9.6.x86_64.rpm和oniguruma-devel-6.9.6-1.el9.6.x86_64.rpm包#更新oniguruma-6.9.6-1.el9.6.x86_64.rpm包
yum update oniguruma-6.9.6-1.el9.6.x86_64.rpm#安裝oniguruma-devel-6.9.6-1.el9.6.x86_64.rpm
yum install oniguruma-devel-6.9.6-1.el9.6.x86_64.rpm -y#進入php目錄下,檢測環境
cd php-8.3.9/./configure \
--prefix=/usr/local/php \
--with-config-file-path=/usr/local/php/etc \
--enable-fpm \
--with-fpm-user=nginx \
--with-fpm-group=nginx \
--with-curl \
--with-iconv \
--with-mhash \
--with-zlib \
--with-openssl \
--enable-mysqlnd \
--with-mysqli \
--with-pdo-mysql \
--disable-debug \
--enable-sockets \
--enable-soap \
--enable-xml \
--enable-ftp \
--enable-gd \
--enable-exif \
--enable-mbstring \
--enable-bcmath \
--with-fpm-systemd#檢測無誤后編譯并安裝
make
make install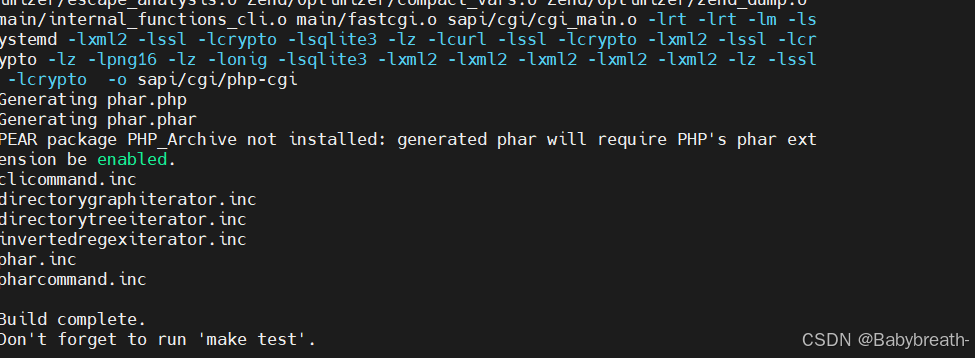

php配置優化
cd /usr/local/php/etc
cp php-fpm.conf.default php-fpm.conf
vim php-fpm.conf#去掉此行注釋
pid = run/php-fpm.pid       #指定pid文件存放位置cd php-fpm.d/
cp www.conf.default www.conf#生成主配置文件
cd /root/php-8.3.9/
cp php.ini-production /usr/local/php/etc/php.ini
vim /usr/local/php/etc/php.ini[Date]; Defines the default timezone used by the date functions; https://php.net/date.timezonedate.timezone = Asia/Shanghai       #修改時區#在主配置文件中將本機ip改為允許所有ipcd php-8.3.9/vim /usr/local/php/etc/php-fpm.d/www.conf;   '/path/to/unix/socket' - to listen on a unix socket.
; Note: This value is mandatory.
listen = 0.0.0.0:9000	#改為0.0.0.#生成啟動文件cd /root/php-8.3.9/cp sapi/fpm/php-fpm.service /lib/systemd/system/# Mounts the /usr, /boot, and /etc directories read-only for processes invoked by this unit.#ProtectSystem=full         #注釋該內容cp sapi/fpm/php-fpm.service /lib/systemd/system/systemctl daemon-reloadsystemctl restart php-fpm.service[root@webserver php-8.3.9]# netstat -antulpe | grep php	#查看php服務是否啟動
tcp        0      0 0.0.0.0:9000            0.0.0.0:*               LISTEN      0          137571     162490/php-fpm: mas
準備php測試頁面
[root@webserver ~]# cd /usr/local/nginx/html/
[root@webserver html]# vim index.php
<?phpphpinfo();
?>
配置nginx轉發
[root@webserver html]# cd /usr/local/nginx/conf.d
[root@webserver conf.d]# vim vhosts.confserver {listen 80;server_name www.test.org;location ~ \.php$ {fastcgi_pass 127.0.0.1:9000;fastcgi_index index.php;fastcgi_param SCRIPT_FILRNAME /scripts$fastcgi_script_name;include fastcgi.conf;}
}#驗證語法并重啟服務
[root@webserver ~]# nginx -t
nginx: the configuration file /usr/local/nginx/conf/nginx.conf syntax is ok
nginx: configuration file /usr/local/nginx/conf/nginx.conf test is successful
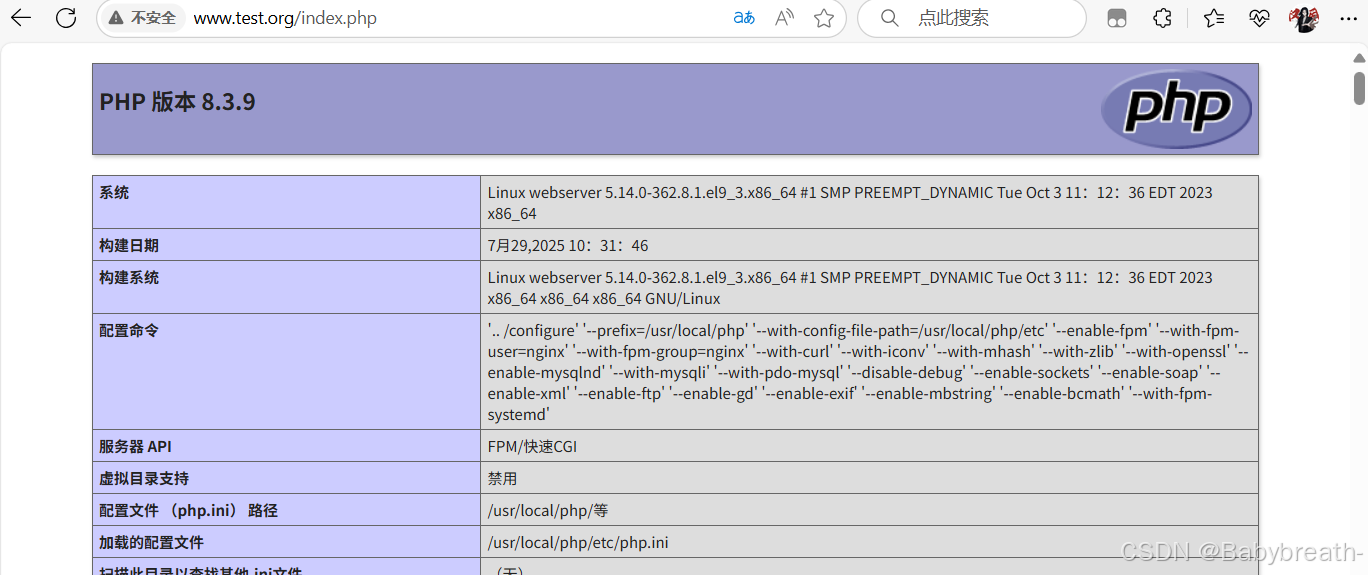
[root@webserver ~]# nginx -s reload測試,瀏覽器中輸入www.test.org/index.php
添加php環境變量
[root@webserver ~]# vim ~/.bash_profile# .bash_profile# Get the aliases and functions
if [ -f ~/.bashrc ]; then. ~/.bashrc
fi# User specific environment and startup programsexport PATH=$PATH:/usr/local/nginx/sbin:/usr/local/php/bin #在后面加上:/usr/local/php
php擴展模塊
memcache模塊
#安裝memcache模塊
tar zxf memcache-8.2.tgzcd memcache-8.2/yum install autoconf[root@webserver memcache-8.2]# phpize
Configuring for:
PHP Api Version:         20230831
Zend Module Api No:      20230831
Zend Extension Api No:   420230831./configuremakemake install[root@webserver memcache-8.2]# ls /usr/local/php/lib/php/extensions/no-debug-non-zts-20230831/
memcache.so  opcache.so#復制測試文件到nginx發布目錄中并更改配置cp example.php memcache.php /usr/local/nginx/html/vim /usr/local/nginx/html/memcache.phpdefine('ADMIN_USERNAME','yna');  // Admin Username
define('ADMIN_PASSWORD','yna');  // Admin Password
define('DATE_FORMAT','Y/m/d H:i:s');
define('GRAPH_SIZE',200);
define('MAX_ITEM_DUMP',50);
$MEMCACHE_SERVERS[] = 'localhost:11211'; // add more as an array
#$MEMCACHE_SERVERS[] = 'mymemcache-server2:11211'; // add more as an array#配置php 加載memcache模塊
vim /usr/local/php/etc/php.ini;extension=zipextension=memcache;zend_extension=opcachesystemctl reload  php-fpm[root@wb-nginx memcache-8.2]# yum install memcached -y[root@wb-nginx memcache-8.2]# systemctl enable --now memcached.service
Created symlink /etc/systemd/system/multi-user.target.wants/memcached.service → /usr/lib/systemd/system/memcached.service.[root@webserver memcache-8.2]# php -m | grep mem
memcachecat /etc/sysconfig/memcachedPORT="11211"USER="memcached"cMAXCONN="1024"CACHESIZE="64"OPTIONS="-l 0.0.0.0,::1"
測試
#進入到memcache下,進行壓測測試
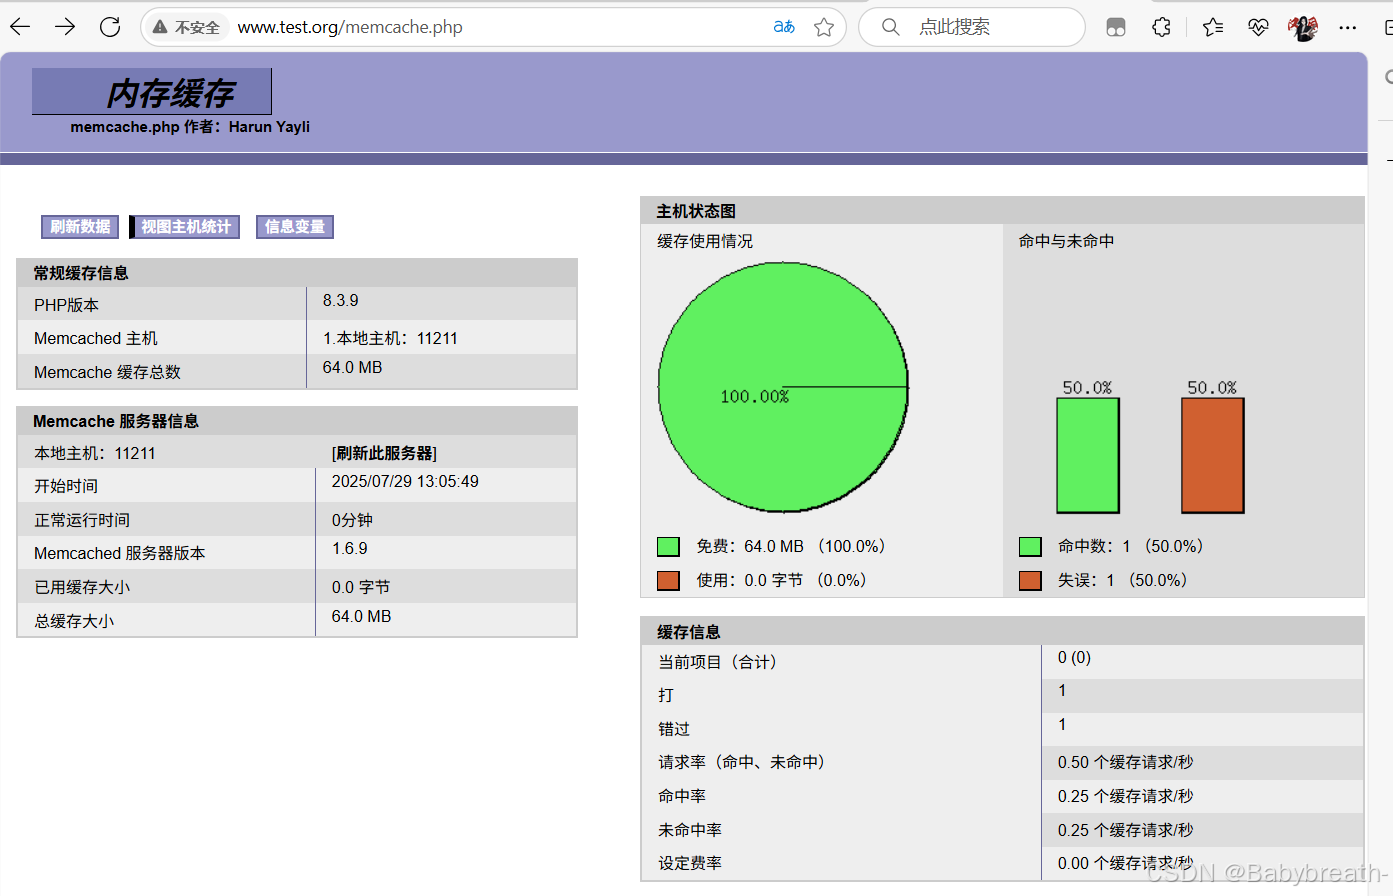
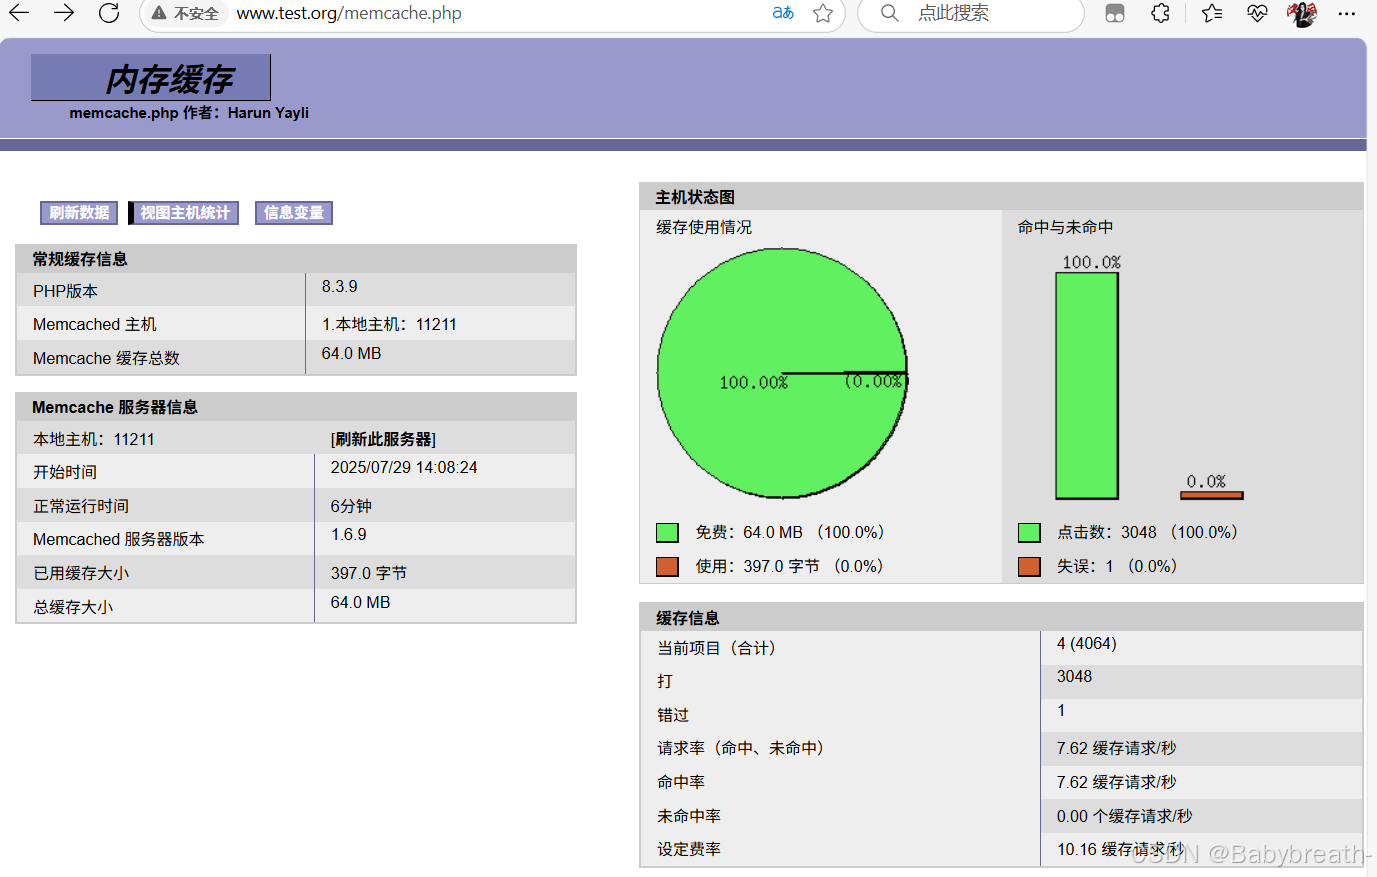
[root@webserver memcache-8.2]# ab -n 1000 -c 50 http://www.test.org/example.php訪問 http://php.test.org/example.php 不斷刷新
訪問 http://php.test.org/memcache.php 查看命中效果
php高速緩存
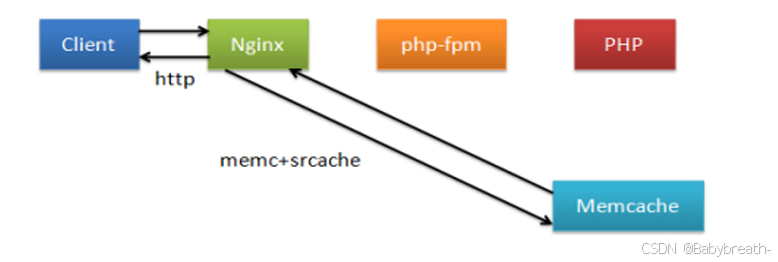
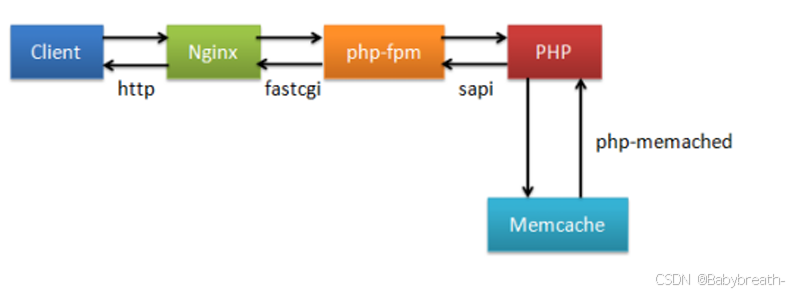
當客戶端向nginx發送請求時,nginx會通過php來請求memcache。如此一來,響應速度會受限于php,但是做完高速緩存后,在nginx第二次請求相同的數據時,會直接訪問memcache而跳過php,這樣就加快了響應速度
配置
#在nginx中添加模塊:memc和srcache
tar xzf memc-nginx-module-0.20.tar.gz
tar xzf srcache-nginx-module-0.33.tar.gzcd nginx-1.26.1/
./configure --prefix=/usr/local/nginx --user=nginx --group=nginx --with-http_ssl_module --with-http_v2_module --with-http_realip_module --with-http_stub_status_module --with-http_gzip_static_module --with-pcre --with-stream --with-stream_ssl_module --with-stream_realip_module --add-module=/root/memc-nginx-module-0.20 --add-module=/root/echo-nginx-module-0.63 --add-module=/root/srcache-nginx-module-0.33make編譯后不需要make install
#關閉nginx
systemctl stop nginx.service#使用新的nginx覆蓋掉舊的即可
cd objs/
cp nginx /usr/local/nginx/sbin/#編輯配置文件
vim /usr/local/nginx/conf.d/vhosts.confupstream memcache{server 127.0.0.1:11211;keepalive 512;
}server{listen 80;server_name www.test.org;location /memc {internal;memc_connect_timeout 100ms;memc_send_timeout 100ms;memc_read_timeout 100ms;set $memc_key $query_string;set $memc_exptime 300;memc_pass memcache;}location ~ \.php$ {set $key $uri$args;srcache_fetch GET /memc $key;srcache_store PUT /memc $key;fastcgi_pass 127.0.0.1:9000;fastcgi_index index.php;fastcgi_param SCRIPT_FILRNAME /scripts$fastcgi_script_name;include fastcgi.conf;}
}
測試
#壓測測試
#配置高速緩存前
[root@webserver conf.d]# ab -n10000 -c500 http://www.test.org/index.phpServer Software:        nginx/1.26.1
Server Hostname:        www.test.org
Server Port:            80Document Path:          /index.php
Document Length:        75004 bytesConcurrency Level:      500
Time taken for tests:   2.098 seconds
Complete requests:      10000
Failed requests:        1006(Connect: 0, Receive: 0, Length: 1006, Exceptions: 0)
Total transferred:      751888304 bytes
HTML transferred:       750038398 bytes
Requests per second:    4767.55 [#/sec] (mean)
Time per request:       104.876 [ms] (mean)
Time per request:       0.210 [ms] (mean, across all concurrent requests)
Transfer rate:          350064.85 [Kbytes/sec] received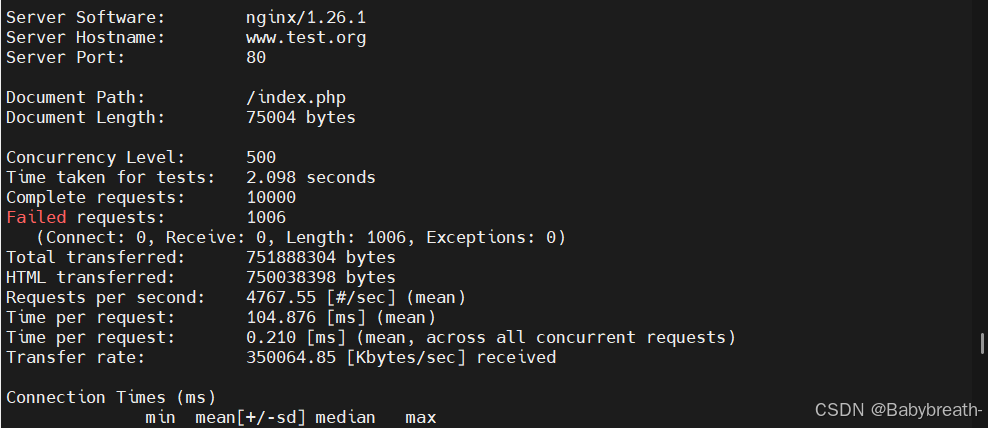
#配置php高速緩存后
[root@webserver conf.d]# ab -n10000 -c500 http://www.test.org/index.phpServer Software:        nginx/1.26.1
Server Hostname:        www.test.org
Server Port:            80Document Path:          /index.php
Document Length:        75003 bytesConcurrency Level:      500
Time taken for tests:   1.118 seconds
Complete requests:      10000
Failed requests:        0
Total transferred:      752130000 bytes
HTML transferred:       750030000 bytes
Requests per second:    8945.84 [#/sec] (mean)
Time per request:       55.892 [ms] (mean)
Time per request:       0.112 [ms] (mean, across all concurrent requests)
Transfer rate:          657073.70 [Kbytes/sec] received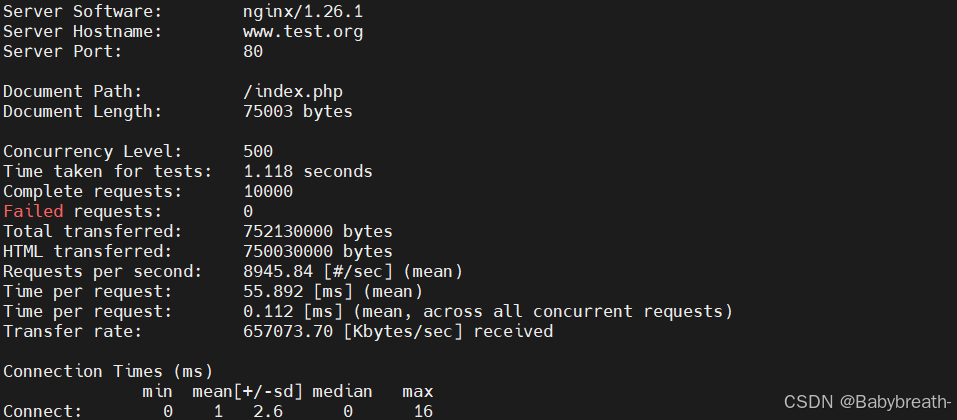
nginx二次開發版本
編譯安裝 openresty
tar zxf openresty-1.25.3.1.tar.gzcd openresty-1.25.3.1/./configure --prefix=/apps/openresty #此處可以自定義安裝路徑
--user=nginx
--group=nginx
--with-http_ssl_module
--with-http_v2_module
--with-http_realip_module
--with-http_stub_status_module
--with-http_gzip_static_module
--with-pcre
--with-stream
--with-stream_ssl_module
--with-stream_realip_modulegmake
gmake install#添加環境變量
vim ~/.bash_profile# .bash_profile# Get the aliases and functions
if [ -f ~/.bashrc ]; then. ~/.bashrc
fi# User specific environment and startup programsexport PATH=$PATH:/usr/local/nginx/sbin:/usr/local/php/bin:/apps/openresty/bin
#加入openresty的實際的安裝目錄下的bin /apps/openresty/binsource ~/.bash_profile#查看版本
[root@webserver openresty]# openresty -V
nginx version: openresty/1.25.3.1
built by gcc 11.4.1 20230605 (Red Hat 11.4.1-2) (GCC)
built with OpenSSL 3.0.7 1 Nov 2022
TLS SNI support enabled
configure arguments: --prefix=/apps/openresty/nginx --with-cc-opt=-O2 --add-module=../ngx_devel_kit-0.3.3 --add-module=../echo-nginx-module-0.63 --add-module=../xss-nginx-module-0.06 --add-module=../ngx_coolkit-0.2 --add-module=../set-misc-nginx-module-0.33 --add-module=../form-input-nginx-module-0.12 --add-module=../encrypted-session-nginx-module-0.09 --add-module=../srcache-nginx-module-0.33 --add-module=../ngx_lua-0.10.26 --add-module=../ngx_lua_upstream-0.07 --add-module=../headers-more-nginx-module-0.37 --add-module=../array-var-nginx-module-0.06 --add-module=../memc-nginx-module-0.20 --add-module=../redis2-nginx-module-0.15 --add-module=../redis-nginx-module-0.3.9 --add-module=../rds-json-nginx-module-0.16 --add-module=../rds-csv-nginx-module-0.09 --add-module=../ngx_stream_lua-0.0.14 --with-ld-opt=-Wl,-rpath,/apps/openresty/luajit/lib --user=nginx --group=nginx --with-http_ssl_module --with-http_v2_module --with-http_realip_module --with-http_stub_status_module --with-http_gzip_static_module --with-pcre --with-stream --with-stream_ssl_module --with-stream_realip_module --with-stream --without-pcre2 --with-stream_ssl_preread_module#啟動服務
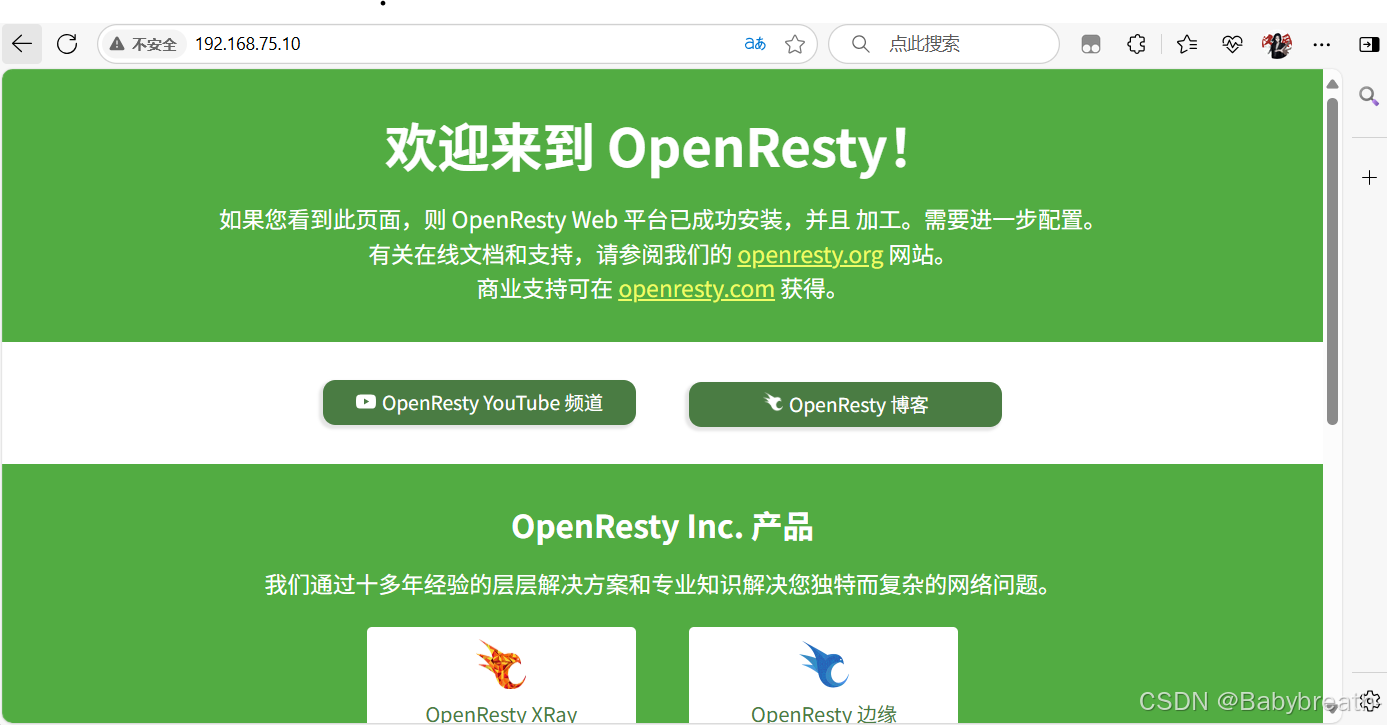
openresty瀏覽器訪問測試


![[找出字符串中第一個匹配項的下標]](http://pic.xiahunao.cn/[找出字符串中第一個匹配項的下標])
)
)


)


)


