1.運行環境
| 主機 | 主機名 | 系統 | 服務 |
| 192.168.75.154 | Server-Web | Linux | Web |
| 192.168.75.155 | Server-NFS-DNS | Linux | NFS/DNS |
2.基礎配置
配置主機名,靜態IP地址
開啟防火墻并配置
部分開啟SElinux并配置
服務器之間使用同ntp.aliyun.com進行時間同步
服務器之間使用用ntp.aliyun.com進行時間同步
服務器之間實現SSH免密登錄
3.業務需求
Server-NFS-DNS主機配置NFS服務器,將博客網站資源文件共享給Server-Web主機,Server-NFS-DNS主機配置DNS
Server-Web主機配置web服務,通過域名www.wp.com可以訪問到自建的博客網站
4.準備工作
4.1配置靜態IP
master端:
[root@master ~]# nmcli c modify ens32 ipv4.method manual  ipv4.addresses '192.168.75.154/24'  ipv4.gateway '192.168.75.2'  ipv4.dns  '114.114.114.114'
[root@master ~]# nmcli c reload
[root@master ~]# nmcli c up  ens32
node1端:
[root@node1 ~]# nmcli c modify ens32 ipv4.method manual  ipv4.addresses '192.168.75.155/24'  ipv4.gateway '192.168.75.2'  ipv4.dns  '114.114.114.114'
[root@node1 ~]# nmcli c reload
[root@node1 ~]# nmcli c up  ens32
4.2修改主機名及hosts映射
Server-Web端:
[root@master ~]# hostnamectl set-hostname Server-Web
[root@master ~]# bash
[root@Server-Web ~]# vim /etc/hosts
127.0.0.1   localhost localhost.localdomain localhost4 localhost4.localdomain4
::1         localhost localhost.localdomain localhost6 localhost6.localdomain6
192.168.75.154   Server-Web
192.168.75.155   Server-NFS-DNS
?Server-NFS-DNS端:
[root@node1 ~]# hostnamectl set-hostname Server-NFS-DNS
[root@node1 ~]# bash
[root@Server-NFS-DNS ~]# vim /etc/hosts
127.0.0.1   localhost localhost.localdomain localhost4 localhost4.localdomain4
::1         localhost localhost.localdomain localhost6 localhost6.localdomain6
192.168.75.154  Server-Web
192.168.75.155  Server-NFS-DNS
4.3開啟防火墻
Server-Web端:
[root@Server-Web ~]# systemctl enable --now firewalld
Created symlink /etc/systemd/system/dbus-org.fedoraproject.FirewallD1.service → /usr/lib/systemd/system/firewalld.service.
Created symlink /etc/systemd/system/multi-user.target.wants/firewalld.service → /usr/lib/systemd/system/firewalld.service.
Server-NFS-DNS端:
[root@Server-NFS-DNS ~]# systemctl enable --now firewalld
Created symlink /etc/systemd/system/dbus-org.fedoraproject.FirewallD1.service → /usr/lib/systemd/system/firewalld.service.
Created symlink /etc/systemd/system/multi-user.target.wants/firewalld.service → /usr/lib/systemd/system/firewalld.service.
4.4時間同步
Server-Web端:
[root@Server-Web ~]# vim /etc/chrony.conf    #修改第三行
server ntp.aliyun.com iburst
[root@Server-Web ~]# systemctl restart chronyd
[root@Server-Web ~]# chronyc sources -v.-- Source mode  '^' = server, '=' = peer, '#' = local clock./ .- Source state '*' = current best, '+' = combined, '-' = not combined,
| /             'x' = may be in error, '~' = too variable, '?' = unusable.
||                                                 .- xxxx [ yyyy ] +/- zzzz
||      Reachability register (octal) -.           |  xxxx = adjusted offset,
||      Log2(Polling interval) --.      |          |  yyyy = measured offset,
||                                \     |          |  zzzz = estimated error.
||                                 |    |           \
MS Name/IP address         Stratum Poll Reach LastRx Last sample
===============================================================================
^* 203.107.6.88                  2   6    17     5  -5090us[-4621us] +/-   37ms
[root@Server-Web ~]# date
2025年 07月 27日 星期日 18:08:35 CST
Server-NFS-DNS端:
[root@Server-NFS-DNS ~]# vim /etc/chrony.conf
server ntp.aliyun.com iburst
[root@Server-NFS-DNS ~]# systemctl restart chronyd
[root@Server-NFS-DNS ~]# chronyc sources -v.-- Source mode  '^' = server, '=' = peer, '#' = local clock./ .- Source state '*' = current best, '+' = combined, '-' = not combined,
| /             'x' = may be in error, '~' = too variable, '?' = unusable.
||                                                 .- xxxx [ yyyy ] +/- zzzz
||      Reachability register (octal) -.           |  xxxx = adjusted offset,
||      Log2(Polling interval) --.      |          |  yyyy = measured offset,
||                                \     |          |  zzzz = estimated error.
||                                 |    |           \
MS Name/IP address         Stratum Poll Reach LastRx Last sample
===============================================================================
^* 203.107.6.88                  2   6    17     8    +16us[ +486us] +/-   31ms
[root@Server-NFS-DNS ~]# date
2025年 07月 27日 星期日 18:09:51 CST
4.5配置免密ssh登錄
Server-Web端:
[root@Server-Web ~]# ssh-keygen -t rsa     #生成公鑰私鑰,一路回車
Generating public/private rsa key pair.
Enter file in which to save the key (/root/.ssh/id_rsa):
Created directory '/root/.ssh'.
Enter passphrase (empty for no passphrase):
Enter same passphrase again:
Your identification has been saved in /root/.ssh/id_rsa
Your public key has been saved in /root/.ssh/id_rsa.pub
The key fingerprint is:
SHA256:BmrsJaPrUhQnHAaRgjFFJA9Sg5Bpq3TtYBP1FSMaGQI root@Server-Web
The key's randomart image is:
+---[RSA 3072]----+
|%EXo.+o. +.      |
|OB+oo.+ o .      |
|o o+o...         |
| o.* o .         |
|o.o X . S        |
|. .+ = .         |
| .. .            |
|.  .             |
| oo              |
+----[SHA256]-----+
[root@Server-Web ~]# ssh-copy-id 192.168.75.155
/usr/bin/ssh-copy-id: INFO: Source of key(s) to be installed: "/root/.ssh/id_rsa.pub"
The authenticity of host '192.168.75.155 (192.168.75.155)' can't be established.
ED25519 key fingerprint is SHA256:C956Oy13qc7K4u0BsOU0sFnkMCIITeWu/OG37KN/g8M.
This key is not known by any other names
Are you sure you want to continue connecting (yes/no/[fingerprint])? yes    #輸入yes
/usr/bin/ssh-copy-id: INFO: attempting to log in with the new key(s), to filter out any that are already installed
/usr/bin/ssh-copy-id: INFO: 1 key(s) remain to be installed -- if you are prompted now it is to install the new keysAuthorized users only. All activities may be monitored and reported.
root@192.168.75.155's password:                     #輸入密碼123Number of key(s) added: 1Now try logging into the machine, with:   "ssh '192.168.75.155'"
and check to make sure that only the key(s) you wanted were added.[root@Server-Web ~]# ssh root@192.168.75.155
[root@Server-NFS-DNS ~]# 注銷
Connection to 192.168.75.155 closed.
[root@Server-Web ~]#
?Server-NFS-DNS端:
[root@Server-NFS-DNS ~]# ssh-keygen -t rsa     #生成公鑰私鑰,一路回車
Generating public/private rsa key pair.
Enter file in which to save the key (/root/.ssh/id_rsa):
Enter passphrase (empty for no passphrase):
Enter same passphrase again:
Your identification has been saved in /root/.ssh/id_rsa
Your public key has been saved in /root/.ssh/id_rsa.pub
The key fingerprint is:
SHA256:cEu+8trkEH2wKG3RRCVw7pKwfy2BTZopPTQdlZZdq/4 root@Server-NFS-DNS
The key's randomart image is:
+---[RSA 3072]----+
|      .o*oo+ ..  |
|       * o+ .  . |
|    . = O.    .  |
|     * ^ +   .   |
|    + # S . .    |
|     = + = .     |
|      + = . .    |
|       O .   .   |
|      ..+     E  |
+----[SHA256]-----+
[root@Server-NFS-DNS ~]# ssh-copy-id 192.168.75.154
/usr/bin/ssh-copy-id: INFO: Source of key(s) to be installed: "/root/.ssh/id_rsa.pub"
The authenticity of host '192.168.75.154 (192.168.75.154)' can't be established.
ED25519 key fingerprint is SHA256:v5NN8DUNHZVB+SwY/sB92f4DQshbsJAV58mz9TMbCb4.
This key is not known by any other names
Are you sure you want to continue connecting (yes/no/[fingerprint])? yes   #輸入yes
/usr/bin/ssh-copy-id: INFO: attempting to log in with the new key(s), to filter out any that are already installed
/usr/bin/ssh-copy-id: INFO: 1 key(s) remain to be installed -- if you are prompted now it is to install the new keysAuthorized users only. All activities may be monitored and reported.
root@192.168.75.154's password:             #輸入密碼123Number of key(s) added: 1Now try logging into the machine, with:   "ssh '192.168.75.154'"
and check to make sure that only the key(s) you wanted were added.[root@Server-NFS-DNS ~]# ssh root@192.168.75.154
[root@Server-Web ~]# 注銷
Connection to 192.168.75.154 closed.
[root@Server-NFS-DNS ~]#
5.環境搭建
5.1Server-Web端安裝LNMP環境軟件
[root@Server-Web ~]# yum install nginx php* mariadb-server -y
5.2Server-NFS-DNS端上傳博客軟件
網址:https://cn.wordpress.org/,下載后為zip壓縮文件
將wordpress上傳到192.168.75.155(Server-NFS-DNS)端的/目錄下
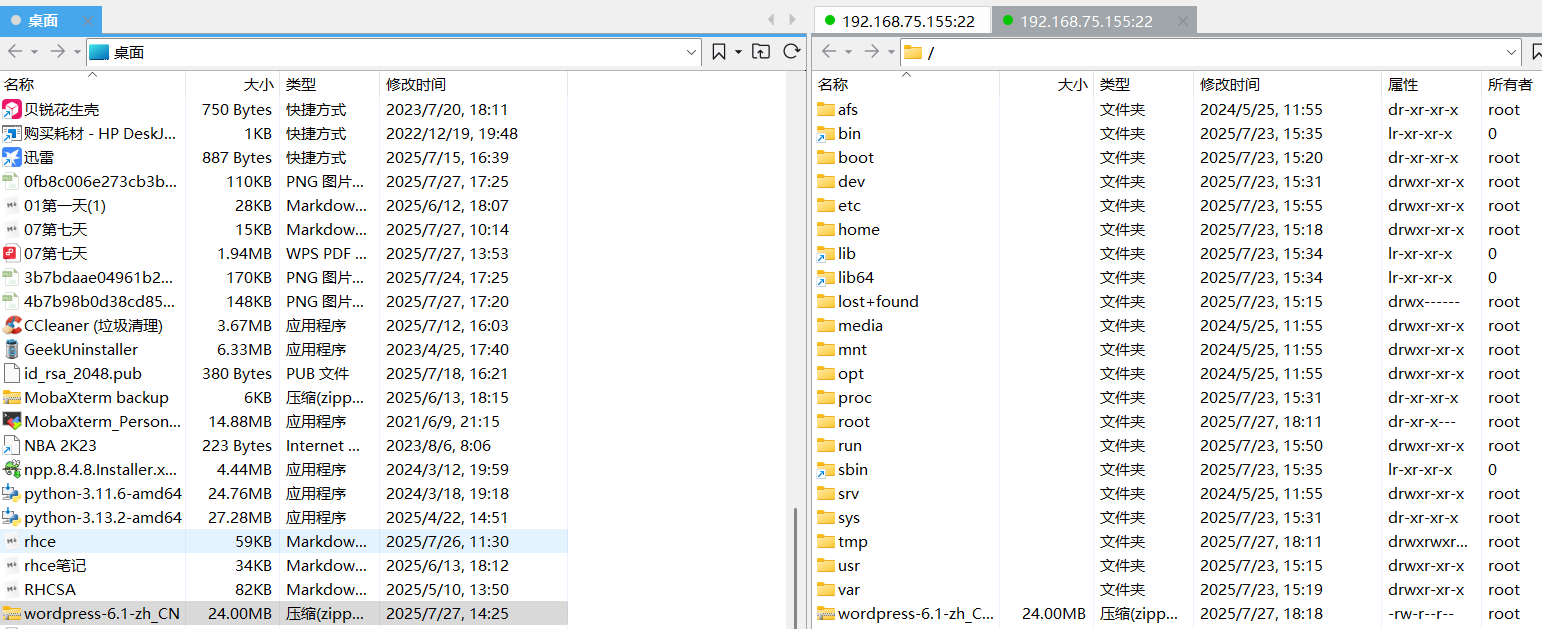
解壓縮:
[root@Server-NFS-DNS /]# unzip wordpress-6.1-zh_CN.zip
5.3Server-NFS-DNS端設置NFS共享
目的:將Server-NFS-DNS端的/wordpress目錄共享給192.168.75.154(Server-Web)
[root@Server-NFS-DNS wordpress]# yum install rpcbind  -y
[root@Server-NFS-DNS wordpress]# yum install nfs-utils  -y
[root@Server-NFS-DNS /]# vim /etc/exports        #編輯配置文件
/wordpress	192.168.75.154(rw,all_squash,sync)   #添加
[root@Server-NFS-DNS /]# chmod -R  777 /wordpress #設置權限
#防火墻添加服務放行
[root@Server-NFS-DNS /]# firewall-cmd --permanent --zone=public --add-service=mountd
success
[root@Server-NFS-DNS /]# firewall-cmd --permanent --zone=public --add-service=rpc-bind
success
[root@Server-NFS-DNS /]# firewall-cmd --permanent --zone=public --add-service=nfssuccess
[root@Server-NFS-DNS /]# firewall-cmd --reload
success
[root@Server-NFS-DNS /]# firewall-cmd --list-all
public (active)target: defaulticmp-block-inversion: nointerfaces: ens32sources: services: dhcpv6-client mdns mountd nfs rpc-bind sshports: protocols: forward: yesmasquerade: noforward-ports: source-ports: icmp-blocks: rich rules:
#啟動服務
[root@Server-NFS-DNS /]# systemctl restart rpcbind
[root@Server-NFS-DNS /]# systemctl start nfs-server
5.4Server-Web設置
5.4.1掛載遠程共享目錄
[root@Server-Web ~]# yum install rpcbind  -y
[root@Server-Web ~]# yum install nfs-utils  -y
[root@Server-Web ~]# showmount -e 192.168.75.155  #查看
Export list for 192.168.75.155:
/wordpress 192.168.75.154
[root@Server-Web ~]# mkdir /wp              #新建本地掛載目錄
[root@Server-Web ~]# mount -t nfs 192.168.75.155:/wordpress  /wp    #掛載
[root@Server-Web ~]# cd /wp
[root@Server-Web wp]# ls
index.php             wp-config-sample.php  wp-mail.php
license.txt           wp-content            wp-settings.php
readme.html           wp-cron.php           wp-signup.php
wp-activate.php       wp-includes           wp-trackback.php
wp-admin              wp-links-opml.php     xmlrpc.php
wp-blog-header.php    wp-load.php
wp-comments-post.php  wp-login.php
5.4.2nginx設置
[root@Server-Web wp]# cd ~
[root@Server-Web ~]# firewall-cmd --permanent --zone public --add-service=http  # 放行
[root@Server-Web ~]# firewall-cmd --reload
[root@Server-Web ~]# vim  /etc/nginx/nginx.conf    # 編輯nginx配置文件root         /wp;
5.4.3修改wordpress配置文件
[root@Server-Web ~]# cd  /wp
[root@Server-Web wp]# cp  wp-config-sample.php  wp-config.php   # 根據模板拷貝配置文件# 編輯wp-config.php配置文件
[root@Server-Web wp]# vim  wp-config.php
# 定位23行修改后半部分
define('DB_NAME', 'wordpress'); # WordPress數據庫的名稱define('DB_USER', 'jeams');     # MySQL數據庫用戶名define('DB_PASSWORD', '123456');  # MySQL數據庫密碼
5.4.5啟動數據庫
[root@Server-Web ~]# systemctl start mariadb5.4.6在數據庫中創建數據庫和用戶
[root@Server-Web ~]# mysql
Welcome to the MariaDB monitor.  Commands end with ; or \g.
Your MariaDB connection id is 3
Server version: 10.5.29-MariaDB MariaDB ServerCopyright (c) 2000, 2018, Oracle, MariaDB Corporation Ab and others.Type 'help;' or '\h' for help. Type '\c' to clear the current input statement.MariaDB [(none)]> create database wordpress;    # 創建數據庫,尾部有分號
Query OK, 1 row affected (0.000 sec)# 第一個''為數據庫賬號,@后面的''內容為數據庫可以登錄的地址,localhost意為只能本機登錄。用戶和密碼與wordpress配置文件一樣
MariaDB [(none)]> create user 'jeams'@'localhost' identified by '123456';
Query OK, 0 rows affected (0.001 sec)# 給用戶授權
MariaDB [(none)]> grant all on wordpress.* to 'jeams'@'localhost';
Query OK, 0 rows affected (0.001 sec)MariaDB [(none)]> exit
Bye
5.4.7重啟數據庫和http
[root@Server-Web ~]# systemctl restart mariadb
[root@Server-Web ~]# systemctl restart nginx
5.5測試
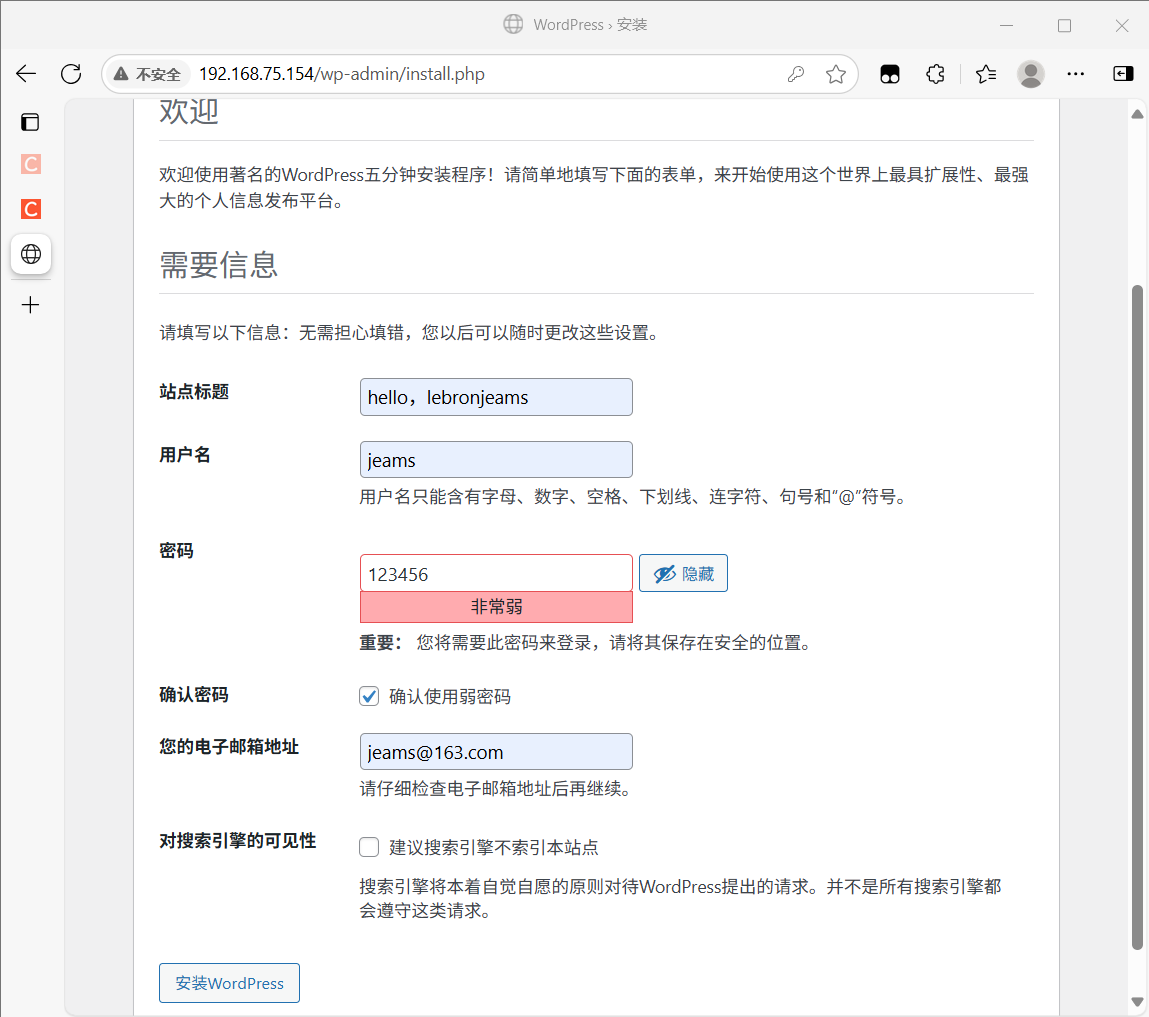
在windows端輸入192.168.75.154繼續完成wordpress配置(郵箱必須設置)
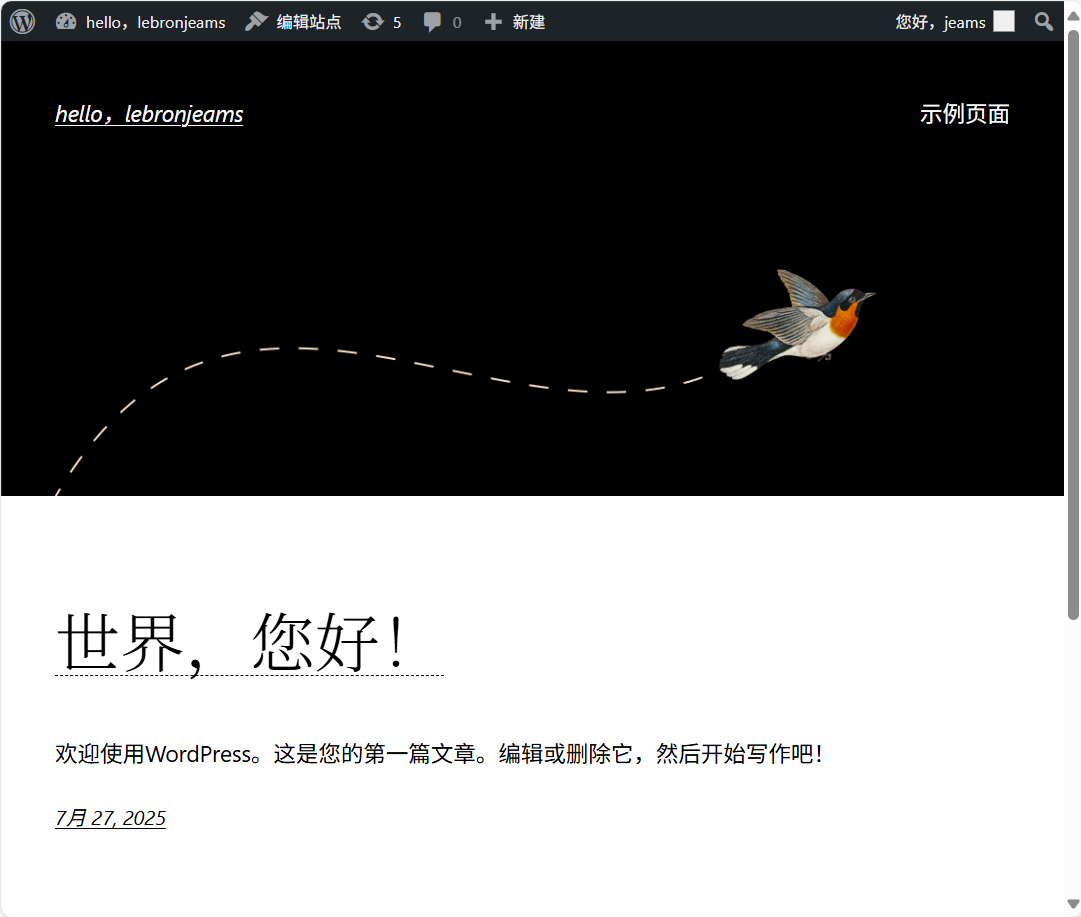
成功界面:
5.6在Server-NFS-DNS端配置DNS
5.6.1原則:www.wp.com正向解析為192.168.75.154
安裝:
[root@Server-NFS-DNS ~]# yum install bind -y
[root@Server-NFS-DNS ~]# firewall-cmd --permanent --zone public --add-service=dns  # 防火墻放行
success
[root@Server-NFS-DNS /]# firewall-cmd --reload
success
[root@Server-NFS-DNS /]# firewall-cmd --list-all
public (active)target: defaulticmp-block-inversion: nointerfaces: ens32sources: services: dhcpv6-client dns mdns mountd nfs rpc-bind sshports: protocols: forward: yesmasquerade: noforward-ports: source-ports: icmp-blocks: rich rules:
5.6.3編輯主配置文件
[root@Server-NFS-DNS ~]# vim  /etc/named.conf# 第11  19行修改為any任意主機
11         listen-on port 53 { any; };19         allow-query     { any; };
5.6.4修改區域配置文件
[root@Server-NFS-DNS ~]# vim /etc/named.rfc1912.zoneszone "jeams.com" IN {type master;file "jeams.com.zone";allow-update { none; };
};
5.6.5新建區域數據文件并配置解析
[root@Server-NFS-DNS /]# cd /var/named/
[root@Server-NFS-DNS named]# ls
data  dynamic  named.ca  named.empty  named.localhost  named.loopback  slaves
[root@Server-NFS-DNS named]# cp -a named.localhost jeams.com.zone
[root@Server-NFS-DNS named]# vim jeams.com.zone
$TTL 1D
jeams.com.	IN SOA	ns.jeams.com. jeams.163.com. (0	; serial1D	; refresh1H	; retry1W	; expire3H )	; minimum
jeams.com.		IN	NS	ns.jeams.com.
ns.jeams.com.	IN	A	192.168.75.155
www.jeams.com.	IN	A	192.168.75.154
5.6.5啟動服務
[root@Server-NFS-DNS named]# systemctl restart named5.6.6測試
將Server-Web端的DNS改為192.168.75.155后并輸入www.wp.com域名訪問
[root@Server-Web ~]# curl www.jeams.com
<!DOCTYPE html>
<html lang="zh-CN">
<head><meta charset="UTF-8" /><meta name="viewport" content="width=device-width, initial-scale=1" />
<meta name='robots' content='max-image-preview:large' />
<title>hello,lebronjeams</title>
<link rel='dns-prefetch' href='//192.168.75.154' />
<link rel="alternate" type="application/rss+xml" title="hello,lebronjeams » Feed" href="http://192.168.75.154/index.php/feed/" />
<link rel="alternate" type="application/rss+xml" title="hello,lebronjeams » 評論Feed" href="http://192.168.75.154/index.php/comments/feed/" />

)

的完整流程)


![[2025CVPR-圖象超分辨方向]DORNet:面向退化的正則化網絡,用于盲深度超分辨率](http://pic.xiahunao.cn/[2025CVPR-圖象超分辨方向]DORNet:面向退化的正則化網絡,用于盲深度超分辨率)


2025年7月底測試好用:從理論到實踐的完整技術方案)
)


![[10月考試] F](http://pic.xiahunao.cn/[10月考試] F)
