
個人名片:

🐼作者簡介:一名大三在校生,喜歡AI編程🎋
🐻???個人主頁🥇:落798.
🐼個人WeChat:hmmwx53
🕊?系列專欄:🖼?
- 零基礎學Java——小白入門必備🔥
- 重識C語言——復習回顧🔥
- 計算機網絡體系———深度詳講
- HCIP數通工程師-刷題與實戰🔥🔥🔥
- 微信小程序開發——實戰開發🔥
- HarmonyOS 4.0 應用開發實戰——實戰開發🔥🔥🔥
- Redis快速入門到精通——實戰開發🔥🔥🔥
- RabbitMQ快速入門🔥
🐓每日一句:🍭我很忙,但我要忙的有意義!
歡迎評論 💬點贊👍🏻 收藏 📂加關注+
文章目錄
- 原理-手寫IoC
- 4.1、回顧Java反射
- 4.2、實現Spring的IoC
- 寫在后面🔥🔥🔥:
- 歡迎添加微信,加入我的核心小隊,請備注來意
原理-手寫IoC
IoC(Inversion of Control,控制反轉)是一種設計原則,它的核心思想是將組件之間的依賴關系從組件內部轉移到外部。在傳統的程序設計中,組件(如類或模塊)通常在內部創建或查找其依賴的其他組件。而在IoC中,這些依賴關系由外部容器或框架在運行時注入,從而實現了解耦。
手寫一個簡單的IoC容器的基本步驟如下:
-
定義組件接口:首先,你需要定義一個或多個接口,這些接口將被組件實現,以便容器可以管理它們。
-
創建容器類:容器類負責管理組件的實例化、配置和依賴注入。
-
注冊組件:允許用戶向容器中注冊組件,指定它們的類型和實現。
-
解析依賴:當請求某個組件時,容器將解析并注入所有必要的依賴。
-
實例化組件:容器負責根據注冊的信息實例化組件。
Spring框架的IOC是基于Java反射機制實現的,下面我們先回顧一下java反射。
4.1、回顧Java反射
Java反射機制是在運行狀態中,對于任意一個類,都能夠知道這個類的所有屬性和方法;對于任意一個對象,都能夠調用它的任意方法和屬性;這種動態獲取信息以及動態調用對象方法的功能稱為Java語言的反射機制。簡單來說,反射機制指的是程序在運行時能夠獲取自身的信息。
要想解剖一個類,必須先要獲取到該類的Class對象。而剖析一個類或用反射解決具體的問題就是使用相關API**(1)java.lang.Class(2)java.lang.reflect**,所以,Class對象是反射的根源。
自定義類
package com.atguigu.reflect;public class Car {//屬性private String name;private int age;private String color;//無參數構造public Car() {}//有參數構造public Car(String name, int age, String color) {this.name = name;this.age = age;this.color = color;}//普通方法private void run() {System.out.println("私有方法-run.....");}//get和set方法public String getName() {return name;}public void setName(String name) {this.name = name;}public int getAge() {return age;}public void setAge(int age) {this.age = age;}public String getColor() {return color;}public void setColor(String color) {this.color = color;}@Overridepublic String toString() {return "Car{" +"name='" + name + '\'' +", age=" + age +", color='" + color + '\'' +'}';}
}
編寫測試類
package com.atguigu.reflect;import org.junit.jupiter.api.Test;
import java.lang.reflect.Constructor;
import java.lang.reflect.Field;
import java.lang.reflect.Method;public class TestCar {//1、獲取Class對象多種方式@Testpublic void test01() throws Exception {//1 類名.classClass clazz1 = Car.class;//2 對象.getClass()Class clazz2 = new Car().getClass();//3 Class.forName("全路徑")Class clazz3 = Class.forName("com.atguigu.reflect.Car");//實例化Car car = (Car)clazz3.getConstructor().newInstance();System.out.println(car);}//2、獲取構造方法@Testpublic void test02() throws Exception {Class clazz = Car.class;//獲取所有構造// getConstructors()獲取所有public的構造方法
//        Constructor[] constructors = clazz.getConstructors();// getDeclaredConstructors()獲取所有的構造方法public  privateConstructor[] constructors = clazz.getDeclaredConstructors();for (Constructor c:constructors) {System.out.println("方法名稱:"+c.getName()+" 參數個數:"+c.getParameterCount());}//指定有參數構造創建對象//1 構造public
//        Constructor c1 = clazz.getConstructor(String.class, int.class, String.class);
//        Car car1 = (Car)c1.newInstance("夏利", 10, "紅色");
//        System.out.println(car1);//2 構造privateConstructor c2 = clazz.getDeclaredConstructor(String.class, int.class, String.class);c2.setAccessible(true);Car car2 = (Car)c2.newInstance("捷達", 15, "白色");System.out.println(car2);}//3、獲取屬性@Testpublic void test03() throws Exception {Class clazz = Car.class;Car car = (Car)clazz.getDeclaredConstructor().newInstance();//獲取所有public屬性//Field[] fields = clazz.getFields();//獲取所有屬性(包含私有屬性)Field[] fields = clazz.getDeclaredFields();for (Field field:fields) {if(field.getName().equals("name")) {//設置允許訪問field.setAccessible(true);field.set(car,"五菱宏光");System.out.println(car);}System.out.println(field.getName());}}//4、獲取方法@Testpublic void test04() throws Exception {Car car = new Car("奔馳",10,"黑色");Class clazz = car.getClass();//1 public方法Method[] methods = clazz.getMethods();for (Method m1:methods) {//System.out.println(m1.getName());//執行方法 toStringif(m1.getName().equals("toString")) {String invoke = (String)m1.invoke(car);//System.out.println("toString執行了:"+invoke);}}//2 private方法Method[] methodsAll = clazz.getDeclaredMethods();for (Method m:methodsAll) {//執行方法 runif(m.getName().equals("run")) {m.setAccessible(true);m.invoke(car);}}}
}
4.2、實現Spring的IoC
我們知道,IoC(控制反轉)和DI(依賴注入)是Spring里面核心的東西,那么,我們如何自己手寫出這樣的代碼呢?下面我們就一步一步寫出Spring框架最核心的部分。
①搭建子模塊
搭建模塊:guigu-spring,搭建方式如其他spring子模塊
②準備測試需要的bean
添加依賴
<dependencies><!--junit5測試--><dependency><groupId>org.junit.jupiter</groupId><artifactId>junit-jupiter-api</artifactId><version>5.3.1</version></dependency>
</dependencies>
創建UserDao接口
package com.atguigu.spring6.test.dao;public interface UserDao {public void print();
}
創建UserDaoImpl實現
package com.atguigu.spring6.test.dao.impl;import com.atguigu.spring.dao.UserDao;public class UserDaoImpl implements UserDao {@Overridepublic void print() {System.out.println("Dao層執行結束");}
}
創建UserService接口
package com.atguigu.spring6.test.service;public interface UserService {public void out();
}
創建UserServiceImpl實現類
package com.atguigu.spring.test.service.impl;import com.atguigu.spring.core.annotation.Bean;
import com.atguigu.spring.service.UserService;@Bean
public class UserServiceImpl implements UserService {//    private UserDao userDao;@Overridepublic void out() {//userDao.print();System.out.println("Service層執行結束");}
}
③定義注解
我們通過注解的形式加載bean與實現依賴注入
bean注解
package com.atguigu.spring.core.annotation;import java.lang.annotation.ElementType;
import java.lang.annotation.Retention;
import java.lang.annotation.RetentionPolicy;
import java.lang.annotation.Target;@Target(ElementType.TYPE)
@Retention(RetentionPolicy.RUNTIME)
public @interface Bean {
}
依賴注入注解
package com.atguigu.spring.core.annotation;import java.lang.annotation.ElementType;
import java.lang.annotation.Retention;
import java.lang.annotation.RetentionPolicy;
import java.lang.annotation.Target;@Target({ElementType.FIELD})
@Retention(RetentionPolicy.RUNTIME)
public @interface Di {
}
說明:上面兩個注解可以隨意取名
④定義bean容器接口
package com.atguigu.spring.core;public interface ApplicationContext {Object getBean(Class clazz);
}
⑤編寫注解bean容器接口實現
AnnotationApplicationContext基于注解掃描bean
package com.atguigu.spring.core;import java.util.HashMap;public class AnnotationApplicationContext implements ApplicationContext {//存儲bean的容器private HashMap<Class, Object> beanFactory = new HashMap<>();@Overridepublic Object getBean(Class clazz) {return beanFactory.get(clazz);}/*** 根據包掃描加載bean* @param basePackage*/public AnnotationApplicationContext(String basePackage) {}
}
⑥編寫掃描bean邏輯
我們通過構造方法傳入包的base路徑,掃描被@Bean注解的java對象,完整代碼如下:
package com.atguigu.spring.core;import com.atguigu.spring.core.annotation.Bean;import java.io.File;
import java.util.HashMap;public class AnnotationApplicationContext implements ApplicationContext {//存儲bean的容器private HashMap<Class, Object> beanFactory = new HashMap<>();private static String rootPath;@Overridepublic Object getBean(Class clazz) {return beanFactory.get(clazz);}/*** 根據包掃描加載bean* @param basePackage*/public AnnotationApplicationContext(String basePackage) {try {String packageDirName = basePackage.replaceAll("\\.", "\\\\");Enumeration<URL> dirs =Thread.currentThread().getContextClassLoader().getResources(packageDirName);while (dirs.hasMoreElements()) {URL url = dirs.nextElement();String filePath = URLDecoder.decode(url.getFile(),"utf-8");rootPath = filePath.substring(0, filePath.length()-packageDirName.length());loadBean(new File(filePath));}} catch (Exception e) {throw new RuntimeException(e);}}private  void loadBean(File fileParent) {if (fileParent.isDirectory()) {File[] childrenFiles = fileParent.listFiles();if(childrenFiles == null || childrenFiles.length == 0){return;}for (File child : childrenFiles) {if (child.isDirectory()) {//如果是個文件夾就繼續調用該方法,使用了遞歸loadBean(child);} else {//通過文件路徑轉變成全類名,第一步把絕對路徑部分去掉String pathWithClass = child.getAbsolutePath().substring(rootPath.length() - 1);//選中class文件if (pathWithClass.contains(".class")) {//    com.xinzhi.dao.UserDao//去掉.class后綴,并且把 \ 替換成 .String fullName = pathWithClass.replaceAll("\\\\", ".").replace(".class", "");try {Class<?> aClass = Class.forName(fullName);//把非接口的類實例化放在map中if(!aClass.isInterface()){Bean annotation = aClass.getAnnotation(Bean.class);if(annotation != null){Object instance = aClass.newInstance();//判斷一下有沒有接口if(aClass.getInterfaces().length > 0) {//如果有接口把接口的class當成key,實例對象當成valueSystem.out.println("正在加載【"+ aClass.getInterfaces()[0] +"】,實例對象是:" + instance.getClass().getName());beanFactory.put(aClass.getInterfaces()[0], instance);}else{//如果有接口把自己的class當成key,實例對象當成valueSystem.out.println("正在加載【"+ aClass.getName() +"】,實例對象是:" + instance.getClass().getName());beanFactory.put(aClass, instance);}}}} catch (ClassNotFoundException | IllegalAccessException | InstantiationException e) {e.printStackTrace();}}}}}}}
⑦java類標識Bean注解
@Bean
public class UserServiceImpl implements UserService
@Bean
public class UserDaoImpl implements UserDao
⑧測試Bean加載
package com.atguigu.spring;import com.atguigu.spring.core.AnnotationApplicationContext;
import com.atguigu.spring.core.ApplicationContext;
import com.atguigu.spring.test.service.UserService;
import org.junit.jupiter.api.Test;public class SpringIocTest {@Testpublic void testIoc() {ApplicationContext applicationContext = new AnnotationApplicationContext("com.atguigu.spring.test");UserService userService = (UserService)applicationContext.getBean(UserService.class);userService.out();System.out.println("run success");}
}
控制臺打印測試
⑨依賴注入
只要userDao.print();調用成功,說明就注入成功
package com.atguigu.spring.test.service.impl;import com.atguigu.spring.core.annotation.Bean;
import com.atguigu.spring.core.annotation.Di;
import com.atguigu.spring.dao.UserDao;
import com.atguigu.spring.service.UserService;@Bean
public class UserServiceImpl implements UserService {@Diprivate UserDao userDao;@Overridepublic void out() {userDao.print();System.out.println("Service層執行結束");}
}
執行第八步:報錯了,說明當前userDao是個空對象
⑩依賴注入實現
package com.atguigu.spring.core;import com.atguigu.spring.core.annotation.Bean;
import com.atguigu.spring.core.annotation.Di;import java.io.File;
import java.lang.reflect.Field;
import java.util.HashMap;
import java.util.Map;public class AnnotationApplicationContext implements ApplicationContext {//存儲bean的容器private HashMap<Class, Object> beanFactory = new HashMap<>();private static String rootPath;@Overridepublic Object getBean(Class clazz) {return beanFactory.get(clazz);}/*** 根據包掃描加載bean* @param basePackage*/public AnnotationApplicationContext(String basePackage) {try {String packageDirName = basePackage.replaceAll("\\.", "\\\\");Enumeration<URL> dirs =Thread.currentThread().getContextClassLoader().getResources(packageDirName);while (dirs.hasMoreElements()) {URL url = dirs.nextElement();String filePath = URLDecoder.decode(url.getFile(),"utf-8");rootPath = filePath.substring(0, filePath.length()-packageDirName.length());loadBean(new File(filePath));}} catch (Exception e) {throw new RuntimeException(e);}//依賴注入loadDi();}private  void loadBean(File fileParent) {if (fileParent.isDirectory()) {File[] childrenFiles = fileParent.listFiles();if(childrenFiles == null || childrenFiles.length == 0){return;}for (File child : childrenFiles) {if (child.isDirectory()) {//如果是個文件夾就繼續調用該方法,使用了遞歸loadBean(child);} else {//通過文件路徑轉變成全類名,第一步把絕對路徑部分去掉String pathWithClass = child.getAbsolutePath().substring(rootPath.length() - 1);//選中class文件if (pathWithClass.contains(".class")) {//    com.xinzhi.dao.UserDao//去掉.class后綴,并且把 \ 替換成 .String fullName = pathWithClass.replaceAll("\\\\", ".").replace(".class", "");try {Class<?> aClass = Class.forName(fullName);//把非接口的類實例化放在map中if(!aClass.isInterface()){Bean annotation = aClass.getAnnotation(Bean.class);if(annotation != null){Object instance = aClass.newInstance();//判斷一下有沒有接口if(aClass.getInterfaces().length > 0) {//如果有接口把接口的class當成key,實例對象當成valueSystem.out.println("正在加載【"+ aClass.getInterfaces()[0] +"】,實例對象是:" + instance.getClass().getName());beanFactory.put(aClass.getInterfaces()[0], instance);}else{//如果有接口把自己的class當成key,實例對象當成valueSystem.out.println("正在加載【"+ aClass.getName() +"】,實例對象是:" + instance.getClass().getName());beanFactory.put(aClass, instance);}}}} catch (ClassNotFoundException | IllegalAccessException | InstantiationException e) {e.printStackTrace();}}}}}}private void loadDi() {for(Map.Entry<Class,Object> entry : beanFactory.entrySet()){//就是咱們放在容器的對象Object obj = entry.getValue();Class<?> aClass = obj.getClass();Field[] declaredFields = aClass.getDeclaredFields();for (Field field : declaredFields){Di annotation = field.getAnnotation(Di.class);if( annotation != null ){field.setAccessible(true);try {System.out.println("正在給【"+obj.getClass().getName()+"】屬性【" + field.getName() + "】注入值【"+ beanFactory.get(field.getType()).getClass().getName() +"】");field.set(obj,beanFactory.get(field.getType()));} catch (IllegalAccessException e) {e.printStackTrace();}}}}}}
執行第八步:執行成功,依賴注入成功
寫在后面🔥🔥🔥:
林納斯·托瓦茲(Linus Torvalds)說:“我從心底認為,優秀的程序員與平庸的程序員之間的區別,是在于認為自己的代碼重要還是數據結構更加重要。平庸的程序員眼里只有代碼,優秀的程序員則關注數據結構及之前的關系。”
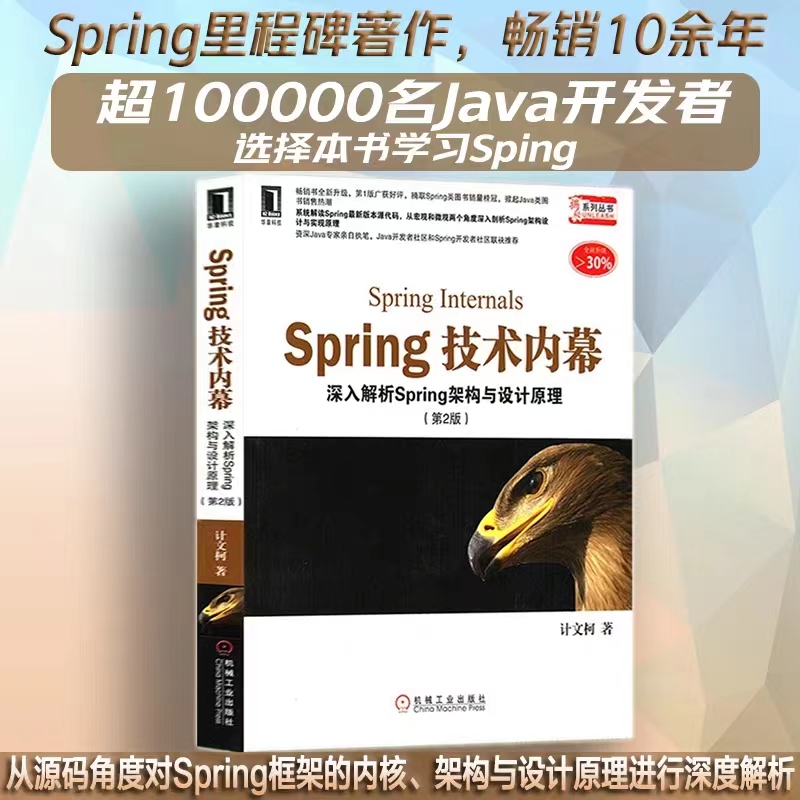
《spring技術內幕:深入解析spring架構與計原理(第2版)》是國內一本系統分析spring源代碼的經典著作,也是spring領域的問鼎之作,由業界擁有10余年開發經驗的資深java專家親自執筆,java開發者社區和spring開發者社區聯袂推薦。本書第1版不僅在內容上獲得了讀者的廣泛好評,而且在銷量上也摘取了同類書的桂冠,曾經一度掀起java類圖書的銷售熱潮。第2版不僅繼承了第1版在內容組織和寫作方式上的優點,而且還根據廣大讀者的反饋改進了若干細節上的不足。更為重要的是,結合spring的最新版本對過時的內容進行了更新,并增加了大量新內容,使本書更趨近于完美。
本專欄是自己深入學習并結合Spring技術內幕一經典圖書內容做出的的心得與總結,將其精簡編寫成一篇專欄供大家學習,希望對新學習Spring框架技術的小伙伴有所幫助。
圖書推薦:

歡迎添加微信,加入我的核心小隊,請備注來意
👇👇👇👇👇👇👇👇👇👇👇👇👇👇👇
)


