前言
?本篇主要是結合手寫數字例子,結合PyTorch 介紹一下Gan 實戰
第一輪訓練效果

第20輪訓練效果,已經可以生成數字了

68 輪

目錄:?
- ? 谷歌云服務器(Google Colab)
- ? 整體訓練流程
- ? Python 代碼
一? 谷歌云服務器(Google Colab)
? ? ?個人用的一直是聯想小新筆記本,雖然非常穩定方便。但是現在跑深度學習,性能確實有點跟不上.?
? ?1.1? ? 打開谷歌云服務器(Google Colab)
? ? ? https://colab.research.google.com/
? ? 1. 2? 新建筆記
? ? ? ? ? ? ? ? ? 
1
?1.4? 選擇T4GPU?


1.5? 點擊運行按鈕
可以看到當前硬件的情況

? ? ?
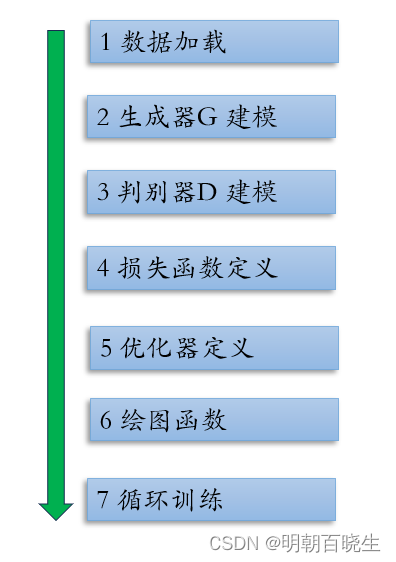
二? 整體訓練流程
三? ? PyTorch 例子
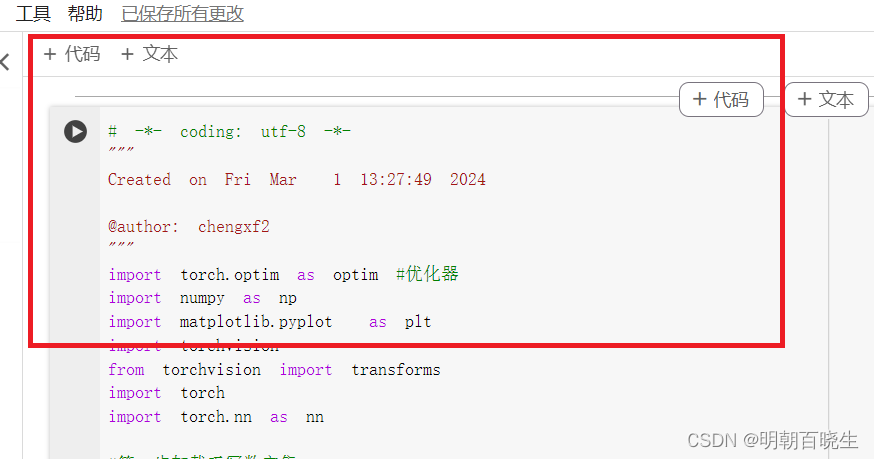
# -*- coding: utf-8 -*-
"""
Created on Fri Mar  1 13:27:49 2024@author: chengxf2
"""
import torch.optim as optim #優化器
import numpy as np
import matplotlib.pyplot  as plt
import torchvision
from torchvision import transforms
import torch
import torch.nn as nn#第一步加載手寫數字集
def loadData():#同時歸一化數據集(-1,1)style = transforms.Compose([transforms.ToTensor(),   #0-1 歸一化0-1, channel,height,widthtransforms.Normalize(mean=0.5, std=0.5) #變成了-1,1 ])trainData = torchvision.datasets.MNIST('data',train=True,transform=style,download=True)dataloader = torch.utils.data.DataLoader(trainData,batch_size= 16,shuffle=True)imgs,_ = next(iter(dataloader))#torch.Size([64, 1, 28, 28])print("\n imgs shape ",imgs.shape)return dataloaderclass Generator(nn.Module):'''定義生成器輸入:z 隨機噪聲[batch, input_size]輸出:x: 圖片 [batch, height, width, channel]'''def __init__(self,input_size):super(Generator,self).__init__()self.net = nn.Sequential(nn.Linear(in_features = input_size , out_features =256),nn.ReLU(),nn.Linear(in_features = 256 , out_features =512),nn.ReLU(),nn.Linear(in_features = 512 , out_features =28*28),nn.Tanh())def forward(self, z):# z 隨機輸入[batch, dim]x = self.net(z)#[batch, height, width, channel]#print(x.shape)x = x.view(-1,28,28,1)return xclass Discriminator(nn.Module):'''定義鑒別器輸入:x: 圖片 [batch, height, width, channel]輸出:y:  二分類圖片的概率: BCELoss 計算交叉熵損失'''def __init__(self):super(Discriminator,self).__init__()#開始的維度和終止的維度,默認值分別是1和-1self.flatten = nn.Flatten()self.net = nn.Sequential(nn.Linear(in_features = 28*28 , out_features =512),nn.LeakyReLU(), #負值的時候保留梯度信息nn.Linear(in_features = 512 , out_features =256),nn.LeakyReLU(),nn.Linear(in_features = 256 , out_features =1),nn.Sigmoid())def forward(self, x):x = self.flatten(x)#print(x.shape)out =self.net(x)return outdef gen_img_plot(model, epoch, test_input):out = model(test_input).detach().cpu()out = out.numpy()imgs = np.squeeze(out)fig = plt.figure(figsize=(4,4))for i in range(out.shape[0]):plt.subplot(4,4,i+1)img = (imgs[i]+1)/2.0#[-1,1]plt.imshow(img)plt.axis('off')plt.show()def train():#1 初始化參數device ='cuda' if torch.cuda.is_available() else 'cpu'#2 加載訓練數據dataloader = loadData()test_input  = torch.randn(16,100,device=device)#3 超參數maxIter = 20 #最大訓練次數input_size = 100batchNum = 16input_size =100#4 初始化模型gen = Generator(100).to(device)dis = Discriminator().to(device)#5 優化器,損失函數d_optim = torch.optim.Adam(dis.parameters(), lr=1e-4)g_optim = torch.optim.Adam(gen.parameters(),lr=1e-4)loss_fn = torch.nn.BCELoss()#6 loss 變化列表D_loss =[]G_loss= []for epoch in range(0,maxIter):d_epoch_loss = 0.0g_epoch_loss  =0.0#count = len(dataloader)for step ,(realImgs, _) in enumerate(dataloader):realImgs = realImgs.to(device)random_noise = torch.randn(batchNum, input_size).to(device)#先訓練判別器d_optim.zero_grad()real_output = dis(realImgs)d_real_loss = loss_fn(real_output, torch.ones_like(real_output))d_real_loss.backward()#不要訓練生成器,所以要生成器detachfake_img = gen(random_noise)fake_output = dis(fake_img.detach())d_fake_loss = loss_fn(fake_output, torch.zeros_like(fake_output))d_fake_loss.backward()d_loss = d_real_loss+d_fake_lossd_optim.step()#優化生成器g_optim.zero_grad()fake_output = dis(fake_img.detach())g_loss = loss_fn(fake_output, torch.ones_like(fake_output))g_loss.backward()g_optim.step()with torch.no_grad():d_epoch_loss+= d_lossg_epoch_loss+= g_losscount = 16       with torch.no_grad():d_epoch_loss/=countg_epoch_loss/=countD_loss.append(d_epoch_loss)G_loss.append(g_epoch_loss)gen_img_plot(gen, epoch, test_input)print("Epoch: ",epoch)print("-----finised-----")if __name__ == "__main__":train()
參考:
10.完整課程簡介_嗶哩嗶哩_bilibili
理論【PyTorch][chapter 19][李宏毅深度學習]【無監督學習][ GAN]【理論】-CSDN博客


)


![LeetCode 刷題 [C++] 第236題.二叉樹的最近公共祖先](http://pic.xiahunao.cn/LeetCode 刷題 [C++] 第236題.二叉樹的最近公共祖先)


