nexus 手動增加

Google’s Nexus devices are supposed to receive timely updates, but the staggered rollout means it can take weeks for devices to receive over-the-air (OTA) updates. Luckily, there’s a faster (and geekier) way to install?the latest version of Android.
Google的Nexus設備應該會及時收到更新,但分階段推出意味著設備可能需要數周的時間才能收到空中(OTA)更新。 幸運的是,有一種更快(更怪異)的方法來安裝最新版本的Android。
Google provides official system images for their Nexus devices, which anyone can download and flash on their own. This is an easy way to skip the wait when a new version of Android is released for Nexus devices.
Google為Nexus設備提供了官方的系統映像,任何人都可以自行下載并刷新。 當為Nexus設備發布新版本的Android時,這是跳過等待的簡單方法。
Note that this process is more complicated than simply waiting for an over-the-air update. If you’re a normal person and not a geek with an itchy trigger finger, you’ll probably just want to wait.
請注意,此過程比僅等待無線更新更為復雜。 如果您是普通人,而不是觸發手指發癢的怪胎,您可能只想等待。
第一步:解鎖設備的引導程序 (Step One: Unlock Your Device’s Bootloader)
To flash a system image, your device will need to be unlocked. Nexus devices allow you to unlock their bootloader with a single command. If you’ve already unlocked your device to root it or install a custom ROM, you can skip this part. If you haven’t yet, you should be warned the unlocking your device will wipe its data, as if you had performed a factory reset.
要刷新系統映像,您的設備將需要解鎖。 Nexus設備可讓您通過一個命令解鎖其引導程序。 如果您已經解鎖了設備以使其成為root用戶或安裝了自定義ROM,則可以跳過此部分。 如果尚未開始,則應警告您,解鎖設備將擦除其數據,就像您已恢復出廠設置一樣。
You can unlock your boot loader in several different ways. The official method is through a simple teriminal command, but for an even easier?method, you can use the Nexus Root Toolkit, which will walk you through the process.
您可以通過幾種不同的方式解鎖引導加載程序。 官方方法是通過一個簡單的終止命令,但對于更簡單的方法,您可以使用Nexus Root Toolkit ,它將逐步引導您完成該過程。
第二步:安裝ADB和Fastboot (Step Two: Install ADB and Fastboot)
You’ll need two other things for this process: the Android Debug Bridge, which is a command line tool for your computer that lets you interface with your phone, and your phone’s USB drivers. Even if you’ve installed these before, you should get the latest versions now.
此過程還需要另外兩件事:Android調試橋,這是計算機的命令行工具,可讓您與手機連接;以及手機的USB驅動程序。 即使您以前已經安裝了這些,也應該立即獲取最新版本。
We’ve detailed how to install?both before, but here’s the brief version:
在此之前,我們已經詳細介紹了如何安裝這兩種方法,但是這是簡短的版本:
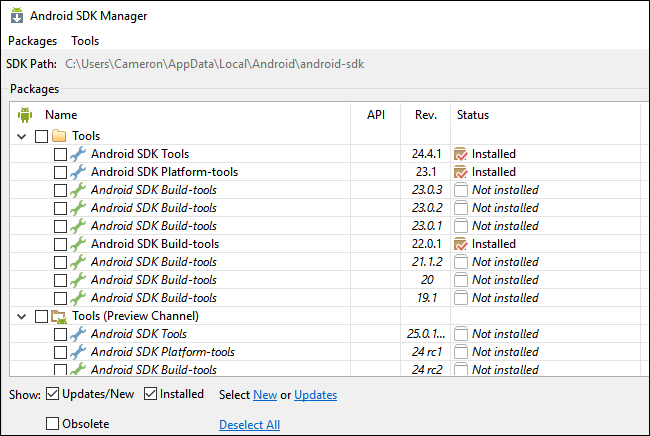
Head to the Android SDK download page and scroll down to “SDK Tools Only”. Download the ZIP file for your platform and unzip it wherever you want to store the ADB files.
轉到Android SDK下載頁面,然后向下滾動到“僅SDK工具”。 下載適合您平臺的ZIP文件,然后將其解壓縮到要存儲ADB文件的位置。
- Start the SDK Manager and deselect everything except “Android SDK Platform-tools”. If you are using a Nexus phone, you can also select “Google USB Driver” to download Google’s drivers. 啟動SDK Manager,然后取消選擇除“ Android SDK Platform-tools”以外的所有內容。 如果您使用的是Nexus手機,則還可以選擇“ Google USB驅動程序”來下載Google的驅動程序。
- After it’s finished installing, you can close the SDK manager. 安裝完成后,您可以關閉SDK管理器。
Install the USB drivers for your phone. You can find these on your phone manufacturer’s website (e.g. Motorola or HTC). If you have a Nexus, you can install the Google drivers you downloaded in step 2 using these instructions.
安裝手機的USB驅動程序。 您可以在電話制造商的網站(例如Motorola或HTC )上找到它們。 如果您有Nexus,則可以按照以下說明安裝在步驟2中下載的Google驅動程序。
- Reboot your computer if prompted. 如果出現提示,請重新啟動計算機。
第三步:下載系統映像 (Step Three: Download the System Image)
Visit Google’s Factory Images for Nexus Devices page and download the appropriate image for your device. Note that you’ll need the image for your specific hardware. For example, there are separate images for the Nexus 7 (2013) with Wi-Fi only and for the Nexus 7 (2013) with cellular data. Make sure you download the right one.
訪問Google的Nexus設備出廠圖像頁面,并下載適合您設備的圖像。 請注意,您將需要特定硬件的映像。 例如,對于僅具有Wi-Fi的Nexus 7(2013)和具有蜂窩數據的Nexus 7(2013),存在單獨的圖像。 確保下載正確的一個。
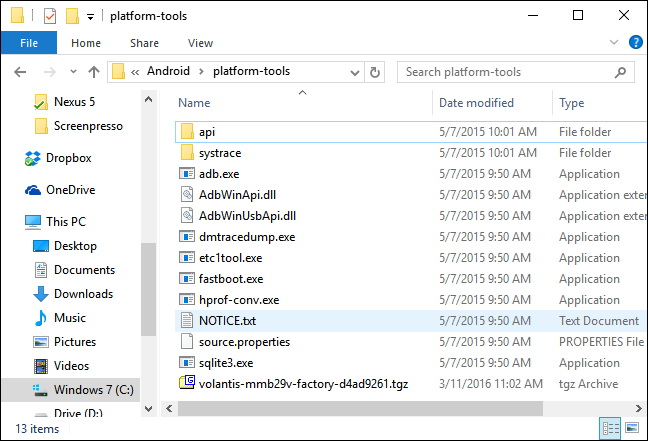
Download the file to your computer and use a file-extraction program, like the free 7-Zip, to extract its contents to your ADB folder.
將文件下載到計算機,并使用文件提取程序(例如免費的7-Zip )將其內容提取到您的ADB文件夾中。
第四步:確定是否擦除數據 (Step Four: Decide Whether to Wipe Your Data)
Flashing the system image in the normal way will wipe your device, essentially performing a factory reset. You can try to update without wiping your device, although you may encounter problems. However, this process should work fine when going from one Android version to the next version.
以正常方式刷新系統映像將擦除您的設備,實質上是恢復出廠設置。 盡管您可能會遇到問題,但是您可以嘗試在不擦除設備的情況下進行更新。 但是,當從一個Android版本轉到下一版本時,此過程應該可以正常工作。
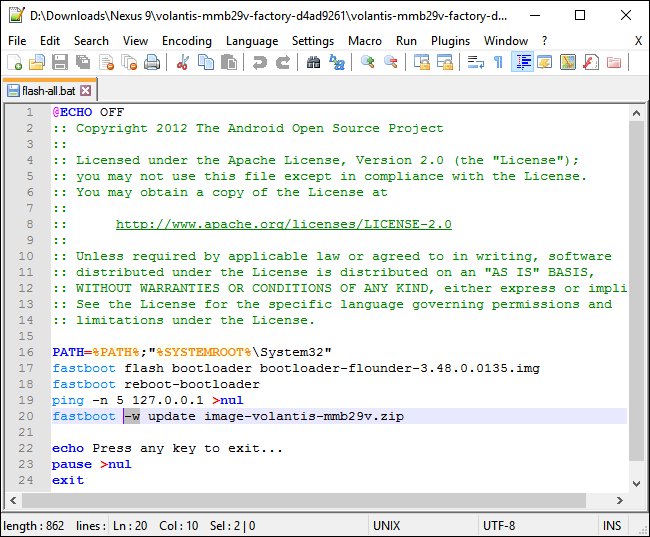
To prevent your device from being wiped, open the flash-all.bat file in a text editor like Notepad++. Edit the line containing “fastboot -w update” and remove the -w switch before saving the file.
為防止設備被擦拭,請在文本編輯器(如Notepad ++)中打開flash-all.bat文件。 在保存文件之前,編輯包含“ fastboot -w update”的行,并刪除-w開關。
第五步:刷新系統映像 (Step Five: Flash the System Image)
Copy the system image files into the same folder as ADB. Then hold the Shift key, right-click in that?folder, and select “Open command window here” to open a Command Prompt window in that folder.
將系統映像文件復制到與ADB相同的文件夾中。 然后按住Shift鍵,右鍵單擊該文件夾,然后選擇“在此處打開命令窗口”以在該文件夾中打開命令提示符窗口。

Enable USB debugging on your Nexus device by accessing the hidden Developer Options menu and turning on the USB debugging option.
通過訪問隱藏的“開發人員選項”菜單并打開USB調試選項,在Nexus設備上啟用USB調試。
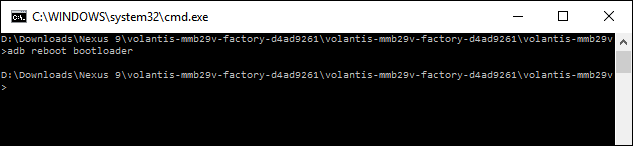
Connect your Nexus device to your computer with its included USB cable, and then run the following command to reboot the device into the boot loader:
使用隨附的USB電纜將Nexus設備連接到計算機,然后運行以下命令將設備重新引導到引導加載程序中:
adb reboot bootloader
If there’s a problem, you may need to fix your device’s drivers. Read this guide for more information on setting up ADB and ensuring it’s working properly. Bear in mind that you’ll have to accept the authentication prompt on the device before the adb command can do anything.
如果有問題,則可能需要修復設備的驅動程序。 閱讀本指南以獲取有關設置ADB并確保其正常運行的更多信息。 請記住,在adb命令可以執行任何操作之前,您必須接受設備上的身份驗證提示。
Once the device displays the boot loader on its screen–you’ll see an Android with its front panel open–double-click the flash-all.bat file. The script should flash your device with the new system image.
設備在屏幕上顯示引導加載程序后,您會看到一個前面板打開的Android設備,雙擊flash-all.bat文件。 該腳本應使用新的系統映像刷新設備。
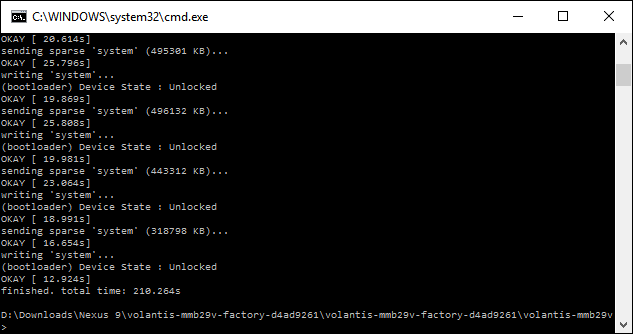
When the process is complete, your device will reboot automatically. If you didn’t remove the -w option, you’ll have to go through the first-time setup process again.
該過程完成后,您的設備將自動重啟。 如果未刪除-w選項,則必須再次執行首次設置過程。
如果腳本不起作用怎么辦 (What to Do If the Script Doesn’t Work)
Sometimes, however, flash-all.bat will generate?an error about missing resources or lack of space. In that situation, it’s generally better to just manually flash everything piece by piece. This trick is also useful if you only want to flash part of the factory image–like the bootloader or the recovery–without flashing the rest.
但是,有時flash-all.bat會生成有關資源丟失或空間不足的錯誤。 在這種情況下,通常最好逐個手動刷新所有內容。 如果您只想刷新部分工廠映像(如引導加載程序或恢復映像)而又不刷新其余部分,則此技巧也很有用。
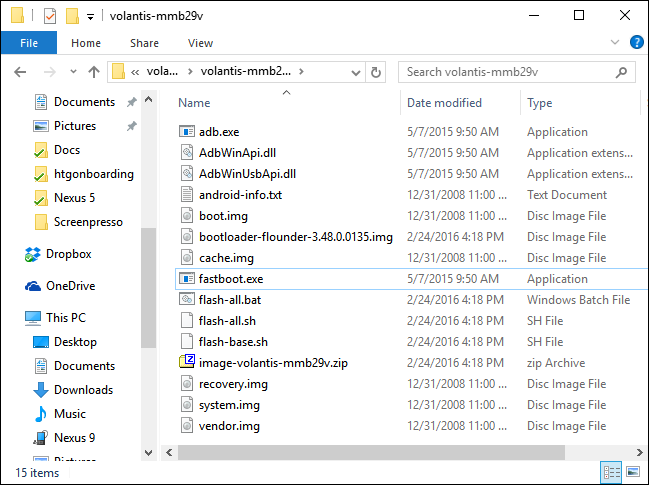
The first thing you’ll need to do before inputting the manual commands is unzip the image file, which typically?uses the “image-device-build.zip” naming format. It’s easier to unzip the contents of the file directly into the folder you’re already working in so all the required?files are in the same location. Once unzipped, there should be five or six additional?files in your working folder (depending on the device): android-info.txt, boot.img, cache.img, recovery.img, system.img, radio.img (for devices with mobile connections only), and vendor.img (Nexus 9 only).
輸入手動命令之前,您需要做的第一件事是解壓縮圖像文件,該文件通常使用“ image -device-build .zip”命名格式。 將文件內容直接解壓縮到您已經在使用的文件夾中比較容易,因此所有必需的文件都位于同一位置。 解壓縮后,工作文件夾中應有五個或六個其他文件(取決于設備):android-info.txt,boot.img,cache.img,recovery.img,system.img,radio.img(針對設備) (僅限移動設備)和vendor.img(僅限Nexus 9)。
Once everything is unpacked, reboot back into the bootloader–using the adb reboot bootloader command from earlier–and run the following commands, pressing Enter after each one, to manually flash?each item to your device.
解壓縮所有內容后,使用較早版本的adb reboot bootloader命令重新引導回adb reboot bootloader ,然后運行以下命令,每輸入一個命令后按Enter鍵,以手動將每個項目刷新到設備中。
fastboot erase boot
fastboot erase cache
fastboot erase recovery
fastboot erase system
fastboot flash bootloader "name-of-bootloader.img"
fastboot reboot-bootloader
fastboot flash radio "name-of-radio.img" (if present)
fastboot reboot-bootloader
fastboot flash system system.img
fastboot flash boot boot.img
fastboot flash recovery recovery.img
fastboot flash cache cache.img
fastboot flash vendor vendor.img (Nexus 9 only)
If you’re doing a clean install of Android and want?to wipe everything, use the following commands next:
如果您要全新安裝Android并想擦除所有內容,請在下面使用以下命令:
fastboot erase userdata
fastboot flash userdata userdata.img
fastboot reboot
Keep in mind that some of these commands can take time some to flash—namely system.img and userdata.img—so don’t worry if the command prompt seems to be unresponsive. Once it’s ready for the next command, the cursor will re-appear.
請記住,其中一些命令可能需要一些時間才能刷新(即system.img和userdata.img),因此請不要擔心命令提示符似乎沒有響應。 一旦準備好執行下一個命令,光標就會重新出現。
This process is also useful if you’ve flashed a custom ROM and need to get back to the standard Android system image that comes with your device. This option is largely intended for developers and Android geeks, so it’s more complicated than simply waiting for a normal OTA (over-the-air) update.
如果您已經刷新了自定義ROM并且需要返回到設備隨附的標準Android系統映像,則此過程也很有用。 此選項主要用于開發人員和Android極客,因此它比簡單地等待正常的OTA(空中下載)更新要復雜得多。
翻譯自: https://www.howtogeek.com/176284/how-to-upgrade-your-nexus-device-without-waiting-by-flashing-a-factory-image/
nexus 手動增加
)


)


)
)
)


)

)


