?
1、位置屬性
jquery的css
position獲取匹配元素相對父元素的偏移位置;offset獲取匹配元素在當前視口的相對偏移,返回的對象包含兩個整型屬性:top 和 left
$("p").offset()
$('div').offset().top
$("p").offset().left
scrollTop獲取匹配元素相對滾動條頂部的偏移 文檔被卷起的像素值;scrollLeft獲取匹配元素相對滾動條左側的偏移,文檔被卷起的像素值;
 //獲取匹配元素相對滾動條頂部的偏移  文檔被卷起的像素值
$(document).scrollTop()
$(document).scrollLeft()//監聽文檔滾動的jquery方法
$(document).scroll(function(){console.log($(document).scrollTop())console.log($(document).scrollLeft())})
innerHeight獲取第一個匹配元素內部區域高度(包括補白、不包括邊框);
$('#box').innerHeight()
innerWidth獲取第一個匹配元素內部區域寬度(包括補白、不包括邊框);
$('#box').innerWeight()
outerHeight獲取第一個匹配元素外部高度(默認包括補白和邊框);
$('#box').outerHeidth()
outerWeight獲取第一個匹配元素外部寬度(默認包括補白和邊框);
$('#box').outerWeidth()
weight取得匹配元素當前計算的寬度值
//獲取值
$('p').width()//設置值
$('p').width(200)
height取得匹配元素當前計算的高度值
//獲取值
$('p').height()
//設置值
$('p').Height(200)
<!DOCTYPE html>
<html><head><meta charset="UTF-8"><title></title><style type="text/css">*{padding: 0;margin: 0;}#box{position: relative;width: 200px;height: 200px;border: 1px solid red;padding: 10px 5px;}p{position: absolute;left:30px;top: 30px}   /*父相子絕*/</style></head><body style="height: 2000px; width: 2000px;">  //內嵌樣式,肯定比上邊的優先級高;給height、width是為了有滾動條<div id="box"><p>我是一個段落標簽</p></div><button id="btn">動畫吧</button><div style="width: 200px;height: 200px;margin:  100px auto;border: 1px solid deepskyblue;"></div></body><script src="jquery-3.2.1.js"></script><script type="text/javascript">$(function(){//1.獲取匹配元素的相對父元素的偏移 positionconsole.log($('p').position().left);   //30console.log($('p').position().top);  //30var offsetTop = $('p').position().top + 50 + 'px';$('#btn').click(function(){   $('p').animate({top:offsetTop},1000);    //執行一個動畫效果})//2.獲取匹配元素 相對滾動條卷起的位置信息  scrollTop scrollLeft
//            console.log($(document).scrollLeft());
//            console.log($(document).scrollTop());
            $(document).scroll(function(){   //調用scroll方法console.log($(document).scrollLeft());console.log($(document).scrollTop());})//3.offset  獲取匹配元素在當前視口的相對偏移 相對于瀏覽器(左上角)console.log($('#box').offset());console.log($('p').offset().top);  //邊框有1console.log($('p').offset().left);console.log($('#btn').offset().top);//4.獲取元素的寬高console.log("寬"+$('#box').width());console.log("高"+$('#box').height());//設置寬高$('#box').width(400);//innerWidth獲取內部區域寬度; / outerWidth獲取外部區域寬度//獲取  width + 2*padding 不包括邊框 獲取匹配元素的內部寬度console.log($('#box').innerWidth()); //410// width + 2*padding + 2*border 獲取匹配元素的外部寬度console.log($('#box').outerWidth()) //412})    </script>
</html>
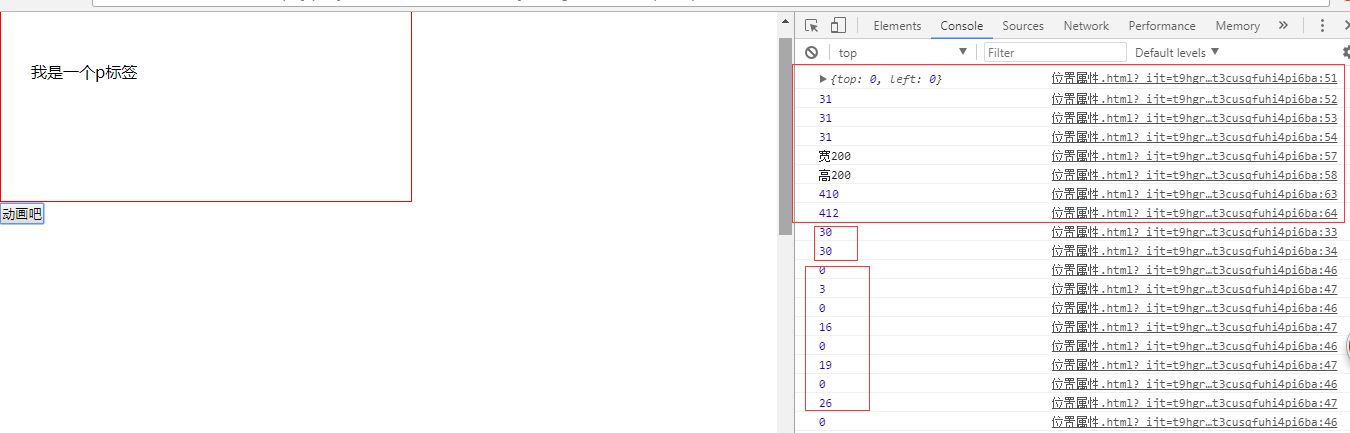
獲取偏移量:相當于父級用的是position,相當于瀏覽器用的是offset;獲取滾動條卷起的位置用的是scrollTop和scrollLeft;
innerWidth是不包括邊框的,outerWidth是包括所有的。
防淘寶導航欄案例
淘寶滾動監聽
<!DOCTYPE html>
<html><head><meta charset="UTF-8"><title></title><style type="text/css">*{padding: 0;margin: 0;}div{width: 100%;}div img{width: 100%;  /*每個div img都填充滿父級100%*/}.nav{display: none;}</style></head><body><div class="top"><img src="images/top.jpg" alt="" /></div><div class="nav"><img src="images/nav.jpg"/></div><div class= 'taobao'><img src="images/taobao1.png"/></div><script src="../jquery-3.2.1.js"></script><script type="text/javascript">$(function(){var h = $('.top').height();  //先獲取top盒子的高度,如果盒子有邊框計算的時就不是height了而是outerWidth
$(document).scroll(function(){var scollTp = $(document).scrollTop();  //scrollTop 文檔卷起的值,值時時在變大;if(h<scollTp){$('.nav').css({display:'block',position:'fixed',top:0});}else{$('.nav').css({display:'none',position:'static',top:0});}})})</script></body>
</html>
?
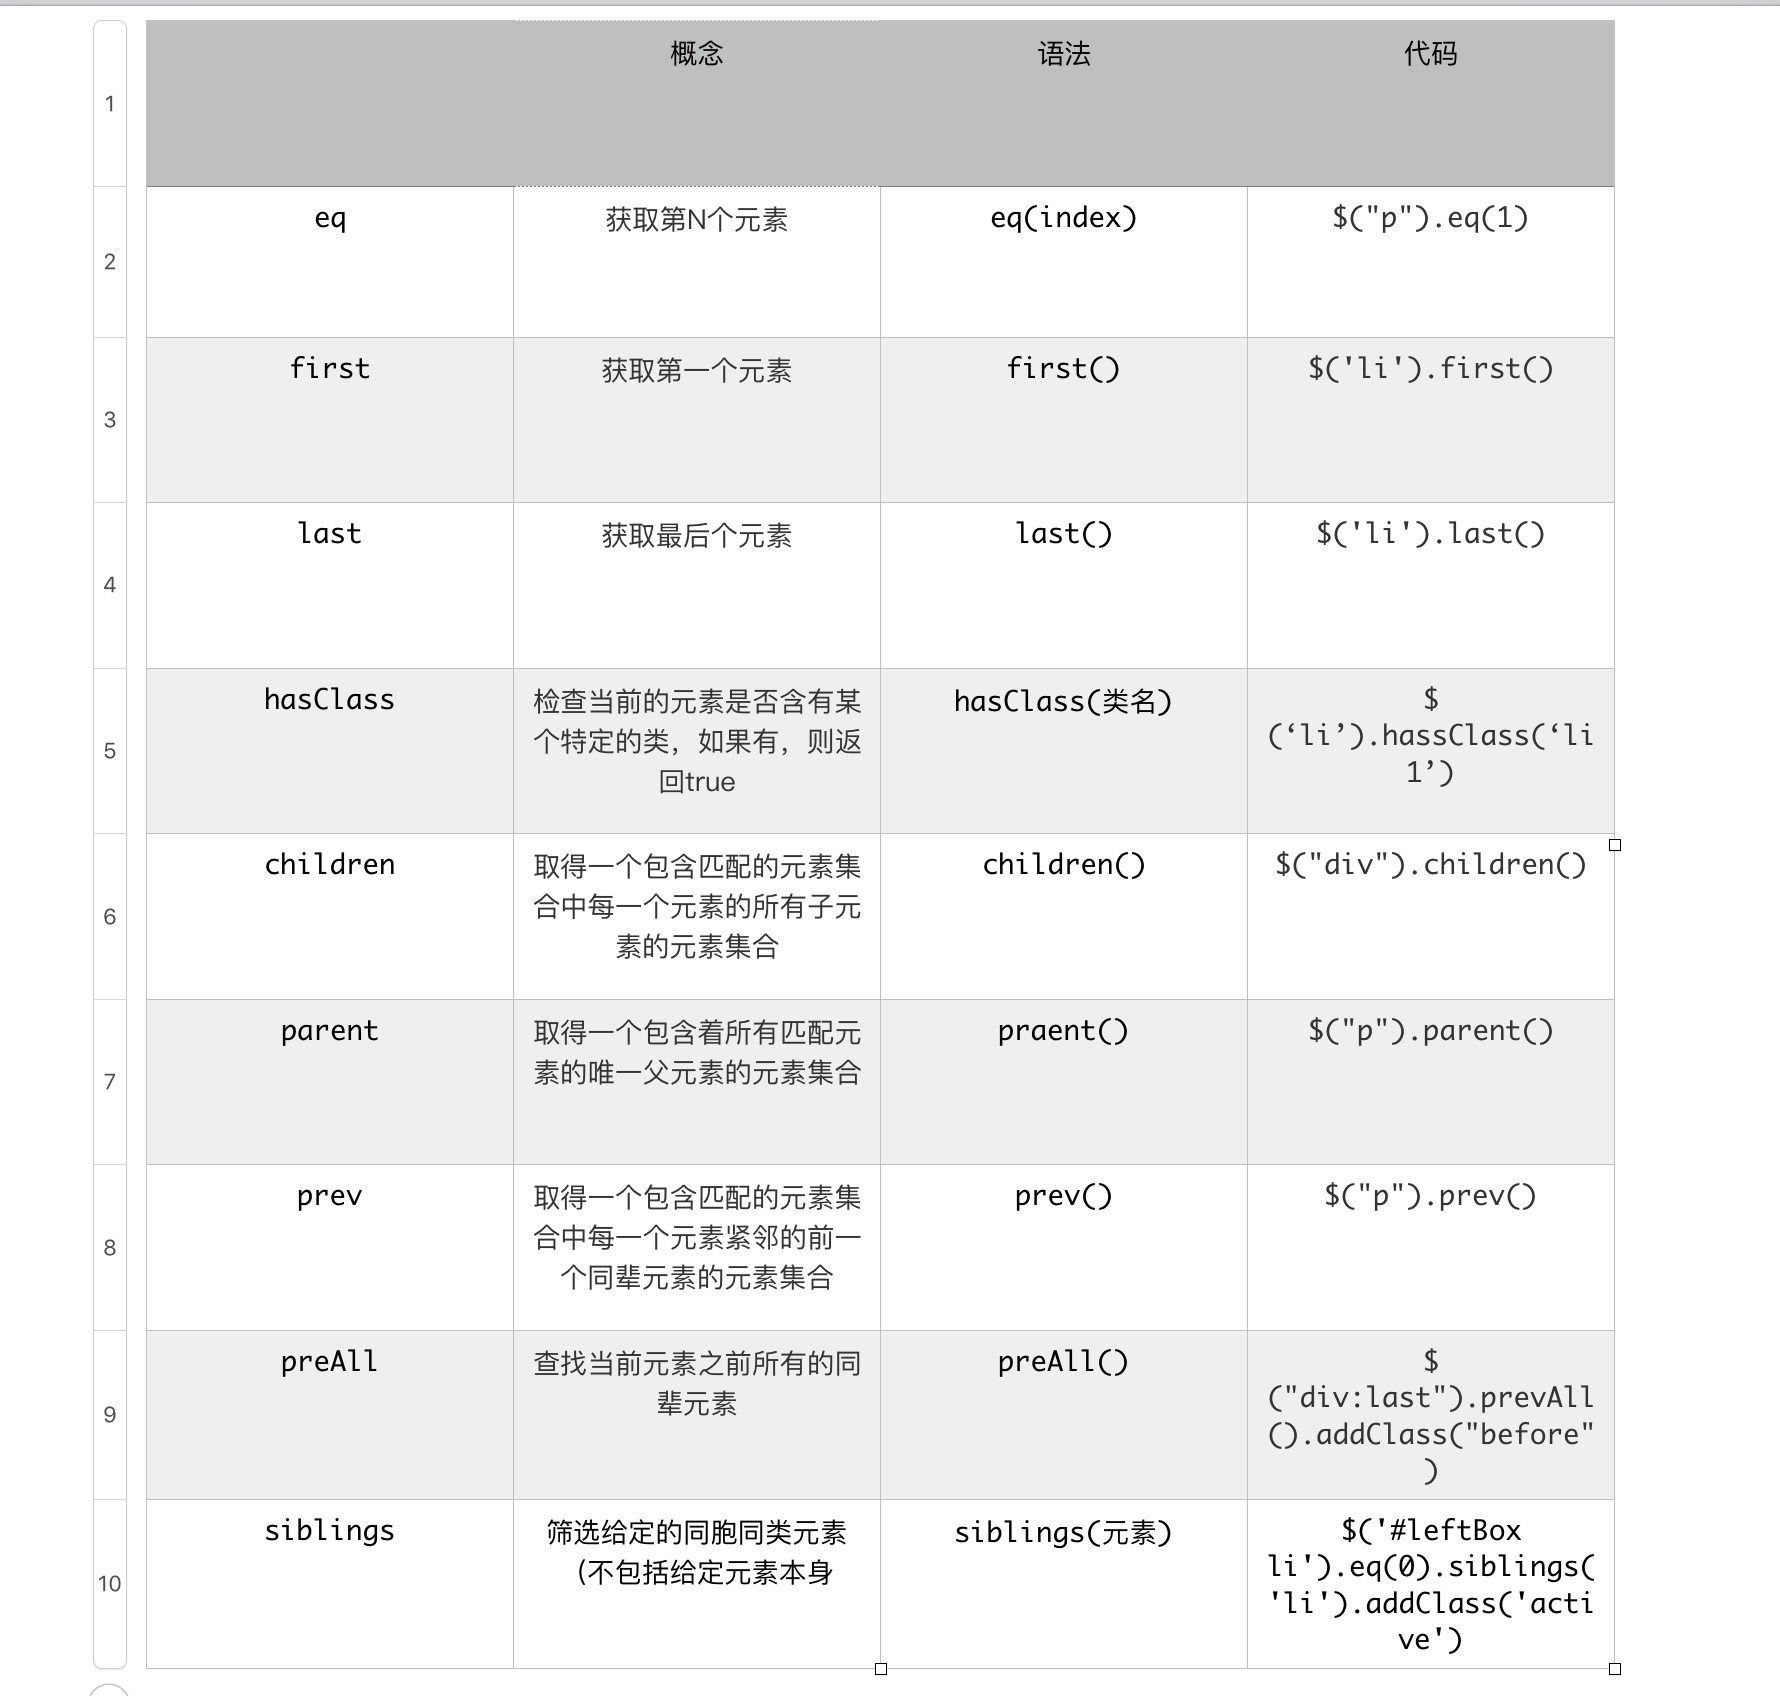
2、jquery篩選方法
?
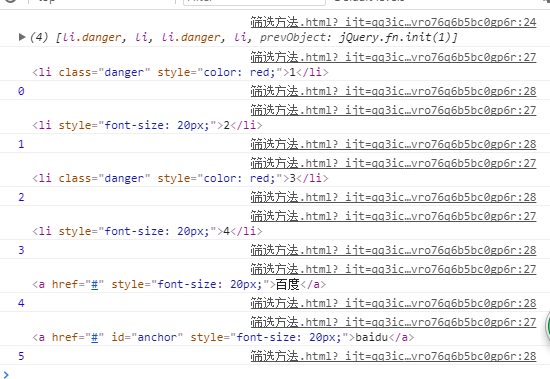
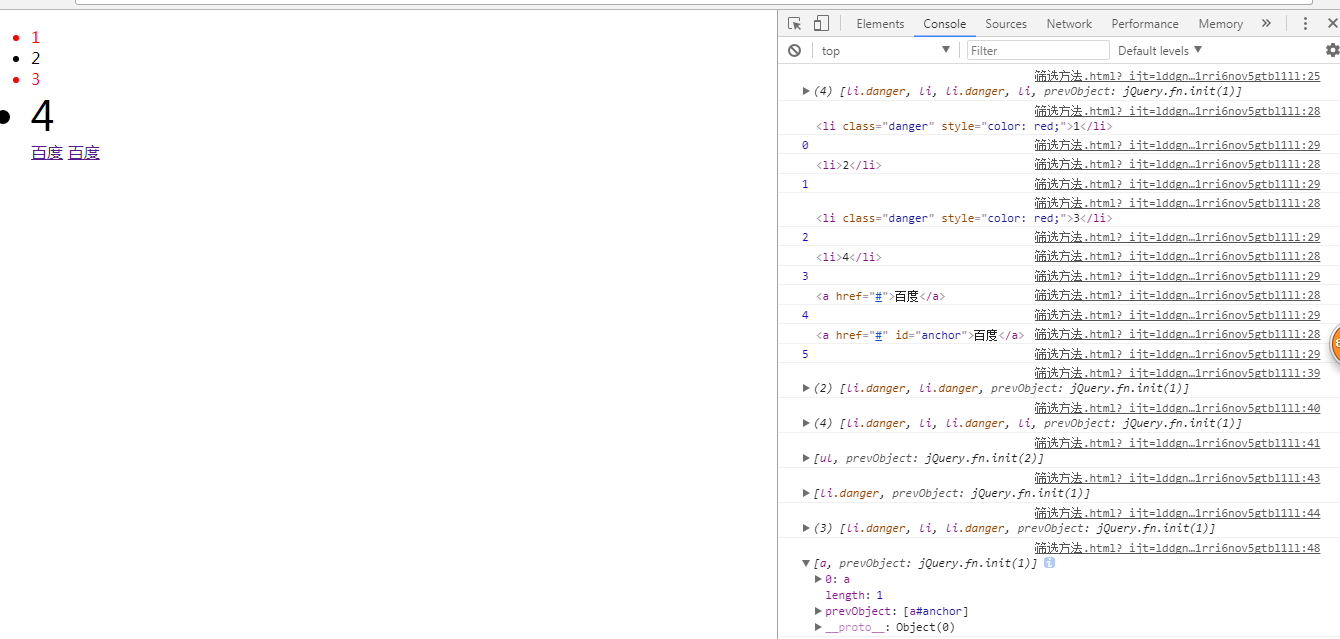
<!DOCTYPE html>
<html lang="en">
<head><meta charset="UTF-8"><title></title><style type="text/css">li.active{font-size: 40px;}</style>
</head>
<body><ul><li class="danger">1</li><li>2</li><li class="danger">3</li><li>4</li><a href="#">百度</a><a href="#" id="anchor">百度</a></ul>
</body>
<script src="../jquery-3.2.1.js"></script>
<script type="text/javascript">$(function () {console.log($('li'));   //  4個//jquery遍歷方法.each()$('ul').children().each(function (index,ele) {     // $('li') 就等于 $('ul').children();index是索引,ele是元素 dom對象。
            console.log(ele);console.log(index);var isDanger = $(this).hasClass('danger');  //檢查當前元素是否含有某個類,如果有則返回trueif (isDanger){$(this).css('color','red');} else {// $(this).css('font-size','20px');
            }})console.log($('ul').children('.danger'))  //取得一個包含匹配的元素集合中每一個元素的所有子集合的元素集合。console.log($('li'))console.log($('a').parent());  //獲取的是li,父標簽一級
console.log($('li').last().prev()); //last是li標簽的最后一個元素;它是最后一個標簽的前一個同類元素;li.dangerconsole.log($('li').last().prevAll());   //最后一個元素的所有元素;是一個數組,找的索引是從下往上去找的//siblingsconsole.log($('#anchor').siblings('a'))  //匹配元素同胞之間選擇 ;siblings('a')指同胞間的所有的a標簽$('li').hover(function () {$(this).addClass('active').siblings('li').removeClass('active');})})</script></html>
?
遍歷
?
?案例1-選項卡嵌套
<!DOCTYPE html>
<html><head><meta charset="UTF-8"><title></title>    <style type="text/css">*{padding: 0;margin: 0;}ul{list-style: none;}/*清除浮動產生的問題*/#box:after{content: "";display: block;clear: both;}#box{width: 800px;border: 1px solid black;margin: 20px auto;background: blue;}#leftBox{width: 200px;float: left;}#leftBox li{width: 200px;height: 89px;background: red;margin-bottom: 2px;color: white;font: 50px/89px "黑體";  text-align: center;}#rightBox div{display: none;float: left; width: 600px;}#rightBox p{width:100%;height: 325px;font: 100px/325px "黑體";text-align: center;background: greenyellow }/*父元素設置display:table使它成為一個塊級表格元素* 子元素設置display:table-cell使子元素成為表格單元格,就好比是在表格中一樣*/#rightBox ul{width: 600px;display: table;}#rightBox li{display: table-cell;background: purple;height: 40px;border-right: 2px solid blue;font: 30px/40px "黑體";text-align: center;color: white;}#leftBox .active{background: yellow;color: black;}#rightBox .active{background: white;color: black;}</style></head><body><div id="box"><ul id="leftBox"><li>a</li><li>b</li><li>c</li><li>d</li></ul><div id="rightBox"><div style="display: block"><p>a1</p><ul><li class="active">a1</li><li>a2</li><li>a3</li><li>a4</li></ul></div><div><p>b1</p><ul><li class="active">b1</li><li>b2</li><li>b3</li><li>b4</li></ul></div><div><p>c1</p><ul><li class="active">c1</li><li>c2</li><li>c3</li><li>c4</li><li>c5</li><li>c6</li></ul></div><div><p>d1</p><ul><li class="active">d1</li><li>d2</li><li>d3</li><li>d4</li></ul></div></div></div></body><script src="jquery-3.2.1.js"></script><script type="text/javascript">$(function(){//鼠標移入的時候$('#leftBox li').mouseover(function(){//修改自己的樣式$(this).addClass('active').siblings('li').removeClass('active');//修改右邊的div
                console.log($(this).index())$('#rightBox div').eq($(this).index()).show().siblings('div').hide();})$('#rightBox li').click(function(){$(this).addClass('active').siblings('li').removeClass('active');var liValue  = $(this).html();$(this).parent().prev().html(liValue);})})</script>
</html>

?
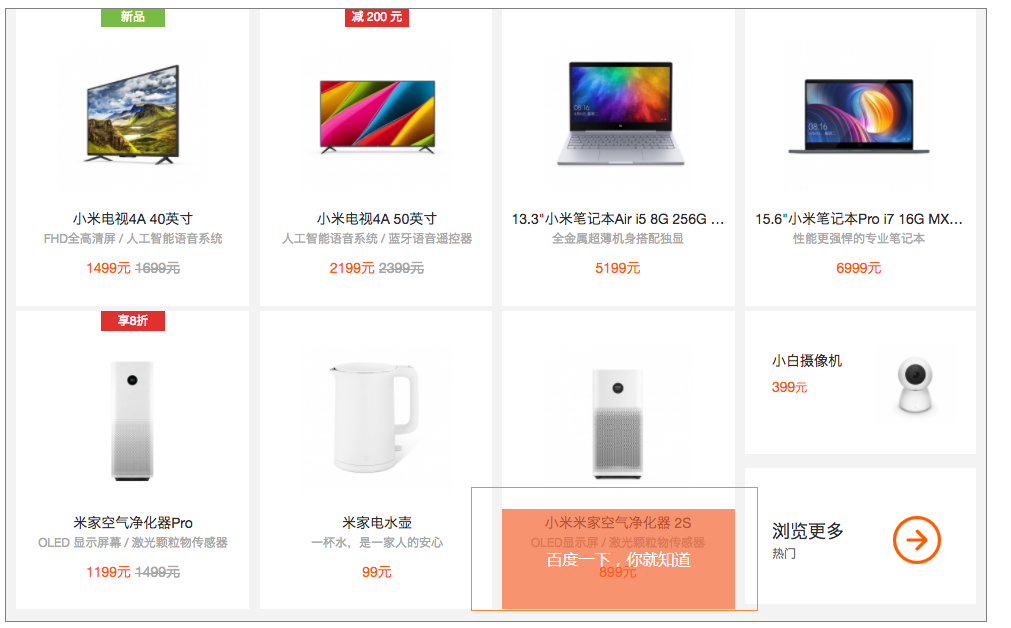
?案例2小米官網
<!DOCTYPE html>
<html lang="en">
<head><meta charset="UTF-8"><title>Title</title><style type="text/css">*{padding: 0;margin: 0;}ul{list-style: none;}.wrap{width: 980px;height: 612px;margin: 20px auto 0px;background: #f4f3f4;border: 1px solid gray;}ul li{float: left;margin-left: 10px;position: relative;overflow: hidden;  /*超出部分隱藏*/width: 233px;height: 300px;}ul li p{width: 233px;height: 100px;background: rgba(245,102,51,.7);position: absolute;bottom: -100px;text-align: center;color: white;line-height: 100px;}</style></head>
<body><div class="wrap"><ul><li><a href="#"><img src="images/xiaomi_01.png"/> </a><p>百度一下,你就知道了</p> </li><li><a href="#"><img src="images/xiaomi_02.png"/></a><p>百度一下,你就知道</p></li><li><a href="#"><img src="images/xiaomi_03.png"/></a><p>百度一下,你就知道</p></li><li><a href="#"><img src="images/xiaomi_04.png"/></a><p>百度一下,你就知道</p></li><li><a href="#"><img src="images/xiaomi_05.png"/></a><p>百度一下,你就知道</p></li><li><a href="#"><img src="images/xiaomi_07.png"/></a><p>百度一下,你就知道</p></li><li><a href="#"><img src="images/xiaomi_08.png"/></a><p>百度一下,你就知道</p></li><li><a href="#"><img src="images/xiaomi_09.png"/></a><p>百度一下,你就知道</p></span></li></ul></div>
</body>
<script src="../jquery-3.2.1.js"></script>
<script type="text/javascript">//mouseenter進入   mouseleave 離開$('.wrap li').hover(function () {$(this).children('p').stop(true).animate({bottom:0},100); //移進去的時候先讓它停一下
},function () {$(this).children('p').stop(true).animate({bottom:-100},100);})</script>
</html>
案例3-焦點輪播圖
<!DOCTYPE html>
<html><head><meta charset="UTF-8"><title></title><style type="text/css">*{padding: 0;margin: 0;}ul,ol{list-style: none;}#wrap{width: 650px;height: 250px;margin: 100px auto 0;background: red;overflow: hidden;position: relative;}/*#wrap img{display: block;}*/#wrap ul{height: 250px;position: relative;z-index: 1;}#wrap ol{height: 30px;position: absolute;z-index: 2;bottom: 0;right: 0;}#wrap>ul>li{position: absolute;top:0;left: 0;}#wrap>ol>li{float: left;width: 20px;height: 20px;text-align: center;line-height: 20px;border: 1px solid white;background: gray;margin-right: 5px;}#wrap>ol>li:hover{/*設置鼠標形狀*/cursor: pointer;}#wrap li.active{padding: 2px;color: orange;margin-top: -4px;border: 1px solid orange;}            </style></head><body><div id="wrap"><ul><!--設置絕對定位之后 脫離標準流 最后一個盒子層級提升了--><li style="z-index: 1;"><a href="#"><img src="./images/01.jpg"/></a></li><li><a href="#"><img src="./images/02.jpg"/></a></li><li><a href="#"><img src="./images/03.jpg"/></a></li><li><a href="#"><img src="./images/04.jpg"/></a></li><li><a href="#"><img src="./images/05.jpg"/></a></li>            </ul><ol><li class="active">1</li><li>2</li><li>3</li><li>4</li><li>5</li></ol></div></body><script src="http://libs.baidu.com/jquery/2.0.0/jquery.min.js"></script><script type="text/javascript">$(function(){//控制層級關系的索引var index  = 0;$('#wrap>ol>li').mouseenter(function(){index++;  //鼠標移進去的時候//修改下標的class$(this).addClass('active').siblings('li').removeClass('active');//選中哪個給它加一個active,siblings取到每個li,同胞元素removeclass//修改圖片 原理是用了一種層級關系,讓它漂起來;滑的是ol下的li要選取ul下的li$('#wrap>ul>li').eq($(this).index()).css({left:650,'z-index':index}).animate({ //取到索引,然后調整它的css,把想修改的層級關系給它提上來left:0  //改它的絕對定位left值},1000)})})</script>
</html>

?
3、事件流
事件的概念
HTML中與javascript交互是通過事件驅動來實現的,例如鼠標點擊事件、頁面的滾動事件onscroll等等,可以向文檔或者文檔中的元素添加事件偵聽器來預訂事件。想要知道這些事件是在什么時候進行調用的,就需要了解一下“事件流”的概念。
什么是事件流
事件流描述的是從頁面中接收事件的順序
1、DOM事件流
“DOM2級事件”規定的事件流包括三個階段:
① 事件捕獲階段;
② 處于目標階段;
③ 事件冒泡階段。
?
<!DOCTYPE html>
<html lang="en">
<head><meta charset="UTF-8"><title>事件流</title><script>window.onload = function(){var oBtn = document.getElementById('btn');  //取到dom元素oBtn
oBtn.addEventListener('click',function(){  //調用監聽器的一個方法;第一個參數事件名稱,第二個參數是回調函數console.log('btn處于事件捕獲階段');  //4}, true);oBtn.addEventListener('click',function(){console.log('btn處于事件冒泡階段'); //5}, false);document.addEventListener('click',function(){ //給文檔加一個事件console.log('document處于事件捕獲階段');  //1}, true);document.addEventListener('click',function(){  console.log('document處于事件冒泡階段'); //8}, false);document.documentElement.addEventListener('click',function(){console.log('html處于事件捕獲階段');  //2}, true);document.documentElement.addEventListener('click',function(){console.log('html處于事件冒泡階段'); //7}, false);document.body.addEventListener('click',function(){console.log('body處于事件捕獲階段'); //3}, true);document.body.addEventListener('click',function(){console.log('body處于事件冒泡階段'); //6}, false);};</script>
</head>
<body>
<a href="javascript:;" id="btn">按鈕</a>  //阻止a標簽的默認事件,點擊btn的時候會觸發一個click事件
</body>
</html>

1、addEventListener
addEventListener 是DOM2 級事件新增的指定事件處理程序的操作,這個方法接收3個參數:要處理的事件名、作為事件處理程序的函數和一個布爾值。最后這個布爾值參數如果是true,表示在捕獲階段調用事件處理程序;如果是false,表示在冒泡階段調用事件處理程序。
2、document、documentElement和document.body三者之間的關系:
document代表的是整個html頁面; ?document.documentElement代表的是<html>標簽; ?document.body代表的是<body>標簽;
接著我們就來聊聊上面的例子中輸出的結果為什么是這樣:
在標準的“DOM2級事件”中規定,事件流首先是經過事件捕獲階段,接著是處于目標階段,最后是事件冒泡階段。這里可以畫個圖示意一下:
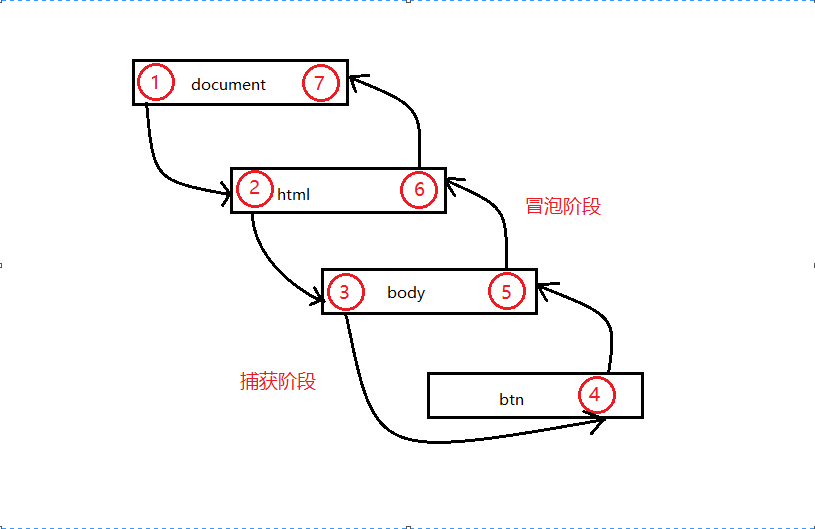
首先在事件捕獲過程中,document對象首先接收到click事件,然后事件沿著DOM樹依次向下,一直傳播到事件的實際目標,就是id為btn的a標簽。
接著在事件冒泡過程中,事件開始時由最具體的元素(a標簽)接收,然后逐級向上傳播到較為不具體的節點(document)。
需要注意的點:由于老版本的瀏覽器不支持事件捕獲,因此在實際開發中需要使用事件冒泡,在由特殊需要時再使用事件捕獲。
補充:
1、IE中的事件流只支持“事件冒泡”,但是版本到了IE9+以后,實現了“DOM2級事件”,也就是說IE9+以后也可以在捕獲階段對元素進行相應的操作。
2、在DOM事件流中,實際的目標在“捕獲階段”不會接收到事件。而是在“處于目標階段”被觸發,并在事件處理中被看成“冒泡階段”的一部分。然后,“冒泡階段”發生,事件又傳播回文檔。
?
從父級到子級一層層冒泡
jquery的常用事件
jquery只有事件冒泡,不支持事件捕獲。
?
?事件對象和冒泡
<!DOCTYPE html>
<html><head><meta charset="UTF-8"><title></title><style type="text/css">#box{width: 200px;height: 200px;background: gray;}p{width: 100px;height: 100px;background: red;}</style></head><body><div id="box"><p class="p1"></p><a href="https://www.luffycity.com">luffy</a></div></body><script src="jquery-3.2.1.js"></script><script type="text/javascript">//  入口函數事件$(function(){//事件對象$('.p1').click(function(ev){//事件類型 事件屬性
                console.log(ev.type);console.log(ev.target);console.log(ev.pageX);console.log(ev.pageY);alert('當前按鈕事件觸發了')//常用的事件方法 1.阻止事件冒泡  2.阻止默認事件//1.阻止事件冒泡
                ev.stopPropagation();})$('#box').click(function(){alert('#box盒子事件觸發了')})$('a').click(function(ev){//阻止a標簽的默認事件
//                ev.preventDefault()
//                ev.stopPropagation();
                alert('哈哈哈哈');return false;})})</script></html>
?
?
事件綁定和移除、觸發自定義事件
<!DOCTYPE html>
<html><head><meta charset="UTF-8"><title></title><style type="text/css">#box{width: 200px;height: 200px;background: red;}</style></head><body><div id="box"></div>    <button>按鈕</button></body><script src="jquery-3.2.1.js"></script><script type="text/javascript">$(function(){//事件的綁定//            $('#box').click(fn)//給當前的dom元素綁定事件//語法:jquery對象.bind('事件類型',fn)
//            $('#box').bind('click mouseenter',function(){  //添加多個事件做同樣的事情;click事件和mouseenter事件、回調函數;類似k value這樣子的
//                alert('事件被綁定了');
//            })
//            //
            function add(){console.log('click');}function add2(){console.log('over');}$('#box').bind({"click":add,"mouseover":add2})//事件移除 如果沒有參數 表示移除所有事件
            setTimeout(function(){
//                $('#box').unbind()
$('#box').unbind('click',function(){  //移除完事件之后,還可以加參數;alert(111);});},3000)//添加的事件不能發生在未來==》動態生成的元素不能直接添加對象 里面的事件不能發生了  ==>事件代理$('body').append('<div style="width: 200px;height: 300px;background: yellow">哈哈哈哈</div>')//補充內容:綁定自定義的事件$('button').bind('myClick',function(ev,a,b,c){alert(111);        alert(a);alert(b);})//觸發自定義的事件$('button').trigger('myClick',[1,2,3])//有幾個參數就傳幾個值
})</script></html>
?
自定義事情和代理事件
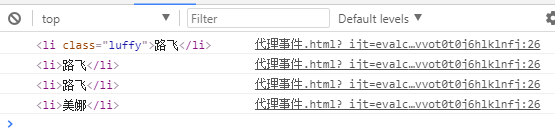
<!DOCTYPE html>
<html><head><meta charset="UTF-8"><title></title></head><body><ul><li class="luffy">路飛</li><li>路飛</li><li>路飛</li></ul></body><script src="jquery-3.2.1.js"></script><script type="text/javascript">$(document).ready(function(){//先點擊
//            $('ul>li').bind('click',function(){
//                console.log($(this));
//            })
//            $('ul>li').click(function(){
//                console.log($(this));
//            })//事件代理 自己完成不了當前的點擊事件,交給父級元素來做這件事件//父級.on('事件名字','點擊當前的標簽元素',fn)

            //$('ul').on('click','#namei,.luffy',function()...//綁定多個選擇器使用這個方法$('ul').on('click','li',function(){ //前邊父級,后邊是點擊當前的事件標簽  console.log(this);})//后來 添加的元素$('ul').append('<li>娜美</li>') //換成a標簽試試;
        //$('ul').append('<a id="namei">娜美</a>')  //})</script>
</html>
?
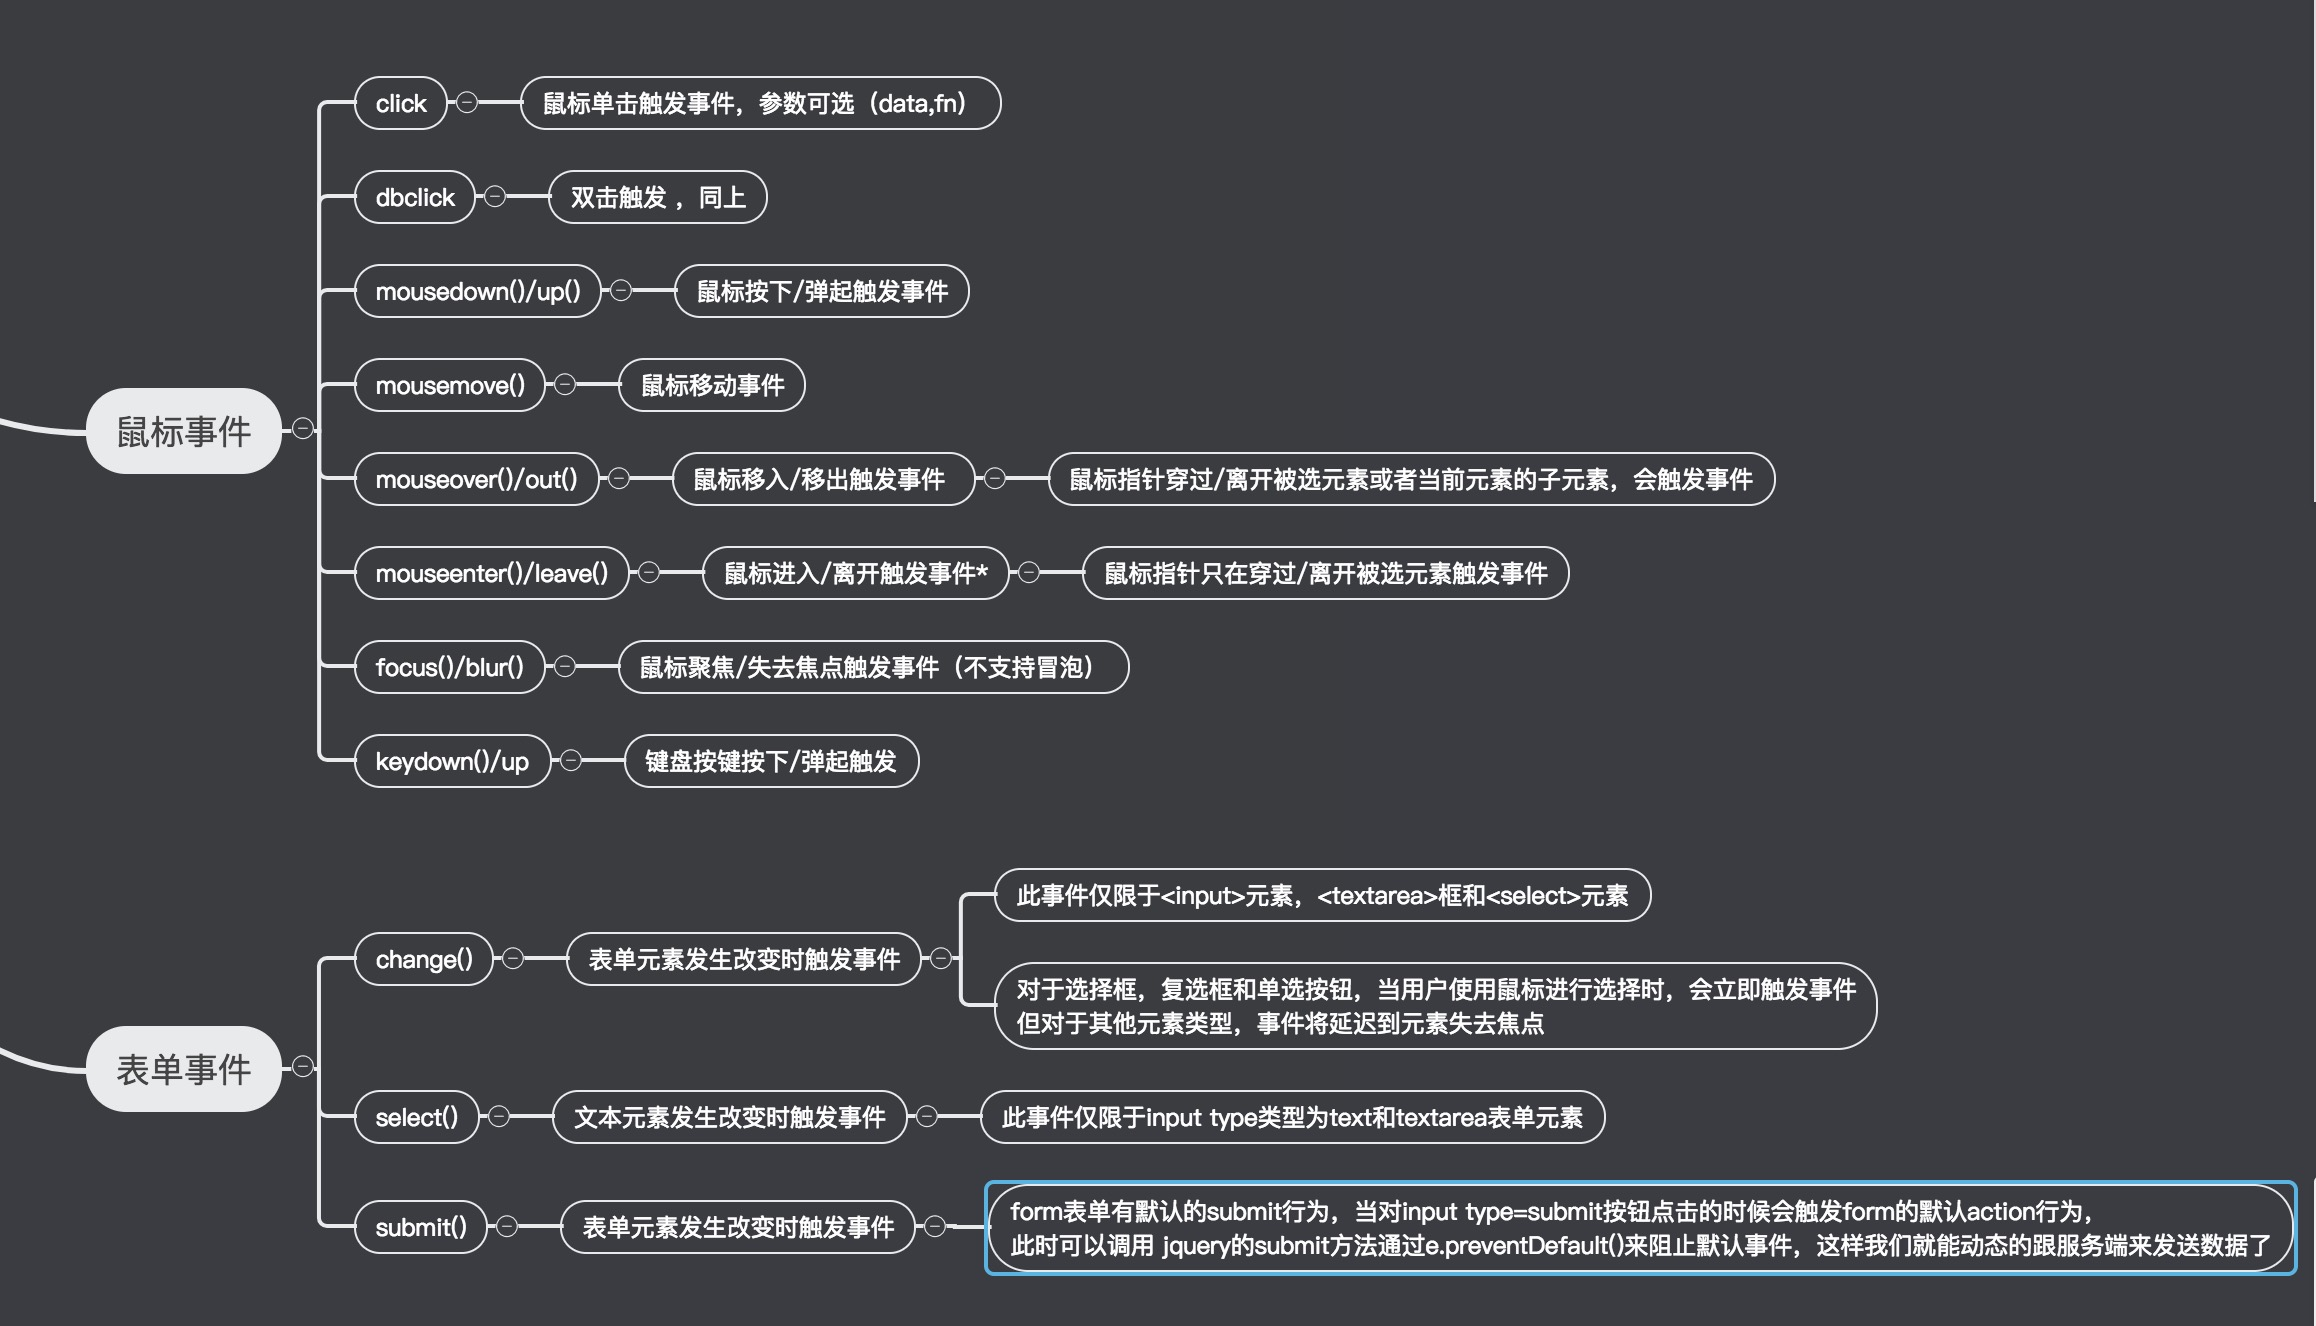
鼠標事件
<!DOCTYPE html>
<html><head><meta charset="UTF-8"><title></title><style type="text/css">*{padding: 0;margin: 0;}#box{width: 200px;height: 200px;background: gray;}#child{width: 100px;height: 100px;background: yellow;}</style></head><body><div id="box"><div id="child"></div><input type="text"  value="123" /><br /><input type="password"  value="" /></div></body><script src="jquery-3.2.1.js"></script><script type="text/javascript">$(document).ready(function(){//點擊事件/*$("#box").click(function(){console.log('click')})//雙擊事件$("#box").dblclick(function(){console.log('dbclick')})*//*//鼠標按下不松開$("#box").mousedown(function(){ //對應的是mouseupconsole.log('mousedown');})//鼠標松開$("#box").mouseup(function(){console.log('mouseup');})*///            被選元素和子元素被選中時 會觸發函數  (移入和移出)/* 先移動父盒子上-mouseover,再移到子盒子上-mouseout(從父盒子移開)、mouseover(移到子盒子子元素會觸發);離開out再over,再出來out$('#box').mouseover(function(){console.log('mouseover');})$('#box').mouseout(function(){console.log('mouseout');})*//*//只有被選元素移入的時候才會觸發;(進入、離開)    移到父盒子上-mouseenter、到子盒子上沒有變化,從父盒子移開mouseleave$('#box').mouseenter(function(){console.log('mouseenter');})$('#box').mouseleave(function(){console.log('mouseleave');})*//*$("#box").mousemove(function(){console.log('mousemove');})*//*獲取焦點$('input[type=text]').focus(function(){console.log($(this).val())  //form表單獲取值用val})$('input[type=text]').blur(function(){console.log($(this).val())})*/$('input[type=password]').keydown(function(e){  //鍵盤按下
                console.log(e.keyCode);if(e.keyCode == 13){console.log('enter被按下了')}//                console.log($(this).val())
            })$('input[type=password]').keyup(function(){  //鍵盤彈起console.log($(this).val())})})</script>
</html>
表單事件
<!DOCTYPE html>
<html>
<head><meta charset="utf-8" /><meta http-equiv="X-UA-Compatible" content="IE=edge"><title>Page Title</title><meta name="viewport" content="width=device-width, initial-scale=1"><style>.show{color: red;}</style></head>
<body><form action="https://www.luffycity.com"><select name="sweets" id="" multiple=''><option value="">巧克力</option><option value="" selected=''>糖果</option><option value="">焦糖</option><option value="" selected=''>曲奇餅</option><option value="">燒餅</option><option value="">麥香餅</option><option value="">曲奇餅2</option>       </select><input type="text" value="hello" id='target'><input type="submit" value="Luffy"/><input type="button" name="" id="" value="按鈕" /></form><input id="other" type="text" value="Trigger the handler"><div class="show"></div><script src="./jquery-3.2.1.min.js"></script><script>$(function() {//change()s事件//此事件僅限于input元素  textarea select$('select').change(function(){console.log($('select option:selected').text());$('.show').text($('select option:selected').text());})//          select()  僅限于用在 input type=text  textarea$('#other').select(function(){console.log($(this).val());})$('form').submit(function(e){
//                //阻止默認事件
                e.preventDefault();//跟服務端有很大掛鉤  下節課 咱們簡單的來玩一下ajax技術
                alert(1111);})})</script></body>
</html>
4、jquery的Ajax技術
AJAX = 異步的javascript和XML(Asynchronous Javascript and XML)
簡言之,在不重載整個網頁的情況下,AJAX通過后臺加載數據,并在網頁上進行顯示。
通過 jQuery AJAX 方法,您能夠使用 HTTP Get 和 HTTP Post 從遠程服務器上請求文本、HTML、XML 或 JSON - 同時您能夠把這些外部數據直接載入網頁的被選元素中。
<!DOCTYPE html>
<html><head><meta charset="UTF-8"><title></title></head><body><button id="btn">演示</button><div id="box"></div></body><script src='jquery-3.2.1.js'></script><script type="text/javascript">$(document).ready(function(){
//            $('#btn').click(function(){
//                  //只傳一個url,導入的index.html文件含有多個傳遞參數,類似于:index/html?name='張三'
//                  $('#box').load('./test.html');
//            })/*//get請求$.ajax({url:'./data.json',type:'get',
//                dataType:'json',success:function(data){console.log(data);},error:function(){}})*//*//注意:post請求無法演示 馬上學django 就可以演示了$.ajax({url:"/course",type:'post',data:{username:'zhangsan',password:'123'},success:function(data){if(data.state == 'ok'&& data.status =='200'){//登錄成功}},error:function(err){console.log(err);}})*/})</script>
</html>
?


)

Canary頻道)


- Cloudera Manager Server)


