線程
Threading用于提供線程相關的操作,線程是應用程序中工作的最小單元。
 1 #!/usr/bin/env python
 2 #coding=utf-8
 3 __author__ = 'yinjia'
 4
 5
 6 import threading,time
 7
 8 def show(arg):
 9     time.sleep(2)
10     print('線程: ' + str(arg))
11
12 for i in range(5):
13     t = threading.Thread(target=show,args=(i,))
14     t.start()
如上述代碼創建了5個線程,target指向函數,arges參數傳遞數值。
- 其它方法:
- start 線程準備就緒,等待CPU調度
- setName 為線程設置名稱
- getName 獲取線程名稱
- setDaemon 設置為后臺線程或前臺線程(默認)。如果是后臺線程,主線程執行過程中,后臺線程也在進行,主線程執行完畢后,后臺線程不論成功與否,均停止;如果是前臺線程,主線程執行過程中,前臺線程也在進行,主線程執行完畢后,等待前臺線程也執行完成后,程序停止
- join 逐個執行每個線程,執行完畢后繼續往下執行,該方法使得多線程變得無意義
- run 線程被cpu調度后自動執行線程對象的run方法
- setName\getName使用方法
 1 #!/usr/bin/env python
 2 #coding=utf-8
 3 __author__ = 'yinjia'
 4
 5
 6 import threading,time
 7
 8 def test(i):
 9     print("線程:%s" %str(i))
10     time.sleep(2)
11
12 for i in range(2):
13     t = threading.Thread(target=test,args=(i,))
14     t.start()
15     t.setName("我的線程: {0}".format(str(i)))
16     print(t.getName())
17
18 運行結果:
19 線程:0
20 我的線程: 0
21 線程:1
22 我的線程: 1


 1 #!/usr/bin/env python
 2 #coding=utf-8
 3 __author__ = 'yinjia'
 4
 5
 6 import threading,time
 7
 8 class MyThread(threading.Thread):
 9     def __init__(self,num):
10         threading.Thread.__init__(self)
11         self.num = num
12
13     def run(self):
14         print("running thread:%s" % self.num)
15         time.sleep(2)
16
17 if __name__ == '__main__':
18     for i in range(2):
19         t1 = MyThread(i)
20         t1.start()
21         t1.setName("我的線程: {0}".format(str(i)))
22         print(t1.getName())
23
24 運行結果:
25 running thread:0
26 我的線程: 0
27 running thread:1
28 我的線程: 1
- ?setDaemon方法使用
 1 #!/usr/bin/env python
 2 #coding=utf-8
 3 __author__ = 'yinjia'
 4
 5
 6 import threading,time
 7
 8 def run(num):
 9     print("running thread %s" % str(num))
10     time.sleep(2)
11     print("OK! %s" % str(num))
12
13 for i in range(2):
14     t = threading.Thread(target=run,args=(i,))
15     #未使用setDaemon時默認是前臺線程
16     #t.setDaemon(True)
17     t.start()
18     t.setName("MyThread_{0}".format(str(i)))
19     print(t.getName())
20
21 運行結果:
22 running thread 0
23 MyThread_0
24 running thread 1
25 MyThread_1
26 OK! 1
27 OK! 0
后臺線程:
 1 #!/usr/bin/env python
 2 #coding=utf-8
 3 __author__ = 'yinjia'
 4
 5
 6 import threading,time
 7
 8 def run(num):
 9     print("running thread %s" % str(num))
10     time.sleep(2)
    #主線程執行結束后,不會執行以下語句
11     print("OK! %s" % str(num))
12
13 for i in range(2):
14     t = threading.Thread(target=run,args=(i,))
15     #使用setDaemon時是后臺線程
16     t.setDaemon(True)
17     t.start()
18     t.setName("MyThread_{0}".format(str(i)))
19     print(t.getName())
20
21
22 運行結果:
23 running thread 0
24 MyThread_0
25 running thread 1
26 MyThread_1
- ?join用法理解
當未使用join方法時候,先執行完主線程再根據超時決定等待子線程執行完才能程序結束;如果使用join方法,先執行子線程執行完后,才開始執行下一步主線程,此方法沒有達到并行效果。
 1 #!/usr/bin/env python
 2 # _*_ coding:utf-8 _*_
 3 __author__ = 'yinjia'
 4
 5 import time,threading
 6
 7 def do_thread(num):
 8     time.sleep(3)
 9     print("this is thread %s" % str(num))
10
11 for i in range(2):
12     t = threading.Thread(target=do_thread, args=(i,))
13     t.start()
14     t.setName("Mythread_{0}".format(str(i)))
15     print("print in main thread: thread name:", t.getName())
16
17 運行效果:【#先同時執行兩個主線程,等待3秒后再執行兩個子線程】
18 print in main thread: thread name: Mythread_0  #主線程
19 print in main thread: thread name: Mythread_1  #主線程
20 this is thread 0 #子線程
21 this is thread 1 #子線程
使用join效果如下:
 1 #!/usr/bin/env python
 2 # _*_ coding:utf-8 _*_
 3 __author__ ='yinjia'
 4
 5 import time,threading
 6
 7 def do_thread(num):
 8     time.sleep(3)
 9     print("this is thread %s" % str(num))
10
11 for i in range(2):
12     t = threading.Thread(target=do_thread, args=(i,))
13     t.start()
14     t.join() #增加join
15     t.setName("Mythread_{0}".format(str(i)))
16     print("print in main thread: thread name:", t.getName())
17
18
19 運行結果:【先執行子線程,然后再執行主線程,單一逐步執行】
20 this is thread 0
21 print in main thread: thread name: Mythread_0
22 this is thread 1
23 print in main thread: thread name: Mythread_1
- 線程鎖(Lock、RLock)
線程是共享內存,當多個線程對一個公共變量修改數據,會導致線程爭搶問題,為了解決此問題,采用線程鎖。
 1 #!/usr/bin/env python
 2 # _*_ coding:utf-8 _*_
 3 __author__ = 'Administrator'
 4
 5 import time,threading
 6
 7 gl_num = 0
 8 lock = threading.RLock()
 9
10 def Func():
11     global gl_num
12     #加鎖
13     lock.acquire()
14     gl_num += 1
15     time.sleep(1)
16     print(gl_num)
17     #解鎖
18     lock.release()
19
20 for i in range(10):
21     t = threading.Thread(target=Func)
22     t.start()
- 信號量(Semaphore)
信號量同時允許一定數量的線程更改數據 ,比如廁所有3個坑,那最多只允許3個人上廁所,后面的人只能等里面有人出來了才能再進去。
 1 #!/usr/bin/env python
 2 # _*_ coding:utf-8 _*_
 3 __author__ = 'yinjia'
 4
 5 import time,threading
 6
 7 def run(n):
 8     semaphore.acquire()
 9     time.sleep(1)
10     print("run the thread: %s" % n)
11     semaphore.release()
12
13 if __name__ == '__main__':
14     num = 0
15     semaphore = threading.BoundedSemaphore(5)  # 最多允許5個線程同時運行
16     for i in range(20):
17         t = threading.Thread(target=run, args=(i,))
18         t.start()
- 事件(event)
事件用于主線程控制其他線程的執行,事件主要提供了三個方法?set、wait、clear。
 1 #!/usr/bin/env python
 2 # _*_ coding:utf-8 _*_
 3 __author__ = 'Administrator'
 4
 5 import time,threading
 6
 7 def run(event):
 8     print("start")
 9     event.wait()
10     print('END.....')
11
12 event_obj = threading.Event()
13 for i in range(2):
14     t = threading.Thread(target=run,args=(event_obj,))
15     t.start()
16
17 event_obj.clear()
18 inp = input("input: ")
19 if inp == 'true':
20     event_obj.set()
21
22 #運行結果:
23 start
24 start
25 input: true
26 END.....
27 END.....
- 條件(Condition)
滿足條件,才能釋放N個線程。
 1 #!/usr/bin/env python
 2 # _*_ coding:utf-8 _*_
 3 __author__ = 'Administrator'
 4
 5 import time,threading
 6
 7 def condition_func():
 8     ret = False
 9     inp = input('>>>')
10     if inp == '1':
11         ret = True
12     return ret
13
14 def run(n):
15     con.acquire()
16     con.wait_for(condition_func)
17     print("run the thread: %s" %n)
18     con.release()
19
20 if __name__ == '__main__':
21
22     con = threading.Condition()
23     for i in range(10):
24         t = threading.Thread(target=run, args=(i,))
25         t.start()
26
27 #運行結果:
28 >>>1
29 run the thread: 0
30 >>>1
31 run the thread: 1
32 >>>1
33 run the thread: 2
- 定時器
 1 #!/usr/bin/env python
 2 # _*_ coding:utf-8 _*_
 3 __author__ = 'Administrator'
 4
 5 from threading import Timer
 6
 7 def hello():
 8     print("hello, world")
 9
10 t = Timer(1, hello)
11 t.start()
?進程
- ?進程數據共享
?方法一:Array
 1 #!/usr/bin/env python
 2 #coding=utf-8
 3 __author__ = 'yinjia'
 4
 5
 6 from multiprocessing import Process, Array, RLock
 7
 8 def Foo(lock,temp,i):
 9     """
10     將第0個數加100
11     """
12     lock.acquire()
13     temp[0] = 100+i
14     for item in temp:
15         print(i,'----->',item)
16     lock.release()
17
18 lock = RLock()
19 temp = Array('i', [11, 22, 33, 44])
20
21 for i in range(20):
22     p = Process(target=Foo,args=(lock,temp,i,))
23     p.start()
方法二:manage.dict()共享數據
 1 #!/usr/bin/env python
 2 #coding=utf-8
 3 __author__ = 'yinjia'
 4
 5 from multiprocessing import Process, Manager
 6
 7 manage = Manager()
 8 dic = manage.dict()
 9
10
11 def Foo(i):
12     dic[i] = 100 + i
13     print(dic)
14     print(dic.values())
15
16
17 for i in range(2):
18     p = Process(target=Foo, args=(i,))
19     p.start()
20     p.join()
?
- 進程池
?進程池方法:?
apply(func[, args[, kwds]]): 阻塞的執行,比如創建一個有3個線程的線程池,當執行時是創建完一個 執行完函數再創建另一個,變成一個線性的執行?
apply_async(func[, args[, kwds[, callback]]]) : 它是非阻塞執行,同時創建3個線程的線程池,同時執行,只要有一個執行完立刻放回池子待下一個執行,并行的執行?
close(): 關閉pool,使其不在接受新的任務。?
terminate() : 結束工作進程,不在處理未完成的任務。?
join() 主進程阻塞,等待子進程的退出, join方法要在close或terminate之后使用。
 1 #!/usr/bin/env python
 2 #coding=utf-8
 3 __author__ = 'yinjia'
 4
 5 from multiprocessing import Pool
 6 import time
 7
 8 def myFun(i):
 9     time.sleep(2)
10     return i+100
11
12 def end_call(arg):
13     print("end_call",arg)
14
15 p = Pool(5)
16 #print(p.apply(myFun,(1,)))
17 #print(p.apply_async(func =myFun, args=(1,)).get())
18
19 print(p.map(myFun,range(10)))
20
21 for i in range(10):
22     p.apply_async(func=myFun,args=(i,),callback=end_call)
23
24 print("end")
25 p.close()
26 p.join()
?
- 生產者&消費型
產生數據的模塊,就形象地稱為生產者;而處理數據的模塊,就稱為消費者。在生產者與消費者之間在加個緩沖區,我們形象的稱之為倉庫,生產者負責往倉庫了進商 品,而消費者負責從倉庫里拿商品,這就構成了生產者消費者模型。
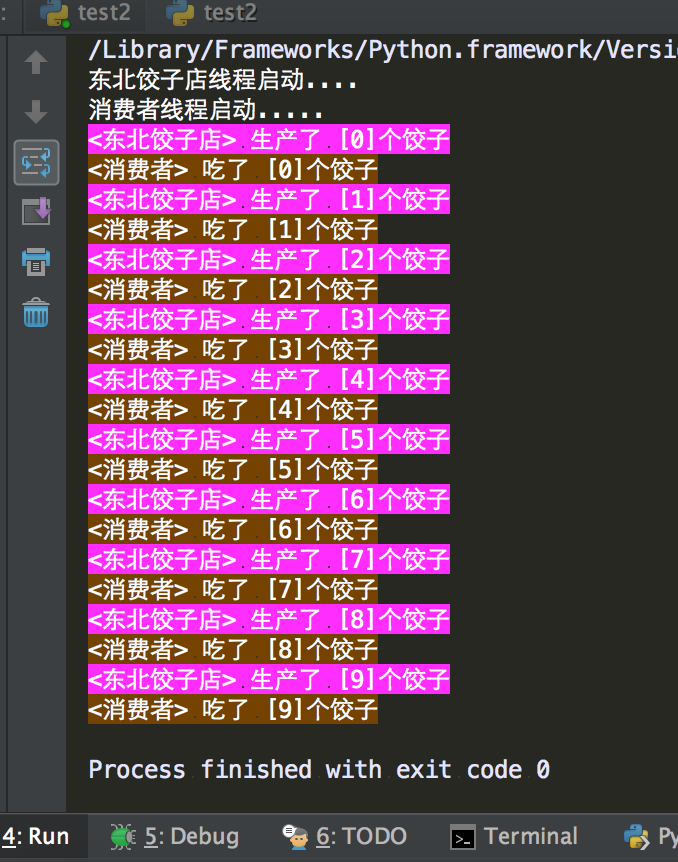
 1 #!/usr/bin/env python
 2 #coding=utf-8
 3 __author__ = 'yinjia'
 4
 5
 6 import queue
 7 import threading,time
 8
 9
10 message = queue.Queue(10)
11
12
13 def producer():
14     name = threading.current_thread().getName()
15     print(name + "線程啟動....")
16     for i in range(10):
17         time.sleep(1)
18         print('\033[45m<%s> 生產了 [%s]個餃子\033[0m' % (name, i))
19         message.put(name)
20
21
22 def consumer():
23     name = threading.current_thread().getName()
24     print(name + "線程啟動.....")
25     for i in range(10):
26         message.get()
27         print('\033[43m<%s> 吃了 [%s]個餃子\033[0m' % (name, i))
28
29
30 if __name__ == '__main__':
31
32     p = threading.Thread(target=producer, name='東北餃子店')
33     c = threading.Thread(target=consumer, name='消費者')
34     p.start()
35     c.start()
?運行結果:
?
協程
協程存在的意義:對于多線程應用,CPU通過切片的方式來切換線程間的執行,線程切換時需要耗時(保存狀態,下次繼續)。協程,則只使用一個線程,在一個線程中規定某個代碼塊執行順序。
協程的適用場景:當程序中存在大量不需要CPU的操作時(IO),適用于協程;
- gevent
 1 #!/usr/bin/env python
 2 # _*_ coding:utf-8 _*_
 3 __author__ = 'Administrator'
 4
 5 import gevent
 6
 7 def foo():
 8     print('Running in foo')
 9     gevent.sleep(0)
10     print('Explicit context switch to foo again')
11
12 def bar():
13     print('Explicit context to bar')
14     gevent.sleep(0)
15     print('Implicit context switch back to bar')
16
17 gevent.joinall([
18     gevent.spawn(foo),
19     gevent.spawn(bar),
20 ])
21
22 #運行結果:
23 Running in foo
24 Explicit context to bar
25 Explicit context switch to foo again
26 Implicit context switch back to bar
- 遇到IO操作自動切換
 1 #!/usr/bin/env python
 2 # _*_ coding:utf-8 _*_
 3
 4 from gevent import monkey; monkey.patch_all()
 5 import gevent
 6 import urllib.request
 7
 8 def f(url):
 9     print('GET: %s' % url)
10     resp = urllib.request.urlopen(url)
11     data = resp.read()
12     print('%d bytes received from %s.' % (len(data), url))
13
14 gevent.joinall([
15         gevent.spawn(f, 'https://www.python.org/'),
16         gevent.spawn(f, 'https://www.baidu.com/'),
17         gevent.spawn(f, 'https://github.com/'),
18 ])
19
20 #運行結果:
21 GET: https://www.python.org/
22 GET: https://www.baidu.com/
23 GET: https://github.com/
24 227 bytes received from https://www.baidu.com/.
25 49273 bytes received from https://www.python.org/.
26 53756 bytes received from https://github.com/.
?上下文管理
 1 #!/usr/bin/env python
 2 # _*_ coding:utf-8 _*_
 3 __author__ = 'Administrator'
 4
 5 import contextlib
 6
 7 @contextlib.contextmanager
 8 def tag(name):
 9     print("<%s>" % name)
10     yield
11     print("</%s>" % name)
12
13 with tag("h1"):
14     print("foo")
15
16 #運行結果:
17 <h1>
18 foo
19 </h1>
 1 #!/usr/bin/env python
 2 # _*_ coding:utf-8 _*_
 3 __author__ = 'Administrator'
 4
 5 import contextlib
 6
 7 @contextlib.contextmanager
 8 def myopen(file_path,mode):
 9     f = open(file_path,mode,encoding='utf-8')
10     try:
11         yield f
12     finally:
13         f.close()
14 with myopen('index.html','r') as file_obj:
15     for i in file_obj:
16         print(i)
更多方法參見:https://docs.python.org/3.6/library/contextlib.html


![[IoC容器Unity]第三回:依賴注入](http://pic.xiahunao.cn/[IoC容器Unity]第三回:依賴注入)


)


