文章目錄
- 前言
- 一、構建需要實例化的額外數據
- 二、在頂點著色器,將實例化 ID 從 appdata 存入 v2f 傳給片元著色器
- 三、在片斷著色器中訪問具體的實例化變量
- 三、使用代碼修改Shader材質屬性,實現GPU實例化后不同對象顏色不同的效果
- 1、在C#測試腳本生成小板凳的時候修改材質屬性
- 2、我們需要使用材質屬性塊來修改才可以不讓GPU實例化失效
前言
在之前的文章中,我們解決了GPU實例化需要的 appdata 、v2f 數據準備 和 使GPU實例化后的頂點位置正確。
-
Unity中Batching優化的GPU實例化(2)
-
Unity中Batching優化的GPU實例化(3)
在這篇文章中,我們來實現一下GPU實例化后怎么使不同對象使用不同的材質顏色,這里只是用顏色作為例子,如果需要 GPU實例化后,不同對象使用不同屬性,也是用此方法。
一、構建需要實例化的額外數據
因為我們需要修改材質的顏色,所以需要定義一個顏色屬性。
但是,在使用GPU實例化定義屬性時,得按如下方法定義
構建需要實例化的額外數據:
#ifdef UNITY_INSTANCING_ENABLED
UNITY_INSTANCING_BUFFER_START(prop自定義名字)
UNITY_DEFINE_INSTANCED_PROP(type, name)
UNITY_INSTANCING_BUFFER_END(prop自定義名字)
#endif
- 在UnityInstancing.cginc文件中,看一下Unity這句話做了什么
UNITY_INSTANCING_BUFFER_START(prop)
UNITY_INSTANCING_BUFFER_END(prop)
其實這兩句話主要是,定義了一個結構體。

-
UNITY_DEFINE_INSTANCED_PROP(fixed4, _Color) 這句話定義結構體中的變量
-
在我的Shader中,使用材質的顏色屬性作為測試:
UNITY_INSTANCING_BUFFER_START(prop)
UNITY_DEFINE_INSTANCED_PROP(fixed4, _Color)
UNITY_INSTANCING_BUFFER_END(prop)
二、在頂點著色器,將實例化 ID 從 appdata 存入 v2f 傳給片元著色器
UNITY_TRANSFER_INSTANCE_ID(v, o); 當需要將實例化ID傳到片斷著色器時,在頂點著色器中添加.
- 在UnityInstancing.cginc文件中,看一下Unity這句話做了什么
由源碼可知,這句話做了類似于 o,uv = i.uv; 這樣的操作

三、在片斷著色器中訪問具體的實例化變量
UNITY_ACCESS_INSTANCED_PROP(arrayName, propName)
- 在UnityInstancing.cginc文件中,看一下Unity這句話做了什么

- 我把我測試使用的_Color替換成UNITY_ACCESS_INSTANCED_PROP(prop, _Color)
fixed4 frag (v2f i) : SV_Target
{
UNITY_SETUP_INSTANCE_ID(i);
return i.worldPos.y * 0.15 + UNITY_ACCESS_INSTANCED_PROP(prop, _Color);
}
三、使用代碼修改Shader材質屬性,實現GPU實例化后不同對象顏色不同的效果
做完以上步驟后,我們的Shader就支持GPU實例化后的不同對象使用不同的顏色屬性了。但是,我們要用代碼修改才有用,不是直接調節屬性面板
我們可以看出,調節屬性面板我們的所有 GPU實例化問題,屬性顏色都會隨之改變
1、在C#測試腳本生成小板凳的時候修改材質屬性
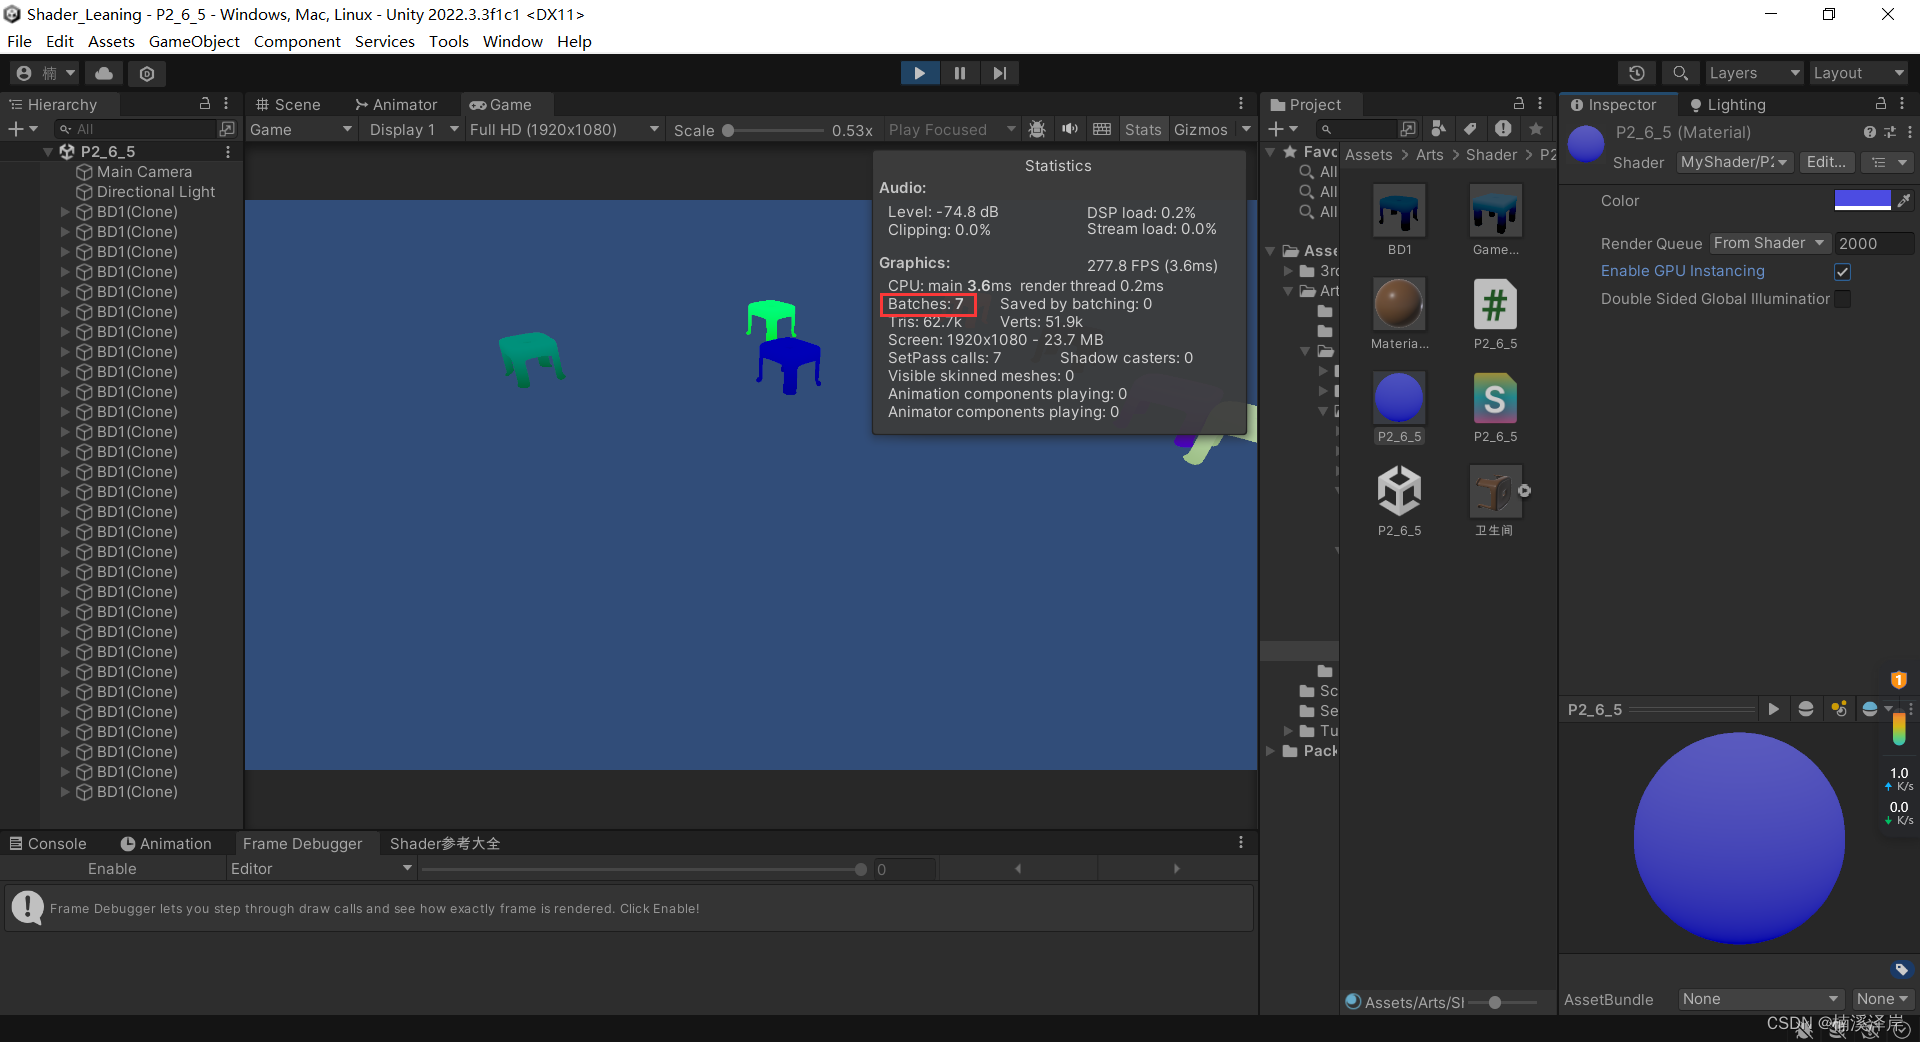
- 我們在生成小板凳時。同時修改小板凳材質屬性的顏色(不能這樣修改,會導致GPU實例化失效):
using UnityEngine;public class P2_6_5 : MonoBehaviour
{public GameObject Prefab;public int Count = 1;public int Range = 10;// Start is called before the first frame updatevoid Start(){for (int i = 0;i < Count;i++){Vector3 pos = Random.insideUnitCircle * Range;Color color = new Color(Random.value,Random.value,Random.value,Random.value);GameObject chair = Instantiate(Prefab,new Vector3(pos.x,0,pos.y),Quaternion.identity);chair.GetComponentInChildren<MeshRenderer>().material.SetColor("_Color", color);}}
}
我們可以看見,雖然顏色變了。但是,GPU實例化失效了
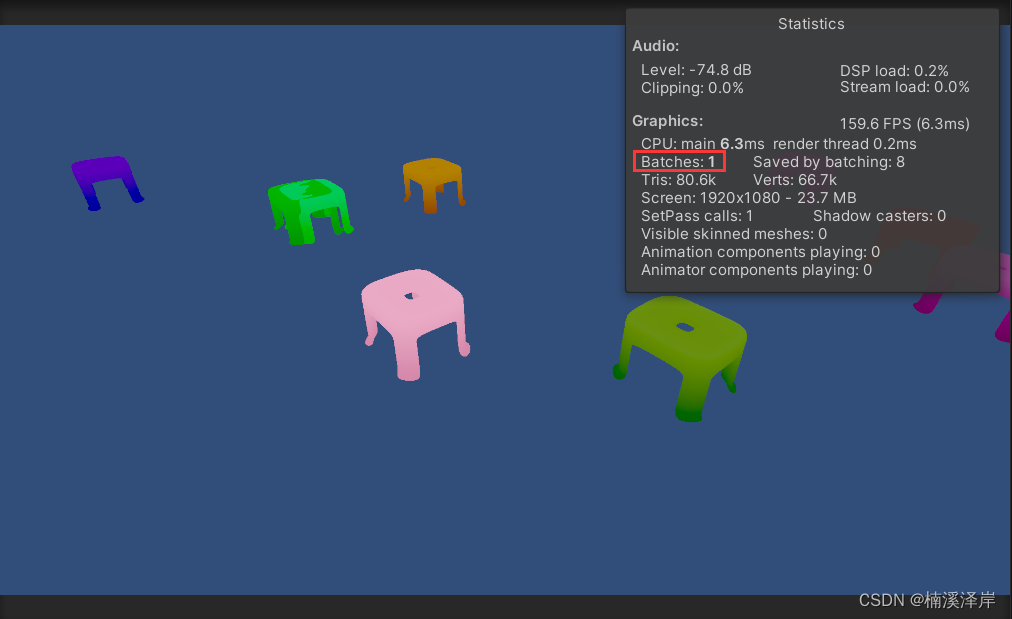
2、我們需要使用材質屬性塊來修改才可以不讓GPU實例化失效
MaterialPropertyBlock prop = new MaterialPropertyBlock();
prop.SetColor(“_Color”,color);
using UnityEngine;public class P2_6_5 : MonoBehaviour
{public GameObject Prefab;public int Count = 1;public int Range = 10;// Start is called before the first frame updatevoid Start(){for (int i = 0;i < Count;i++){Vector3 pos = Random.insideUnitCircle * Range;Color color = new Color(Random.value,Random.value,Random.value,Random.value);GameObject chair = Instantiate(Prefab,new Vector3(pos.x,0,pos.y),Quaternion.identity);MaterialPropertyBlock prop = new MaterialPropertyBlock();prop.SetColor("_Color",color);chair.GetComponentInChildren<MeshRenderer>().SetPropertyBlock(prop);}}
}
最終效果(CPU實例化成功,且不同對象有不同的顏色屬性了):


 uniapp微信小程序)


)
:RK3568底板電路VGA顯示接口原理圖分析)

)


