因為自己寫業務要定制各種 pdf 預覽情況(可能),所以采用了 pdf.js 而不是各種第三方封裝庫,主要還是為了更好的自由度。
一、PDF.js 介紹
官方地址
中文文檔
PDF.js 是一個使用 HTML5 構建的便攜式文檔格式查看器。
pdf.js 是社區驅動的,并由 Mozilla 支持。我們的目標是為解析和呈現 PDF 創建一個通用的、基于 Web 標準的平臺。
二、 安裝方法
1、下載 pdf.js
下載地址

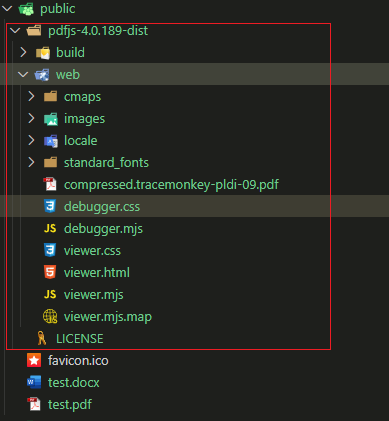
我下載的版本是 pdfjs-4.0.189-dist

2、解壓包并放到項目中
解壓后將完整文件夾放到 vue3 的 public 文件夾內
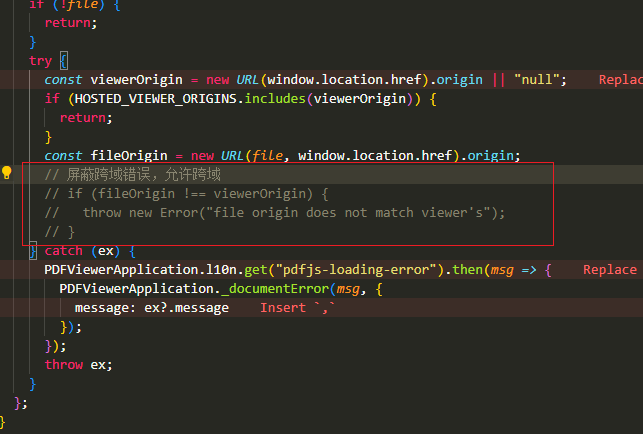
3、屏蔽跨域錯誤,允許跨域
在 web/viewer.mjs 內找到搜索 throw new Error("file origin does not match viewer's") 并注釋掉,如果不注釋,可能會出現跨域錯誤,無法正常預覽文件。
這樣就算安裝完成了,后面我們開始在項目中使用。
三、基礎使用
1、創建 PDF 組件
我們可以創建一個 PDF 組件,代碼如下:
<script setup lang="ts">
import { onMounted, ref } from 'vue';
interface Props {url: string; // pdf文件地址
}
const props = defineProps<Props>();
const pdfUrl = ref(''); // pdf文件地址
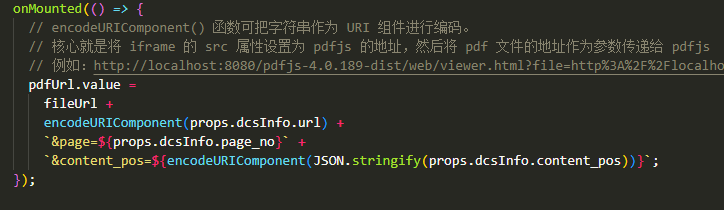
const fileUrl = '/pdfjs-4.0.189-dist/web/viewer.html?file='; // pdfjs文件地址onMounted(() => {// encodeURIComponent() 函數可把字符串作為 URI 組件進行編碼。// 核心就是將 iframe 的 src 屬性設置為 pdfjs 的地址,然后將 pdf 文件的地址作為參數傳遞給 pdfjs// 例如:http://localhost:8080/pdfjs-4.0.189-dist/web/viewer.html?file=http%3A%2F%2Flocalhost%3A8080%2Fpdf%2Ftest.pdfpdfUrl.value = fileUrl + encodeURIComponent(props.url);
});
</script><template><div class="container"><iframe :src="pdfUrl" width="100%" height="100%"></iframe></div>
</template><style scoped lang="scss">
.container {width: 100%;height: 100%;
}
</style>
2、使用組件
比如我們需要預覽 public 下的一個 test.pdf 文件
<div class="pdf-box"><PDF url="/public/test.pdf" />
</div>
下面是界面默認預覽效果
四、進階使用
1、頁面跳轉(傳參)
比如我們要跳到第 10 頁,我們可以在地址里面添加參數 &page=${10}
pdfUrl.value = fileUrl + encodeURIComponent(props.url) + `&page=${10}`;
在 viewer.mjs 找到 setInitialView 函數,注意是下面這個:
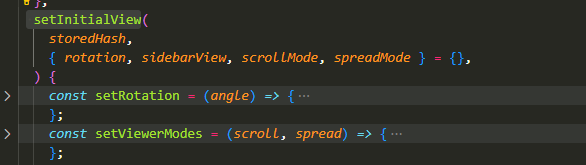
重點:在函數末尾最下面添加下面的跳轉代碼(寫在上面會報錯,因為還沒有獲取到實例)
console.log(this.pdfViewer);// 獲取url參數function getQueryVariable(variable) {var query = window.location.search.substring(1);var vars = query.split('&');for (var i = 0; i < vars.length; i++) {var pair = vars[i].split('=');if (pair[0] == variable) {return pair[1];}}return false;}// 跳轉到指定頁const page = getQueryVariable('page');console.log(page);if (page) {this.pdfViewer.currentPageNumber = Number(page);}
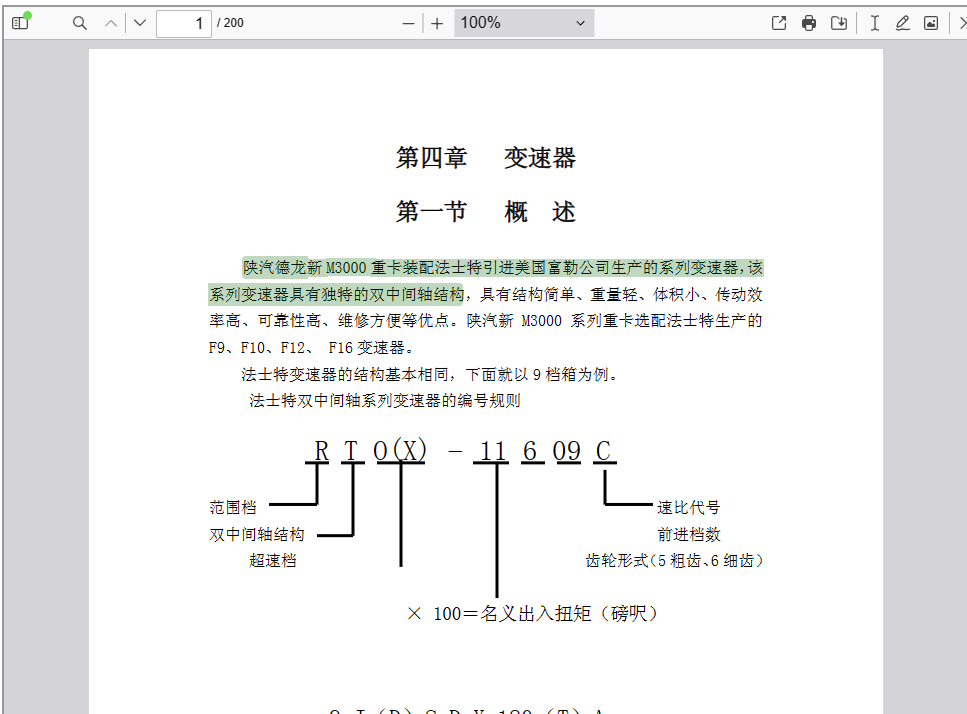
2、文本標注(傳參)
某些時候我們需要跳轉到指定頁面,然后自動標注文本,這個時候就需要自動標注了
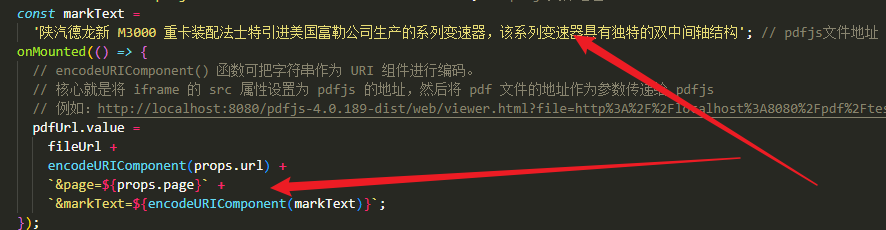
代碼跟跳轉一樣,寫在后面就可以了
// 自動高亮文本(要解碼)decodeURIComponent: 解碼const markText = decodeURIComponent(getQueryVariable('markText'));console.log('markText===>', markText);if (markText) {// 對查詢輸入框進行賦值document.getElementById('findInput').value = markText;// 點擊高亮按鈕實現高亮顯示關鍵詞document.getElementById('findHighlightAll').click();}
目前我還沒有找到批量標注的辦法,批量標注建議還是使用下面頁面+坐標,遮罩的方法
3、添加遮罩高亮(頁碼+坐標)
主要是為了解決批量標注的問題,因為 pdfjs 原生只支持單文本,不支持批量,要修改大量源碼(我能力不行,太難了😥)
所以還是換了種方案,就是后端返回頁碼+坐標,添加遮罩層渲染的方式。
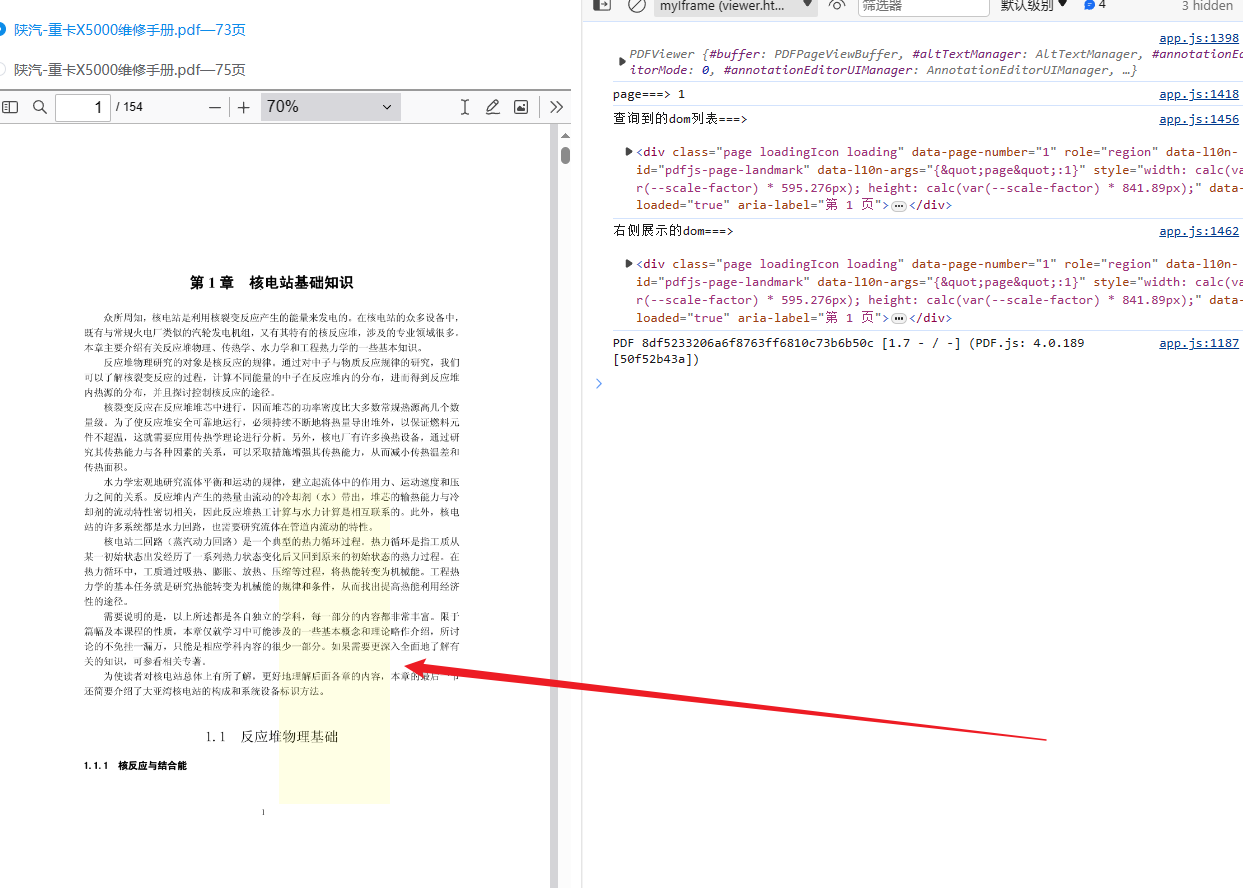
這種方法主要是找到渲染的 dom元素,因為渲染的pdf有一個叫做 data-page-number="1" 的屬性,因此我們可以通過 js 的 querySelectorAll 選擇器找到對應屬性的 dom 元素,然后再操作添加遮罩就可以了,代碼放在下面。
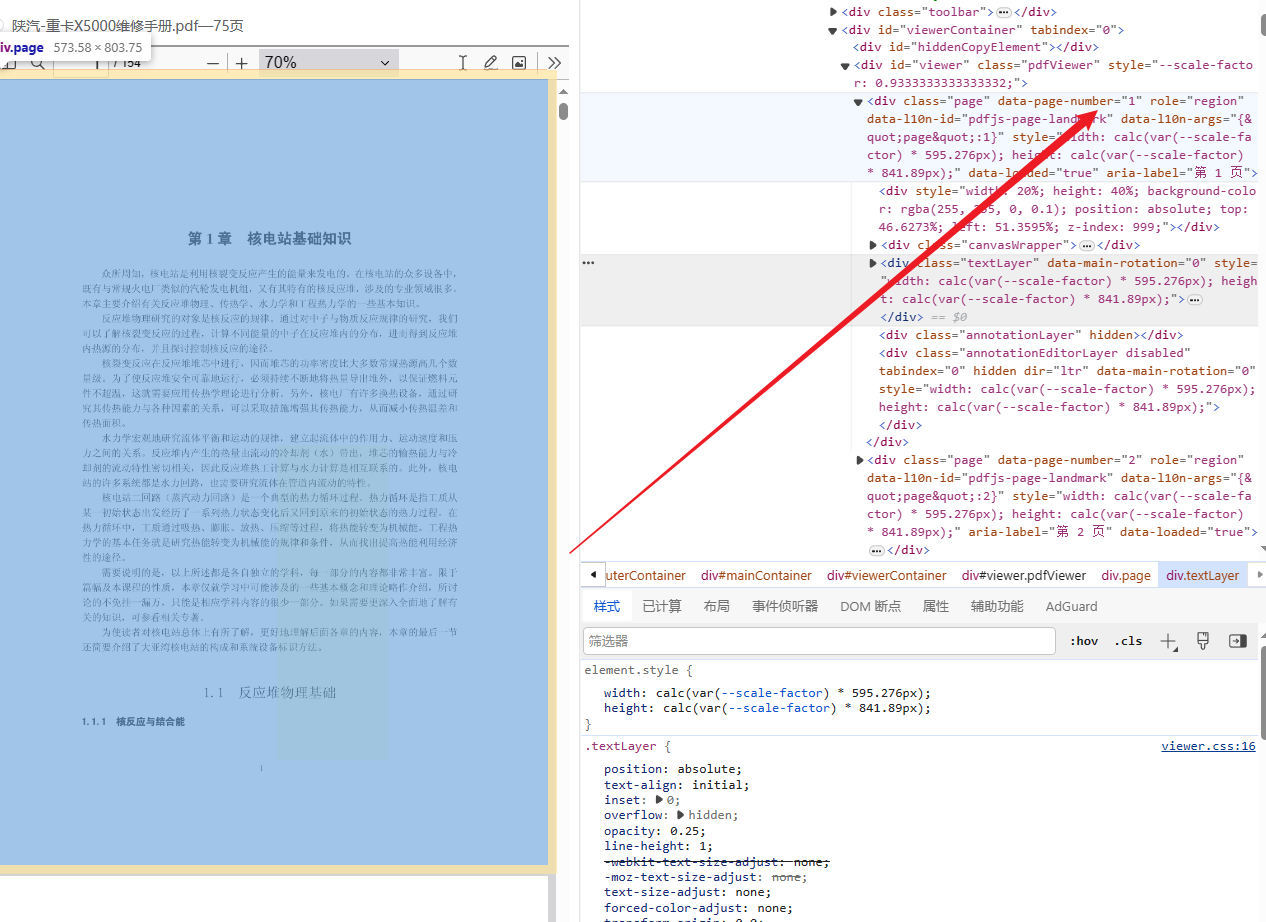
// 測試的坐標const content_pos_1 = {x: 0.5135954145019941,y: 0.4662730487881233,};const content_pos_2 = {x: 0.7135954145019941,y: 0.8662730487881233,};// 查找屬性 data-page-number='頁碼' 的 dom 元素const pageList = document.querySelectorAll(`[data-page-number='${page}']`);console.log('查詢到的dom列表===>\n', pageList[1]);// 查詢到的第一個是左側小菜單頁碼div,第二個是才是展示的divconst pageView = pageList[1];console.log('右側展示的dom===>\n', pageView);// 在元素上畫一個divconst div = document.createElement('div');div.style.width = (content_pos_2.x - content_pos_1.x) * 100 + '%';div.style.height = (content_pos_2.y - content_pos_1.y) * 100 + '%';div.style.backgroundColor = 'rgb(255, 255, 0, 0.1)';div.style.position = 'absolute';div.style.top = content_pos_1.y * 100 + '%';div.style.left = content_pos_1.x * 100 + '%';div.style.zIndex = '1'; // pdfjs 文本的層級是2 所以這里要設置為1 放著不能復制pageView.appendChild(div);
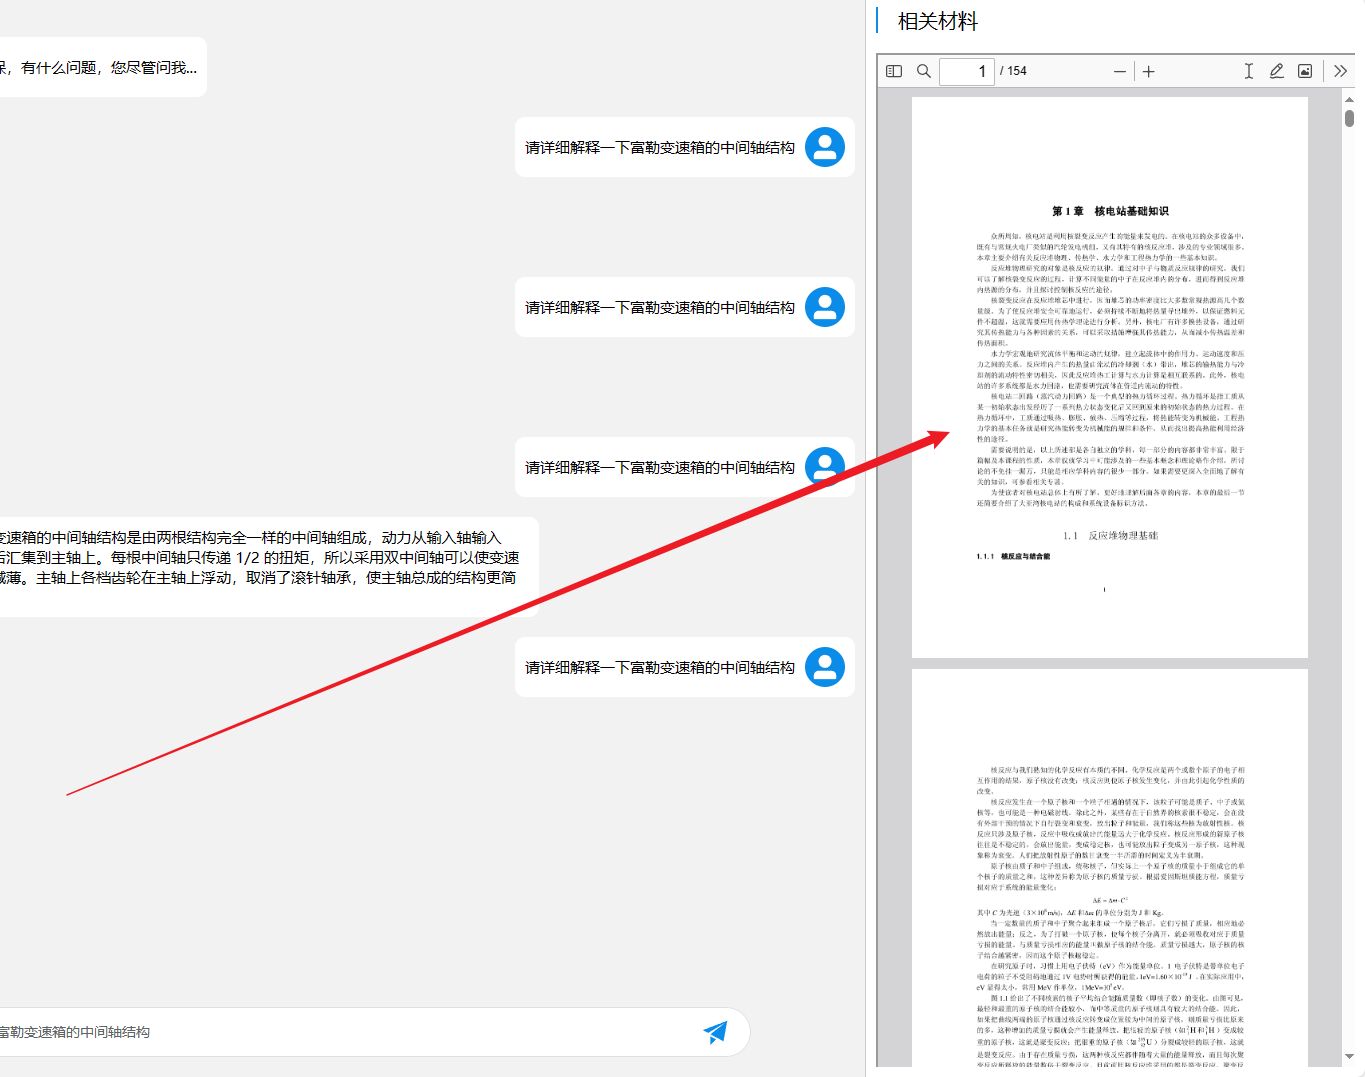
渲染到pdf上就是下面的樣子:
4、添加遮罩高亮(縮放動態更新)
因為 pdf 會縮放的緣故,縮放的話會重新更新 pdf ,我們添加的 div 就會消失,所以我們要在重新更新的時候重新添加,源碼內部重新添加的函數在這個位置: #updateUIState
我們只需要將修改后重新添加的代碼放在尾部就行
首先我們要修改第三部分的代碼
// 測試的坐標const content_pos_1 = {x: 0.5135954145019941,y: 0.4662730487881233,};const content_pos_2 = {x: 0.7135954145019941,y: 0.8662730487881233,};// pdf 縮放會重新設置,所以放在window保存,其他地方要用window.page = page;window.shade = {width: (content_pos_2.x - content_pos_1.x) * 100 + '%',height: (content_pos_2.y - content_pos_1.y) * 100 + '%',top: content_pos_1.y * 100 + '%',left: content_pos_1.x * 100 + '%',};console.log(window.shade);// 查找屬性 data-page-number='頁碼' 的 dom 元素const pageList = document.querySelectorAll(`[data-page-number='${page}']`);console.log('查詢到的dom列表===>\n', pageList[1]);// 查詢到的第一個是左側小菜單頁碼div,第二個是才是展示的divconst pageView = pageList[1];console.log('右側展示的dom===>\n', pageView);// 在元素上畫一個divconst div = document.createElement('div');div.id = 'shade';div.style.width = window.shade.width;div.style.height = window.shade.height;div.style.backgroundColor = 'rgb(255, 255, 0, 0.1)';div.style.position = 'absolute';div.style.top = window.shade.top;div.style.left = window.shade.left;div.style.zIndex = '1';pageView.appendChild(div);
然后在 #updateUIState 函數的末尾添加下面的新增代碼
setTimeout(() => {if (!window.page) return;const pageList = document.querySelectorAll(`[data-page-number='${window.page}']`);const pageView = pageList[1];// 刪除 id 為 shade 的元素(舊遮罩)const shade = document.getElementById('shade');if (shade) {shade.remove();}const div = document.createElement('div');div.id = 'shade';div.style.width = window.shade.width;div.style.height = window.shade.height;div.style.backgroundColor = 'rgb(255, 255, 0, 0.1)';div.style.position = 'absolute';div.style.top = window.shade.top;div.style.left = window.shade.left;div.style.zIndex = '1';pageView.appendChild(div);}, 500);
最終效果如下:

ps:如果要做大量的頁面+坐標渲染(后端返回的是個數組),修改下上面的代碼邏輯就行,傳參自己寫,不難的
當然,也可以看下面的代碼哈哈哈,我還是寫出來吧
5、添加遮罩高亮(數組批量跨頁渲染)
假設后端返回的數據格式是這樣的,是一個包含 頁碼、坐標的標注數組,我們需要在每個頁碼內渲染遮罩
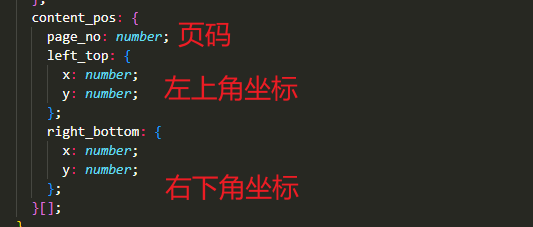
我們就需要這樣傳參
setInitialView(storedHash, { rotation, sidebarView, scrollMode, spreadMode } = {}) 初始化函數中:
window.content_pos = JSON.parse(decodeURIComponent(getQueryVariable('content_pos')));console.log(window.content_pos[0]);window.content_pos.forEach((item, index) => {const page = item.page_no;const shade = {width: (item.right_bottom.x - item.left_top.x) * 100 + '%',height: (item.right_bottom.y - item.left_top.y) * 100 + '%',top: item.left_top.y * 100 + '%',left: item.left_top.x * 100 + '%',};console.log(shade);const pageList = document.querySelectorAll(`[data-page-number='${page}']`);const pageView = pageList[1];const div = document.createElement('div');div.id = 'shade' + index;div.style.width = shade.width;div.style.height = shade.height;div.style.backgroundColor = 'rgb(255, 255, 0, 0.1)';div.style.position = 'absolute';div.style.top = shade.top;div.style.left = shade.left;div.style.zIndex = '1';pageView.appendChild(div);});
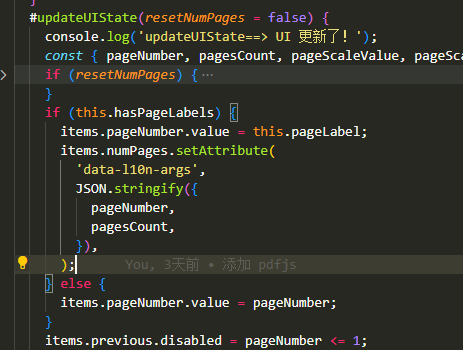
#updateUIState(resetNumPages = false) 更新函數中:
setTimeout(() => {if (window.content_pos) {window.content_pos.forEach((item, index) => {const shadeEl = document.getElementById('shade' + index);if (shadeEl) {shadeEl.remove();}const page = item.page_no;const shade = {width: (item.right_bottom.x - item.left_top.x) * 100 + '%',height: (item.right_bottom.y - item.left_top.y) * 100 + '%',top: item.left_top.y * 100 + '%',left: item.left_top.x * 100 + '%',};const pageList = document.querySelectorAll(`[data-page-number='${page}']`);const pageView = pageList[1];const div = document.createElement('div');div.id = 'shade' + index;div.style.width = shade.width;div.style.height = shade.height;div.style.backgroundColor = 'rgb(255, 255, 0, 0.1)';div.style.position = 'absolute';div.style.top = shade.top;div.style.left = shade.left;div.style.zIndex = '1';pageView.appendChild(div);});}}, 500);
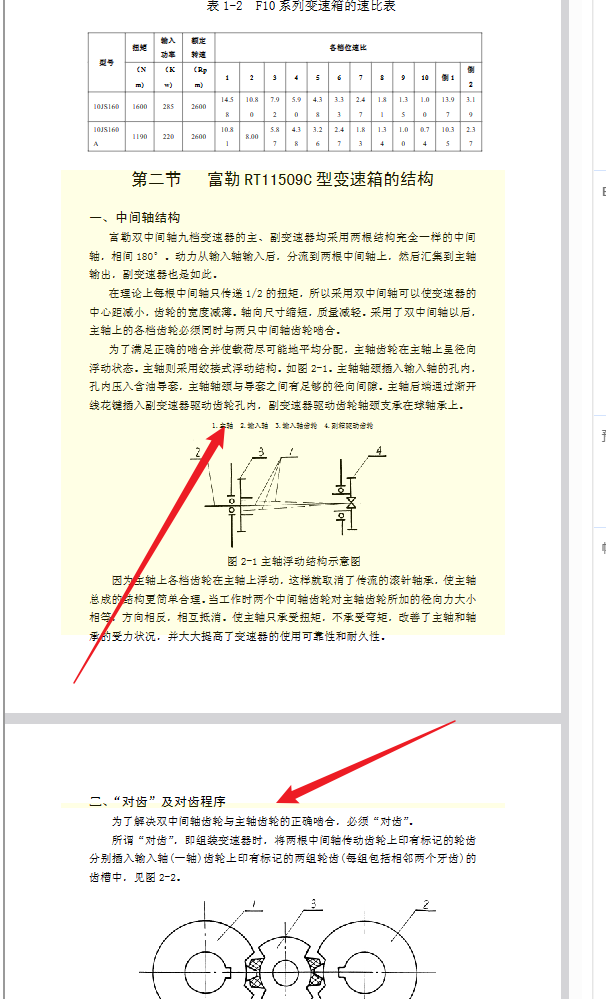
效果展示,可以實現跨頁,多頁渲染
后續根據開發業務持續更新😁
感謝大佬們的無私分享
詳細|vue中使用PDF.js預覽文件實踐
vue3項目使用pdf.js插件實現:搜索高亮、修改pdf.js顯示的頁碼、向pdf.js傳值、控制搜索、處理接口文件流
pdf.js根據路徑里傳參數高亮顯示關鍵字(跳轉到對應頁面)
:人工智能的歷史以及再探矩陣)


)
freeRTOS移植STMF103)


