前言
云原生應用程序通常需要可擴展的消息傳遞解決方案,以提供消息隊列、主題和訂閱等功能。.NET Aspire 組件簡化了連接到各種消息傳遞提供程序(例如 Azure 服務總線)的過程。在本教程中,小編將為大家介紹如何創建一個 ASP.NET Core 應用并將提交的消息將發送到服務總線主題以供訂閱者使用。
環境準備
要使用 .NET Aspire,需要在本地安裝以下軟件:
- .NET 8.0
- .NET Aspire 工作負載:
- 使用 Visual Studio 安裝程序
- 使用dotnet workload install aspire命令
- Docker 桌面
- 集成開發環境 (IDE) 或代碼編輯器,例如:
- Visual Studio 2022 預覽版 17.9 或更高版本(可選)
- Visual Studio 代碼(可選)
設置 Azure 服務總線賬戶
az group create -n <your-resource-group-name> -location eastus
az servicebus namespace create -g <your-resource-group-name> --name <your-namespace-name> --location eastus
az servicebus topic create --g <your-resource-group-name> --namespace-name <your-namespace-name> --name notifications
az servicebus topic subscription create --g <your-resource-group-name> --namespace-name <your-namespace-name> --topic-name notifications --name mobile
備注:your-resource-group-name和your-namespace-name替換為自己值即可。
Azure 身份驗證
可以使用無密碼身份驗證或連接字符串來完成此快速入門。無密碼連接使用 Azure Active Directory 和基于角色的訪問控制 (RBAC) 連接到服務總線命名空間。無需擔心代碼、配置文件或安全存儲(例如 Azure Key Vault)中存在硬編碼連接字符串。
除此之外,還可以使用連接字符串連接到服務總線命名空間,但建議在實際應用程序和生產環境中使用無密碼方法。有關更多信息,請閱讀身份驗證和授權或訪問無密碼概述頁面。
創建項目
- 在 Visual Studio 頂部,導航到“文件” “新建” “項目”。
- 在對話框窗口中,搜索ASP.NET Core并選擇ASP.NET Core Web API。選擇下一步。
- 在“配置新項目”屏幕上:
- 輸入項目名稱AspireMessaging。
- 將其余值保留為默認值,然后選擇“下一步”。
添加 Worker Service
接下來,將工作線程服務項目添加到解決方案,以檢索和處理發往 Azure 服務總線的消息。
- 在解決方案資源管理器中,右鍵單擊頂級AspireMessaging解決方案節點,然后選擇“添加” “新項目”。
- 搜索并選擇Worker Service模板,然后選擇Next。
- 對于項目名稱,輸入AspireMessaging.Worker并選擇下一步。
- 在附加信息屏幕上:
- 確保選擇.NET 8.0 。
- 確保選中Enlist in .NET Aspire Orchestration并選擇Create。
Visual Studio 將項目添加到您的解決方案中,并使用新的代碼行更新項目的Program.cs文件:AspireMessaging.AppHost
builder.AddProject<Projects.AspireMessaging_WorkerService>("aspiremessaging.workerservice");
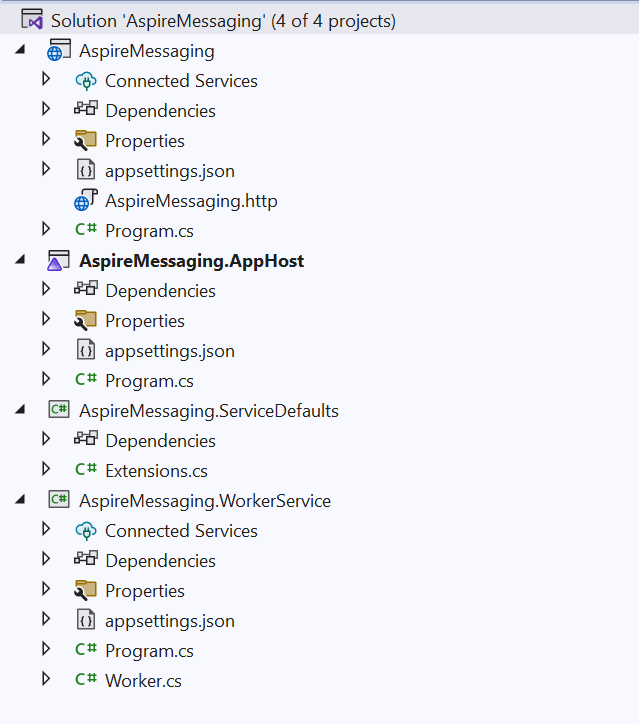
完整的文件結構:
將 .NET Aspire 組件添加到 API
將.NET Aspire Azure 服務總線組件添加到您的AspireMessaging應用程序:
dotnet add package Aspire.Azure.Messaging.ServiceBus --prerelease
在Razor Pages 項目的Program.csAspireMessaging文件中,添加對擴展方法的調用AddAzureServiceBus:
builder.AddAzureServiceBus("serviceBusConnection");
在項目的_appsettings.json文件中AspireMessaging,添加對應的連接信息:
{"ConnectionStrings": {"serviceBusConnection": "Endpoint=sb://{your_namespace}.servicebus.windows.net/;SharedAccessKeyName=accesskeyname;SharedAccessKey=accesskey"}
}
備注:將{your_namespace}替換為自己的服務總線空間的名稱
創建 API 端點
提供一個端點來接收數據并將其發布到服務總線主題并向訂閱者廣播。將以下端點添加到AspireMessaging項目中以向主題發送消息:
app.MapPost("/notify", static async (ServiceBusClient client, string message) =>
{var sender = client.CreateSender("notifications");// Create a batchusing ServiceBusMessageBatch messageBatch =await sender.CreateMessageBatchAsync();if (messageBatch.TryAddMessage(new ServiceBusMessage($"Message {message}")) is false){// If it's too large for the batch.throw new Exception($"The message {message} is too large to fit in the batch.");}// Use the producer client to send the batch of // messages to the Service Bus topic.await sender.SendMessagesAsync(messageBatch);Console.WriteLine($"A message has been published to the topic.");
})
將 .NET Aspire 組件添加到 Worker Service
將.NET Aspire Azure 服務總線組件添加到AspireMessaging.Worker應用程序:
dotnet add package Aspire.Azure.Messaging.ServiceBus --prerelease
在Razor Pages 項目的Program.csAspireMessaging.Worker文件中,添加對擴展方法的調用AddAzureServiceBus:
builder.AddAzureServiceBus("serviceBusConnection");
在項目的_appsettings.json文件中AspireMessaging.Worker,添加對應的連接信息:
{"ConnectionStrings": {"serviceBusConnection": "Endpoint=sb://{your_namespace}.servicebus.windows.net/;SharedAccessKeyName=accesskeyname;SharedAccessKey=accesskey"}
}
備注:將{your_namespace}替換為自己的服務總線空間的名稱
處理來自訂閱者的消息
當新消息放入隊列時messages,工作服務應檢索、處理和刪除該消息。更新Worker.cs類以匹配以下代碼:
public class Worker(ILogger<Worker> logger,ServiceBusClient client) : BackgroundService
{protected override async Task ExecuteAsync(CancellationToken stoppingToken){while (!stoppingToken.IsCancellationRequested){var processor = client.CreateProcessor("notifications","mobile",new ServiceBusProcessorOptions());// add handler to process messagesprocessor.ProcessMessageAsync += MessageHandler;// add handler to process any errorsprocessor.ProcessErrorAsync += ErrorHandler;// start processing await processor.StartProcessingAsync();logger.LogInformation("Wait for a minute and then press any key to end the processing");Console.ReadKey();// stop processinglogger.LogInformation("\nStopping the receiver...");await processor.StopProcessingAsync();logger.LogInformation("Stopped receiving messages");}}async Task MessageHandler(ProcessMessageEventArgs args){string body = args.Message.Body.ToString();logger.LogInformation("Received: {Body} from subscription.", body);// complete the message. messages is deleted from the subscription.await args.CompleteMessageAsync(args.Message);}// handle any errors when receiving messagesTask ErrorHandler(ProcessErrorEventArgs args){logger.LogError(args.Exception, args.Exception.Message);return Task.CompletedTask;}
}
最后:在本地運行并測試應用程序
- 按 Visual Studio 頂部的運行按鈕啟動 Aspire 應用程序。.NET Aspire 儀表板應用程序應在瀏覽器中打開。
- 在項目頁面的aspireweb行中,單擊Endpoints列中的鏈接以打開 API 的 Swagger UI 頁面。
- 在 .NET Aspire 儀表板上,導航到AspireWorkerService項目的日志。
- 返回 Swagger UI 頁面,展開/notify端點并選擇Try it out。
- 在消息輸入框中輸入測試消息。
- 選擇執行以發送測試請求。
- 切換回AspireWorkerService日志。看到輸出日志中打印的測試消息。
擴展鏈接:
如何使用 Blazor 框架在前端瀏覽器中導入/導出 Excel XLSX
如何在.NET電子表格應用程序中創建流程圖
如何將實時數據顯示在前端電子表格中


)


試題)
)


