文章目錄
- 一、UV下載
- 1.官方一鍵安裝
- 2.github下載安裝
- 二、更換國內鏡像源(加速下載)
- 方法1:臨時環境變量(單次生效)
- 方法2:永久配置(推薦)
- 方法3:命令行直接指定源
- 三、驗證鏡像源是否生效
一、UV下載
1.官方一鍵安裝
# On Windows.
powershell -ExecutionPolicy ByPass -c "irm https://astral.sh/uv/install.ps1 | iex"
# On macOS and Linux.
curl -LsSf https://astral.sh/uv/install.sh | sh
2.github下載安裝
國內網絡問題無法下載解決方案
來到github下載自己對應系統的包:
https://github.com/astral-sh/uv/releases
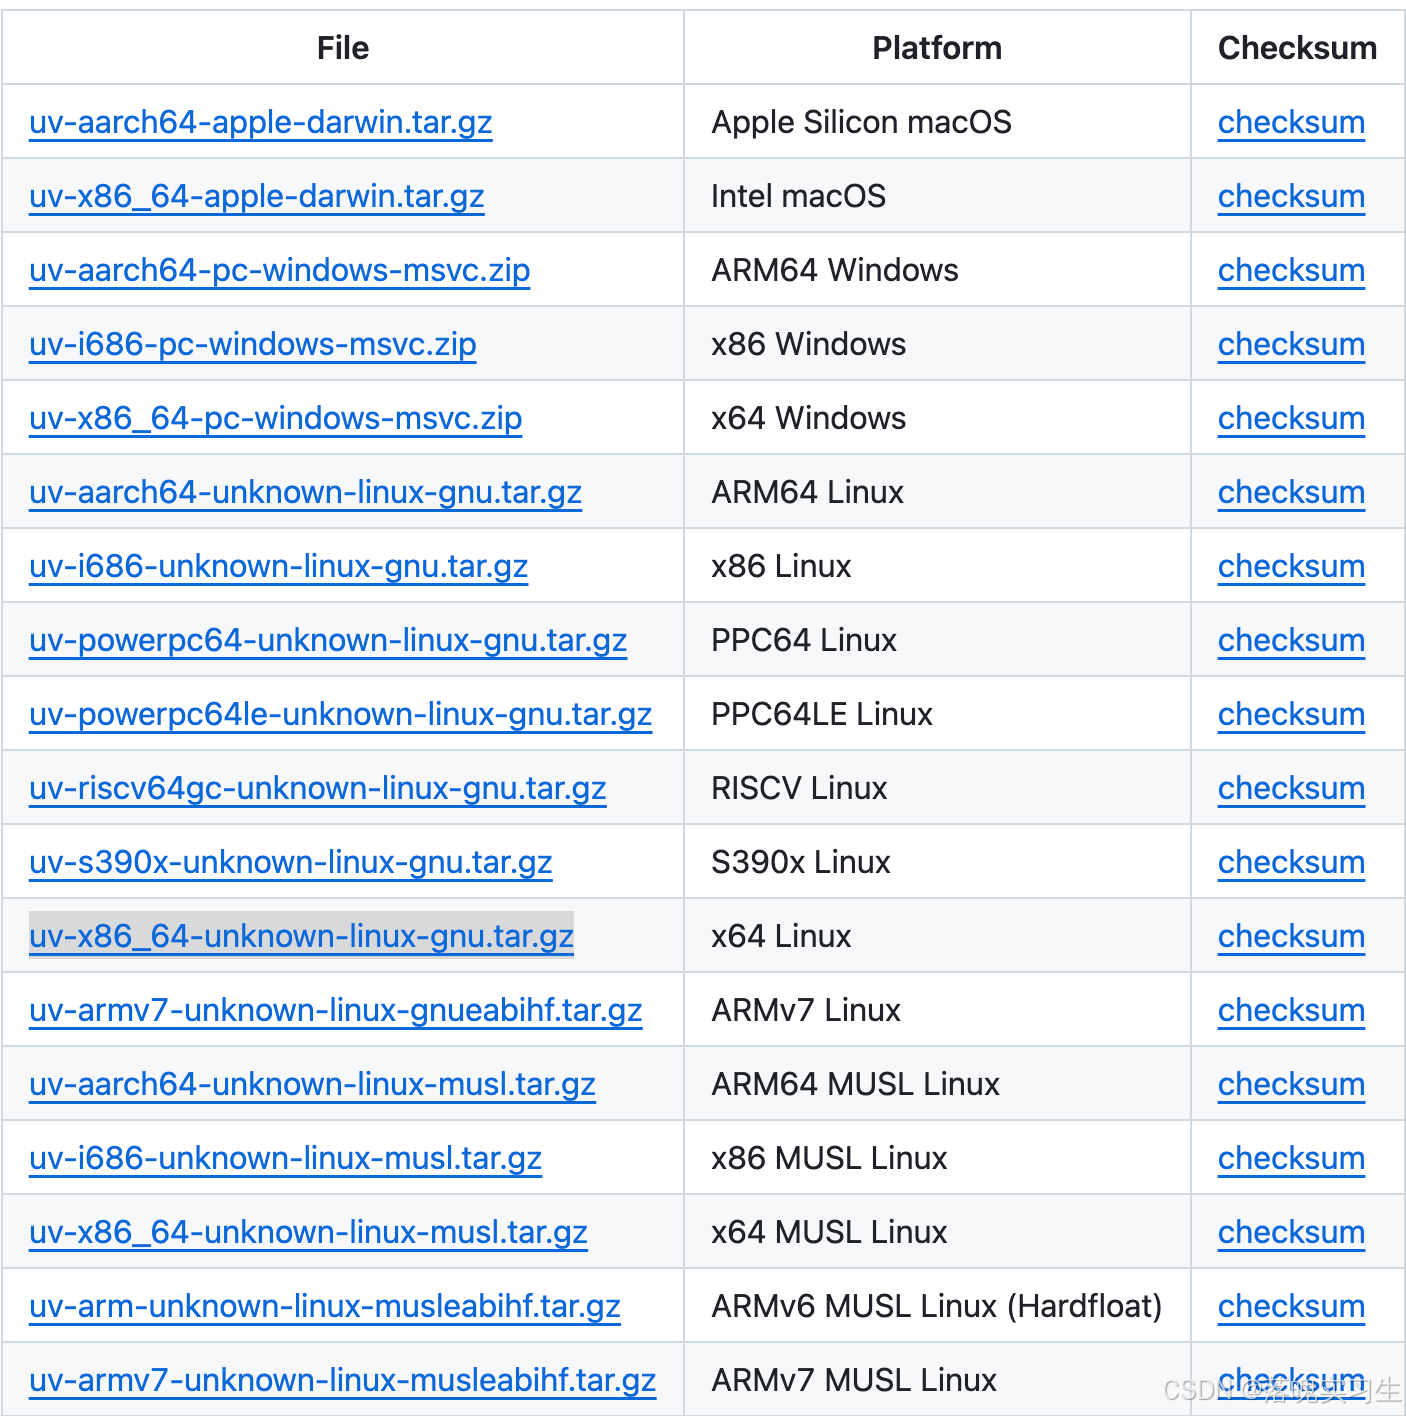
我這里以linux為例選擇x86_64下載地址為:
https://github.com/astral-sh/uv/releases/download/0.8.3/uv-x86_64-unknown-linux-gnu.tar.gz
下載到本地后上傳到服務器并解壓縮
將uv 、 uvx 放到 /usr/local/bin下即可!!!!!!
二、更換國內鏡像源(加速下載)
方法1:臨時環境變量(單次生效)
# 使用阿里云鏡像源
export UV_INDEX_URL=https://mirrors.aliyun.com/pypi/simple/
uv pip install [包名]# 或清華大學鏡像源
export UV_INDEX_URL=https://pypi.tuna.tsinghua.edu.cn/simple/
方法2:永久配置(推薦)
創建或修改配置文件
在用戶目錄下創建 uv.toml 文件(路徑參考):
- Linux/macOS:
~/.config/uv/uv.toml - Windows:
%APPDATA%\uv\uv.toml
添加國內鏡像源
編輯文件內容如下:
[[index]]
url = "https://mirrors.aliyun.com/pypi/simple/"
default = true
# 或使用清華源
# url = "https://pypi.tuna.tsinghua.edu.cn/simple/"
方法3:命令行直接指定源
uv pip install -i https://pypi.tuna.tsinghua.edu.cn/simple/ [包名]
三、驗證鏡像源是否生效
# 查看當前配置
uv config get index.url# 安裝測試包(觀察下載速度)
uv pip install numpy
常見鏡像源地址
| 鏡像名稱 | URL |
|---|---|
| 阿里云 | https://mirrors.aliyun.com/pypi/simple/ |
| 清華大學 | https://pypi.tuna.tsinghua.edu.cn/simple/ |
| 豆瓣 | https://pypi.doubanio.com/simple/ |
| 華為云 | https://repo.huaweicloud.com/repository/pypi/simple/ |
注意事項
- 若同時使用 pip 和 uv,鏡像源需分別配置(uv 不讀取 pip 的配置)。
- 更換源后如遇 SSL 錯誤,嘗試將 http:// 替換為 https://。
- 清除緩存命令:
uv clean。

)


)|SVM-KKT條件的數學理解)
模型添加教學)


)


