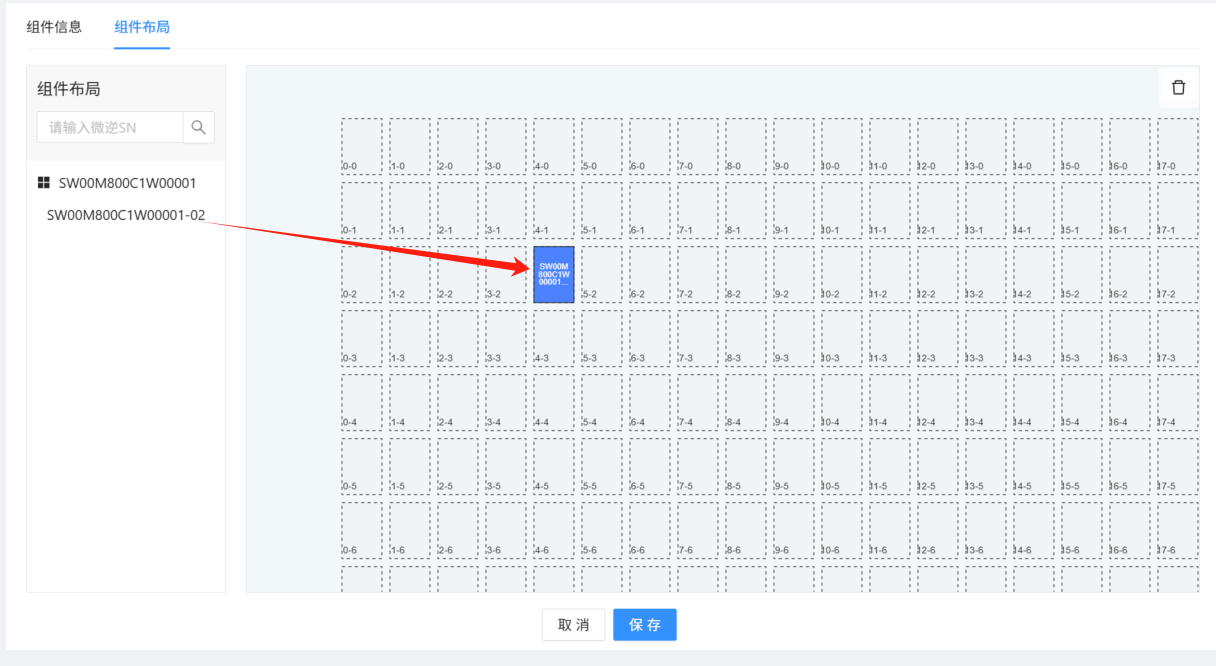
拖拽效果圖
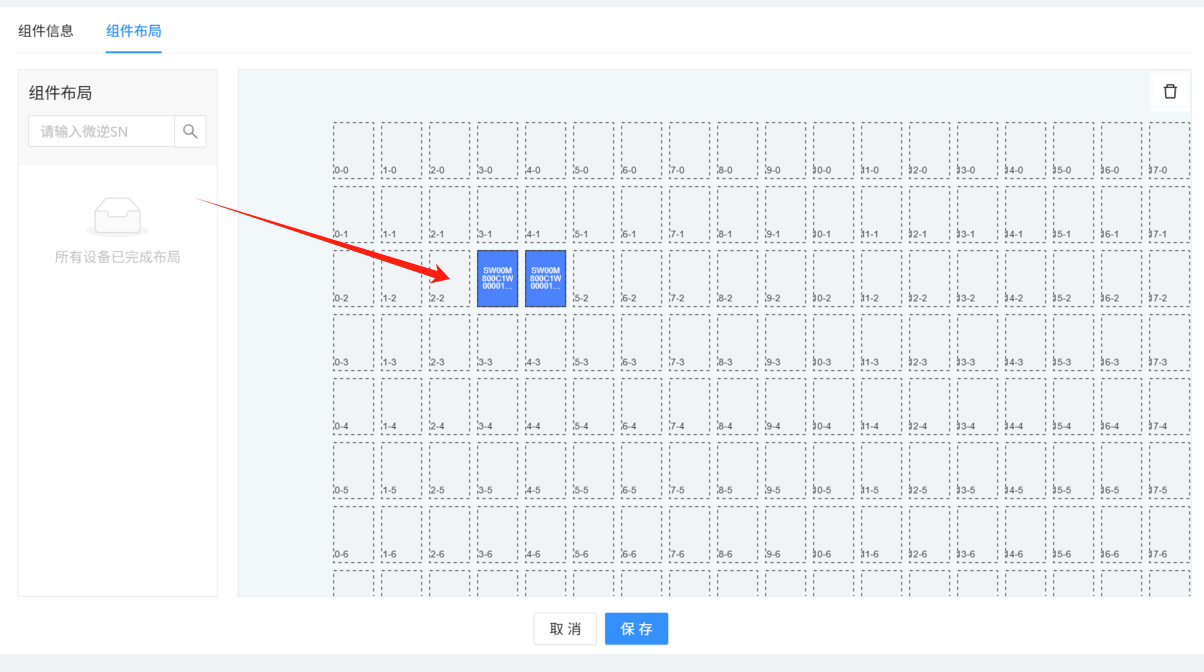
拖拽后
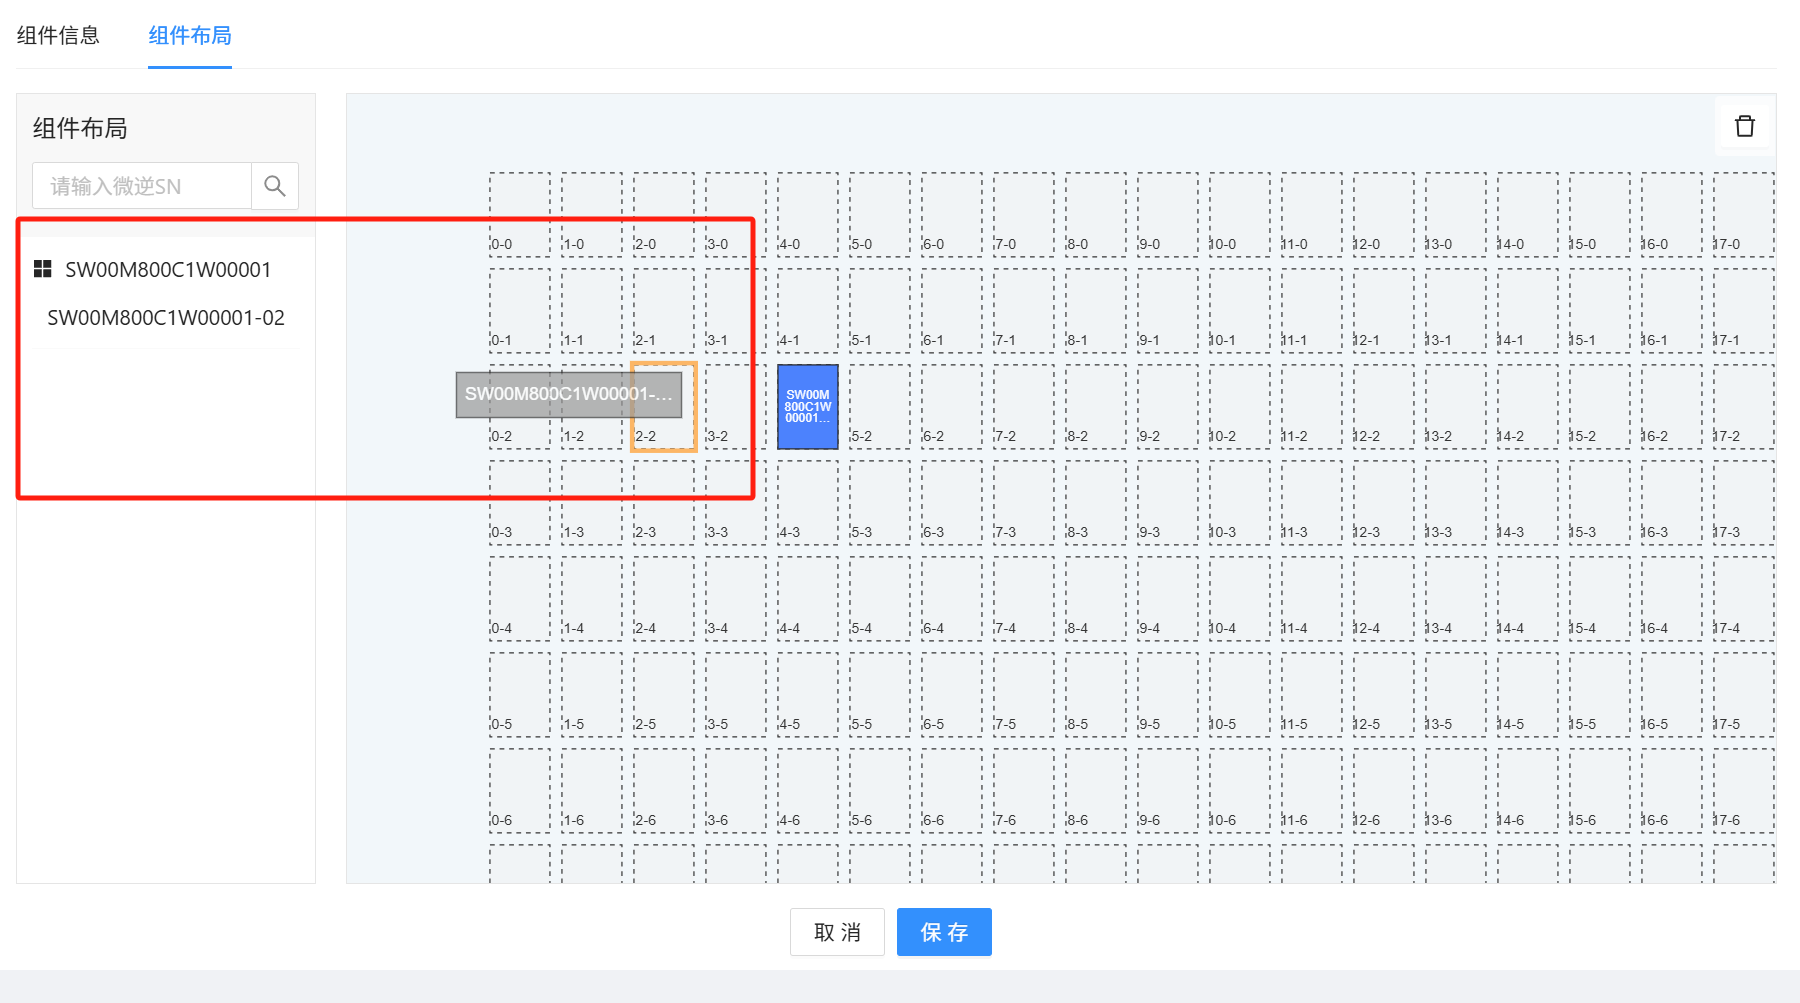
布局預覽

官方: X6 圖編輯引擎 | AntV
安裝依賴
# npm
npm install @antv/x6 --save
npm install @antv/x6-plugin-dnd --save
npm install @antv/x6-plugin-export --save
需要引入的代碼
import { Graph, Shape } from '@antv/x6';
import { Dnd } from "@antv/x6-plugin-dnd";
頁面布局實現 我們設計左右布局
<div class="pannels-drag-view"><div class="left-tree"><div style="width: 100%;padding: 0px 10px 10px;"><div style="border-bottom: 1px solid #FAFAFA;"></div><div class="tree-one"><a-space><AppstoreFilled height="20px"/><span>00000001</span></a-space></div><div style="padding-left: 10px;" class="move-view"@mousedown="startDrag($event, {key: value.key, title: value.title})">
1111111111111111</div><div></div></div><div class="right-view" :style="{height: graphHeight+'px', 'min-height': 500, maxHeight: 900}"><div ref="container" :style="{height: graphHeight+'px'}"></div></div>
</div>
<style lang="less">
.pannels-layout-view {background-color: #FFFFFF;width: 100%;height: 100%;display: flex;flex-direction: column;.left-tree {width: 200px;min-width: 200px;border: 1px solid #e5e5e5;margin-right: 20px;display: flex;display: -webkit-flex;flex-direction: column;.tree-one {padding: 10px 0px 0px;cursor: pointer;display: flex;flex-direction: row;justify-items: start;}.move-view {padding: 10px;cursor: move;}.move-view:hover {background-color: #F7F7F7;}.ant-tree-switcher {width: 10px;}.ant-tree {.ant-tree-node-content-wrapper  {.cursor_move {cursor: move;}}}}.right-view {display: flex;flex-direction: column;flex: 1;height: 100%;overflow: auto;border: 1px solid #e5e5e5;overflow: hidden;position: relative;.layout-setting {position: absolute;top: 1px;right: 1px;z-index: 10;padding: 6px 12px;background: hsla(0, 0%, 100%, .7);.ant-btn {border-width: 0;}.ant-btn-icon-only {padding: 1px 0;border-width: 0;}}}
}</style>
創建節點
// 創建節點
Graph.registerNode('custom-node',{inherit: 'rect',width: 50,height: 70,},true,
);
在onMounted 中設置畫布,和初始化內容
// 初始化畫布
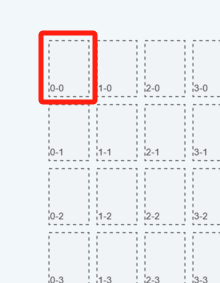
graph = new Graph({container: container.value,autoResize: true,background: {color: '#F2F7FA',},interacting: ({cell}) => {if (cell.getData() == undefined || cell.getData().disableMove) {return { nodeMovable: false }}return true;},panning: true,mousewheel: true,embedding: {enabled: true,findParent({node}) {const bbox = node.getBBox();return this.getNodes().filter((nodeTemp) => {const data = nodeTemp.getData();if (data && data.parent) {const targetBox = nodeTemp.getBBox();const targetBBox = bbox.intersectsWithRect(targetBox);return targetBBox;}return false;})}}});處理布局 ,在畫布上繪制 19 * 20個虛線方框,作為父容器,如下圖
代碼示例:
onMounted(() => {let targetPointTemp = [];let nodesListTemp = []// 處理布局for (let i = 0; i < 20; i++) {for (let j = 0; j < 9; j++) {let x = i * 60;let y = j * 80;// 設置吸附點targetPointTemp.push({x: x,y: y})const rectNode = new Shape.Rect({id: `${i}-${j}`,shape: 'custom-node',x: x,y: y,width: 50,height: 70,zIndex: 9,// label: `${i}-${j}`,data: {parent: true,disableMove: true,cpx: i,cpy: j},draggable: false,attrs: {body: {fill: '#F1F4F6',stroke: "#333333",strokeWidth: 1,strokeDasharray: '4, 4'},title: {text: `${i}-${j}`,fill: '#333333',verticalAnchor: 'bottom',fontSize: 12,refX: 10,refY: 60,}},markup: [{tagName: 'rect',selector: 'body',},{tagName: 'text',selector: 'title',}],})nodesListTemp.push(rectNode);}}graph.zoom(-0.2);shapeNodesList.value = nodesListTemp;// 添加節點到畫布graph.addNodes(nodesListTemp);
})
使用DND畫布外向畫布內拖拽,并吸附,效果如下:
實現:外部向畫布拖拽
import { Dnd } from "@antv/x6-plugin-dnd";// 移動左側樹,配合DND 與Graph 拖拽與監聽
const startDrag = (e, data) => {const {key, title } = data;const keys = key.split('-');const invSn = keys[0];const id = keys[1];const newNode = graph.createNode({id: title?title:'',shape: 'rect',width: 150,height: 30,draggable: true,data: {parent: false,disableMove: false,id: id,partSn: title,invSn: invSn,partSn: title,},attrs: {label: {text: title,fill: '#FFFFFF',verticalAnchor: 'middle',fontSize: 12,ellipsis: true,breakWord: true,textWrap: {width: -10,height: -10,ellipsis: true}},body: {stroke: "#333333",strokeWidth: 1,fill: '#999999'}},zIndex: 11});const dnd = new Dnd({target: graph,getDragNode: (node) => node.clone({keepId: true}),getDropNode: (node) => node.clone({keepId: true}),validateNode: () => {console.log("drag successed")},})dnd.start(newNode, e);currentParent.value = null;
}
畫布中監聽并處理拖拽事件并吸附
onMounted(() => {
// 添加節點監聽graph.on('node:added', (env) => {const { cell, node } = env;console.log("node:added");const data = cell.data;// 獲取父節點const parent = node.getParent();let position = cell.position();if (parent) {position = parent.getPosition();if (position.x > maxX.value || position.y > maxY.value || position.x < 0 || position.y < 0) {graph.removeNode(cell);return false;}} else {if (position.x > maxX.value || position.y > maxY.value || position.x < 0 || position.y < 0) {graph.removeNode(cell);return false;}}//  刪除dom   removeDomResData(data, cell);node.setProp('size', { width: 50, height: 70 });if (parent) {// 判斷子節點數量const childCount = parent.getChildCount();if (childCount > 1) {startDragOut(data, cell);return false}position = parent.getPosition();cell.position(position.x, position.y, cell);cell.setAttrs({body: {stroke: "#222222",strokeWidth: 1,fill: '#3E82FF'}})cell.setParent(parent);cell.insertTo(parent);} else {const cellParent = cell.getParent();cell.setAttrs({body: {stroke: "#222222",strokeWidth: 1,fill: '#3E82FF'}})if (cellParent) {cell.setParent(cellParent);cell.insertTo(cellParent);}}saveLayoutData(data, cell);});})
嵌入父節點的監聽
// 嵌入父節點監聽graph.on('node:embedded', ({ cell, node }) => {const parent = cell.getParent();const position = parent.getPosition();const data = cell.getData(); // 獲取節點數據if (data.parent != undefined && data.parent) {parent.removeChild(node);return false;}if (position.x > maxX.value || position.y > maxY.value || position.x < 0 || position.y < 0) {parent.removeChild(node);cell.position(startX.value, startY.value, cell);cell.setParent(currentParent.value);cell.insertTo(currentParent.value);return false;}const childCount = parent.getChildCount();if (childCount > 1) {parent.removeChild(node);if (currentParent.value) {cell.position(startX.value, startY.value, cell);cell.setParent(currentParent.value);cell.insertTo(currentParent.value);return false} else {const cellParent = cell.parent;if (cellParent) {const cellCount = cell.parent.getChildCount();if (cellCount > 1) {return false}const px = cellParent.getPosition().x;const py = cellParent.getPosition().y;cell.position(px, py, cell);cell.setParent(cellParent);cell.insertTo(cellParent);return false}// cell.setParent(null);graph.removeCell(cell);startDragOut(data, cell);return false;}}cell.position(position.x, position.y, cell);cell.setAttrs({body: {stroke: "#222222",strokeWidth: 1,fill: '#3E82FF'}})cell.setParent(parent);cell.insertTo(parent);saveLayoutData(data, cell);});畫布中 子節點的移動處理
onMounted(() => {// 鼠標按下事件graph.on('node:mousedown', (node)=>{console.log("node:mousedown")const { cell } = node;const parent = cell.getParent();if (parent) {currentParent.value = parent;} else {currentParent.value = null;}// 記錄初始位置if (!cell.data.parent) {const position = cell.position();startX.value = position.x;startY.value = position.y;} else {startX.value = null;startY.value = null;}});
/// 鼠標按下后的離開事件graph.on("node:mouseup", (env) => {console.log("node:mouseup")const { cell, node } = env;const position = cell.position();if (position.x < 0 && position.y > 0 && position.y < maxY.value) {const data = cell.getData();startDragOut(data, cell);return false;}if (position.x > maxX.value || position.y > maxY.value || position.x < 0 || position.y < 0) {cell.position(startX.value, startY.value, cell);if (currentParent.value) {cell.setParent(currentParent.value);cell.insertTo(currentParent.value);}return false;}});// 監聽節點事件函數graph.on('node:removed', (args) => {//   更新有效節點數據對象const { cell } = args;const data = cell.getData();removeLayoutData(data);});})
畫布中布局變化記錄事件
// 保存布局變化
const saveLayoutData = (data, cell) => {const { id, partSn, invSn} = data;let tempList = notSavedDataList.value;const position = cell.getPosition();const x = Math.ceil(position.x / 60);const y = Math.ceil(position.y / 80);const _index = _.findIndex(tempList, {id: id});if (_index >= 0) {const newData = {id: id,laidOutX: x,laidOutY: y,partSn: partSn,invSn: invSn}tempList[_index] = newData;} else {const newData = {id: id,laidOutX: x,laidOutY: y,partSn: partSn,invSn: invSn}tempList.push(newData);}notSavedDataList.value = tempList;
}
需要結合antv/X6的事件監聽事件靈活應用
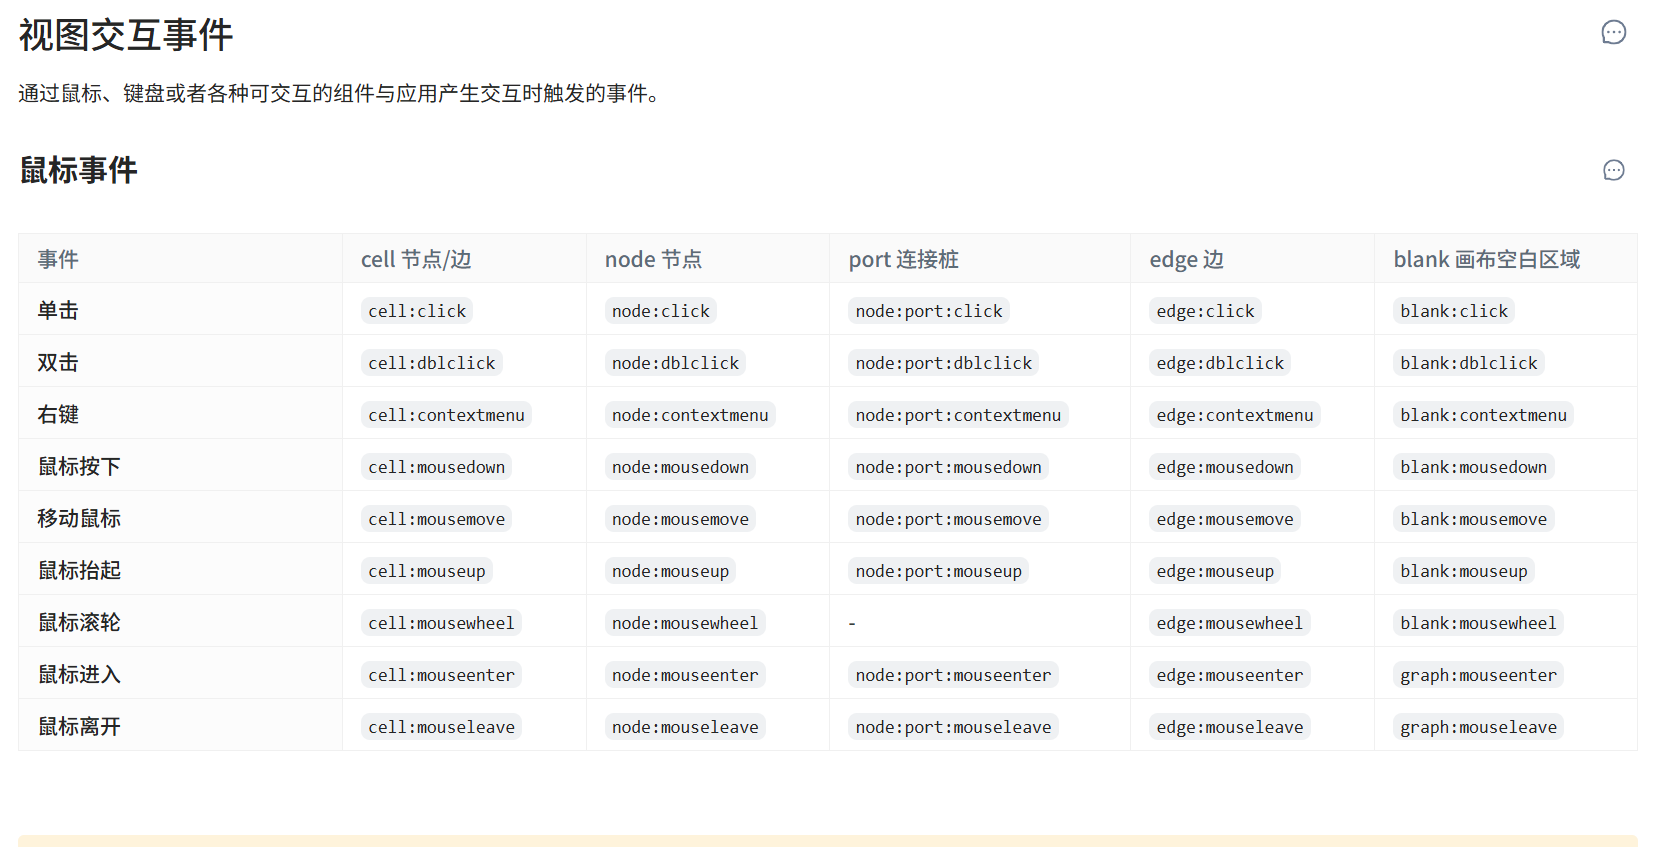
graph.on('cell:click', ({ e, x, y, cell, view }) => {})
graph.on('node:click', ({ e, x, y, node, view }) => {})
graph.on('edge:click', ({ e, x, y, edge, view }) => {})
graph.on('blank:click', ({ e, x, y }) => {})
graph.on('cell:mouseenter', ({ e, cell, view }) => {})
graph.on('node:mouseenter', ({ e, node, view }) => {})
graph.on('edge:mouseenter', ({ e, edge, view }) => {})
graph.on('graph:mouseenter', ({ e }) => {})
實戰:如何通過 HTML 報告識別潛在問題)
PCB設計時如何避免EMI)


![[Vue]跨組件傳值](http://pic.xiahunao.cn/[Vue]跨組件傳值)


