國內用戶必看】用Lima在macOS免費搭建Docker環境,徹底解決鏡像與收費難題!
為了在不同操作系統有一致操作體驗,我選擇使用docker技術安裝ollama,這樣子還有一個好處,即使玩壞了,刪除重建即可,所以首先需要在開發機上安裝docker,從2024年開始在國內使用docker難度越來越大,主要有2大原因:
- docker開始收費了,辦公電腦公司不讓在安裝docker桌面版了
- docker國內鏡像一夜之間都不能用了,docker官方鏡像在國內也是無法訪問的
下面是在 macOS 上使用 limactl 安裝和配置 Docker 的完整步驟。這個方法比 Docker Desktop 更輕量且完全免費。
準備工作
確保你的 macOS 系統已更新到較新版本
確保已安裝 Homebrew(macOS 包管理器)
lima&docker安裝步驟
步驟 1: 安裝 Lima
打開終端(Terminal),執行以下命令:
# 使用 Homebrew 安裝 Lima
brew install lima# 驗證安裝是否成功
limactl --version
步驟 2: 啟動 Docker 實例
Lima 使用模板來創建預配置的虛擬機。我們將使用官方提供的 Docker 模板:
# 創建并啟動一個名為 "docker" 的實例(使用非root用戶模式,推薦)
limactl start --name=docker template://docker
注:除了可以使用官方模板也可以自定義配置文件,啟動命令&配置文件&執行過程日志示例如下
# 與上面的命令 limactl start --name=docker template://docker 二選一執行即可
limactl start  ~/work/docker/lima-default.yaml
arch: "aarch64"# 基本系統配置
images:
- location: "https://cloud-images.ubuntu.com/releases/24.04/release/ubuntu-22.04-server-cloudimg-amd64.img"arch: "x86_64"
- location: "https://cloud-images.ubuntu.com/releases/24.04/release/ubuntu-22.04-server-cloudimg-arm64.img"arch: "aarch64"# 系統配置腳本
provision:
- mode: systemscript: |#!/bin/bashset -eux -o pipefail# 安裝 Dockercurl -fsSL https://get.docker.com | sh# 將用戶添加到 docker 組usermod -aG docker "${LIMA_USER}"# 安裝 Docker Compose 插件apt-get install -y docker-compose-plugin# 掛載配置
mounts:
- location: "~"mountPoint: "/home/${LIMA_USER}.linux"# 端口轉發(關鍵!讓主機可以訪問虛擬機內的 Docker)
portForwards:
- guestSocket: "/var/run/docker.sock"hostSocket: "${LIMA_HOST_HOME}/.lima/docker/sock/docker.sock"# 其他配置
ssh:localPort: 60022
containerd:system: falseuser: false
? Creating an instance "docker" Proceed with the current configuration
INFO[0001] Replacing "http_proxy" value "socks5h://127.0.0.1:13659" with "socks5h://192.168.5.2:13659"
INFO[0001] Replacing "https_proxy" value "socks5h://127.0.0.1:13659" with "socks5h://192.168.5.2:13659"
INFO[0001] Starting the instance "docker" with VM driver "vz"
INFO[0001] Attempting to download the image              arch=aarch64 digest= location="https://cloud-images.ubuntu.com/releases/24.04/release/ubuntu-24.04-server-cloudimg-arm64.img"
INFO[0007] Using cache "/Users/mac/Library/Caches/lima/download/by-url-sha256/002fbe468673695a2206b26723b1a077a71629001a5b94efd8ea1580e1c3dd06/data"
INFO[0007] Converting "/Users/mac/.lima/docker/basedisk" (qcow2) to a raw disk "/Users/mac/.lima/docker/diffdisk"
3.50 GiB / 3.50 GiB [---------------------------------------] 100.00% 1.56 GiB/s
INFO[0009] Expanding to 100GiB
INFO[0010] Attempting to download the nerdctl archive    arch=aarch64 digest="sha256:544fa1e518155fcc01a117ea49819d12d96b4dacfb2b62922f9f7956dc9f6dc8" location="https://github.com/containerd/nerdctl/releases/download/v2.1.3/nerdctl-full-2.1.3-linux-arm64.tar.gz"
INFO[0010] Using cache "/Users/mac/Library/Caches/lima/download/by-url-sha256/46d9ee12c9f3f484518470db8093719f2b3ddca7daa6f1741c71e0aeb198db2a/data"
INFO[0010] [hostagent] Replacing "http_proxy" value "socks5h://127.0.0.1:13659" with "socks5h://192.168.5.2:13659"
INFO[0010] [hostagent] Replacing "https_proxy" value "socks5h://127.0.0.1:13659" with "socks5h://192.168.5.2:13659"
INFO[0010] [hostagent] Replacing "http_proxy" value "socks5h://127.0.0.1:13659" with "socks5h://192.168.5.2:13659"
INFO[0010] [hostagent] Replacing "https_proxy" value "socks5h://127.0.0.1:13659" with "socks5h://192.168.5.2:13659"
INFO[0011] [hostagent] hostagent socket created at /Users/mac/.lima/docker/ha.sock
INFO[0011] [hostagent] Starting VZ (hint: to watch the boot progress, see "/Users/mac/.lima/docker/serial*.log")
INFO[0012] SSH Local Port: 60022
INFO[0011] [hostagent] Waiting for the essential requirement 1 of 2: "ssh"
INFO[0011] [hostagent] [VZ] - vm state change: running
INFO[0021] [hostagent] Waiting for the essential requirement 1 of 2: "ssh"
INFO[0031] [hostagent] Waiting for the essential requirement 1 of 2: "ssh"
INFO[0041] [hostagent] Waiting for the essential requirement 1 of 2: "ssh"
INFO[0052] [hostagent] Waiting for the essential requirement 1 of 2: "ssh"
INFO[0062] [hostagent] Waiting for the essential requirement 1 of 2: "ssh"
INFO[0072] [hostagent] Waiting for the essential requirement 1 of 2: "ssh"
INFO[0082] [hostagent] Waiting for the essential requirement 1 of 2: "ssh"
INFO[0092] [hostagent] Waiting for the essential requirement 1 of 2: "ssh"
INFO[0102] [hostagent] Waiting for the essential requirement 1 of 2: "ssh"
INFO[0112] [hostagent] Waiting for the essential requirement 1 of 2: "ssh"
INFO[0122] [hostagent] Waiting for the essential requirement 1 of 2: "ssh"
INFO[0132] [hostagent] Waiting for the essential requirement 1 of 2: "ssh"
INFO[0142] [hostagent] Waiting for the essential requirement 1 of 2: "ssh"
這個過程會:
- 下載 Ubuntu 基礎鏡像
- 在虛擬機內自動安裝 Docker、Docker Compose 和其他相關工具
- 配置文件共享和端口轉發
- 可能需要幾分鐘時間,取決于你的網絡速度
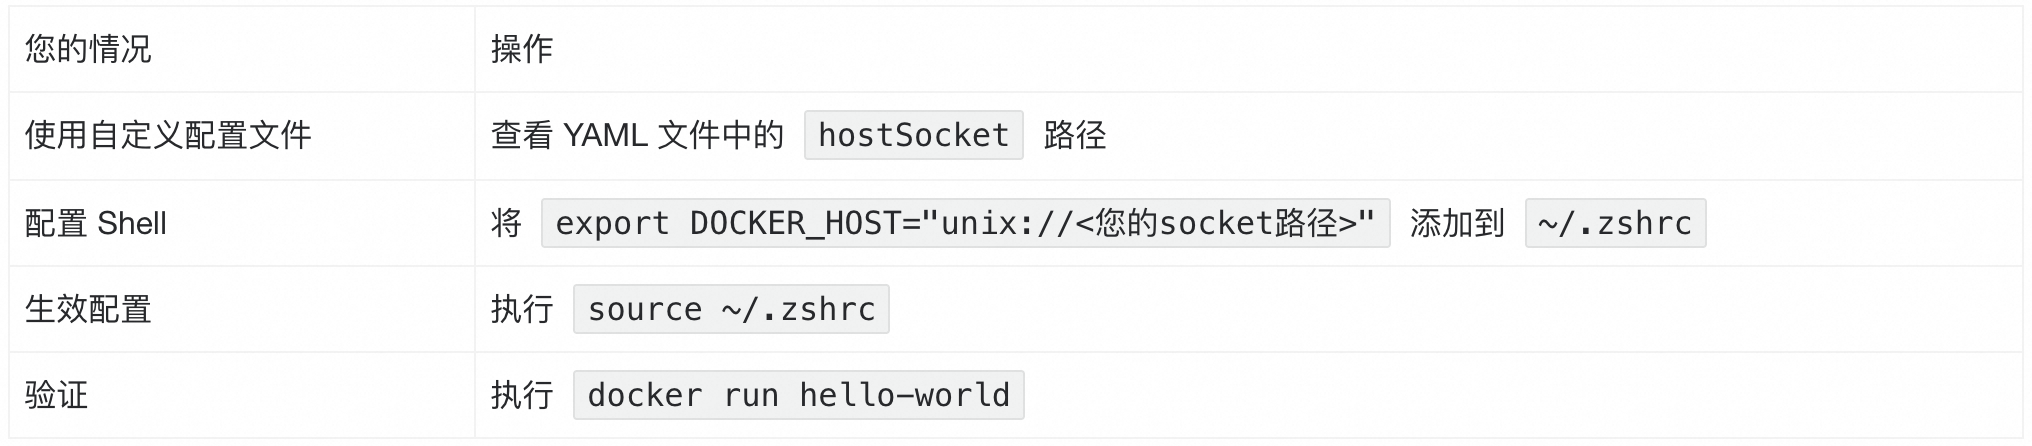
步驟 3: 配置 Shell 環境
安裝完成后,需要設置環境變量,讓 macOS 上的 Docker CLI 能夠與 Lima 虛擬機中的 Docker 引擎通信:
# 將以下行添加到你的 shell 配置文件(~/.zshrc 或 ~/.bash_profile)
echo 'export DOCKER_HOST="unix://${HOME}/.lima/docker/sock/docker.sock"' >> ~/.bash_profile# 使配置生效
source ~/.bash_profile
步驟 4: 驗證安裝
測試 Docker 是否正常工作:
# 檢查 Docker 版本
docker --version# 運行測試容器
docker run --rm hello-world# 查看 Docker 系統信息
docker info
如果這些命令都能正常執行并返回信息,而沒有報錯說無法連接到 Docker 守護進程,那么就說明您的 Shell 環境已經配置成功!
總結
配置注意事項
附加常用命令
limactl list
NAME      STATUS     SSH                VMTYPE    ARCH       CPUS    MEMORY    DISK      DIR
docker    Stopped    127.0.0.1:60022    vz        aarch64    4       4GiB      100GiB    ~/.lima/dockerlimactl delete docker
INFO[0000] The vz driver process seems already stopped
INFO[0000] The host agent process seems already stopped
INFO[0000] Removing *.pid *.sock *.tmp under "/Users/mac/.lima/docker"
INFO[0000] Deleted "docker" ("/Users/mac/.lima/docker")limactl list
WARN[0000] No instance found. Run `limactl create` to create an instance.
快速重建docker
如果虛擬機安裝時出錯,需要修改您的lima-docker.yaml文件想重新創建可以依次執行如下命令:
limactl delete -f docker
rm -rf /Users/mac/.lima/docker
limactl start --name=docker  --debug ~/work/docker/lima-docker.yaml
替代方案2:使用coliama
步驟 1: 安裝必要的工具
安裝 Docker 客戶端和 Colima
# 更新 Homebrew
brew update# 安裝 Docker 客戶端 (命令行工具)
brew install docker# 安裝 Docker Compose (可選但推薦)
brew install docker-compose# 安裝 Colima
brew install colima
步驟 2: 啟動 Colima
2.1 使用默認配置啟動 Colima
# 簡單啟動 (使用默認配置)
colima start
2.2 使用自定義配置啟動 (推薦)
# 使用自定義配置啟動
colima start --cpu 4 --memory 8 --disk 100 --runtime docker   # 注釋如下
colima start \--cpu 4 \          # 分配 4 個 CPU 核心--memory 8 \       # 分配 8GB 內存--disk 100 \       # 分配 100GB 磁盤空間--arch aarch64 \   # 使用 ARM64 架構 (適用于 M1/M2 Mac)--runtime docker   # 使用 Docker 運行時colima start --profile /Users/mac/.colima/default/colima.yaml
INFO[0000] starting colima
INFO[0000] runtime: docker
INFO[0002] creating and starting ... context=vm
INFO[0017] provisioning ... context=docker
INFO[0018] starting ... context=docker
INFO[0020] done
步驟 3: 驗證安裝
3.1 檢查 Colima 狀態
colima status
INFO[0000] colima is running using macOS Virtualization.Framework
INFO[0000] arch: aarch64
INFO[0000] runtime: docker
INFO[0000] mountType: virtiofs
INFO[0000] docker socket: unix:///Users/mac/.colima/default/docker.sock
INFO[0000] containerd socket: unix:///Users/mac/.colima/default/containerd.sock
3.2 檢查 Docker 是否正常工作
# 檢查 Docker 版本
docker --version# 檢查 Docker 信息
docker info# 運行測試容器
docker run hello-world
步驟 4: 常用 Colima 命令
4.1 管理 Colima 實例
# 停止 Colima
colima stop# 暫停 Colima
colima pause# 恢復 Colima
colima unpause# 刪除 Colima 實例
colima delete# 查看 Colima 日志
colima logs
步驟 5: 配置 Colima (可選)
5.1 創建 Colima 配置文件
# 創建配置文件目錄
mkdir -p ~/.colima# 創建配置文件 (如果需要高級配置)
# Colima 會自動使用默認配置,通常不需要手動創建配置文件
5.2 使用不同的運行時
# 如果需要使用 containerd 而不是 Docker
colima start --runtime containerd# 切換回 Docker
colima stop
colima start --runtime docker
步驟 6: 解決常見問題
6.1 如果遇到權限問題
# 將用戶添加到 docker 組 (通常不需要,Colima 會自動處理)
sudo usermod -aG docker $USER# 或者直接使用 sudo (不推薦長期使用)
sudo colima start
6.2 如果啟動失敗
# 查看詳細日志
colima start --debug# 或者查看日志文件
colima logs
6.3 重置 Colima
# 完全重置 Colima
colima delete
rm -rf ~/.colima
brew reinstall colima
colima start
常見錯誤
🚫 錯誤配置示例
? 錯誤:使用環境變量(無效)
export http_proxy=http://127.0.0.1:8080
docker pull hello-world
Docker 不會自動讀取 http_proxy 環境變量,除非你通過 daemon.json 顯式配置。
? 正確:通過 daemon.json 配置
進入虛擬機并修改文件
colima ssh
vi /etc/docker/daemon.json
注:
如果沒有vi命令,則先安裝一下
默認情況下daemon.json 中沒有 proxies節點,下方示例中proxies均屬新增內容
{"registry-mirrors": ["https://<your-mirror>.mirror.aliyuncs.com"],"proxies": {"default": {"httpProxy": "http://127.0.0.1:8080","httpsProxy": "http://127.0.0.1:8080","noProxy": "localhost,127.0.0.1"}}
}
保存后退出虛擬機,重啟colima
colima stop
colima start
docker info
docker info|grep -i proxy -A 5
# 下方是docker info|grep -i proxy -A 5執行結果示例
HTTP Proxy: socks5h://192.168.5.2:8080
HTTPS Proxy: socks5h://192.168.5.2:8080
Experimental: false
Insecure Registries:
::1/128
127.0.0.0/8
Live Restore Enabled: false
🧩 正確:Docker 客戶端代理設置(非守護進程)
如果只想在 客戶端(如 docker build 或 docker pull)使用代理,可通過 HTTP_PROXY 環境變量臨時設置:
HTTP_PROXY=http://127.0.0.1:8080
docker pull hello-world
ollama&Phi-3:mini安裝步驟
這部分之前已經整理過了,詳情見:https://alioo.blog.csdn.net/article/details/150591424


 —— SLS 接入與設置自動化)


—— Nginx反向代理與負載均衡實戰指南)
:人工智能、機器學習與深度學習)
![[網絡入侵AI檢測] 純卷積神經網絡(CNN)模型 | CNN處理數據](http://pic.xiahunao.cn/[網絡入侵AI檢測] 純卷積神經網絡(CNN)模型 | CNN處理數據)


:用戶界面及系統管理界面布局)


