注意:如果后端有contextPath,如/app,那么前端訪問的url就是ip:port/app/ws
后端實現步驟
- 添加Spring Boot WebSocket依賴
- 配置WebSocket端點和消息代理
- 創建控制器,使用SimpMessagingTemplate發送消息
前端實現步驟
- 安裝sockjs-client和stompjs庫
- 封裝WebSocket連接工具類
- 在Vue組件中建立連接,訂閱主題
詳細實現步驟
后端(Spring Boot)實現步驟
1. 添加依賴
<!-- pom.xml -->
<dependency><groupId>org.springframework.boot</groupId><artifactId>spring-boot-starter-websocket</artifactId>
</dependency>
2. 配置WebSocket
@Configuration
@EnableWebSocketMessageBroker
public class WebSocketConfig implements WebSocketMessageBrokerConfigurer {@Overridepublic void registerStompEndpoints(StompEndpointRegistry registry) {// 注冊WebSocket端點,前端連接此地址registry.addEndpoint("/ws").setAllowedOriginPatterns("*") // 解決跨域問題.withSockJS(); // 支持SockJS}@Overridepublic void configureMessageBroker(MessageBrokerRegistry registry) {// 客戶端訂閱的主題前綴registry.enableSimpleBroker("/topic");}
}
3. 發送消息的Controller
@RestController
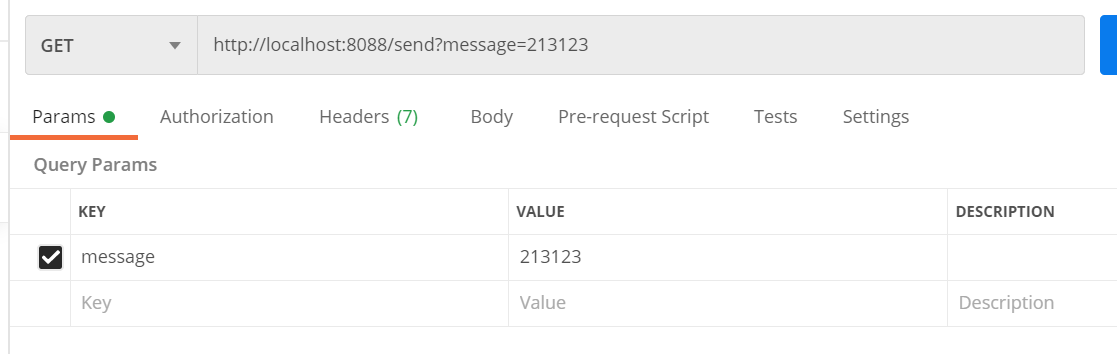
public class MessageController {@Autowiredprivate SimpMessagingTemplate messagingTemplate;// 發送消息到所有客戶端@GetMapping("/send")public void sendToAll(String message) {messagingTemplate.convertAndSend("/topic/messages", message);}}前端(Vue)實現步驟
1. 安裝依賴
npm install sockjs-client stompjs2. 封裝WebSocket工具類
// src/utils/websocket.js
import SockJS from 'sockjs-client';
import Stomp from 'stompjs';
let stompClient = null;
export function connect(url,callback) {const socket = new SockJS(url);stompClient = Stomp.over(socket);stompClient.connect({}, () => {stompClient.subscribe('/topic/messages', (message) => {callback(message.body)});});
}
export function disconnect() {if (stompClient) {stompClient.disconnect();}
}
3. Vue組件集成
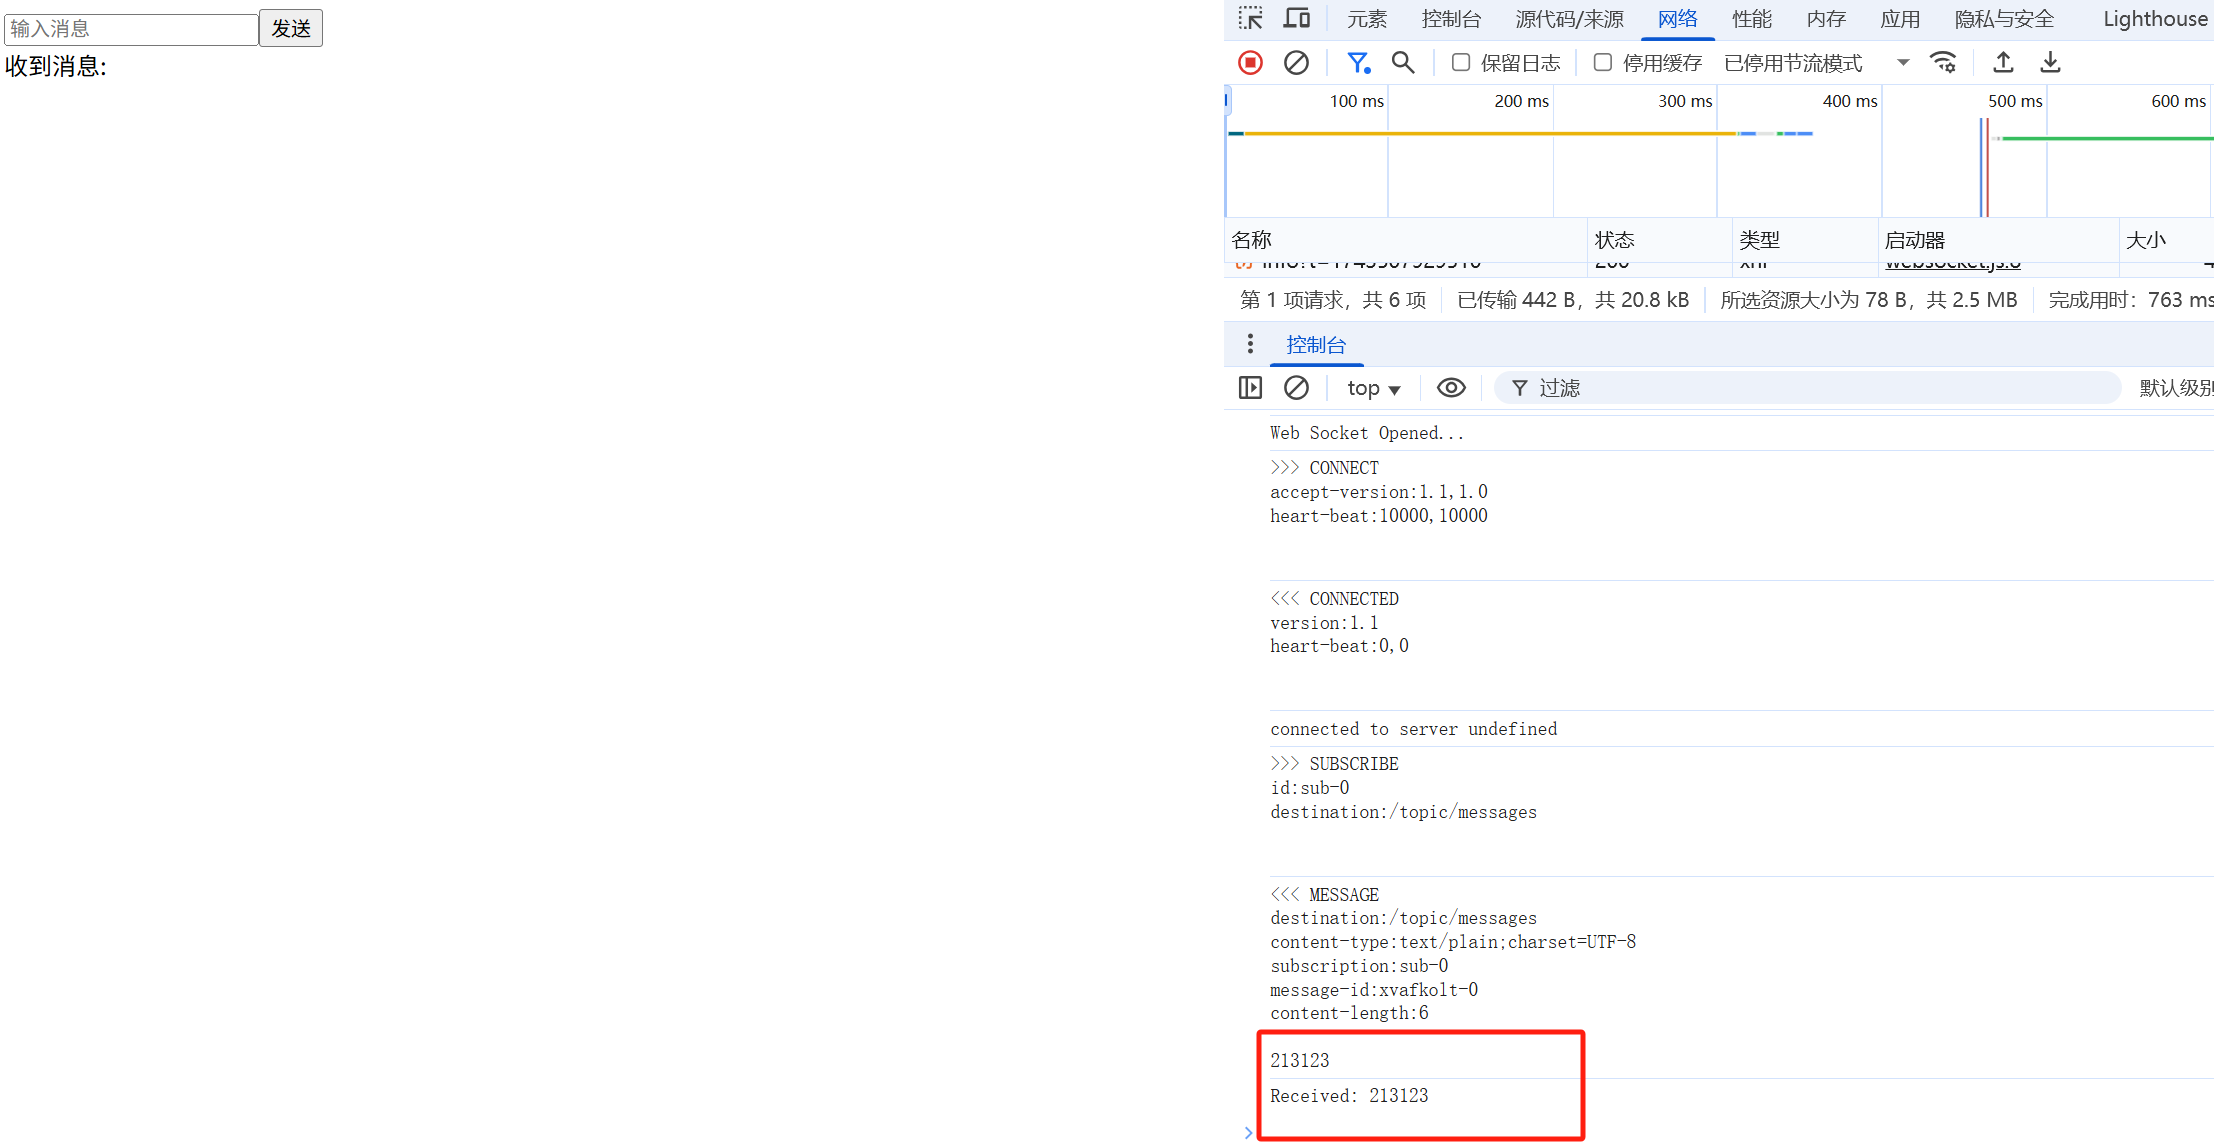
<template><div><div>收到消息: {{ receivedMsg }}</div></div>
</template>
<script>
import { connect, disconnect } from '@/ws/websocket';export default {data() {return {inputMsg: '',receivedMsg: ''};},mounted() {connect('http://localhost:8088/ws',(msg)=>{this.receivedMsg = msg;});},beforeDestroy() {disconnect();},methods: {}
};
</script>
測試
向指定客戶端發送消息
后端
<dependency><groupId>org.springframework.boot</groupId><artifactId>spring-boot-starter-web</artifactId></dependency><dependency><groupId>org.springframework.boot</groupId><artifactId>spring-boot-starter-websocket</artifactId></dependency>package com.config;import org.springframework.context.annotation.Configuration;
import org.springframework.messaging.simp.config.MessageBrokerRegistry;
import org.springframework.web.socket.config.annotation.EnableWebSocketMessageBroker;
import org.springframework.web.socket.config.annotation.StompEndpointRegistry;
import org.springframework.web.socket.config.annotation.WebSocketMessageBrokerConfigurer;/*** @author cyz*/
@Configuration
@EnableWebSocketMessageBroker
public class WebSocketConfig implements WebSocketMessageBrokerConfigurer {@Overridepublic void registerStompEndpoints(StompEndpointRegistry registry) {// 客戶端連接的端點(WebSocket URL)registry.addEndpoint("/ws")// 允許所有來源(根據需求調整).setAllowedOrigins("*")// 支持 SockJS 降級(兼容不支持 WebSocket 的瀏覽器).withSockJS();}@Overridepublic void configureMessageBroker(MessageBrokerRegistry registry) {// 客戶端訂閱的地址前綴(STOMP 主題)registry.enableSimpleBroker("/portCheckProgress");}
}
package com;
import org.springframework.beans.factory.annotation.Autowired;
import org.springframework.messaging.simp.SimpMessagingTemplate;
import org.springframework.web.bind.annotation.GetMapping;
import org.springframework.web.bind.annotation.RequestParam;
import org.springframework.web.bind.annotation.RestController;
/*** @author cyz* @since 2025/4/1 下午5:15*/
@RestController
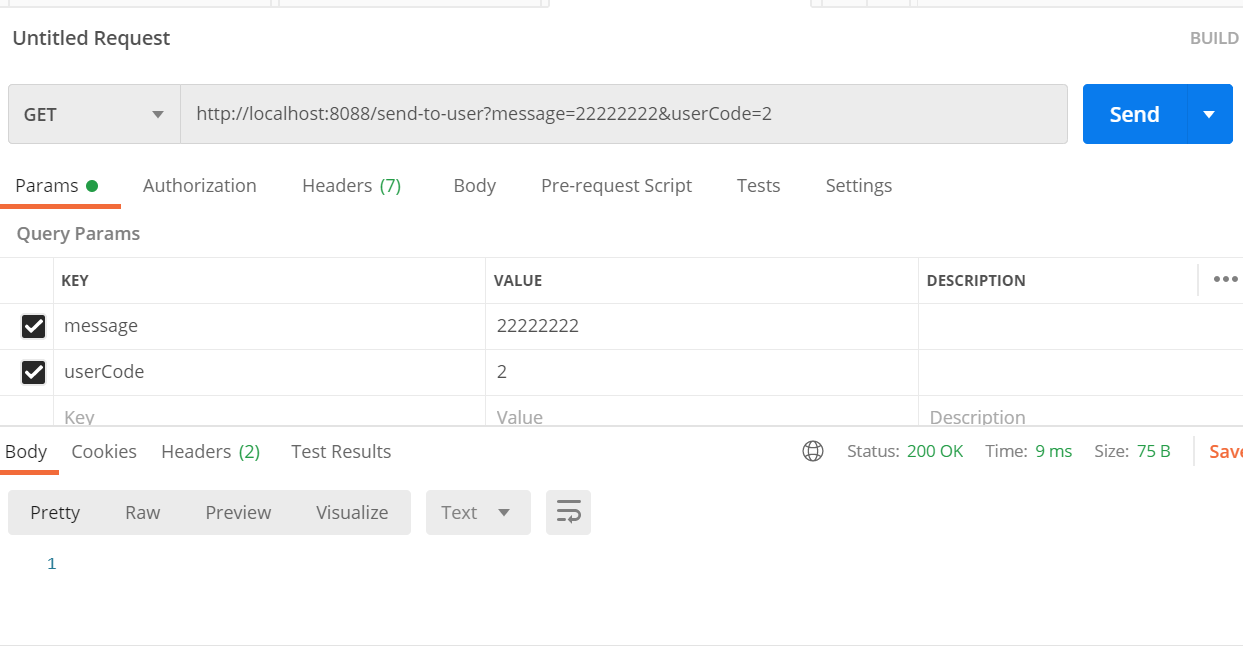
public class MessageController {@Autowiredprivate SimpMessagingTemplate messagingTemplate;@GetMapping("/send-to-user")public void sendToUser(@RequestParam String userCode, @RequestParam String message) {String destination = "/portCheckProgress/info/"+userCode;messagingTemplate.convertAndSend(destination, message);}
}
package com;import org.springframework.boot.SpringApplication;
import org.springframework.boot.autoconfigure.SpringBootApplication;/*** @author cyz* @since 2025/4/1 下午5:12*/
@SpringBootApplication
public class Application {public static void main(String[] args) {SpringApplication.run(Application.class, args);}
}

前端?
// src/utils/websocket.js
import SockJS from 'sockjs-client';
import Stomp from 'stompjs';
let stompClient = null;
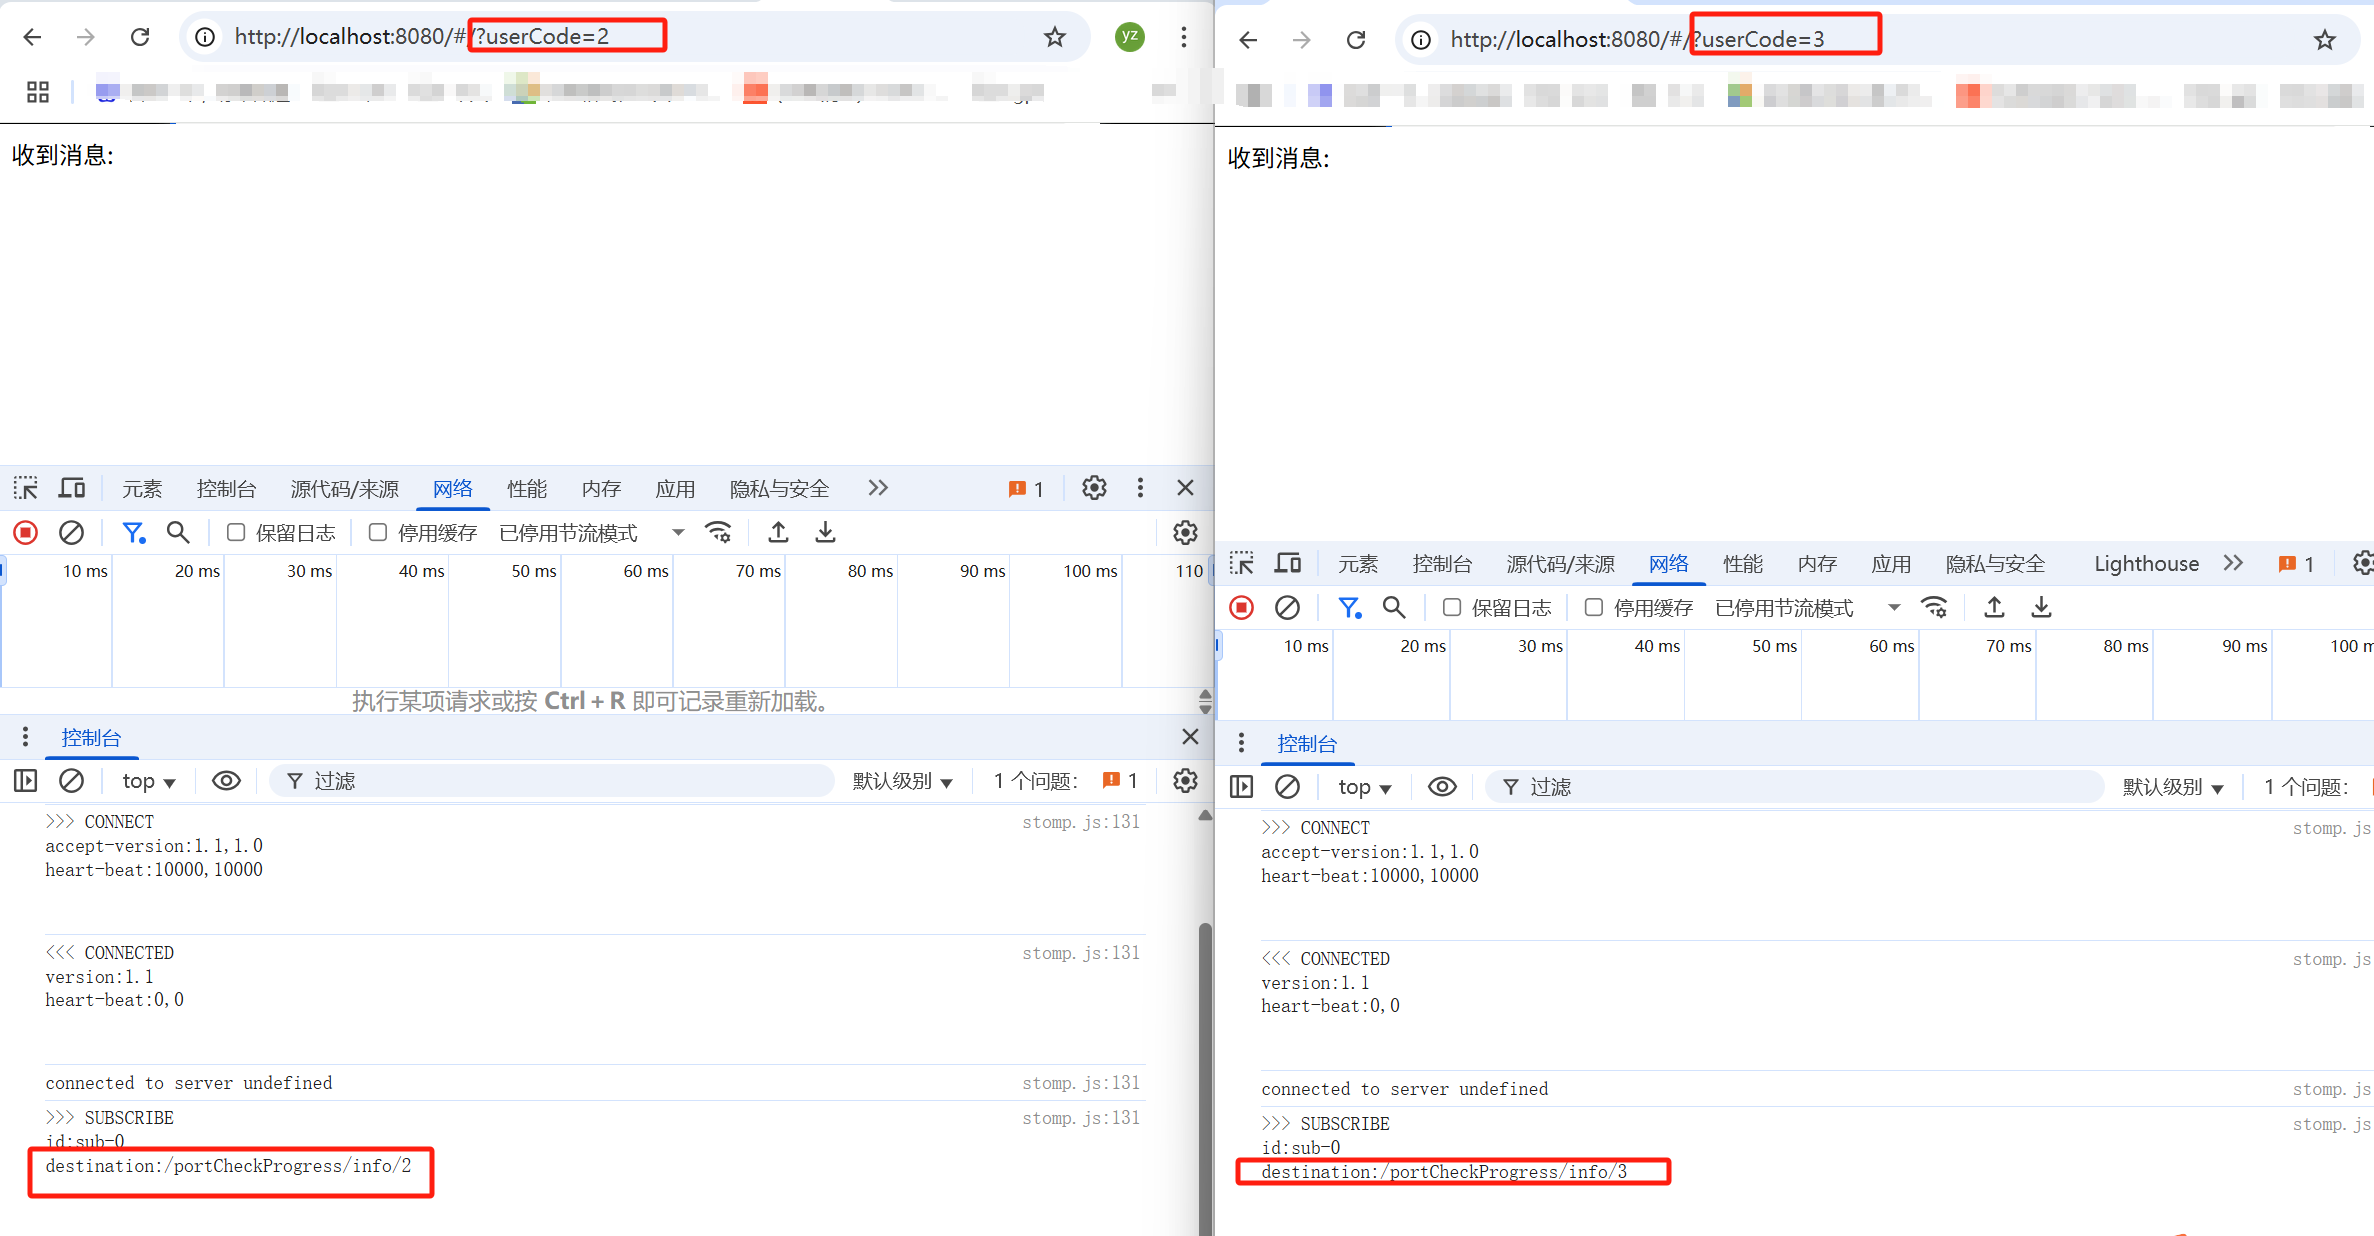
export function connect(url,userCode,callback) {const socket = new SockJS(url);stompClient = Stomp.over(socket);stompClient.connect({}, () => {stompClient.subscribe('/portCheckProgress/info/'+userCode, (message) => {callback(message.body)});});
}
export function disconnect() {if (stompClient) {stompClient.disconnect();}
}<template><div><div>收到消息: {{ receivedMsg }}</div></div>
</template>
<script>
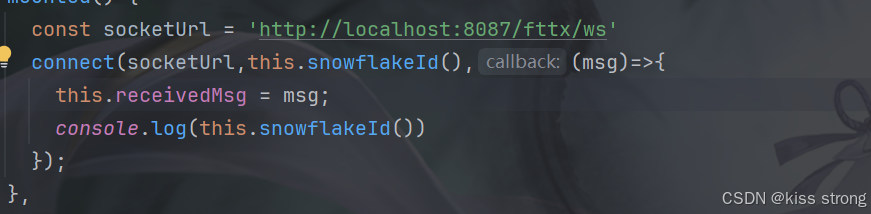
import { connect, disconnect } from '@/ws/websocket';export default {data() {return {inputMsg: '',receivedMsg: ''};},mounted() {var split = location.href.split("?userCode=");var userCode = split[1]connect('http://localhost:8088/ws',userCode,(msg)=>{this.receivedMsg = msg;});},beforeDestroy() {disconnect();},methods: {}
};
</script>測試
向2中發送消息?
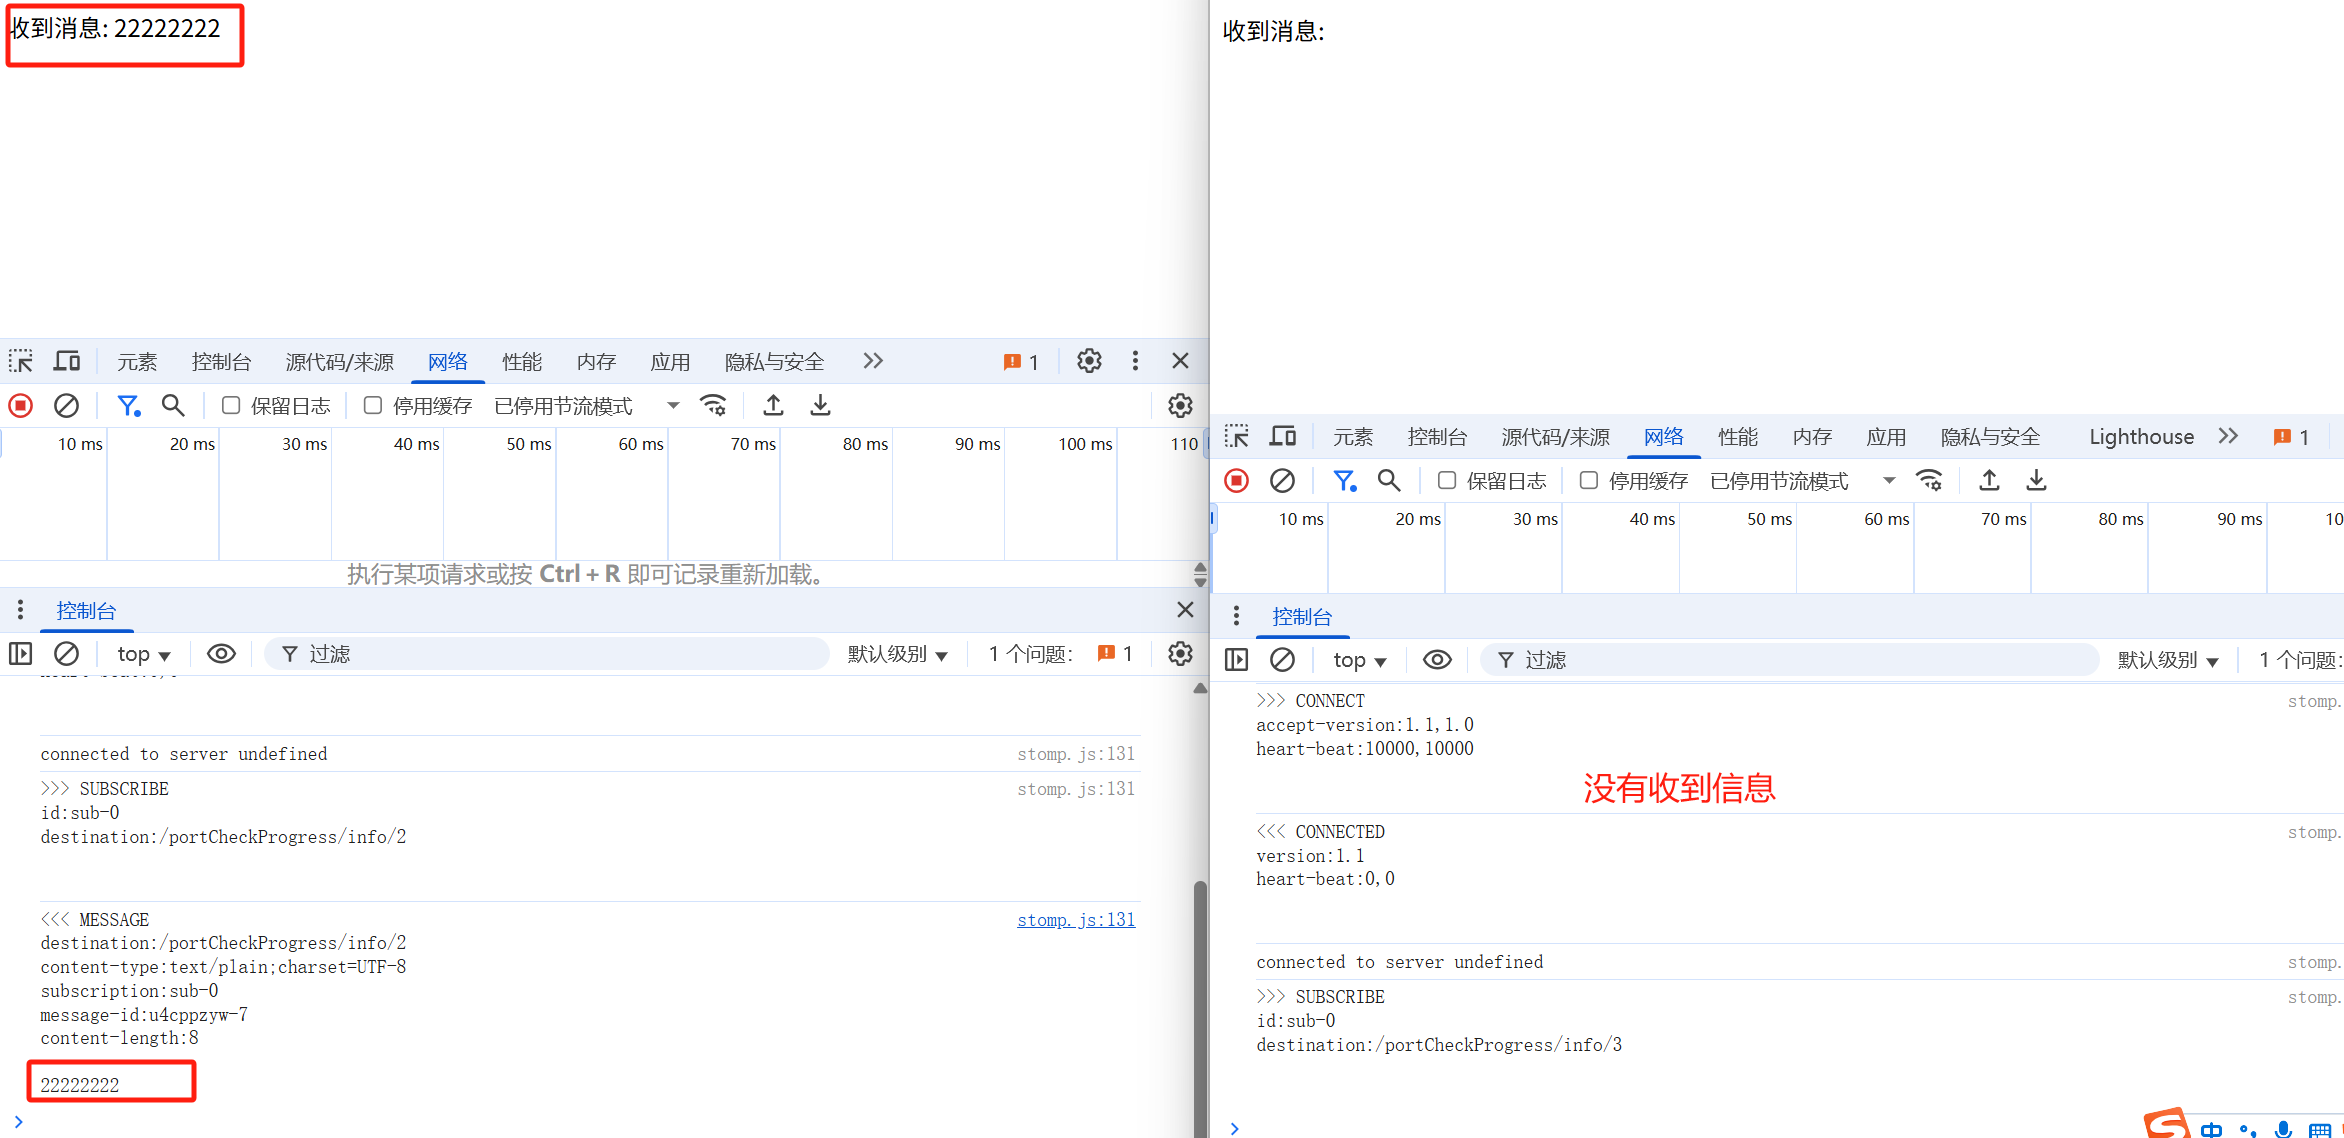
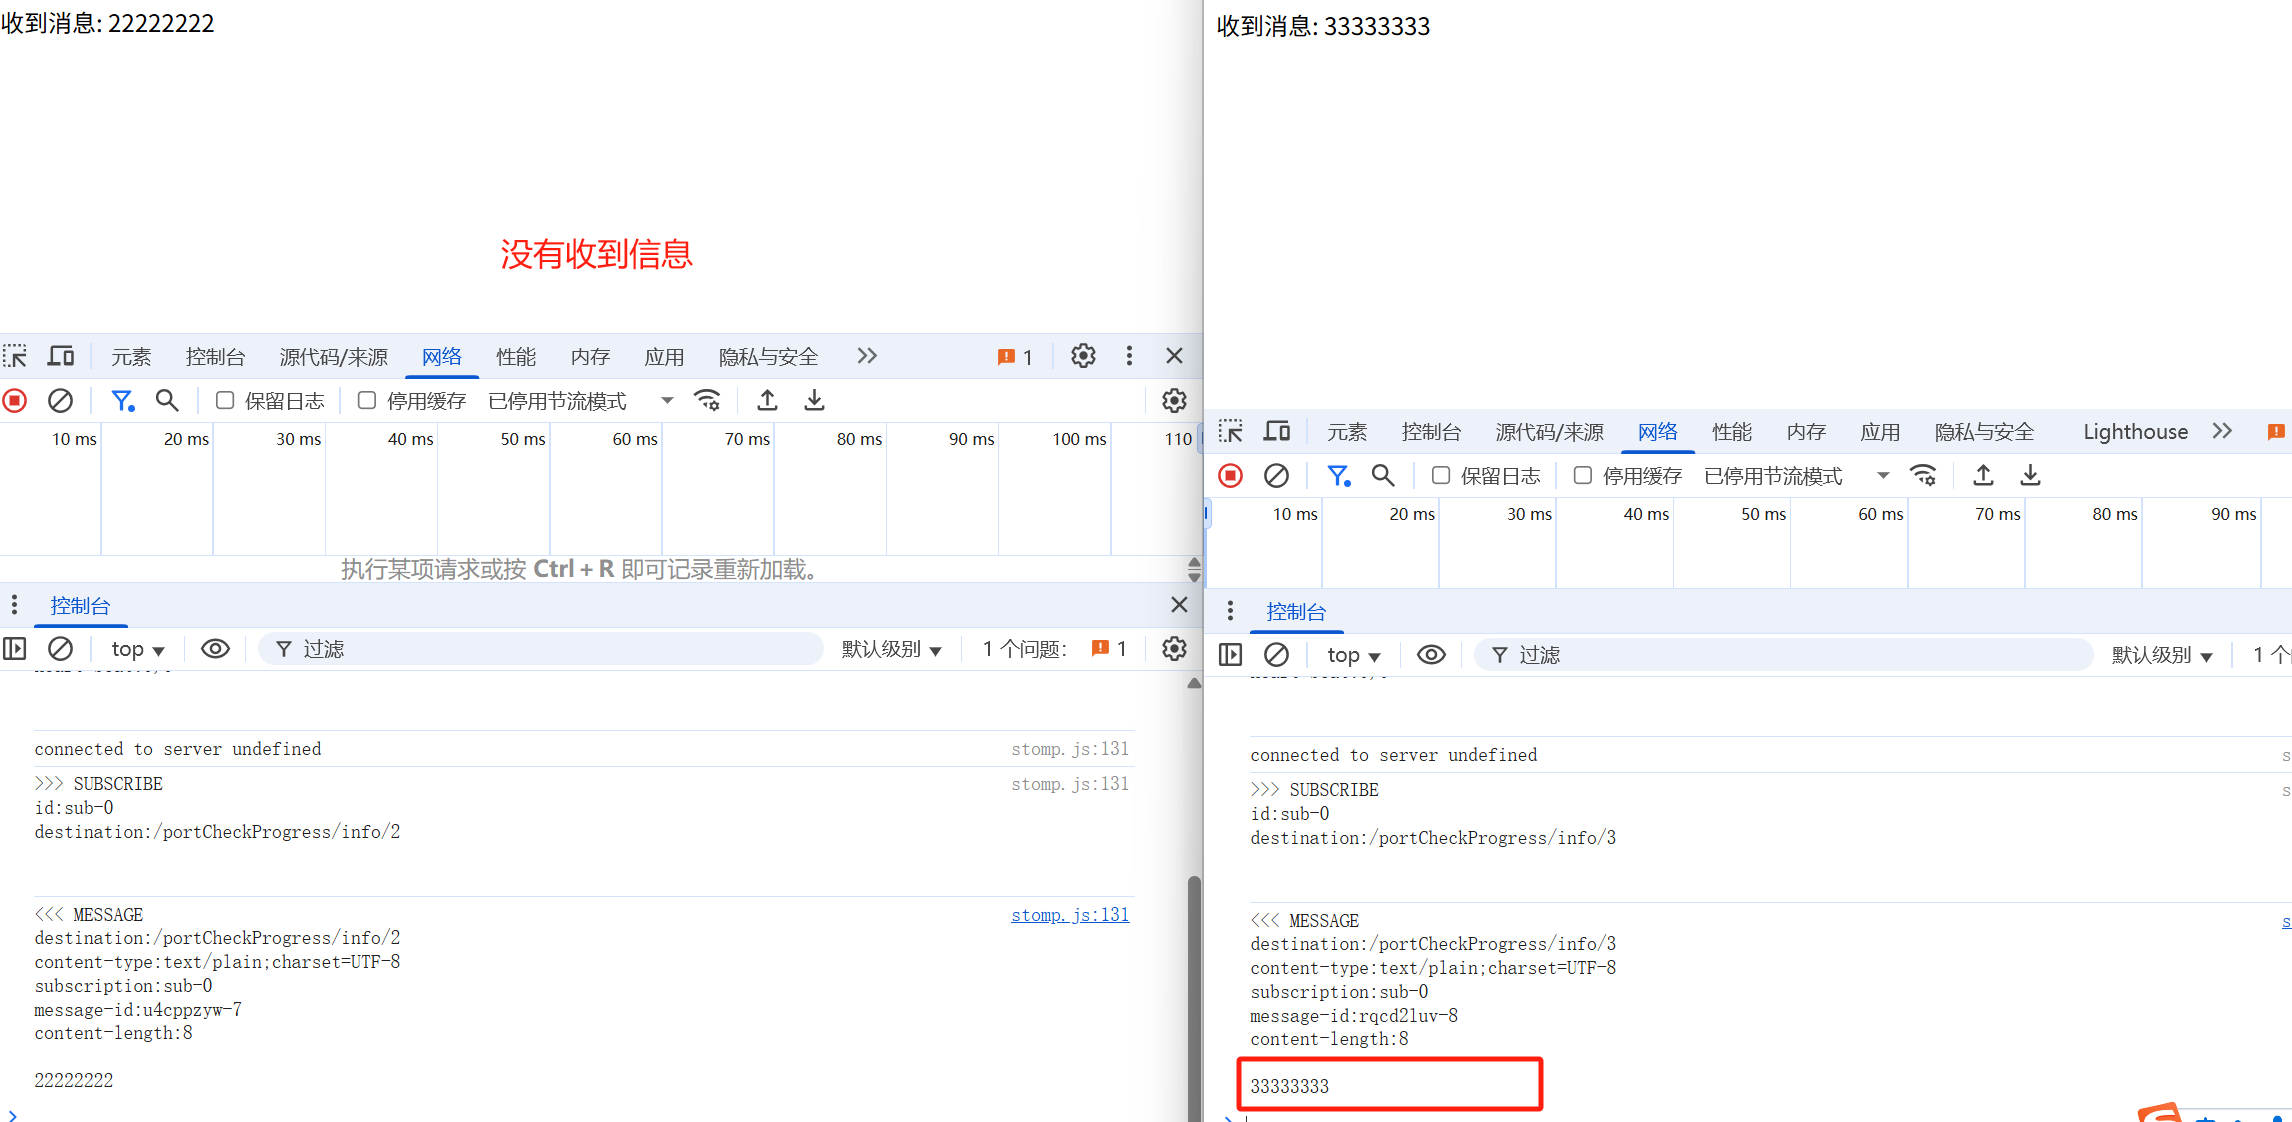
?向3中發送消息?

后端是https?
可以在后端多啟動一個端口,然后重定向到https端口即可,如下
package com.config;import org.apache.catalina.connector.Connector;
import org.springframework.boot.web.embedded.tomcat.TomcatServletWebServerFactory;
import org.springframework.boot.web.servlet.server.ServletWebServerFactory;
import org.springframework.context.annotation.Bean;
import org.springframework.context.annotation.Configuration;/*** @author cyz*/
@Configuration
public class HttpAndHttpsConfig {@Beanpublic ServletWebServerFactory servletContainer() {TomcatServletWebServerFactory tomcat = new TomcatServletWebServerFactory();tomcat.addAdditionalTomcatConnectors(createHttpConnector());return tomcat;}private Connector createHttpConnector() {Connector connector = new Connector("org.apache.coyote.http11.Http11NioProtocol");connector.setScheme("http");connector.setSecure(false);// 與HTTPS端口一致connector.setPort(8087);// 重定向到HTTPS端口connector.setRedirectPort(8088); return connector;}
}
前端寫的是http協議及其端口


)


Gorm的數據庫操作)


跨平臺應用程序項目實戰教程 6 — 彈出框)