git rebase 合并當前分支的多個commit記錄
- git rebase 相關的選項和用法
- step1:找到想要合并的 commit
- step2. 使用 rebase -i
- step3. 編輯提交歷史:
- step4.編輯合并后的提交信息
- step5.完成 rebase 過程:
- step6.**推送更新:**
- step6.**再次查看提交記錄:**
- 一些常用git 命令
git rebase 相關的選項和用法
step1:找到想要合并的 commit
你可能出現過對同一處代碼進行多次處理的場景。這會導致如下提交記錄
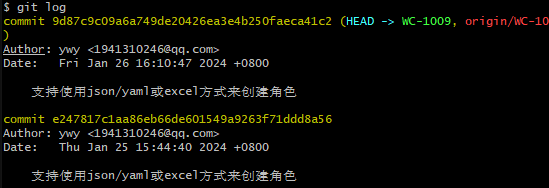
在gitee中也是兩個同樣的提交記錄

其實,2次提交完全可以合并成一次 commit,這個時候 rebase 就很有用了。
step2. 使用 rebase -i
#git rebase -i HEAD~n
#這里的 n 是你想要合并的提交數量加一。例如,如果你想要合并最近的三個提交,就使用 HEAD~3。
git rebase -i HEAD~2
#退出交互式 rebase 狀態
git rebase --abort
step3. 編輯提交歷史:
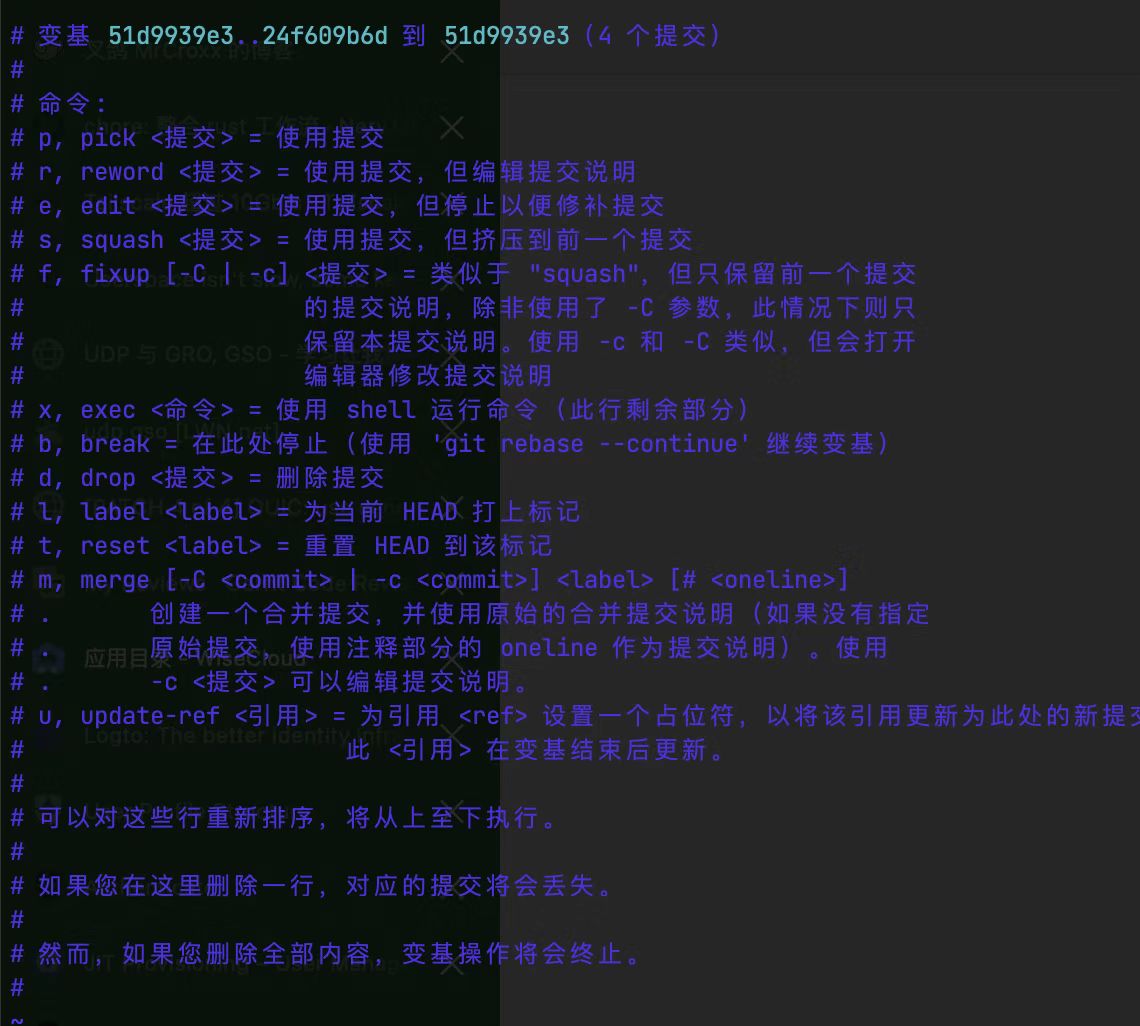
執行上述命令后,會打開一個交互式編輯器,列出了你選擇的提交。每個提交前面都有一個操作標記(通常是 pick)。將你想要合并的提交前的操作標記改為 squash 或 s(表示“合并”),這將把這個提交與前一個提交合并
打開交互編輯器如下:
pick e247817c1 支持使用json/yaml或excel方式來創建角色
pick 9d87c9c09 支持使用json/yaml或excel方式來創建角色# Rebase 6b019ef89..9d87c9c09 onto 6b019ef89 (2 commands)
#
# Commands:
# p, pick <commit> = use commit
# r, reword <commit> = use commit, but edit the commit message
# e, edit <commit> = use commit, but stop for amending
# s, squash <commit> = use commit, but meld into previous commit
# f, fixup <commit> = like "squash", but discard this commit's log message
# x, exec <command> = run command (the rest of the line) using shell
# b, break = stop here (continue rebase later with 'git rebase --continue')
# d, drop <commit> = remove commit
# l, label <label> = label current HEAD with a name
# t, reset <label> = reset HEAD to a label
# m, merge [-C <commit> | -c <commit>] <label> [# <oneline>]
# .       create a merge commit using the original merge commit's
# .       message (or the oneline, if no original merge commit was
# .       specified). Use -c <commit> to reword the commit message.
#
step4.編輯合并后的提交信息
pick e247817c1 支持使用json/yaml或excel方式來創建角色
s 9d87c9c09 支持使用json/yaml或excel方式來創建角色
#修改內容 :wq保存
完成上述操作后,保存并關閉編輯器。Git 將會合并這些提交,并打開一個新的編輯器窗口,讓你編輯合并后的提交信息。在這里你可以編輯合并后的提交信息,或者保持原樣。
#支持使用json/yaml或excel方式來創建角色 這一行打開時是沒有注釋的,注釋掉。
# This is a combination of 2 commits.
# This is the 1st commit message:支持使用json/yaml或excel方式來創建角色# This is the commit message #2:#支持使用json/yaml或excel方式來創建角色
step5.完成 rebase 過程:
保存并關閉編輯器。Git 將會完成 rebase 過程,并應用你的修改。
step6.推送更新:
#如果你在一個公共分支上進行了 rebase 操作,需要使用 --force(或 -f)選項推送更新到遠程倉庫,
#因為 rebase 改寫了提交歷史,可能會導致遠程倉庫的提交歷史與本地不一致。#強行推送
git push -f origin WC-1009
step6.再次查看提交記錄:

一些常用git 命令
#拉取
git pull origin  WC-1071
git init:
#說明: 在當前目錄創建一個新的 Git 倉庫。
#用法: git init [directory]
#示例: git init(在當前目錄初始化一個倉庫)或 git init my_project(在名為 my_project 的目錄中初始化一個倉庫)。
git clone [url]:
#說明: 從遠程倉庫克隆一個項目到本地。
#用法: git clone [url] [directory]
#示例: git clone https://github.com/example/project.git(克隆名為 project 的倉庫到當前目錄)或 git clone https://github.com/example/project.git my_project(克隆到名為 my_project 的目錄)。
git add [file]:
#說明: 將文件添加到暫存區,準備提交。
#用法: git add [file]
#示例: git add index.html(將 index.html 添加到暫存區)或 git add .(將當前目錄下所有修改的文件添加到暫存區)。
git commit -m "message":
#說明: 提交暫存區的文件到本地倉庫,并附上一條說明信息。
#用法: git commit -m "message"
#示例: git commit -m "Added login functionality"(提交并附上說明信息)。
git status:
#說明: 顯示工作區、暫存區和本地倉庫的狀態。
#用法: git status
#示例: git status(顯示當前狀態)。
git diff:
#說明: 顯示工作區和暫存區的文件差異。
#用法: git diff
#示例: git diff(顯示工作區和暫存區的差異)。
git log:
#說明: 顯示本地倉庫的提交歷史。
#用法: git log
#示例: git log(顯示提交歷史)。
git pull:
#說明: 從遠程倉庫拉取最新的提交到本地,并嘗試合并到當前分支。
#用法: git pull [remote] [branch]
#示例: git pull origin master(從遠程的 origin 倉庫的 master 分支拉取最新提交并合并到當前分支)。
git push:
#說明: 將本地倉庫的提交推送到遠程倉庫。
#用法: git push [remote] [branch]
#示例: git push origin master(將當前分支的提交推送到遠程的 origin 倉庫的 master 分支)。
git branch:
#說明: 顯示本地倉庫的分支列表。
#用法: git branch
#示例: git branch(顯示分支列表
git checkout:
#說明:切換分支
#用法: git checkout <branch>
#示例: git checkout master#創建并切換到新的分支:
git checkout -b <new_branch>

—— 音視頻解碼與編碼)


-掌握屏幕單位,應對千變萬化的設備)