文章目錄
- 引言
- 一、項目結構
- 二、頂級pom依賴準備
- 三、common-swagger模塊
- 四、gateway模塊配置
- 五、結果演示
引言
我們在用springboot開發應用時,經常使用swagger來作為我們的接口文檔可視化工具,方便前端同事調用,集成也是比較簡單的,那在微服務系統中,如何使用swagger呢?總不能每個服務都集成一次吧,別急,筆者接下來的內容將十分詳細的給大家展示如何集成swagger3到我們的系統中。
一、項目結構
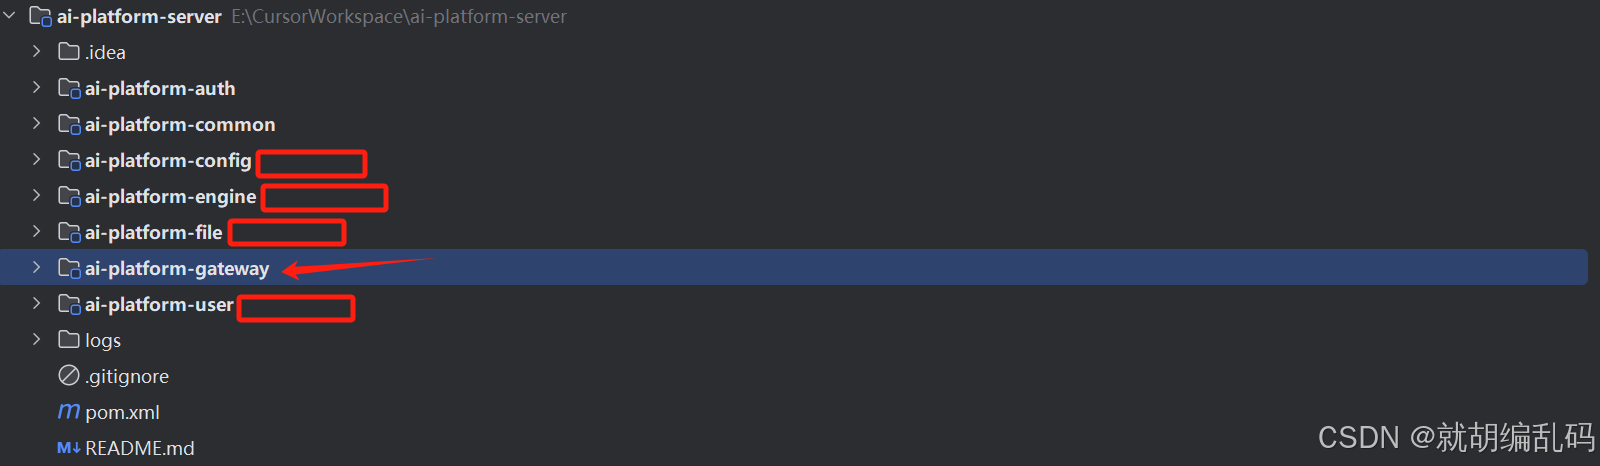
上面是筆者正在開發的AI智能分析平臺項目結構(開發中,還有很多模塊待開發),我為幾個紅框標注的微服務模塊集成了swagger3,文檔的統一訪問入口就在gateway模塊。
環境如下:
- JDK17
- sping boot 版本:3.3.5
- sping cloud 版本:2023.0.3
- spring-cloud-alibaba 版本:2023.0.1.2
二、頂級pom依賴準備
上面的 ai-platform-server 根目錄下的pom.xml即為我的頂級聚合pom,在其中引入如下依賴
<!-- SpringDoc OpenAPI 這是網關gateway模塊專用,因為它是webflux,不是webmvc--><dependency><groupId>org.springdoc</groupId><artifactId>springdoc-openapi-starter-webflux-ui</artifactId><version>${springdoc.version}</version></dependency><!-- SpringDoc webmvc --><dependency><groupId>org.springdoc</groupId><artifactId>springdoc-openapi-starter-webmvc-ui</artifactId><version>${springdoc.version}</version></dependency><dependency><groupId>io.swagger.core.v3</groupId><artifactId>swagger-annotations-jakarta</artifactId><version>${swagger-annotations-jakarta.version}</version></dependency>
這幾個依賴的版本如下
<springdoc.version>2.6.0</springdoc.version><swagger-annotations-jakarta.version>2.2.28</swagger-annotations-jakarta.version>
重點說明:
springdoc-openapi-starter-webmvc-ui
這是為Spring MVC(傳統Servlet棧)應用程序設計的SpringDoc OpenAPI集成模塊。它適用于使用spring-boot-starter-web(基于Servlet)的項目。
主要特點:
- 專為Spring MVC設計
- 集成了Swagger UI界面
- 適用于傳統的Spring Boot Web應用程序
- 基于Servlet API
springdoc-openapi-starter-webflux-ui
這是為Spring WebFlux(響應式棧)應用程序設計的SpringDoc OpenAPI集成模塊。它適用于使用spring-boot-starter-webflux(基于Reactive)的項目。
主要特點:
- 專為Spring WebFlux設計
- 集成了Swagger UI界面
- 適用于響應式Spring Boot應用程序
- 基于Reactive Streams
網關模塊基于Spring Cloud Gateway,它使用的是WebFlux響應式編程模型。所以網關gateway模塊使用springdoc-openapi-starter-webflux-ui,其他模塊使用springdoc-openapi-starter-webmvc-ui。
總結:
- springdoc-openapi-starter-webmvc-ui:用于傳統的基于Servlet的Spring MVC應用程序
- springdoc-openapi-starter-webflux-ui:用于響應式的基于WebFlux的應用程序
以上的疑問解決掉后,再看具體模塊怎么集成的
三、common-swagger模塊
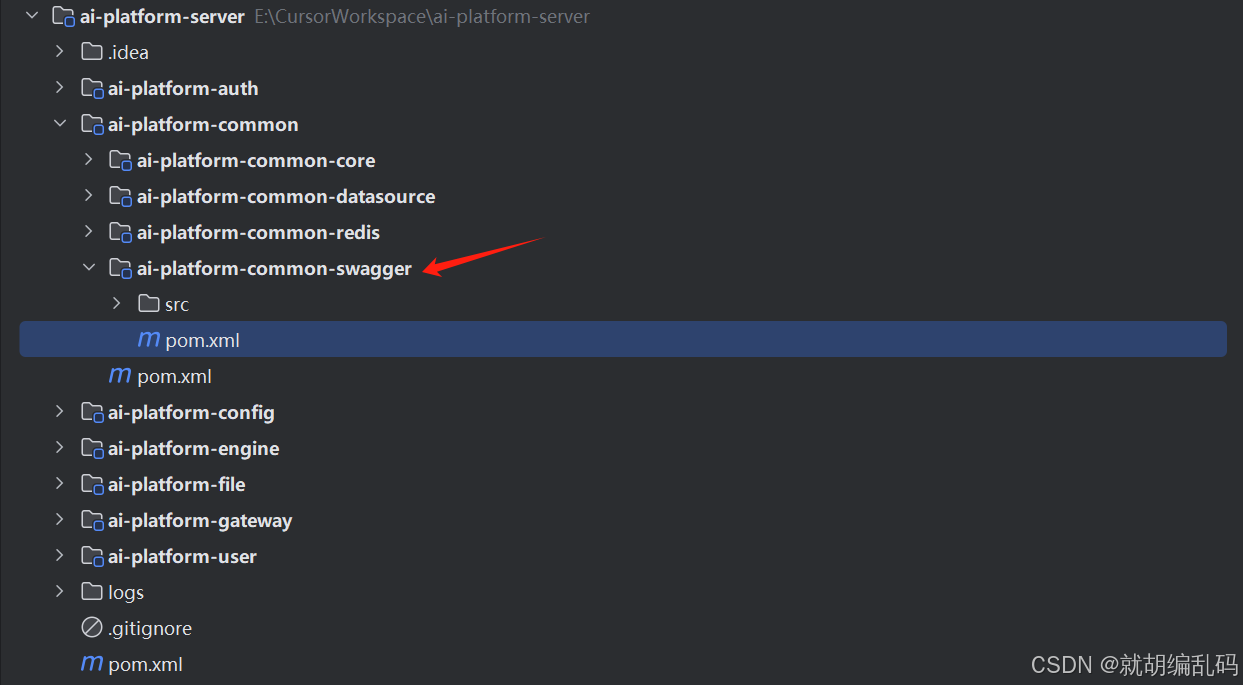
這個模塊是干啥的呢,是除了gateway模塊以外,其他微服務想要集成swagger需要引入的依賴,為了避免每個模塊都引入重復的依賴,同時方便統一管理,我自定義一個模塊,把對應的依賴集中到了一起,這個模塊中的pom依賴內容如下
<dependencies><!-- SpringDoc webmvc 非gateway網關模塊使用這個 --><dependency><groupId>org.springdoc</groupId><artifactId>springdoc-openapi-starter-webmvc-ui</artifactId></dependency><dependency><groupId>io.swagger.core.v3</groupId><artifactId>swagger-annotations-jakarta</artifactId></dependency><!-- Lombok --><dependency><groupId>org.projectlombok</groupId><artifactId>lombok</artifactId><optional>true</optional></dependency></dependencies>
這個common-swagger模塊中定義了一些配置類
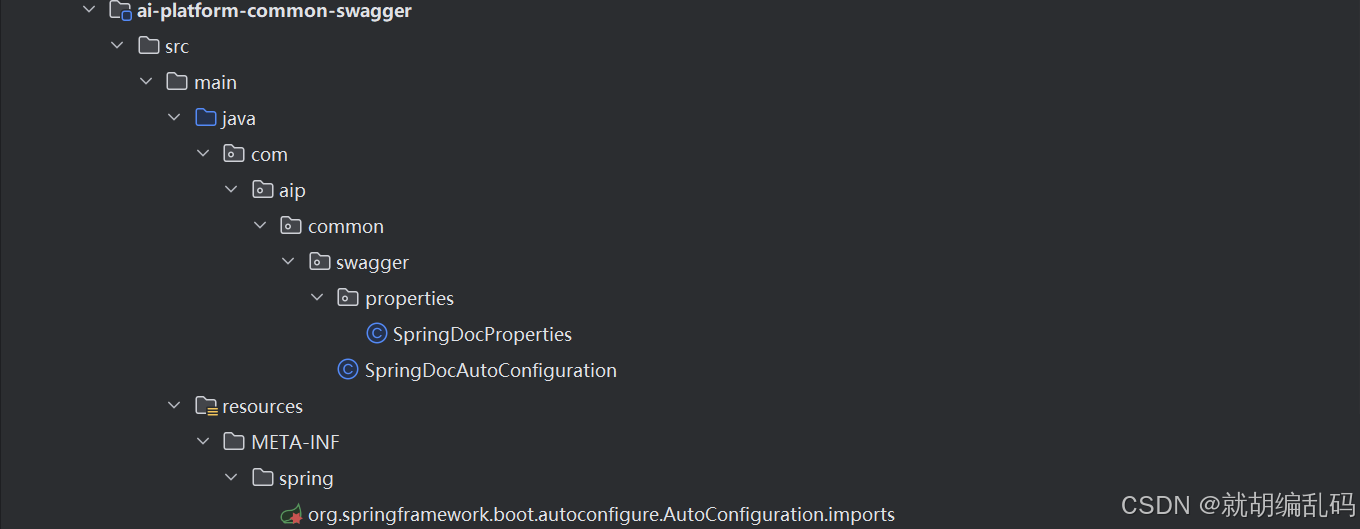
SpringDocProperties
package com.aip.common.swagger.properties;import io.swagger.v3.oas.models.info.Contact;
import io.swagger.v3.oas.models.info.License;
import lombok.Getter;
import lombok.Setter;
import org.springframework.boot.context.properties.ConfigurationProperties;
import org.springframework.boot.context.properties.NestedConfigurationProperty;/*** Swagger 配置屬性*/
@Setter
@Getter
@ConfigurationProperties(prefix = "springdoc")
public class SpringDocProperties {/*** 網關*/private String gatewayUrl;/*** 文檔基本信息*/@NestedConfigurationPropertyprivate InfoProperties info = new InfoProperties();/*** <p>* 文檔的基礎屬性信息* </p>** @see io.swagger.v3.oas.models.info.Info* <p>* 為了 springboot 自動生產配置提示信息,所以這里復制一個類出來*/@Setter@Getterpublic static class InfoProperties {/*** 標題*/private String title = null;/*** 描述*/private String description = null;/*** 聯系人信息*/@NestedConfigurationPropertyprivate Contact contact = null;/*** 許可證*/@NestedConfigurationPropertyprivate License license = null;/*** 版本*/private String version = null;}}
SpringDocAutoConfiguration
package com.aip.common.swagger;import com.aip.common.swagger.properties.SpringDocProperties;
import io.swagger.v3.oas.models.Components;
import io.swagger.v3.oas.models.OpenAPI;
import io.swagger.v3.oas.models.info.Info;
import io.swagger.v3.oas.models.security.SecurityRequirement;
import io.swagger.v3.oas.models.security.SecurityScheme;
import io.swagger.v3.oas.models.servers.Server;
import org.springdoc.core.configuration.SpringDocConfiguration;
import org.springframework.boot.autoconfigure.AutoConfiguration;
import org.springframework.boot.autoconfigure.condition.ConditionalOnMissingBean;
import org.springframework.boot.autoconfigure.condition.ConditionalOnProperty;
import org.springframework.boot.context.properties.EnableConfigurationProperties;
import org.springframework.context.annotation.Bean;import java.util.ArrayList;
import java.util.List;/*** Swagger 文檔配置*/
@AutoConfiguration(before = SpringDocConfiguration.class)
@EnableConfigurationProperties(SpringDocProperties.class)
@ConditionalOnProperty(name = "springdoc.api-docs.enabled", havingValue = "true", matchIfMissing = true)
public class SpringDocAutoConfiguration {@Bean@ConditionalOnMissingBean(OpenAPI.class)public OpenAPI openApi(SpringDocProperties properties) {return new OpenAPI().components(new Components()// 設置認證的請求頭.addSecuritySchemes("apikey", securityScheme())).addSecurityItem(new SecurityRequirement().addList("apikey")).info(convertInfo(properties.getInfo())).servers(servers(properties.getGatewayUrl()));}public SecurityScheme securityScheme() {return new SecurityScheme().type(SecurityScheme.Type.APIKEY).name("Authorization").in(SecurityScheme.In.HEADER).scheme("Bearer");}private Info convertInfo(SpringDocProperties.InfoProperties infoProperties) {Info info = new Info();info.setTitle(infoProperties.getTitle());info.setDescription(infoProperties.getDescription());info.setContact(infoProperties.getContact());info.setLicense(infoProperties.getLicense());info.setVersion(infoProperties.getVersion());return info;}public List<Server> servers(String gatewayUrl) {List<Server> serverList = new ArrayList<>();serverList.add(new Server().url(gatewayUrl));return serverList;}
}
resources文件下的那個是自動配置的,這個不用多說了里面就一行
com.aip.common.swagger.SpringDocAutoConfiguration
四、gateway模塊配置
pom文件需要引入如下
<!-- swagger,這里需要引入響應式的 --><dependency><groupId>org.springdoc</groupId><artifactId>springdoc-openapi-starter-webflux-ui</artifactId></dependency>
這個之前的頂級pom已經做好依賴管理了,這里直接引入就行
gateway模塊配置要特殊點了,因為它是swagger訪問入口,所以會有一些配置和接口訪問權限的問題,首先是配置類 SpringDocConfig
package com.aip.gateway.config;import com.alibaba.nacos.client.naming.event.InstancesChangeEvent;
import com.alibaba.nacos.common.notify.Event;
import com.alibaba.nacos.common.notify.NotifyCenter;
import com.alibaba.nacos.common.notify.listener.Subscriber;
import jakarta.annotation.Resource;
import org.apache.commons.lang3.StringUtils;
import org.springdoc.core.properties.AbstractSwaggerUiConfigProperties;
import org.springdoc.core.properties.SwaggerUiConfigProperties;
import org.springframework.beans.factory.InitializingBean;
import org.springframework.boot.autoconfigure.condition.ConditionalOnProperty;
import org.springframework.cloud.client.discovery.DiscoveryClient;
import org.springframework.context.annotation.Configuration;import java.util.Set;
import java.util.stream.Collectors;/*** SpringDoc配置類*/
@Configuration(proxyBeanMethods = false)
@ConditionalOnProperty(value = "springdoc.api-docs.enabled", matchIfMissing = true)
public class SpringDocConfig implements InitializingBean {@Resourceprivate SwaggerUiConfigProperties swaggerUiConfigProperties;@Resourceprivate DiscoveryClient discoveryClient;/*** 在初始化后調用的方法*/@Overridepublic void afterPropertiesSet() {NotifyCenter.registerSubscriber(new SwaggerDocRegister(swaggerUiConfigProperties, discoveryClient));}
}/*** Swagger文檔注冊器*/
class SwaggerDocRegister extends Subscriber<InstancesChangeEvent> {@Resourceprivate SwaggerUiConfigProperties swaggerUiConfigProperties;@Resourceprivate DiscoveryClient discoveryClient;//需要排除api的微服務模塊應用名稱private final static String[] EXCLUDE_ROUTES = new String[]{"ai-platform-auth","ai-platform-gateway"};public SwaggerDocRegister(SwaggerUiConfigProperties swaggerUiConfigProperties, DiscoveryClient discoveryClient) {this.swaggerUiConfigProperties = swaggerUiConfigProperties;this.discoveryClient = discoveryClient;}/*** 事件回調方法,處理InstancesChangeEvent事件** @param event 事件對象*/@Overridepublic void onEvent(InstancesChangeEvent event) {Set<AbstractSwaggerUiConfigProperties.SwaggerUrl> swaggerUrlSet = discoveryClient.getServices().stream().flatMap(serviceId -> discoveryClient.getInstances(serviceId).stream()).filter(instance -> !StringUtils.equalsAny(instance.getServiceId(), EXCLUDE_ROUTES)).map(instance -> {AbstractSwaggerUiConfigProperties.SwaggerUrl swaggerUrl = new AbstractSwaggerUiConfigProperties.SwaggerUrl();swaggerUrl.setName(instance.getServiceId());//這里是v2還是v3看你的swagger-ui訪問地址的請求路徑swaggerUrl.setUrl(String.format("/%s/v3/api-docs", instance.getServiceId()));return swaggerUrl;}).collect(Collectors.toSet());swaggerUiConfigProperties.setUrls(swaggerUrlSet);}/*** 訂閱類型方法,返回訂閱的事件類型** @return 訂閱的事件類型*/@Overridepublic Class<? extends Event> subscribeType() {return InstancesChangeEvent.class;}
}
這個類的主要作用是注冊各個子服務的接口文檔訪問url,以及排除哪些服務不需要展示接口文檔
再有一個就是接口文檔這個訪問地址應該排除在我們的請求認證體系之外,比如筆者用的是JWT認證,這里把代碼放上僅供參考
package com.aip.gateway.filter;import com.aip.common.constants.CommonConstants;
import com.aip.common.utils.JwtUtils;
import jakarta.annotation.Resource;
import lombok.RequiredArgsConstructor;
import lombok.extern.slf4j.Slf4j;
import org.springframework.cloud.gateway.filter.GatewayFilterChain;
import org.springframework.cloud.gateway.filter.GlobalFilter;
import org.springframework.core.Ordered;
import org.springframework.http.HttpHeaders;
import org.springframework.http.HttpStatus;
import org.springframework.http.server.reactive.ServerHttpRequest;
import org.springframework.stereotype.Component;
import org.springframework.util.AntPathMatcher;
import org.springframework.util.StringUtils;
import org.springframework.web.server.ServerWebExchange;
import reactor.core.publisher.Mono;import java.util.Arrays;
import java.util.List;/*** JWT認證過濾器* 網關統一處理JWT認證,避免各服務重復驗證*/
@Slf4j
@Component
@RequiredArgsConstructor
public class JwtAuthenticationFilter implements GlobalFilter, Ordered {@Resourceprivate JwtUtils jwtUtils;private final AntPathMatcher pathMatcher = new AntPathMatcher();// 不需要認證的路徑private static final List<String> EXCLUDE_PATHS = Arrays.asList("/api/v1/auth/login","/api/v1/auth/refresh","/api/v1/auth/register","/api/v1/auth/send-verification-code","/api/v1/auth/verify-code","/api/v1/auth/forgot-password","/api/v1/auth/reset-password","/actuator/**","/swagger-ui/**","/**/v3/api-docs/**","/health/**","/ping/**","/error");// 不需要租戶ID的路徑private static final List<String> NO_TENANT_PATHS = Arrays.asList("/api/v1/auth/login","/api/v1/auth/register","/api/v1/auth/forgot-password","/api/v1/auth/reset-password","/actuator/**","/swagger-ui/**","/**/v3/api-docs/**");@Overridepublic Mono<Void> filter(ServerWebExchange exchange, GatewayFilterChain chain) {ServerHttpRequest request = exchange.getRequest();String path = request.getPath().value();String method = request.getMethod().name();log.debug("網關JWT過濾器處理請求: {} {}", method, path);// 檢查是否是需要排除的路徑if (isExcludePath(path)) {log.debug("跳過JWT認證: {}", path);return chain.filter(exchange);}// 獲取Authorization頭String authorization = request.getHeaders().getFirst(HttpHeaders.AUTHORIZATION);if (!StringUtils.hasText(authorization) || !authorization.startsWith("Bearer ")) {log.warn("請求缺少有效的Authorization頭: {}", path);return unauthorizedResponse(exchange, "缺少認證Token");}// 提取TokenString token = authorization.substring(7);// 驗證Token格式(這里只做基本驗證,詳細驗證由各服務完成)if (!isValidTokenFormat(token)) {log.warn("Token格式無效: {}", path);return unauthorizedResponse(exchange, "Token格式無效");}// 獲取租戶IDString tenantId = getTenantId(request);if (!StringUtils.hasText(tenantId) && isTenantRequired(path)) {log.warn("請求缺少租戶ID: {}", path);return unauthorizedResponse(exchange, "缺少租戶ID");}// 將Token和租戶ID添加到請求頭,傳遞給下游服務// 下游服務可以直接使用這些信息,無需再次解析JWTServerHttpRequest modifiedRequest = request.mutate().header(CommonConstants.Security.GATEWAY_TOKEN_HEADER, token).header(CommonConstants.Security.GATEWAY_TENANT_ID_HEADER, tenantId != null ? tenantId : "").header(CommonConstants.Security.GATEWAY_USER_ID_HEADER, extractUserIdFromToken(token)) // 從Token中提取用戶ID.header(CommonConstants.Security.GATEWAY_USERNAME_HEADER, extractUsernameFromToken(token)) // 從Token中提取用戶名.build();log.debug("JWT認證通過: path={}, tenantId={}, userId={}", path, tenantId, extractUserIdFromToken(token));return chain.filter(exchange.mutate().request(modifiedRequest).build());}@Overridepublic int getOrder() {return -100; // 高優先級}/*** 檢查是否為排除路徑*/private boolean isExcludePath(String requestPath) {return EXCLUDE_PATHS.stream().anyMatch(pattern -> pathMatcher.match(pattern, requestPath));}/*** 檢查是否需要租戶ID*/private boolean isTenantRequired(String requestPath) {return NO_TENANT_PATHS.stream().noneMatch(pattern -> pathMatcher.match(pattern, requestPath));}/*** 獲取租戶ID*/private String getTenantId(ServerHttpRequest request) {// 優先從請求頭獲取String tenantId = request.getHeaders().getFirst(CommonConstants.Tenant.TENANT_ID_HEADER);if (StringUtils.hasText(tenantId)) {return tenantId;}// 從請求參數獲取String query = request.getURI().getQuery();if (StringUtils.hasText(query) && query.contains("tenantId=")) {String[] params = query.split("&");for (String param : params) {if (param.startsWith("tenantId=")) {return param.substring("tenantId=".length());}}}// 從請求路徑獲取(如:/api/v1/tenant/{tenantId}/...)String path = request.getPath().value();String[] pathParts = path.split("/");for (int i = 0; i < pathParts.length - 1; i++) {if ("tenant".equals(pathParts[i]) && i + 1 < pathParts.length) {return pathParts[i + 1];}}return null;}/*** 驗證Token格式(基本驗證)*/private boolean isValidTokenFormat(String token) {if (!StringUtils.hasText(token)) {return false;}// JWT Token應該包含兩個點,分為三部分String[] parts = token.split("\\.");if (parts.length != 3) {return false;}// 每部分都不應該為空for (String part : parts) {if (!StringUtils.hasText(part)) {return false;}}return true;}/*** 從Token中提取用戶ID*/private String extractUserIdFromToken(String token) {return jwtUtils.extractUserIdFromToken(token);}/*** 從Token中提取用戶名*/private String extractUsernameFromToken(String token) {return jwtUtils.extractUsernameFromToken(token);}/*** 返回未授權響應*/private Mono<Void> unauthorizedResponse(ServerWebExchange exchange, String message) {exchange.getResponse().setStatusCode(HttpStatus.UNAUTHORIZED);exchange.getResponse().getHeaders().add(HttpHeaders.CONTENT_TYPE, "application/json;charset=UTF-8");String responseBody = String.format("{\"code\":%d,\"message\":\"%s\",\"data\":null}",401, message);return exchange.getResponse().writeWith(Mono.just(exchange.getResponse().bufferFactory().wrap(responseBody.getBytes())));}
}
其中的 EXCLUDE_PATHS 即為跳過JWT認證的url路徑列表,其中就包含了下面兩個路徑
"/swagger-ui/**",
"/**/v3/api-docs/**"
以上就是集成過程中的主要內容,各個子服務當然也需要一定的配置,就以ai-platform-user這個子模塊為例
首先是在該模塊的pom下添加該之前創建的 common-swagger依賴
<!-- Swagger 模塊 --><dependency><groupId>com.aip</groupId><artifactId>ai-platform-common-swagger</artifactId></dependency>
然后是配置文件application.yml中配置如下內容
springdoc:# 網關場景下的 API 文檔地址(需網關路由支持)gatewayUrl: http://localhost:8080/api/${spring.application.name}api-docs:enabled: truepath: /v3/api-docsswagger-ui:path: /swagger-ui.htmlinfo:title: '用戶模塊接口文檔'version: 1.0.0description: '用戶模塊接口描述'contact:name: ai-platformurl: https://www.baidu.com
這個gatewayUrl在前面的 SpringDocAutoConfiguration 這個類中有用到讀取這個屬性
其他的模塊如engine、file模塊、config模塊等都按照這個來配置即可
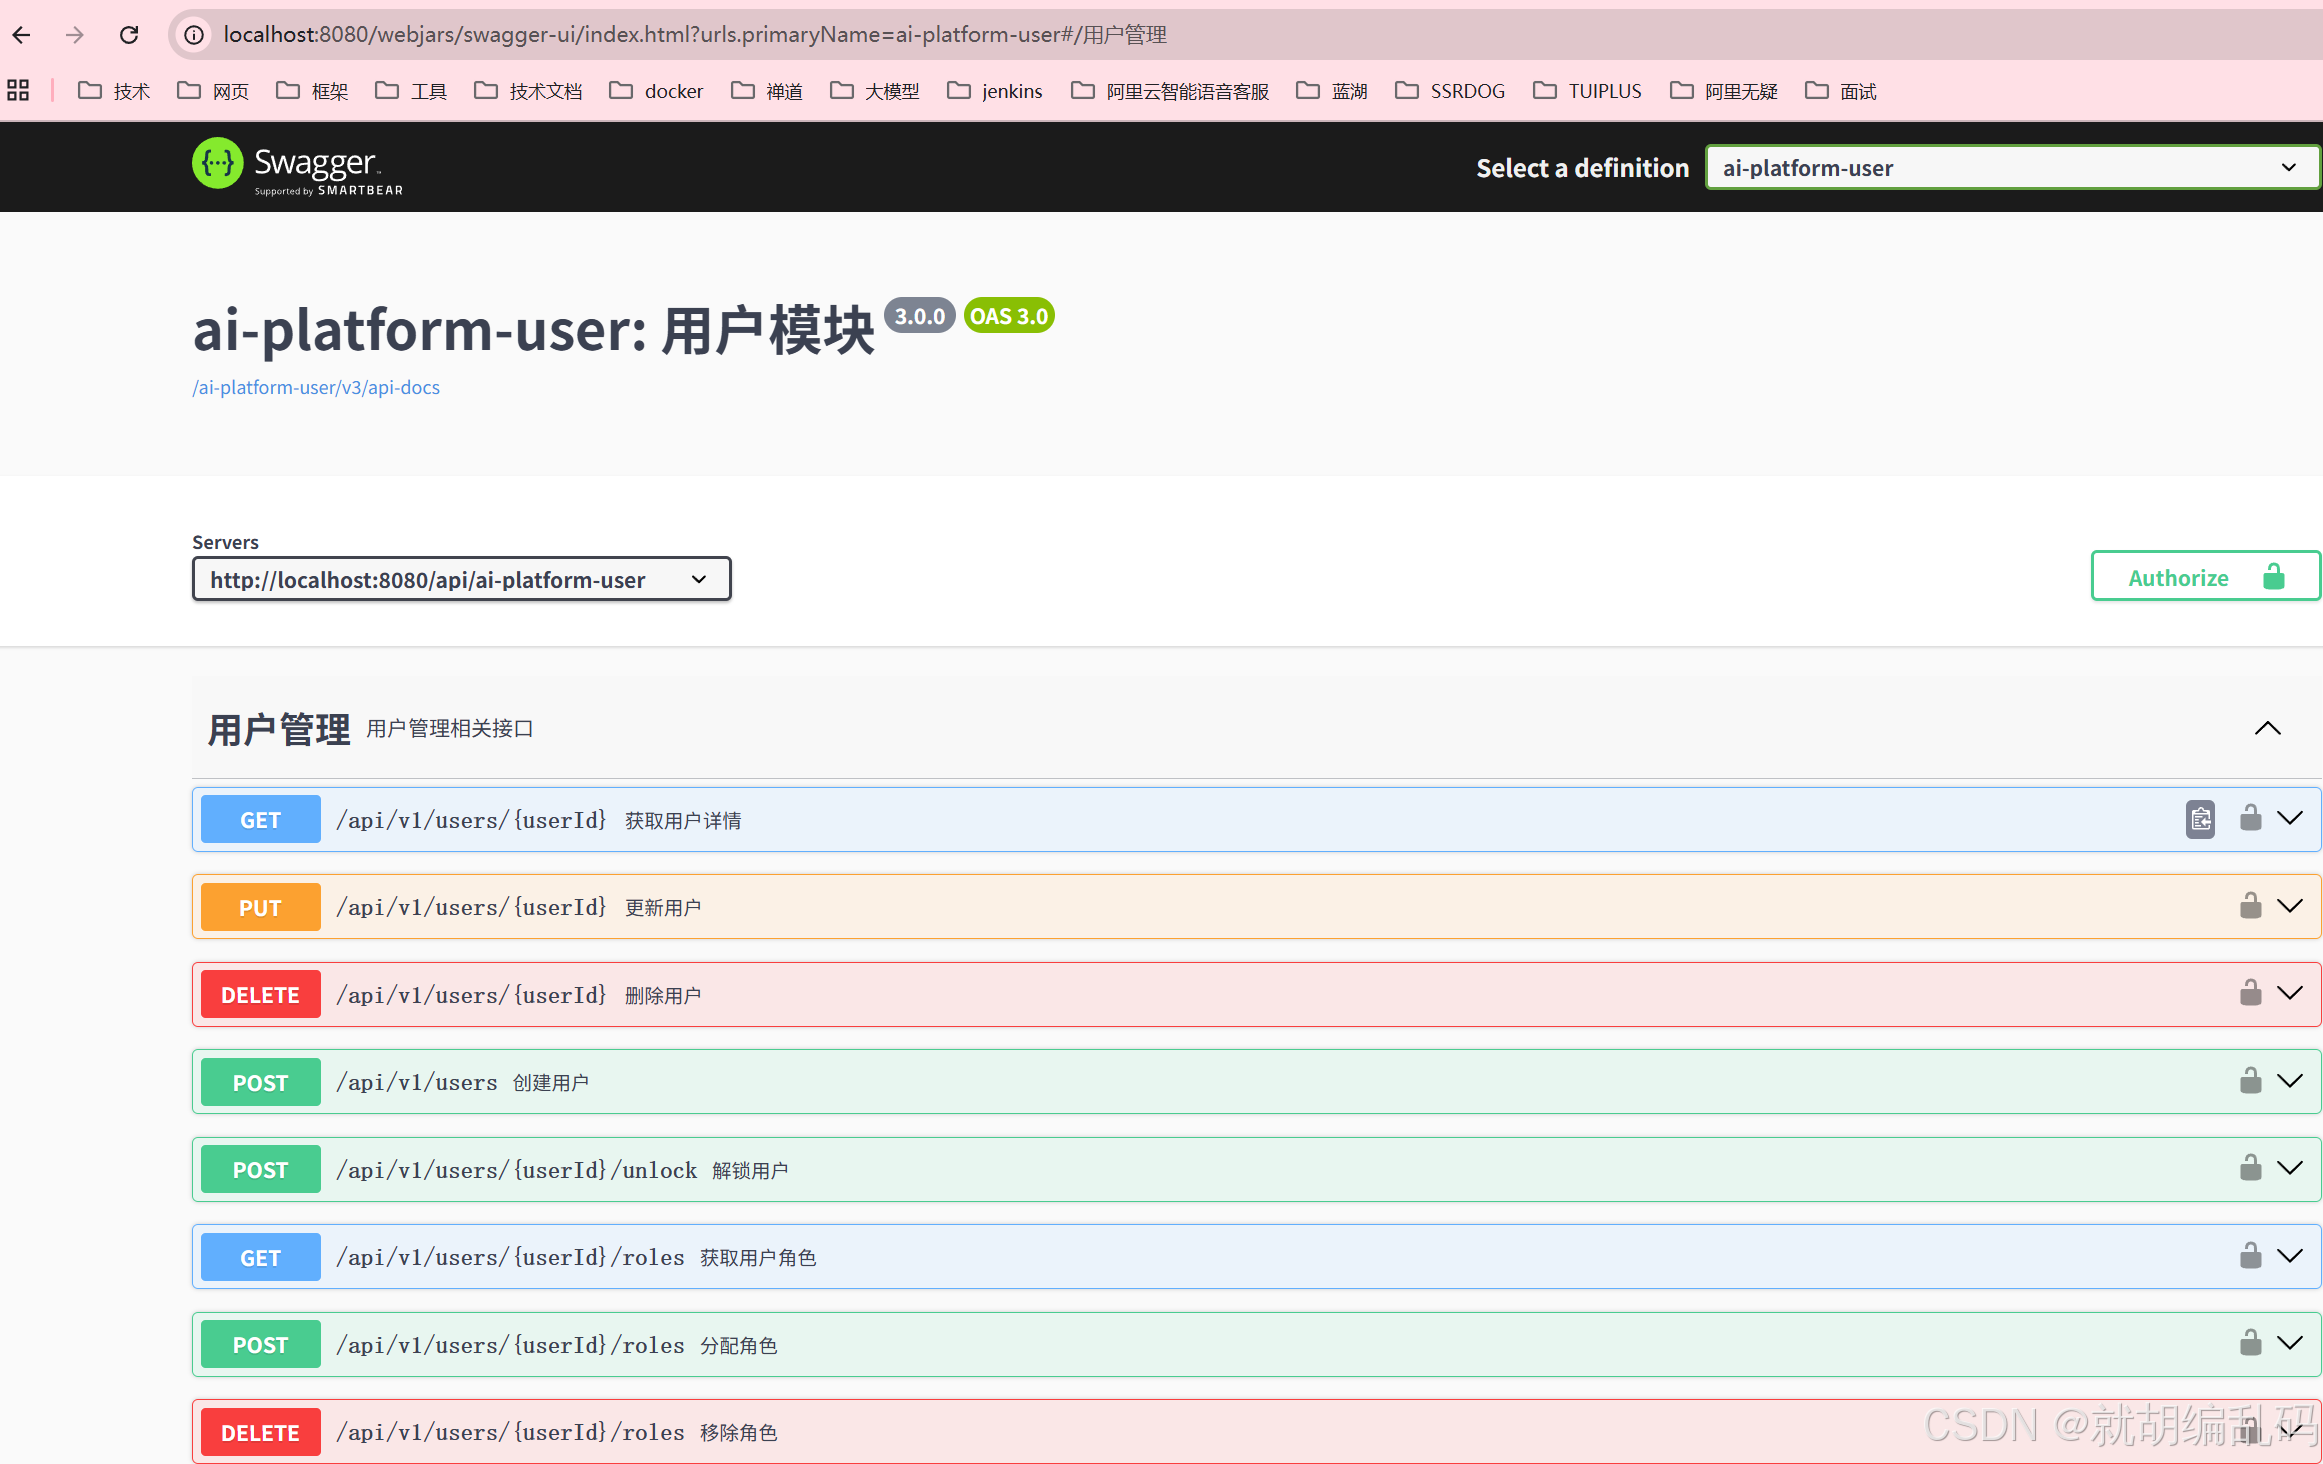
五、結果演示
按照上面的步驟集成好后,啟動你的微服務系統,瀏覽器訪問如下地址
http://localhost:8080/swagger-ui.html
具體controller的參數和實體類上配套使用swagger3給定的一些參數注解,這個自行去查找資料
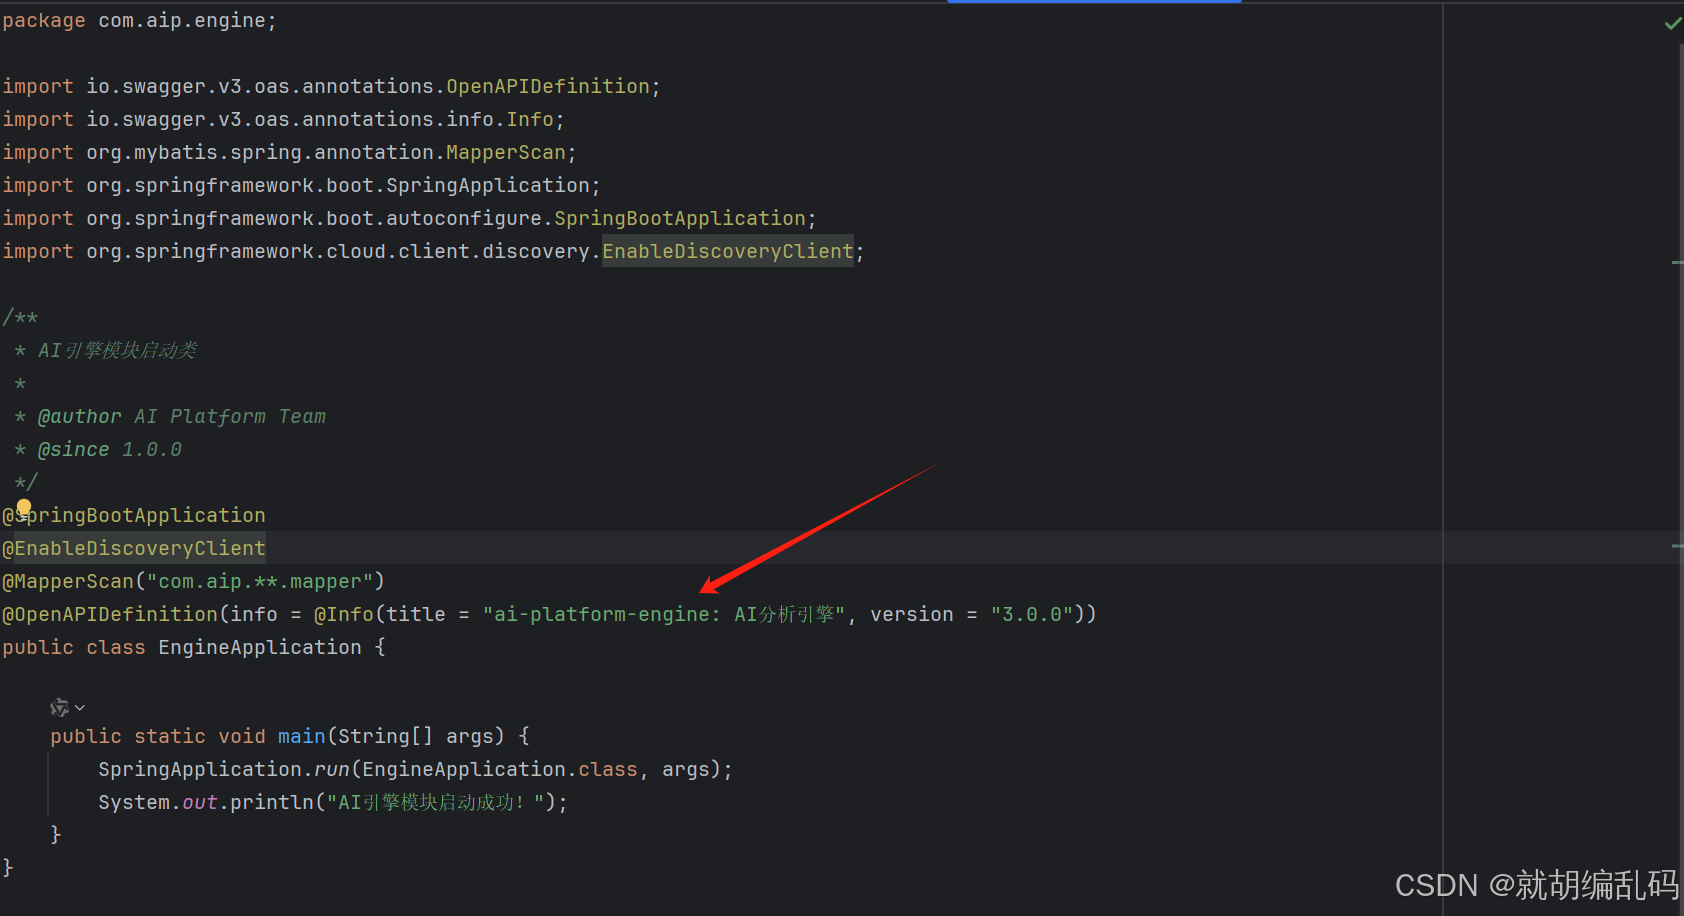
對于每個子服務的啟動類上可加上以下注解,這樣每個服務接口文檔就會有標題了,如上圖的 ai-platform-user: 用戶模塊
到這里,集成swagger3的教程就結束了,諸位如果對微服務架構比較熟悉,按照筆者的教程集成起來應該不是難事


1.0.1 BETA》發布)


)


Leetcode155最小棧+739每日溫度)
】NLP(自然語言處理)基礎)


