一.nginx安裝
1.1nginx概述
1.1.1?nginx介紹
Nginx是一款高性能的開源HTTP和反向代理服務器,是免費的、開源的、高性能的HTTP和反向代理服務器、郵件代理服務器、以及TCP/UDP代理服務器解決C10K問題(10K Connections)。同時也支持IMAP/POP3代理服務器。它以其高性能、低資源消耗、高并發處理能力和靈活的配置而聞名。
1.1.2nginx功能
1.1.3 基礎特性
1.1.4?Web 服務相關的功能
1.2nginx安裝
安裝依賴軟件 沒安裝會在編譯過程中報錯,在安裝完就可以正常編譯完成
[root@Nginx ~]# dnf install gcc pcre-devel zlib-devel openssl-devel -y[root@Nginx nginx-1.24.0]# useradd -s /sbin/nologin -M nginx #不創建家目錄[root@Nginx nginx]# tar zxf nginx-1.24.0.tar.gz[root@Nginx nginx]# cd nginx-1.24.0/[root@Nginx nginx-1.24.0]# ls
auto CHANGES.ru configure html Makefile objs src
CHANGES conf contrib LICENSE man README
在編譯安裝前可以隱藏版本信息
vim /src/core/nginx.h 進去配置文件修改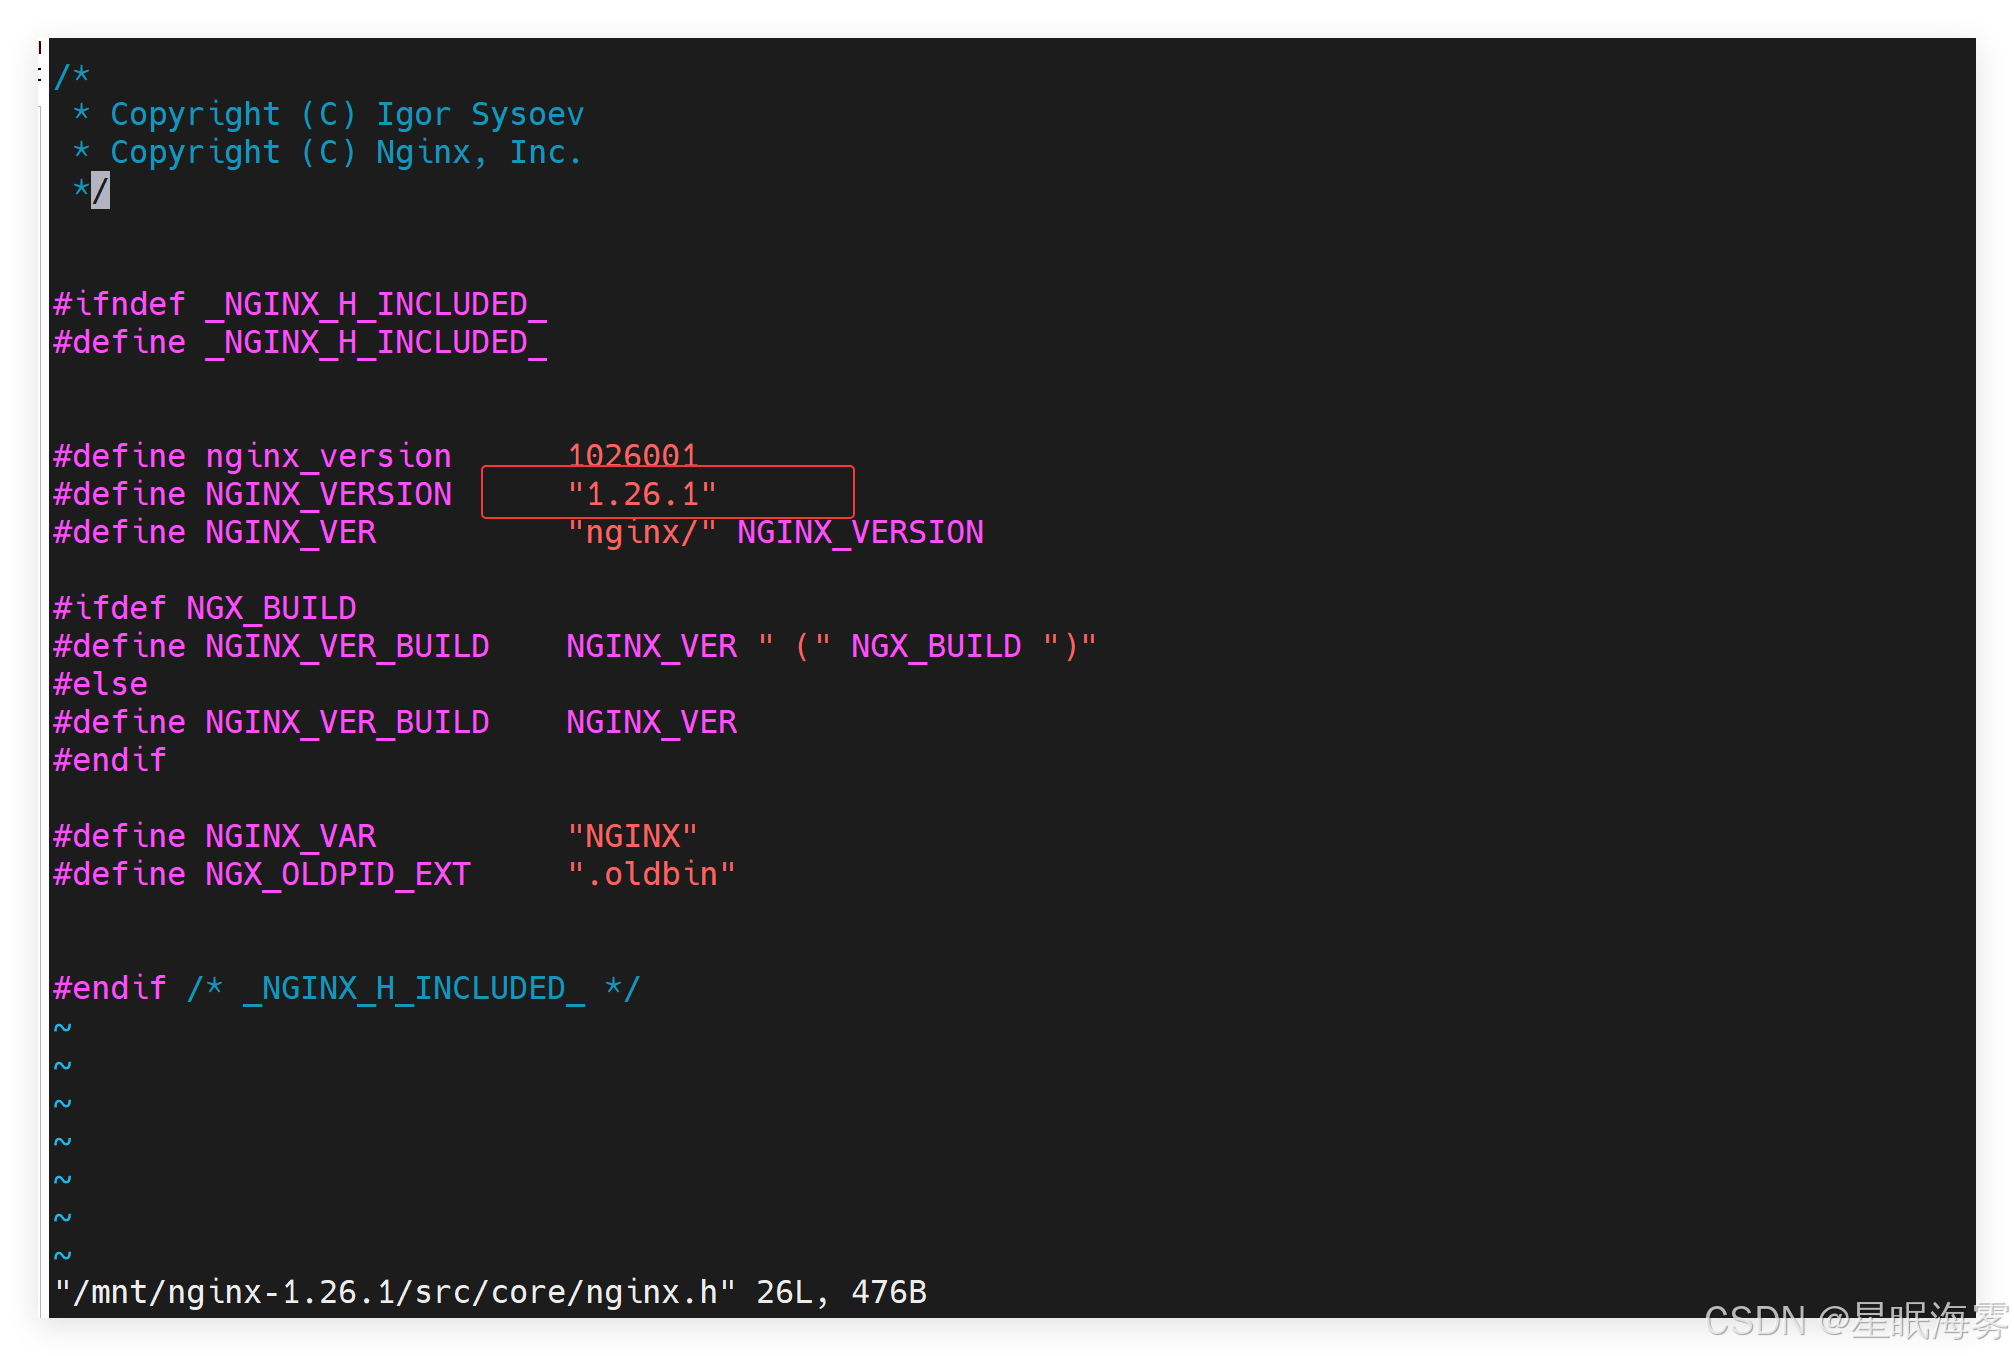
[root@Nginx nginx-1.24.0]#  ./configure --prefix=/usr/local/nginx --user=nginx --group=nginx --with-http_ssl_module --with-http_v2_module --with-http_realip_module
--with-http_stub_status_module --with-http_gzip_static_module --with-pcre
--with-stream --with-stream_ssl_module --with-stream_realip_module --user=nginx \					 # 指定nginx運行用戶
--group=nginx \ 				 # 指定nginx運行組
--with-http_ssl_module \		 # 支持https://
--with-http_v2_module \ 		 # 支持http版本2
--with-http_realip_module \ 	 # 支持ip透傳
--with-http_stub_status_module \ # 支持狀態頁面
--with-http_gzip_static_module \ # 支持壓縮
--with-pcre \           		 # 支持正則
--with-stream \ 				 # 支持tcp反向代理
--with-stream_ssl_module \ 		 # 支持tcp的ssl加密
--with-stream_realip_module    	 # 支持tcp的透傳ip編譯安裝
[root@Nginx nginx-1.24.0]# make
[root@Nginx nginx-1.24.0]# make install
完成后查看文件
[root@webserver ~]# ls /usr/local/nginx/    #安裝完成后
conf  html  logs  sbin
##############################################################################
conf:保存nginx所有的配置文件,其中nginx.conf是nginx服務器的最核心最主要的配置文件,其他的.conf則是用來配置nginx相關的功能的,例如fastcgi功能使用的是fastcgi.conf和fastcgi_params兩個文件,配置文件一般都有一個樣板配置文件,是以.default為后綴,使用時可將其復制并將default后綴去掉即可。html目錄中保存了nginx服務器的web文件,但是可以更改為其他目錄保存web文件,另外還有一個50x的web文件是默認的錯誤頁面提示頁面。
logs:用來保存nginx服務器的訪問日志錯誤日志等日志,logs目錄可以放在其他路徑,比如/var/logs/nginx里面。sbin:保存nginx二進制啟動腳本,可以接受不同的參數以實現不同的功能。
##############################################################################
配置環境變量
[root@webserver ~]# vim ~/.bash_profile #配置環境變量
export PATH=$PATH:/usr/local/nginx/sbin
[root@webserver ~]# source ~/.bash_profile  #改動立即生效#查看
[root@webserver ~]# nginx -V
nginx version: nginx/1.24.0
built by gcc 11.3.1 20221121 (Red Hat 11.3.1-4) (GCC)
...
#############################################################################
-?,-h : this help	 #幫助
-v : show version and exit #顯示版本
-V : show version and configure options then exit #顯示版本和編譯參數
-t : test configuration and exit #測試配置文件是否異
-T : test configuration, dump it and exit #測試并打印
-q : suppress non-error messages during configuration testing #靜默模式
-s signal : send signal to a master process: stop, quit, reopen, reload #發送信號,reload信號 會生成新的worker,但master不會重新生成
-p prefix : set prefix path (default: /etc/nginx/) #指定Nginx 目錄
-c filename : set configuration file (default: /etc/nginx/nginx.conf) #配置文件路徑
-g directives : set global directives out of configuration file #設置全局指令,注意和配置文件不要同時配置,否則沖突
#############################################################################
nginx啟動文件
百度搜索 systemd site:nginx.org
[root@webserver ~]# cat /lib/systemd/system/nginx.service
[Unit]
Description=The NGINX HTTP and reverse proxy server
After=syslog.target network.target remote-fs.target nss-lookup.target[Service]
Type=forking
PIDFile=/usr/local/nginx/logs/nginx/nginx.pid	#pid文件路徑
ExecStartPre=/usr/local/nginx/sbin/nginx -t		#啟動前做配置語法檢查
ExecStart=/usr/local/nginx/sbin/nginx			#啟動 Nginx。
ExecReload=/bin/kill -s HUP $MAINPID
ExecStop=/bin/kill -s QUIT $MAINPID
PrivateTmp=true[Install]
WantedBy=multi-user.target
[root@webserver ~]#Type=forking:Nginx 是傳統的 fork 類型的守護進程。
ExecStartPre:啟動前做配置語法檢查,非常推薦。
ExecStart:啟動 Nginx。
ExecReload:使用 HUP 信號優雅重載配置。
ExecStop:使用 QUIT 信號優雅停止服務。
PrivateTmp=true:增強安全隔離。
WantedBy=multi-user.target:系統多用戶模式下自動啟動。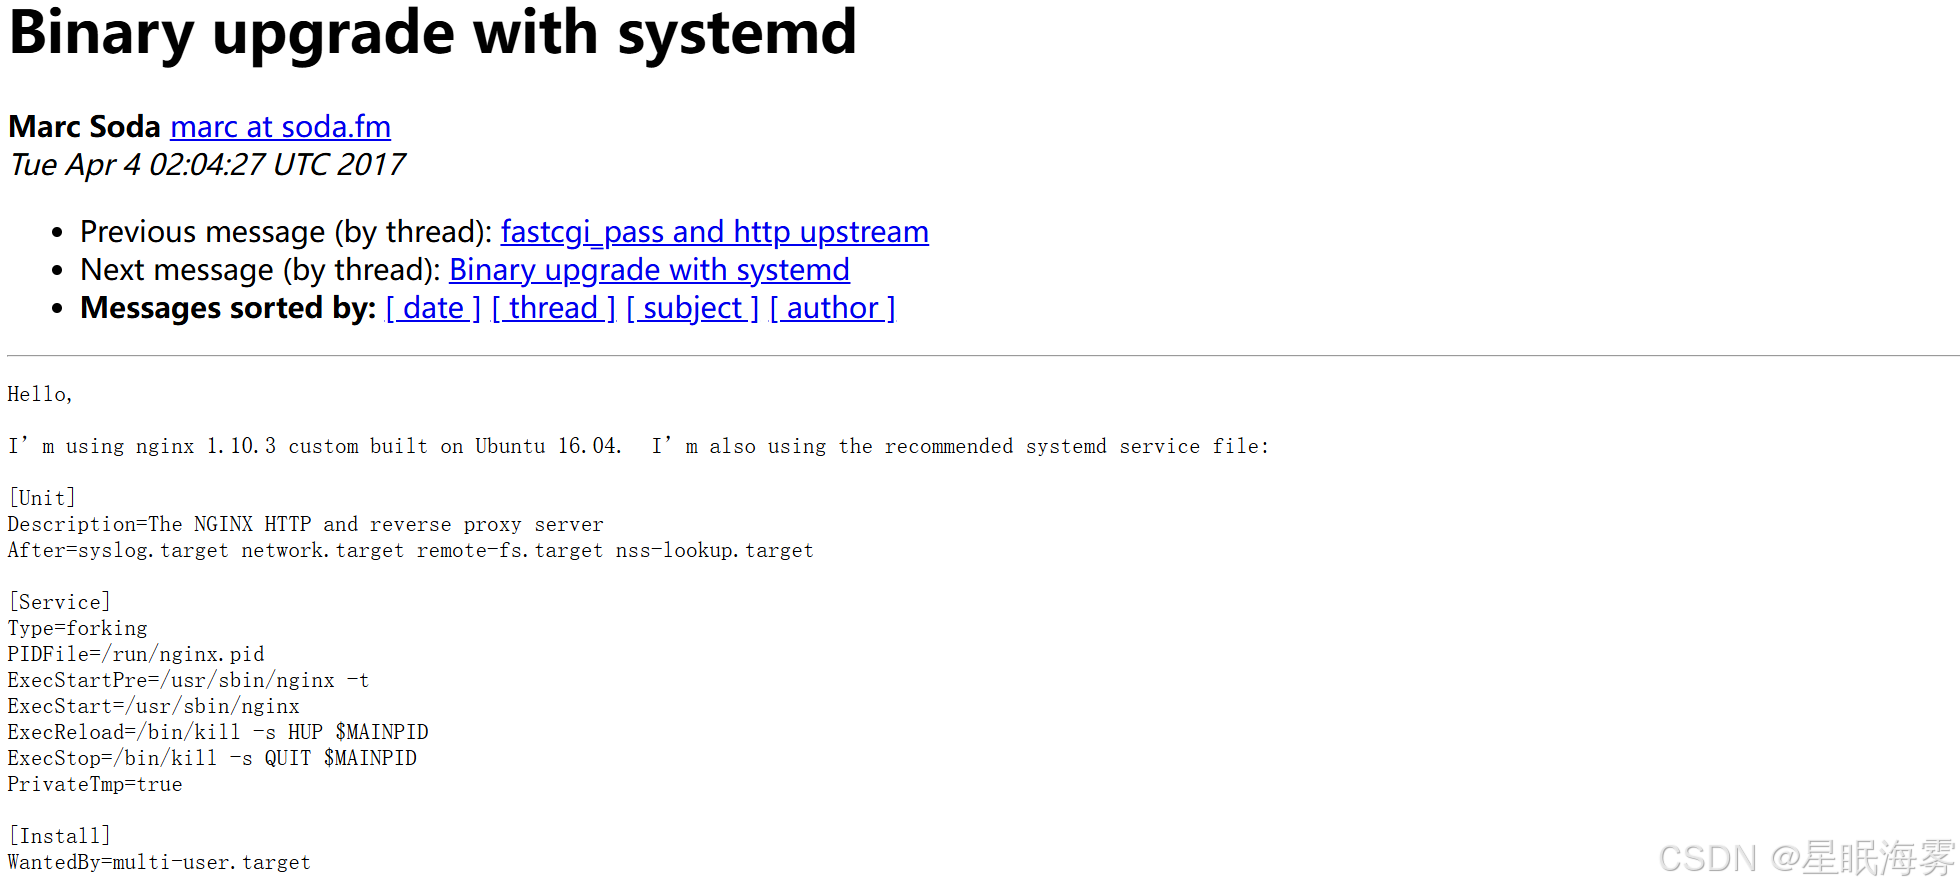
復制過來更改自己相關文件所在的路徑
1.3平滑升級和回滾
1.3.1平滑升級
先下載新版本,解壓編譯不安裝make不make install
[root@Nginx nginx]# tar zxf nginx-1.26.1.tar.gz
[root@Nginx nginx]# cd nginx-1.26.1/[root@webserver ~]# vim /mnt/nginx-1.26.1/auto/cc/gcc
# debug
#CFLAGS="$CFLAGS -g"  #將此行注釋掉#開始編譯新版本
[root@Nginx nginx-1.26.1]# ./configure --prefix=/usr/local/nginx --user=nginx --group=nginx --with-http_ssl_module --with-http_v2_module --with-http_realip_module --with-http_stub_status_module --with-http_gzip_static_module --with-pcre --with-stream --with-stream_ssl_module --with-stream_realip_module    	 #只要make無需要make install
[root@Nginx nginx-1.26.1]# make
#查看兩個版本
[root@Nginx nginx-1.26.1]# ll objs/nginx /usr/local/nginx/sbin/nginx
-rwxr-xr-x 1 root root 1239416 Jul 18 15:08 objs/nginx
-rwxr-xr-x 1 root root 5671488 Jul 18 11:41 /usr/local/nginx/sbin/nginx
升級
#把之前的舊版的nginx命令備份
[root@Nginx ~]# cd /usr/local/nginx/sbin/
[root@Nginx sbin]# cp nginx nginx.24
#把新版本的nginx命令復制過去
[root@webserver ~]# alias
alias cp='cp -i'
#cp 默認是 cp -i  使用/bin/cp -f 覆蓋老版本的nginx
[root@Nginx sbin]# /bin/cp -f /root/nginx/nginx-1.26.1/objs/nginx  . #當前路徑
#復制完查看nginx大小是否改變,新版本與舊版本大小不一致
#檢測一下有沒有問題
[root@Nginx sbin]# nginx -t
nginx: the configuration file /usr/local/nginx/conf/nginx.conf syntax is ok
nginx: configuration file /usr/local/nginx/conf/nginx.conf test is successful[root@Nginx sbin]# kill -USR2 48732
#nginx worker ID
#USR2 平滑升級可執行程序,將存儲有舊版本主進程PID的文件重命名為nginx.pid.oldbin,并啟動新的nginx
#此時兩個master的進程都在運行,只是舊的master不在監聽,由新的master監聽80
#此時Nginx開啟一個新的master進程,這個master進程會生成新的worker進程,這就是升級后的Nginx進程,此時老的進程不會自動退出,但是當接收到新的請求不作處理而是交給新的進程處理。[root@Nginx sbin]# ps aux | grep nginx   出現了新版本的master和worker
root 48732 0.0 0.1 9868 2436 ? Ss 14:17 0:00 nginx: master
process /usr/local/nginx/sbin/nginx
nobody 48733 0.0 0.2 14200 4868 ? S 14:17 0:00 nginx: worker
process
root 52075 0.0 0.3 9876 6528 ? S 15:41 0:00 nginx: master
process /usr/local/nginx/sbin/nginx
nobody 52076 0.0 0.2 14208 4868 ? S 15:41 0:00 nginx: worker
process[root@Nginx sbin]# curl -I localhost
HTTP/1.1 200 OK
Server: nginx/1.24.0 ##依舊是舊版本生生效
...kill
#回收舊版本
[root@Nginx sbin]# kill -WINCH 48732   #關閉舊版本worker進程(id為master的id)
[root@Nginx sbin]# ps aux | grep nginx  #舊版本的worker消失
root 48732 0.0 0.1 9868 2436 ? Ss 14:17 0:00 nginx: master
process /usr/local/nginx/sbin/nginx
root 52075 0.0 0.3 9876 6528 ? S 15:41 0:00 nginx: master
process /usr/local/nginx/sbin/nginx
nobody 52076 0.0 0.2 14208 4868 ? S 15:41 0:00 nginx: worker
process
#檢測版本信息
[root@Nginx sbin]# curl -I localhost
HTTP/1.1 200 OK
Server: nginx/1.26.1 #新版本生效
...
回滾
#如果升級的版本發現問題需要回滾,可以重新拉起舊版本的worker
[root@Nginx sbin]# cp nginx nginx.26
[root@Nginx sbin]# ls
nginx nginx.24 nginx.26
[root@Nginx sbin]# mv nginx.24 nginx
mv: overwrite 'nginx'? y
[root@Nginx sbin]# kill -HUP 48732   #激活舊版本
[root@Nginx sbin]# ps aux | grep nginx  #舊版本worker出現
root 48732 0.0 0.1 9868 2436 ? Ss 14:17 0:00 nginx: master
process /usr/local/nginx/sbin/nginx
root 52075 0.0 0.3 9876 6528 ? S 15:41 0:00 nginx: master
process /usr/local/nginx/sbin/nginx
nobody 52076 0.0 0.2 14208 5124 ? S 15:41 0:00 nginx: worker
process
nobody 52130 0.0 0.2 14200 4868 ? S 16:30 0:00 nginx: worker
process
[root@Nginx sbin]# kill -WINCH 52075  回收新版本
[root@Nginx sbin]# ps aux | grep nginx   新版本worker消失
root 48732 0.0 0.1 9868 2436 ? Ss 14:17 0:00 nginx: master
process /usr/local/nginx/sbin/nginx
root 52075 0.0 0.3 9876 6528 ? S 15:41 0:00 nginx: master
process /usr/local/nginx/sbin/nginx
nobody 52130 0.0 0.2 14200 4868 ? S 16:30 0:00 nginx: worker
process
root 52137 0.0 0.1 221664 2176 pts/0 S+ 16:31 0:00 grep --
color=auto nginx
[root@Nginx sbin]# curl -I localhost
HTTP/1.1 200 OK
Server: nginx/1.24.0 ##版本回滾完成
Date: Thu, 18 Jul 2024 08:31:51 GMT
二.?配置
2.1全局配置說明
user nginx nginx; #啟動Nginx工作進程的用戶和組
worker_processes [number | auto]; #啟動Nginx工作進程的數量,一般設為和CPU核心數相同
worker_cpu_affinity 00000001 00000010 00000100 00001000 | auto ;
#將Nginx工作進程綁定到指定的CPU核心,默認Nginx是不進行進程綁定的,綁定并不是意味著當前nginx進
程獨占以一核心CPU,但是可以保證此進程不運行在其他核心上,這就極大減少了nginx的工作進程在不同的
cpu核心上的來回跳轉,減少了CPU對進程的資源分配與回收以及內存管理等,因此可以有效的提升nginx服務
器的性能。
CPU MASK: 00000001:0號CPU
00000010:1號CPU
10000000:7號CPU
#示例
worker_cpu_affinity 0001 0010 0100 1000;第0號---第3號CPU
worker_cpu_affinity 0101 1010;
#示例
worker_processes 4;
worker_cpu_affinity 00000010 00001000 00100000 10000000;
[root@centos8 ~]# ps axo pid,cmd,psr | grep nginx
31093 nginx: master process /apps 1
34474 nginx: worker process 1
34475 nginx: worker process 3
34476 nginx: worker process 5
34477 nginx: worker process 7
修改pam限制
#沒改之前
[root@webserver ~]# sudo -u nginx ulimit -n
1024?[root@webserver ~]# vim /etc/security/limits.conf
* ? ? ? - ? nofile ? ?  100000       #寫入
* ? ? ? - ? nproc ? ? ? 100000?
改之后
[root@webserver ~]# sudo -u nginx ulimit -n
100000
配置說明
worker_connections 65535; #設置單個工作進程的最大并發連接數
use epoll; #使用epoll事件驅動,
#Nginx支持眾多的事件驅動,
#比如:select、poll、epoll,只能設置在events模塊中
設置
accept_mutex on; #on為同一時刻一個請求輪流由work進程處理,
#而防止被同時喚醒所有worker
#避免多個睡眠進程被喚醒的設置,默認為off
#新請求會喚醒所有worker進程,此過程也稱為"驚群"
#因此nginx剛安裝完以后要進行適當的優化。建議設置為on
multi_accept on; #on時Nginx服務器的每個工作進程可以同時接受多個新的網
絡連接
#此指令默認為off,
#即默認為一個工作進程只能一次接受一個新的網絡連接
#打開后幾個同接受多個。建議設置為on
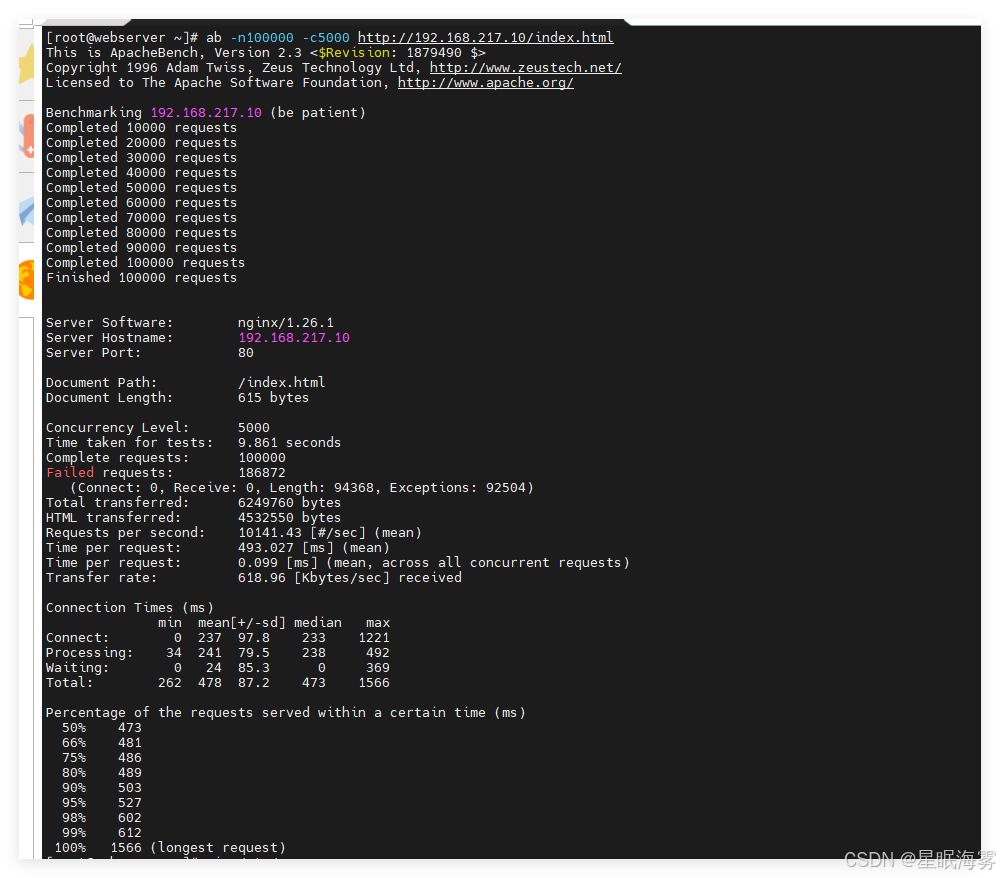
}示例:實現nginx的高并發
安裝測試工具
安裝httpd-tools測試ab -u10000 -c5000 http://192.168.217.10/index.html
共10000個請求,每次5000并發
-n 請求總量
-c并發量
2.2核心配置
2.2.1新建一個pc的web站點
在主配置文件中的server模塊后面定義子配置文件的路徑
[root@webserver ~]# vim /usr/local/nginx/conf/nginx.conf#在配置文件的最后面添加此行#注意不要放在最前面,會導致前面的命令無法生效
[root@webserver lee]# mkdir /web/nginx/timi/lee/html  #建立測試頁面目錄
[root@webserver lee]# echo timilee.org > /web/nginx/timi/lee/html/index.html   寫測試頁面#寫配置文件
[root@webserver lee]# vim /usr/local/nginx/conf.d/vhosts.confserver{listen 80;server_name timilee.org;index       index.html;location / {root /web/nginx/timi/lee/html;}
}
訪問測試
[root@webserver lee]# curl timilee.org
timilee.org
[root@webserver lee]#
如果不通先檢查防火墻和selinux
2.2.2?賬戶認證功能
[root@webserver ~]# htpasswd -c -m /usr/local/nginx/.htpasswd admin
New password:
Re-type new password:
Adding password for user admin
[root@webserver ~]#
#-b 表示非交互建立用戶認證 -c 表示創建認證文件 當認證文件不存在時需要-c#當文件存在時-c會覆蓋原文件
Adding password for user admin
[root@webserver ~]# htpasswd -m /usr/local/nginx/.htpasswd lee
New password:
Re-type new password:
Adding password for user lee
[root@webserver ~]# cat /usr/local/nginx/.htpasswd
admin:$apr1$.A4Oi905$i3VoBy6wui2QMl68CUkmc0
lee:$apr1$Rif8tx0r$B1QBerxsKWjH8iBsJiiGu1[root@webserver ~]# mkdir -p /web/nginx/timi/lee/login
[root@webserver ~]# echo login > /web/nginx/timi/lee/login/index.html
[root@webserver ~]# cat  /web/nginx/timi/lee/login/index.html
login[root@Nginx ~]# vim /usr/local/nginx/conf.d/vhosts.conf
server {
listen 80;
server_name lee.timinglee.org;
location /login {
root /webdata/nginx/timinglee.org/lee;
index index.html;
auth_basic "login password";
auth_basic_user_file "/usr/local/nginx/conf/.htpasswd";
}
}
#重啟Nginx并訪問測試
[root@node100 ~]# curl lee.timinglee.org/login/ -u lee:lee
login
[root@node100 ~]# curl lee.timinglee.org/login/ -u admin:lee
login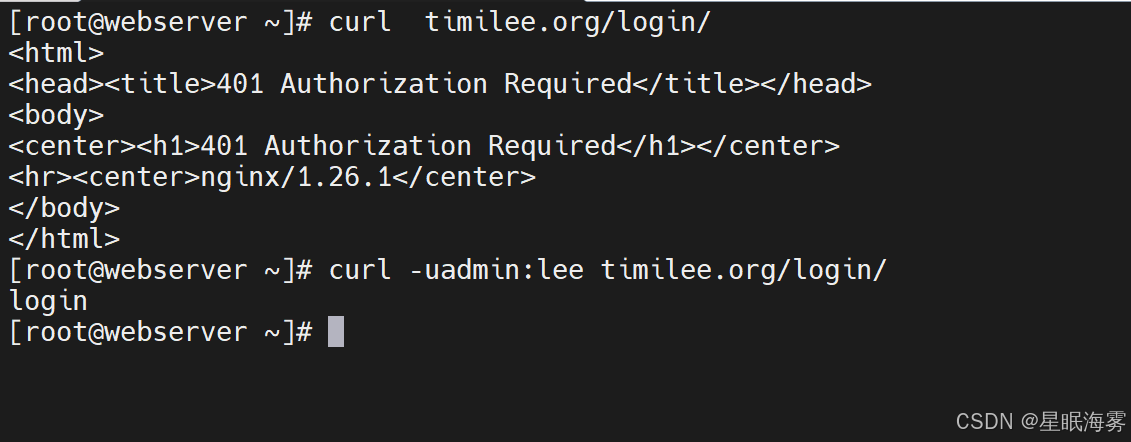
2.2.3自定義錯誤頁面
[root@webserver ~]# mkdir /web/nginx/timi/lee/errors
[root@webserver ~]# echo error page > /web/nginx/timi/lee/errors/error.html
[root@webserver ~]#
[root@webserver ~]# vim /usr/local/nginx/conf.d/vhosts.conf
server{listen 80;server_name timilee.org;error_page 500 502 503 504 404 /errors/error.html;##只能空格分隔且空格只能有一個location /login {root    /web/nginx/timi/lee;index   index.html;auth_basic "login passwd";auth_basic_user_file /usr/local/nginx/.htpasswd;}location /errors {root /web/nginx/timi/lee;}}測試:
[root@node100 ~]# curl lee.timinglee.org/haha
error page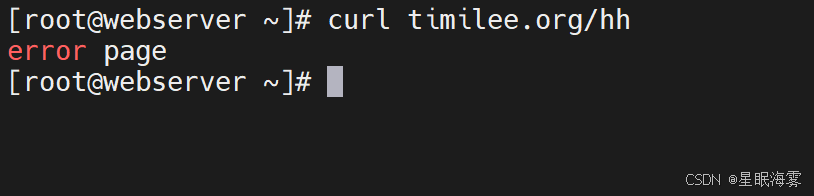
2.2.4?錯誤日志**
[root@webserver ~]# vim /usr/local/nginx/conf.d/vhosts.conf
server{listen 80;server_name timilee.org;error_page 500 502 503 504 404 /errors/error.html;access_log /web/nginx/timi/lee/logs/access.log;  ###加入,確保目錄存在error_log /web/nginx/timi/lee/logs/error.log;    ###location /login {root    /web/nginx/timi/lee;index   index.html;auth_basic "login passwd";auth_basic_user_file /usr/local/nginx/.htpasswd;}location /errors {root /web/nginx/timi/lee;}}
#重啟nginx并訪問不存在的頁面進行測試并驗證是在指定目錄生成新的日志文件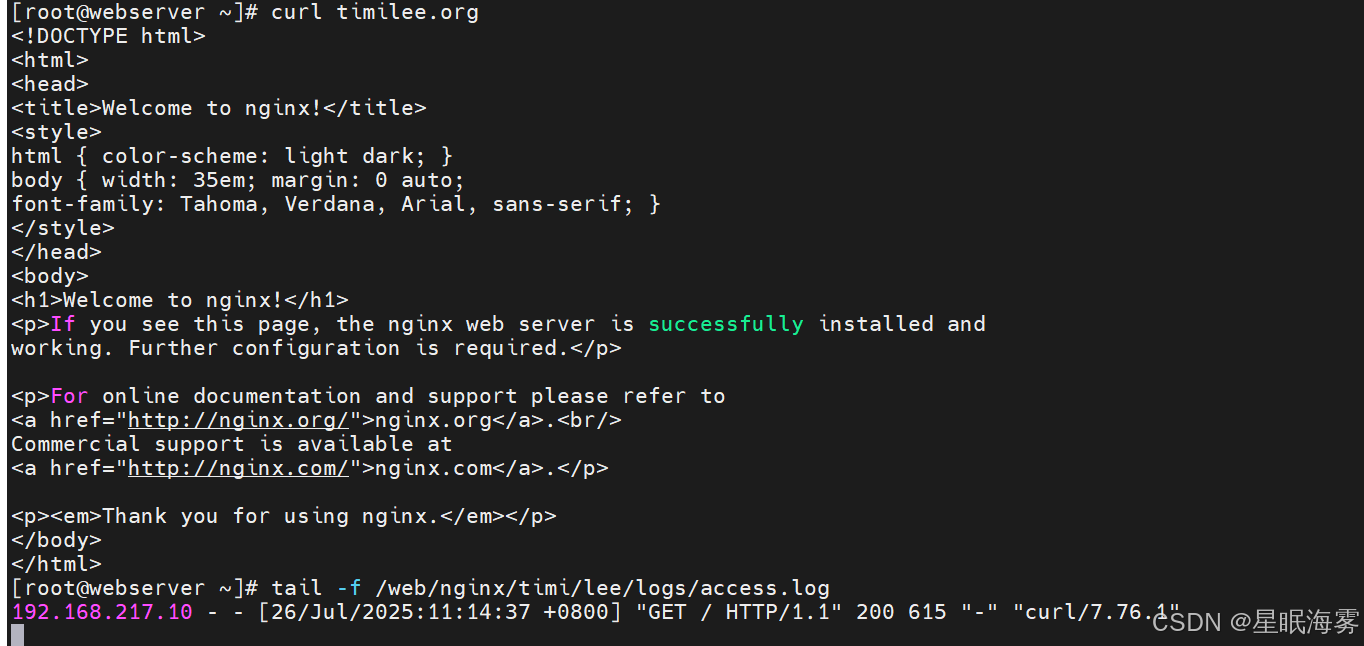

2.2.5檢測文件是否存在
try_files會按順序檢查文件是否存在,返回第一個找到的文件或文件夾(結尾加斜線表示為文件夾),如果所有文件或文件夾都找不到,會進行一個內部重定向到最后一個參數。只有最后一個參數可以引起一個內部重定向,之前的參數只設置內部URI的指向。最后一個參數是回退URI且必須存在,否則會出現內部500錯誤。
語法格式
Syntax: try_files file ... uri;
try_files file ... =code;
Default: —
Context: server, location
如果不存在頁面, 就轉到default.html頁面
server{listen 80;root    /web/nginx/timi/lee;index   index.html;server_name timilee.org;error_page 500 502 503 504 404 /errors/error.html;access_log /web/nginx/timi/lee/logs/access.log;error_log /web/nginx/timi/lee/logs/error.log;try_files $uri $uri.html $uri/index.html /errors/default.html;  ####location /login {auth_basic "login passwd";auth_basic_user_file /usr/local/nginx/.htpasswd;}location /errors {}
}
參數解釋
| 參數 | 解釋 |
|---|---|
$uri | 當前請求的完整路徑(不含參數),例如 /about。 |
$uri.html | 在 $uri 后面追加 .html,例如 /about.html。 |
$uri/index.html | 把 $uri 當成目錄,嘗試其下的 index.html,例如 /about/index.html。 |
/errors/default.html | 以上全部失敗時,統一返回這個文件作為最終響應。 |
測試
2.2.6長鏈接
配置:
[root@webserver ~]# vim /usr/local/nginx/conf/nginx.conf??????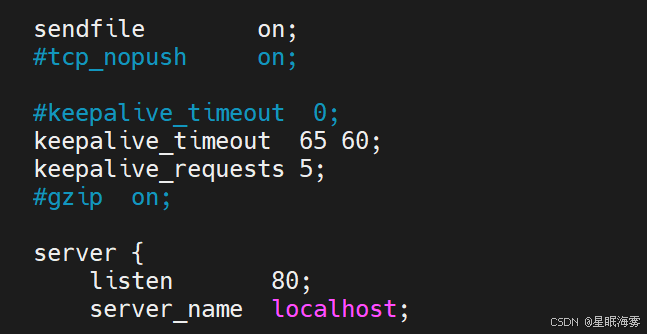
第一個參數(65):
這是發送給客戶端的 HTTP 響應頭中的
Keep-Alive: timeout=65的值。它告訴客戶端,如果客戶端在 65 秒內沒有新的請求,服務器將關閉連接。
這個值主要用于客戶端的 HTTP 客戶端(如瀏覽器)。
第二個參數(60):
這是服務器端實際等待客戶端新請求的超時時間。
如果客戶端在 60 秒內沒有發送新的請求,服務器將主動關閉連接。
這個值是 Nginx 服務器內部的超時設置,用于優化資源使用。
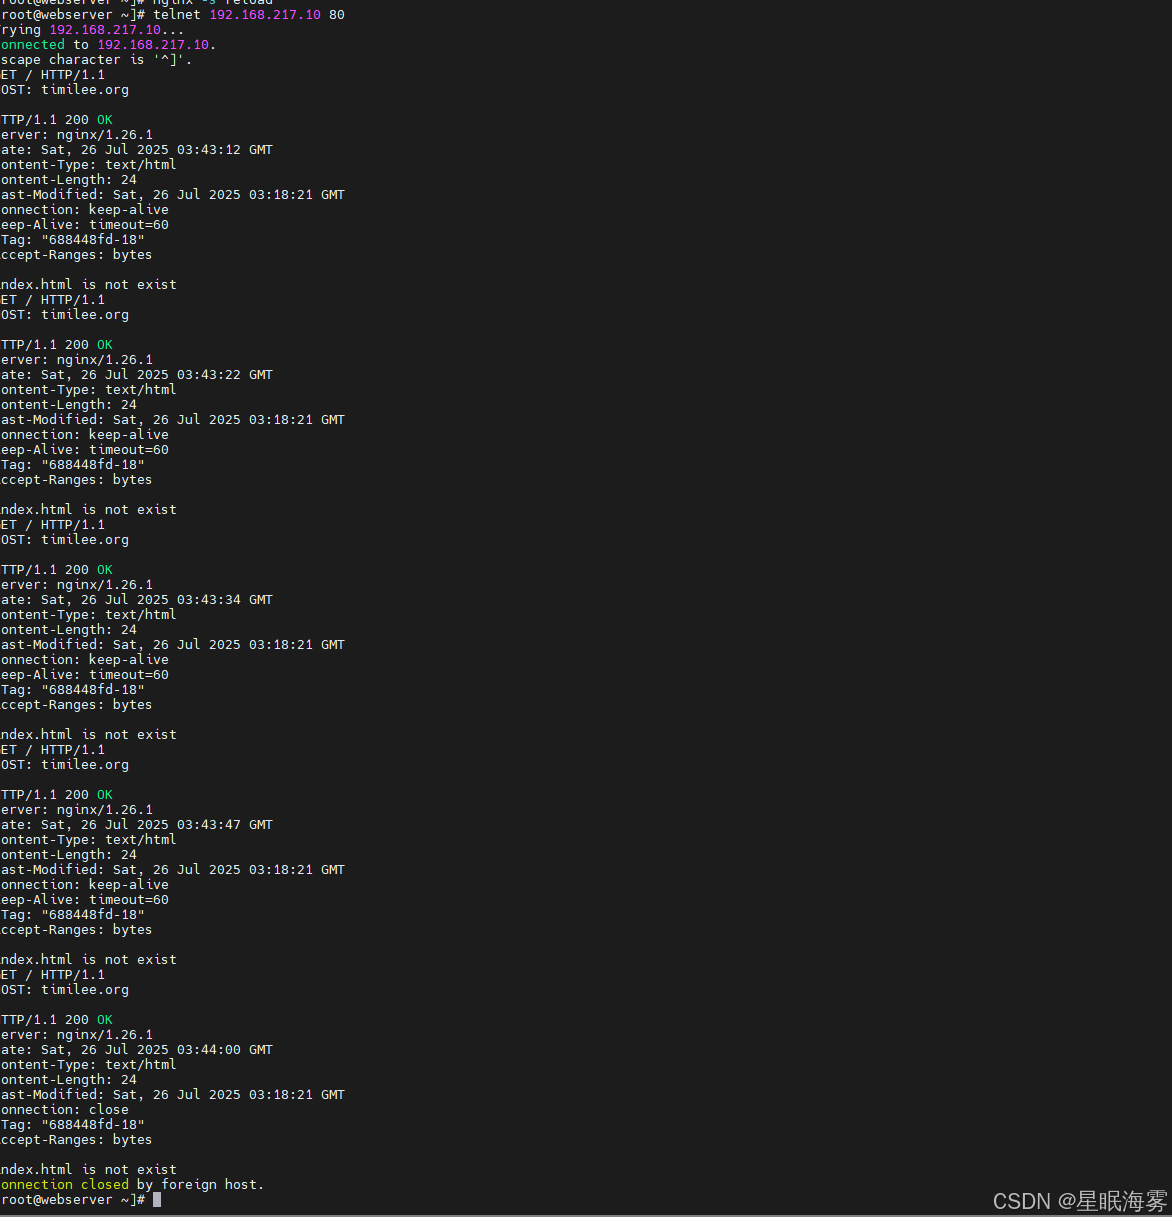
安裝測試軟件并測試
[root@webserver ~]# yum install telnet -y
[root@webserver ~]# telnet 192.168.217.10 80
Trying 192.168.217.10...
Connected to 192.168.217.10.
Escape character is '^]'.
GET / HTTP/1.1      #第一次輸入
HOST: timilee.org   #輸入#回車
HTTP/1.1 200 OK
Server: nginx/1.26.1
Date: Sat, 26 Jul 2025 03:43:12 GMT
Content-Type: text/html
Content-Length: 24
Last-Modified: Sat, 26 Jul 2025 03:18:21 GMT
Connection: keep-alive
Keep-Alive: timeout=60
ETag: "688448fd-18"
Accept-Ranges: bytes
五次斷開連接
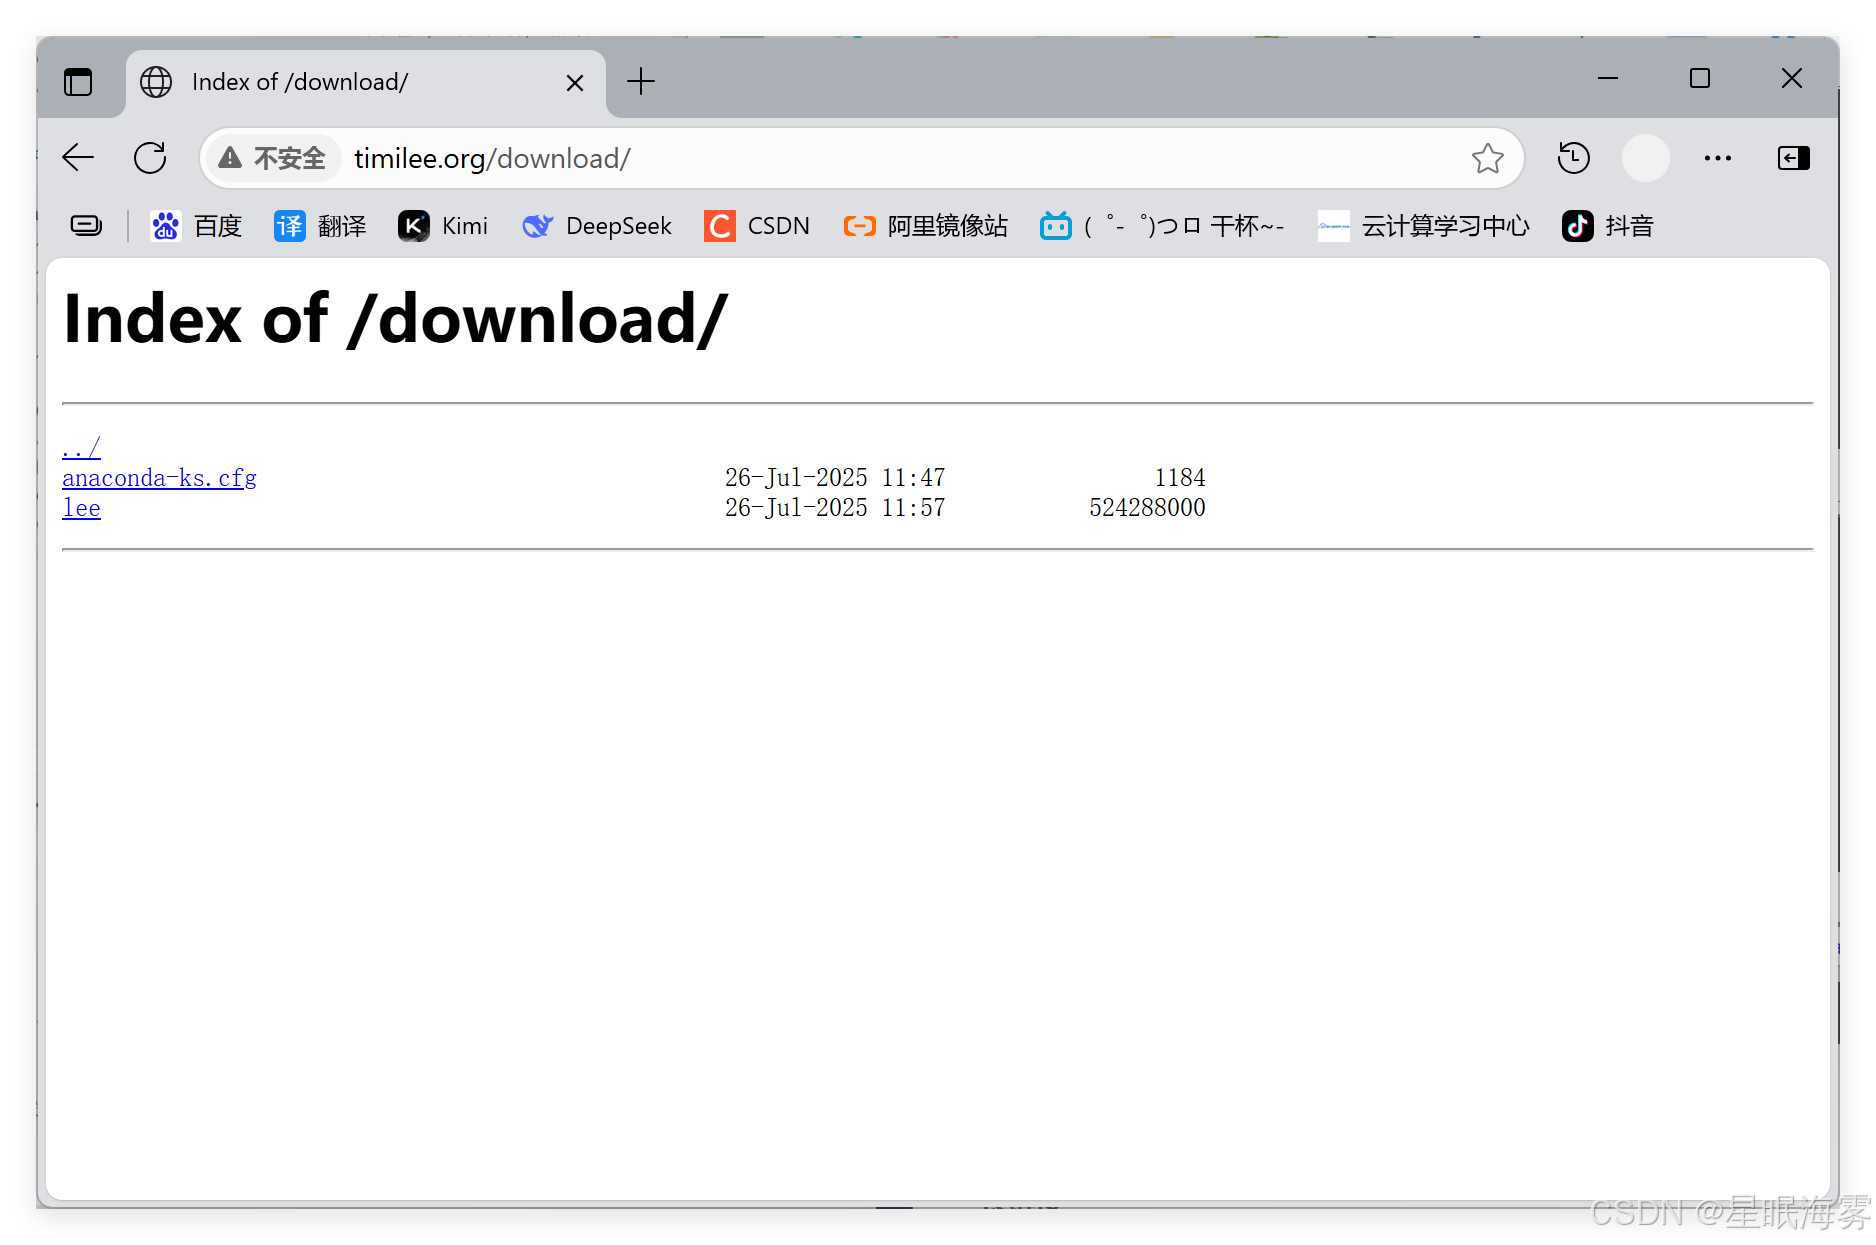
2.2.7作為下載服務器配置
ngx_http_autoindex_module 模塊處理以斜杠字符 "/" 結尾的請求,并生成目錄列表,可以做為下載服務
配置使用
相關指令:
autoindex on | off; 			#自動文件索引功能,默為off
autoindex_exact_size on | off;	#計算文件確切大小(單位bytes),off 顯示大概大小(單位K、M),默on
autoindex_localtime on | off ; 		 #顯示本機時間而非GMT(格林威治)時間,默認off
autoindex_format html | xml | json | jsonp; #顯示索引的頁面文件風格,默認html
limit_rate rate; 		#限制響應客戶端傳輸速率(除GET和HEAD以外的所有方法),單B/s,bytes/second, 					      #默認值0,表示無限制,此指令由ngx_http_core_module提供
set $limit_rate 4k;     #也可以通變量限速,單位B/s,同時設置,此項優級高.
建立資源存放目錄
root@webserver ~]# mkdir /web/nginx/timi/lee/download建立實驗素材
創建一個 500MB 的測試文件 /web/nginx/timi/lee/download/lee,用于測試 Nginx 的下載功能。[root@webserver ~]# dd if=/dev/zero of=/web/nginx/timi/lee/download/lee bs=1M count=500
500+0 records in
500+0 records out
524288000 bytes (524 MB, 500 MiB) copied, 3.67725 s, 143 MB/sif=/dev/zero:輸入源為“零設備”,生成空字節。
of=/web/nginx/timi/lee/download/lee:輸出文件路徑(文件名 lee)。
bs=1M count=500:每次寫入 1MB,共寫 500 次 → 500MB。
配置
server{server{listen 80;server_name timilee.org;root         /web/nginx/timi/lee;index       index.html;error_page 500 502 503 504 404 /errors/error.html;access_log /web/nginx/timi/lee/logs/access.log;error_log /web/nginx/timi/lee/logs/error.log;try_files $uri $uri.html $uri/index.html /errors/default.html;location /login {auth_basic "login passwd";auth_basic_user_file /usr/local/nginx/.htpasswd;}location /errors {}location /download {autoindex on;		     #自動索引功能autoindex_exact_size on; #計算文件確切大小(單位bytes),#此為默認值,off只顯示大概大小(單位kb、mb、gb)autoindex_localtime on;  #on表示顯示本機時間而非GMT(格林威治)時間,默為為off顯
示GMT時間limit_rate 1024k;        #限速,默認不限速}
}在windows訪問需要配置域名解析在windows系統域名解析
以管理員身份打開記事本
搜索C:\Windows\System32\drivers\etc\
hosts是隱藏文件,打開寫入需要的域名解析后保存
#重啟Nginx并訪問測試下載頁面
2.3核心配置
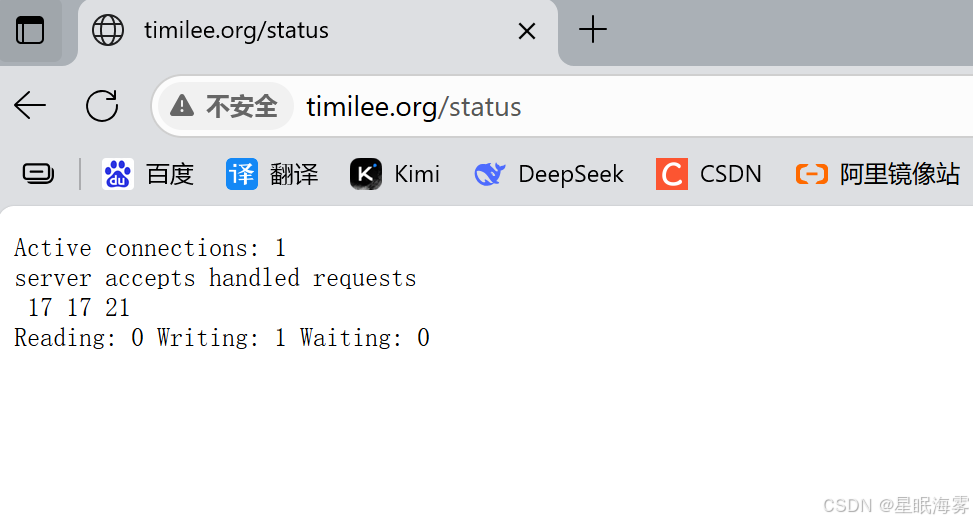
2.3.1狀態頁
基于nginx 模塊 ngx_http_stub_status_module 實現,
在編譯安裝nginx的時候需要添加編譯參數 --with-http_stub_status_module
否則配置完成之后監測會是提示法錯誤
#配置示例:
location /nginx_status {
stub_status;
auth_basic "auth login";
auth_basic_user_file /apps/nginx/conf/.htpasswd;
allow 192.168.0.0/16;
allow 127.0.0.1;
deny all;
}
#狀態頁用于輸出nginx的基本狀態信息:
#輸出信息示例:
Active connections: 291
server accepts handled requests
16630948 16630948 31070465
上面三個數字分別對應accepts,handled,requests三個值
Reading: 6 Writing: 179 Waiting: 106
Active connections: #當前處于活動狀態的客戶端連接數
#包括連接等待空閑連接數=reading+writing+waiting
accepts: #統計總值,Nginx自啟動后已經接受的客戶端請求連接的總數。
handled: #統計總值,Nginx自啟動后已經處理完成的客戶端請求連接總數
#通常等于accepts,除非有因worker_connections限制等被拒絕的
連接
requests: #統計總值,Nginx自啟動后客戶端發來的總的請求數
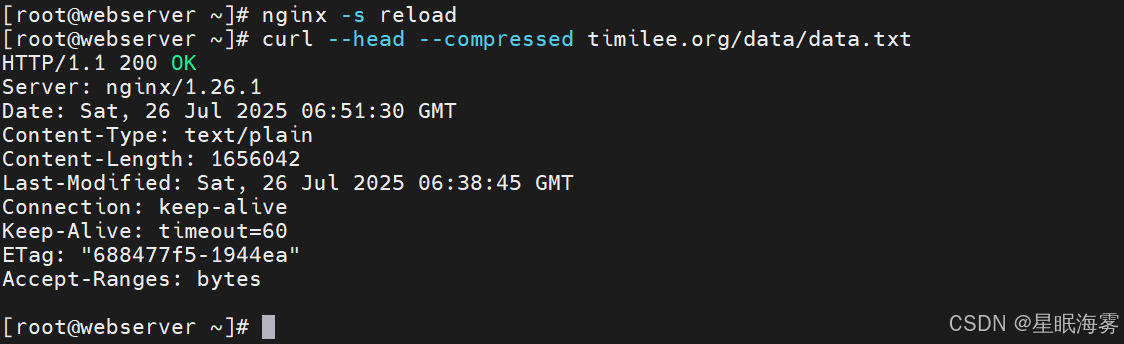
4.2 Nginx 壓縮功能
Nginx支持對指定類型的文件進行壓縮然后再傳輸給客戶端,而且壓縮還可以設置壓縮比例,壓縮后的文
件大小將比源文件顯著變小,樣有助于降低出口帶寬的利用率,降低企業的IT支出,不過會占用相
應的CPU資源。
Nginx對文件的壓縮功能是依賴于模塊 ngx_http_gzip_module,默認是內置模塊
配置指令如下:
示例:
Reading: #當前狀態,正在讀取客戶端請求報文首部的連接的連接數
#數值越大,說明排隊現象嚴重,性能不足
Writing: #當前狀態,正在向客戶端發送響應報文過程中的連接數,數值越大,說明
訪問量很大
Waiting: #當前狀態,正在等待客戶端發出請求的空閑連接數
開啟 keep-alive的情況下,這個值等于active –
(reading+writing)配置:
server{......location /status {stub_status;auth_basic "status page";auth_basic_user_file /usr/local/nginx/.htpasswd;}
}
測試
2.3.2壓縮功能
Nginx支持對指定類型的文件進行壓縮然后再傳輸給客戶端,而且壓縮還可以設置壓縮比例,壓縮后的文
件大小將比源文件顯著變小,樣有助于降低出口帶寬的利用率,降低企業的IT支出,不過會占用相
應的CPU資源。
Nginx對文件的壓縮功能是依賴于模塊 ngx_http_gzip_module,默認是內置模塊
配置指令:
#啟用或禁用gzip壓縮,默認關閉
gzip on | off;
#壓縮比由低到高從1到9,默認為1,值越高壓縮后文件越小,但是消耗cpu比較高。基本設定未4或者5
gzip_comp_level 4;
#禁用IE6 gzip功能,早期的IE6之前的版本不支持壓縮
gzip_disable "MSIE [1-6]\.";
#gzip壓縮的最小文件,小于設置值的文件將不會壓縮
gzip_min_length 1k;
#啟用壓縮功能時,協議的最小版本,默認HTTP/1.1
gzip_http_version 1.0 | 1.1;
#指定Nginx服務需要向服務器申請的緩存空間的個數和大小,平臺不同,默認:32 4k或者16 8k;
gzip_buffers number size;
#指明僅對哪些類型的資源執行壓縮操作;默認為gzip_types text/html,不用顯示指定,否則出錯
gzip_types mime-type ...;
#如果啟用壓縮,是否在響應報文首部插入“Vary: Accept-Encoding”,一般建議打開
gzip_vary on | off;
#預壓縮,即直接從磁盤找到對應文件的gz后綴的式的壓縮文件返回給用戶,無需消耗服務器CPU
#注意: 來自于ngx_http_gzip_static_module模塊
gzip_static on | off;
測試
?
2.3.3Nginx 變量使用
nginx的變量可以在配置文件中引用,作為功能判斷或者日志等場景使用變量可以分為內置變量和自定義變量
內置變量是由nginx模塊自帶,通過變量可以獲取到眾多的與客戶端訪問相關的值。
常用內置變量
$remote_addr;
#存放了客戶端的地址,注意是客戶端的公網IP$args;
#變量中存放了URL中的所有參數
#例如:https://search.jd.com/Search?keyword=手機&enc=utf-8
#返回結果為: keyword=手機&enc=utf-8$is_args
#如果有參數為? 否則為空$document_root;
#保存了針對當前資源的請求的系統根目錄,例
如:/webdata/nginx/timinglee.org/lee。$document_uri;
#保存了當前請求中不包含參數的URI,注意是不包含請求的指令
#比如:http://lee.timinglee.org/var?\id=11111會被定義為/var
#返回結果為:/var$host;
#存放了請求的host名稱
limit_rate 10240;
echo $limit_rate;
#如果nginx服務器使用limit_rate配置了顯示網絡速率,則會顯示,如果沒有設置, 則顯示0$remote_port;
#客戶端請求Nginx服務器時隨機打開的端口,這是每個客戶端自己的端口$remote_user;
#已經經過Auth Basic Module驗證的用戶名$request_body_file;
#做反向代理時發給后端服務器的本地資源的名稱$request_method;
#請求資源的方式,GET/PUT/DELETE等$request_filename;
#當前請求的資源文件的磁盤路徑,由root或alias指令與URI請求生成的文件絕對路徑,
#如:webdata/nginx/timinglee.org/lee/var/index.html$request_uri;
#包含請求參數的原始URI,不包含主機名,相當于:$document_uri?$args,
#例如:/main/index.do?id=20190221&partner=search$scheme;
#請求的協議,例如:http,https,ftp等$server_protocol;
#保存了客戶端請求資源使用的協議的版本,例如:HTTP/1.0,HTTP/1.1,HTTP/2.0等$server_addr;
#保存了服務器的IP地址$server_name;
#虛擬主機的主機名$server_port;
#虛擬主機的端口號$http_user_agent;
#客戶端瀏覽器的詳細信息$http_cookie;
#客戶端的所有cookie信息$cookie_key1
#name為任意請求報文首部字部cookie的key名$http_HOST
curl -v timilee.org 查看首部字段
#name為任意請求報文首部字段,表示記錄請求報文的首部字段,name的對應的首部字段名需要為小寫,如果有
橫線需要替換為下劃線
#示例:
echo $http_user_agent;
echo $http_host;$sent_http_<name>
#name為響應報文的首部字段,name的對應的首部字段名需要為小寫,如果有橫線需要替換為下劃線,此變量有
問題
echo $sent_http_server;$arg_<name>
#此變量存放了URL中的指定參數,name為請求url中指定的參數
echo $arg_id;
?配置示例:
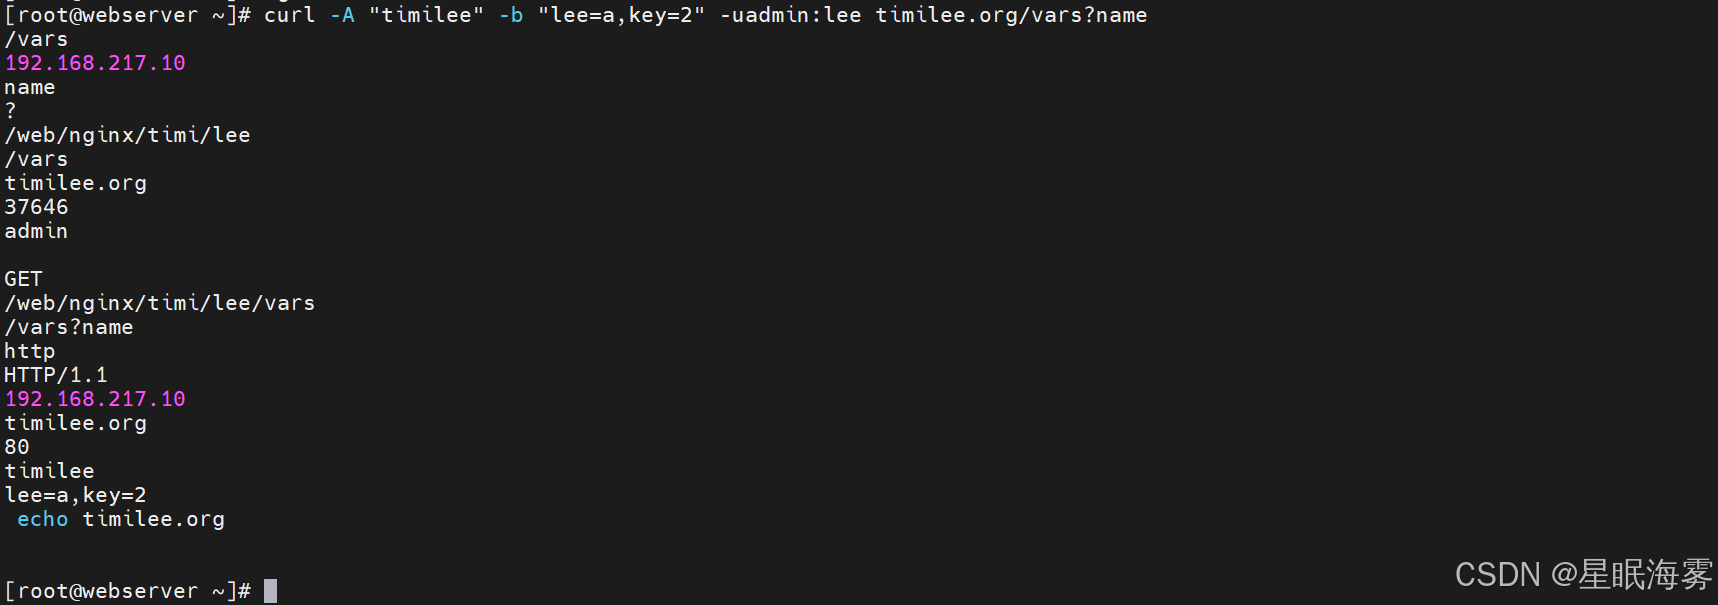
 location /vars {default_type text/html;echo $uri;echo $remote_addr;echo $args;echo $is_args;echo $document_root;echo $document_uri;echo $host;echo $remote_port;echo $remote_user;echo $request_body_file;echo $request_method;echo $request_filename;echo $request_uri;echo $scheme;echo $server_protocol;echo $server_addr;echo $server_name;echo $server_port;echo $http_user_agent;echo $http_cookie;echo $cookie_key1echo $http_HOST;echo $sent_http_Accept;echo $arg_name;}
}
測試:
[root@webserver ~]# curl -A "timilee" -b "lee=a,key=2" -uadmin:lee timilee.org/vars?name| 參數 | 含義 |
|---|---|
-A "timilee" | 設置 User-Agent 為 timilee |
-b "lee=a,key=2" | 設置 Cookie:lee=a 和 key=2 |
-u admin:lee | 使用 HTTP Basic Auth,用戶名 admin,密碼 lee |
timilee.org/vars?name | 請求的 URL(GET 請求,查詢參數為 name,但值未給出) |
?自定義變量
假如需要自定義變量名稱和值,使用指令set $variable value;
語法格式:
Syntax: set $variable value;
Default: —
Context: server, location, if
示例:
location /vars {default_type text/html;set $name timihaha;echo $name;set $web_port $server_port;echo $web_port;}


——graph之檢查點)


)


 部署Doris)


,解決類別不平衡問題,案例:邏輯回歸 信用卡欺詐檢測)

