
一、為什么要學 Composition API?
在以前我們寫代碼用Vue2寫:
export default {data() {return { count: 0, msg: 'hello' }},methods: {add() { this.count++ }},computed: {double() { return this.count * 2 }}
}
很明顯?
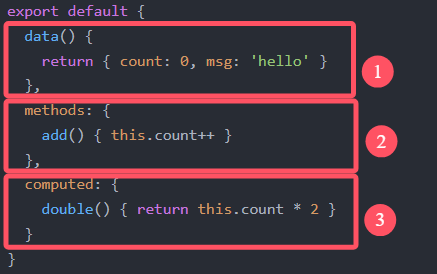
一個功能被拆成三塊:data、methods、computed,找起來麻煩,改起來更麻煩。
Vue3 提出了 Composition API,把同一功能的代碼用函數包在一起,就像把襪子卷成球——整整齊齊不丟單只!
二、舞臺:setup 函數
1. setup 是什么?
舞臺:所有 Composition API 都要在
setup()里表演。時機:組件創建前執行,比任何生命周期都早。
注意:里面訪問
this會得到undefined(因為組件實例還沒出生呢)。
<template><p>{{ name }}</p><button @click="changeName">改名</button>
</template><script>
export default {setup() {let name = '張三'function changeName() {name = '李四' // 頁面不會變!因為 name 不是響應式console.log(name)}return { name, changeName } // 暴露給模板用}
}
</script>我說白了:setup?是 Vue 3 中一個新概念,它就像是組件的"控制中心"或"大腦"。讓我用大白話給你解釋:?
想象一下你要組裝一個玩具:
setup?就像是打開工具箱的步驟在這個工具箱里,你準備好所有零件(數據、方法、計算屬性等)
然后你告訴 Vue:"這些就是我要在組件里使用的所有東西"
三、讓數據活起來:ref 與 reactive
讓數據活起來是啥意思呢?
讓我們來試試:
let A = 1import { ref } from 'vue'let B = ref(1)這兩有什么區別呢?
第一個是一個"死"數據,是非響應式的數據
第二個是可以發生更改的響應式數據
1. ref:基本類型的響應式法寶
語法:
let xxx = ref(初始值)規矩:在 JS 里改要加
.value,模板里直接用。
<script setup>
import { ref } from 'vue'let age = ref(18)function addAge() {age.value++ // JS 里要加 .value
}
</script><template><p>年齡:{{ age }}</p> <!-- 模板里不用 .value --><button @click="addAge">+1</button>
</template>
2. reactive:對象類型的響應式法寶
語法:
let obj = reactive({...})深度響應:對象里隨便嵌套多少層,都能追蹤變化。
<script setup>
import { reactive } from 'vue'let car = reactive({ brand: '奔馳', price: 100 })function addPrice() {car.price += 10
}
</script><template><p>我的{{ car.brand }}價值{{ car.price }}萬</p><button @click="addPrice">再漲10萬</button>
</template>
3. ref vs reactive 速記表
場景 推薦 原因 基本類型 ref reactive 會報警告 簡單對象 均可 看個人喜好 深層嵌套對象 reactive 寫起來更簡潔,無需層層.value 四、語法糖?
<script setup>:懶人必備每次寫
setup() { return {...} }很煩?Vue3 提供語法糖:
<script setup>
// 這里面的代碼直接就是 setup 的內容,無需 return
import { ref } from 'vue'
const count = ref(0)
</script>(還能更懶)再裝個插件 vite-plugin-vue-setup-extend,還能直接寫組件名:
<script setup name="UserCard">
// 組件名就叫 UserCard,省去寫 name 屬性
</script>
五、解構不丟響應式:toRefs & toRef
當你想從 reactive 對象中“摘”屬性出來用時,直接解構會丟失響應式,就像把耳機線從卷線盒里抽出來——全亂了!
用 toRefs / toRef 解決:
哈這個時候就會有同學說,toRef與toRefs的區別是什么呢?,其實最大的區別就是有沒有s
toRef?的作用
- 功能:將響應式對象(reactive 創建的對象)中的單個屬性轉換為一個響應式的 ref 對象。
toRefs?的作用
- 功能:將響應式對象(reactive 創建的對象)的所有屬性批量轉換為 ref 對象,并包裝成一個普通對象(每個屬性都是對應的 ref)。
import { reactive, toRefs } from 'vue'const user = reactive({name: 'Alice',age: 20
})// 將 user 的所有屬性轉換為 ref 并包裝成普通對象
const refs = toRefs(user)
// refs 結構:{ name: Ref, age: Ref }// 解構后仍保持響應性
const { name, age } = refs// 修改 ref 會同步影響原對象
name.value = 'Bob'
console.log(user.name) // 輸出:Bob// 修改原對象也會同步影響 ref
user.age = 21
console.log(age.value) // 輸出:21
?????????好啦,到這里已經將最基礎的幾個用法,和框架已經搭好了,所以也來用兩個練習來鞏固一下下
六、實戰小案例:待辦事項
需求:添加、刪除、標記完成,并統計完成數量。
<script setup>
import { ref, reactive, computed } from 'vue'// 1. 數據
const todos = reactive([])
const input = ref('')// 2. 計算屬性
const doneCount = computed(() => todos.filter(t => t.done).length)// 3. 方法
function addTodo() {if (!input.value.trim()) returntodos.push({ id: Date.now(), text: input.value, done: false })input.value = ''
}function toggle(todo) {todo.done = !todo.done
}function delTodo(id) {const index = todos.findIndex(t => t.id === id)todos.splice(index, 1)
}
</script><template><h2>待辦清單</h2><input v-model="input" @keyup.enter="addTodo" placeholder="輸入后敲回車" /><ul><li v-for="t in todos" :key="t.id"><input type="checkbox" v-model="t.done" /><span :class="{ done: t.done }">{{ t.text }}</span><button @click="delTodo(t.id)">刪除</button></li></ul><p>已完成:{{ doneCount }} / {{ todos.length }}</p>
</template><style>
.done { text-decoration: line-through; color: gray; }
</style>
這里面有一個用法沒講,就是computed,它的作用也很簡單,就是對數據的自動更新(當數據變化的時候,它這個函數就會觸發,讓數據發生更新)?
七、課后作業(動手才能真會)
個人資料卡
用<script setup>做一個可編輯的“姓名、年齡、郵箱、簡介”卡片,要求支持新增、修改、刪除。購物車 2.0
在上文購物車案例基礎上,增加:商品數量加減
優惠券打 9 折
按分類篩
因為我們現在是比較基礎的,所以我們最好是邏輯清晰,將這些都理解
作業一:
思路:
卡片:很簡單,用一個div盒子裝著,將里面的元素全部寫在盒子里面,再將里面的元素居中,樣式肯定就不會差。
可編輯的“姓名、年齡、郵箱、簡介”:用input將他們顯示出來,但是我們要獲取輸入框里面的元素,這個時候我們就需要v-model進行雙向綁定
新增、修改、刪除.:這些毫無疑問肯定是一堆按鈕,所以我們需要寫點擊按鈕,里面函數用一些的方法進行這些操作
最后其實需要顯示出來的,將原本一開始的元素顯示出來,后面增加的元素也需要事實顯示出來。
代碼(簡陋版)
<script setup lang="ts">
// 練習1:創建一個個人資料編輯組件,要求使用setup語法糖,
// 包含姓名、年齡、郵箱、個人簡介等字段,實現數據的增刪改查功能。
import {reactive} from "vue";
import { ref } from 'vue'interface Profile {id: numbername: stringage: numberemail: stringintro: string
}// 資料列表
const profiles = ref<Profile[]>([])// 表單數據
const form = ref<Profile>({id: Date.now(),name: '',age: 0,email: '',intro: ''
})function text() {console.log(profiles)console.log("=================")console.log(form)
}const isEdit = ref(false)
let editIndex = -1function resetForm() {form.value = {id: Date.now(),// id: Date.now() 表示用當前的時間戳(即自1970年1月1日以來的毫秒數)來生成一個唯一的數字,作為這個新表單的唯一標識。name: '',age: 0,email: '',intro: ''}isEdit.value = falseeditIndex = -1
}// ... 是擴展運算符,用于“展開”對象里的所有屬性。
// { ...form.value } 表示“復制 form.value 里的所有屬性到一個新對象”。
// 常用于【對象淺拷貝】、【合并屬性】等操作。
// 等價于
// const obj = {
//   name: form.value.name,
//   age: form.value.age,
//   // ...其他所有屬性
// }
// 但用 ...form.value 寫法更簡潔、更靈活。// 新增或保存編輯
function handleSubmit() {if (isEdit.value && editIndex !== -1) {profiles.value[editIndex] = { ...form.value }} else {profiles.value.push({ ...form.value })}resetForm()
}// 編輯
function editProfile(idx: number) {const item = profiles.value[idx]form.value = { ...item }isEdit.value = trueeditIndex = idx
}// 刪除
function deleteProfile(idx: number) {profiles.value.splice(idx, 1)if (isEdit.value && editIndex === idx) {resetForm()}
}</script><template><button @click="text">檢查</button><div><h2>個人資料編輯</h2><form @submit.prevent="handleSubmit"><div><label>姓名:</label><input v-model="form.name" required /></div><div><label>年齡:</label><input v-model.number="form.age" type="number" required min="0" /></div><div><label>郵箱:</label><input v-model="form.email" type="email" required /></div><div><label>個人簡介:</label><textarea v-model="form.intro" required></textarea></div><button type="submit">{{ isEdit ? '保存修改' : '添加' }}</button><button v-if="isEdit" type="button" @click="resetForm">取消編輯</button></form><h3>資料列表</h3><table border="1" cellpadding="5"><thead><tr><th>姓名</th><th>年齡</th><th>郵箱</th><th>個人簡介</th><th>操作</th></tr></thead><tbody><tr v-for="(profile, idx) in profiles" :key="profile.id">
<!--          <td>{{ key }}</td>--><td>{{ profile.name }}</td><td>{{ profile.age }}</td><td>{{ profile.email }}</td><td>{{ profile.intro }}</td><td><button @click="editProfile(idx)">編輯</button><button @click="deleteProfile(idx)">刪除</button></td></tr></tbody></table></div></template><style scoped></style>
作業二:
接下來的購物車的思路:
其實完全就是名片作業的升級版而已,你將名片變成購物車,進行購物車的增加,刪除功能
新功能:進行購物車里面商品的價錢的總和,并且進行優惠價的計算
????????
<template><div class="shopping-cart"><h2>購物車(進階版)</h2><div class="category-filter"><span>分類:</span><buttonv-for="category in categories":key="category":class="{ active: selectedCategory === category }"@click="selectCategory(category)">{{ category }}</button></div><table class="cart-table"><thead><tr><th>商品</th><th>單價</th><th>數量</th><th>小計</th><th>操作</th></tr></thead><tbody><tr v-for="item in filteredCartItems" :key="item.id"><td>{{ item.name }} ({{ item.category }})</td><td>¥{{ item.price.toFixed(2) }}</td><td><button @click="decreaseQuantity(item)">-</button>{{ item.quantity }}<button @click="increaseQuantity(item)">+</button></td><td>¥{{ (item.price * item.quantity).toFixed(2) }}</td><td><button @click="removeItem(item)">刪除</button></td></tr></tbody></table><div class="coupon-section"><label for="coupon">優惠券:</label><select id="coupon" v-model="selectedCoupon"><option value="">請選擇</option><option v-for="coupon in coupons" :key="coupon.id" :value="coupon.code">{{ coupon.name }} ({{ coupon.discount }}% off)</option></select></div><div class="total">總計:¥{{ total.toFixed(2) }}</div></div>
</template><script>
export default {data() {return {cartItems: [{id: 1,name: "蘋果",category: "生鮮",price: 6.5,quantity: 3},{id: 2,name: "T恤",category: "服飾",price: 59,quantity: 1},{id: 3,name: "藍牙耳機",category: "數碼",price: 199,quantity: 1}],categories: ["All", "生鮮", "數碼", "服飾"],selectedCategory: "All",coupons: [{ id: 1, code: "COUPON1", name: "滿減券", discount: 10 },{ id: 2, code: "COUPON2", name: "折扣券", discount: 15 }],selectedCoupon: ""};},computed: {filteredCartItems() {if (this.selectedCategory === "All") {return this.cartItems;}return this.cartItems.filter(item => item.category === this.selectedCategory);},total() {return this.cartItems.reduce((acc, item) => acc + item.price * item.quantity, 0);}},methods: {selectCategory(category) {this.selectedCategory = category;},increaseQuantity(item) {item.quantity++;},decreaseQuantity(item) {if (item.quantity > 1) {item.quantity--;}},removeItem(item) {const index = this.cartItems.indexOf(item);if (index!== -1) {this.cartItems.splice(index, 1);}}}
};
</script><style scoped>
.shopping-cart {font-family: Arial, sans-serif;
}
.category-filter button {margin-right: 5px;padding: 5px 10px;cursor: pointer;
}
.category-filter button.active {background-color: #4CAF50;color: white;
}
.cart-table {border-collapse: collapse;width: 100%;margin: 20px 0;
}
.cart-table th,
.cart-table td {border: 1px solid #ddd;padding: 8px;text-align: left;
}
.cart-table button {padding: 2px 5px;cursor: pointer;
}
.coupon-section {margin: 10px 0;
}
.total {font-weight: bold;font-size: 1.2em;
}
</style>
基礎的語法講到這里就結束拉!


:TApplication窗體)
自定義相機渲染到Canvas(離屏渲染))


)
)

![[硬件電路-115]:模擬電路 - 信號處理電路 - 功能放大器工作分類、工作原理、常見芯片](http://pic.xiahunao.cn/[硬件電路-115]:模擬電路 - 信號處理電路 - 功能放大器工作分類、工作原理、常見芯片)

