鋒哥原創的Python Web開發 Django5視頻教程:
2024版 Django5 Python web開發 視頻教程(無廢話版) 玩命更新中~_嗶哩嗶哩_bilibili2024版 Django5 Python web開發 視頻教程(無廢話版) 玩命更新中~共計57條視頻,包括:2024版 Django5 Python web開發 視頻教程(無廢話版) 玩命更新中~、第2講 Django5安裝、第3講 Django5創建項目(用命令方式)等,UP主更多精彩視頻,請關注UP賬號。![]() https://www.bilibili.com/video/BV14Z421z78C/用戶登錄功能,后端驗證主要通過auth模塊提供的authenticate校驗方法,以及login登錄方法實現。
https://www.bilibili.com/video/BV14Z421z78C/用戶登錄功能,后端驗證主要通過auth模塊提供的authenticate校驗方法,以及login登錄方法實現。
首先urls.py里加下映射:
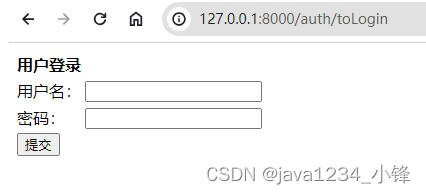
# 跳轉登錄頁面path('auth/toLogin', helloWorld.views.to_login),# 提交登錄請求path('auth/login', helloWorld.views.login),登錄頁面login.html:
<!DOCTYPE html>
<html lang="en">
<head><meta charset="UTF-8"><title>登錄頁面</title>
</head>
<body>
<form action="/auth/login" method="post">{% csrf_token %}<table><tr><th>用戶登錄</th></tr><tr><td>用戶名:</td><td><input type="text" name="username" value="{{ username }}"></td></tr><tr><td>密碼:</td><td><input type="password" name="password" value="{{ password }}"></td></tr><tr><td><input type="submit" value="提交"></td><td><font color="red">{{ errorInfo }}</font></td></tr></table>
</form>
</body>
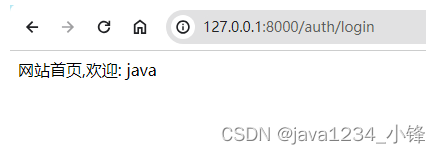
</html>網站首頁index.html,登錄成功后跳轉:
<!DOCTYPE html>
<html lang="en">
<head><meta charset="UTF-8"><title>網站首頁</title>
</head>
<body>
網站首頁,歡迎: {{ request.user }}
</body>
</html>
views.py里實現to_login和login方法。
通過auth.authenticate校驗用戶是否已經存在。校驗用戶成功后,返回的是一個封裝好的用戶對象;校驗錯誤則返回None
用戶對象is_active方法判斷用戶是否激活。
通過調用auth.login,用戶登錄成功之后,返回給客戶端登錄的憑證或者說是令牌、隨機字符串,則不需要我們去操作diango_session表,會自動創建session
當執行完auth.authenticate和auth.login后,也就是登錄成功后,我們就可以通過request.user直接獲取到當前登錄的用戶對象數據
-
登錄成功的情況下,該方法獲得的是登錄用戶對象
-
登錄不成功的情況下,該方法獲得的是匿名對象
AnonymousUser
def to_login(request):"""跳轉登錄頁面:param request::return:"""
?return render(request, 'auth/login.html')
?
?
def login(request):"""登錄處理:param request::return:"""username = request.POST.get('username')password = request.POST.get('password')# 通過auth模塊來檢驗加密后的密碼 ,校驗成功返回用戶對象,否則返回NoneresUser: User = auth.authenticate(request, username=username, password=password)if resUser and resUser.is_active:print(resUser, type(resUser))# 用戶登錄成功之后(返回給客戶端登錄的憑證或者說是令牌、隨機字符串)auth.login(request, resUser)return render(request, 'auth/index.html')else:return render(request, 'auth/login.html',context={"errorInfo": "用戶名或者密碼錯誤", "username": username, "password": password})
我們來測試下:瀏覽器輸入: http://127.0.0.1:8000/auth/toLogin 進入登錄頁面:
用戶名密碼輸入錯誤,提示報錯信息:

用戶名密碼輸入正確,則跳轉到主頁:


)


)


)


不規則形狀填充顏色)


概念詳解)