Spring Boot 憑借其 "約定大于配置" 的理念,極大簡化了 Java 應用開發流程。本文將從 Spring Boot 核心特性出發,詳細解析靜態資源映射規則、Thymeleaf 模板引擎的使用,并結合完整實戰案例,幫助開發者快速上手 Spring Boot web 開發。
一、Spring Boot 簡介:簡化開發的核心優勢
Spring Boot 是 Spring 生態的 "開箱即用" 框架,其核心優勢在于自動配置—— 通過預設場景化配置,讓開發者無需手動整合各種框架,專注于業務邏輯實現。
1.1 Spring Boot 開發流程
使用 Spring Boot 開發應用的典型步驟:
- 創建應用:通過 Spring Initializr(或 IDE 插件)選擇所需模塊(如 web、thymeleaf 等);
- 極簡配置:僅需在
application.properties/yml中指定少量個性化配置(如端口、緩存時間等); - 編寫業務:直接開發控制器、服務層等業務代碼,無需關心框架整合細節。
1.2 自動配置的核心疑問
使用 Spring Boot 時,我們常關心:
- 框架默認配置了哪些組件?
- 如何修改默認配置?
- 能否擴展默認功能?
這些問題的答案,藏在 Spring Boot 的自動配置原理中 —— 通過@Conditional系列注解,根據類路徑下的依賴、配置參數動態激活配置類,開發者可通過自定義配置類或配置文件覆蓋默認行為。
二、靜態資源映射規則:Spring Boot 如何處理靜態資源?
Web 應用中,靜態資源(JS、CSS、圖片等)的訪問是基礎需求。Spring Boot 通過WebMvcAutoConfiguration自動配置了靜態資源映射規則,無需手動配置即可訪問。
2.1 核心配置類解析
靜態資源映射的核心邏輯在WebMvcAutoConfiguration的addResourceHandlers方法中,主要處理以下場景:
@Override
public void addResourceHandlers(ResourceHandlerRegistry registry) {// 若關閉默認映射(spring.resources.add-mappings=false),則不生效if (!this.resourceProperties.isAddMappings()) {logger.debug("Default resource handling disabled");return;}// 處理webjars資源if (!registry.hasMappingForPattern("/webjars/**")) {customizeResourceHandlerRegistration(registry.addResourceHandler("/webjars/**").addResourceLocations("classpath:/META-INF/resources/webjars/").setCachePeriod(cachePeriod));}// 處理靜態資源文件夾String staticPathPattern = this.mvcProperties.getStaticPathPattern();if (!registry.hasMappingForPattern(staticPathPattern)) {customizeResourceHandlerRegistration(registry.addResourceHandler(staticPathPattern).addResourceLocations(this.resourceProperties.getStaticLocations()).setCachePeriod(cachePeriod));}
}
2.2 四大靜態資源訪問規則
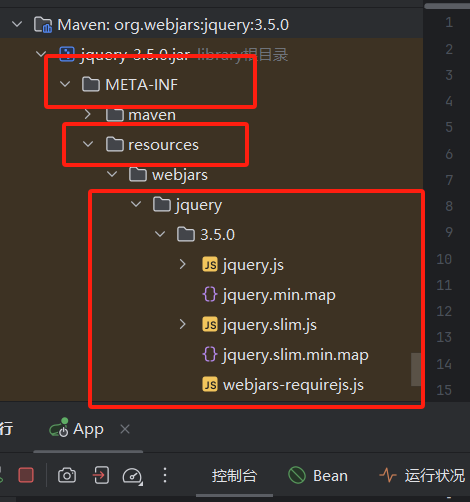
(1)WebJars:以 Jar 包形式管理靜態資源
WebJars 將常用前端庫(如 jQuery、Bootstrap)打包成 Jar 包,方便 Maven/Gradle 管理。Spring Boot 默認映射規則:
訪問路徑:/webjars/**
資源位置:classpath:/META-INF/resources/webjars/
使用示例:
- 引入 jQuery 的 WebJar 依賴(pom.xml):
<dependency><groupId>org.webjars</groupId><artifactId>jquery</artifactId><version>3.5.0</version>
</dependency>
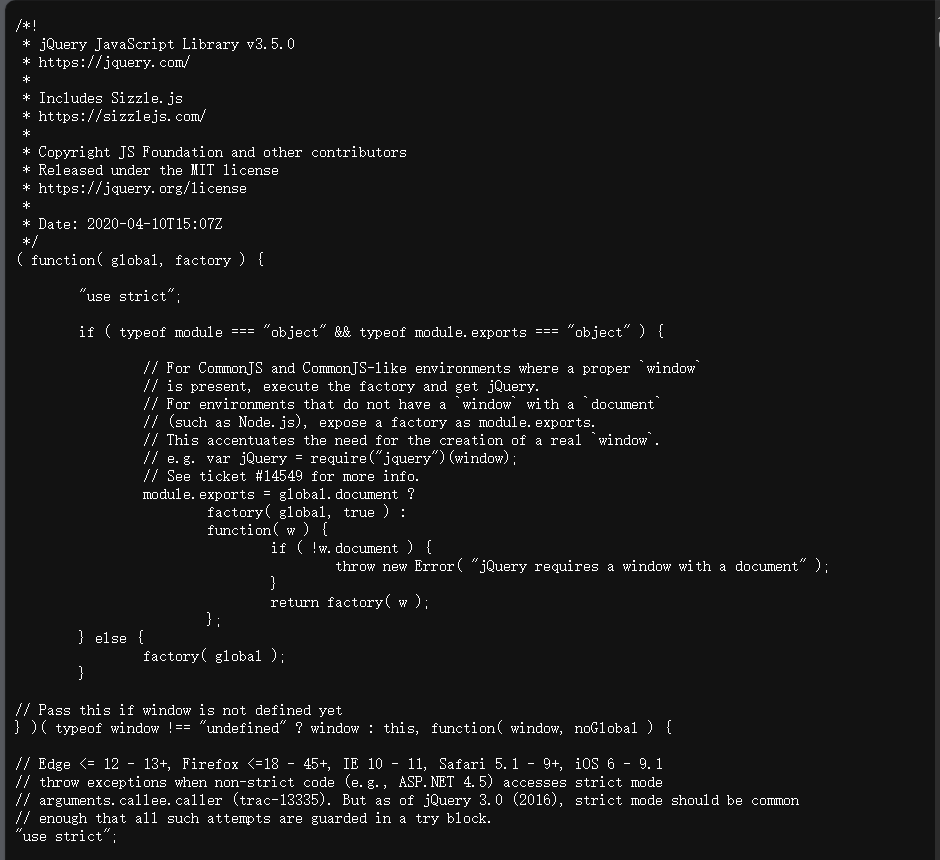
- 訪問 jQuery:通過
http://localhost:8080/webjars/jquery/3.5.0/jquery.js即可訪問。
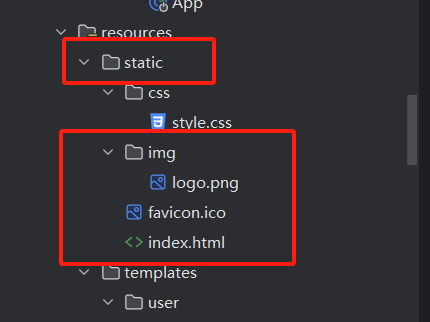
(2)靜態資源文件夾:直接訪問本地資源
Spring Boot 默認將以下路徑作為靜態資源文件夾,通過/**路徑直接訪問:
classpath:/META-INF/resources/classpath:/resources/classpath:/static/(推薦)classpath:/public/- 項目根路徑
/(不推薦,易與控制器路徑沖突)
示例:在src/main/resources/static/下放置img/logo.png,可通過http://localhost:8080/img/logo.png訪問。
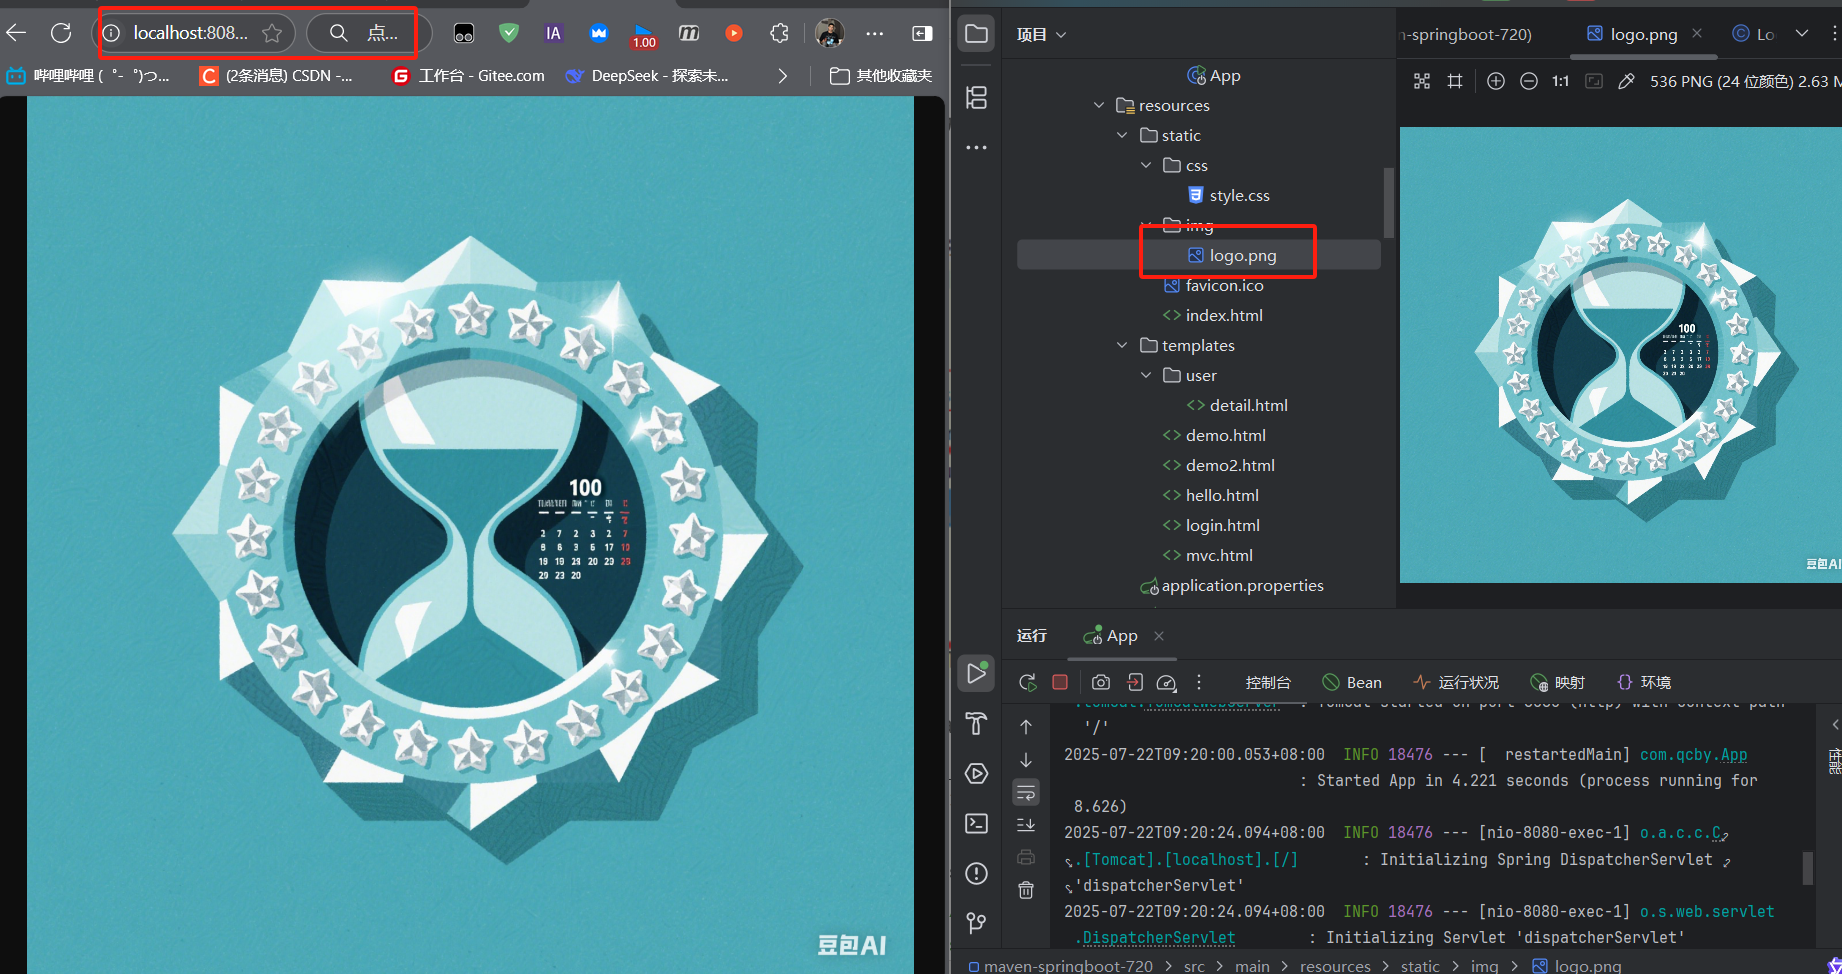
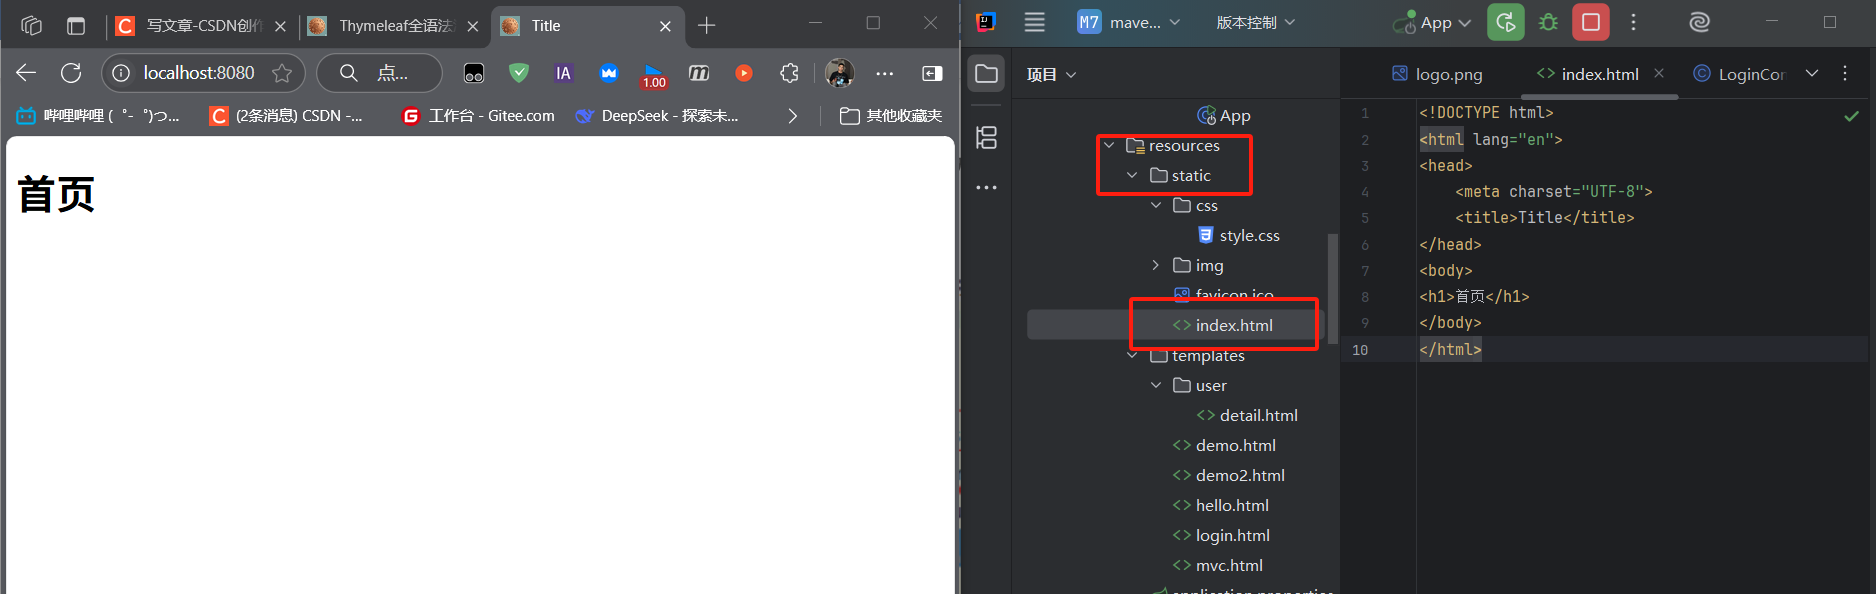
(3)歡迎頁:默認首頁自動映射
靜態資源文件夾下的index.html會被自動識別為歡迎頁,訪問http://localhost:8080/時直接返回該頁面。
實現邏輯:WebMvcAutoConfiguration中的WelcomePageHandlerMapping會映射/**到靜態資源文件夾下的index.html。
(4)Favicon:網站圖標自動配置
瀏覽器會自動請求**/favicon.ico作為網站圖標,Spring Boot 默認從靜態資源文件夾中查找該文件。
關閉方式:在配置文件中設置spring.mvc.favicon.enabled=false即可禁用默認圖標。
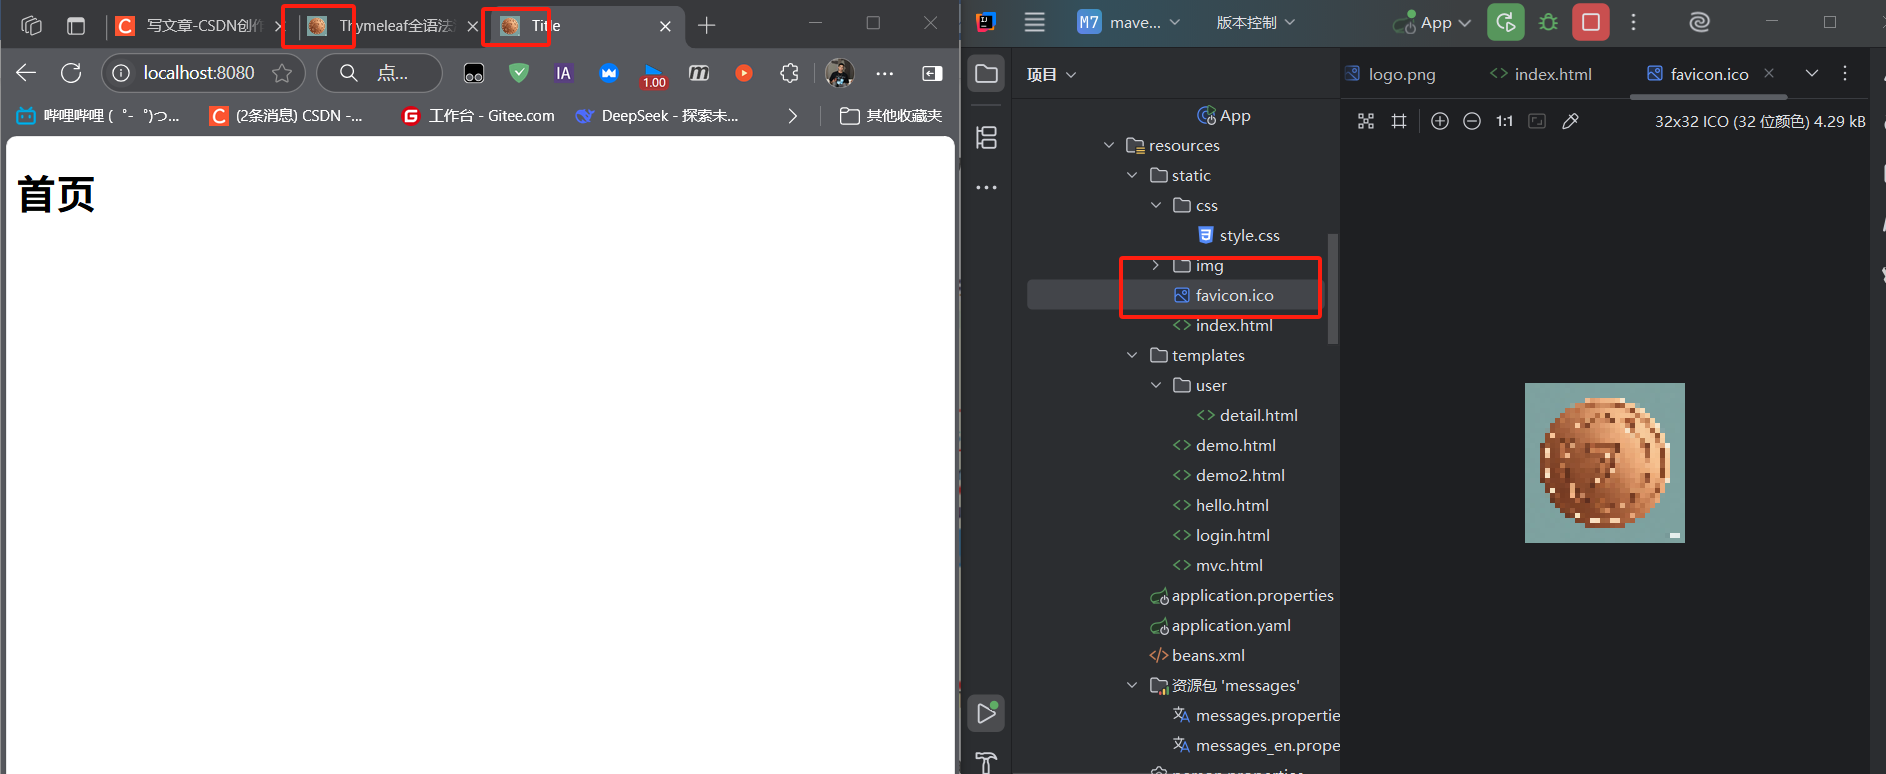
配置后重啟后沒有顯示可能是瀏覽器緩存問題。可以通過?Ctrl+Shift+R清理緩存
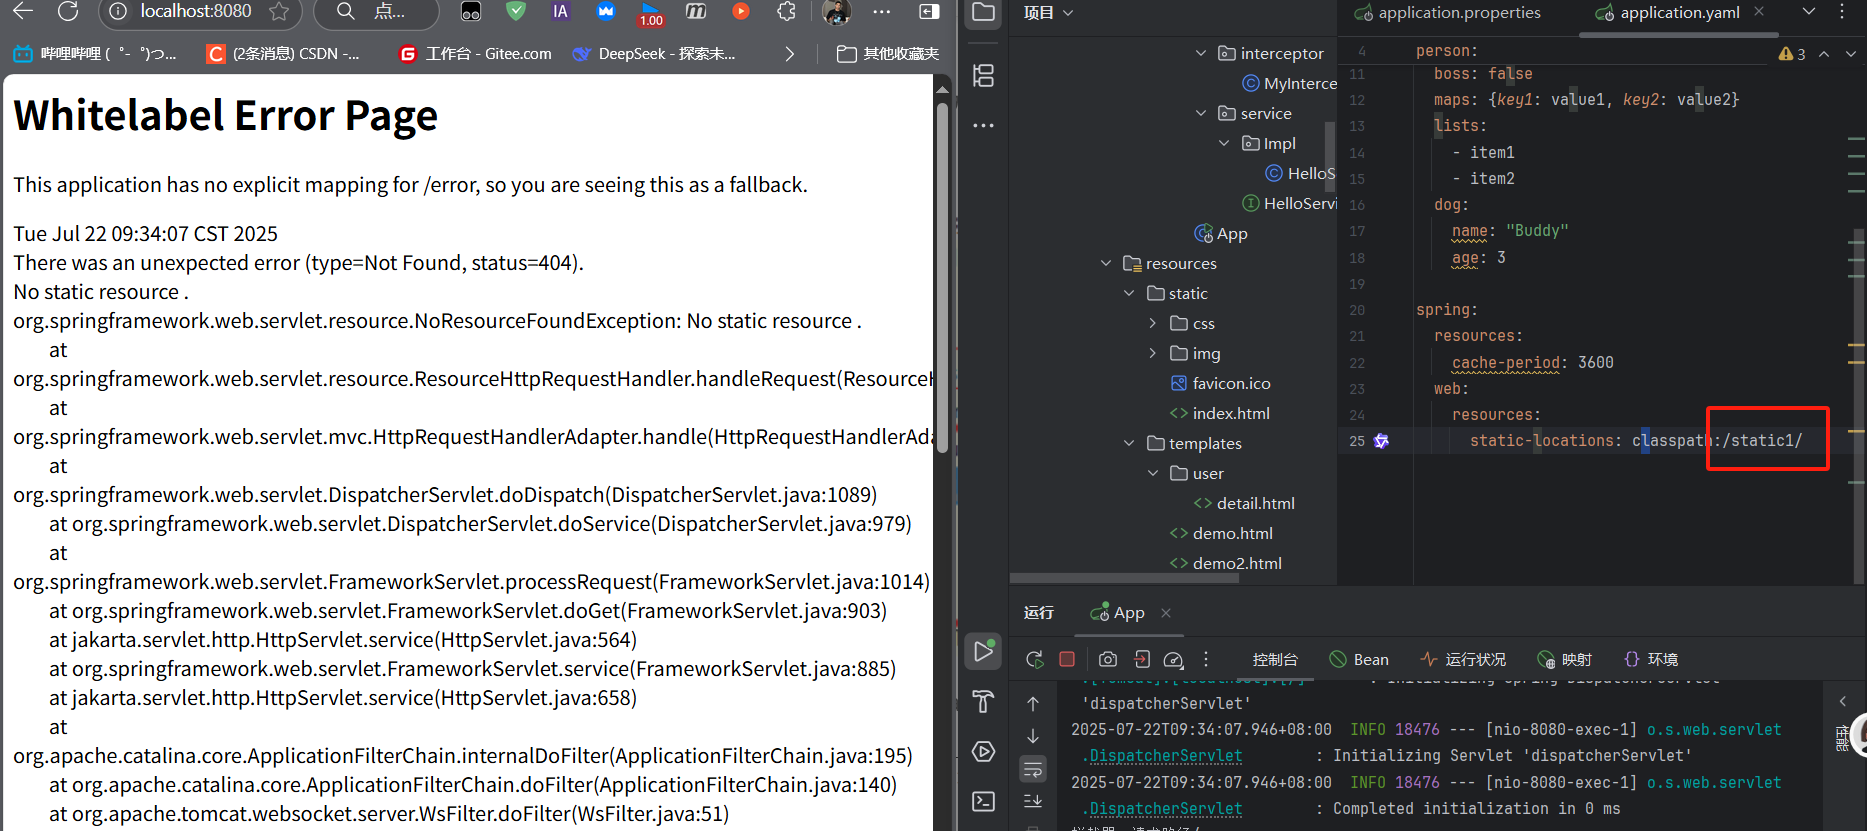
2.3 靜態資源配置擴展
可通過application.properties修改靜態資源行為:
# 關閉默認靜態資源映射(謹慎使用)
spring.resources.add-mappings=false
# 設置靜態資源緩存時間(單位:秒)
spring.resources.cache.period=3600
# 自定義靜態資源文件夾路徑(默認值不變,追加新路徑)
spring.resources.static-locations=classpath:/static/,classpath:/my-resources/
三、Thymeleaf 模板引擎:Spring Boot 推薦的視圖層方案
JSP 因依賴 Servlet 容器、無法嵌入 Jar 包等問題,逐漸被現代模板引擎替代。Spring Boot 推薦使用Thymeleaf—— 一款基于 HTML 的服務器端模板引擎,支持自然模板(模板即靜態原型)、強大的表達式語法和 Spring 生態深度整合。
3.1 引入與基礎配置
(1)引入依賴
在pom.xml中添加 Thymeleaf Starter:
<dependency><groupId>org.springframework.boot</groupId><artifactId>spring-boot-starter-thymeleaf</artifactId>
</dependency>
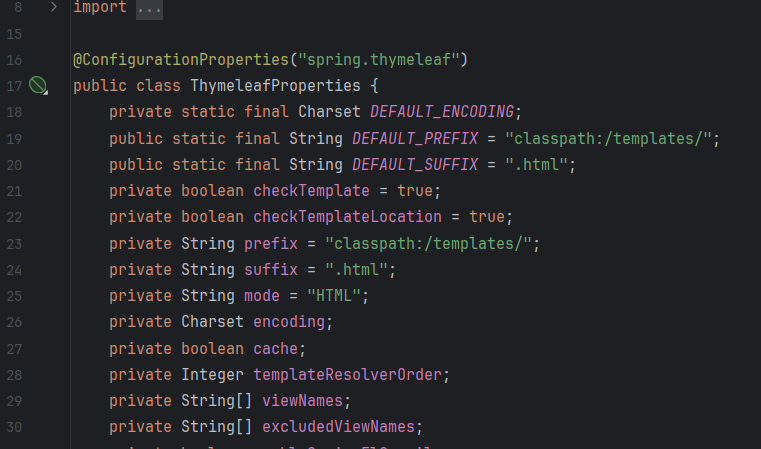
(2)核心配置屬性
Thymeleaf 的默認配置由ThymeleafProperties類定義,可通過application.properties修改:
public class ThymeleafProperties {// 默認模板前綴:classpath:/templates/(模板文件存放位置)private String prefix = "classpath:/templates/";// 默認模板后綴:.html(模板文件擴展名)private String suffix = ".html";// 編碼:UTF-8private Charset encoding = StandardCharsets.UTF_8;// 開發環境建議關閉緩存(默認true)private boolean cache = true;// 模板模式:HTML(支持HTML5、XML等)private String mode = "HTML";
}
開發環境配置(推薦):
# 關閉模板緩存(修改后無需重啟)
spring.thymeleaf.cache=false
# 自定義模板前綴(默認不變)
spring.thymeleaf.prefix=classpath:/templates/
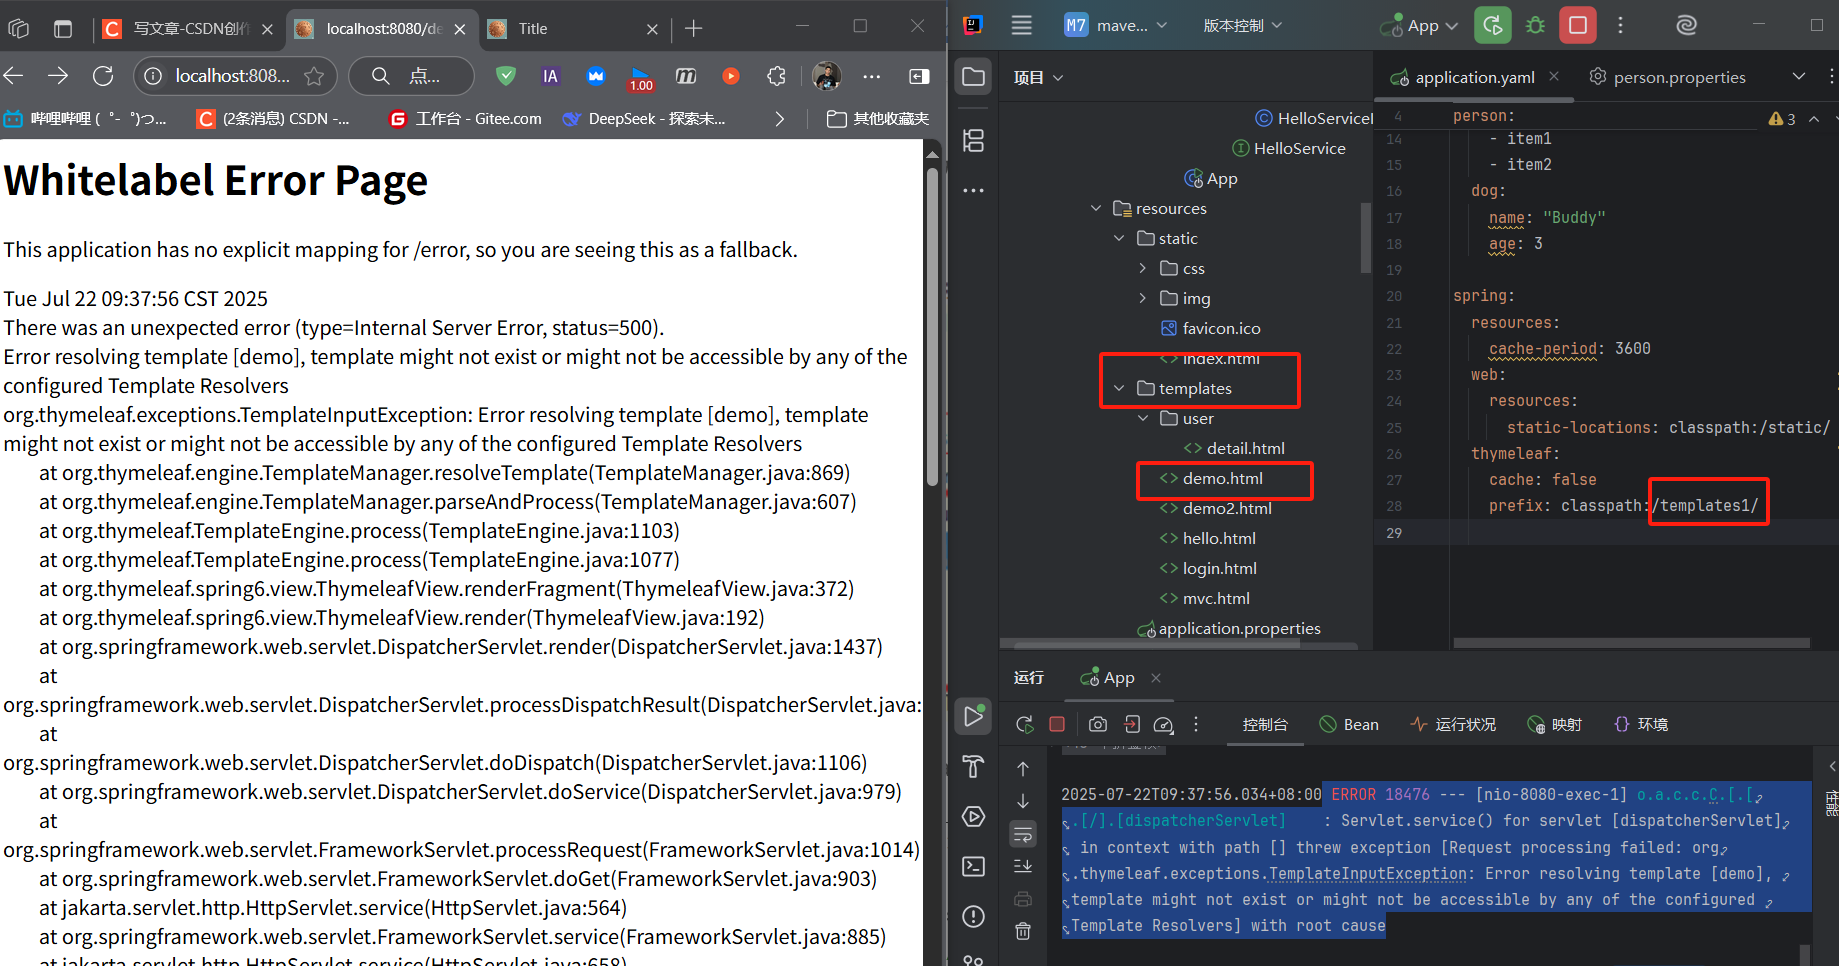 ?出現?
?出現?Error resolving template [demo]?錯誤的核心原因是:Thymeleaf 無法找到名為?demo?的模板文件,通常是由于模板路徑、文件名錯誤或配置問題導致的。
3.2 Thymeleaf 語法全解析
Thymeleaf 通過自定義屬性(th:*)實現動態內容替換,核心語法包括四大表達式、豐富的操作符和常用標簽。
(1)四大標準表達式
| 表達式類型 | 語法 | 作用 |
|---|---|---|
| 變量表達式 | ${...} | 訪問模型數據(Model/Request/Session 等) |
| 選擇表達式 | *{...} | 基于th:object的子屬性訪問 |
| 國際化表達式 | #{...} | 從國際化資源文件中獲取內容 |
| URL 表達式 | @{...} | 生成 URL(自動拼接上下文路徑) |
變量表達式示例:
控制器傳遞數據:
@RequestMapping("/success")
public String hello(Model model) {model.addAttribute("user", new User("張三", "123456", 20, 88.5, 1));return "success"; // 對應templates/success.html
}
模板中使用:
<!-- 顯示用戶名 -->
<p th:text="${user.username}">默認用戶名</p>
<!-- 顯示年齡+1 -->
<p th:text="${user.age + 1}">默認年齡</p>
選擇表達式示例:
通過th:object指定對象后,用*{...}簡化屬性訪問:
<div th:object="${user}"><p>用戶名:<span th:text="*{username}"></span></p><p>年齡:<span th:text="*{age}"></span></p>
</div>
<!-- 等價于 ${user.username}、${user.age} -->
國際化表達式示例:
- 創建國際化資源文件(
src/main/resources/i18n/messages.properties):
welcome.cn=歡迎訪問系統
welcome.en=Welcome to the system
- 模板中使用:
<p>中文:<span th:text="#{welcome.cn}"></span></p>
<p>英文:<span th:text="#{welcome.en}"></span></p>
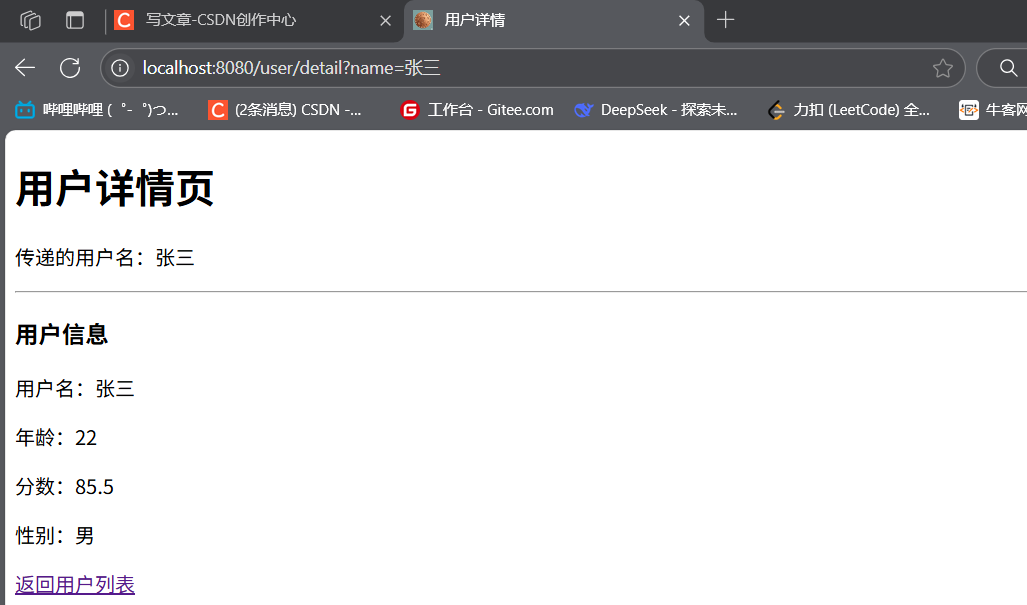
URL 表達式示例:
生成路徑時自動拼接上下文路徑,無需硬編碼項目名:
<!-- 絕對路徑 -->
<a th:href="@{/login}">登錄頁</a>
<!-- 帶參數的路徑 -->
<a th:href="@{/user/detail(name=${user.username})}">用戶詳情</a>
<!-- 表單提交路徑 -->
<form th:action="@{/user/save}" method="post"><input type="submit" value="提交">
</form>
(2)表達式支持的語法操作
Thymeleaf 表達式支持豐富的操作,滿足復雜業務場景:
文本操作:字符串拼接(
+)、文本替換(|...|)<p th:text="'用戶名:' + ${user.username}"></p> <p th:text="|用戶${user.id}的名稱是${user.username}|"></p>算術運算:
+、-、*、/、%<p>年齡+1:<span th:text="${user.age + 1}"></span></p> <p>分數8折:<span th:text="${user.score * 0.8}"></span></p>布爾與比較運算:
and、or、!;>(gt)、<(lt)、==(eq)等<p th:if="${user.age > 18 and user.score >= 60}">成年且及格</p> <p th:text="${user.gender eq 1 ? '男' : '女'}"></p>條件運算:三目運算符、默認值(
?:)<p>是否成年:<span th:text="${user.age > 18 ? '是' : '否'}"></span></p> <p>昵稱:<span th:text="${user.nickname ?: '未知'}"></span></p>
(3)常用標簽實戰
Thymeleaf 提供了大量標簽簡化頁面開發,核心標簽及示例如下:
| 標簽 | 作用 | 示例 |
|---|---|---|
th:text | 文本替換(轉義 HTML) | <p th:text="${user.username}">默認值</p> |
th:utext | 文本替換(不轉義 HTML) | <p th:utext="${htmlContent}">默認HTML</p> |
th:each | 循環遍歷 | <tr th:each="u : ${userList}">...</tr> |
th:if/th:unless | 條件判斷(unless 為反向判斷) | <p th:if="${user.age > 18}">成年</p> |
th:switch/th:case | 多條件分支 | <div th:switch="${user.role}">...</div> |
th:href/th:src | 鏈接 / 資源路徑 | <a th:href="@{/login}">登錄</a> |
th:value | 表單值綁定 | <input th:value="${user.username}"> |
th:each循環示例:
控制器傳遞用戶列表:
@RequestMapping("/all")
public String showAll(Model model) {List<User> userList = Arrays.asList(new User("李四", "654321", 17, 59.0, 2),new User("王五", "abcdef", 25, 92.5, 1));model.addAttribute("userList", userList);return "demo2";
}
模板中循環展示:
<table border="1"><tr><th>序號</th><th>用戶名</th><th>年齡</th></tr><!-- stat為狀態變量:index(索引)、count(計數)、even/odd(奇偶)等 --><tr th:each="u, stat : ${userList}"><td th:text="${stat.index + 1}"></td><td th:text="${u.username}"></td><td th:text="${u.age}"></td></tr>
</table>
th:switch多分支示例:
<div th:switch="${user.gender}"><p th:case="1">性別:男</p><p th:case="2">性別:女</p><p th:case="*">性別:未知</p> <!-- default分支 -->
</div>
四、實戰案例:完整代碼與運行效果
結合以上知識點,我們通過一個完整案例展示 Spring Boot+Thymeleaf 開發流程。
4.1 項目結構
src/
├── main/
│   ├── java/
│   │   └── com/qcby/mavenspringboot/
│   │       ├── controller/
│   │       │   ├── ThymeleafDemo2Controller.java  // 數據展示控制器
│   │       │   ├── LoginController.java           // 登錄控制器
│   │       │   └── UserController.java            // 用戶詳情控制器
│   │       ├── entity/
│   │       │   └── User.java                      // 用戶實體類
│   │       └── MavenSpringbootApplication.java    // 啟動類
│   └── resources/
│       ├── application.properties                // 配置文件
│       ├── static/                               // 靜態資源
│       │   └── img/
│       │       └── logo.png
│       └── templates/                            // Thymeleaf模板
│           ├── demo2.html                         // 演示頁
│           ├── login.html                         // 登錄頁
│           ├── hello.html                         // 登錄成功頁
│           └── user/
│               └── detail.html                    // 用戶詳情頁
└── pom.xml                                        // 依賴配置
4.2 核心代碼實現
(1)User 實體類
public class User {private String username;private String password;private int age;private double score;private int gender; // 1-男,2-女// 構造器、getter、setterpublic User(String username, String password, int age, double score, int gender) {this.username = username;this.password = password;this.age = age;this.score = score;this.gender = gender;}// getter和setter省略
}
(2)Thymeleaf 演示控制器
@Controller
@RequestMapping("/demo2")
public class ThymeleafDemo2Controller {@RequestMapping("/all")public String showAll(Model model) {// 傳遞基本數據model.addAttribute("hello", "歡迎使用Thymeleaf!");// 傳遞用戶對象User user = new User("張三", "123456", 20, 88.5, 1);model.addAttribute("user", user);// 傳遞用戶列表List<User> userList = Arrays.asList(new User("李四", "654321", 17, 59.0, 2),new User("王五", "abcdef", 25, 92.5, 1),new User("趙六", "fedcba", 30, 76.0, 2));model.addAttribute("userList", userList);return "demo2"; // 跳轉至demo2.html}
}
(3)demo2.html 模板(核心語法演示)
<!DOCTYPE html>
<html lang="en" xmlns:th="http://www.thymeleaf.org">
<head><meta charset="UTF-8"><title>Thymeleaf全語法演示</title>
</head>
<body><!-- 變量表達式 ${} --><h2>1. 變量表達式 ${}</h2><div th:text="${hello}">默認文本</div><!-- 選擇表達式 *{} --><h2>2. 選擇表達式 *{}</h2><div th:object="${user}"><p>用戶名:<span th:text="*{username}"></span></p><p>年齡:<span th:text="*{age}"></span></p></div><!-- 國際化表達式 #{} --><h2>3. 國際化表達式 #{}</h2><p>中文歡迎:<span th:text="#{welcome.cn}"></span></p><!-- URL表達式 @{} --><h2>4. URL表達式 @{}</h2><a th:href="@{/login}">登錄頁</a><a th:href="@{/user/detail(name=${user.username})}">用戶詳情</a><!-- 表達式操作 --><h2>5. 表達式操作</h2><p>年齡+1:<span th:text="${user.age + 1}"></span></p><p>是否成年:<span th:text="${user.age > 18 ? '是' : '否'}"></span></p><!-- th:each循環 --><h2>6. th:each循環</h2><table border="1"><tr th:each="u, stat : ${userList}"><td th:text="${stat.index + 1}"></td><td th:text="${u.username}"></td><td th:text="${u.age}"></td></tr></table>
</body>
</html>
(3)登錄功能實現
LoginController:
@Controller
public class LoginController {// 跳轉登錄頁@GetMapping("/login")public String toLogin() {return "login";}// 處理登錄提交@PostMapping("/login")public String doLogin(@RequestParam("username") String username,@RequestParam("password") String password,Model model) {// 簡單驗證(實際項目需查數據庫)if ("admin".equals(username) && "123456".equals(password)) {model.addAttribute("msg", username);return "hello"; // 登錄成功頁} else {return "redirect:/login?error"; // 登錄失敗重定向}}
}
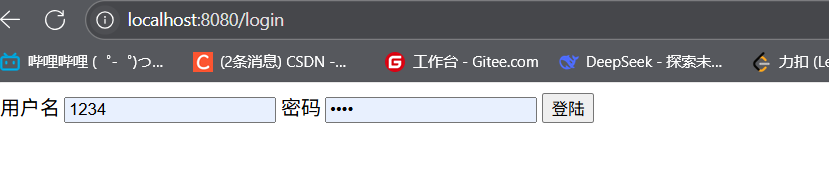
login.html:
<form th:action="@{/login}" method="post"><input type="text" name="username" placeholder="用戶名"><br><input type="password" name="password" placeholder="密碼"><br><input type="submit" value="登錄">
</form>
<!-- 顯示錯誤信息 -->
<p th:if="${param.error}" style="color: red;">用戶名或密碼錯誤</p>
4.3 依賴配置(pom.xml)
<parent><groupId>org.springframework.boot</groupId><artifactId>spring-boot-starter-parent</artifactId><version>3.5.3</version>
</parent><dependencies><!-- Web依賴 --><dependency><groupId>org.springframework.boot</groupId><artifactId>spring-boot-starter-web</artifactId></dependency><!-- Thymeleaf依賴 --><dependency><groupId>org.springframework.boot</groupId><artifactId>spring-boot-starter-thymeleaf</artifactId></dependency><!-- WebJars(jQuery) --><dependency><groupId>org.webjars</groupId><artifactId>jquery</artifactId><version>3.5.0</version></dependency><!-- 熱部署(開發用) --><dependency><groupId>org.springframework.boot</groupId><artifactId>spring-boot-devtools</artifactId><optional>true</optional></dependency>
</dependencies>
4.4 配置文件(application.properties)
# 端口配置
server.port=8082
# Thymeleaf配置
spring.thymeleaf.cache=false
# 靜態資源緩存時間
spring.resources.cache.period=3600
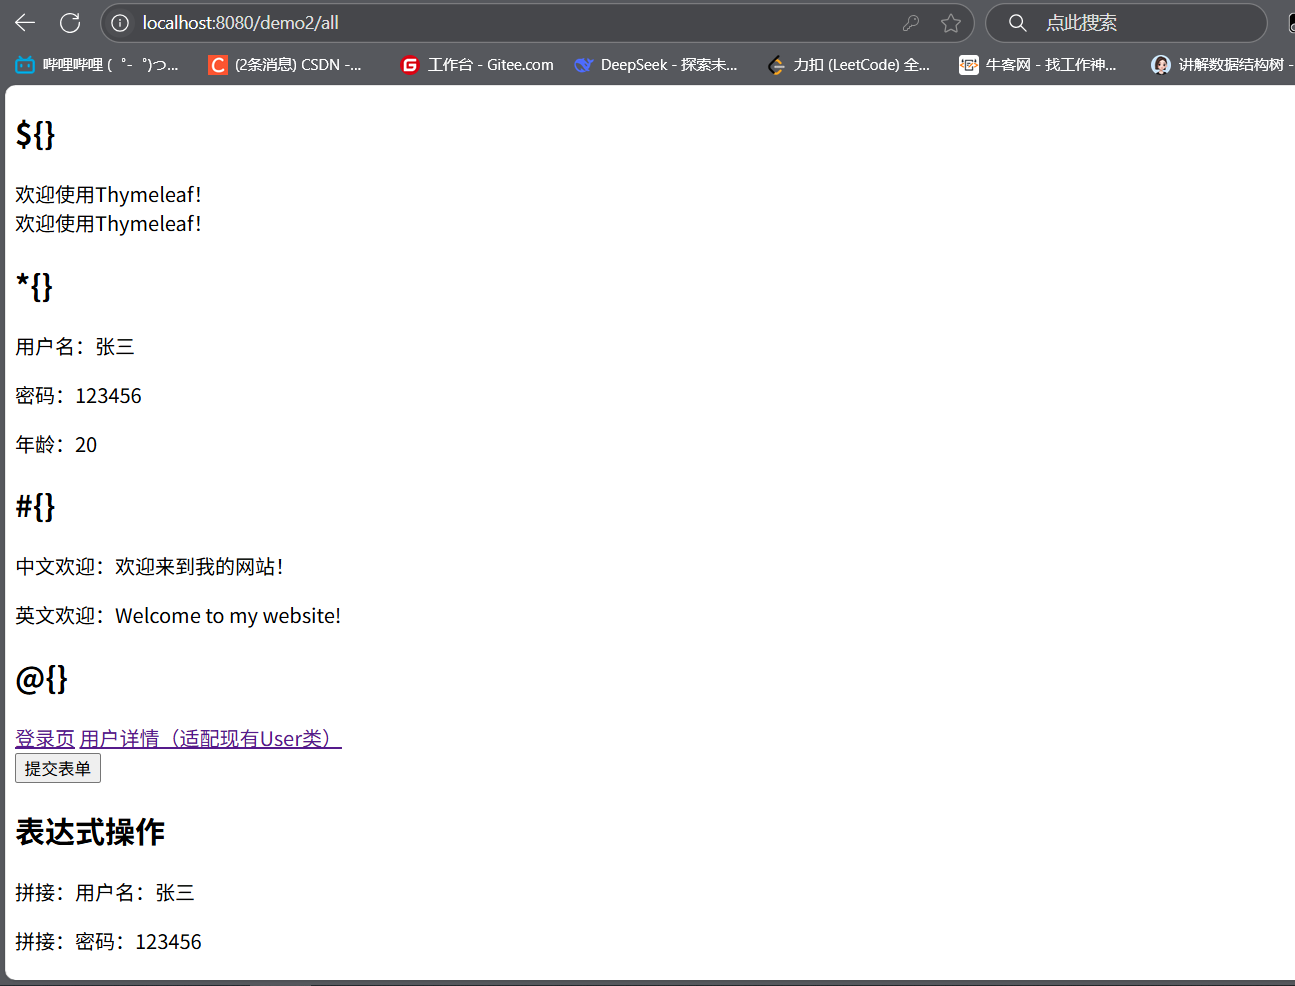
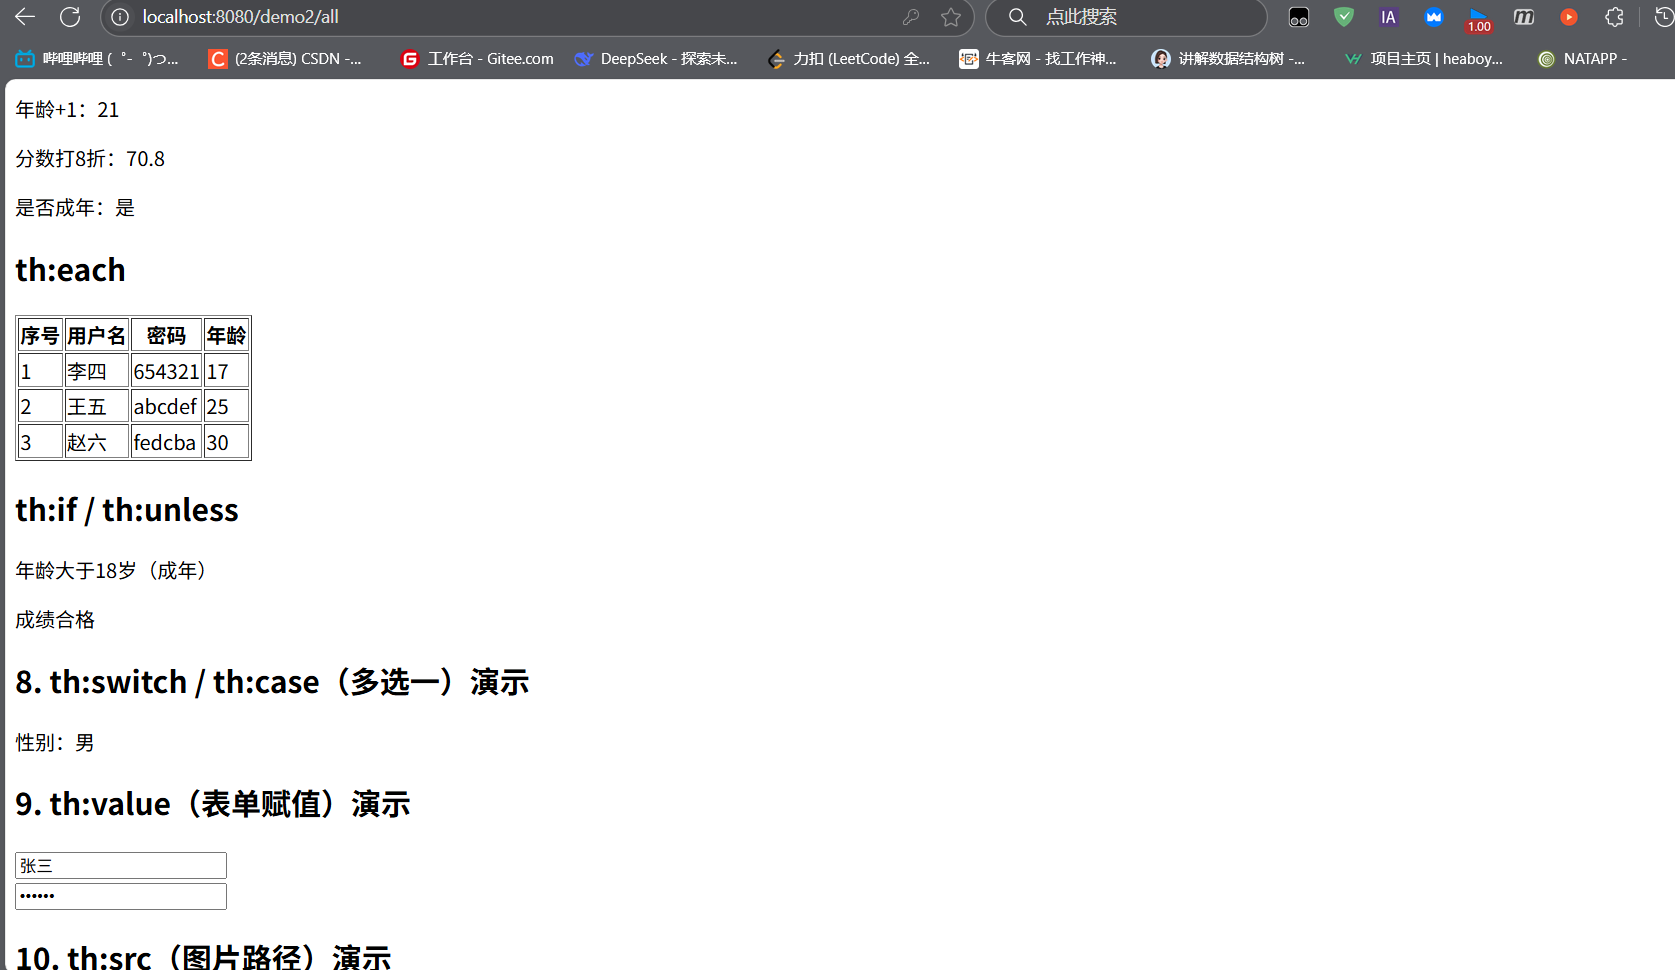
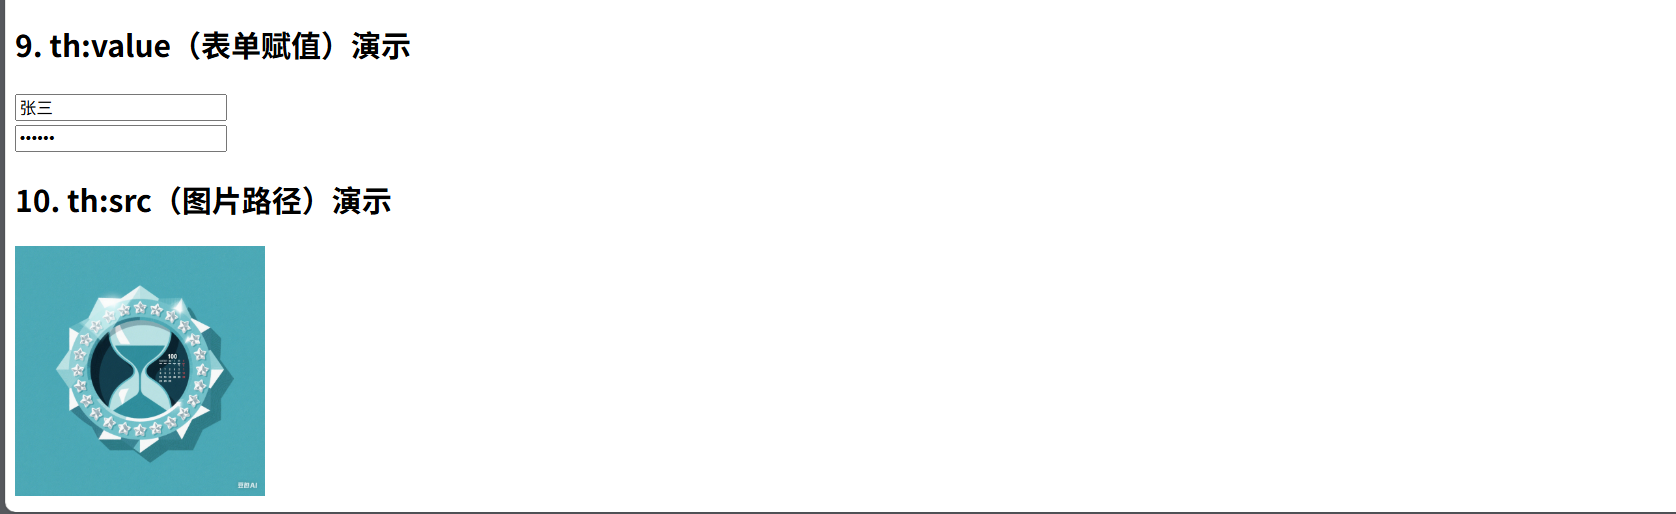
4.5 運行效果
- 啟動應用:運行
MavenSpringbootApplication; - 訪問演示頁:
http://localhost:8082/demo2/all,可看到 Thymeleaf 各種語法的展示效果; - 測試登錄:
http://localhost:8082/login,輸入admin/123456可跳轉至成功頁。
 ?
?
?


:運行狀態鏈)


)


