隨著信創產業的推進,鯤鵬arm64架構得以快速發展。而由于信創領域的主要客戶通常部署在內網環境中,這使得離線部署成為該架構方案實施過程中不可或缺的關鍵環節。
**環境涉及軟件版本信息**
+ 服務器芯片: **鯤鵬920/飛騰2000(arm64)**
+ 操作系統:**銀河麒麟V10**
+ Containerd: **1.7.13**
+ Kubernetes:**v1.30.12**
+ KubeSphere:**v4.1.3**
+ KubeKey: **v3.1.9(二開版)**
+ Docker: **24.0.9**
+ DockerCompose: **v2.26.1**
+ Harbor: **v2.7.1**
+ Prometheus: **v2.51.2**
**服務器基本信息**
```plain
[root@node1 ~]# uname -a
Linux node1 4.19.90-17.5.ky10.aarch64 #1 SMP Fri Aug 7 13:35:33 CST 2020 aarch64 aarch64 aarch64 GNU/Linux
[root@node1 ~]#?
[root@node1 ~]# cat /etc/os-release?
NAME="Kylin Linux Advanced Server"
VERSION="V10 (Tercel)"
ID="kylin"
VERSION_ID="V10"
PRETTY_NAME="Kylin Linux Advanced Server V10 (Tercel)"
ANSI_COLOR="0;31"
[root@node1 ~]#
```

## 1.說明
作者使用`k8s`和`kubesphere`過程中已適配芯片和操作系統如下:
+ CPU芯片:
? ? - 鯤鵬
? ? - 飛騰
? ? - 海光
? ? - 兆芯
? ? - 國際芯片:interl、amd等
+ 操作系統
? ? - 銀河麒麟V10
? ? - 麒麟國防版
? ? - 麒麟信安
? ? - 中標麒麟V7
? ? - 統信 UOS
? ? - 華為歐拉 openEuler、移動大云
? ? - 阿里龍蜥 Anolis OS
? ? - 騰訊 TencentOS
? ? - 國際操作系統:centos、ubuntu、debian等
本文由 [編碼如寫詩-天行1st] 原創編寫,有任何問題可添加作者微信 [sd_zdhr] 獲取幫助。
關于我:
+ 主要從事后端開發,兼具前端、運維及全棧工程師,熱愛`Golang`、`Docker`、`kubernetes`、`KubeSphere`。
+ 信創服務器`k8s`&`KubeSphere`布道者、`KubeSphere`離線部署布道者
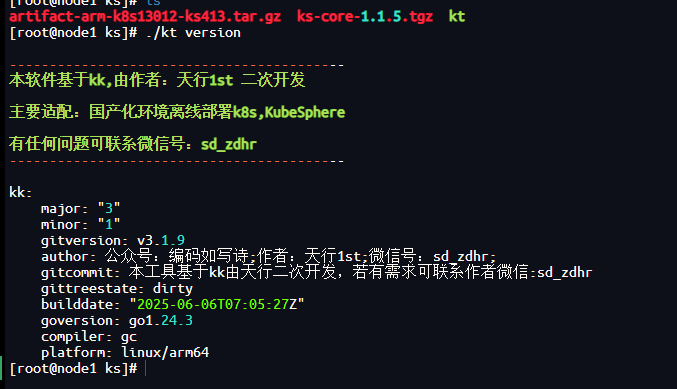
### 關于kt
`kt`是基于`kk`二次開發產物,主要為適配信創國產化環境和簡化`arm`部署過程。
支持`arm64`和`amd64`架構國產操作系統,已適配芯片+操作系統如上。
## 2.前提條件
參考如下示例準備至少三臺主機,其中node1可省略,讓master節點即是主節點也是工作節點
| **<font style="color:rgb(66, 75, 93);">主機名</font>** | **<font style="color:rgb(66, 75, 93);">IP</font>** | **<font style="color:rgb(66, 75, 93);">架構</font>** | **<font style="color:rgb(66, 75, 93);">OS</font>** | **<font style="color:rgb(66, 75, 93);">用途</font>** |
| --- | --- | --- | --- | --- |
| <font style="color:rgb(66, 75, 93);">node</font> | <font style="color:rgb(66, 75, 93);">192.168.3.249</font> | <font style="color:rgb(66, 75, 93);">X86_64</font> | <font style="color:rgb(66, 75, 93);">Ubuntu24.04</font> | <font style="color:rgb(66, 75, 93);">聯網主機,用于制作離線包</font> |
| <font style="color:rgb(66, 75, 93);">node1</font> | <font style="color:rgb(66, 75, 93);">192.168.0.80</font> | <font style="color:rgb(66, 75, 93);">arm64</font> | <font style="color:rgb(66, 75, 93);">麒麟V10</font> | <font style="color:rgb(66, 75, 93);">離線環境主節點,鏡像倉庫節點</font> |
## 3.構建離線包
在node可聯網節點上操作
### 3.1 上傳kt
將`[kt_x86.tar.gz](https://pan.xunlei.com/s/VOSc93lCJRKUTy_L9U5DHzDhA1?pwd=3r38#。 "kt_x86版本")`上傳至可聯網節點解壓后操作,即日起至`2025-07-09`免費使用。
### 3.2 創建 manifest 文件
```plain
export KKZONE=cn
./kt create manifest --with-kubernetes v1.30.12 --with-registry
```
### 3.3 編輯 manifest 文件
```plain
vi manifest-sample.yaml
```
```yaml
apiVersion: kubekey.kubesphere.io/v1alpha2
kind: Manifest
metadata:
? name: sample
spec:
? arches:
? - arm64
? operatingSystems: []
? kubernetesDistributions:
? - type: kubernetes
? ? version: v1.30.12
? components:
? ? helm:?
? ? ? version: v3.14.3
? ? cni:?
? ? ? version: v1.2.0
? ? etcd:?
? ? ? version: v3.5.13
? ? containerRuntimes:
? ? - type: docker
? ? ? version: 24.0.9
? ? - type: containerd
? ? ? version: 1.7.13
? ? calicoctl:
? ? ? version: v3.27.4
? ? crictl:?
? ? ? version: v1.29.0
? ? docker-registry:
? ? ? version: "2"
? ? harbor:
? ? ? version: v2.7.1
? ? docker-compose:
? ? ? version: v2.26.1
? images:
? - registry.cn-beijing.aliyuncs.com/kubesphereio/pause:3.9
? - registry.cn-beijing.aliyuncs.com/kubesphereio/kube-apiserver:v1.30.12
? - registry.cn-beijing.aliyuncs.com/kubesphereio/kube-controller-manager:v1.30.12
? - registry.cn-beijing.aliyuncs.com/kubesphereio/kube-scheduler:v1.30.12
? - registry.cn-beijing.aliyuncs.com/kubesphereio/kube-proxy:v1.30.12
? - registry.cn-beijing.aliyuncs.com/kubesphereio/coredns:1.9.3
? - registry.cn-beijing.aliyuncs.com/kubesphereio/k8s-dns-node-cache:1.22.20
? - registry.cn-beijing.aliyuncs.com/kubesphereio/kube-controllers:v3.27.4
? - registry.cn-beijing.aliyuncs.com/kubesphereio/cni:v3.27.4
? - registry.cn-beijing.aliyuncs.com/kubesphereio/node:v3.27.4
? - registry.cn-beijing.aliyuncs.com/kubesphereio/pod2daemon-flexvol:v3.27.4
? # ks
? - dockerhub.kubekey.local/gjing1st/kubesphere/ks-extensions-museum:v1.1.6
? - dockerhub.kubekey.local/gjing1st/kubesphere/ks-controller-manager:v4.1.3
? - dockerhub.kubekey.local/gjing1st/kubesphere/ks-apiserver:v4.1.3
? - dockerhub.kubekey.local/gjing1st/kubesphere/ks-console:v4.1.3
? - dockerhub.kubekey.local/gjing1st/kubesphere/kubectl:v1.27.16
? registry:
? ? auths: {}
```
### 3.4 導出離線制品
```plain
export KKZONE=cn
./kt artifact export -m manifest-sample.yaml -o artifact-arm-k8s13012-ks413.tar.gz
```
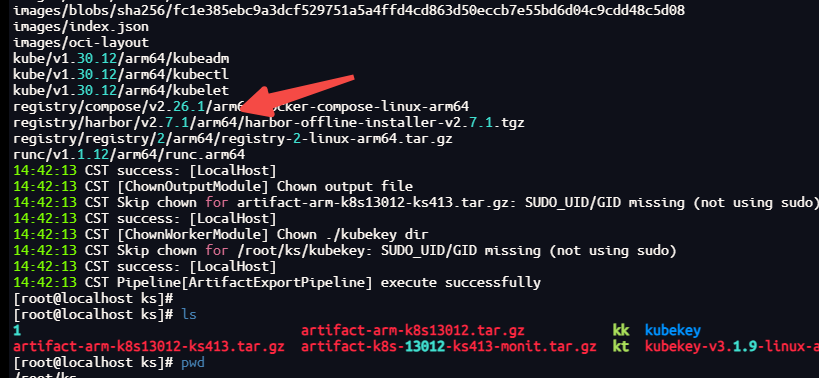
可以看到下載了`arm64` 版本的`harbor`,由于`harbor`官方不支持arm版本,因此`kk`也不支持`arm`版本`harbor`。此版本`harbor`和`kk`為自己制作,由于`harbor:v2.8.0`版本之后不支持擴展`helm`功能,我司需要用其`helm`管理應用,所以這里使用`v2.7.1`版本。
### 3.5 下載 KubeSphere Core Helm Chart
安裝helm
```plain
curl https://raw.githubusercontent.com/helm/helm/main/scripts/get-helm-3 | bash
```
下載 KubeSphere Core Helm Chart
```plain
VERSION=1.1.3 ? ? # Chart 版本
helm fetch https://charts.kubesphere.io/main/ks-core-${VERSION}.tgz
```
## 4 離線部署準備
### 4.1 將安裝包拷貝至離線環境
將 kt、制品 artifact 、Helm文件等通過介質拷貝至**node1節點**。
### 4.2 初始化操作系統
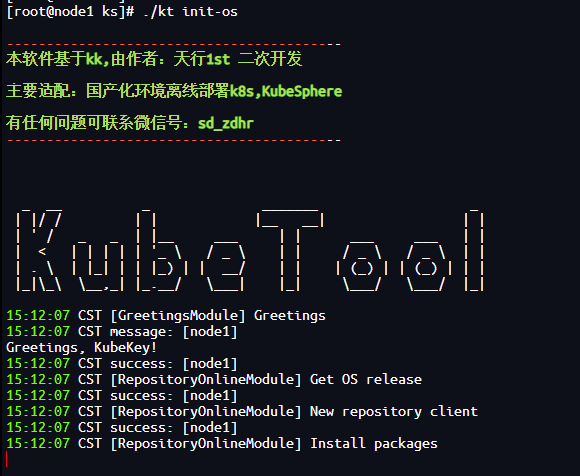
**所有節點**,上傳`[kt_arm.tar.gz](https://pan.xunlei.com/s/VOSc8AKcsUM5K5Lxma9KBW2sA1?pwd=85gd#。 "kt_arm版本")`解壓后執行`./kt init-os`,已適配操作系統和架構見`1.說明`
### 4.3 修改配置文件?
主要修改相關節點和harbor信息
```plain
vi config-sample.yaml
```
```yaml
kind: Cluster
metadata:
? name: sample
spec:
? hosts:
? - {name: node1, address: 192.168.0.80, internalAddress: 192.168.0.80, user: root, password: "123456"}
? roleGroups:
? ? etcd:
? ? - node1
? ? control-plane:
? ? - node1
? ? worker:
? ? - node1
? ? registry:
? ? - node1
? controlPlaneEndpoint:
? ? ## Internal loadbalancer for apiservers?
? ? # internalLoadbalancer: haproxy
? ? domain: lb.kubesphere.local
? ? address: ""
? ? port: 6443
? kubernetes:
? ? version: v1.30.12
? ? clusterName: cluster.local
? ? autoRenewCerts: true
? ? containerManager: docker
? etcd:
? ? type: kubekey
? network:
? ? plugin: calico
? ? kubePodsCIDR: 10.233.64.0/18
? ? kubeServiceCIDR: 10.233.0.0/18
? ? ## multus support. https://github.com/k8snetworkplumbingwg/multus-cni
? ? multusCNI:
? ? ? enabled: false
? registry:
? ? type: harbor
? ? registryMirrors: []
? ? insecureRegistries: []
? ? privateRegistry: "dockerhub.kubekey.local"
? ? namespaceOverride: "kubesphereio"
? ? auths: # if docker add by `docker login`, if containerd append to `/etc/containerd/config.toml`
? ? ? "dockerhub.kubekey.local":
? ? ? ? username: "admin"
? ? ? ? password: Harbor@123 # 此處可自定義,kk3.1.8新特性
? ? ? ? skipTLSVerify: true # Allow contacting registries over HTTPS with failed TLS verification.
? ? ? ? plainHTTP: false # Allow contacting registries over HTTP.
? ? ? ? certsPath: "/etc/docker/certs.d/dockerhub.kubekey.local"
? addons: []
```
### 4.4 創建鏡像倉庫
```plain
./kt init registry -f config-sample.yaml -a artifact-arm-k8s13012-ks413.tar.gz
```
可以看到使用了`arm64`版本的harbor

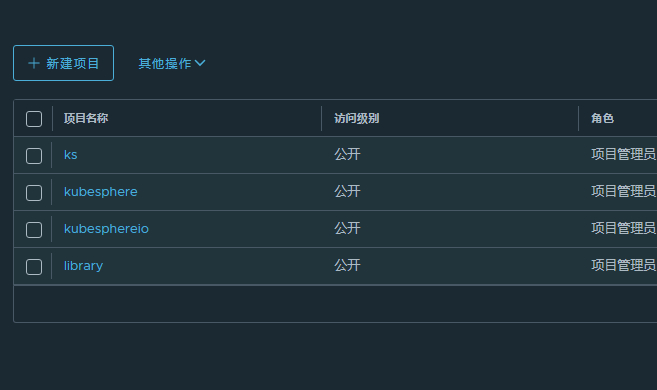
### 4.5 創建harbor項目
<font style="background-color:rgb(255,245,235);">說明:</font>
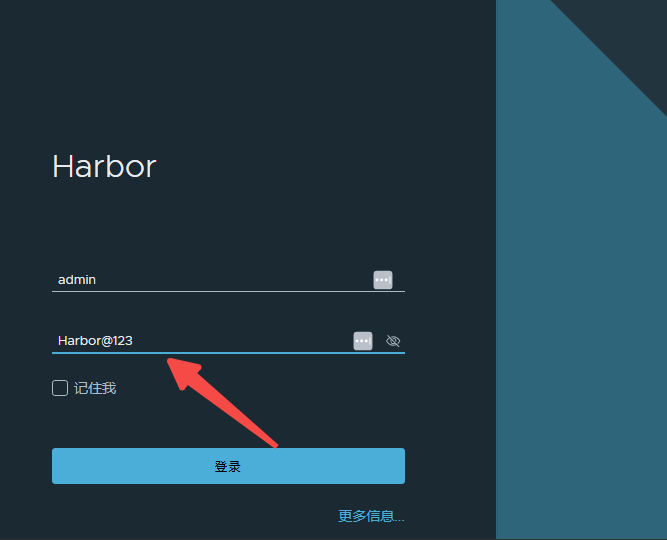
<font style="background-color:rgb(255,245,235);">Harbor 管理員賬號:</font>**<font style="background-color:rgb(255,245,235);">admin</font>**<font style="background-color:rgb(255,245,235);">,密碼:</font>**<font style="background-color:rgb(255,245,235);">Harbor@123</font>**<font style="background-color:rgb(255,245,235);">。密碼同步使用配置文件中的對應password</font>
<font style="background-color:rgb(255,245,235);">harbor 安裝文件在 </font>`<font style="background-color:rgb(255,245,235);">/opt/harbor</font>`<font style="background-color:rgb(255,245,235);"> 目錄下,可在該目錄下對 harbor 進行運維。</font>
```plain
vi create_project_harbor.sh
```
```bash
#!/usr/bin/env bash
url="https://dockerhub.kubekey.local" ?# 或修改為實際鏡像倉庫地址
user="admin"
passwd="Harbor@123"
harbor_projects=(
? ? ? ? gjing1st
? ? ? ? kubesphere
? ? ? ? kubesphereio
)
for project in "${harbor_projects[@]}"; do
? ? echo "creating $project"
? ? curl -u "${user}:${passwd}" -X POST -H "Content-Type: application/json" "${url}/api/v2.0/projects" -d "{ \"project_name\": \"${project}\", \"public\": true}" -k ?# 注意在 curl 命令末尾加上 -k
done
```
#### 創建 Harbor 項目
```plain
chmod +x create_project_harbor.sh
./create_project_harbor.sh
```
#### 驗證
## 5 安裝Kubernetes
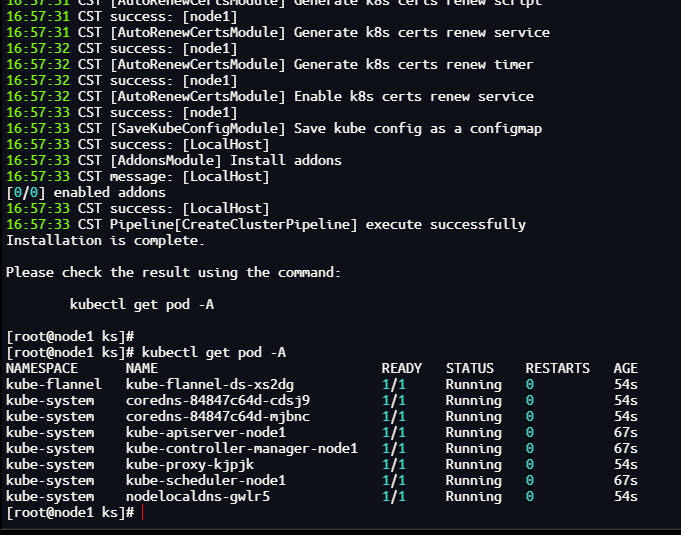
執行以下命令創建 Kubernetes 集群:
```plain
./kt create cluster -f config-sample.yaml -a artifact-arm-k8s13012-ks413.tar.gz ?--with-local-storage
```
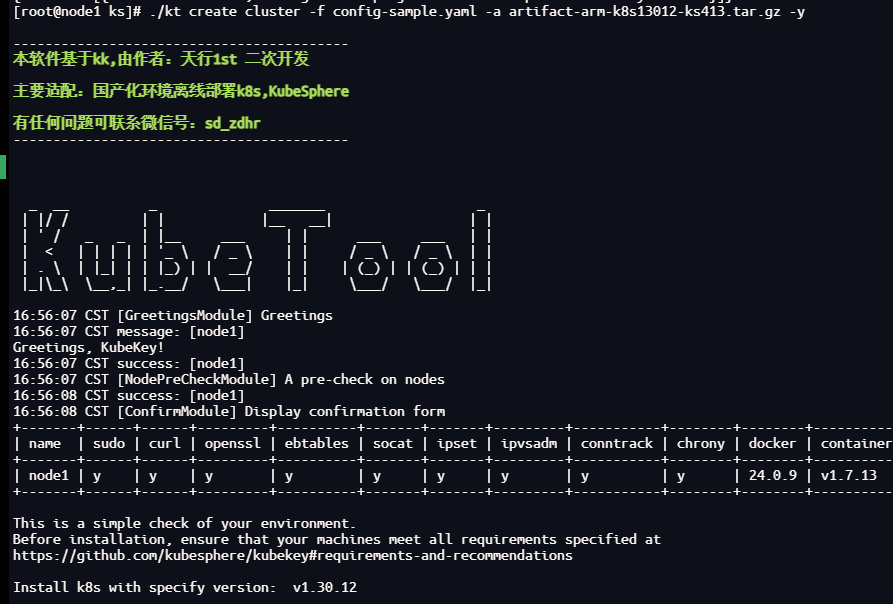
等待大概兩分鐘左右看到成功消息
## 6 安裝 KubeSphere
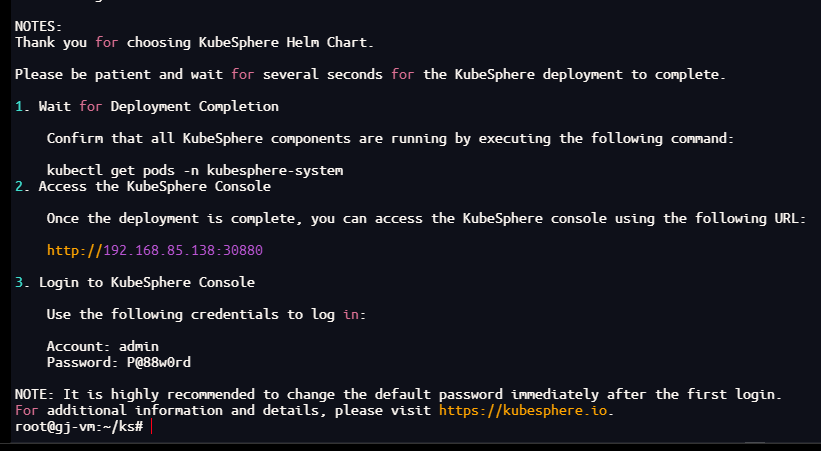
```plain
helm upgrade --install -n kubesphere-system --create-namespace ks-core ks-core-1.1.5.tgz \
? ? ?--set global.imageRegistry=dockerhub.kubekey.local/ks \
? ? ?--set extension.imageRegistry=dockerhub.kubekey.local/ks \
? ? ?--set ksExtensionRepository.image.tag=v1.1.5 \
? ? ?--debug \
? ? ?--wait
```
等待大概30秒左右看到成功消息
## 7 驗證
登錄頁面
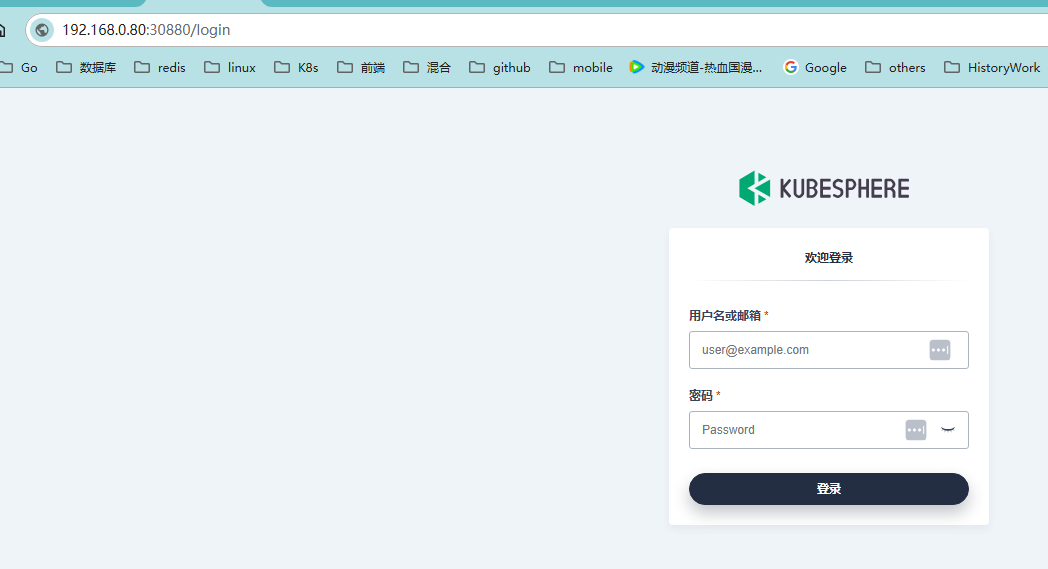
初次登錄需要換密碼,如果不想換也可以繼續填寫`P@88w0rd`,不過建議更換

首頁

集群節點版本信息

概覽


)
)
(二十一)——unordered_set和unordered_map)


)

read函數)

