一般通常情況下,我們都是前端主動朝后端發送請求,那么有沒有可能,后端主動給前端推送消息呢?這時候就可以借助websocket來實現。下面給出一個簡單的實現樣例。
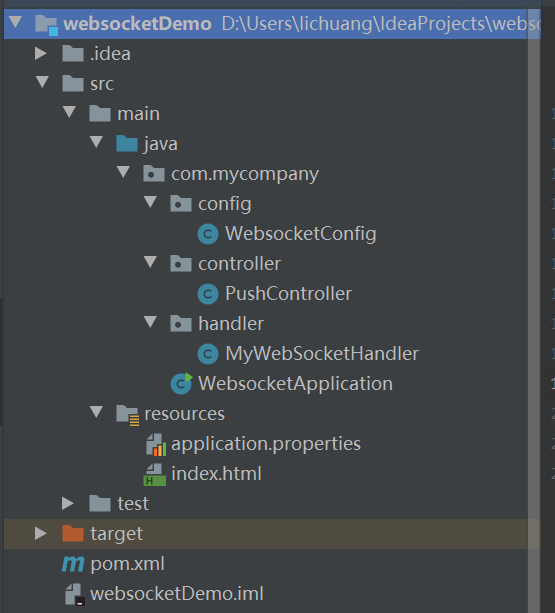
首先創建一個websocketDemo工程,該工程的整體結構如下:
(1)修改POM文件,增加相關依賴
<?xml version="1.0" encoding="UTF-8"?>
<project xmlns="http://maven.apache.org/POM/4.0.0"xmlns:xsi="http://www.w3.org/2001/XMLSchema-instance"xsi:schemaLocation="http://maven.apache.org/POM/4.0.0 http://maven.apache.org/xsd/maven-4.0.0.xsd"><modelVersion>4.0.0</modelVersion><groupId>com.mycompany</groupId><artifactId>websocketDemo</artifactId><version>1.0-SNAPSHOT</version><parent><groupId>org.springframework.boot</groupId><artifactId>spring-boot-starter-parent</artifactId><version>2.7.18</version><relativePath/></parent><properties><project.build.sourceEncoding>UTF-8</project.build.sourceEncoding><maven.compiler.source>1.8</maven.compiler.source><maven.compiler.target>1.8</maven.compiler.target></properties><dependencies><dependency><groupId>org.springframework.boot</groupId><artifactId>spring-boot-starter-web</artifactId></dependency><dependency><groupId>org.springframework.boot</groupId><artifactId>spring-boot-starter-websocket</artifactId></dependency></dependencies></project>
(2)新增application.properties文件,增加端口配置信息,并設置端口為8085
server.port=8085(3)新增socket處理器MyWebSocketHandler
package com.mycompany.handler;import org.springframework.stereotype.Component;
import org.springframework.web.socket.CloseStatus;
import org.springframework.web.socket.TextMessage;
import org.springframework.web.socket.WebSocketSession;
import org.springframework.web.socket.handler.TextWebSocketHandler;import java.io.IOException;
import java.util.Map;
import java.util.concurrent.ConcurrentHashMap;@Component
public class MyWebSocketHandler extends TextWebSocketHandler {private static final Map<String, WebSocketSession> sessions = new ConcurrentHashMap<>();@Overridepublic void afterConnectionEstablished(WebSocketSession session) {System.out.println("連接建立");sessions.put(session.getId(), session);}@Overridepublic void afterConnectionClosed(WebSocketSession session, CloseStatus status) {System.out.println("連接關閉");sessions.remove(session.getId());}public void sendToAll(String message) {sessions.forEach((id, session) -> {if (session.isOpen()) {try {session.sendMessage(new TextMessage(message));} catch (Exception e) {System.out.println("出現異常,原因" + e);sessions.remove(id);}} else {sessions.remove(id);}});}
}
(5)新增socket配置類
package com.mycompany.config;import com.mycompany.handler.MyWebSocketHandler;
import org.springframework.beans.factory.annotation.Autowired;
import org.springframework.context.annotation.Configuration;
import org.springframework.web.socket.config.annotation.EnableWebSocket;
import org.springframework.web.socket.config.annotation.WebSocketConfigurer;
import org.springframework.web.socket.config.annotation.WebSocketHandlerRegistry;@Configuration
@EnableWebSocket
public class WebsocketConfig implements WebSocketConfigurer {@Autowiredprivate MyWebSocketHandler myWebSocketHandler;@Overridepublic void registerWebSocketHandlers(WebSocketHandlerRegistry registry) {registry.addHandler(myWebSocketHandler, "/ws").setAllowedOrigins("*");}}
(6)新增控制器類,我們編寫了一個接口,用來觸發推消息的功能,也就當調用/api/push接口時,就會給瀏覽器推送消息,推送的消息內容為msg字段的值
package com.mycompany.controller;import com.mycompany.handler.MyWebSocketHandler;
import org.springframework.beans.factory.annotation.Autowired;
import org.springframework.web.bind.annotation.GetMapping;
import org.springframework.web.bind.annotation.RestController;@RestController
public class PushController {@Autowiredprivate MyWebSocketHandler myWebSocketHandler;@GetMapping("/api/push")public String push(String msg) {myWebSocketHandler.sendToAll(msg);return "推送成功";}}
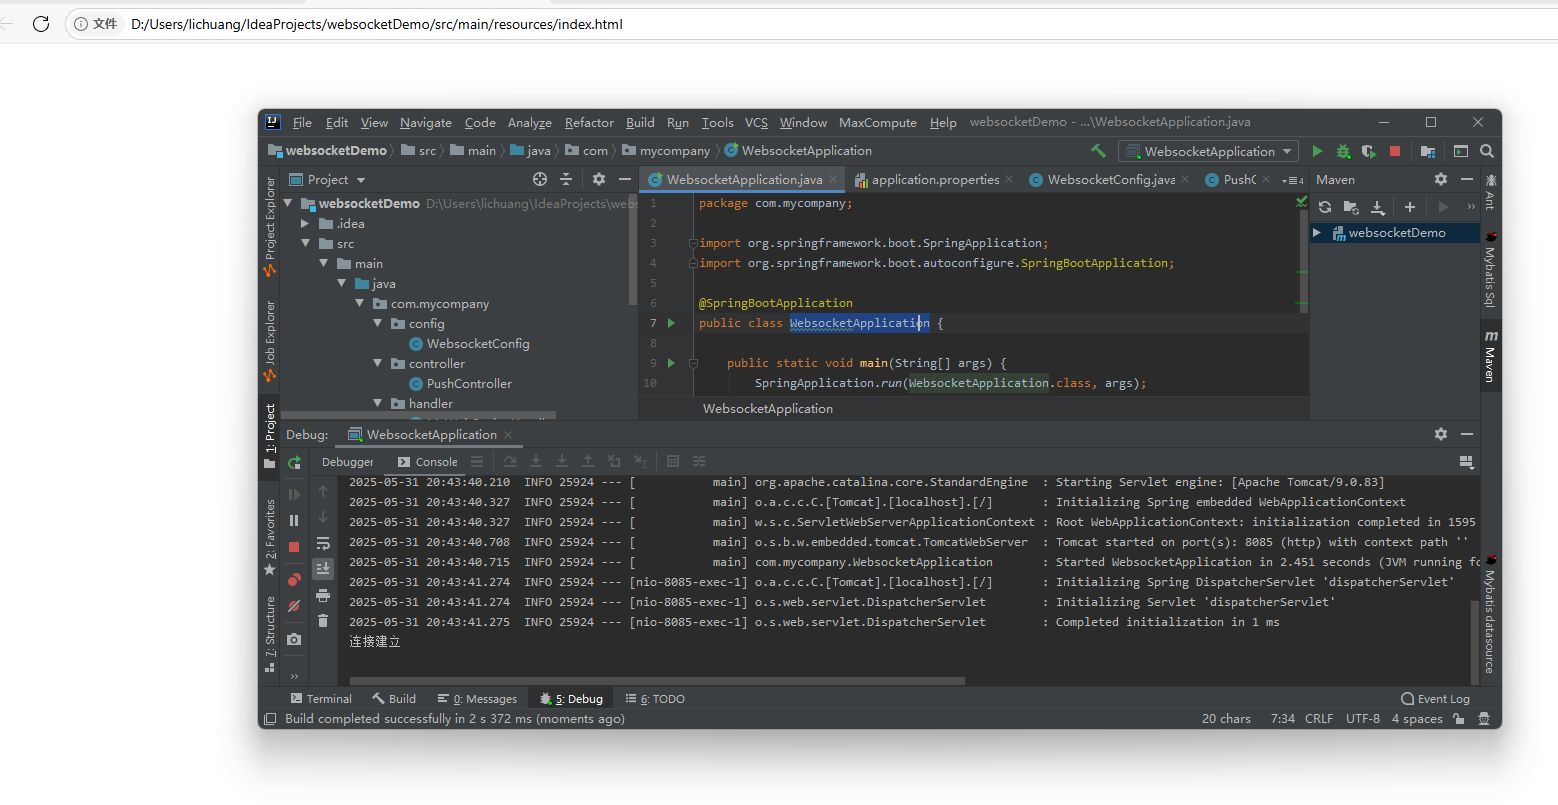
(7)編寫啟動類WebsocketApplication
package com.mycompany;import org.springframework.boot.SpringApplication;
import org.springframework.boot.autoconfigure.SpringBootApplication;@SpringBootApplication
public class WebsocketApplication {public static void main(String[] args) {SpringApplication.run(WebsocketApplication.class, args);}
}
(8)編寫一個index.html頁面,注意其中的端口需要和application.properties中的端口保持一致
<!DOCTYPE html>
<script>
const socket = new WebSocket('ws://localhost:8085/ws');
socket.onmessage = (e) => {console.log('收到推送:', e.data);document.getElementById('msg').innerHTML += e.data + '<br>';
};
</script>
<div id="msg"></div>
(9)驗證測試。首先啟動項目WebsocketApplication,然后通過瀏覽器打開index.html頁面
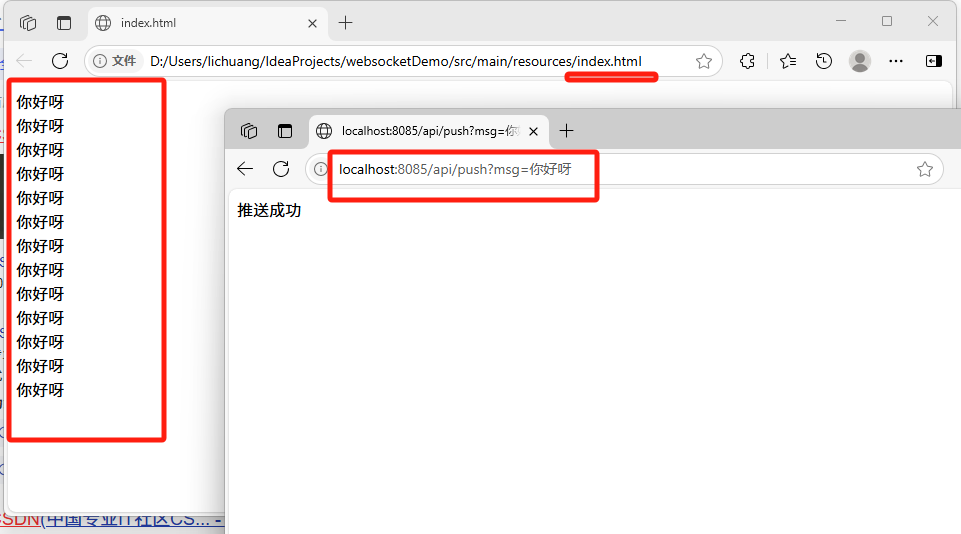
然后我們在瀏覽器地址欄輸入localhost:8085/api/push?msg=你好呀,然后我們會看到瀏覽器中的index.html頁面會顯示收到推送的內容。我們可以多次刷新/api/push接口,然后會看到index.html頁面也打印多次推送的信息,如下圖。


踩坑記錄)
)


)


)