transform是torchvision下的一個.py文件,這個python文件中定義了很多的類和方法,主要實現對圖片進行一些變換操作
一、Transforms講解
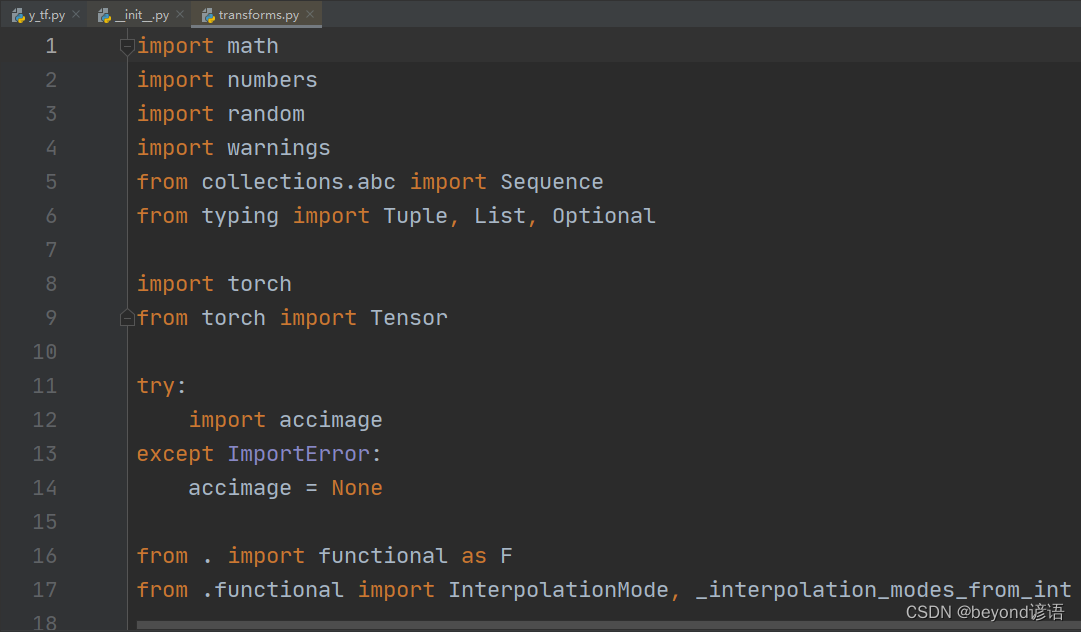
from torchvision import transforms#按著Ctrl,點擊transforms
進入到__init__.py文件中
from .transforms import *#再次按著Ctrl,點擊.transforms
from .autoaugment import *
進入transform.py文件中,可以看到transforms其實就是transform.py一個python文件,可以理解為其是一個工具包
點擊Structure,或Alt+7,查看下這個文件的大概結構框架
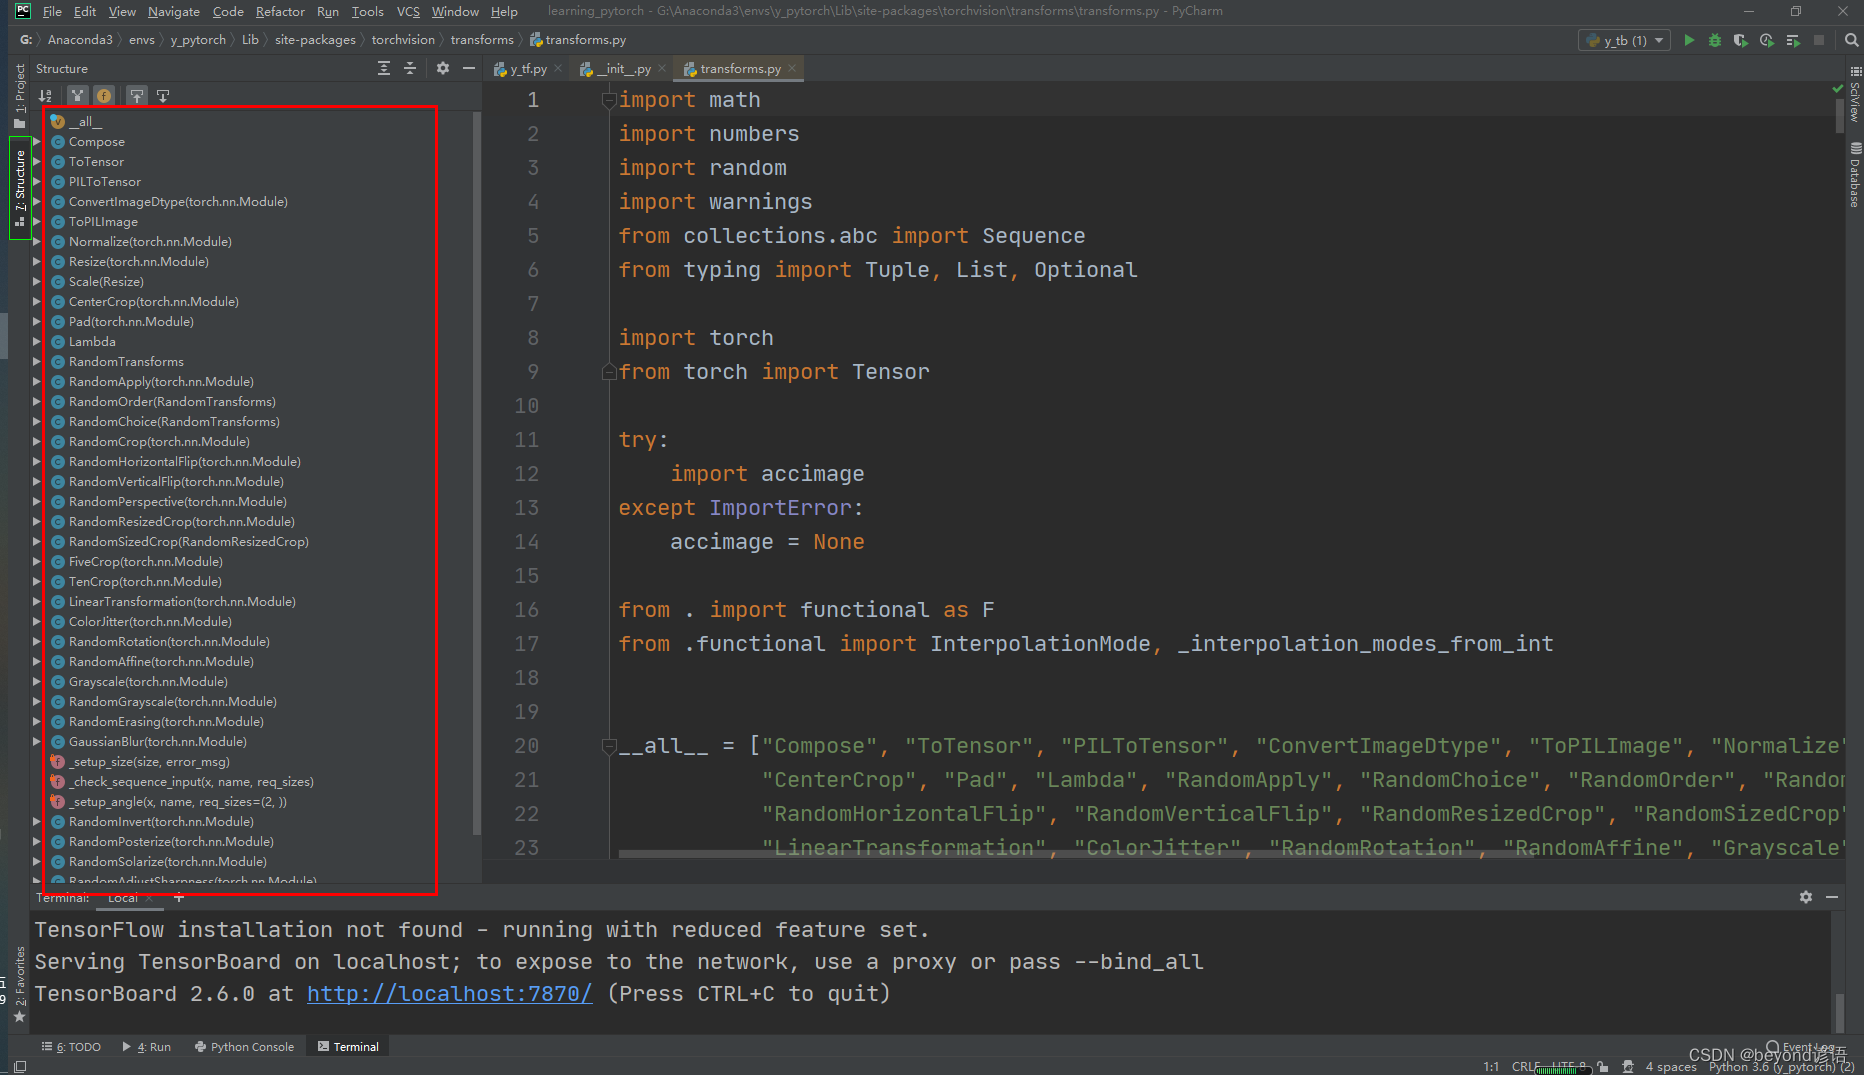
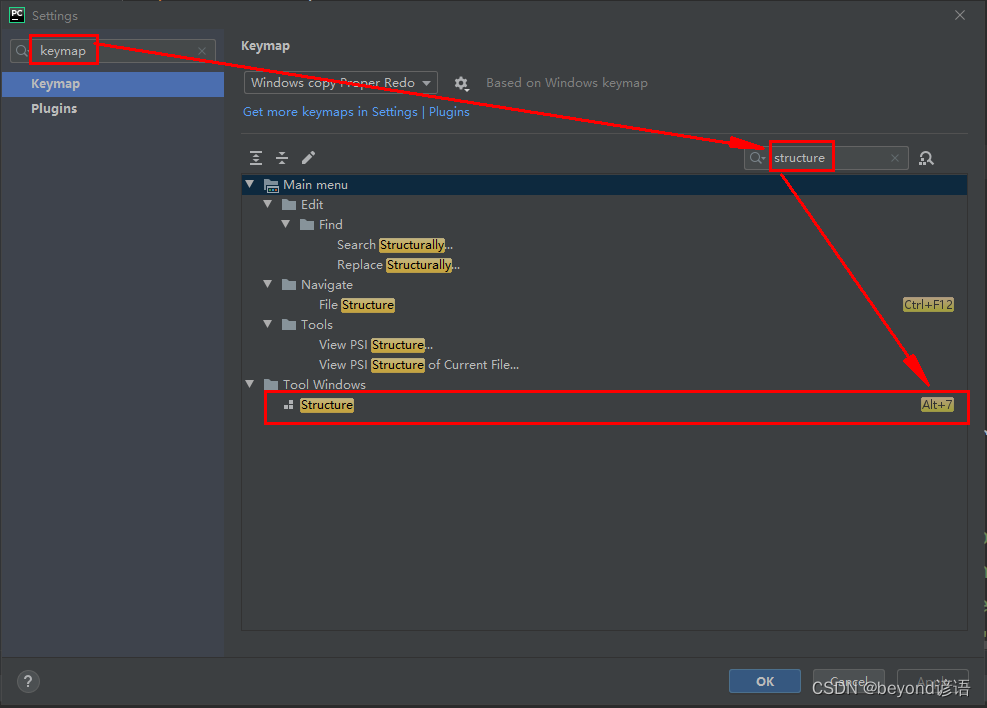
File–Settings–keymap–structure,可以查看快捷鍵
通俗點:transform指的就是transform.py文件,該文件里面有好多類,可以對圖像進行各種各樣的操作
二、ToTensor類
看下文檔給的使用說明
Ctrl+P:顯示方法所需要的參數
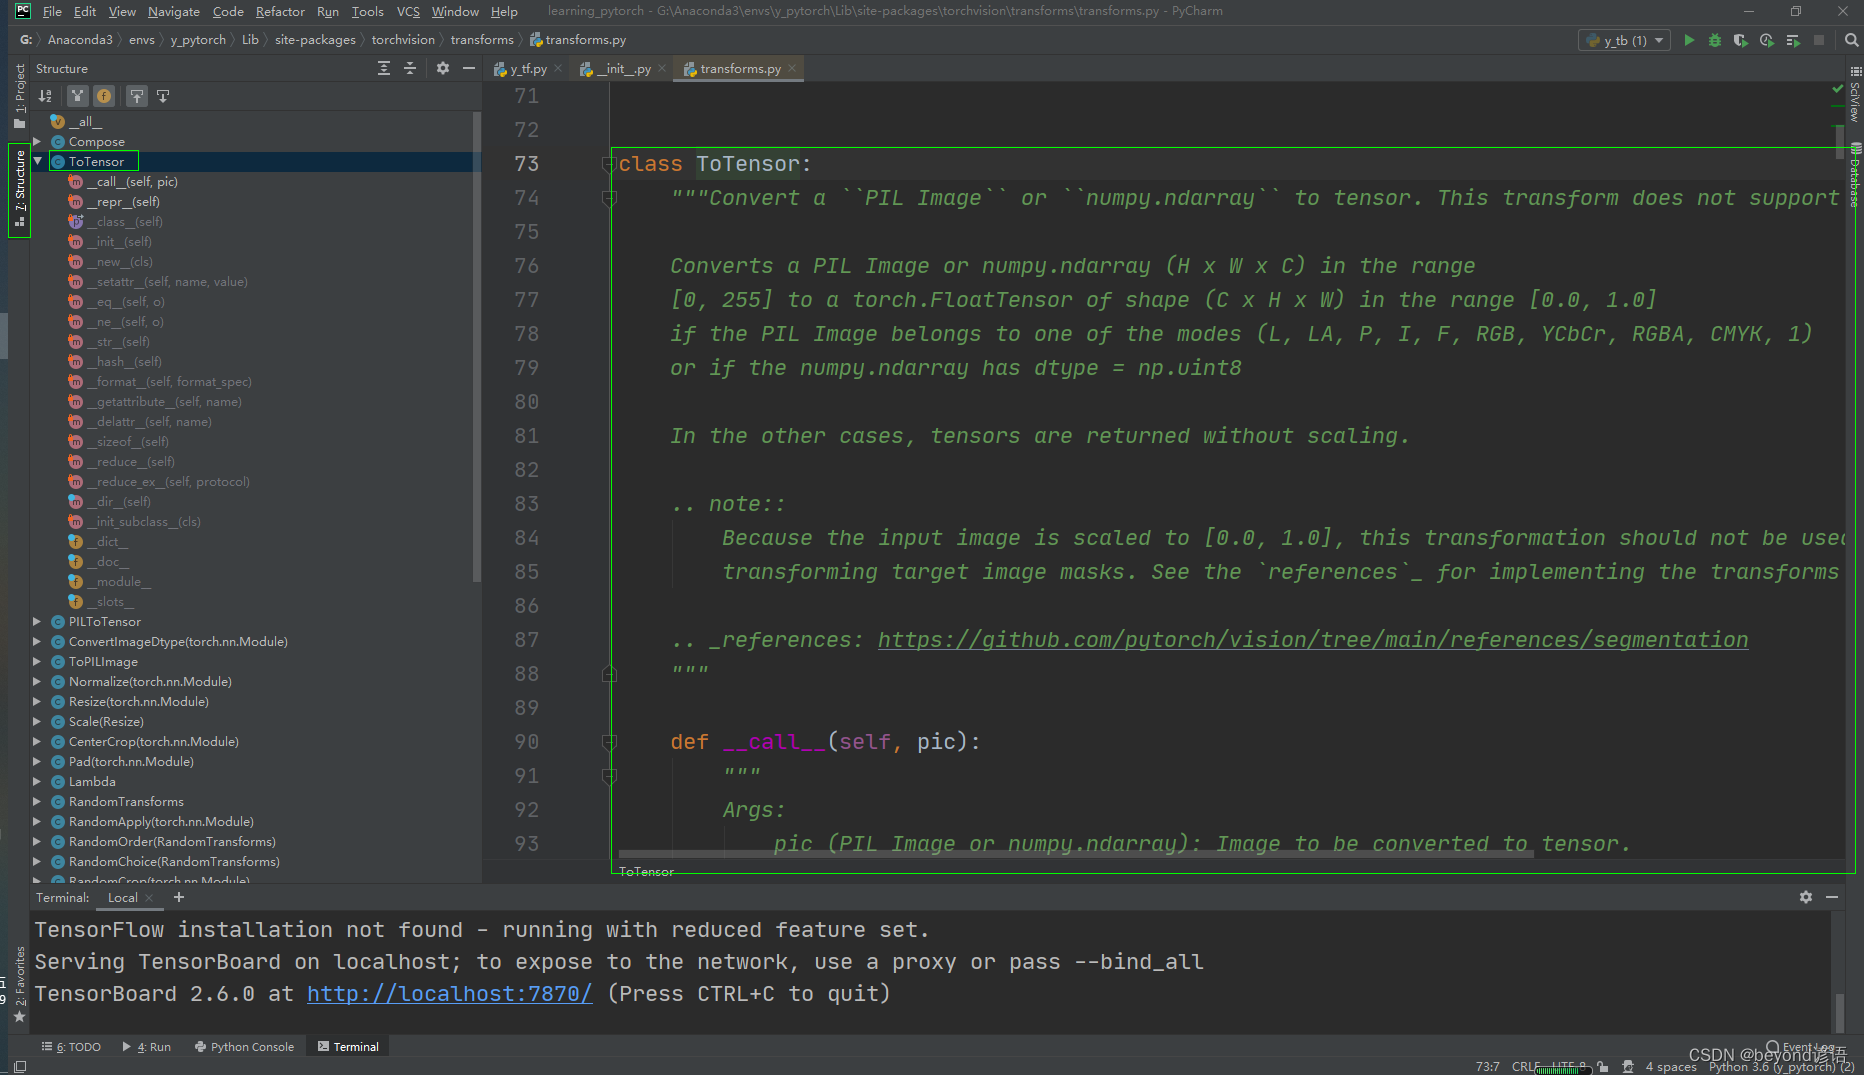
    """Convert a ``PIL Image`` or ``numpy.ndarray`` to tensor. This transform does not support torchscript.
#可以看到其實就將PIL Image、numpy.ndarray類型的圖片轉換為tensor類型
#PIL針對的是Python自帶的Image進行open操作;numpy.ndarray針對的是OpenCV的imread操作Converts a PIL Image or numpy.ndarray (H x W x C) in the range[0, 255] to a torch.FloatTensor of shape (C x H x W) in the range [0.0, 1.0]if the PIL Image belongs to one of the modes (L, LA, P, I, F, RGB, YCbCr, RGBA, CMYK, 1)or if the numpy.ndarray has dtype = np.uint8In the other cases, tensors are returned without scaling... note::Because the input image is scaled to [0.0, 1.0], this transformation should not be used whentransforming target image masks. See the `references`_ for implementing the transforms for image masks... _references: https://github.com/pytorch/vision/tree/main/references/segmentation"""
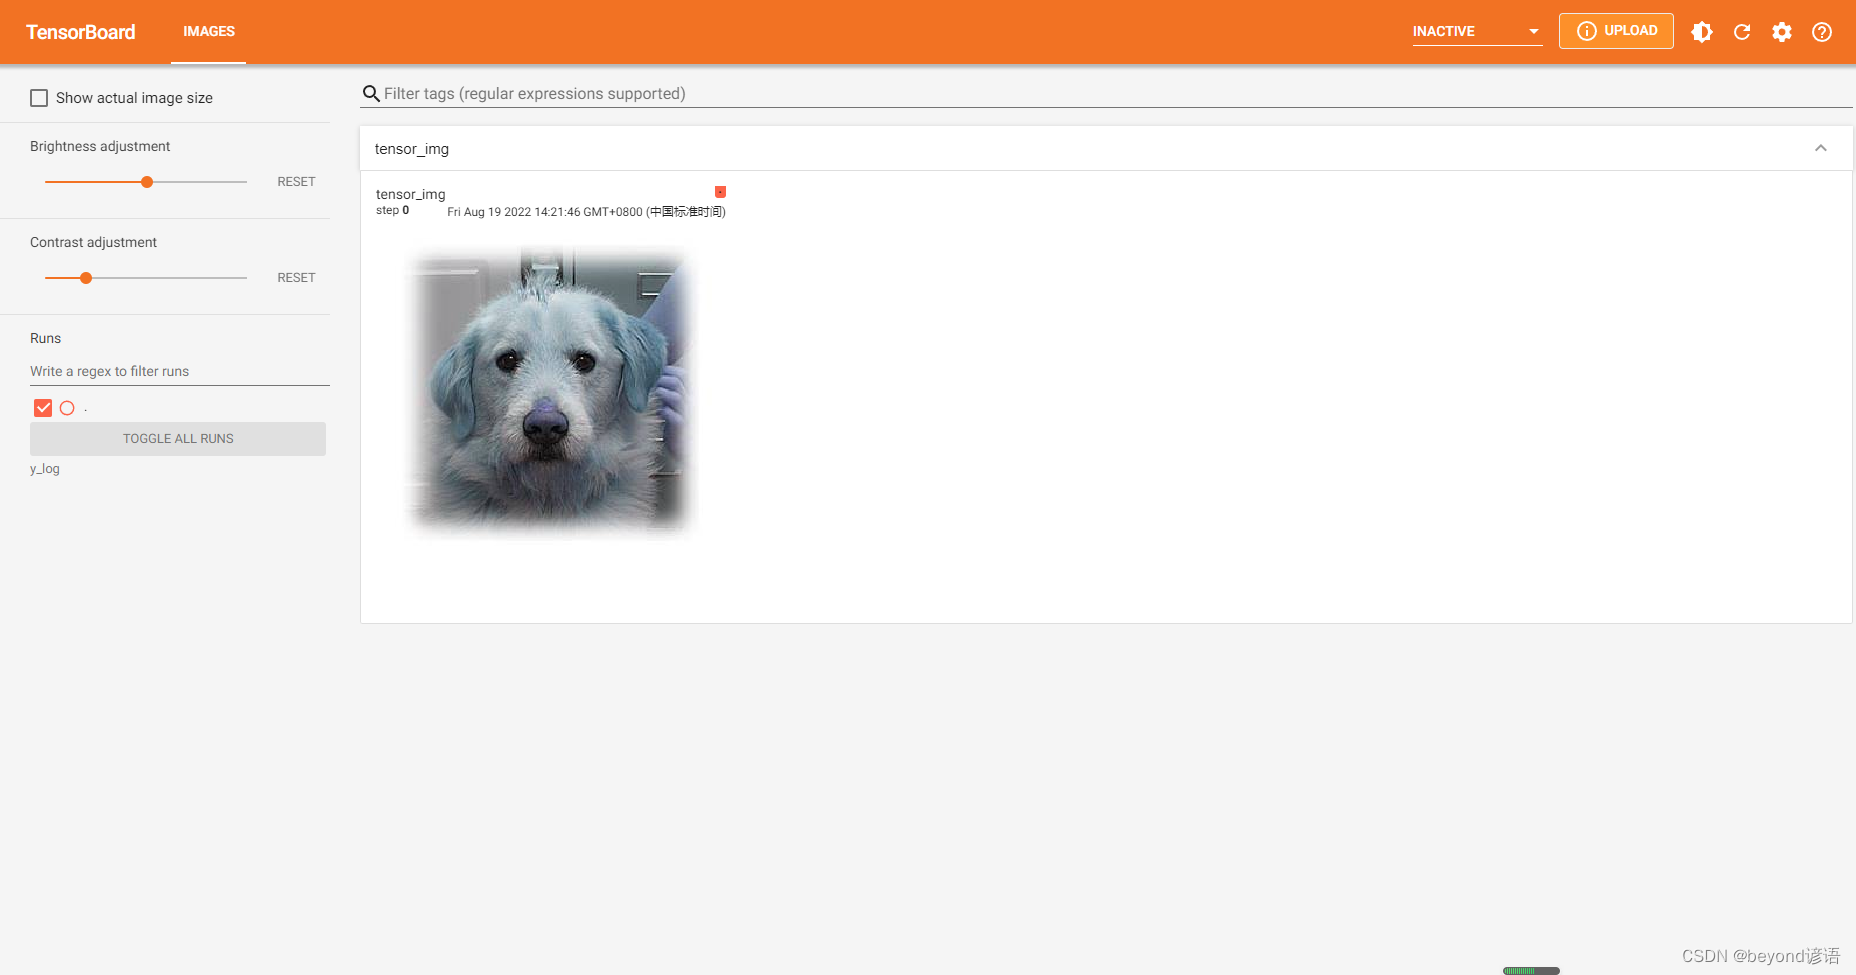
Ⅰ通過PIL的Image讀取圖片類型為PIL,使用ToTensor將圖片類型轉換為tensor,并通過add_image上傳tensorbord
import cv2 as cv
from PIL import Image
from torch.utils.tensorboard import SummaryWriter
from torchvision import transformsimg_path = "G:/PyCharm/workspace/learning_pytorch/dataset/a/3.jpg"# 通過Image打開的圖片類型為PIL
img = Image.open(img_path)
print(type(img))#<class 'PIL.JpegImagePlugin.JpegImageFile'># # 通過opencv的imread打開的圖片類型為numpy.ndarray
# img = cv.imread(img_path)
# print(type(img))#<class 'numpy.ndarray'>#通過transforms的ToTensor即可轉換為Tensor類型
tensor_trans = transforms.ToTensor()#創建ToTensor對象
tensor_img = tensor_trans(img)#Ctrl+p  查看需要傳入的參數,傳入圖片
print(type(tensor_img))#<class 'torch.Tensor'>
print(tensor_img.shape)#torch.Size([3, 299, 300])"""
add_image()要求:
①圖片類型為torch.Tensor, numpy.array, or string/blobname
②圖片尺寸規格為(3, H, W),若不一樣需要通過dataformats參數進行聲明
很顯然tensor_img滿足add_image的基本要求,可以直接傳入使用
"""writer = SummaryWriter("y_log")writer.add_image("tensor_img",tensor_img)#默認從0開始
writer.close()
在Terminal下運行tensorboard --logdir=y_log --port=2312,logdir為打開事件文件的路徑,port為指定端口打開;
通過指定端口2312進行打開tensorboard,若不設置port參數,默認通過6006端口進行打開。

點擊該鏈接或者復制鏈接到瀏覽器打開即可
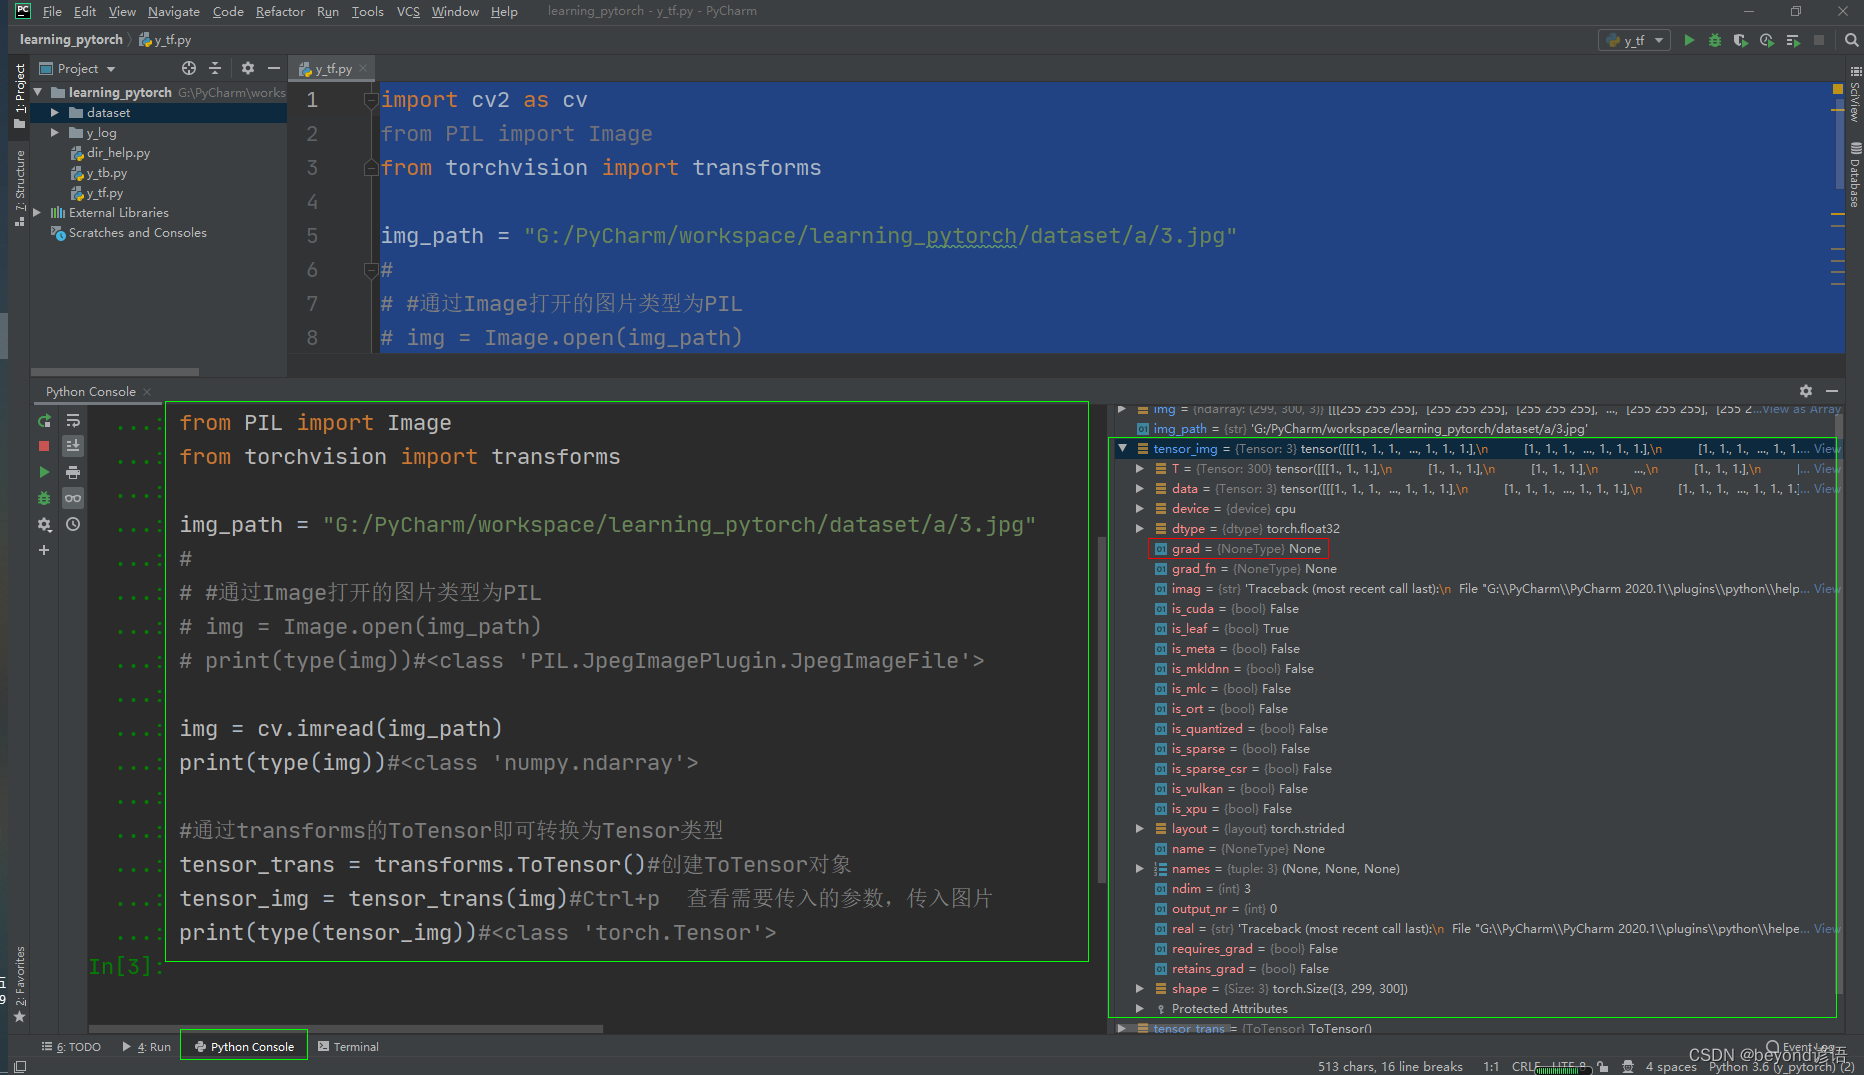
Ⅱ為啥神經網絡中傳入的圖片數據類型必須是tensor?
打開Python Console,將上面的代碼復制運行
可以看到tensor包含grad梯度等信息,也就是tensor數據類型包裝了神經網絡所需要的一些參數信息
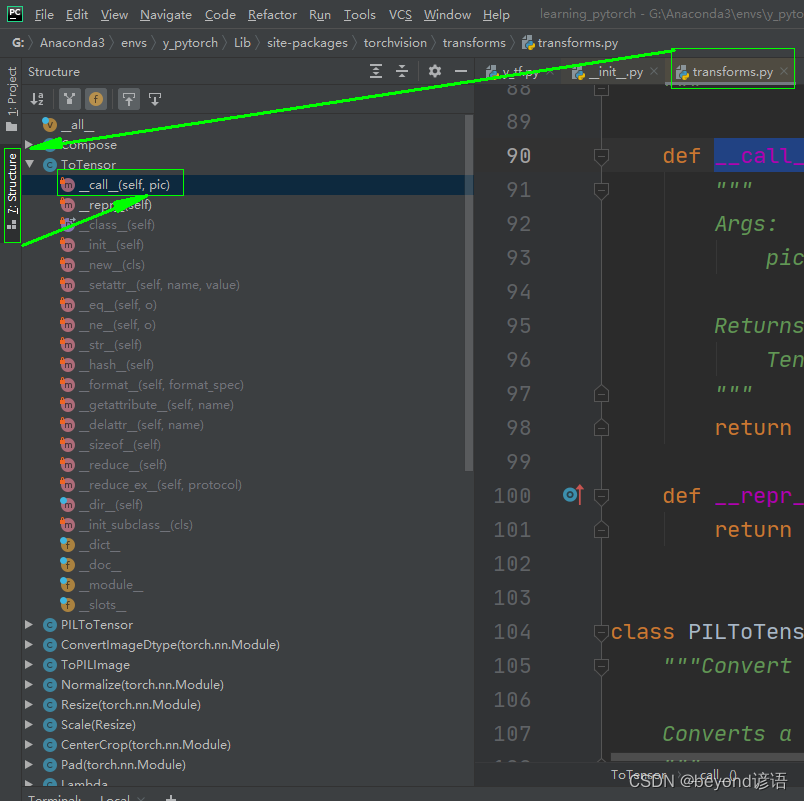
Ⅲ__call__方法的作用
transform.py文件中的ToTensor類下面有一個__call__方法,接下來進行探討下該方法的作用是啥
class Band:def __call__(self, bandname):print("call-"+bandname)def music_band(self,bandname):print("hello-"+bandname)band = Band()
band("beyond")#call-beyond
band.music_band("huangjiaju")#hello-huangjiaju
由結果可以看出,在Band類中,若直接對其對象傳入參數,會使用__call__方法;若指定某個方法名稱才會使用某方法。其實__call__方法起到默認優先考慮的效果而已。
三、ToPILImage類
看下文檔給的使用說明
Ctrl+P:顯示方法所需要的參數

    """Convert a tensor or an ndarray to PIL Image. This transform does not support torchscript.
#將tensor、ndarray 轉換為PIL類型Converts a torch.*Tensor of shape C x H x W or a numpy ndarray of shapeH x W x C to a PIL Image while preserving the value range.Args:mode (`PIL.Image mode`_): color space and pixel depth of input data (optional).If ``mode`` is ``None`` (default) there are some assumptions made about the input data:- If the input has 4 channels, the ``mode`` is assumed to be ``RGBA``.- If the input has 3 channels, the ``mode`` is assumed to be ``RGB``.- If the input has 2 channels, the ``mode`` is assumed to be ``LA``.- If the input has 1 channel, the ``mode`` is determined by the data type (i.e ``int``, ``float``,``short``)... _PIL.Image mode: https://pillow.readthedocs.io/en/latest/handbook/concepts.html#concept-modes"""
通過ToPILImage方法可將tensor、ndarray類型圖片轉換為PIL類型
from torch.utils.tensorboard import SummaryWriter
from PIL import Image
import cv2 as cv
import numpy as np
from torchvision import transformsimg_path = "G:/PyCharm/workspace/learning_pytorch/dataset/a/3.jpg"img = cv.imread(img_path)
type(img)#numpy.ndarrayPIL = transforms.ToPILImage()
PIL_img = PIL(img)
type(PIL_img)#PIL.Image.ImagePIL_img.show()#展示照片cv.imshow("img",img)#展示照片
cv.waitKey(0)
cv.destroyAllWindows()
四、Normalize類
看下文檔給的使用說明
Ctrl+P:顯示方法所需要的參數
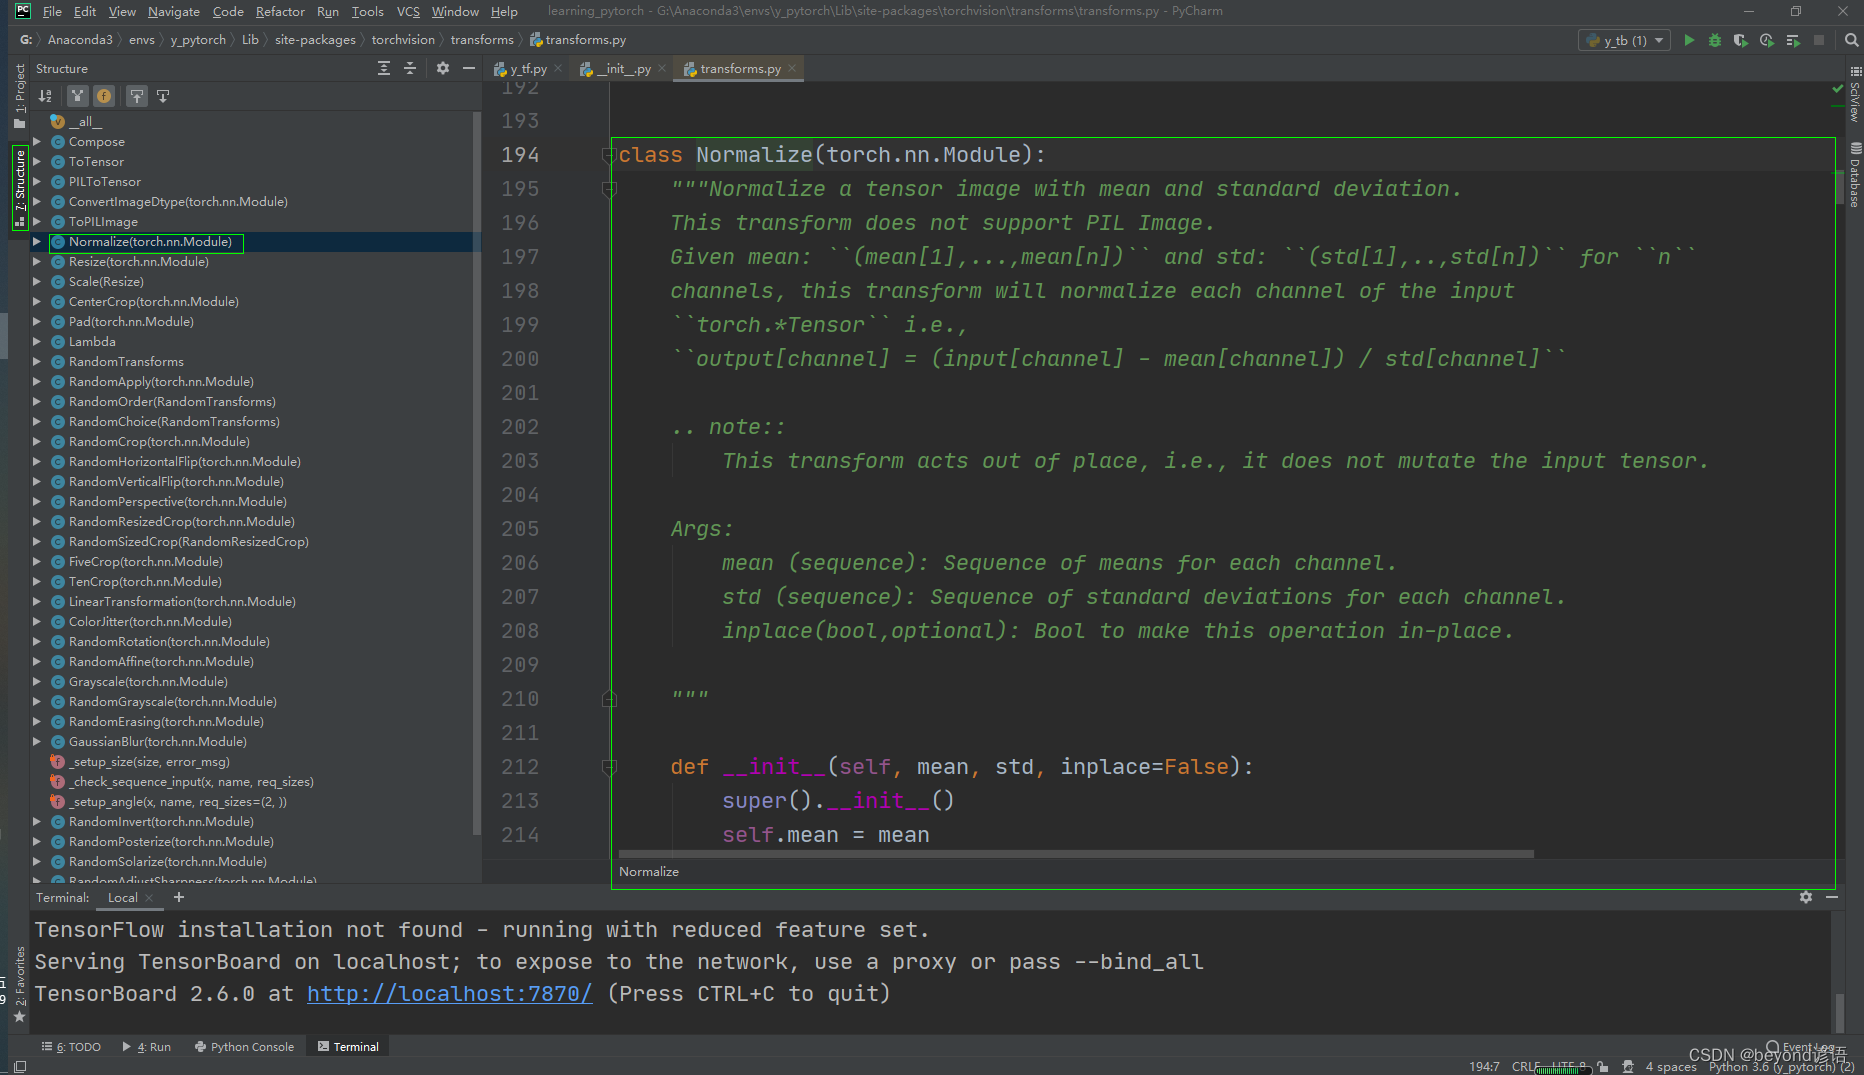
    """Normalize a tensor image with mean and standard deviation.
#用均值和標準差歸一化張量圖像,也就是歸一化操作This transform does not support PIL Image.Given mean: ``(mean[1],...,mean[n])`` and std: ``(std[1],..,std[n])`` for ``n``channels, this transform will normalize each channel of the input``torch.*Tensor`` i.e.,``output[channel] = (input[channel] - mean[channel]) / std[channel]``.. note::This transform acts out of place, i.e., it does not mutate the input tensor.Args:mean (sequence): Sequence of means for each channel.std (sequence): Sequence of standard deviations for each channel.inplace(bool,optional): Bool to make this operation in-place."""
使用要求:必須是tensor類型,由文檔介紹可得:
output[channel] = (input[channel] - mean[channel]) / std[channel]
from PIL import Image
from torch.utils.tensorboard import SummaryWriter
import cv2 as cv
import numpy as np
from torchvision import transformswrite = SummaryWriter("y_log")img_path = "dataset/b/6.jpg"img = cv.imread(img_path)
print(type(img))#<class 'numpy.ndarray'>
print(img.size)#61375
print(img.shape)#(375, 499, 3)trans_tensor = transforms.ToTensor()
img_tensor = trans_tensor(img)
print(type(img_tensor))#<class 'torch.Tensor'>print(img_tensor[0][0][0])#tensor(0.5255)
trans_normalize = transforms.Normalize([0.5, 0.5, 0.5], [0.5, 0.5, 0.5])
img_normalize = trans_normalize(img_tensor)
print(img_normalize[0][0][0])#tensor(0.0510)#公式:output[channel] = (input[channel] - mean[channel]) / std[channel]
#(0.5255-0.5)/0.5 = 0.051print(img_normalize.shape)#torch.Size([3, 375, 499])
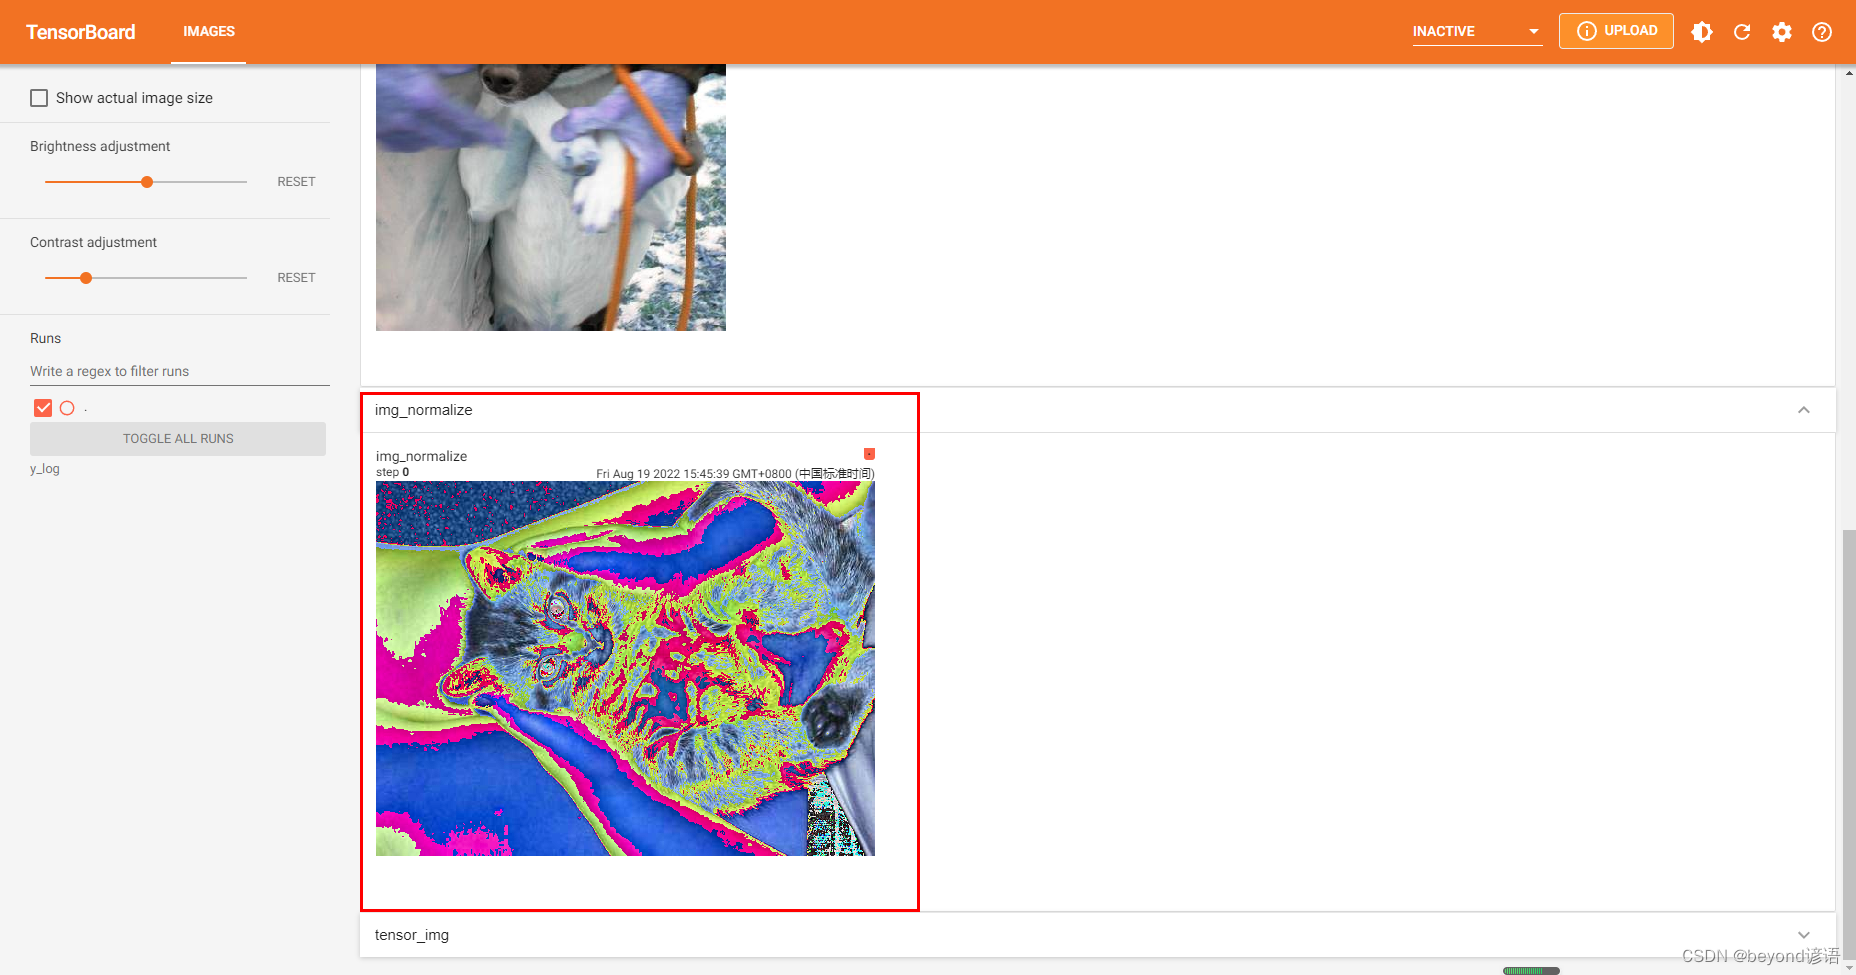
#shape符合add_image的要求(C,H,W),可直接傳入使用write.add_image("img_normalize",img_normalize)write.close()
在Terminal下運行tensorboard --logdir=y_log --port=2312,logdir為打開事件文件的路徑,port為指定端口打開;
通過指定端口2312進行打開tensorboard,若不設置port參數,默認通過6006端口進行打開。
點擊該鏈接或者復制鏈接到瀏覽器打開即可
五、Resize類
看下文檔給的使用說明
Ctrl+P:顯示方法所需要的參數
    """Resize the input image to the given size.
#將輸入圖像調整為給定大小,也就是對輸入圖像進行尺寸變換If the image is torch Tensor, it is expectedto have [..., H, W] shape, where ... means an arbitrary number of leading dimensions.. warning::The output image might be different depending on its type: when downsampling, the interpolation of PIL imagesand tensors is slightly different, because PIL applies antialiasing. This may lead to significant differencesin the performance of a network. Therefore, it is preferable to train and serve a model with the same inputtypes. See also below the ``antialias`` parameter, which can help making the output of PIL images and tensorscloser.Args:size (sequence or int): Desired output size. If size is a sequence like(h, w), output size will be matched to this. If size is an int,smaller edge of the image will be matched to this number.i.e, if height > width, then image will be rescaled to(size * height / width, size).
#需要給出要裁剪成的形狀(h,w),若只給一個數,則默認裁剪成一個正方形.. note::In torchscript mode size as single int is not supported, use a sequence of length 1: ``[size, ]``.interpolation (InterpolationMode): Desired interpolation enum defined by:class:`torchvision.transforms.InterpolationMode`. Default is ``InterpolationMode.BILINEAR``.If input is Tensor, only ``InterpolationMode.NEAREST``, ``InterpolationMode.BILINEAR`` and``InterpolationMode.BICUBIC`` are supported.For backward compatibility integer values (e.g. ``PIL.Image.NEAREST``) are still acceptable.max_size (int, optional): The maximum allowed for the longer edge ofthe resized image: if the longer edge of the image is greaterthan ``max_size`` after being resized according to ``size``, thenthe image is resized again so that the longer edge is equal to``max_size``. As a result, ``size`` might be overruled, i.e thesmaller edge may be shorter than ``size``. This is only supportedif ``size`` is an int (or a sequence of length 1 in torchscriptmode).antialias (bool, optional): antialias flag. If ``img`` is PIL Image, the flag is ignored and anti-aliasis always used. If ``img`` is Tensor, the flag is False by default and can be set to True for``InterpolationMode.BILINEAR`` only mode. This can help making the output for PIL images and tensorscloser... warning::There is no autodiff support for ``antialias=True`` option with input ``img`` as Tensor."""
輸入類型為PIL圖片,通過Resize轉換大小,再通過ToTensor轉換為tensor類型上傳tensorboard
from PIL import Image
from torch.utils.tensorboard import SummaryWriter
import cv2 as cv
import numpy as np
from torchvision import transformswrite = SummaryWriter("y_log")img_path = "dataset/b/6.jpg"img = Image.open(img_path)
print(type(img))#<class 'PIL.JpegImagePlugin.JpegImageFile'>
print(img.size)#(499, 375)   原始圖片的大小
trans_resize = transforms.Resize((300,300))
img_PIL_resize = trans_resize(img)#進行裁剪
print(img_PIL_resize)#<PIL.Image.Image image mode=RGB size=300x300 at 0x1FDDC07C9B0>  原圖像已經變成了(300,300),但還是PIL類型#要想上傳到tensorboard上,必須是tensor、numpy.array類型,這里通過ToTensor方法轉換為tensor
trans_tensor = transforms.ToTensor()
img_tensor = trans_tensor(img_PIL_resize)
print(type(img_tensor))#<class 'torch.Tensor'>write.add_image("img_PIL_resize",img_tensor)#默認從0開始write.close()
在Terminal下運行tensorboard --logdir=y_log --port=2312,logdir為打開事件文件的路徑,port為指定端口打開;
通過指定端口2312進行打開tensorboard,若不設置port參數,默認通過6006端口進行打開。
點擊該鏈接或者復制鏈接到瀏覽器打開即可
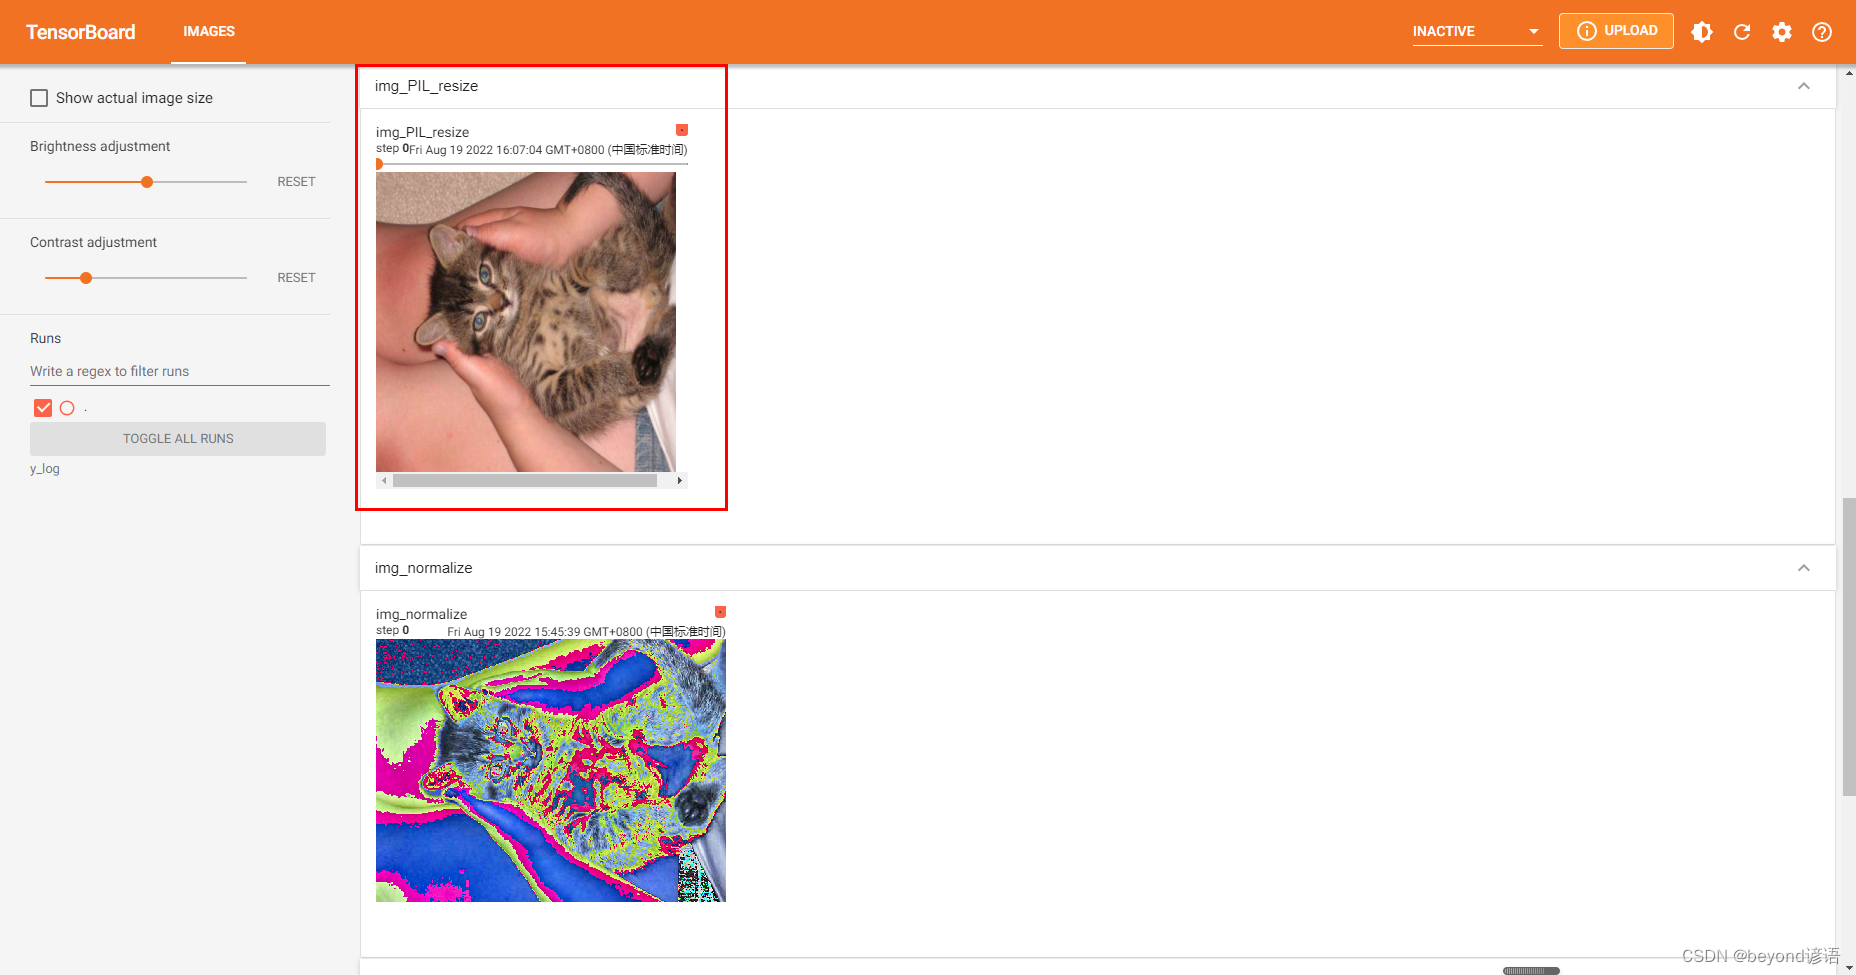
與下面的歸一化之后的圖像相比,大小很明顯發生了變化
六、Compose類
看下文檔給的使用說明
Ctrl+P:顯示方法所需要的參數
    """Composes several transforms together. This transform does not support torchscript.
#組合一些transforms一起使用Please, see the note below.Args:transforms (list of ``Transform`` objects): list of transforms to compose.Example:>>> transforms.Compose([>>>     transforms.CenterCrop(10),#先對圖片進行一次中心裁剪>>>     transforms.PILToTensor(),#再對圖片轉換為tensor>>>     transforms.ConvertImageDtype(torch.float),#之后再將圖像轉換為dtype,如果需要,縮放其值>>> ])#一個Compose可以實現多次的transforms對圖片進行操作.. note::In order to script the transformations, please use ``torch.nn.Sequential`` as below.>>> transforms = torch.nn.Sequential(>>>     transforms.CenterCrop(10),>>>     transforms.Normalize((0.485, 0.456, 0.406), (0.229, 0.224, 0.225)),>>> )>>> scripted_transforms = torch.jit.script(transforms)Make sure to use only scriptable transformations, i.e. that work with ``torch.Tensor``, does not require`lambda` functions or ``PIL.Image``."""
說白了就是組合多種transform操作
from PIL import Image
from torch.utils.tensorboard import SummaryWriter
import cv2 as cv
import numpy as np
from torchvision import transformswriter = SummaryWriter('y_log')img_path = "dataset/b/6.jpg"img = Image.open(img_path)
print(type(img))#<class 'PIL.JpegImagePlugin.JpegImageFile'>
print(img.size)#(499, 375) 原始圖片的大小
#①剪切尺寸
trans_resize = transforms.Resize((300,300))
img_PIL_resize = trans_resize(img)#進行裁剪
print(img_PIL_resize)#<PIL.Image.Image image mode=RGB size=300x300 at 0x1FDDC07C9B0> 原圖像已經變成了(300,300),但還是PIL類型#②PIL轉Tensor
trans_tensor = transforms.ToTensor()trans_compose = transforms.Compose([trans_resize,trans_tensor])
#Compose參數都是transform對象,且第一個輸出必須滿足第二個輸入
#trans_resize為Resize對象,最后輸出為PIL類型
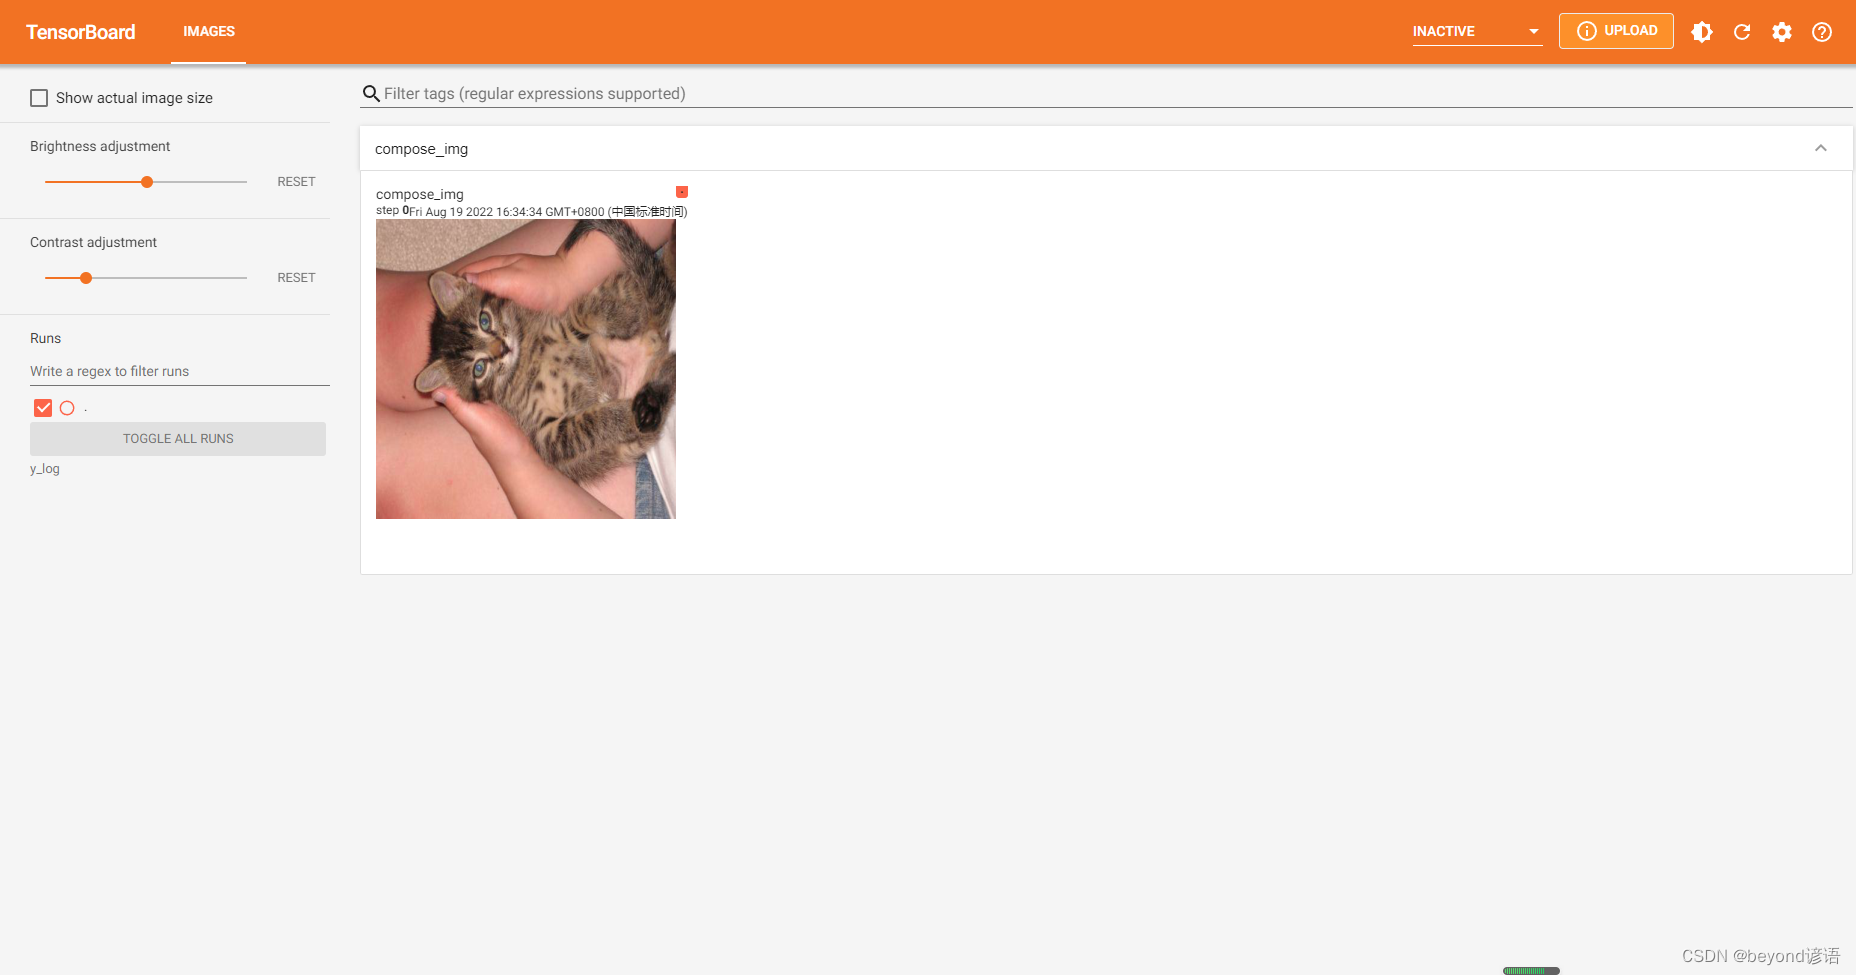
#trans_tensor為ToTensor對象,輸入為PIL,輸出為tensorimg_all = trans_compose(img)
#因為最后輸出為tensor,故才可以通過add_image上傳至tensorboardwriter.add_image("compose_img",img_all)
writer.close()
在Terminal下運行tensorboard --logdir=y_log --port=2312,logdir為打開事件文件的路徑,port為指定端口打開;
通過指定端口2312進行打開tensorboard,若不設置port參數,默認通過6006端口進行打開。
點擊該鏈接或者復制鏈接到瀏覽器打開即可,該操作其實就是將Resize和ToTensor進行了整合使用而已
八、RandomCrop類
看下文檔給的使用說明
Ctrl+P:顯示方法所需要的參數

    """Crop the given image at a random location.If the image is torch Tensor, it is expectedto have [..., H, W] shape, where ... means an arbitrary number of leading dimensions,but if non-constant padding is used, the input is expected to have at most 2 leading dimensionsArgs:size (sequence or int): Desired output size of the crop. If size is anint instead of sequence like (h, w), a square crop (size, size) ismade. If provided a sequence of length 1, it will be interpreted as (size[0], size[0]).padding (int or sequence, optional): Optional padding on each borderof the image. Default is None. If a single int is provided thisis used to pad all borders. If sequence of length 2 is provided this is the paddingon left/right and top/bottom respectively. If a sequence of length 4 is providedthis is the padding for the left, top, right and bottom borders respectively.
#需要給出要裁剪成的形狀(h,w),若只給一個數,則默認裁剪成一個正方形.. note::In torchscript mode padding as single int is not supported, use a sequence oflength 1: ``[padding, ]``.pad_if_needed (boolean): It will pad the image if smaller than thedesired size to avoid raising an exception. Since cropping is doneafter padding, the padding seems to be done at a random offset.fill (number or str or tuple): Pixel fill value for constant fill. Default is 0. If a tuple oflength 3, it is used to fill R, G, B channels respectively.This value is only used when the padding_mode is constant.Only number is supported for torch Tensor.Only int or str or tuple value is supported for PIL Image.padding_mode (str): Type of padding. Should be: constant, edge, reflect or symmetric.Default is constant.- constant: pads with a constant value, this value is specified with fill- edge: pads with the last value at the edge of the image.If input a 5D torch Tensor, the last 3 dimensions will be padded instead of the last 2- reflect: pads with reflection of image without repeating the last value on the edge.For example, padding [1, 2, 3, 4] with 2 elements on both sides in reflect modewill result in [3, 2, 1, 2, 3, 4, 3, 2]- symmetric: pads with reflection of image repeating the last value on the edge.For example, padding [1, 2, 3, 4] with 2 elements on both sides in symmetric modewill result in [2, 1, 1, 2, 3, 4, 4, 3]"""
說白了就是隨機對圖片進行裁剪
from PIL import Image
from torch.utils.tensorboard import SummaryWriter
import cv2 as cv
import numpy as np
from torchvision import transformswriter = SummaryWriter('y_log')img_path = "dataset/b/6.jpg"img = Image.open(img_path)
print(type(img))#<class 'PIL.JpegImagePlugin.JpegImageFile'>
print(img.size)#(499, 375) 原始圖片的大小
#①隨機剪切尺寸
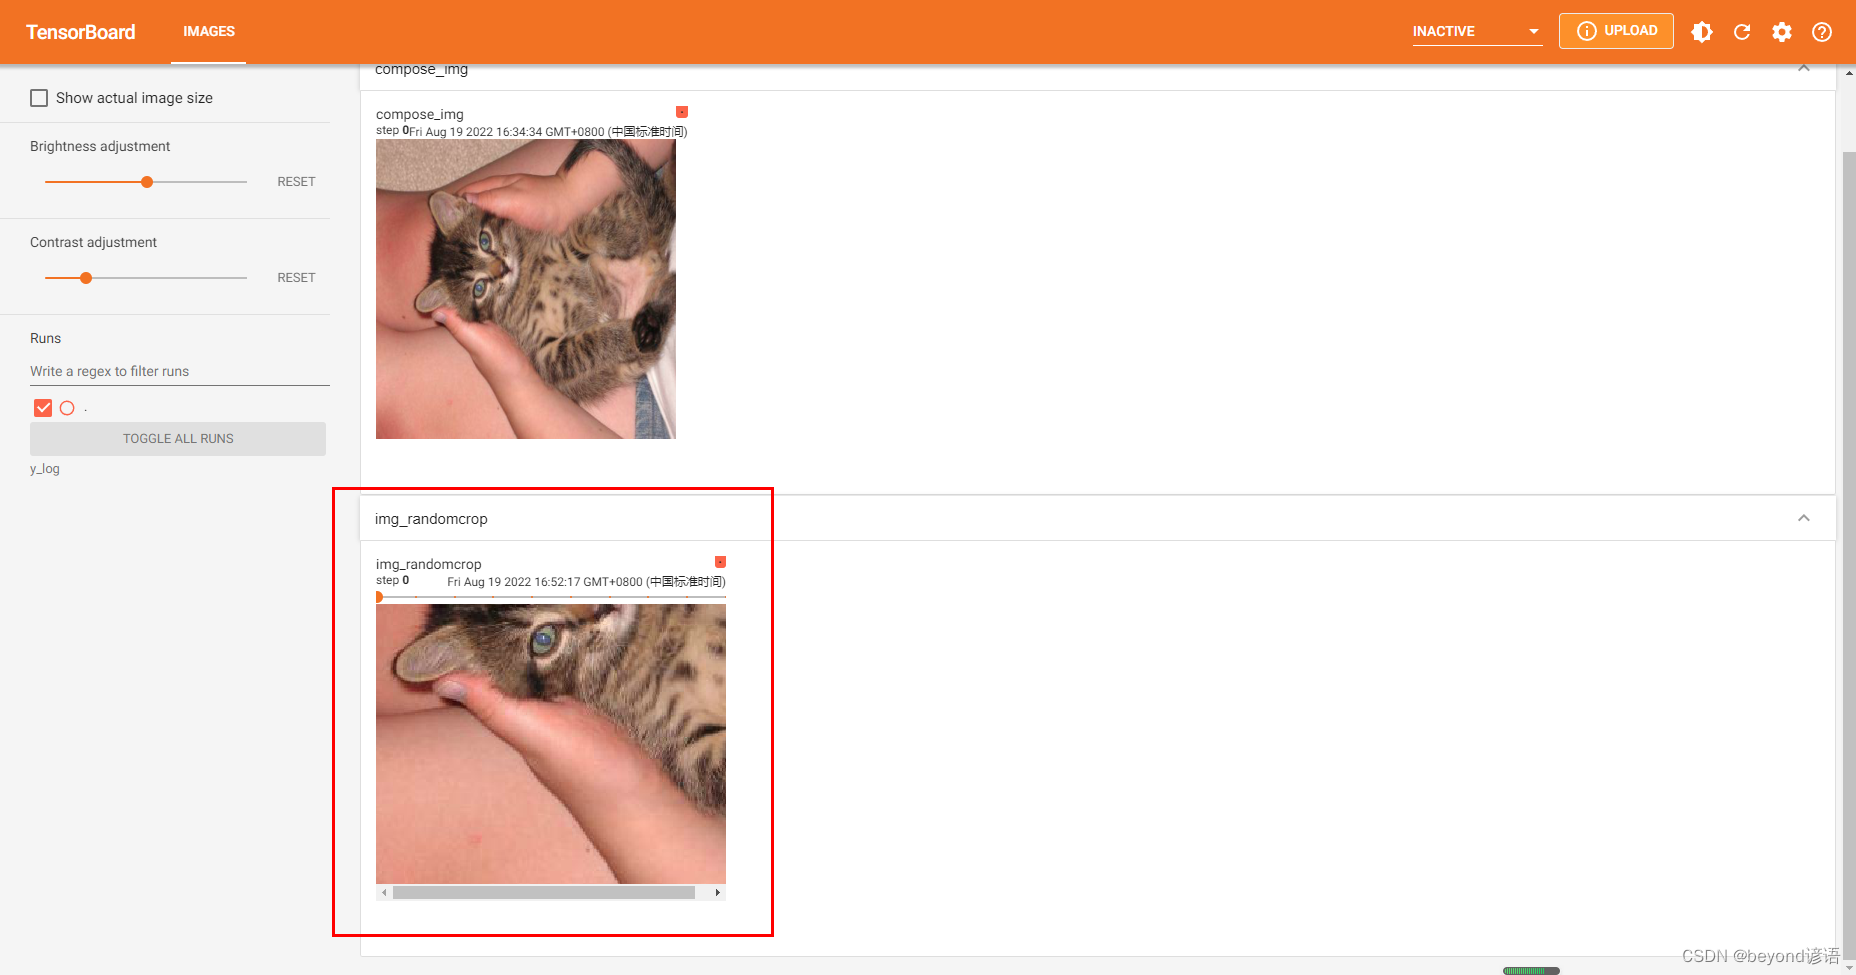
trans_random = transforms.RandomCrop((200,250))#(h,w)
img_PIL_random = trans_random(img)#隨機進行裁剪
print(img_PIL_random)#<PIL.Image.Image image mode=RGB size=250,200 at 0x1FDDC07C9B0>
#PIL輸出為(w,h),即原圖像已經變成了(h,w),(200,250),但還是PIL類型#②PIL轉Tensor
trans_tensor = transforms.ToTensor()trans_compose = transforms.Compose([trans_random,trans_tensor])
#Compose參數都是transform對象,且第一個輸出必須滿足第二個輸入
#trans_resize為Resize對象,最后輸出為PIL類型
#trans_tensor為ToTensor對象,輸入為PIL,輸出為tensorfor i in range(10):img_randomcrop = trans_compose(img)# 因為最后輸出為tensor,故才可以通過add_image上傳至tensorboardwriter.add_image("img_randomcrop",img_randomcrop,i)writer.close()
在Terminal下運行tensorboard --logdir=y_log --port=2312,logdir為打開事件文件的路徑,port為指定端口打開;
通過指定端口2312進行打開tensorboard,若不設置port參數,默認通過6006端口進行打開。
點擊該鏈接或者復制鏈接到瀏覽器打開即可
七、CenterCrop類
看下文檔給的使用說明
Ctrl+P:顯示方法所需要的參數
    """Crops the given image at the center.
#對圖像進行中心裁剪If the image is torch Tensor, it is expectedto have [..., H, W] shape, where ... means an arbitrary number of leading dimensions.If image size is smaller than output size along any edge, image is padded with 0 and then center cropped.Args:size (sequence or int): Desired output size of the crop. If size is anint instead of sequence like (h, w), a square crop (size, size) ismade. If provided a sequence of length 1, it will be interpreted as (size[0], size[0])."""
說白了就是對圖像進行中心裁剪
from PIL import Image
from torch.utils.tensorboard import SummaryWriter
import cv2 as cv
import numpy as np
from torchvision import transformswriter = SummaryWriter('y_log')img_path = "dataset/b/6.jpg"img = Image.open(img_path)
print(type(img))#<class 'PIL.JpegImagePlugin.JpegImageFile'>
print(img.size)#(499, 375)   原始圖片的大小
#①中間剪切尺寸
trans_center = transforms.CenterCrop((200,250))#(h,w)
img_PIL_center = trans_center(img)#隨機進行裁剪
print(img_PIL_center)#<PIL.Image.Image image mode=RGB size=250,200 at 0x1FDDC07C9B0>
#PIL輸出為(w,h),即原圖像已經變成了(h,w),(200,250),但還是PIL類型#②PIL轉Tensor
trans_tensor = transforms.ToTensor()trans_compose = transforms.Compose([trans_center,trans_tensor])
#Compose參數都是transform對象,且第一個輸出必須滿足第二個輸入
#trans_resize為Resize對象,最后輸出為PIL類型
#trans_tensor為ToTensor對象,輸入為PIL,輸出為tensorimg_centercrop = trans_compose(img)writer.add_image("img_centercrop",img_centercrop)
writer.close()
在Terminal下運行tensorboard --logdir=y_log --port=2312,logdir為打開事件文件的路徑,port為指定端口打開;
通過指定端口2312進行打開tensorboard,若不設置port參數,默認通過6006端口進行打開。
點擊該鏈接或者復制鏈接到瀏覽器打開即可


)


:從線程返回數據的兩種方法)
)


