
t30智能插座怎么設置
If you like the idea of smart outlets, but wish you had one with more than just one receptacle on it, the ConnectSense Smart Outlet is worth looking into. Here’s how to set it up and instantly get double the fun.
如果您喜歡智能插座的想法,但是希望您擁有一個僅帶有一個插座的插座,那么值得研究一下ConnectSense智能插座。 設置方法并立即獲得雙倍樂趣。
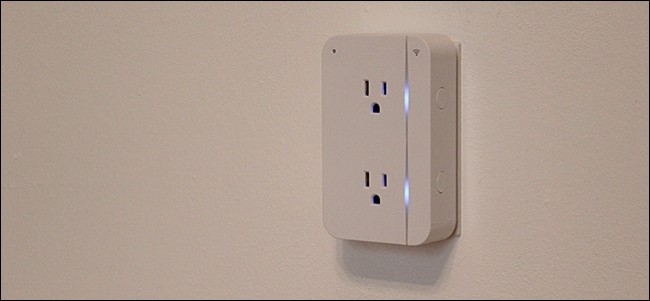
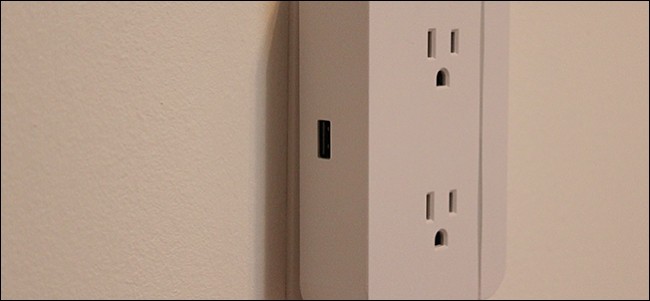
While ConnectSense isn’t as widely known of a brand in the smarthome market, its Smart Outlet deserves a lot of credit for its two-receptacle setup and integrated 2.4-amp USB port. Most other smart switches only have one outlet to plug stuff into and no USB ports whatsoever, including the popular Belkin WeMo Switch.
盡管ConnectSense在智能家居市場中并不是一個廣為人知的品牌,但其智能插座的兩插座設置和集成的2.4安培USB端口值得稱贊。 大多數其他智能交換機只有一個插座可以插入東西,而沒有USB端口,包括流行的Belkin WeMo Switch 。
Of course, the $80 price tag might scare you away, but most one-receptacle smart outlets are around $40, so if you consider this has two outlets and a USB port, you’re actually getting more for your money.
當然, 80美元的價格標簽可能會嚇到你,但是大多數單插座智能插座的價格都在40美元左右,因此,如果您認為這有兩個插座和一個USB端口,您實際上會得到更多的錢。
Sadly, though, it doesn’t work with?Android devices, nor does it integrate with other smarthome products like the Amazon Echo. But it does support?HomeKit, so if you’re an iOS user that uses HomeKit as the center of your smart home, ConnectSense will fit in nicely.?Here’s?how to set it up and begin using it in no time.
可惜的是,它不能與Android設備一起使用,也不能與其他智能家居產品(如Amazon Echo)集成。 但是它確實支持HomeKit,因此,如果您是將HomeKit用作智能家居中心的iOS用戶,ConnectSense將非常適合。 這是設置方法并立即開始使用的方法。
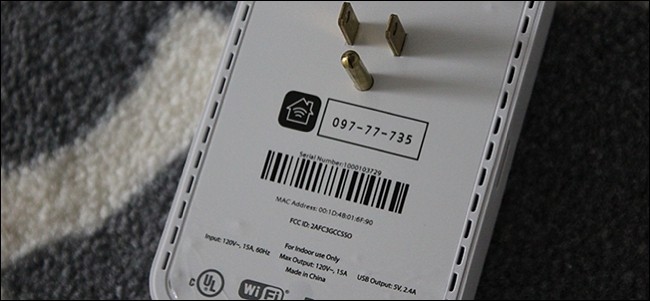
The first thing you’ll want to do–before you even plug the device in–is to write down the HomeKit code that’s on the back of the switch, since you’ll need this later. The switch does come with a card that you can scan, but it’s way too easy to lose, so it’s always nice to have a backup.
在插入設備之前,您要做的第一件事就是寫下位于交換機背面的HomeKit代碼,因為稍后將需要它。 交換機確實附帶有可以掃描的卡,但是丟失起來太容易了,因此備份總是很不錯的。
Next, after you have written down the HomeKit code, go ahead and plug the Smart Outlet into a free outlet in your house and download the ConnectSense app from the iTunes App Store.
接下來,在寫下HomeKit代碼之后,繼續并將Smart Outlet插入家中的免費插座,然后從iTunes App Store下載ConnectSense應用程序。
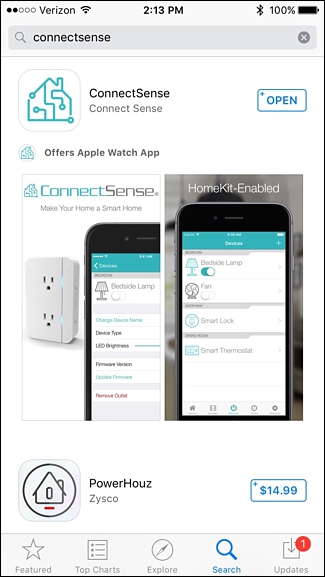
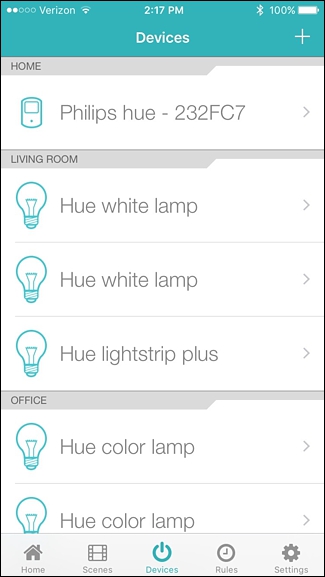
Go ahead and open up the app after it’s installed. If you have other HomeKit-supported devices set up (like, say, Philips Hue lights), they might show up automatically in the ConnectSense app.
在安裝后繼續打開該應用程序。 如果您設置了其他HomeKit支持的設備(例如Philips Hue燈),它們可能會自動顯示在ConnectSense應用程序中。
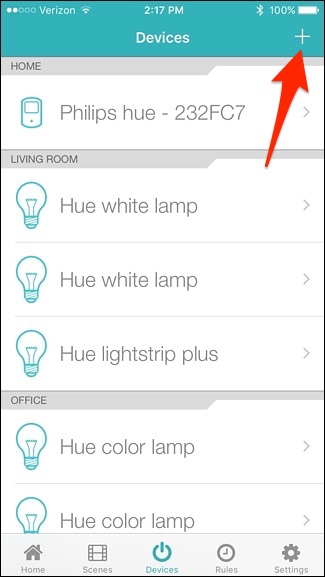
Tap on the “+” button in the top-right corner of the screen.
點擊屏幕右上角的“ +”按鈕。
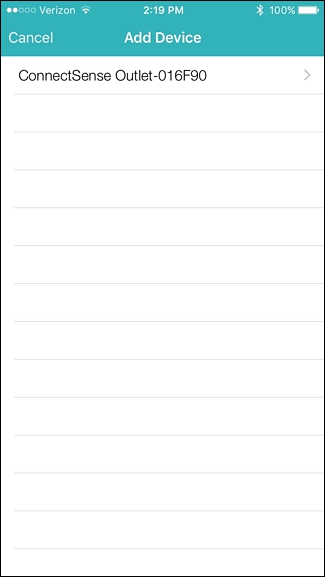
The ConnectSense Smart Outlet will appear under “Add Device”. Go ahead and select it.
ConnectSense智能插座將出現在“添加設備”下。 繼續選擇它。
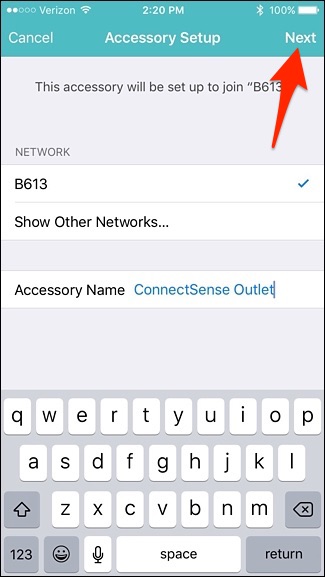
On the next screen, you’ll confirm the Wi-Fi network that the Smart Outlet will connect to, and you can also change the name of the device in the “Accessory Name” box and typing in a new, custom name for it.
在下一個屏幕上,您將確認智能插座將連接的Wi-Fi網絡,也可以在“附件名稱”框中更改設備的名稱,并為其輸入新的自定義名稱。
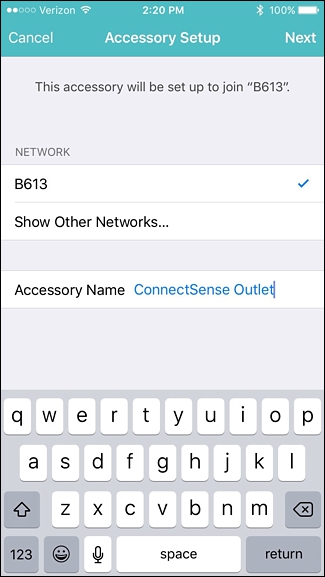
Tap on “Next” in the top-right corner when you’re done with that.
完成后,點擊右上角的“下一步”。
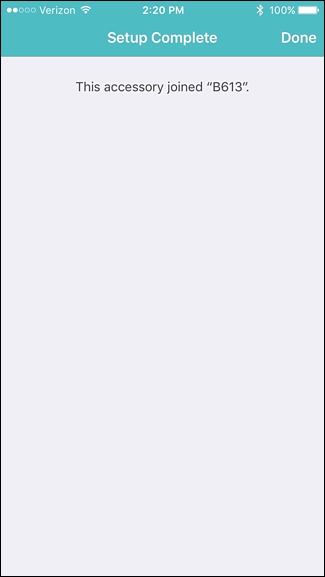
The Smart Outlet will then connect to your Wi-Fi network–no need to enter the Wi-Fi?password or anything.
然后,智能插座將連接到您的Wi-Fi網絡-無需輸入Wi-Fi密碼或其他任何內容。

When it’s finished, it will say that the device successfully joined your Wi-Fi network. Tap on “Done” in the top-right corner.
完成后,將說明該設備已成功加入您的Wi-Fi網絡。 點擊右上角的“完成”。
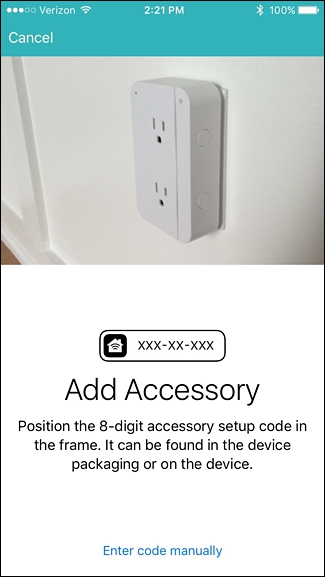
Next, you’ll need to scan or enter in the HomeKit code that you wrote down earlier. Again, if you have the included card that came with the switch, you can quickly just scan that, but if not, tap on “Enter code manually” at the bottom.
接下來,您需要掃描或輸入您之前寫下的HomeKit代碼。 同樣,如果您具有交換機隨附的隨附卡,則可以快速對其進行掃描,但是如果沒有,請點擊底部的“手動輸入代碼”。
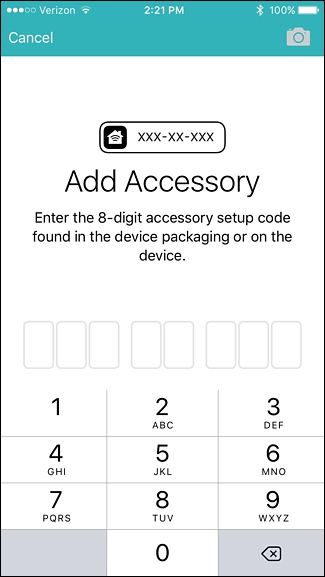
Enter in the HomeKit code and it will automatically advance you to the next screen when you finish filling it in.
輸入HomeKit代碼,完成填寫后,它將自動帶您進入下一個屏幕。
From there, you’ll be taken to the final setup screen.
從那里,您將進入最終設置屏幕。
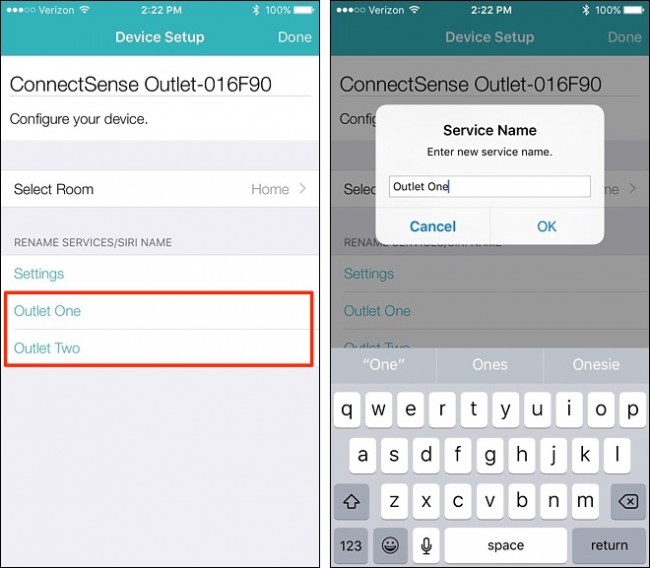
Where it says “Outlet One” and “Outlet Two”, you can rename them by tapping on them and entering in a custom name for each receptacle.
如果顯示“插座一”和“插座二”,則可以通過點擊它們并為每個插座輸入自定義名稱來重命名它們。
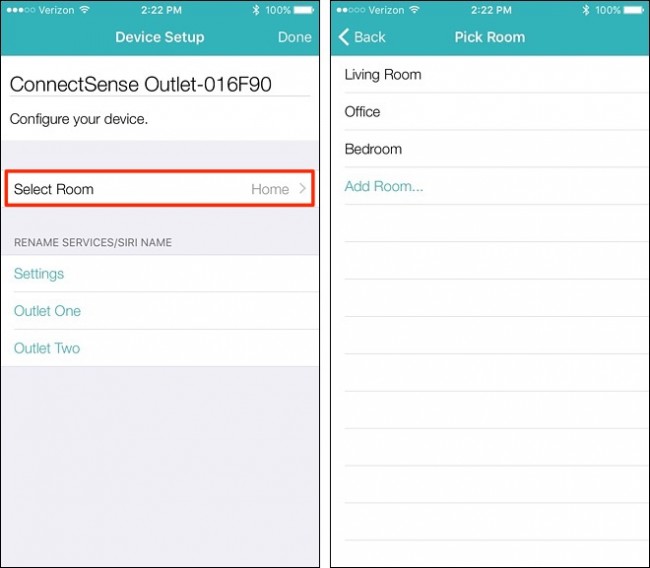
You can also select which room the outlet is in by tapping on “Select Room” (only if you have rooms set up in your HomeKit configuration).?After you’re finished, tap on “Done” in the top-right corner.
您還可以通過點擊“選擇房間”來選擇插座所在的房間(僅當您在HomeKit配置中設置了房間時)。 完成后,點擊右上角的“完成”。
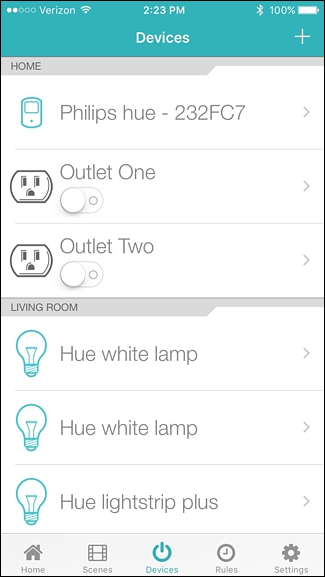
The Smart Outlet will now appear on the main screen of the app and you can now toggle each receptacle on and off individually.
現在,智能插座將出現在應用程序的主屏幕上,您現在可以分別打開和關閉每個插座。
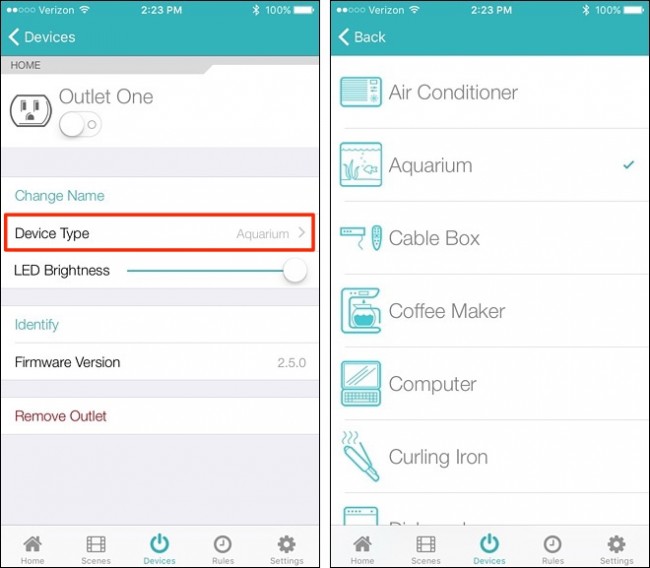
Tapping on one of the outlets will bring up more settings, where you can change the icon under “Device Type” and adjust the brightness of the LED status light on the outlet device itself.
輕按其中一個插座將顯示更多設置,您可以在其中更改“設備類型”下的圖標,并調整插座設備本身上的LED狀態燈的亮度。
The ConnectSense Smart Outlet is perhaps one of the easiest smart switches to set up. It’s certainly a lot easier and quicker than the Belkin WeMo Switch, and its two individually-controlled receptacles make it a one-of-a-kind device to add to your smart home arsenal.
ConnectSense智能插座可能是最容易設置的智能交換機之一。 它肯定比Belkin WeMo Switch更加方便快捷,并且它的兩個獨立控制的插座使其成為一種獨一無二的設備,可以添加到您的智能家居庫中。
翻譯自: https://www.howtogeek.com/253675/how-to-set-up-the-connectsense-smart-outlet/
t30智能插座怎么設置


 文章列表接口分頁、過濾、搜索、排序)

無法進入tt1~tt6(NVIDIA驅動安裝相關-黑屏,login loop,分辨率)...)
打開office2010總是在配置進度)


)


