figma設計
Putting together a design system may seem like an unnecessary hassle. It’s often easier to jump straight into designing things without having to worry about styles, components, or libraries. Some might even argue that when it comes to smaller projects, creating a design system takes nearly as much time as designing the entire project, so why bother?
組合設計系統似乎是不必要的麻煩。 直接進入設計事物通常更容易,而不必擔心樣式,組件或庫。 甚至有人可能會爭辯說,當涉及到較小的項目時,創建設計系統所花費的時間幾乎與設計整個項目所花費的時間一樣多,那么為什么要打擾?
While it’s true creating a design system is an additional step in the design process, what’s also true is that, regardless of the size of the project, the first version of your project rarely gets accepted by the client. Depending on the size of the project as well as the severity of the changes, introducing them could take a lot of time.
創建設計系統確實是設計過程中的附加步驟,但同樣重要的是,無論項目大小如何,客戶都很少接受項目的第一個版本。 根據項目的大小以及變更的嚴重性,引入這些變更可能會花費很多時間。
So whether you’re designing huge platforms or small e-commerce websites, design systems could save you a lot of time in the long run. Instead of going through each and every view making sure that you’ve applied the new colors or fonts, you could just take a look at your styles and components, introduce all the necessary changes in a few clicks and automatically populate them to the entire project.
因此,無論您是設計大型平臺還是小型電子商務網站,從長遠來看,設計系統都可以為您節省大量時間。 無需遍歷每個視圖來確保已應用新的顏色或字體,而只需查看樣式和組件,單擊幾下即可進行所有必要的更改,然后自動將其填充到整個項目中。
Not only does this save you time, but it also allows for more coherent design practices as you limit yourself to only using predefined styles and components.
這不僅可以節省您的時間,而且由于您僅使用預定義的樣式和組件,因此還可以實現更一致的設計實踐。
Figma gives you the tools to create a simple, easily reusable design system. There are a few ways you could approach this, and I’m going to try and cover all of them. I’d also like to take you through the list of things you’ll need to build your very own basic design system, which you can then modify and grow to best suit your project’s needs.
Figma為您提供了創建簡單,易于重用的設計系統的工具。 您可以通過幾種方法來解決這個問題,我將嘗試涵蓋所有這些方法。 我還要向您介紹構建自己的基本設計系統所需的事項,然后可以對其進行修改和擴展,使其最適合您的項目需求。
Technically you could use one of the available ready-made design systems for Figma, but I’d argue this is not a very good idea unless you’re trying to create something in a hurry. I believe it’s always best to put in the time to build your project from the ground up. This will allow you to better understand how each component is created and solve any issues that may arise while working with the design system.
從技術上講,您可以使用Figma可用的現成的設計系統之一,但是我認為這不是一個好主意,除非您要急著創建一些東西。 我認為,最好花時間從頭開始構建您的項目。 這將使您更好地了解如何創建每個組件并解決在使用設計系統時可能出現的任何問題。
Sometimes it can be hard to create a design system without seeing the bigger picture. It’s a good idea to base your design system around an already finished project.
有時,如果不看大圖就很難創建設計系統。 將您的設計系統基于已經完成的項目是一個好主意。
The first and most important thing is creating a proper grid for your design system. Depending on what kind of framework you’ll be working with, you could be using different types of grids. The one I personally use most often is the Bootstrap grid. I like to set up my grid to not only help me space around objects horizontally but also vertically. I’m not going to go into why you should be using a grid, as that’s a subject for another article.
首先也是最重要的事情是為您的設計系統創建適當的網格。 根據您將使用的框架類型,可能會使用不同類型的網格。 我個人最常使用的一個是Bootstrap網格。 我喜歡設置網格,不僅可以幫助我水平放置對象,而且可以垂直放置對象。 我不會討論為什么要使用網格,因為這是另一篇文章的主題。

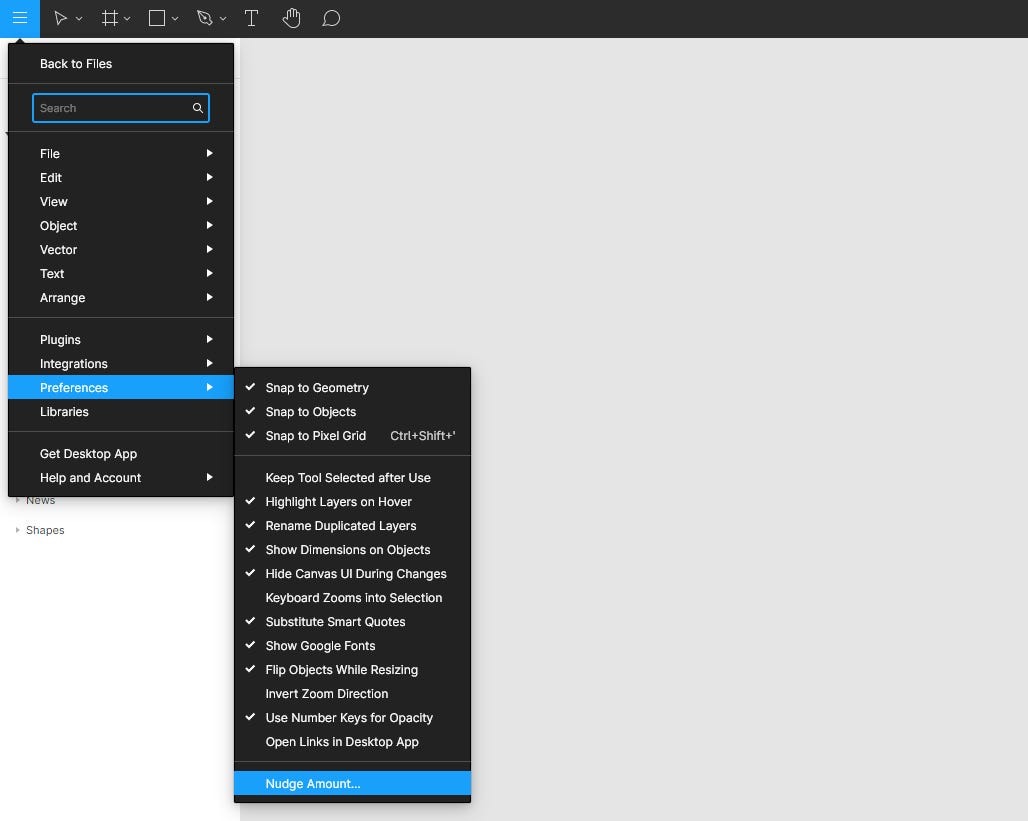
You should turn thus created grid into a style. Now if you haven’t done that already, it’s also a good idea to go into the Figma hamburger menu > Preferences > Nudge Amount and set the values to 1 and 8. This way your keyboard arrow keys in combination with the shift key will allow you to move the objects around while sticking to the grid you’ve just created.
您應該將這樣創建的網格轉換為樣式。 現在,如果您還沒有這樣做,那么進入Figma漢堡菜單>“偏好設置”>“微移數量”并將值設置為1和8也是一個好主意。這樣,您的鍵盤箭頭鍵與Shift鍵的組合將允許您可以在移動對象的同時保持剛創建的網格的位置。
The next step is to create a bunch of font styles that we’re going to be using in our project. It’s important to remember to cover all the basics such as several styles for headlines, paragraph texts, hints, captions, and such. Do as many as the kind of projects you’re involved with may necessitate. You might think to yourself: “Hey, why not have the same style for buttons and menus since they use the same font?” Well, you might find yourself in a bit of a pickle if it turns out that you only need to change the font size for your menu elements at a later stage of your project.
下一步是創建將在項目中使用的一堆字體樣式。 重要的是要記住涵蓋所有基礎知識,例如標題的多種樣式,段落文本,提示,標題等。 盡可能多地參與您需要參與的項目。 您可能會想:“嘿,為什么按鈕和菜單使用相同的字體卻沒有相同的樣式?” 好吧,如果事實證明您只需要在項目的稍后階段更改菜單元素的字體大小,您可能會感到有點煩。

I like to keep all my font styles displayed in a frame, so I know whether they play well together or not. This kind of setup will be necessary if you decide to duplicate your design system instead of using it as a library for your project, but I’ll get back to that later. Generally this amount of styles should be enough for any kind of average-sized website with a decent amount of text in it.
我喜歡將所有字體樣式都顯示在一個框架中,因此我知道它們是否可以很好地協同工作。 如果您決定復制設計系統而不是將其用作項目的庫,則必須進行這種設置,但是稍后再講。 通常,對于任何類型的帶有中等數量文本的中等大小的網站,此樣式數量應足夠。
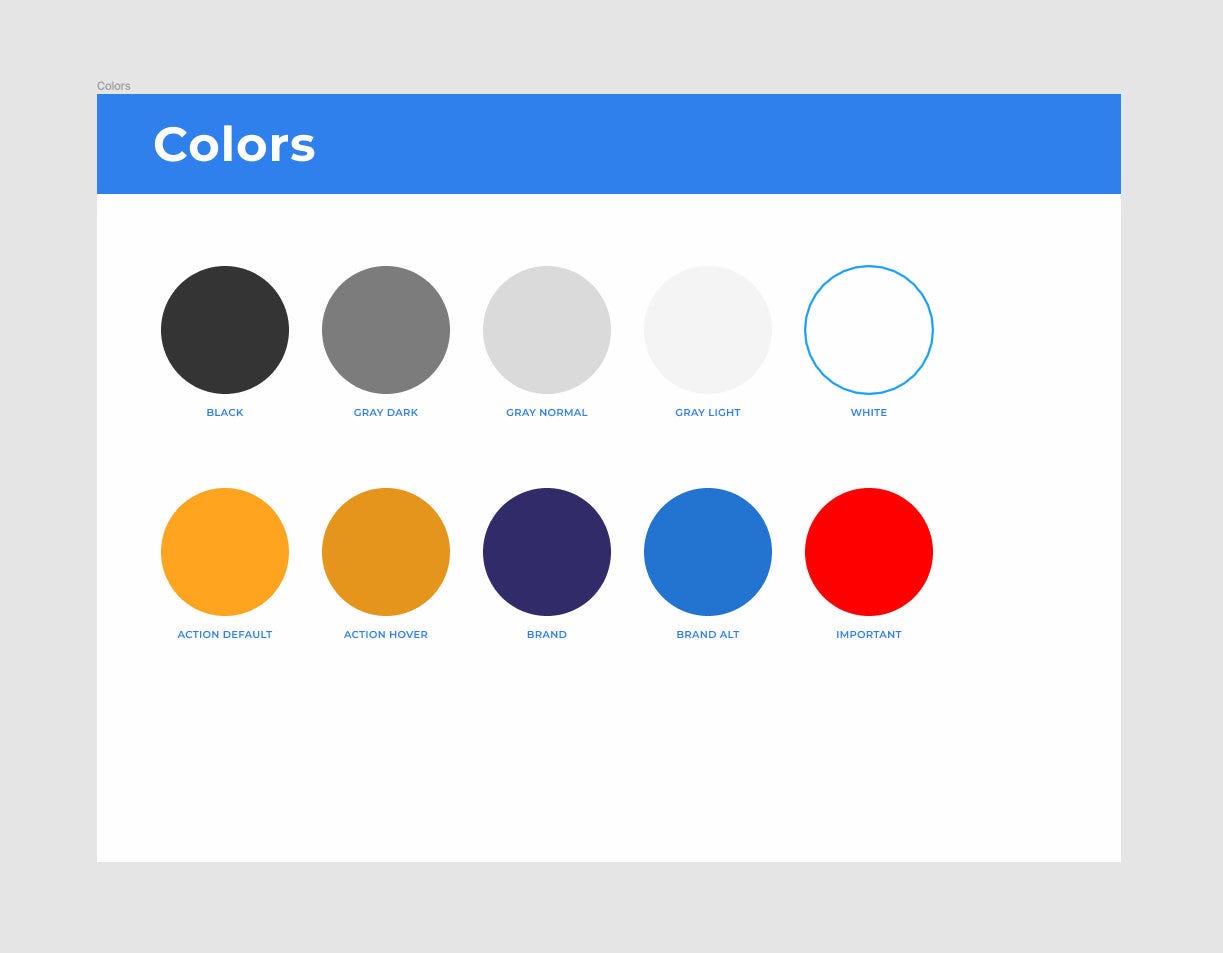
When it comes to colors I usually define styles for the brand colors, the action color, and some grays. You might want to define styles for important, warning, success, error messages, and such as well. Dealing with a strictly defined palette makes not only the design process but also the hand-off much easier.
當談到顏色時,我通常會為品牌顏色,動作顏色和一些灰色定義樣式。 您可能想為重要,警告,成功,錯誤消息等定義樣式。 處理嚴格定義的調色板不僅使設計過程變得容易,而且使交接變得更加容易。
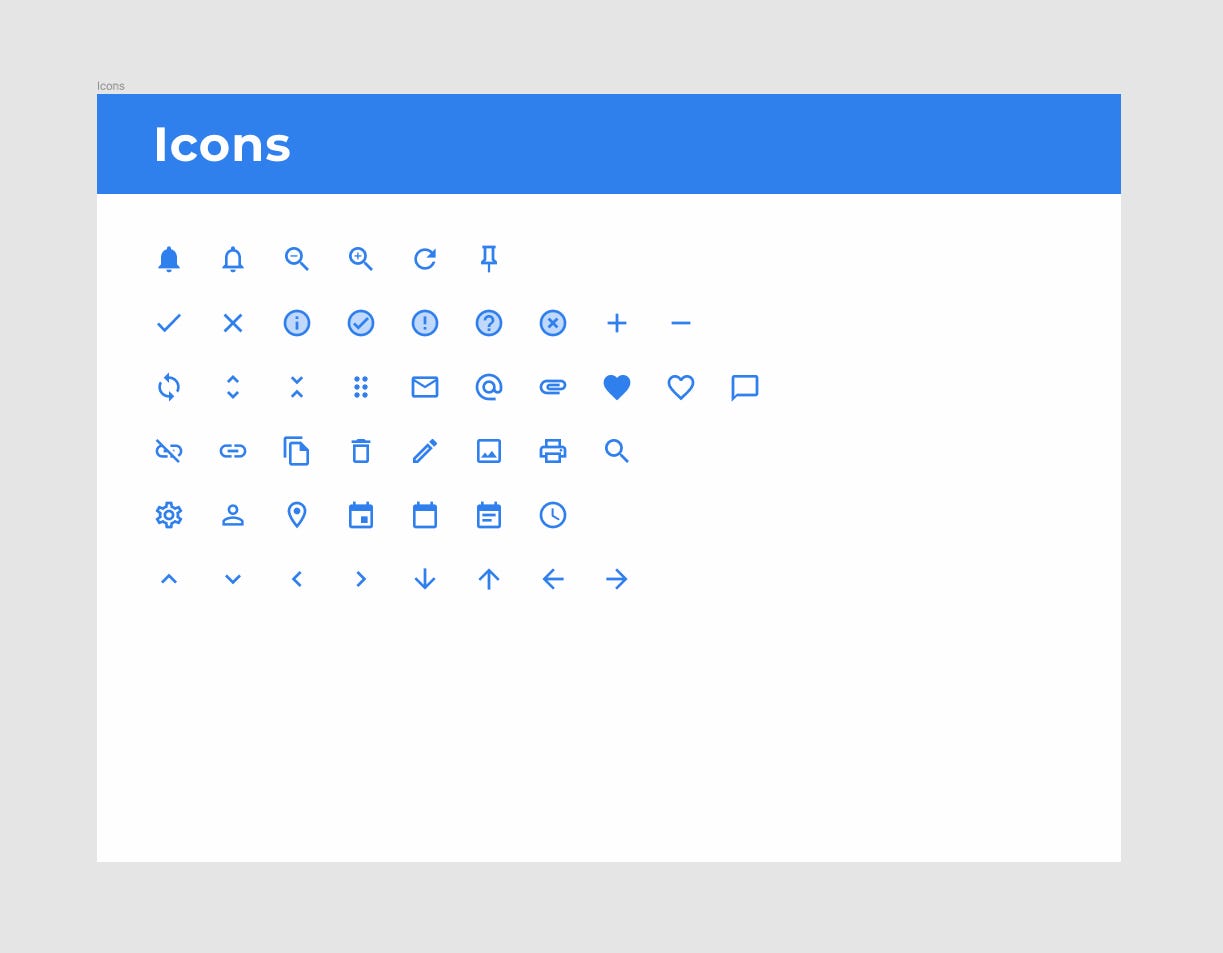
A basic set of often-used icons is also a good idea. I’ve used Google’s Material icons for this example. Even if you‘re tasked with designing your own set you can use these as placeholders in early mockups that are easy to replace at a later time.
一組基本的常用圖標也是一個好主意。 在此示例中,我使用了Google的“材質”圖標。 即使您要設計自己的集合,也可以在早期的模型中將它們用作占位符,以便以后替換。
Even though there’s a variety of plugins that can automatically generate content for you such as avatars or images, I prefer to create a predefined set of images or avatars as styles, to retain coherence in case I decide to use them as placeholders.
即使有多種插件可以自動為您生成內容(例如頭像或圖像),我還是希望創建一組預定義的圖像或頭像作為樣式,以保持連貫性,以防萬一我決定將它們用作占位符。
It’s not very intuitive, but Figma lets you set up images as color styles that you can later use like any normal color style — to fill a given object using a predefined set of characteristics. What’s even more interesting is that objects can have a lot of fill layers within themselves that interact with each other (this also applies to strokes, effects and so on) and so a group of fill layers all within a single object could be defined as an easily modifiable style. Fill layers can also be moved to front or back and copied between objects. This is an awesome feature that not a lot of people know about.
它不是很直觀,但是Figma允許您將圖像設置為顏色樣式,以后可以像任何常規顏色樣式一樣使用-使用一組預定義的特征填充給定的對象。 更有意思的是,對象內部可以具有很多相互交互的填充層(這也適用于筆觸,效果等),因此可以將單個對象內的一組填充層定義為易于修改的樣式。 填充層也可以移到前面或后面,并在對象之間復制。 這是一個很棒的功能,鮮為人??知。

You can of course achieve similar effects by setting up images as components, but you can’t use components as fills.
通過將圖像設置為組件,您當然可以達到類似的效果,但是不能將組件用作填充。
The last step is to create some shadows for your project. For a small design system I wouldn’t bother with an entire complex elevation system, just a couple of different shadow styles should be enough.
最后一步是為您的項目創建一些陰影。 對于小型設計系統,我不會理會整個復雜的高程系統,只需幾個不同的陰影樣式就足夠了。

Once you have all the styles set up this way it’s time to start putting together some components.
一旦以這種方式設置了所有樣式,就可以開始組合一些組件了。
Before Auto Layout there was a whole different approach to creating buttons. You’d start with defining shape components that would then serve as button backgrounds through using appropriate constraints. You’d use these shapes across all your components so that if you decided to change your corner-radius, this change would affect all your buttons, images, input fields, and so on. While this technique still has its merits and can still be used in some situations, it won’t work with Figma’s Auto Layout feature.
在“自動布局”之前,有一種完全不同的方法來創建按鈕。 您將從定義形狀組件開始,然后通過使用適當的約束將其用作按鈕背景。 您將在所有組件中使用這些形狀,以便如果決定更改角半徑,則此更改將影響所有按鈕,圖像,輸入字段等。 盡管此技術仍然有其優點,并且仍可以在某些情況下使用,但它不適用于Figma的“自動布局”功能。
Auto Layout is an amazing feature, but in the case of buttons it’s not always the best solution. Sometimes you need to size your buttons according to a grid. Some of the projects I’ve worked on necessitated both, standard and Auto Layout buttons. Some of them could do without Auto Layout at all. Not one could do without the standard, non-Auto Layout buttons. When creating a small design system such as this one I’d stick with non-Auto Layout buttons.
自動布局是一個了不起的功能,但是對于按鈕而言,它并不總是最好的解決方案。 有時您需要根據網格調整按鈕的大小。 我從事的一些項目需要標準按鈕和自動布局按鈕。 他們中的一些人根本不需要自動版圖。 沒有標準的非自動布局按鈕,誰也做不到。 在創建這樣的小型設計系統時,我會堅持使用非自動布局按鈕。
At this point you actually start using your styles. You can use your Button font style, put it in a frame, fill it with the Action Default style, slap the Button Default effect on it and you’ve got yourself a button. Do this a couple more times to create appropriate styles for different styles.
至此,您實際上開始使用樣式了。 您可以使用Button字體樣式,將其放在框架中,并用Action Default樣式填充,在其上拍上Button Default效果,您便會自己擁有一個按鈕。 多做幾次,為不同的樣式創建合適的樣式。

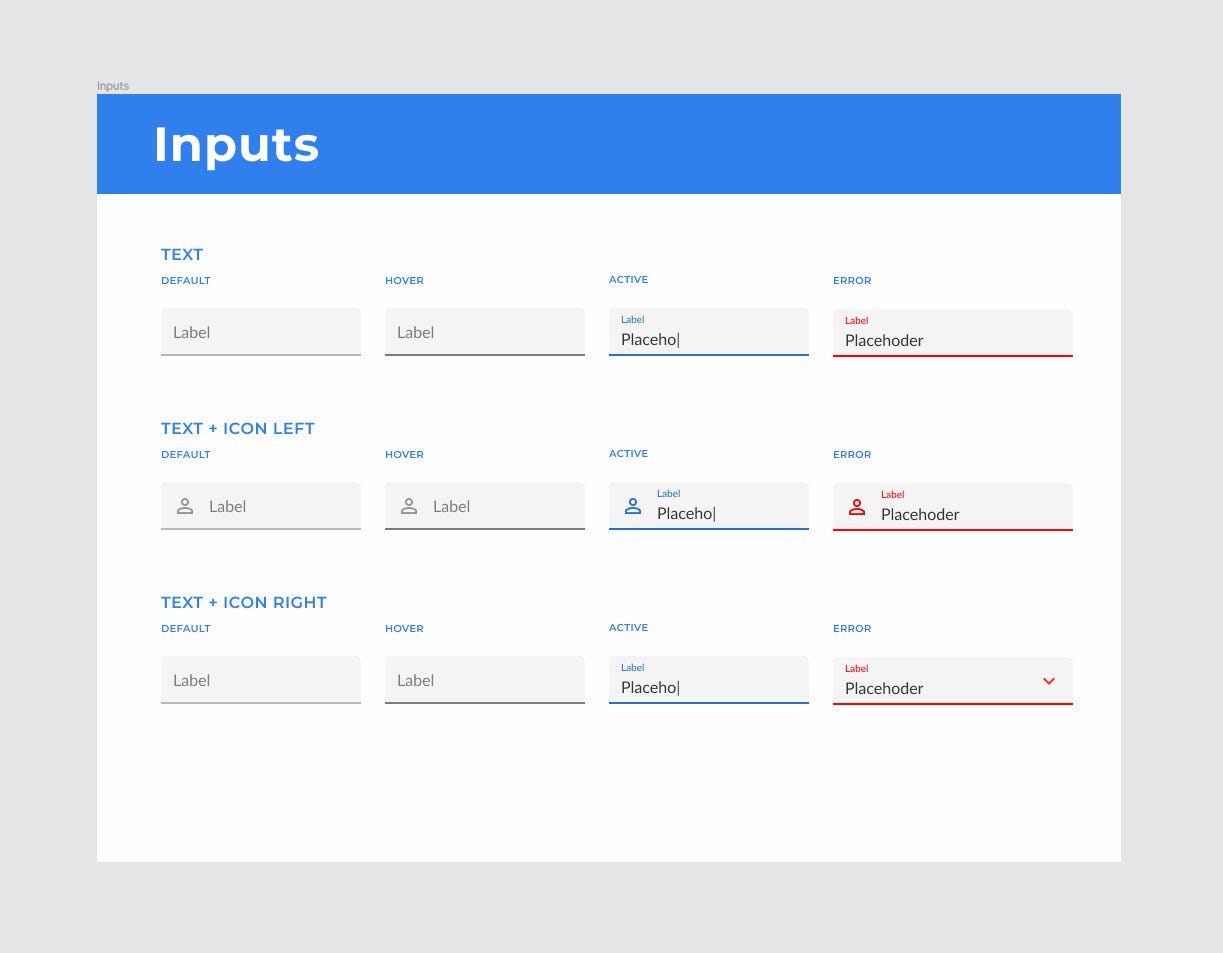
In the case of a simple design system like this one I’d finish up with a set of inputs in different states. Again, you should base their design on the styles you’ve already created.
對于像這樣的簡單設計系統,我將完成一組處于不同狀態的輸入。 同樣,您應該基于已經創建的樣式來設計它們。
At this point you’ve got all the basic ingredients to start working on a new design. Where you go from here should depend on what kind of projects you do most often and what other patterns could be turned into reusable components that often appear in your projects. Often work with e-commerce websites? It’d probably be a good idea to create some product card components, maybe a checkout form.
至此,您已經具備了開始進行新設計的所有基本要素。 您從這里去的位置應取決于您最常執行的項目類型以及哪些其他模式可以轉換為經常出現在項目中的可重用組件。 經常與電子商務網站合作嗎? 創建一些產品卡組件(可能是結帳表格)可能是一個好主意。
Now there are two ways you can go about reusing your design system for new projects. As with most things in life, each has its pros and cons. Go with whatever is best for your design practices and the type of projects you deal with.
現在,您可以通過兩種方法將設計系統重新用于新項目。 與生活中的大多數事物一樣,每種事物都有其優點和缺點。 選擇最適合您的設計實踐和所處理項目類型的項目。
You can do it the way it was intended by Figma. Use the design system you’ve created as a library. This way you get access to the entire design system right away, but any heavy modifications of the components are out of the question obviously. You can only modify the colors and hide their elements. Other than that you’re stuck with what’s in the design system. The same thing goes for all styles. You can add new ones, but can’t modify the originals. It’d actually be a better idea to split the design systems into separate libraries and so you could, for example, use a button library, a gray color library, an elevation library, etc.
您可以按照Figma的預期方式進行操作。 使用您創建為庫的設計系統。 通過這種方式,您可以立即訪問整個設計系統,但是顯然不需要對組件進行任何重大修改。 您只能修改顏色并隱藏其元素。 除此之外,您還無法使用設計系統中的內容。 所有樣式都一樣。 您可以添加新的,但不能修改原始的。 將設計系統分成單獨的庫實際上是一個更好的主意,因此您可以使用例如按鈕庫,灰色庫,高程庫等。
The second approach and the way I do it is to simply duplicate the entire design system. This way there’s nothing stopping you from modifying all your components. The bad thing about duplicating design systems is the fact that it makes you lose all your styles. You basically need to go through all your fonts, colors, fills, and whatever else you might’ve set up and turn them into styles once again. This isn’t so bad however as it only takes a few minutes and still makes you save a lot of time in the long run.
第二種方法和我做的方法是簡單地復制整個設計系統。 這樣,您就無法阻止您修改所有組件。 復制設計系統的壞事是它使您失去所有樣式的事實。 基本上,您需要遍歷所有字體,顏色,填充以及您可能要設置的其他內容,然后再次將它們轉換為樣式。 但這還算不錯,因為它只需要幾分鐘,從長遠來看仍然可以節省很多時間。
Technically a design system is a much more complex structure than what we’ve created so far. But while a complete design system is supposed to include all reusable characteristics and patterns of a design, our basic design system’s goal is to help you kick start your designs.
從技術上講,設計系統的結構要比我們到目前為止創建的結構復雜得多。 但是,盡管完整的設計系統應該包含設計的所有可重用特征和樣式,但我們的基本設計系統的目標是幫助您啟動設計。
翻譯自: https://uxdesign.cc/simple-reusable-design-system-in-figma-a3a01236a7e3
figma設計
本文來自互聯網用戶投稿,該文觀點僅代表作者本人,不代表本站立場。本站僅提供信息存儲空間服務,不擁有所有權,不承擔相關法律責任。 如若轉載,請注明出處:http://www.pswp.cn/news/274314.shtml 繁體地址,請注明出處:http://hk.pswp.cn/news/274314.shtml 英文地址,請注明出處:http://en.pswp.cn/news/274314.shtml
如若內容造成侵權/違法違規/事實不符,請聯系多彩編程網進行投訴反饋email:809451989@qq.com,一經查實,立即刪除!相關文章

WPF 關于鼠標事件和坐標

訪問25%無法訪問的人-如何設計可訪問性

DDD:實體如何處理外部依賴

架構師論壇 創業_我在早期創業時作為設計師學到的東西

HFileOutputFormat與TotalOrderPartitioner

qt按鈕禁用和激活禁用_為什么試探法只是經驗法則:禁用按鈕的情況

Teach Yourself Java 2 in 21 Days 書中樣例代碼實踐

好奇心機制_好奇心問題

20130328java基礎學習筆記-循環結構for以及for,while循環區別

小程序設計避免犯什么錯_新設計師犯下的5種印刷錯誤以及如何避免

移動設備web文字單位_移動設備如何塑造現代Web設計

hp-ux修改時區方法_UX研究人員可以倡導人類的6種方法

2013年3月百度之星A題

為什么張揚的人別人很討厭_為什么每個人總是討厭重新設計,即使他們很好

轉載--C語言:浮點數在內存中的表示

學習ui設計_如果您想學習UI設計,該怎么辦

自適應主題)
30個WordPress Retina(iPad)自適應主題

Thinking in java第一章對象導論
