效果圖底圖 線框圖
為什么使用線框? (Why wireframe?)
Simply put, wireframes provide a structure and layout for content and assets.
簡而言之,線框提供了內容和資產的結構和布局。
You can wireframe just about any kind of presentation, from posters and Powerpoint presentations to web pages and apps. Anything that can be shown can be wireframed — it’s not limited to digital products.
您可以對任何類型的演示進行線框設計,從海報和Powerpoint演示到網頁和應用程序。 可以顯示的任何內容都可以進行線框設計-不限于數字產品。
People use wireframes for many reasons, among them:
人們使用線框的原因很多,其中包括:
- To assess options and feasibility for content layout 評估內容布局的選項和可行性
- To communicate design vision and rationale 傳達設計愿景和基本原理
- To get consensus or agreement 獲得共識或協議
In this tutorial, I will cover creating a wireframe for a web page.
在本教程中,我將介紹如何為網頁創建線框。
準備進行線框圖制作-開始需要什么? (Prepping for wireframing — What do you need to get started?)
Generally, you will need to have some idea of the purpose of the page, what’s going to be on the page, and who the page is for.
通常,您需要對頁面的用途,頁面上的內容以及頁面的目的有所了解。
When wireframing as part of a website project, you should try to have the following done and available:
當將線框圖作為網站項目的一部分時,您應該嘗試完成以下操作并可用:
User stories
用戶故事
User personas
用戶角色
Issues with the current page/site (if applicable)
當前網頁/網站的問題 (如適用)
Goals for the new page (both user goals and organization goals)
新頁面目標 (包括用戶的目標和組織目標)
Information architecture (IA) sitemap
信息架構(IA)網站地圖
The above information can help you determine your content strategy and what you plan to put on the web page to help guide your visitors to their goals. Once you know what is going to go on each page, you can start wireframing.
以上信息可以幫助您確定內容策略以及計劃在網頁上放置哪些內容 ,以幫助指導訪問者實現他們的目標。 一旦知道每一頁將要發生的事情,就可以開始線框圖。
塊框架與線框架 (Blockframing vs wireframing)
I figured it’s worth mentioning blockframing and how I explain the difference between them and wireframes.
我認為值得一提的是塊框架以及如何解釋它們與線框之間的區別。
Blockframes provide rough structure and help you determine the content going on the page.
塊框提供粗略的結構,可幫助您確定頁面上顯示的內容。
Wireframes refine layouts to include buttons, images, and other ways of interacting with the content that is in the blocks.
線框將布局優化為包括按鈕,圖像以及其他與塊中內容進行交互的方式。
Not all projects start with blockframes, but they can eliminate unnecessary focus on small elements like links or buttons before decisions are made about placement of content.
并非所有項目都以塊框開頭,但是在做出內容放置決定之前,它們可以消除不必要的關注,例如鏈接或按鈕等小元素。
線框圖工具? (Tools for wireframing?)
You don’t need fancy tools. All you really need is something to write on and something to write with. I recommend using a notepad and a pencil if you’re just starting out (or even if you’re not). Many designers and analysts get caught up in the tool, and forget about communication.
您不需要花哨的工具。 您真正需要的只是寫東西和寫東西。 如果您剛剛起步(甚至不是開始),我建議使用記事本和鉛筆。 許多設計人員和分析人員陷入了這一工具,而忘了交流。
Tools also make it too easy for people to turn what should be a low fidelity wireframe into high fidelity design that leads to premature discussions around non-essential details.
工具還使人們太容易將應為低保真度的線框轉換為高保真度的設計,從而導致圍繞非必要細節的過早討論。
The chief job of a wireframe is to communicate. Forget about tools until you get the hang of what you are doing and begin to think structurally.
線框的主要工作是進行交流。 忘掉工具,直到掌握了正在做的事情并開始進行結構性思考。
I used Excalidraw (free) to create the wireframe used as the main image of this article, but you can see that it could easily be done with a writing tool (pen or pencil) and paper. So that is what you should grab right now.
我使用Excalidraw (免費)創建了用作本文主要圖像的線框,但是您可以看到,可以使用書寫工具(鋼筆或鉛筆)和紙輕松地完成此操作。 這就是您現在應該抓住的。
快速教程—布置一個簡單的網頁 (Quick tutorial — Laying out a simple web page)
We are going to create a wireframe by tearing down an existing page (the Bootstrap Documentation page) to its frame and practicing with that. This page is simple and has no images or advanced functionality that we really have to account for in a wireframe.
我們將通過將現有頁面(“ Bootstrap文檔”頁面) 拆解到其框架并進行實踐來創建線框。 此頁面很簡單,沒有線框圖中確實需要考慮的圖像或高級功能。
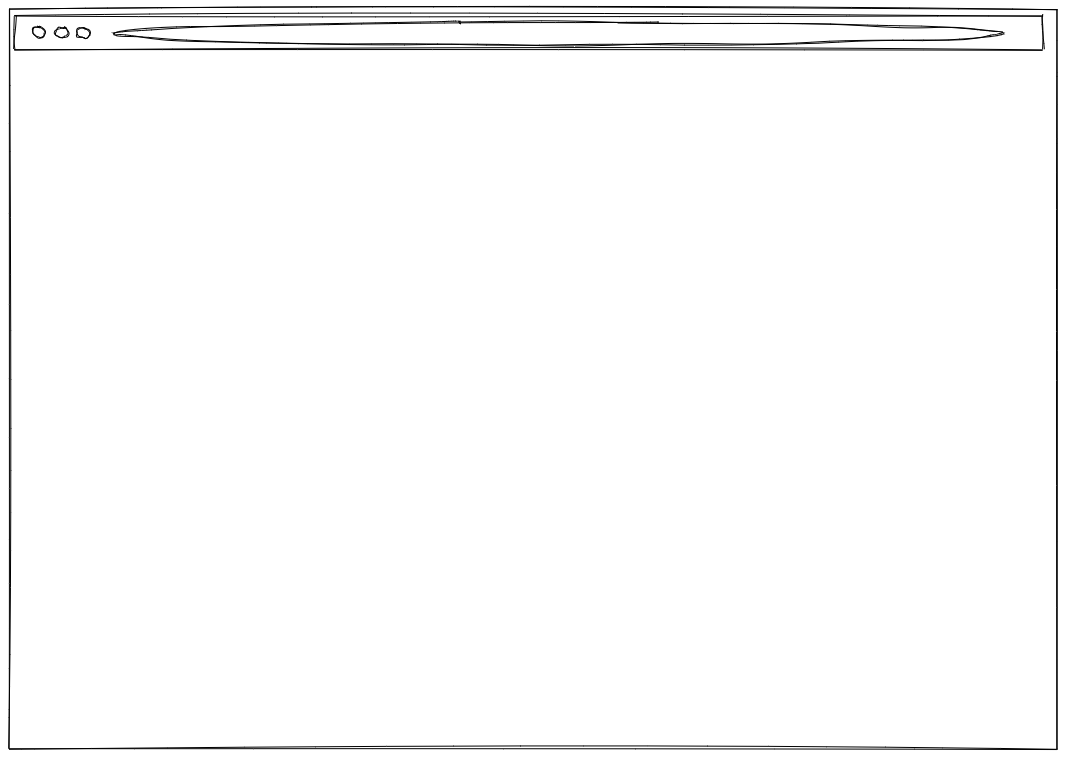
1.創建框架 (1. Create the frame)
First, it’s helpful to create the frame for where the content is going to go. Since this is a web page, draw a rectangle (landscape oriented) and if desired, you can draw a simple toolbar just to indicate that this frame is a browser window.
首先,為內容要去的地方創建框架很有幫助。 由于這是一個網頁,因此繪制一個矩形(面向橫向),如果需要,您可以繪制一個簡單的工具欄,僅表明該框架是瀏覽器窗口。
If you want to start with the mobile layout, then draw a rectangle that is portrait oriented.
如果要從移動布局開始,請繪制一個縱向的矩形。
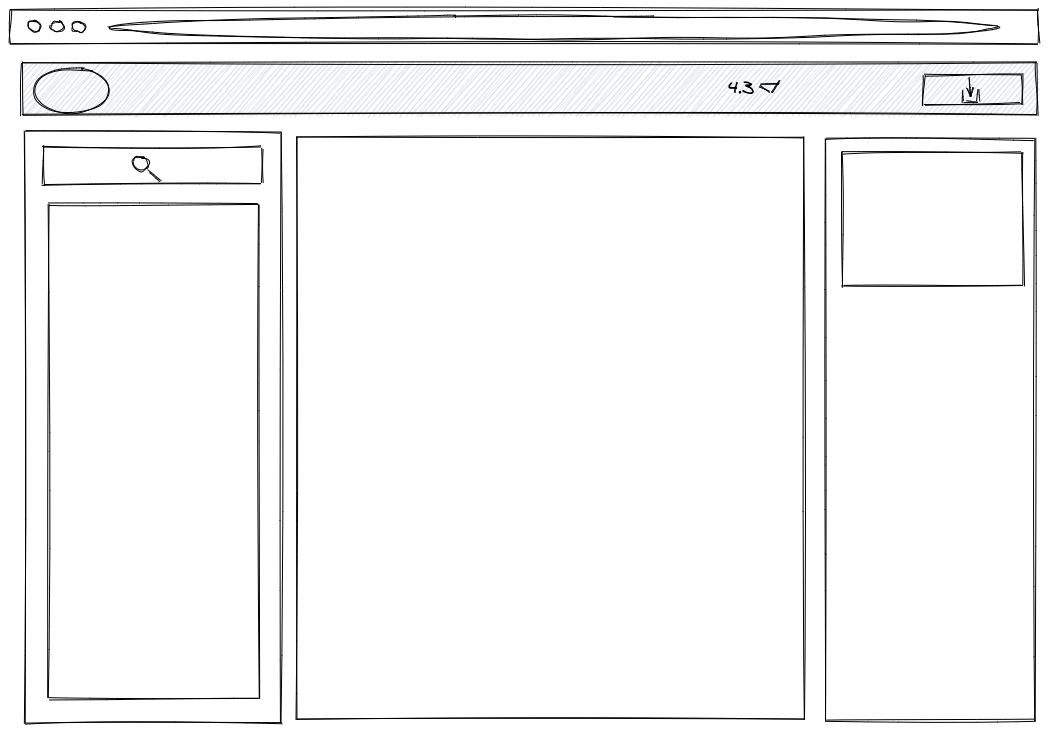
2.分塊結構塊/大面積 (2. Chunk out structural blocks/large areas)
Start with large areas that you know are going to be on the page. The Bootstrap Documentation page has only four main areas, so draw rectangles for the following:
從您將在頁面上看到的大區域開始。 “引導程序文檔”頁面只有四個主要區域,因此請為以下內容繪制矩形:
- Main navigation — this goes all the way across the top 主導航-一直到頂部
- Left sidebar — this is where side navigation will be 左側邊欄-這是側面導航的位置
- Right sidebar — this is where Quick Links will be 右側欄-這是快速鏈接的位置
- Main page content 主頁內容
The Bootstrap site has no footer, so there is no need to add that in this tutorial.
Bootstrap站點沒有頁腳,因此無需在本教程中添加它。

3.根據目標添加靜態和功能元素 (3. Add static and functional elements based on goals)
The Bootstrap site has some goals, clearly. One of them is to get downloads of the framework, so their primary CTA is a download button that sits in the navigation bar. Draw that.
引導站點顯然有一些目標。 其中之一是下載框架,因此它們的主要CTA是位于導航欄中的下載按鈕。 畫出來。
On the Documentation part of the site, you can change the version of Bootstrap you are referencing, so include some indication that you can change the version from 4.4 (current version) to a prior version. Put that in the main navigation bar, too.
在站點的“文檔”部分,您可以更改要引用的Bootstrap 的版本 ,因此請注意一些指示,您可以將版本從4.4(當前版本)更改為先前版本。 也將其放在主導航欄中。
The Documentation part of the Bootstrap site also has a search bar, so let’s add that to the top of the sidebar where it is on the real site. The placement of search here, specifically, is important.
Bootstrap站點的“文檔”部分還具有搜索欄,因此我們將其添加到側欄頂部(在實際站點中)。 特別是在這里的搜索位置很重要 。
If search were in the main navigation, it would communicate that the search is sitewide and not specific to documentation.
如果搜索位于主導航中,則它將傳達該搜索在整個站點范圍內且不特定于文檔的信息。
On the Bootstrap site, that search field is NOT sitewide. It is restricted to the Documentation portion of the site.
在Bootstrap站點上,該搜索字段不在站點范圍內。 它僅限于站點的“文檔”部分。
You can also go ahead and add where the logo will be (in the main nav).
您也可以繼續添加徽標的位置(在主導航欄中)。
4.添加內容塊 (4. Add content blocks)
You won’t actually add content in a wireframe. At least, not in a low fidelity wireframe. Depending on your team, your stakeholders, and what makes sense for your project, you might add Greek text or titles to help show where something is going to go.
您實際上不會在線框中添加內容。 至少不是在低保真度的線框中。 根據您的團隊,您的利益相關者以及對您的項目有意義的內容,您可以添加希臘文字或標題以幫助顯示要去的地方。
For our purposes, just add lines to indicate text. Thick lines signify titles, while thinner lines indicate body copy.
為了我們的目的,只需添加行以指示文本。 粗線表示標題,而細線表示正文。
Draw a few short thin lines to indicate menu links in the main and side navigation areas. You don’t have to add the exact number; remember, this is to communicate placement of content and assets.
在主導航和側面導航區域中畫一些短的細線以指示菜單鏈接。 您不必添加確切的數字; 請記住,這是為了傳達內容和資產的位置。
Finish up with a quick note where social links are going to go. I chose to just write “social links” and not take the time to draw icon symbols, as it’s not important at this stage.
最后快速注釋一下社交鏈接的去向。 我選擇只寫“社交鏈接”,而不花時間繪制圖標符號,因為在此階段這并不重要。
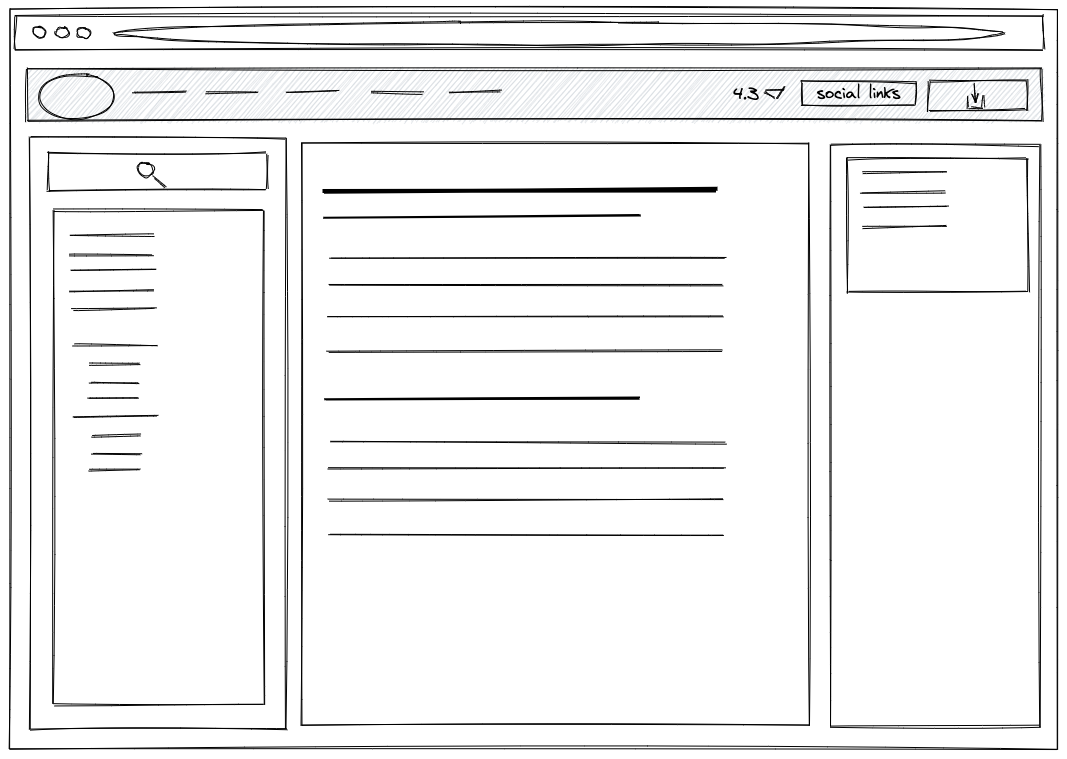
Done!
做完了!
Remember, try to do this with pen and paper, first. Or a whiteboard. Stay focused on structure and layout. The more your wireframe looks like a blueprint and not a web page, the more you’re doing it right.
請記住,首先嘗試使用筆和紙進行此操作。 或白板。 專注于結構和布局。 您的線框看起來像是藍圖而不是網頁,越多,您做得就越正確。
Now, you can talk through the layout with stakeholders and make important decisions around content and goals without worrying about details that will come much later in the process.
現在,您可以與利益相關者討論布局,并圍繞內容和目標做出重要決策,而不必擔心流程中稍后會出現的細節。
翻譯自: https://medium.com/swlh/a-5-minute-wireframing-tutorial-f84c36e86e79
效果圖底圖 線框圖
本文來自互聯網用戶投稿,該文觀點僅代表作者本人,不代表本站立場。本站僅提供信息存儲空間服務,不擁有所有權,不承擔相關法律責任。 如若轉載,請注明出處:http://www.pswp.cn/news/274197.shtml 繁體地址,請注明出處:http://hk.pswp.cn/news/274197.shtml 英文地址,請注明出處:http://en.pswp.cn/news/274197.shtml
如若內容造成侵權/違法違規/事實不符,請聯系多彩編程網進行投訴反饋email:809451989@qq.com,一經查實,立即刪除!相關文章

多線程 - 你知道線程棧嗎

怎么讓qt發聲_第3部分:添加網絡字體-讓我們的單詞發聲

mysql語句中把string類型字段轉datetime類型

名詞解釋:對等知識互聯網_網站設計理論:比較和對等
——Archives)
hadoop深入研究:(五)——Archives

人民幣小寫金額轉大寫金額

饑餓的盛世讀后感_滿足任何設計師饑餓感的原型制作工具


figma 安裝插件_我制作Figma插件的經驗


安卓中的對話框通知---簡單的對話框入門

mac photoshop_我討厭Photoshop…

PHP中的ob_start用法詳解

做事用人 用人做事_做事:構建我的第一個Web應用程序的經驗教訓
![[轉]C#委托的異步調用](http://pic.xiahunao.cn/[轉]C#委托的異步調用)
[轉]C#委托的異步調用

vista下載_Vista和視圖在游戲設計中的功能

微軟開始提供公共預覽版Windows 8.1下載

keynote使用手冊_如何使用Keynote和智能手機為AR創建原型

