今天我們要學習的是consul在soringcloud中的使用。首先學習consul之前,我們應該看看consul的官網,對它有一個初步的認識。
1. consul 官網 (https://www.consul.io)
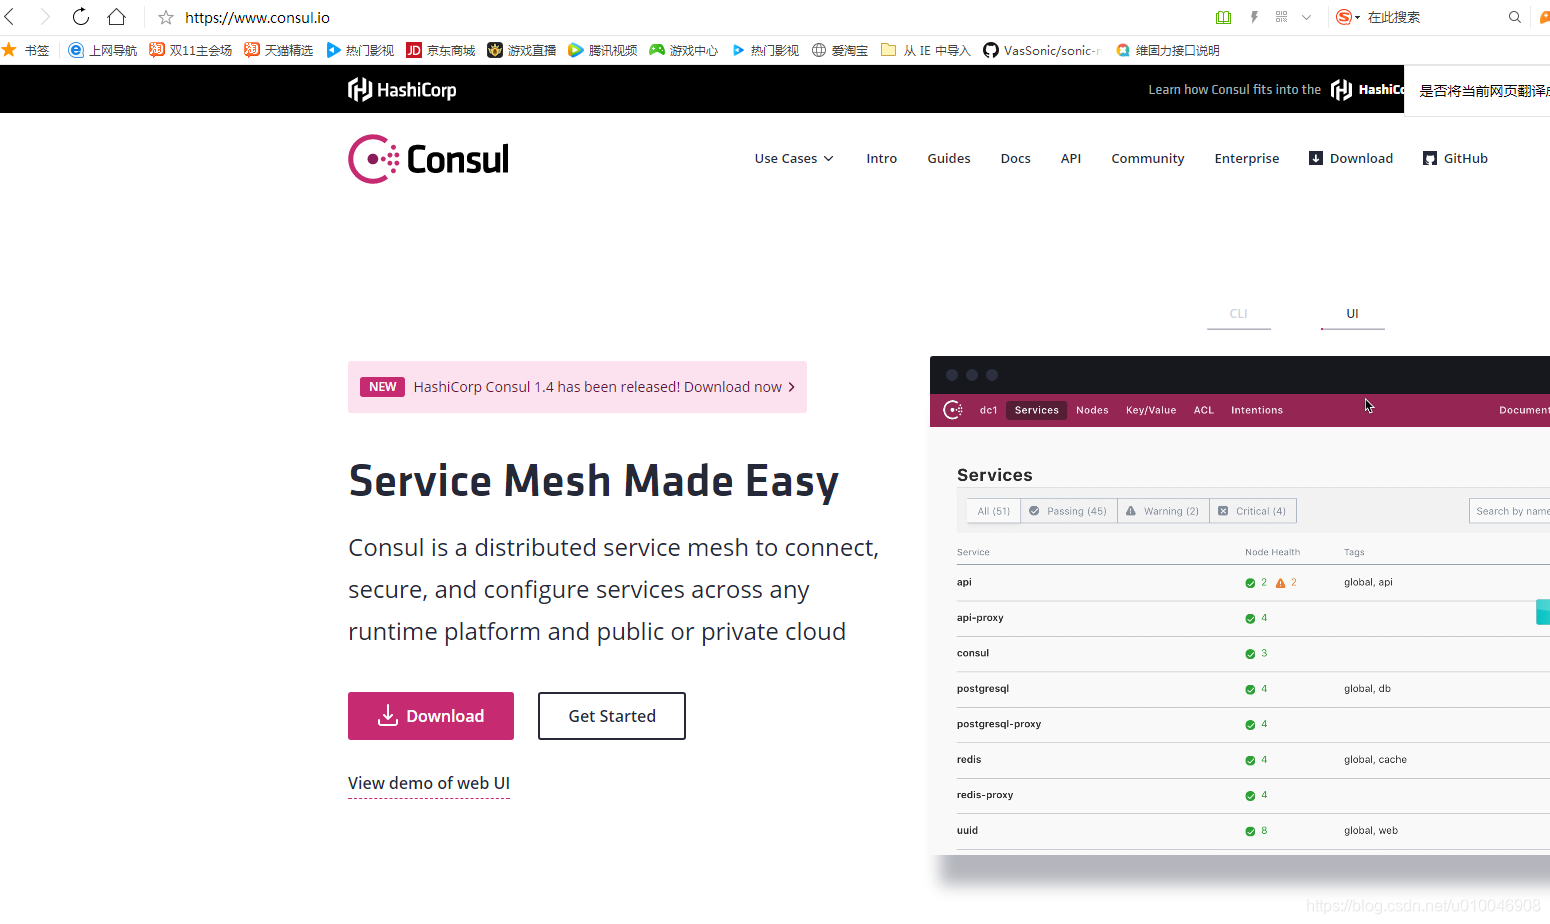
2. consul 簡介
consul是google開源的一個使用go語言開發的服務發現、配置管理中心服務。內置了服務注冊與發現框 架、分布一致性協議實現、健康檢查、Key/Value存儲、多數據中心方案,不再需要依賴其他工具(比如ZooKeeper等)。服務部署簡單,只有一個可運行的二進制的包。每個節點都需要運行agent,他有兩種運行模式server和client。每個數據中心官方建議需要3或5個server節點以保證數據安全,同時保證server-leader的選舉能夠正確的進行。
3.consul基本概念
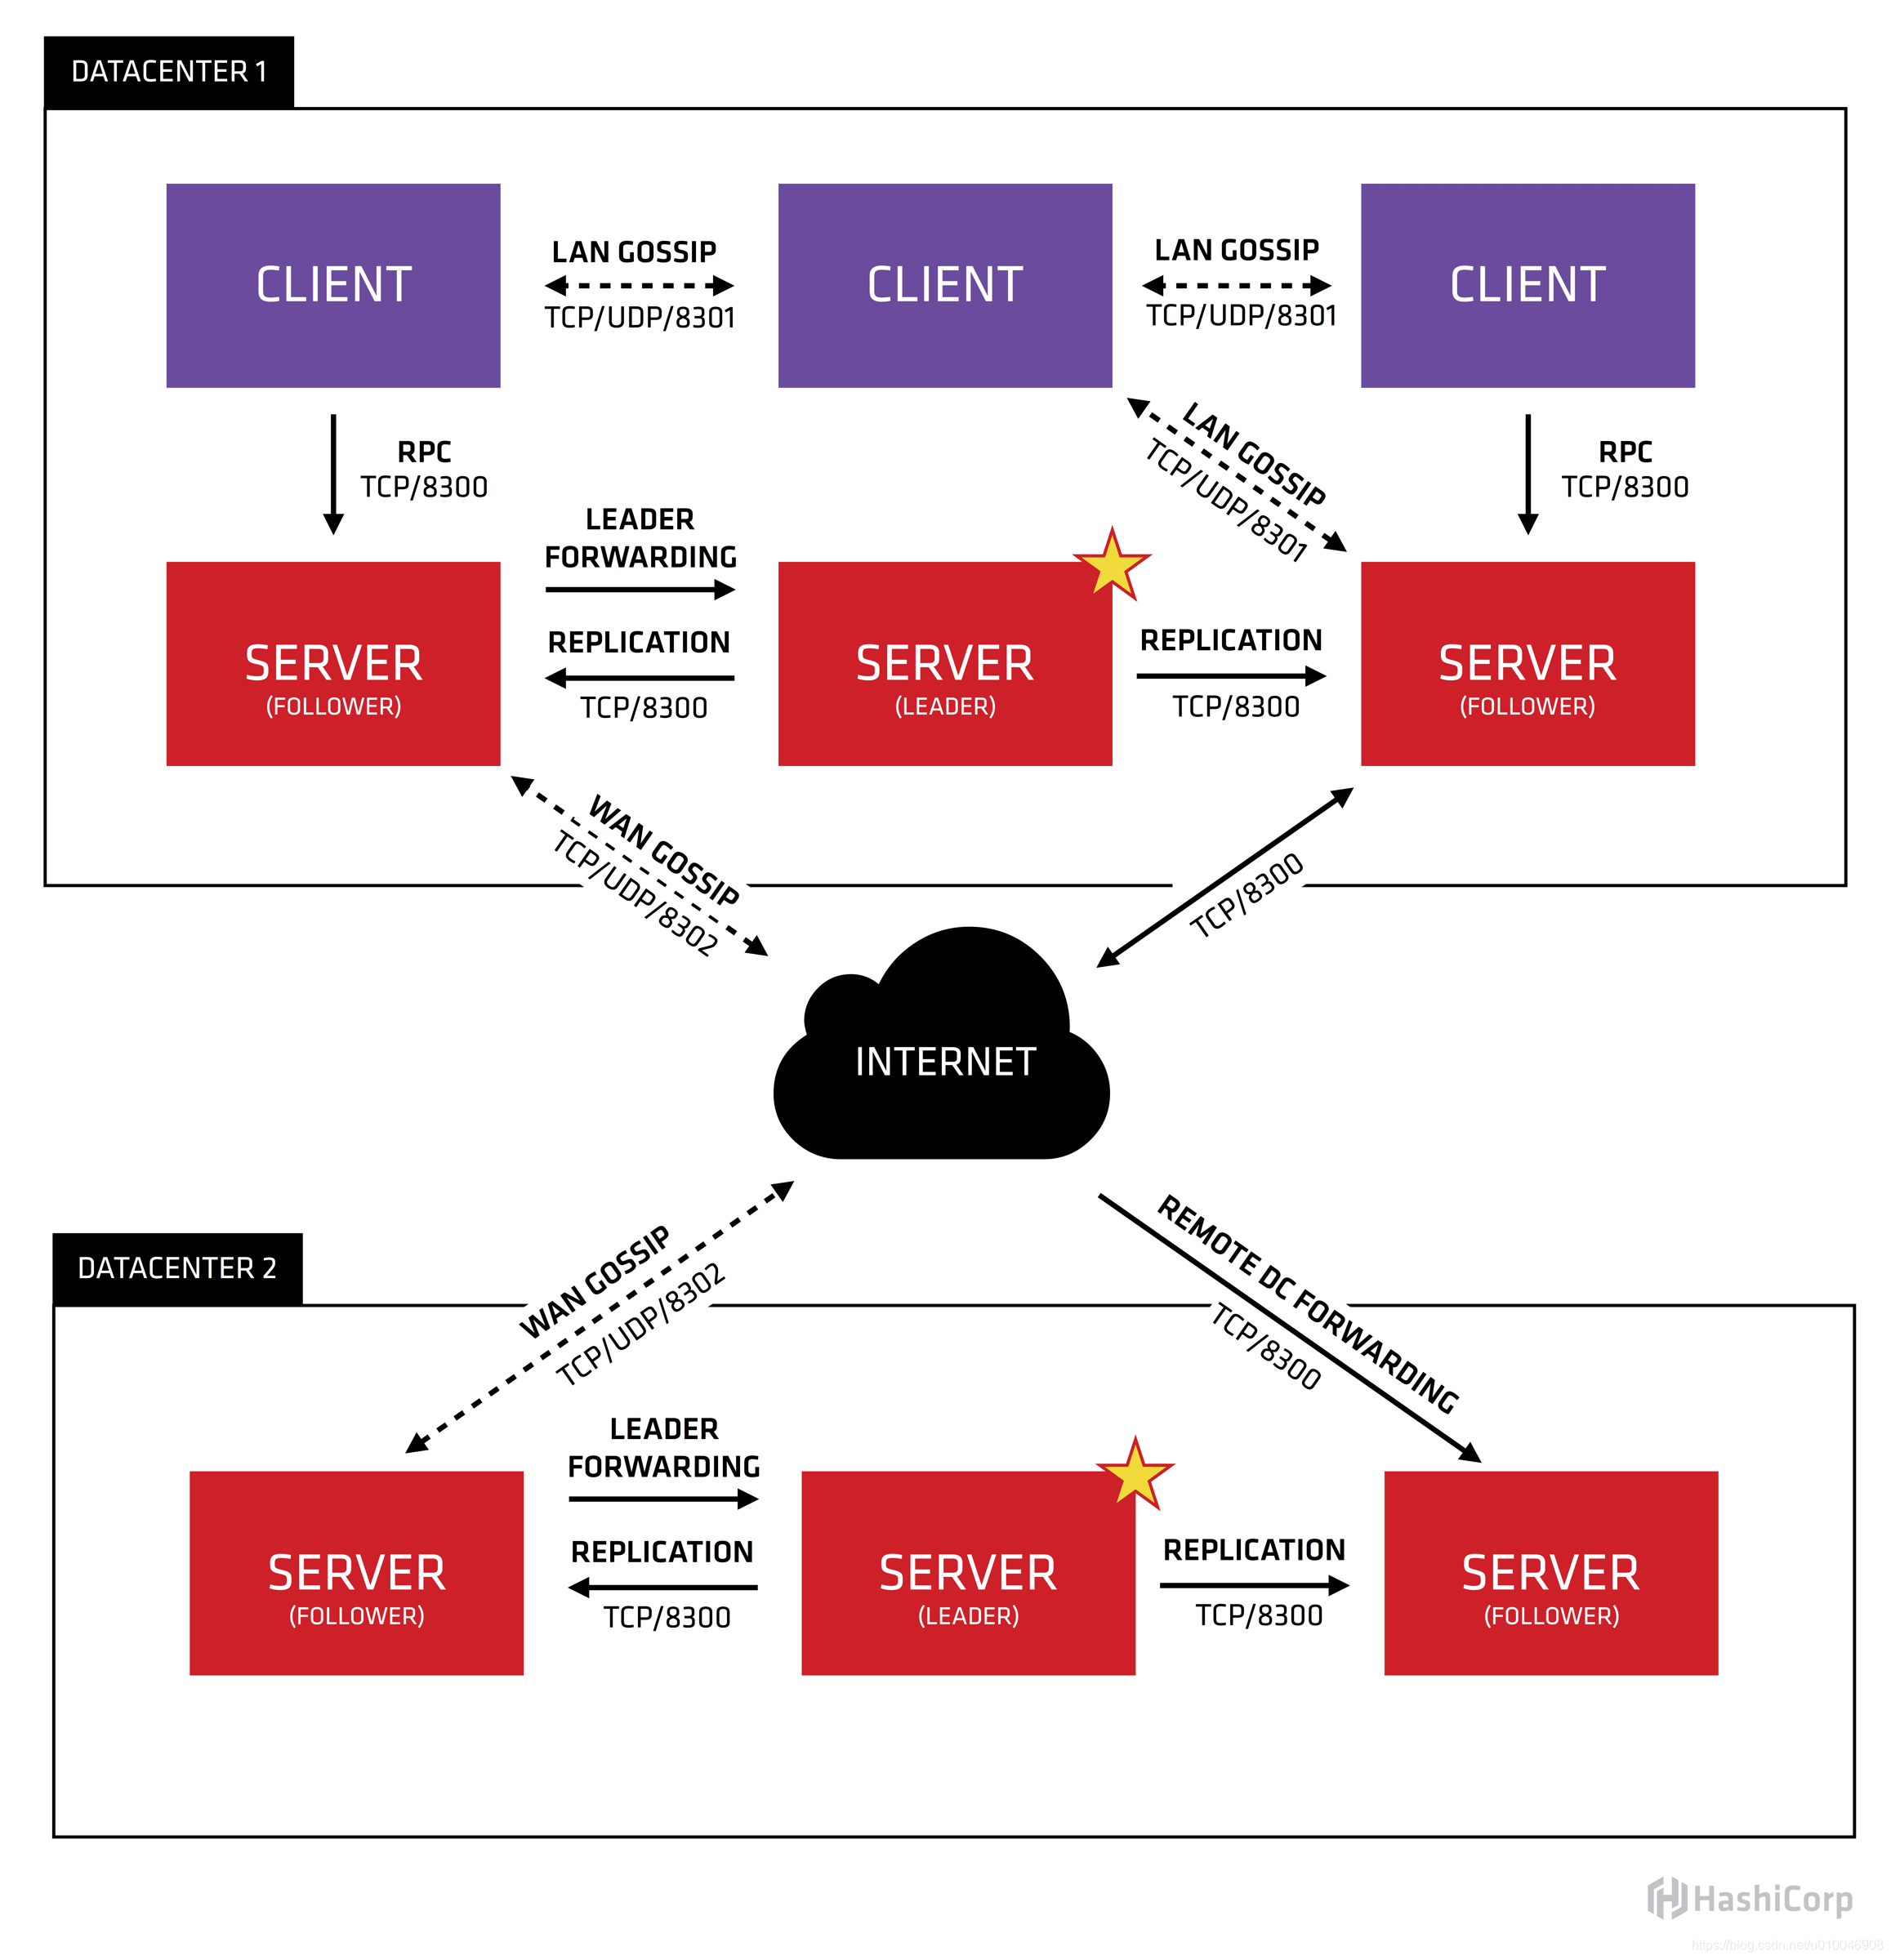
- client
CLIENT表示consul的client模式,就是客戶端模式。是consul節點的一種模式,這種模式下,所有注冊到當前節點的服務會被轉發到SERVER,本身是不持久化這些信息。
- server
SERVER表示consul的server模式,表明這個consul是個server,這種模式下,功能和CLIENT都一樣,唯一不同的是,它會把所有的信息持久化的本地,這樣遇到故障,信息是可以被保留的。
- server-leader
中間那個SERVER下面有LEADER的字眼,表明這個SERVER是它們的老大,它和其它SERVER不一樣的一點是,它需要負責同步注冊的信息給其它的SERVER,同時也要負責各個節點的健康監測。
- raft
server節點之間的數據一致性保證,一致性協議使用的是raft,而zookeeper用的paxos,etcd采用的也是taft。
- 服務發現協議
consul采用http和dns協議,etcd只支持http
- 服務注冊
consul支持兩種方式實現服務注冊,一種是通過consul的服務注冊http API,由服務自己調用API實現注冊,另一種方式是通過json個是的配置文件實現注冊,將需要注冊的服務以json格式的配置文件給出。consul官方建議使用第二種方式。
- 服務發現
consul支持兩種方式實現服務發現,一種是通過http API來查詢有哪些服務,另外一種是通過consul agent 自帶的DNS(8600端口),域名是以NAME.service.consul的形式給出,NAME即在定義的服務配置文件中,服務的名稱。DNS方式可以通過check的方式檢查服務。
- 服務間的通信協議
Consul使用gossip協議管理成員關系、廣播消息到整個集群,他有兩個gossip pool(LAN pool和WAN pool),LAN pool是同一個數據中心內部通信的,WAN pool是多個數據中心通信的,LAN pool有多個,WAN pool只有一個。
4.consul架構圖
5.Consul常用命令
5.1 agent 運行一個consul agent
consul agent -dev
5.2 join 將agent加入到consul集群
consul join IP
5.3 members 列出consul cluster的members
consul members
5.4 leave 將節點移除所在集群
consul leave
6.consul安裝和啟動
點擊“download”下載:使用命令啟動
consul agent -dev
啟動成功之后在地址:http://localhost:8500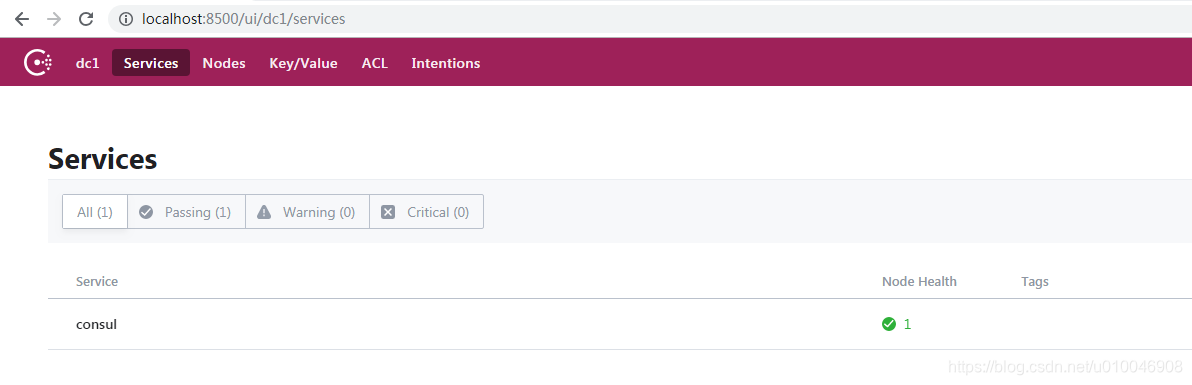
7.consul服務的發現與注冊
7.1 注冊服務
使用HTTP API 注冊個服務,使用[接口API](https://www.consul.io/api/agent/service.html API)調用
調用 http://localhost:8500/v1/agent/service/register PUT 注冊一個服務。request body:
{"ID": "userServiceId", //服務id"Name": "userService", //服務名"Tags": [              //服務的tag,自定義,可以根據這個tag來區分同一個服務名的服務"primary","v1"],"Address": "127.0.0.1",//服務注冊到consul的IP,服務發現,發現的就是這個IP"Port": 9000,          //服務注冊consul的PORT,發現的就是這個PORT"EnableTagOverride": false,"Check": {             //健康檢查部分"DeregisterCriticalServiceAfter": "90m","HTTP": "http://www.baidu.com", //指定健康檢查的URL,調用后只要返回20X,consul都認為是健康的"Interval": "10s"   //健康檢查間隔時間,每隔10s,調用一次上面的URL}
}
使用curl調用
curl http://127.0.0.1:8500/v1/agent/service/register -X PUT -i -H "Content-Type:application/json" -d '{"ID": "userServiceId",  "Name": "userService","Tags": ["primary","v1"],"Address": "127.0.0.1","Port": 8000,"EnableTagOverride": false,"Check": {"DeregisterCriticalServiceAfter": "90m","HTTP": "http://www.baidu.com","Interval": "10s"}
}'
結果
  % Total    % Received % Xferd  Average Speed   Time    Time     Time  CurrentDload  Upload   Total   Spent    Left  Speed
100   288    0     0  100   288      0  18000 --:--:-- --:--:-- --:--:-- 18000HTTP/1.1 200 OK
Vary: Accept-Encoding
Date: Wed, 26 Dec 2018 05:11:32 GMT
Content-Length: 0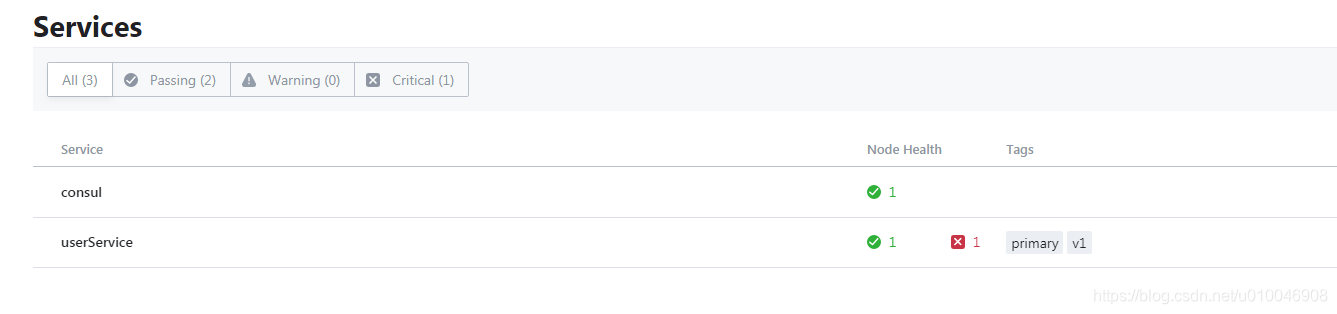
7.2 發現個服務
剛剛注冊了名為userService的服務,我們現在發現(查詢)下這個服務
curl http://127.0.0.1:8500/v1/catalog/service/userService
返回的響應:
 curl http://127.0.0.1:8500/v1/catalog/service/userService% Total    % Received % Xferd  Average Speed   Time    Time     Time  CurrentDload  Upload   Total   Spent    Left  Speed
100   891  100   891    0     0  28741      0 --:--:-- --:--:-- --:--:-- 28741[{"ID": "9b831a00-ae68-d575-5e51-df193897b834","Node": "vip-PC","Address": "127.0.0.1","Datacenter": "dc1","TaggedAddresses": {"lan": "127.0.0.1","wan": "127.0.0.1"},"NodeMeta": {"consul-network-segment": ""},"ServiceKind": "","ServiceID": "userServiceId","ServiceName": "userService","ServiceTags": ["primary","v1"],"ServiceAddress": "127.0.0.1","ServiceWeights": {"Passing": 1,"Warning": 1},"ServiceMeta": {},"ServicePort": 8000,"ServiceEnableTagOverride": false,"ServiceProxyDestination": "","ServiceProxy": {},"ServiceConnect": {},"CreateIndex": 88,"ModifyIndex": 88}
]
基本的服務發現和注冊我們已經弄清楚了。接下來我來看看Spring Cloud 整合consul的使用。
8. consul服務提供者
8.1創建一個項目:spring-cloud-consul-provider
引入依賴
<?xml version="1.0" encoding="UTF-8"?>
<project xmlns="http://maven.apache.org/POM/4.0.0" xmlns:xsi="http://www.w3.org/2001/XMLSchema-instance"xsi:schemaLocation="http://maven.apache.org/POM/4.0.0 http://maven.apache.org/xsd/maven-4.0.0.xsd"><modelVersion>4.0.0</modelVersion><parent><groupId>org.springframework.boot</groupId><artifactId>spring-boot-starter-parent</artifactId><version>2.1.1.RELEASE</version><relativePath/> <!-- lookup parent from repository --></parent><groupId>com.lidong</groupId><artifactId>spring-cloud-consul-producer</artifactId><version>1.0.0</version><name>spring-cloud-consul-producer</name><description>Demo project for Spring Boot</description><properties><java.version>1.8</java.version><spring-cloud.version>Greenwich.RC2</spring-cloud.version></properties><dependencies><dependency><groupId>org.springframework.boot</groupId><artifactId>spring-boot-starter-actuator</artifactId></dependency><dependency><groupId>org.springframework.cloud</groupId><artifactId>spring-cloud-starter-consul-discovery</artifactId></dependency><dependency><groupId>org.springframework.boot</groupId><artifactId>spring-boot-starter-web</artifactId></dependency><dependency><groupId>org.springframework.boot</groupId><artifactId>spring-boot-starter-test</artifactId><scope>test</scope></dependency></dependencies><dependencyManagement><dependencies><dependency><groupId>org.springframework.cloud</groupId><artifactId>spring-cloud-dependencies</artifactId><version>${spring-cloud.version}</version><type>pom</type><scope>import</scope></dependency></dependencies></dependencyManagement><build><plugins><plugin><groupId>org.springframework.boot</groupId><artifactId>spring-boot-maven-plugin</artifactId></plugin></plugins></build><repositories><repository><id>spring-milestones</id><name>Spring Milestones</name><url>https://repo.spring.io/milestone</url></repository></repositories></project>
對配置文件做一個簡單的介紹,我們使用的是最新版的springboot2.1.1,springcloud.Greenwich.RC2版本。
其中:
spring-boot-starter-actuator   健康檢查依賴于此包。
spring-cloud-starter-consul-discovery   Spring Cloud consul的服務發現支持。
8.2 提供者添加配置(application.yml)
server:port: 9001 #提供者的端口
spring:application:name: spring-cloud-consul-producercloud:consul:host: localhostport: 8500discovery:tags: devserviceName: spring-cloud-consul-producer   # 注冊到consul的服務名稱healthCheckPath: /actuator/healthhealthCheckInterval: 15shealthCheckUrl: http://127.0.0.1:9001/actuator/healthregister: trueprefer-ip-address: false
consul的地址和端口號默認是127.0.0.1:8500,如果沒有配置hosts,默認的地址localhost,consul服務會占用8500端口
server.port :9001 服務的提供者的端口
spring.application.name 是指注冊到 consul的服務名稱,后期客戶端會根據這個名稱來進行服務調用。
spring.application.cloud.discovery.discovery.host: localhost
spring.application.cloud.discovery.discovery. port:8500
8.3 修改啟動類
添加 @EnableDiscoveryClient 注解,開啟服務發現支持。
package com.lidong.provider;import org.springframework.boot.SpringApplication;
import org.springframework.boot.autoconfigure.SpringBootApplication;
import org.springframework.cloud.client.discovery.EnableDiscoveryClient;/*** 開啟服務發現*/
@EnableDiscoveryClient
@SpringBootApplication
public class SpringCloudLidongProviderApplication {public static void main(String[] args) {SpringApplication.run(SpringCloudLidongProviderApplication.class, args);}}
8.4新建服務
新建 ConsulProducerController,提供 sayHello 接口, 返回一個hello—>字符串。
package com.lidong.provider.service;import org.springframework.web.bind.annotation.RequestMapping;
import org.springframework.web.bind.annotation.RestController;/*** 創建服務*/
@RestController
public class ConsulProducerController {@Value("${server.port}")private Integer port;/*** 服務接口* @param name* @return*/@RequestMapping("/hello")public String sayHello(@RequestParam("name")String name) {return "hello ---> "+name+" port -->"+port;}
}
啟動項目:
2018-12-26 13:21:42.984 INFO 20248 --- [ main] o.s.b.w.embedded.tomcat.TomcatWebServer : Tomcat started on port(s): 9001 (http) with context path ''
2018-12-26 13:21:42.994 INFO 20248 --- [ main] o.s.c.c.s.ConsulServiceRegistry : Registering service with consul: NewService{id='spring-cloud-consul-producer-9001', name='spring-cloud-consul-producer', tags=[dev, secure=false], address='vip-PC', meta=null, port=9001, enableTagOverride=null, check=Check{script='null', interval='15s', ttl='null', http='http://127.0.0.1:9001/actuator/health', method='null', header={}, tcp='null', timeout='null', deregisterCriticalServiceAfter='null', tlsSkipVerify=null, status='null'}, checks=null}
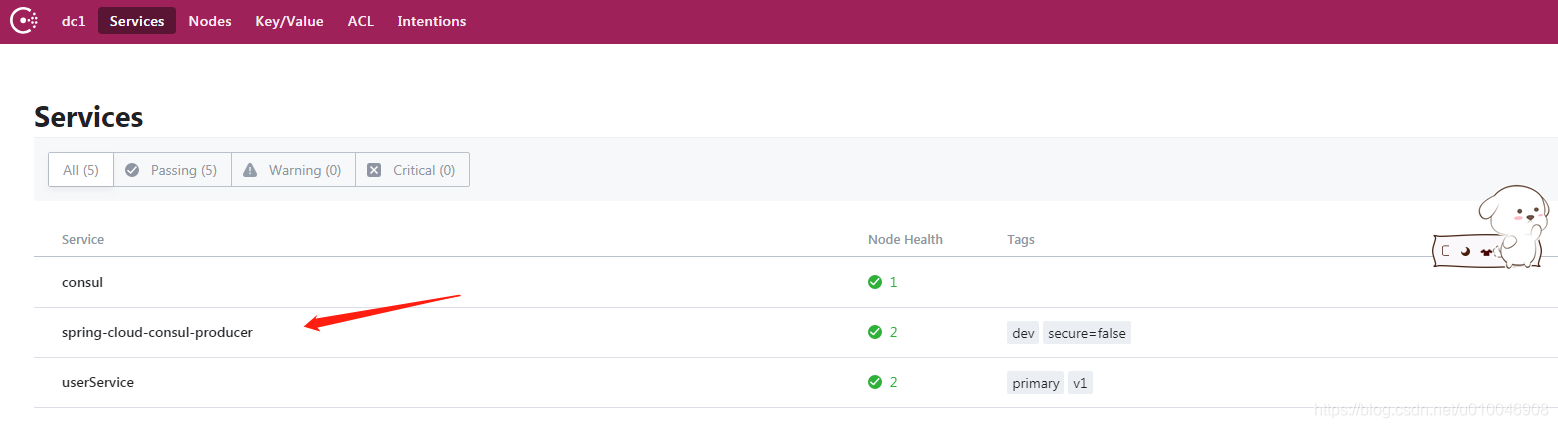
2018-12-26 13:21:43.008 INFO 20248 --- [ main] l.p.SpringCloudLidongProviderApplication : Started SpringCloudLidongProviderApplication in 4.09 seconds (JVM running for 4.755)服務提供者發布成功。
這時候,我們在控制臺會發現服務列表中有一個名字為spring-cloud-consul-producer的服務
點擊詳情會發現服務的詳細信息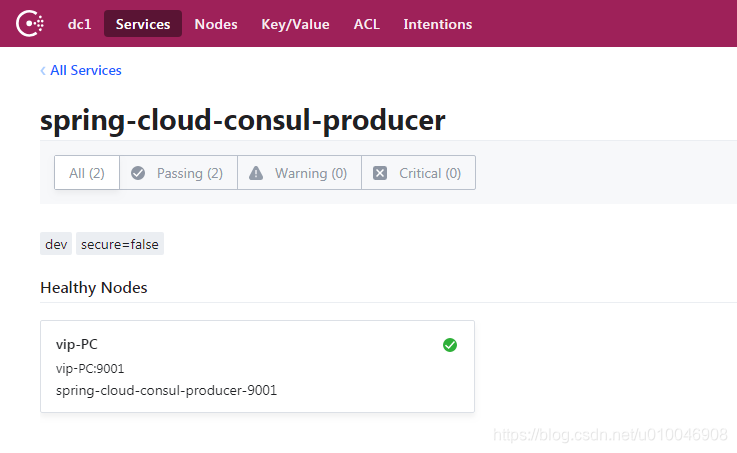
9. Consul服務消費者
9.1創建一個項目:spring-cloud-consul-consumer
引入依賴
<?xml version="1.0" encoding="UTF-8"?>
<project xmlns="http://maven.apache.org/POM/4.0.0" xmlns:xsi="http://www.w3.org/2001/XMLSchema-instance"xsi:schemaLocation="http://maven.apache.org/POM/4.0.0 http://maven.apache.org/xsd/maven-4.0.0.xsd"><modelVersion>4.0.0</modelVersion><parent><groupId>org.springframework.boot</groupId><artifactId>spring-boot-starter-parent</artifactId><version>2.1.1.RELEASE</version><relativePath/> <!-- lookup parent from repository --></parent><groupId>com.lidong</groupId><artifactId>spring-cloud-consul-consumer</artifactId><version>0.0.1-SNAPSHOT</version><name>spring-cloud-consul-consumer</name><description>Demo project for Spring Boot</description><properties><java.version>1.8</java.version><spring-cloud.version>Greenwich.RC2</spring-cloud.version></properties><dependencies><dependency><groupId>org.springframework.boot</groupId><artifactId>spring-boot-starter-actuator</artifactId></dependency><dependency><groupId>org.springframework.cloud</groupId><artifactId>spring-cloud-starter-consul-discovery</artifactId></dependency><dependency><groupId>org.springframework.boot</groupId><artifactId>spring-boot-starter-web</artifactId></dependency><dependency><groupId>org.springframework.boot</groupId><artifactId>spring-boot-starter-test</artifactId><scope>test</scope></dependency><dependency><groupId>org.springframework.cloud</groupId><artifactId>spring-cloud-starter-netflix-ribbon</artifactId></dependency><dependency><groupId>org.springframework.cloud</groupId><artifactId>spring-cloud-starter-openfeign</artifactId></dependency></dependencies><dependencyManagement><dependencies><dependency><groupId>org.springframework.cloud</groupId><artifactId>spring-cloud-dependencies</artifactId><version>${spring-cloud.version}</version><type>pom</type><scope>import</scope></dependency></dependencies></dependencyManagement><build><plugins><plugin><groupId>org.springframework.boot</groupId><artifactId>spring-boot-maven-plugin</artifactId></plugin></plugins></build><repositories><repository><id>spring-milestones</id><name>Spring Milestones</name><url>https://repo.spring.io/milestone</url></repository></repositories></project>
9.2 消費者添加配置(application.yml)
server:port: 9002 #服務消費者的端口
spring:application:name: spring-cloud-consul-consumercloud:consul:host: localhostport: 8500discovery:tags: devregister: false    #設置不需要注冊到 consul 中healthCheckPath: /actuator/healthhealthCheckInterval: 15shealthCheckUrl: http://127.0.0.1:9002/actuator/health
consul的地址和端口號默認是 127.0.0.1:8500,如果沒有配置hosts,默認的地址localhost,consul服務會占用8500接口
server.port :9006 服務的消費者的端口
spring.application.cloud.consul.discovery.register: false
9.3配置啟動類
package com.lidong.consumer;import org.springframework.beans.factory.annotation.Autowired;
import org.springframework.boot.SpringApplication;
import org.springframework.boot.autoconfigure.SpringBootApplication;
import org.springframework.boot.web.client.RestTemplateBuilder;
import org.springframework.cloud.client.discovery.EnableDiscoveryClient;
import org.springframework.cloud.client.loadbalancer.LoadBalanced;
import org.springframework.context.annotation.Bean;
import org.springframework.web.bind.annotation.PathVariable;
import org.springframework.web.bind.annotation.RequestMapping;
import org.springframework.web.bind.annotation.RequestMethod;
import org.springframework.web.bind.annotation.RequestParam;
import org.springframework.web.client.RestTemplate;
@SpringBootApplication
@EnableDiscoveryClient
public class SpringCloudConsulConsumerApplication {@Autowiredprivate RestTemplateBuilder builder;@LoadBalanced@Bean// 添加負載均衡支持,很簡單,只需要在RestTemplate上添加@LoadBalanced注解,那么RestTemplate即具有負載均衡的功能,如果不加@LoadBalanced注解的話,會報java.net.UnknownHostException:springboot-h2異常,此時無法通過注冊到Eureka Server上的服務名來調用服務,因為RestTemplate是無法從服務名映射到ip:port的,映射的功能是由LoadBalancerClient來實現的。public RestTemplate restTemplate() {return builder.build();}public static void main(String[] args) {SpringApplication.run(SpringCloudConsulConsumerApplication.class, args);}}
9.4創建消費服務
package com.lidong.consumer.controller;import org.springframework.beans.factory.annotation.Autowired;
import org.springframework.cloud.client.ServiceInstance;
import org.springframework.cloud.client.discovery.DiscoveryClient;
import org.springframework.cloud.client.loadbalancer.LoadBalancerClient;
import org.springframework.web.bind.annotation.RequestMapping;
import org.springframework.web.bind.annotation.RequestParam;
import org.springframework.web.bind.annotation.RestController;
import org.springframework.web.client.RestTemplate;/*** 創建服務的消費者*/
@RestController
public class ConsumerController {private static final String SERVICE_NAME = "spring-cloud-consul-producer";@Autowiredprivate DiscoveryClient discoveryClient;/*** 獲取所有服務*/@RequestMapping("/services")public Object services() {return discoveryClient.getInstances(SERVICE_NAME);}/*** 消費服務*/@RequestMapping("/callSayHello")public String services(@RequestParam("name") String name) {ServiceInstance serviceInstance = (ServiceInstance) discoveryClient.getInstances(SERVICE_NAME);String callServiceResult = new RestTemplate().getForObject(serviceInstance.getUri().toString() + "/hello", String.class);System.out.println(callServiceResult);return callServiceResult;}
}
http://localhost:9002/services
獲取服務列表的結果
[{"instanceId":"spring-cloud-consul-producer-9001","serviceId":"spring-cloud-consul-producer","host":"vip-PC","port":9001,"secure":false,"metadata":{"dev":"dev","secure":"false"},"uri":"http://vip-PC:9001","scheme":null}]
測試請求的url
http://localhost:9002/callSayHello?name=9002
消費的結果
hello ---> 9002 port -->9001
源碼地址
https://download.csdn.net/download/u010046908/10877868


)


)


