其實一直以來都感覺純視覺SLAM很難落地產品,所以一直在找機會學習激光slam,之前也在深藍學院上買了一個激光salm的課程,慚愧,至今也沒開始學呢,年底之前,我想工作之余研究一下激光slam和ros,我感覺這兩個東西對我來說很重要,所以這兩天先抽時間把google的cartographer工程配置了一下,期間也遇到了一些問題,不過我逐一解決,最終配置成功。接下來就開始研究激光slam技術,以及cartographer的代碼。希望能幫上和我一起想開始學習cartographer的小伙伴,如果有什么問題,可以隨時想我提問,大家一起學習。
更新:注意:我之前安裝了conda,conda里面的python版本是3.7的,我在安裝cartographer_ros的時候沒有關閉conda所以出現了錯誤,因為ros只能在python2.7版本下才能正常工作,所以我就conda deactivate base.這樣就恢復到了原來的python2.7的版本。
參考文獻如下
https://google-cartographer.readthedocs.io/en/latest/
https://blog.csdn.net/xmy306538517/article/details/81455625
https://www.cnblogs.com/hitcm/p/5939507.html
step1:安裝一些依賴庫?
# Install the required libraries that are available as debs.
sudo apt-get update
sudo apt-get install -y \clang \cmake \g++ \git \google-mock \libboost-all-dev \libcairo2-dev \libcurl4-openssl-dev \libeigen3-dev \libgflags-dev \libgoogle-glog-dev \liblua5.2-dev \libsuitesparse-dev \lsb-release \ninja-build \stow# Install Ceres Solver and Protocol Buffers support if available.
# No need to build it ourselves.
if [[ "$(lsb_release -sc)" = "focal" || "$(lsb_release -sc)" = "buster" ]]
thensudo apt-get install -y python3-sphinx libgmock-dev libceres-dev protobuf-compiler
elsesudo apt-get install -y python-sphinxif [[ "$(lsb_release -sc)" = "bionic" ]]thensudo apt-get install -y libceres-devfi
fi
?
step2: 安裝abseil, 注意,在最后一步執行sudo stow absl之前要先執行sudo apt-get install stow安裝stow
git clone https://github.com/abseil/abseil-cpp.git
cd abseil-cpp
git checkout d902eb869bcfacc1bad14933ed9af4bed006d481
mkdir build
cd build
cmake -G Ninja \-DCMAKE_BUILD_TYPE=Release \-DCMAKE_POSITION_INDEPENDENT_CODE=ON \-DCMAKE_INSTALL_PREFIX=/usr/local/stow/absl \..
ninja
sudo ninja install
cd /usr/local/stow
sudo stow absl
step3: 這個下載鏈接是google的資源,如果你沒有設置全局翻墻,在terminal不可翻墻,就不能下載成功,解決方法是在github里搜索ceres-solver,然后采用git clone的方式下載,如果在網頁上直接Download下載下來的工程中滅有.git文件,無法完成git checkout tags/${VERSION}
VERSION="1.13.0"# Build and install Ceres.
git clone https://ceres-solver.googlesource.com/ceres-solver
cd ceres-solver
git checkout tags/${VERSION}
mkdir build
cd build
cmake .. -G Ninja -DCXX11=ON
ninja
CTEST_OUTPUT_ON_FAILURE=1 ninja test
sudo ninja install
step4: 安裝protobuf.使用下面的下載鏈接下載時如果一直出現early EOF的超時錯誤時,就使用
git clone --depth=1 https://github.com/google/protobuf.git 進行下載,--depth=1是約束了只下載最新git log的版本。
VERSION="v3.4.1"# Build and install proto3.
git clone https://github.com/google/protobuf.git
cd protobuf
git checkout tags/${VERSION}
mkdir build
cd build
cmake -G Ninja \-DCMAKE_POSITION_INDEPENDENT_CODE=ON \-DCMAKE_BUILD_TYPE=Release \-Dprotobuf_BUILD_TESTS=OFF \../cmake
ninja
sudo ninja install
step5: 安裝cartographer
# Build and install Cartographer.git clone git@github.com:cartographer-project/cartographer.git
cd cartographer
mkdir build
cd build
cmake .. -G Ninja
ninja
CTEST_OUTPUT_ON_FAILURE=1 ninja test
sudo ninja install
step6:安裝cartographer_ros
注意:創建ros工程的workspace時,根據你自己的路徑來就可以,還有在將工程的devel中的setup.bash的路徑寫入到.bashrc中時也要注意你的路徑。這樣做的好處你,你新打開一個窗口進行操作時,不需要重新執行source YOUR_PATH/devel/setup.bash了就。
sudo apt-get install -y python-wstool python-rosdep ninja-buildmkdir -p /code/ROS/catkin_ws_cartographer/src
cd /code/ROS/catkin_ws_cartographer/src
git clone --recursive https://github.com/googlecartographer/cartographer_ros.gitcd /code/ROS/catkin_ws_cartographer
catkin_make_isolated --install --use-ninja -Dcartographer_DIR="/usr/local/share/cartographer/"
source /code/ROS/catkin_ws_cartographer/devel_isolated/setup.bash
echo "source /code/ROS/catkin_ws_cartographer/devel_isolated/setup.bash" >> ~/.bashrc
step7:下載數據集
2d數據集:
https://storage.googleapis.com/cartographer-public-data/bags/backpack_2d/cartographer_paper_deutsches_museum.bag3d數據集:
https://storage.googleapis.com/cartographer-public-data/bags/backpack_3d/b3-2016-04-05-14-14-00.bagstep8: 運行程序
注意:修改成你自己的存放數據集的路徑。
roslaunch cartographer_ros demo_backpack_2d.launch bag_filename:=${HOME}/Downloads/cartographer_paper_deutsches_museum.bag
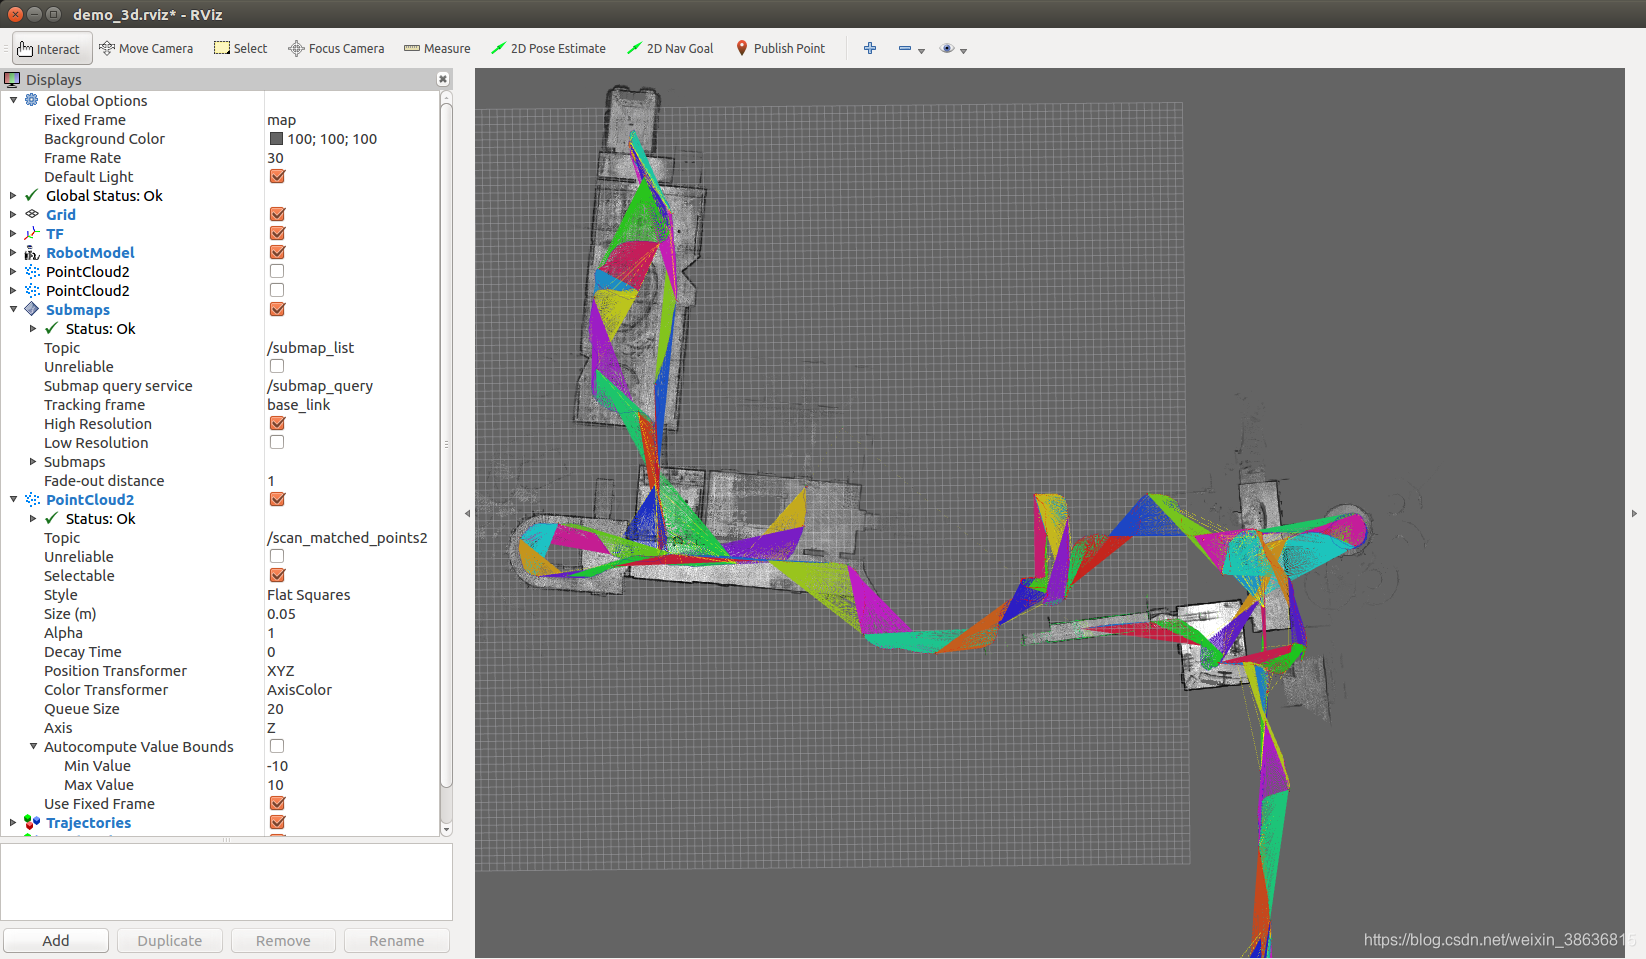
roslaunch cartographer_ros demo_backpack_3d.launch bag_filename:=${HOME}/Downloads/cartographer_3d_deutsches_museum.bagstep9: 測試結果展示
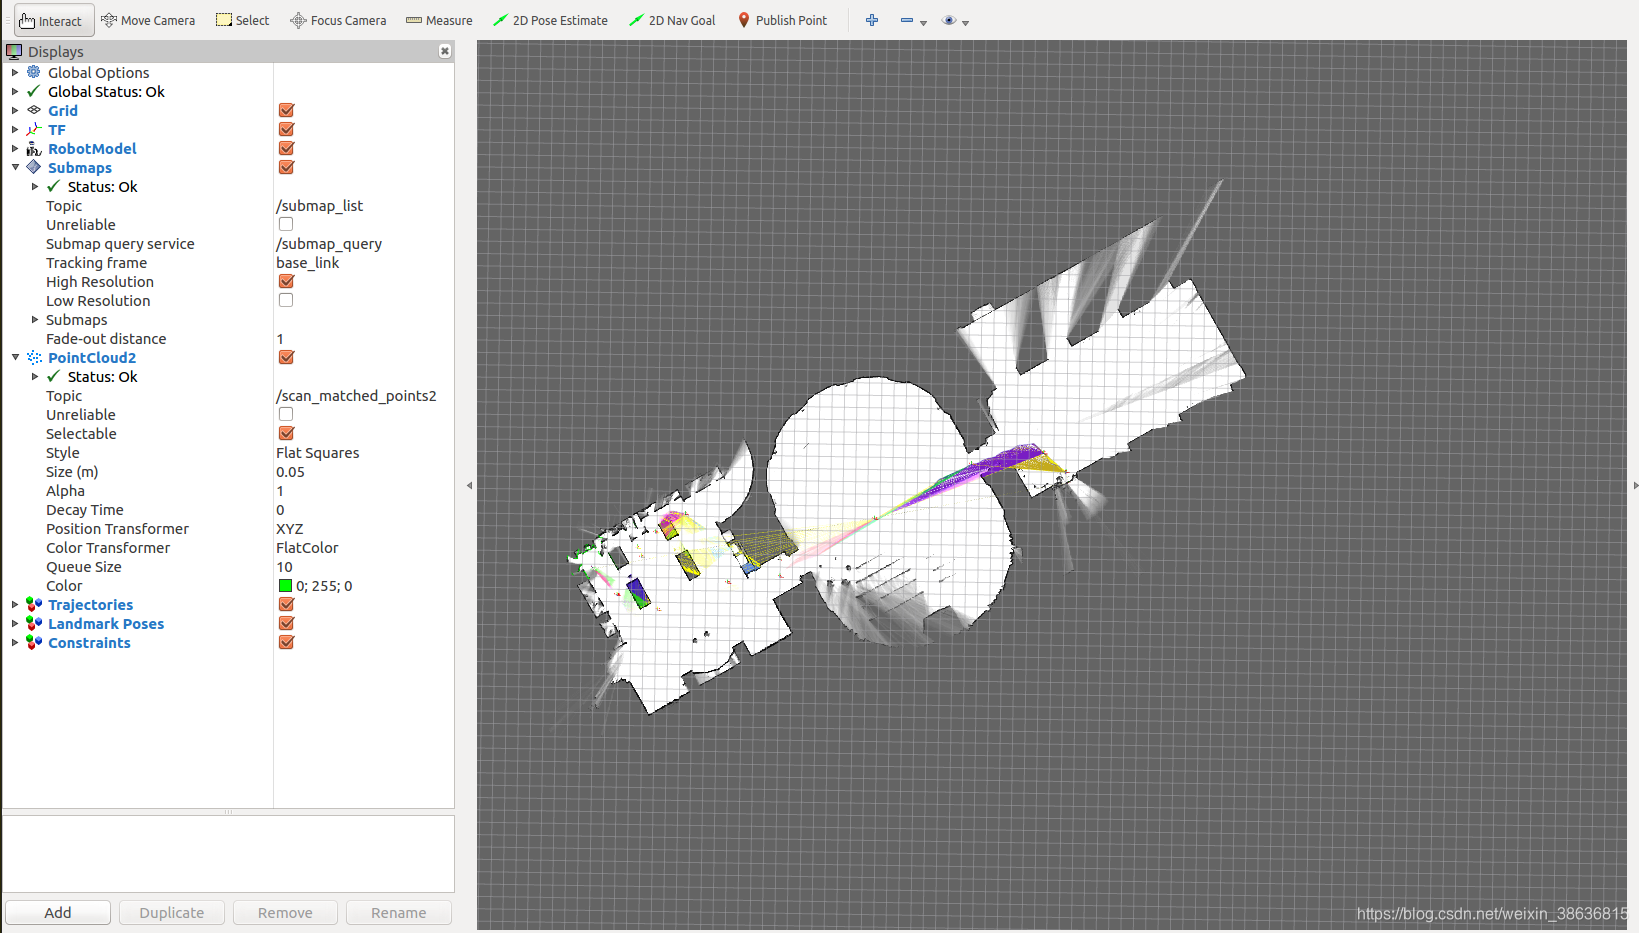
?

與重載(overload)區別)

—— SVN版本控制工具)
CPU篇)
)


)


![信息學競賽相關優秀文章合集[持續更新]](http://pic.xiahunao.cn/信息學競賽相關優秀文章合集[持續更新])
