python -opencv 輪廓檢測(多邊形,外接矩形,外接圓)
邊緣檢測步驟:
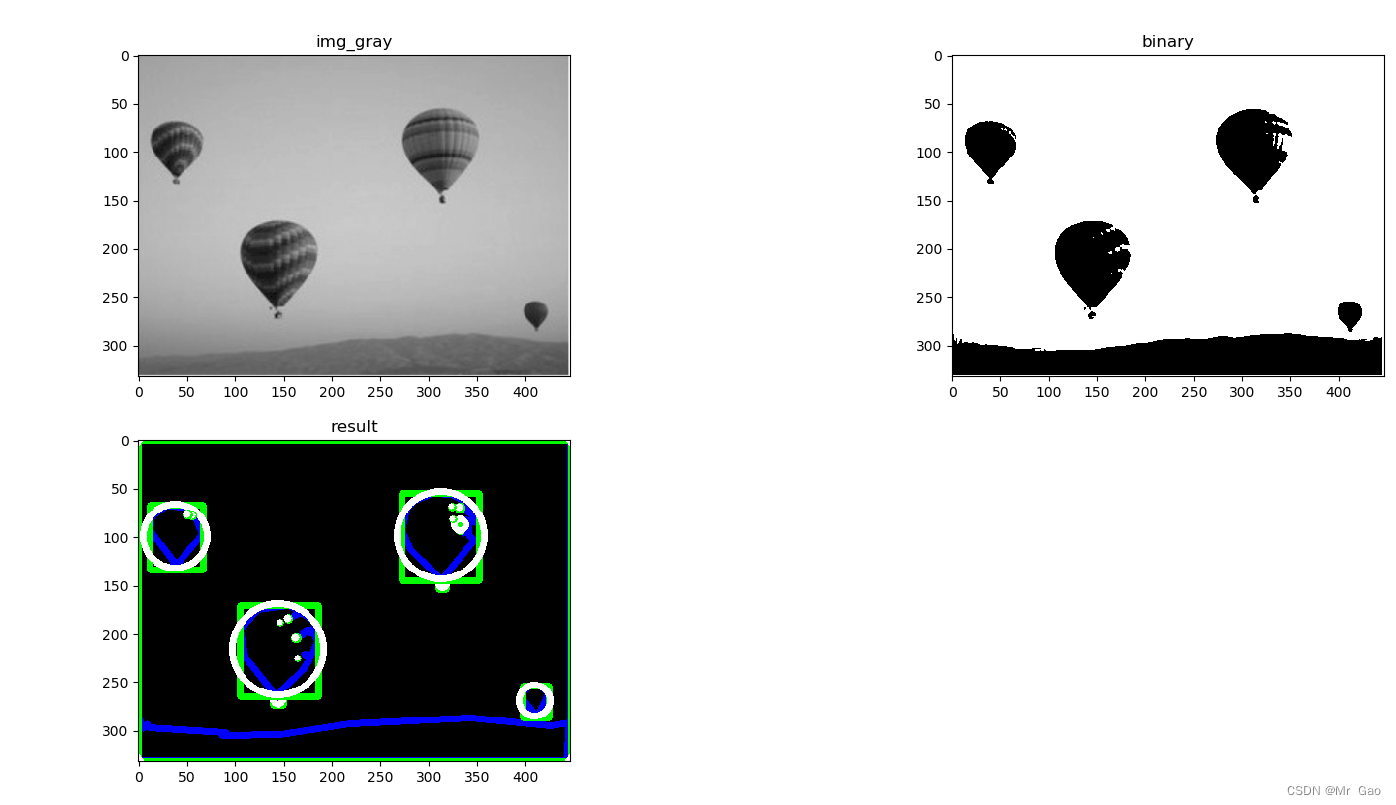
第一步:讀取圖像為灰度圖
第二步:進行二值化處理
第三步:使用cv2.findContours對二值化圖像提取輪廓
第三步:將輪廓繪制到圖中
代碼如下:
from ctypes.wintypes import SIZE
from multiprocessing.pool import IMapUnorderedIterator
import cv2
import copy
import math
import matplotlib.pyplot as plt
import matplotlib as mpl
import numpy as np
import ospath=r'D:\learn\photo\cv\res\ballon.png'img=cv2.imread(path,1)
img_gray=cv2.imread(path,0)def cv_show(name,img):cv2.imshow(name,img)#cv2.waitKey(0),接收0,表示窗口暫停cv2.waitKey(0)#銷毀所有窗口cv2.destroyAllWindows()#cv_show('img_gray',img_gray)#進行二值化處理
ret,binary=cv2.threshold(img_gray,0,255,cv2.THRESH_BINARY+cv2.THRESH_OTSU)#cv_show('dist',dist)def BGR_TO_RGB(img):return img[:,:, ::-1];
#檢測輪廓countourClose,hierrachyclose=cv2.findContours(binary,cv2.RETR_TREE,cv2.CHAIN_APPROX_SIMPLE)print("len(countourclose) is",len(countourClose))#countourClose 輪廓坐標信息
#hierrachyclose 輪廓之間的層次結構#背景圖
result=np.zeros(img.shape,np.uint8)#繪制輪廓邊框
for  i in range(len(countourClose)):cnt=countourClose[i]#近似多邊形#第一個參數,表示精度,單位是像素#第二個像素表示是否閉合approx=cv2.approxPolyDP(cnt,3,True)#繪制輪廓#-1表示繪制所有輪廓#5線條粗細cv2.drawContours(result,[approx],-1,(0,0,255),5)#繪制矩形x,y,w,h=cv2.boundingRect(cnt)cv2.rectangle(result,(x,y),(x+w,y+h),(0,255,0),5)#繪制最小外接圓(x,y),r=cv2.minEnclosingCircle(cnt)center=(int(x),int(y))r=int(r)cv2.circle(result,center,r,(255,255,255),5)#plt.figure(figsize=(400,600))print(img_gray.shape)
print(img_gray[0][0])
plt.subplot(221)
#img_gray=BGR_TO_RGB(img_gray,'gray')
plt.imshow(img_gray,'gray')
plt.title('img_gray')plt.subplot(222)
plt.imshow(binary,'gray')
plt.title('binary')
plt.subplot(223)
plt.imshow(result,'gray')
plt.title('result')plt.show()
os.system("pause")
運行結果如下:


使用Clover升級舊電腦-(高階玩法)讓固態硬盤內置Win11 PE啟動系統](http://pic.xiahunao.cn/[原創](免改BIOS)使用Clover升級舊電腦-(高階玩法)讓固態硬盤內置Win11 PE啟動系統)


)
![[網鼎杯 2020 朱雀組]phpweb](http://pic.xiahunao.cn/[網鼎杯 2020 朱雀組]phpweb)
分類教程(樣本制作、特征添加、訓練、精度、最優參數、統計面積))


