一、路由的基本概念
你是否好奇單頁應用(SPA)是如何在不刷新頁面的情況下實現頁面切換的?這就離不開路由的功勞。
- 路由:本質是一組 key-value 的對應關系,在前端領域中,key 通常是路徑,value 是對應的組件。
- 路由器:管理多個路由的工具,負責根據路徑匹配對應的組件并進行渲染。
- SPA 應用特點:
- 整個應用只有一個完整的頁面
- 點擊導航鏈接不會刷新頁面,只會做局部更新
- 數據通過 ajax 請求獲取
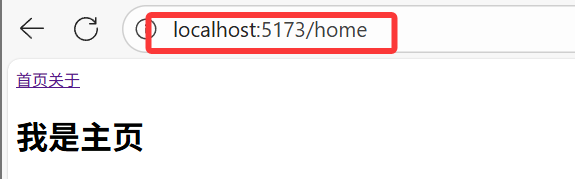
舉個例子,當我們訪問?/home?路徑時,路由器會幫我們渲染?Home?組件;訪問?/about?路徑時,渲染?About?組件,這就是前端路由的核心作用。
二、路由項目的初始化
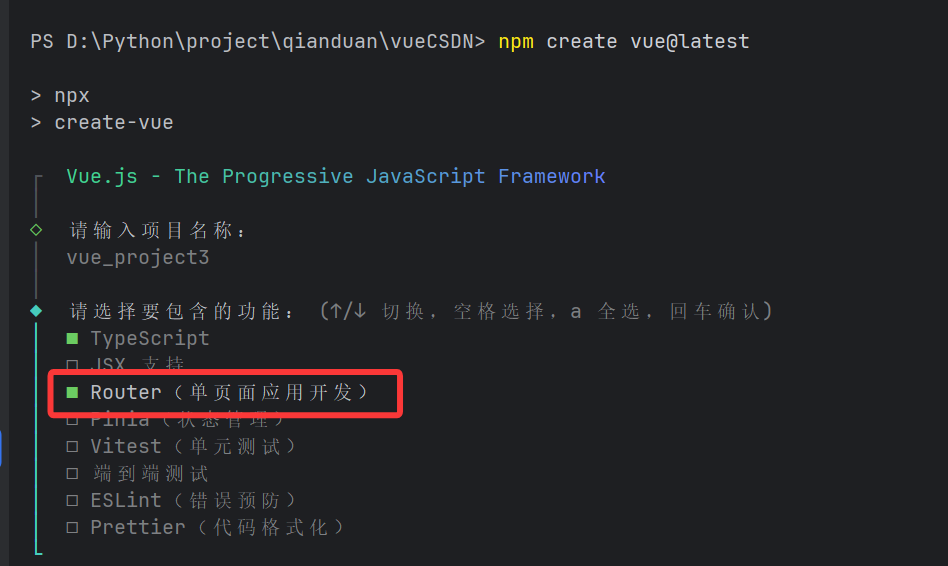
2.1 創建項目的時選擇路由
在使用 Vue CLI 或 Vite 創建 Vue 項目時,通常會有一個選項讓我們選擇是否安裝 Vue Router,直接勾選即可快速初始化帶有路由配置的項目。
2.2 手搓路由(手動配置路由)
假如我們創建項目的時候沒有添加路由配置,那我們怎么手動的添加路由配置呢?
①安裝 Vue Router(Vue 3 對應版本為 4.x)
npm install vue-router@4
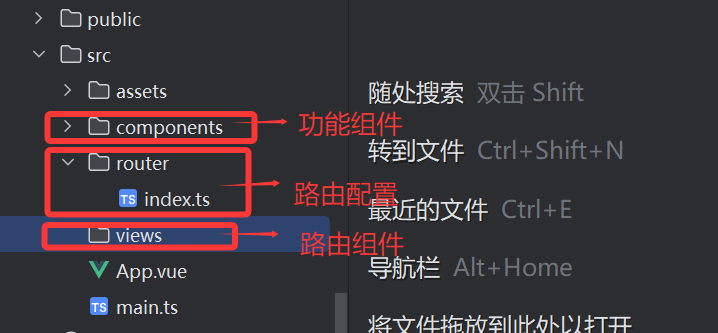
②創建路由配置文件(通常在?src/router/index.ts)
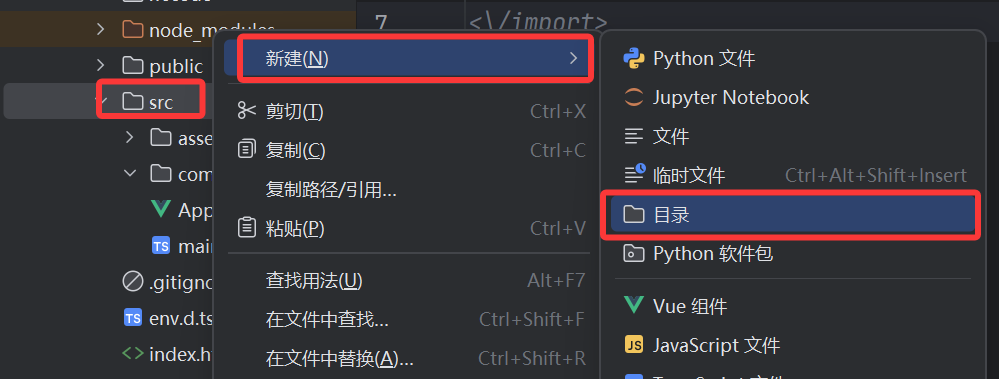
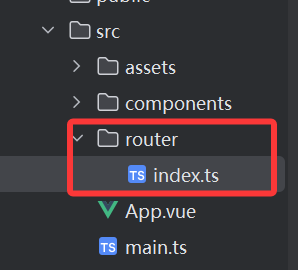
src/router/index.ts
// 1、導入創建路由對象(傳入工作模式,路由規則):
// 導入createRouter對象, 創建路由對象// 2、導入創建工作模式:
// ①導入createWebHistory對象, 創建歷史工作模式
// ②導入createWebHashHistory對象, 創建哈希工作模式
import {createRouter,createWebHistory} from "vue-router";
const roter = createRouter({history:createWebHistory(),routes:[// 路由規則]
})
// 拋出路由對象,用于掛載到Vue實例中
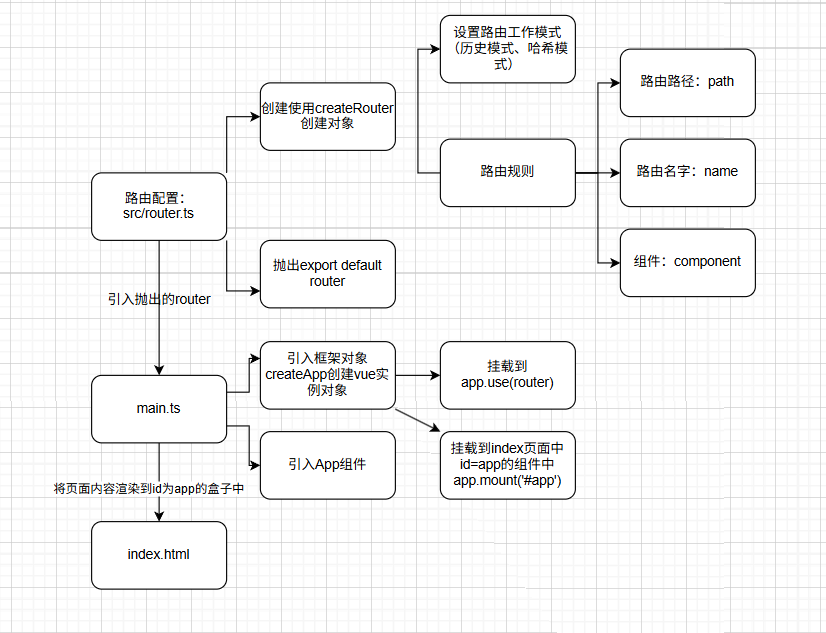
export default roter③在src/main.ts掛載到index的#app
src/main.ts
import './assets/main.css'
// 引入剛剛創建的src/router/index.ts router實例
import router from './router'import { createApp } from 'vue'
import App from './App.vue'const app = createApp(App)// 掛載router實例到app實例
app.use(router)app.mount('#app')
③原理的示意圖
三、路由的基本使用
3.1 創建路由器
如何創建一個路由器來管理我們的路由規則呢?
// src/router/index.ts
import { createRouter, createWebHistory } from "vue-router";
import Home from "@/pages/Home.vue";
import About from "@/pages/About.vue";// 創建路由器實例
const router = createRouter({history: createWebHistory(), // 路由模式routes: [ // 路由規則數組{path: "/home", // 路徑name: "home", // 路由名稱component: Home // 對應的組件},{path: "/about",name: "about",component: About}]
});export default router;
3.2?路由的兩種工作模式
路由有兩種工作模式,它們各有什么特點,該如何選擇呢?
3.2.1?history 模式(createWebHistory)
const router = createRouter({history: createWebHistory(), // history模式// ...路由規則
});- 優點:URL 更加美觀,不帶有?
#,更接近傳統網站的 URL - 缺點:項目上線后,需要服務端配合處理路徑問題,否則刷新頁面可能會出現 404 錯
3.2.2?hash 模式(createWebHashHistory)
const router = createRouter({history: createWebHashHistory(), // hash模式// ...路由規則
});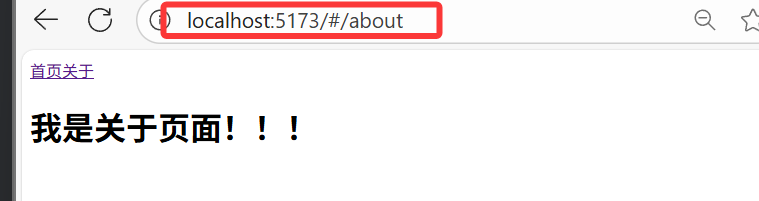
- 優點:兼容性更好,不需要服務器端處理路徑
- 缺點:URL 帶有?
#?不夠美觀,SEO 優化方面相對較差
總結:開發環境下兩種模式均可使用;生產環境如果服務端支持,優先選擇 history 模式,否則使用 hash 模式。
3.3?路由的使用(<router-link><router-view>)
路由的使用:
1.路由導航
<router-link to="src" active-class="選中之后的樣式類名"></router-link>
2.路由展示
<router-view></router-view>
<template>
<!-- 1、路由導航 --><div class="nav"><!-- to 表示目標路徑,active-class 是選中時的樣式類名 --><router-link to="/home" active-class="active">首頁</router-link><routerLink to="/about" active-class="active">關于</routerLink></div>
<!-- 2、路由展示 --><div class="content"><router-view></router-view></div>
</template><script setup></script><style>
/* 1、路由沒有被選中 */
a{color: black;
}
/* 1、路由被選中樣式 */
.active {color: #3a5fc6;border: #3a5fc6 1px solid;
}
</style>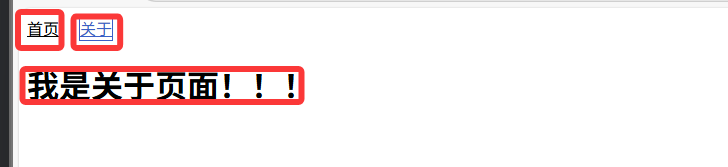
3.4?to的三種寫法、
<router-link>?的?to?屬性有多種寫法,分別適用于什么場景呢?
3.4.1 寫法一:對象型path寫法? :to"{path:'src'}"
<router-link :to="{path:'/home'}" active-class="active">首頁</router-link>適用于需要動態生成路徑或攜帶參數的場景。
3.4.2?寫法二:字符串寫法(簡寫):to:"src"
<routerLink to="/about" active-class="active">關于</routerLink>適用于路徑固定的簡單場景,寫法簡潔。
3.4.3 寫法三:對象型name寫法? :to"{name:'name'}"
<routerLink :to="{name:'new'}" active-class="active">新頁面</routerLink>需要先在路由規則中配置?name?屬性,優點是當路徑發生變化時,只需修改路由規則中的?path,不需要修改所有導航鏈接。
3.4.4 設置replace禁止返回上一個頁面
使用replace清除瀏覽器的歷史記錄,不能返回上次瀏覽頁面。
<router-link replace :to="{path:'/home'}" active-class="active">首頁</router-link>
<routerLink replace to="/about" active-class="active">關于</routerLink>
<routerLink replace :to="{name:'new'}" active-class="active">新頁面</routerLink>
四、路由嵌套
在實際開發中,我們經常會遇到頁面中嵌套子頁面的情況,比如新聞頁面中嵌套新聞詳情,這時就需要用到嵌套路由。
如何配置嵌套路由呢?
-
編寫子組件(如?
NewsDetail.vue) -
在路由規則中使用?
children?配置項
// src/router/index.ts
import {createRouter,createWebHistory,createWebHashHistory} from "vue-router";
import Home from "../views/homeView.vue";
import About from "../views/aboutView.vue";
import New from "../views/newView.vue";
import NewList from "../views/newlistView.vue";
const roter =  createRouter({history:createWebHashHistory(),routes:[// 路由規則{path: "/home", // 路徑name: "home", // 路由名稱component: Home // 對應的組件},{path: "/about",name: "about",component: About},{path: "/New",name: "new",component: New,children:[{path:"NewList",name:"NewList",component:NewList}]},]
})
// 拋出路由對象,用于掛載到Vue實例中
export default roter
注意:
子路由不需要加"/",否則不會被識別為子路由!!!

在新聞頁面添加路由導航和路由渲染:
// src/views/newList.vue
<template><h1>我是新聞頁面</h1><router-link to="/new/NewList">新聞詳情</router-link><router-view></router-view>
</template>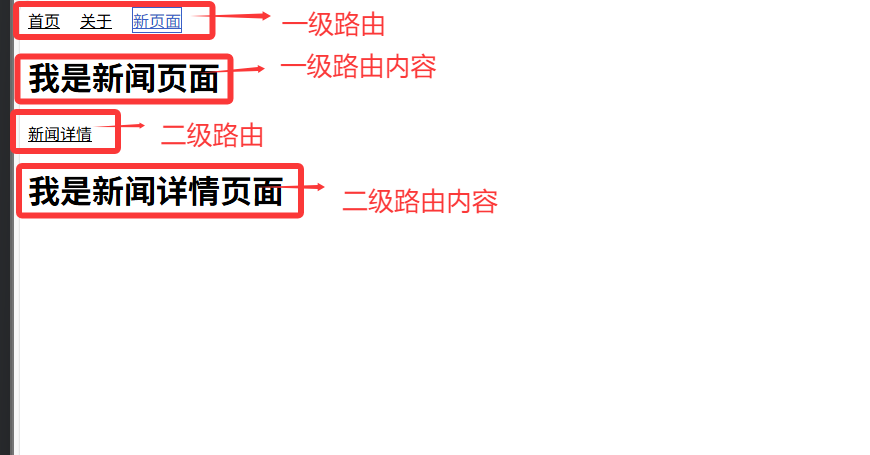
五、路由傳參
在頁面跳轉時,我們經常需要傳遞參數(如新聞 ID、用戶 ID 等),Vue Router 提供了兩種主要的傳參方式:query 傳參和 params 傳參。
5.1 to + query 傳參
query 傳參的參數會顯示在 URL 中,形如??id=1&title=新聞標題。
query傳參的路徑樣式:

5.1.1 模板字符串的 query 傳參
①路由設置
{path: '/newList',name: 'newList',component: newListView,children:[{// 不要設置參數path: 'newDetail',name: 'newDetail',component: newDetailView,}]
},
②父路由傳遞參數
<script setup lang="ts">
import { RouterLink, RouterView } from 'vue-router'
import {reactive} from "vue";
const news = reactive([{id: 1001,title: '新聞標題1',content: '新聞內容1'},{id: 1002,title: '新聞標題2',content: '新聞內容2'},{id: 1003,title: '新聞標題3',content: '新聞內容3'},{id: 1004,title: '新聞標題4',content: '新聞內容4'},
])
</script><template><div class="nav" v-for="anew in news" >  // 注意<router-link  :to="`/newList/newDetail?id=${anew.id}&title=${anew.title}&content=${anew.content}`">{{anew.title}}</router-link></div><div class="content"><router-view></router-view></div>
</template><style scoped></style>
③子路由接受參數
<script setup lang="ts">
import { useRoute} from 'vue-router'
const route = useRoute()
</script><template><h2>news詳情頁面</h2><ul>// 注意怎么訪問參數<li>{{route.query.id}}</li><li>{{route.query.title}}</li><li>{{route.query.content}}</li></ul>
</template>
5.1.2 query 傳參 + 對象型參數
①路由設置
{path: '/newList',name: 'newList',component: newListView,children:[{// 不要設置參數path: 'newDetail',name: 'newDetail',component: newDetailView,}]
},
②父路由傳遞參數
<script setup lang="ts">
import { RouterLink, RouterView } from 'vue-router'
import {reactive} from "vue";
const news = reactive([{id: 1001,title: '新聞標題1',content: '新聞內容1'},{id: 1002,title: '新聞標題2',content: '新聞內容2'},{id: 1003,title: '新聞標題3',content: '新聞內容3'},{id: 1004,title: '新聞標題4',content: '新聞內容4'},
])
</script><template><div class="nav" v-for="anew in news" >  // 注意<router-link :to="{path:'/newList/newDetail',query:{id:anew.id,title:anew.title,content:anew.content}}">{{anew.title}}</router-link></div><div class="content"><router-view></router-view></div>
</template>
③子路由接受參數
<script setup lang="ts">
import { useRoute} from 'vue-router'
const route = useRoute()
</script><template><h2>news詳情頁面</h2><ul>// 注意怎么訪問參數<li>{{route.query.id}}</li><li>{{route.query.title}}</li><li>{{route.query.content}}</li></ul>
</template>
5.1.3 name + query 傳參 + 對象型參數
①路由設置
{path: '/newList',name: 'newList',component: newListView,children:[{// 不要設置參數path: 'newDetail',name: 'newDetail',component: newDetailView,}]
},
②父路由傳遞參數
<script setup lang="ts">
import { RouterLink, RouterView } from 'vue-router'
import {reactive} from "vue";
const news = reactive([{id: 1001,title: '新聞標題1',content: '新聞內容1'},{id: 1002,title: '新聞標題2',content: '新聞內容2'},{id: 1003,title: '新聞標題3',content: '新聞內容3'},{id: 1004,title: '新聞標題4',content: '新聞內容4'},
])
</script><template><div class="nav" v-for="anew in news" >  // 注意<router-link :to="{name:'newDetail',query:{id:anew.id,title:anew.title,content:anew.content}}">{{anew.title}}</router-link></div><div class="content"><router-view></router-view></div>
</template>
③子路由接受參數
<script setup lang="ts">
import { useRoute} from 'vue-router'
const route = useRoute()
</script><template><h2>news詳情頁面</h2><ul>// 注意怎么訪問參數<li>{{route.query.id}}</li><li>{{route.query.title}}</li><li>{{route.query.content}}</li></ul>
</template>
5.2?to + params 寫法傳參
params 傳參的參數需要在路由路徑中占位,URL 形式如?/news/detail/1/新聞標題。
5.2.1 params 傳參 + 模板字符串
①路由設置
{path: '/newList',name: 'newList',component: newListView,children:[{// 設置參數為路徑的一部分path: 'newDetail/:id/:title/:content',name: 'newDetail',component: newDetailView,}]
},
②父路由傳遞參數
<script setup lang="ts">
import { RouterLink, RouterView } from 'vue-router'
import {reactive} from "vue";
const news = reactive([{id: 1001,title: '新聞標題1',content: '新聞內容1'},{id: 1002,title: '新聞標題2',content: '新聞內容2'},{id: 1003,title: '新聞標題3',content: '新聞內容3'},{id: 1004,title: '新聞標題4',content: '新聞內容4'},
])
</script><template><div class="nav" v-for="anew in news" > // 注意<router-link :to="`/newList/newDetail/${anew.id}/${anew.title}/${anew.content}`">{{anew.title}}</router-link></div><div class="content"><router-view></router-view></div>
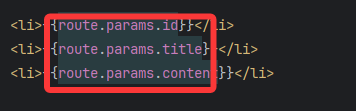
</template>③子路由接受參數
<script setup lang="ts">
import { useRoute} from 'vue-router'
const route = useRoute()
</script><template><h2>news詳情頁面</h2><ul>// 注意怎么訪問參數<li>{{route.params.id}}</li><li>{{route.params.title}}</li><li>{{route.params.content}}</li></ul>
</template>
5.2.2 name + params 傳參 + 對象型參數
①路由設置
{path: '/newList',name: 'newList',component: newListView,children:[{// 設置參數為路徑的一部分path: 'newDetail/:id/:title/:content',name: 'newDetail',component: newDetailView,}]
},
②父路由傳遞參數
<script setup lang="ts">
import { RouterLink, RouterView } from 'vue-router'
import {reactive} from "vue";
const news = reactive([{id: 1001,title: '新聞標題1',content: '新聞內容1'},{id: 1002,title: '新聞標題2',content: '新聞內容2'},{id: 1003,title: '新聞標題3',content: '新聞內容3'},{id: 1004,title: '新聞標題4',content: '新聞內容4'},
])
</script><template><div class="nav" v-for="anew in news" >  // 注意<router-link :to="{name:'newDetail',params:{id:anew.id, title:anew.title, content:anew.content}}">{{anew.title}}</router-link></div><div class="content"><router-view></router-view></div>
</template>
③子路由接受參數
<script setup lang="ts">
import { useRoute} from 'vue-router'
const route = useRoute()
</script><template><h2>news詳情頁面</h2><ul>// 注意怎么訪問參數<li>{{route.params.id}}</li><li>{{route.params.title}}</li><li>{{route.params.content}}</li></ul>
</template>
5.3??defineProps接受參數小技巧
這樣傳遞過來的參數獲取起來大家會不會覺得寫起來很復雜,其實使用defineProps就可以很好的解決父組件向子組件傳參的問題得到解決:
①在路由中修改
{path: '/newList',name: 'newList',component: newListView,children:[{// 設置參數為路徑的一部分path: 'newDetail/:id/:title/:content',name: 'newDetail',component: newDetailView,// 設置為defineProps為tureprops: true,}]
},
②在子組件中修改
<script setup lang="ts">
import { useRoute} from 'vue-router'
const route = useRoute()
// 接受路由參數
defineProps(['id', 'title', 'content'])
</script><template><h2>news詳情頁面</h2><ul>// 注意怎么訪問參數<li>{{id}}</li><li>{{title}}</li><li>{{content}}</li></ul>
</template>5.4?query 傳參 vs params 傳參 總結
| 特點 | query 傳參 | params 傳參 |
|---|---|---|
| URL 顯示 | 帶?和 & 符號 | 路徑的一部分 |
| 路由配置 | 無需特殊配置 | 需要在 path 中占位 |
| 跳轉方式 | 可使用 path 或 name | 只能使用 name |
| 刷新頁面 | 參數不丟失 | 參數不丟失 |
| 適用場景 | 非必需參數(如篩選條件) | 必需參數(如資源 ID) |
六、路由的編程式導航
除了使用?<RouterLink>?組件進行聲明式導航,我們還可以通過代碼實現編程式導航(如點擊按鈕跳轉,綁定點擊事件)。
如何通過代碼實現頁面跳轉呢?
主要導航方法:
6.1 router.push(location, onComplete?, onAbort?)
- 最常用的方法,向 history 棧添加一個新記錄
- 等同于?
<router-link :to="...">
// 字符串路徑
router.push('/home')
// 對象
router.push({ path: '/home' })
// 命名的路由
router.push({ name: 'user', params: { userId: '123' } })
// 帶查詢參數
router.push({ path: '/register', query: { plan: 'private' } })
6.2 router.replace(location, onComplete?, onAbort?)
- 替換當前 history 棧中的記錄,不會留下歷史記錄
- 等同于?
<router-link :to="..." replace>
router.replace('/home')
router.replace({ path: '/home' })
6.3 router.go(n)
- 在 history 記錄中前進或后退多少步
// 前進一步
router.go(1)
// 后退一步
router.go(-1)
// 前進三步
router.go(3)
6.4 router.back()
- 等同于?
router.go(-1) - 后退一步
6.5 router.forward()
- 等同于?
router.go(1) - 前進一步
6.6 編程式導航的實現
①在導航頁面導入:import {useRoute,useRouter} from 'vue-router'
②創建路由對象:const router = useRouter():因為編程式子導航要使用router的相關方法
③綁定點擊事件
④設置綁定事件
示例1:
<script setup lang="ts">
import {useRoute,useRouter} from 'vue-router'
const router = useRouter()   //可以用來實現編程式導航
const tocenter = () => {router.push("/center");
}
function toabout() {router.push({name:'about'})
}
function tohome() {router.push({name:'home'})
}
const tonewList = () => {router.push({path:'/newList'})
}
</script><template><div class="container"><h1>vu3-課堂練習</h1><div class="box"><div class="nav"><ul><li><button @click="tohome">首頁</button></li><li><button @click="tonewList">新聞列表</button></li><li><button @click="toabout">關于</button></li><li><button @click="tocenter">用戶中心</button></li></ul></div><div class="content"><router-view></router-view></div></div></div>
</template>
示例2:
<script setup lang="ts">
import {useRouter} from 'vue-router'
const userouter = useRouter()
function toback(){userouter.back()
}
function tonext(){userouter.forward()
}
</script>
<template><div class="center">用戶中心</div><button v-on:click="toback">返回上一級</button><button @click="tonext">到下一級</button>
</template>
6.7?useRoute和useRouter的區別
①useRoute
作用:用于獲取當前活躍的路由信息對象(
Route?對象)返回值:一個響應式的路由信息對象,包含當前路由的各種屬性
主要屬性:
path:當前路由的路徑params:路由參數(如?/user/:id?中的?id)query:URL 查詢參數(如??name=test)hash:URL 中的哈希值name:路由名稱meta:路由元信息fullPath:完整的 URL 路徑,包含查詢參數和哈希
②useRouter
作用:用于獲取路由實例(
Router?對象)返回值:路由實例,包含各種路由操作方法
主要方法:
push():導航到新路由(類似?router-link?的?to?屬性)replace():替換當前路由,不會留下歷史記錄go(n):在歷史記錄中前進或后退?n?步back():后退一步,相當于?go(-1)forward():前進一步,相當于?go(1)addRoute():動態添加路由removeRoute():移除路由使用場景:需要編程式導航或操作路由實例時使用
七、重定向和404
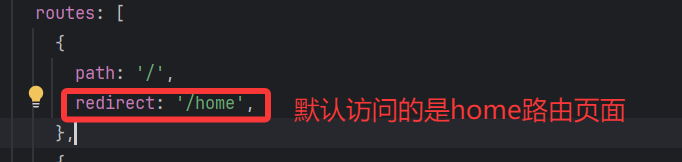
7.1 重定向
什么是重定向?
重定向的核心特點是:瀏覽器請求A地址,服務器/路由系統告訴瀏覽器"去B地址",然后瀏覽器自動跳轉到B地址。
大家是否看到過瀏覽器控制臺報出這樣的警告:

其實本質上的原因就是沒有設置重定向,當訪問 網址:http://localhost:5173/,瀏覽器不知道要跳轉到哪個路由去,可以設置重定向來解決這一問題:
7.2 404?概念和使用
在 Web 開發里,404 是客戶端錯誤狀態碼?,當服務器找不到對應請求的資源(比如頁面、接口數據等)時,就會返回 404 響應 。在前端路由場景中,404 主要用來處理用戶訪問不存在的路由路徑,讓用戶看到友好的 “頁面未找到” 提示,而非空白或報錯頁面,提升體驗。
比如訪問不存在的路徑的時候就會跳轉到404頁面:
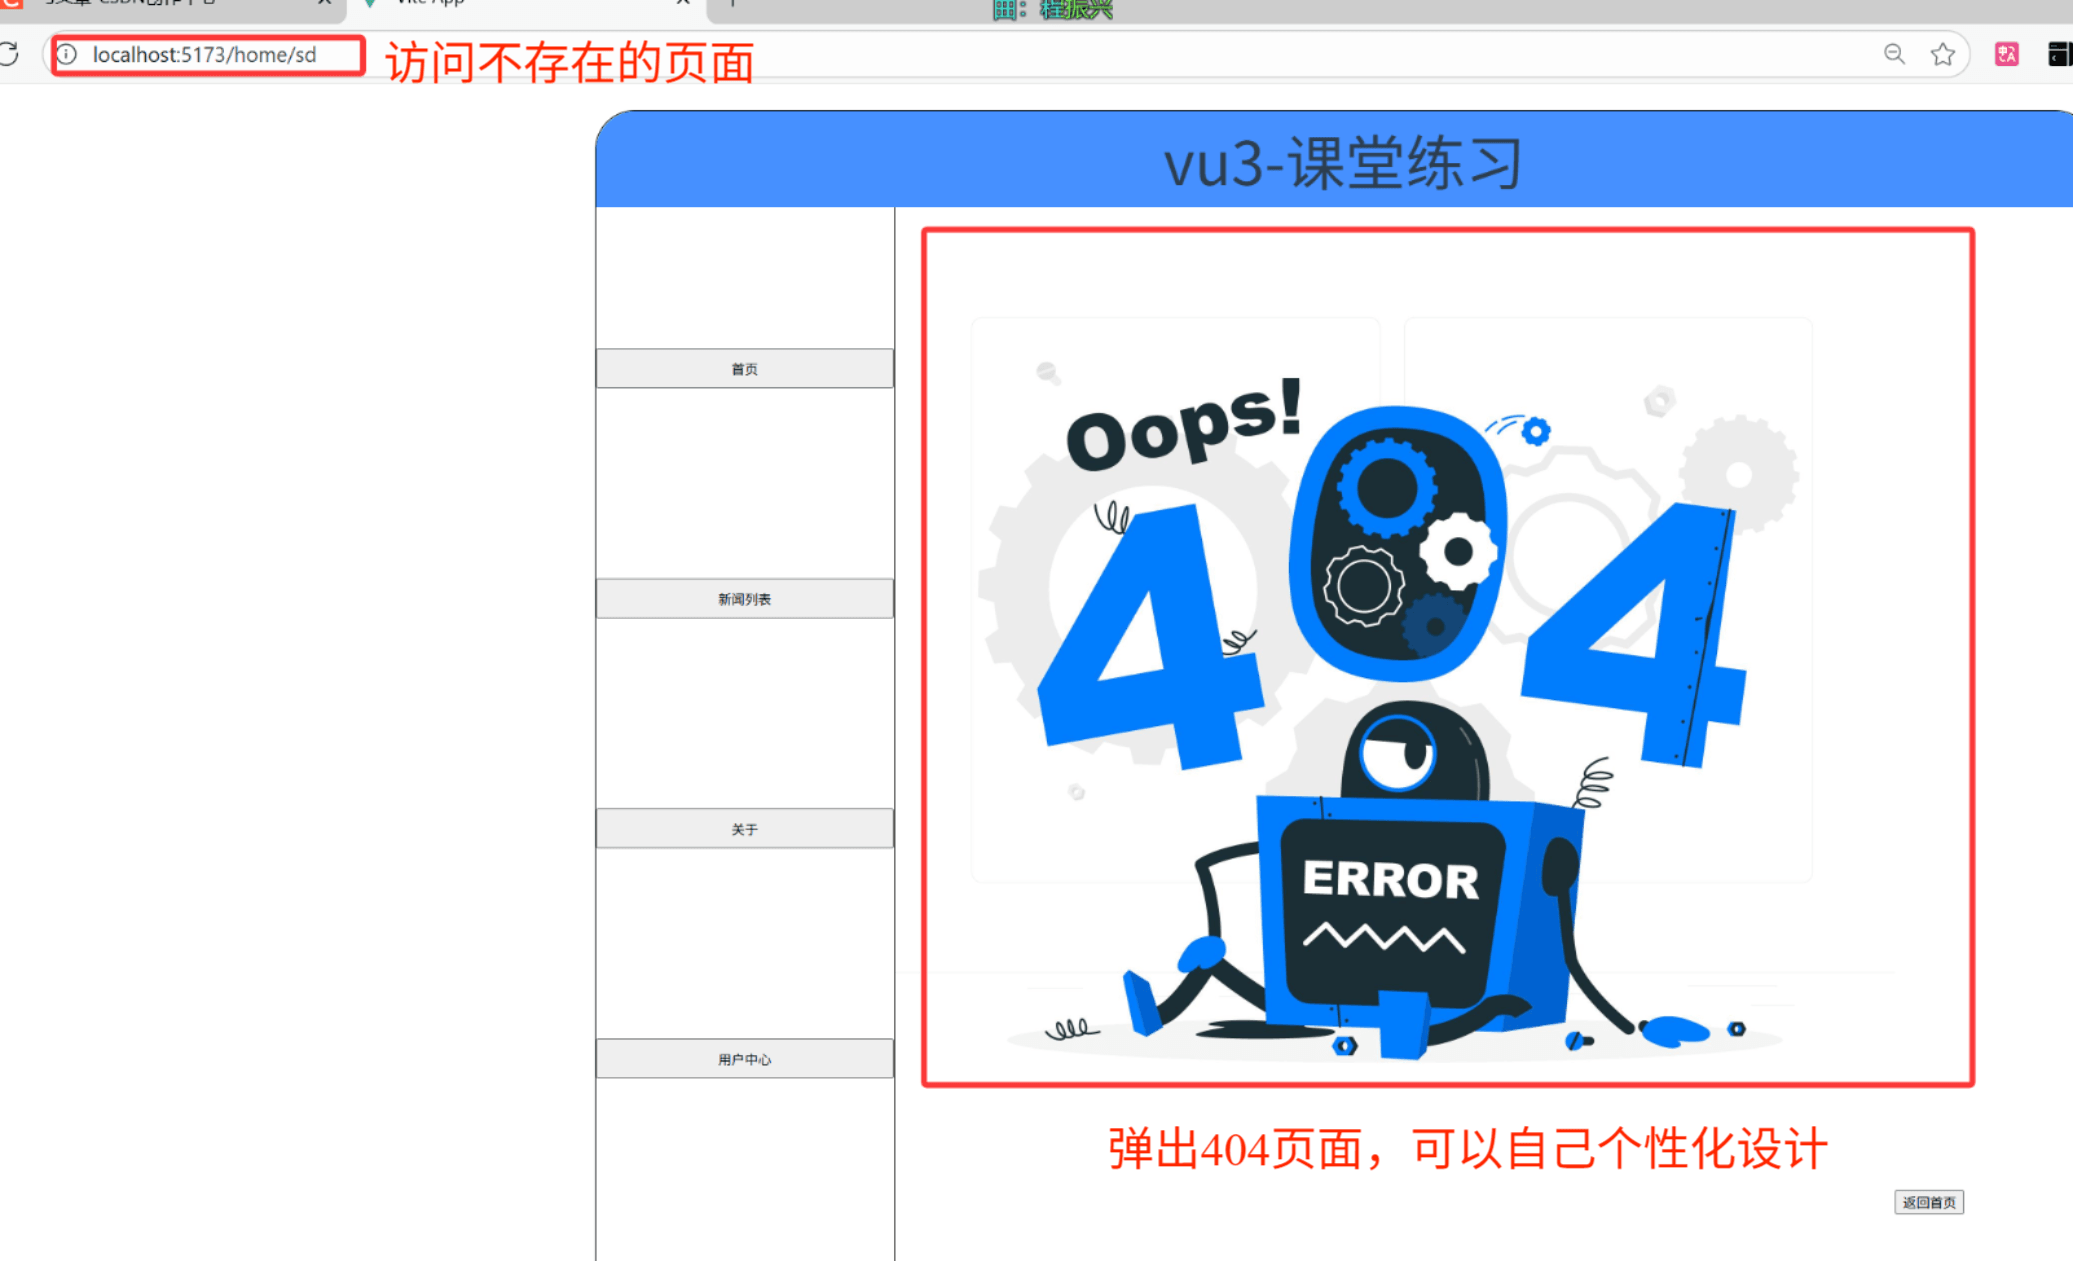
①在src/index.ts 路由配置中設置:
{path: "/:pathMatch(.*)*", // 匹配所有未定義的路徑name: "notFind",component: NotFind,}②設置NotFind頁面
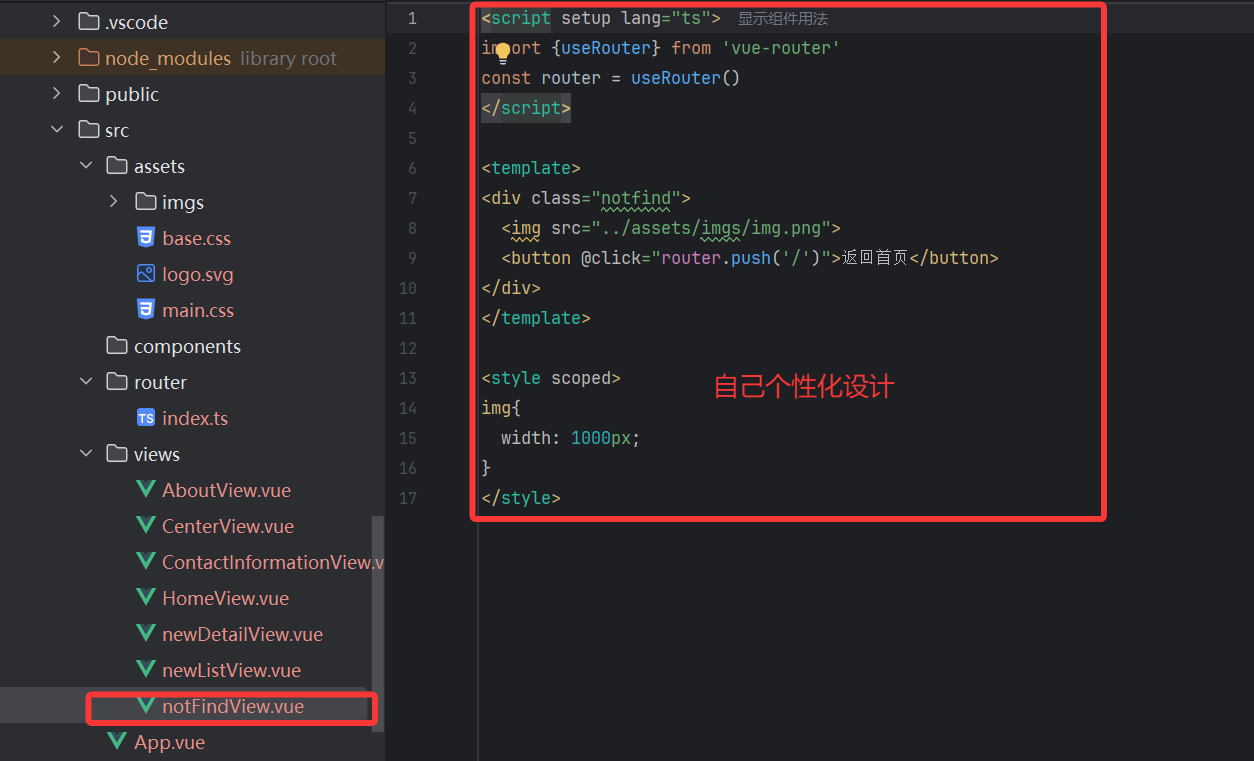
這樣當我們訪問不存在的頁面的時候就會自動跳轉到404頁面啦!!!
八、路由守衛(補充內容)
路由守衛可以控制路由的訪問權限,比如未登錄用戶不能訪問個人中心頁面。
8.1 全局前置守衛
// src/router/index.ts
router.beforeEach((to, from, next) => {// to:即將進入的路由// from:即將離開的路由// next():允許導航,next('/login'):跳轉到登錄頁,next(false):阻止導航// 判斷是否需要登錄權限if (to.meta.requiresAuth) {// 檢查是否登錄(這里假設登錄信息存儲在 localStorage 中)const token = localStorage.getItem("token");if (token) {next(); // 已登錄,允許訪問} else {next("/login"); // 未登錄,跳轉到登錄頁}} else {next(); // 不需要登錄,允許訪問}
});使用時需要在路由規則中添加?meta?屬性:
{path: "/profile",name: "profile",component: Profile,meta: { requiresAuth: true } // 表示需要登錄權限
}
掌握這些知識點后,你可以輕松實現單頁應用的路由管理,包括頁面跳轉、參數傳遞、權限控制等功能。在實際開發中,需要根據具體場景選擇合適的路由配置和傳參方式,讓你的應用更加靈活和高效。


)


)