教學視頻參考:B站——Three.js教學
教學鏈接:Three.js中文網??老陳打碼 | 麒躍科技
一.什么是Three.js?
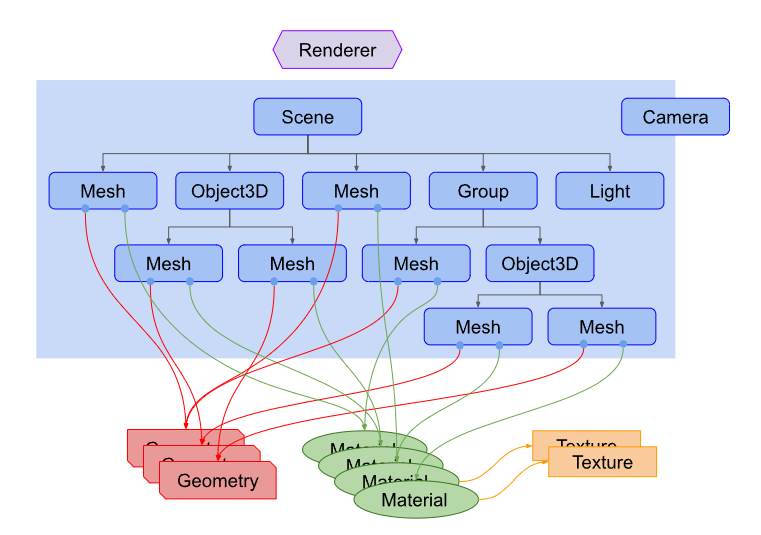
Three.js? 是一個基于 JavaScript 的 ?3D 圖形庫,用于在網頁瀏覽器中創建和渲染交互式 3D 內容。它基于 WebGL(一種瀏覽器原生支持的 3D 圖形 API),但通過更簡單的抽象層讓開發者無需直接編寫復雜的 WebGL 代碼即可構建 3D 場景。
下面是官網鏈接:基礎 - three.js manual、three.js docs
二.入門 —— Vue3編寫一個可旋轉的正方體頁面
在App.vue內編寫代碼:
首先初始化基礎環境:
// 1.1 創建場景(容器)
const scene = new THREE.Scene();// 1.2 創建透視相機
const camera = new THREE.PerspectiveCamera(75, // 視野角度window.innerWidth / window.innerHeight, // 寬高比0.1, // 近裁剪面1000 // 遠裁剪面
);// 1.3 創建WebGL渲染器(啟用抗鋸齒)
const renderer = new THREE.WebGLRenderer({ antialias: true });
renderer.setSize(window.innerWidth, window.innerHeight); // 設置渲染尺寸
document.body.appendChild(renderer.domElement); // 將畫布添加到頁面
當調用
new THREE.WebGLRenderer()時,Three.js會自動創建一個<canvas>元素,以至于我們通過renderer.domElement可以獲取這個canvas,并通過
document.body.appendChild(renderer.domElement)直接將canvas插入body。(這就是不寫<canvas>也可以渲染的原因)
隨后創建3D正方體:
| 參數 | 類型 | 作用 |
|---|---|---|
geometry | THREE.BufferGeometry | 定義物體的形狀(如立方體、球體等) |
material | THREE.Material | 定義物體的外觀(顏色、紋理、反光等) |
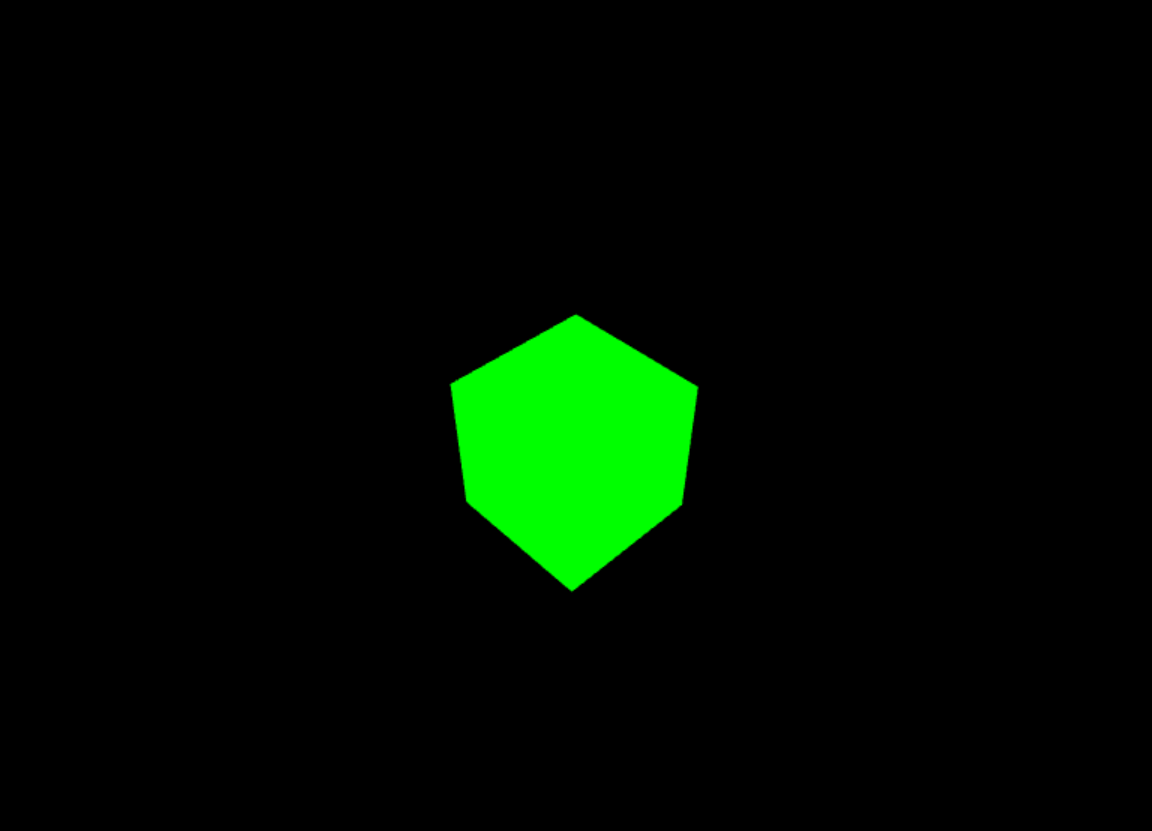
// 2.1 創建立方體幾何體
const geometry = new THREE.BoxGeometry(1, 1, 1); // 1x1x1的立方體// 2.2 創建綠色基礎材質
const material = new THREE.MeshBasicMaterial({ color: 0x00ff00 });// 2.3 組合幾何體和材質為網格對象
const cube = new THREE.Mesh(geometry, material);// 2.4 將立方體添加到場景
scene.add(cube);
?之后設置相機位置:
這里是直接設置成在z軸并對準原點
camera.position.z = 5; // 相機沿z軸后退5個單位
camera.lookAt(0, 0, 0); // 相機對準場景中心
最后使用遞歸animate()方法不斷調用來讓正方體展示并旋轉:
function animate() {requestAnimationFrame(animate); // 循環調用自身cube.rotation.x += 0.01; // x軸旋轉cube.rotation.y += 0.01; // y軸旋轉renderer.render(scene, camera); // 渲染場景
}
animate(); // 啟動動畫
下面是完整代碼:?
<script setup>
import * as THREE from 'three'// 創建場景
const scene = new THREE.Scene();// 創建相機
const camera = new THREE.PerspectiveCamera(75, window.innerWidth / window.innerHeight, 0.1, 1000); // 視野角度, 寬高比, 最近可見距離, 最遠可見距離// 創建渲染器
const renderer = new THREE.WebGLRenderer({ antialias: true }); // 抗鋸齒
renderer.setSize(window.innerWidth, window.innerHeight); // 設置渲染器大小
document.body.appendChild(renderer.domElement); // 將渲染器添加到頁面中// 創建幾何體
const geometry = new THREE.BoxGeometry(1, 1, 1); // 創建一個立方體幾何體
const material = new THREE.MeshBasicMaterial({ color: 0x00ff00 }); // 創建一個綠色的材質
const cube = new THREE.Mesh(geometry, material); // 創建一個網格對象
scene.add(cube); // 將網格對象添加到場景中
// 設置相機位置
camera.position.z = 5; // 設置相機位置
camera.lookAt(0, 0, 0); // 設置相機朝向原點
// 渲染循環
function animate() {requestAnimationFrame(animate); // 請求下一幀動畫cube.rotation.x += 0.01; // 旋轉立方體cube.rotation.y += 0.01; // 旋轉立方體// 渲染renderer.render(scene, camera); // 渲染場景和相機
}
animate(); // 開始動畫循環</script><template><div></div>
</template><style scoped>
* {margin: 0;padding: 0;
}/* 3D效果都是畫在canvas畫布上 */
canvas{display: block;position: fixed;left: 0;top: 0;width: 100vw;height: 100vh;
}
</style>
?三. 基礎操作
1.坐標輔助器與軌道輔助器
坐標輔助器(AxesHelper)是可視化 ?3D 坐標系?(X/Y/Z 軸),能夠幫助開發者快速理解場景的空間方向。
- ?X軸(紅色)??:水平向右
- ?Y軸(綠色)??:垂直向上
- ?Z軸(藍色)??:垂直于屏幕(正向朝外)
import * as THREE from 'three';// 創建場景
const scene = new THREE.Scene();// 添加坐標輔助器(參數:坐標軸長度)
const axesHelper = new THREE.AxesHelper(5); // 5個單位長度
scene.add(axesHelper);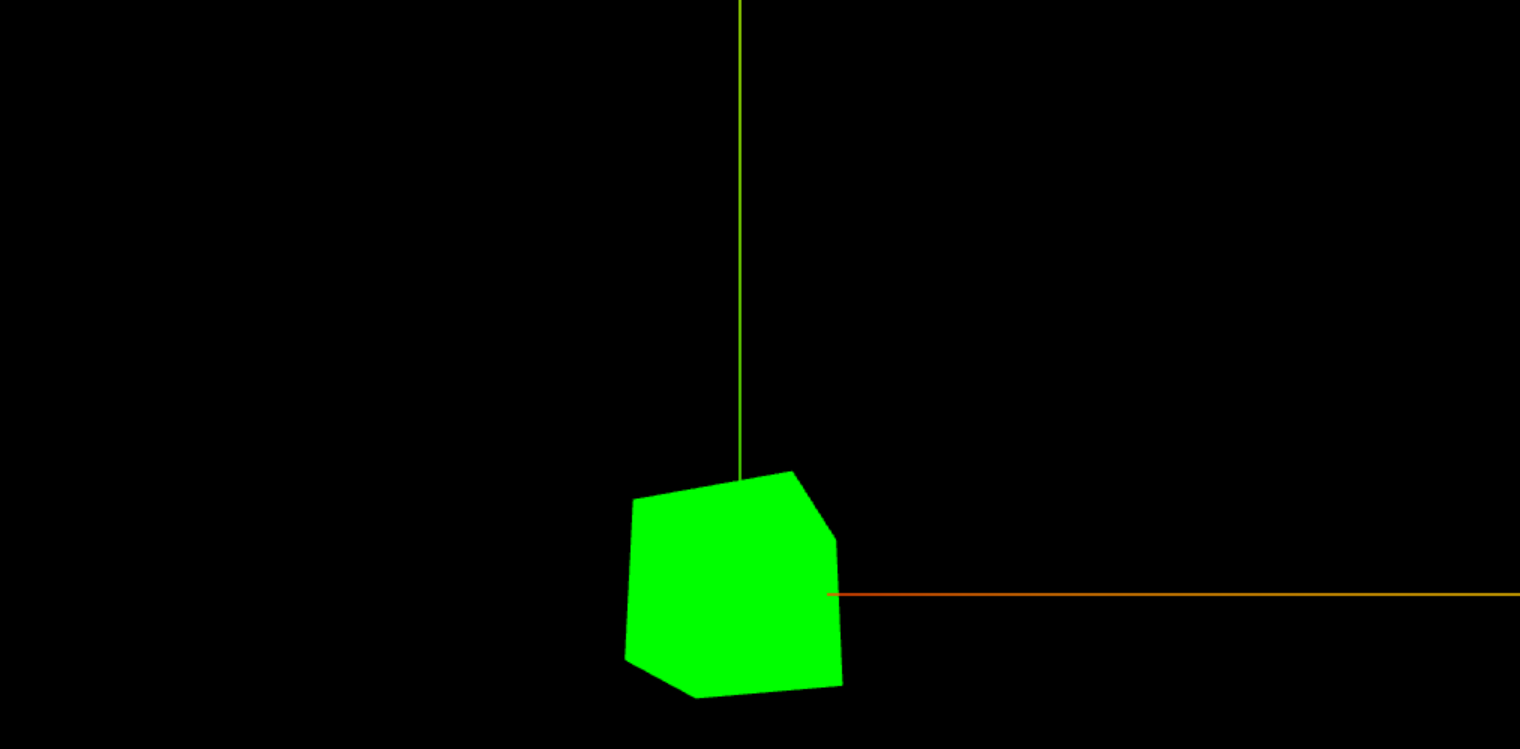
由于我們的相機正對著z軸拍攝,所以z軸只是一個點。在上圖可以清晰的看見y軸x軸。
而我們想要用鼠標來改變相機的位置就需要使用軌道控制器:
軌道控制器:
- 允許用戶 ?用鼠標交互控制相機,實現:
- ?旋轉?(左鍵拖動)
- ?縮放?(滾輪)
- ?平移?(右鍵拖動)
- 適用于 ?調試 3D 場景? 或 ?交互式展示。
<script setup>
import * as THREE from 'three'
import { OrbitControls } from 'three/addons/controls/OrbitControls.js'// 創建場景
const scene = new THREE.Scene();// 初始化相機和渲染器
const camera = new THREE.PerspectiveCamera(75, window.innerWidth / window.innerHeight, 0.1, 1000);
const renderer = new THREE.WebGLRenderer({ antialias: true });
renderer.setSize(window.innerWidth, window.innerHeight);
document.body.appendChild(renderer.domElement);// 創建幾何體
const geometry = new THREE.BoxGeometry(1, 1, 1);
const material = new THREE.MeshBasicMaterial({ color: 0x00ff00 });
const cube = new THREE.Mesh(geometry, material);
scene.add(cube);// 設置相機位置
camera.position.z = 5;
camera.lookAt(0, 0, 0);// 添加坐標輔助器
const axesHelper = new THREE.AxesHelper(5);
scene.add(axesHelper);// 創建軌道控制器
const controls = new OrbitControls(camera, renderer.domElement);
controls.enableDamping = true;
controls.dampingFactor = 0.05;// 動畫循環
function animate() {requestAnimationFrame(animate);controls.update();renderer.render(scene, camera);
}
animate();// 處理窗口大小變化
window.addEventListener('resize', () => {camera.aspect = window.innerWidth / window.innerHeight;camera.updateProjectionMatrix();renderer.setSize(window.innerWidth, window.innerHeight);
});
</script><template><!-- 空模板即可,Three.js會自動管理canvas --><div></div>
</template><style scoped>
* {margin: 0;padding: 0;
}canvas {display: block;position: fixed;left: 0;top: 0;width: 100vw;height: 100vh;
}
</style>
在這里縮放是我們的相機在不斷的變換位置,以至于看到3D正方體不斷的被我們拉動位置。
在這里可以設置是否帶有阻尼,也就是是否帶有慣性:
controls.enableDamping = true; // 啟用阻尼(慣性效果)
controls.dampingFactor = 0.05; // 阻尼系數,越大停的越快
controls.autoRotate = true; // 設置旋轉速度
?如果我們想要換一個對象監聽,可以將軌道控制器 new OrbitControls(camera, renderer.domElement) 使用?new OrbitControls(camera, domElement.body) 來監聽,同時要修改CSS:Controls – three.js docs
// 創建軌道控制器
const controls = new OrbitControls(camera, domElement.body);// 樣式渲染(不寫可能頁面看不到)
body {width: 100vw;height: 100vh;
}
2.物體位移與父子元素
在 Three.js 中,理解物體位移和父子元素關系是構建復雜場景的基礎。
Vector3 – three.js docs
每個 Three.js 物體(Object3D)都有?position?屬性,它是一個?Vector3?對象,包含 x、y、z 三個分量:
const cube = new THREE.Mesh(geometry, material);  // 創建一個新的 3D 網格物體?(Mesh)// 設置位置
cube.position.set(1, 2, 3); // x=1, y=2, z=3// 或者單獨設置
cube.position.x = 1;
cube.position.y = 2;
cube.position.z = 3;
// 也可以使用set方法
cube.position.set(1,2,3);
如何讓其位移呢?
?世界坐標 = 父級世界坐標 + 子級局部坐標
在講解父子元素前需要了解 ->?
什么是局部坐標,什么是世界坐標呢?
| 相對坐標(局部坐標) | 世界坐標 | |
|---|---|---|
| ?定義? | 相對于父級容器的坐標 | 相對于場景原點的絕對坐標 |
| ?表示? | object.position | 通過計算得到 |
| ?影響? | 受父級變換影響 | 不受父級變換影響 |
| ?用途? | 物體在父容器內的布局 | 場景中的絕對定位 |
??世界坐標 = 父級世界坐標 + 子級局部坐標
【存在旋轉/縮放時,必須用?
getWorldPosition()?計算】
?【1】相對坐標(局部坐標)
特點:
- 存儲在?
object.position?中- 所有變換操作默認基于局部坐標系
- 子對象繼承父對象的變換
在 Three.js 中,
const parent = new THREE.Group();?用于創建一個空容器對象?(Group),它是組織和管理 3D 場景中多個物體的核心工具。?
- 繼承自?
THREE.Object3D,但沒有幾何體(Geometry)和材質(Material)- 僅用于邏輯分組,自身不可見,不參與渲染
方法 作用 .add(object1, object2...)添加子對象 .remove(object)移除子對象 .clear()清空所有子對象 .getObjectByName(name)按名稱查找子對象
const parent = new THREE.Group();
parent.position.set(2, 0, 0);const child = new THREE.Mesh(geometry, material);
child.position.set(1, 0, 0); // 相對于父級的坐標parent.add(child);
// 此時child的局部坐標是(1,0,0),世界坐標是(3,0,0)
?【2】世界坐標
特點:
- 物體在全局場景中的絕對位置
- 需要計算得到(考慮所有父級變換)
- 常用于碰撞檢測、物理計算等
const worldPosition = new THREE.Vector3();
object.getWorldPosition(worldPosition);const worldRotation = new THREE.Quaternion();
object.getWorldQuaternion(worldRotation);const worldScale = new THREE.Vector3();
object.getWorldScale(worldScale);
?3.物體的縮放與旋轉
在 Three.js 中,縮放(scale)和旋轉(rotation)是物體變換(transform)的兩個核心操作,它們與位移(position)共同構成了物體的完整空間變換。
Euler – three.js docs
Three.js 提供了多種旋轉表示方式:(旋轉順序默認為 'XYZ')
rotation?(歐拉角,默認)quaternion?(四元數)
// 分別繞各軸旋轉
cube.rotation.x = Math.PI/4; // 繞X軸旋轉45度
cube.rotation.y = Math.PI/2; // 繞Y軸旋轉90度// 使用set方法
cube.rotation.set(Math.PI/4, 0, 0);
?旋轉與父子關系:
const parent = new THREE.Group();
parent.rotation.y = Math.PI/2;const child = new THREE.Mesh(geometry, material);
child.position.set(1, 0, 0);
parent.add(child);// child會繼承parent的旋轉,其世界位置會變化
Three.js 的變換順序是:?縮放 → 旋轉 → 平移?
假如父組件被縮放,那么子組件也會跟著父組件被縮放的倍數進行縮放。
// 以下兩個操作不等價
cube.scale.set(2, 1, 1);
cube.rotation.y = Math.PI/4;// 與
cube.rotation.y = Math.PI/4;
cube.scale.set(2, 1, 1);
4.畫布自適應窗口:
在 Three.js 開發中,實現畫布(Canvas)自適應窗口大小是創建響應式 3D 應用的基礎。
// 監聽窗口的變化
window.addEventListener('resize', () => {// 重置渲染器寬高比renderer.setSize(window.innerWidth, window.innerHeight);// 重置相機的寬高比camera.aspect = window.innerWidth / window.innerHeight;// 更新相機投影矩陣camera.updateProjectionMatrix();
});
現在注冊一個按鈕監聽點擊事件來讓其全屏:
// 監聽按鈕點擊事件
const button = document.createElement('button');
button.innerHTML = '點擊全屏';
button.style.position = 'absolute';
button.style.top = '10px';
button.style.left = '10px';
button.style.zIndex = '1000';
button.style.backgroundColor = '#fff';
button.onclick = () => {// 全屏if (document.fullscreenElement) {document.exitFullscreen();} else {document.documentElement.requestFullscreen();}
};
document.body.appendChild(button);
// 監聽全屏事件
document.addEventListener('fullscreenchange', () => {if (document.fullscreenElement) {button.innerHTML = '退出全屏';} else {button.innerHTML = '點擊全屏';}
});
?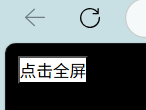 左側就是渲染的效果。
5.lilGUI
Lil-GUI(原名為 dat.GUI)是一個輕量級的JavaScript庫,專門用于創建調試控制面板,特別適合Three.js等WebGL項目的參數調節。
下載依賴:
npm install lil-gui導入lilGUI:
import GUI from 'three/examples/jsm/libs/lil-gui.module.min.js';我們以實現全屏按鈕為例:
// 監聽按鈕點擊事件
const gui = new GUI();
// 定義事件
const event = { FullScreen: () => {document.documentElement.requestFullscreen();},ExitFullscreen: () => {document.exitFullscreen();},ChangeColor: () => {cube.material.color.set(Math.random() * 0xffffff);},
};
// 添加按鈕
gui.add(event, 'FullScreen').name('全屏');
gui.add(event, 'ExitFullscreen').name('退出全屏');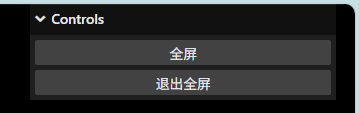 左側圖片就是我們的渲染效果。
還可以使用lilGUI調節立方體的位置:
// 隨機控制立方體位置
gui.add(cube.position, 'x', -5, 5).name('立方體X軸位置');
// 也可以是下面這樣
gui.add(cube.position, 'x').min(-5).max(5).step(1).name('立方體X軸位置');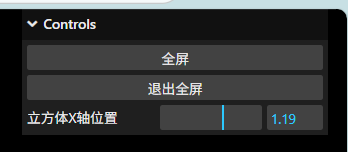
也可以使用folder創建下拉框:
const folder = gui.addFolder('立方體位置');
folder.add(cube.position, 'x', -5, 5).name('立方體X軸位置');
folder.add(cube.position, 'y', -5, 5).name('立方體Y軸位置');
folder.add(cube.position, 'z', -5, 5).name('立方體Z軸位置');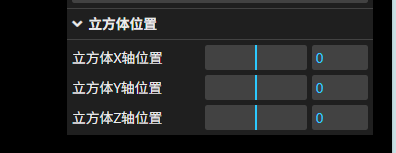
也可以綁定監聽事件:
const folder = gui.addFolder('立方體位置');
folder.add(cube.position, 'x', -5, 5).onChange(() => {console.log('立方體X軸位置:', cube.position.x);}).name('立方體X軸位置');
folder.add(cube.position, 'y', -5, 5).name('立方體Y軸位置');
folder.add(cube.position, 'z', -5, 5).name('立方體Z軸位置');
也可以監聽最后停下的事件:
folder.add(cube.position, 'y', -5, 5).onFinishChange(()=>{console.log('立方體Y軸位置:', cube.position.y);
}).name('立方體Y軸位置');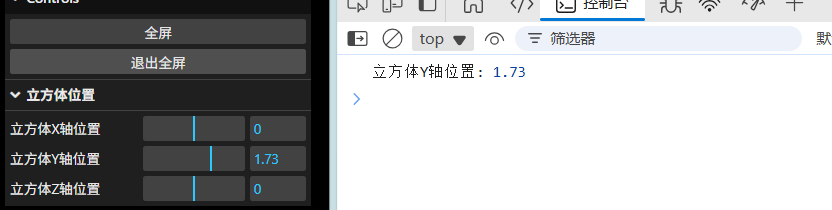 ?也可以使用布爾值設置是否為線框模式:
const gui = new GUI();
const material = new THREE.MeshBasicMaterial({ color: 0x00ff00 });
gui.add(material, 'wireframe').name('線框模式');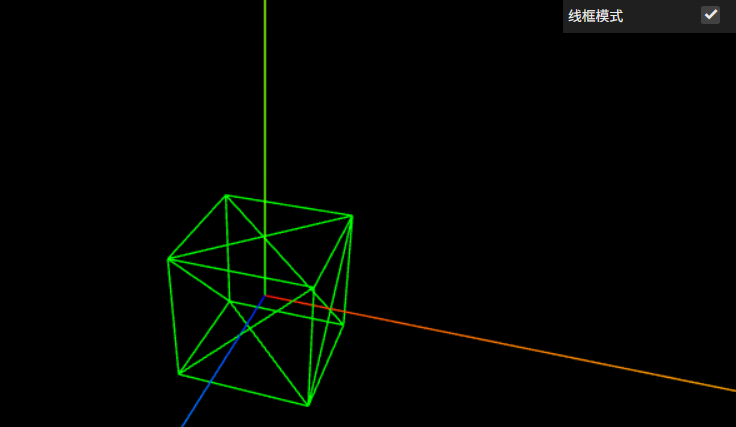
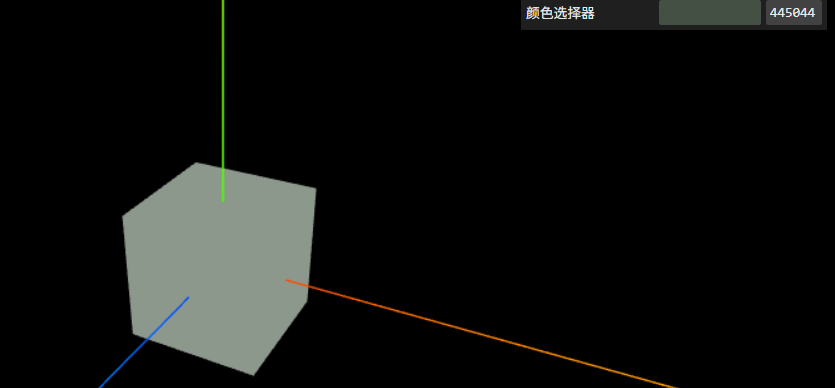
也可以選擇顏色:
// 選擇顏色
gui.addColor(material, 'color').name('顏色選擇器').onChange((val) => {cube.material.color.set(val);console.log('立方體顏色:', material.color.getHexString());
});
四.幾何體
幾何體是 Three.js 中定義3D物體形狀的基礎組件。它們由頂點(vertices)、面(faces)、邊(edges)等元素構成,決定了物體的基本形狀和結構。?
BufferGeometry – three.js docs
1.幾何體_頂點_索引?
由于一個矩形是由兩個三角形構成,所以需要兩組頂點數據(2*3=6)構造,下面的代碼用來構造一個矩形:????????
const geometry = new THREE.BufferGeometry();
// 創建一個簡單的矩形. 在這里我們左上和右下頂點被復制了兩次。
// 因為在兩個三角面片里,這兩個頂點都需要被用到。
// 創建頂點數據
const vertices = new Float32Array( [-1.0, -1.0,  1.0,1.0, -1.0,  1.0,1.0,  1.0,  1.0,1.0,  1.0,  1.0,-1.0,  1.0,  1.0,-1.0, -1.0,  1.0
] );// itemSize = 3 因為每個頂點都是一個三元組。
geometry.setAttribute( 'position', new THREE.BufferAttribute( vertices, 3 ) );
const material = new THREE.MeshBasicMaterial( { color: 0xff0000 } );
const mesh = new THREE.Mesh( geometry, material );
使用下面代碼查看我們構造的矩形:
<template><div ref="container" class="three-container"></div>
</template><script setup>
import { ref, onMounted, onUnmounted } from 'vue';
import * as THREE from 'three';
import { OrbitControls } from 'three/addons/controls/OrbitControls.js';const container = ref(null);onMounted(() => {// 1. 創建場景、相機和渲染器const scene = new THREE.Scene();const camera = new THREE.PerspectiveCamera(75, window.innerWidth / window.innerHeight, 0.1, 1000);const renderer = new THREE.WebGLRenderer({ antialias: true });// 2. 設置渲染器大小并添加到DOMrenderer.setSize(window.innerWidth, window.innerHeight);container.value.appendChild(renderer.domElement);// 3. 創建幾何體和材質(線框模式)const geometry = new THREE.BufferGeometry();const vertices = new Float32Array([-1.0, -1.0,  1.0,1.0, -1.0,  1.0,1.0,  1.0,  1.0,1.0,  1.0,  1.0,-1.0,  1.0,  1.0,-1.0, -1.0,  1.0]);geometry.setAttribute('position', new THREE.BufferAttribute(vertices, 3));// 使用MeshBasicMaterial并啟用線框模式const material = new THREE.MeshBasicMaterial({ color: 0xff0000,wireframe: true  // 啟用線框模式});const mesh = new THREE.Mesh(geometry, material);scene.add(mesh);// 4. 添加坐標軸輔助器(紅色-X,綠色-Y,藍色-Z)const axesHelper = new THREE.AxesHelper(5);scene.add(axesHelper);// 5. 添加網格輔助器(地面網格)const gridHelper = new THREE.GridHelper(10, 10);scene.add(gridHelper);// 6. 設置相機位置camera.position.set(3, 3, 5);camera.lookAt(0, 0, 0);// 7. 添加軌道控制器const controls = new OrbitControls(camera, renderer.domElement);controls.enableDamping = true; // 啟用阻尼效果controls.dampingFactor = 0.05;// 8. 動畫循環const animate = () => {requestAnimationFrame(animate);controls.update(); // 更新控制器renderer.render(scene, camera);};animate();// 9. 窗口大小調整處理const onWindowResize = () => {camera.aspect = window.innerWidth / window.innerHeight;camera.updateProjectionMatrix();renderer.setSize(window.innerWidth, window.innerHeight);};window.addEventListener('resize', onWindowResize);// 10. 組件卸載時清理onUnmounted(() => {window.removeEventListener('resize', onWindowResize);container.value?.removeChild(renderer.domElement);geometry.dispose();material.dispose();controls.dispose();});
});
</script><style scoped>
.three-container {position: fixed;top: 0;left: 0;width: 100%;height: 100%;overflow: hidden;margin: 0;padding: 0;
}
</style>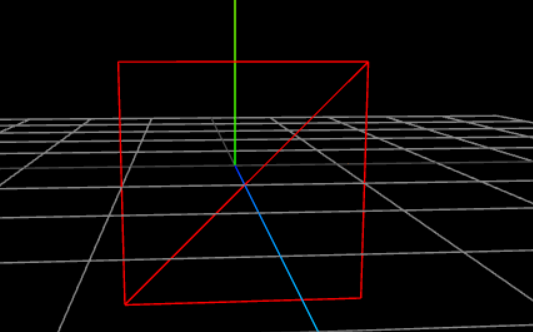
也可以使用索引來索引頂點位置進行構建:
// 創建幾何體 - 使用索引繪制
const geometry = new THREE.BufferGeometry();// 定義4個頂點(矩形只需要4個頂點,而不是之前的6個重復頂點)
const vertices = new Float32Array([-1.0, -1.0,  1.0,  // 頂點0 - 左下1.0, -1.0,  1.0,  // 頂點1 - 右下1.0,  1.0,  1.0,  // 頂點2 - 右上-1.0,  1.0,  1.0   // 頂點3 - 左上
]);// 定義索引(用2個三角形組成矩形)
const indices = new Uint16Array([0, 1, 2,  // 第一個三角形0, 2, 3   // 第二個三角形
]);// 設置幾何體屬性
geometry.setAttribute('position', new THREE.BufferAttribute(vertices, 3));
geometry.setIndex(new THREE.BufferAttribute(indices, 1)); // 1表示每個索引是1個數字
?2.幾何體劃分頂點組設置不同材質
下面代碼展示了正方體每個面由不同的顏色組成:
<template><div ref="container" class="three-container"></div>
</template><script setup>
import { ref, onMounted, onUnmounted } from 'vue';
import * as THREE from 'three';
import { OrbitControls } from 'three/addons/controls/OrbitControls.js';const container = ref(null);onMounted(() => {// 1. 創建場景、相機和渲染器const scene = new THREE.Scene();const camera = new THREE.PerspectiveCamera(75,window.innerWidth / window.innerHeight,0.1,1000);const renderer = new THREE.WebGLRenderer({ antialias: true });// 2. 設置渲染器renderer.setSize(window.innerWidth, window.innerHeight);container.value.appendChild(renderer.domElement);// 3. 創建多材質立方體const createMultiMaterialCube = () => {const geometry = new THREE.BoxGeometry(2, 2, 2);// 為每個面創建不同材質const materials = [new THREE.MeshBasicMaterial({ color: 0xff0000 }), // 右 - 紅new THREE.MeshBasicMaterial({ color: 0x00ff00 }), // 左 - 綠new THREE.MeshBasicMaterial({ color: 0x0000ff }), // 上 - 藍new THREE.MeshBasicMaterial({ color: 0xffff00 }), // 下 - 黃new THREE.MeshBasicMaterial({ color: 0xff00ff }), // 前 - 紫new THREE.MeshBasicMaterial({ color: 0x00ffff })  // 后 - 青];return new THREE.Mesh(geometry, materials);};const cube = createMultiMaterialCube();scene.add(cube);// 4. 添加輔助工具const axesHelper = new THREE.AxesHelper(5);scene.add(axesHelper);const gridHelper = new THREE.GridHelper(10, 10);scene.add(gridHelper);// 5. 設置相機camera.position.set(3, 3, 5);camera.lookAt(0, 0, 0);// 6. 添加控制器const controls = new OrbitControls(camera, renderer.domElement);controls.enableDamping = true;// 7. 動畫循環const animate = () => {requestAnimationFrame(animate);cube.rotation.x += 0.01;cube.rotation.y += 0.01;controls.update();renderer.render(scene, camera);};animate();// 8. 響應式處理const onWindowResize = () => {camera.aspect = window.innerWidth / window.innerHeight;camera.updateProjectionMatrix();renderer.setSize(window.innerWidth, window.innerHeight);};window.addEventListener('resize', onWindowResize);// 9. 清理onUnmounted(() => {window.removeEventListener('resize', onWindowResize);container.value?.removeChild(renderer.domElement);controls.dispose();});
});
</script><style scoped>
.three-container {position: fixed;top: 0;left: 0;width: 100%;height: 100%;overflow: hidden;margin: 0;padding: 0;
}
</style>
3.threejs常見的幾何體:
下面是網站鏈接:
常見的幾何體
// 常見幾何體
// BoxGeometry (立方體)
const geometry = new THREE.BoxGeometry(width, height, depth);
// SphereGeometry (球體)
const geometry = new THREE.SphereGeometry(radius, widthSegments, heightSegments);
// CylinderGeometry (圓柱體)
const geometry = new THREE.CylinderGeometry(radiusTop, radiusBottom, height, radialSegments);
// ConeGeometry (圓錐體)
const geometry = new THREE.ConeGeometry(radius, height, radialSegments);
// TorusGeometry (圓環)
const geometry = new THREE.TorusGeometry(radius, tube, radialSegments, tubularSegments);
// 平面幾何體
// PlaneGeometry (平面)
const geometry = new THREE.PlaneGeometry(width, height, widthSegments, heightSegments);
// CircleGeometry (圓形)
const geometry = new THREE.CircleGeometry(radius, segments);
// RingGeometry (環形)
const geometry = new THREE.RingGeometry(innerRadius, outerRadius, thetaSegments);
4.基礎網絡材質
Material – three.js docs
材質描述了對象objects的外觀。它們的定義方式與渲染器無關, 因此,如果我們決定使用不同的渲染器,不必重寫材質。
我們先準備一個平面的渲染代碼:
<template><div ref="container" class="three-container"></div>
</template><script setup>
import { ref, onMounted, onUnmounted } from 'vue';
import * as THREE from 'three';
import { OrbitControls } from 'three/addons/controls/OrbitControls.js';
import { GUI } from 'lil-gui';const container = ref(null);
let gui = null;
let controls = null;onMounted(() => {// 1. 初始化場景const scene = new THREE.Scene();const camera = new THREE.PerspectiveCamera(75,window.innerWidth / window.innerHeight,0.1,1000);const renderer = new THREE.WebGLRenderer({ antialias: true });renderer.setSize(window.innerWidth, window.innerHeight);container.value.appendChild(renderer.domElement);// 初始化 GUIgui = new GUI();// 創建平面const planeGeometry = new THREE.PlaneGeometry(1, 1);const planeMaterial = new THREE.MeshBasicMaterial({ color: 0xffffff,});const planeMesh = new THREE.Mesh(planeGeometry, planeMaterial);scene.add(planeMesh);// 設置相機位置camera.position.z = 3;camera.lookAt(0, 0, 0);// 添加軌道控制器controls = new OrbitControls(camera, renderer.domElement);controls.enableDamping = true;// 動畫循環const animate = () => {requestAnimationFrame(animate);controls.update();renderer.render(scene, camera);};animate();// 窗口大小調整const onWindowResize = () => {camera.aspect = window.innerWidth / window.innerHeight;camera.updateProjectionMatrix();renderer.setSize(window.innerWidth, window.innerHeight);};window.addEventListener('resize', onWindowResize);// 清理資源onUnmounted(() => {window.removeEventListener('resize', onWindowResize);if (gui) gui.destroy();if (controls) controls.dispose();planeGeometry.dispose();planeMaterial.dispose();renderer.dispose();container.value?.removeChild(renderer.domElement);});
});
</script><style scoped>
.three-container {position: fixed;top: 0;left: 0;width: 100%;height: 100%;overflow: hidden;margin: 0;padding: 0;
}
</style>
為了將指定照片作為紋理貼在上面,我們添加一個紋理加載器THREE.TextureLoader(),將指定路徑的紋理貼在創建的平面上:
// 初始化 GUI
gui = new GUI();
// 創建紋理加載器
const textureLoader = new THREE.TextureLoader();
// 2. 創建平面
const planeGeometry = new THREE.PlaneGeometry(1, 1);
const planeMaterial = new THREE.MeshBasicMaterial({ color: 0xffffff,map: textureLoader.load('/src/assets/jinggai.jpg') // 紋理路徑
});
const planeMesh = new THREE.Mesh(planeGeometry, planeMaterial);
scene.add(planeMesh);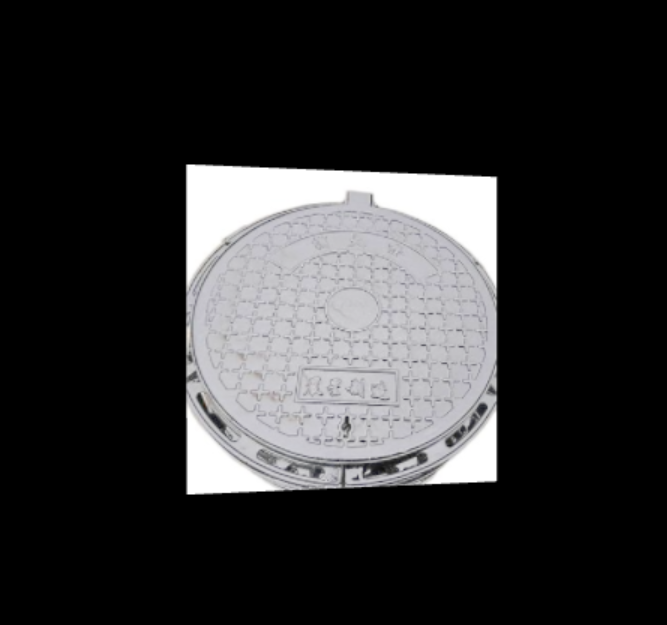
?然后設置允許透明度以及雙面渲染:
// 初始化 GUI
gui = new GUI();
// 創建紋理加載器
const textureLoader = new THREE.TextureLoader();
// 2. 創建平面
const planeGeometry = new THREE.PlaneGeometry(1, 1);
const planeMaterial = new THREE.MeshBasicMaterial({ color: 0xffffff,map: textureLoader.load('/src/assets/jinggai.jpg'),side: THREE.DoubleSide, // 雙面渲染transparent: true, // 透明
});
const planeMesh = new THREE.Mesh(planeGeometry, planeMaterial);
scene.add(planeMesh);
然后插入hdr格式照片來作為我們的全景環境:
先導入RGBELoader:
import { RGBELoader } from 'three/examples/jsm/Addons.js';
<template><div ref="container" class="three-container"></div>
</template><script setup>
import { ref, onMounted, onUnmounted } from 'vue';
import * as THREE from 'three';
import { OrbitControls } from 'three/addons/controls/OrbitControls.js';
import { RGBELoader } from 'three/addons/loaders/RGBELoader.js';
import { GUI } from 'lil-gui';const container = ref(null);
let gui = null;
let controls = null;onMounted(() => {// 1. 初始化場景const scene = new THREE.Scene();const camera = new THREE.PerspectiveCamera(75,window.innerWidth / window.innerHeight,0.1,1000);const renderer = new THREE.WebGLRenderer({ antialias: true,toneMapping: THREE.ACESFilmicToneMapping, // 啟用色調映射toneMappingExposure: 1.0 // 設置曝光});renderer.setSize(window.innerWidth, window.innerHeight);renderer.outputColorSpace = THREE.SRGBColorSpace; // 設置色彩空間container.value.appendChild(renderer.domElement);// 2. 初始化 GUIgui = new GUI();const params = {envMapIntensity: 1.0,exposure: 1.0};// 3. 加載 HDR 環境貼圖const rgbeLoader = new RGBELoader();rgbeLoader.load('/src/assets/environment.hdr', // 替換為你的HDR文件路徑(texture) => {// 設置球形映射texture.mapping = THREE.EquirectangularReflectionMapping; // 設置場景環境貼圖scene.environment = texture;scene.background = texture;// 可選:創建平面材質const planeGeometry = new THREE.PlaneGeometry(1, 1);const planeMaterial = new THREE.MeshStandardMaterial({color: 0xffffff,metalness: 0.5,roughness: 0.1,envMap: texture, // 使用環境貼圖envMapIntensity: params.envMapIntensity});const planeMesh = new THREE.Mesh(planeGeometry, planeMaterial);scene.add(planeMesh);// GUI 控制gui.add(params, 'envMapIntensity', 0, 2).onChange((value) => {planeMaterial.envMapIntensity = value;});gui.add(params, 'exposure', 0, 2).onChange((value) => {renderer.toneMappingExposure = value;});},undefined, // 進度回調(error) => {console.error('加載HDR環境貼圖失敗:', error);});// 4. 添加光源(增強效果)const ambientLight = new THREE.AmbientLight(0x404040);scene.add(ambientLight);const directionalLight = new THREE.DirectionalLight(0xffffff, 1);directionalLight.position.set(1, 1, 1);scene.add(directionalLight);// 5. 設置相機camera.position.z = 3;camera.lookAt(0, 0, 0);// 6. 添加控制器controls = new OrbitControls(camera, renderer.domElement);controls.enableDamping = true;// 7. 動畫循環const animate = () => {requestAnimationFrame(animate);controls.update();renderer.render(scene, camera);};animate();// 8. 窗口大小調整const onWindowResize = () => {camera.aspect = window.innerWidth / window.innerHeight;camera.updateProjectionMatrix();renderer.setSize(window.innerWidth, window.innerHeight);};window.addEventListener('resize', onWindowResize);// 9. 清理資源onUnmounted(() => {window.removeEventListener('resize', onWindowResize);if (gui) gui.destroy();if (controls) controls.dispose();renderer.dispose();container.value?.removeChild(renderer.domElement);});
});
</script><style scoped>
.three-container {position: fixed;top: 0;left: 0;width: 100%;height: 100%;overflow: hidden;margin: 0;padding: 0;
}
</style>
5.霧fog:
霧效(Fog)是 Three.js 中用于模擬大氣效果的重要功能,它能創造深度感和距離感,使場景看起來更加真實。
const scene = new THREE.Scene();
scene.fog = new THREE.Fog(0xcccccc, 10, 100); // 線性霧
scene.fog = new THREE.FogExp2(0xcccccc, 0.01); // 指數霧
下面以極其長的長方體為例展示霧的效果:
<template><div ref="container" class="three-container"></div>
</template><script setup>
import { ref, onMounted, onUnmounted } from 'vue';
import * as THREE from 'three';
import { OrbitControls } from 'three/addons/controls/OrbitControls.js';
import { GUI } from 'lil-gui';const container = ref(null);
let gui = null;
let controls = null;onMounted(() => {// 1. 初始化場景const scene = new THREE.Scene();const camera = new THREE.PerspectiveCamera(60,window.innerWidth / window.innerHeight,0.1,1000);const renderer = new THREE.WebGLRenderer({ antialias: true });renderer.setSize(window.innerWidth, window.innerHeight);container.value.appendChild(renderer.domElement);// 2. 添加霧效scene.fog = new THREE.FogExp2(0xcccccc, 0.01); // 使用指數霧scene.background = new THREE.Color(0xcccccc); // 背景色與霧色一致// 3. 創建長形長方體const length = 50;  // 長度const width = 2;    // 寬度const height = 2;   // 高度const geometry = new THREE.BoxGeometry(width, height, length);const material = new THREE.MeshStandardMaterial({ color: 0x3498db,metalness: 0.3,roughness: 0.7});const longBox = new THREE.Mesh(geometry, material);scene.add(longBox);// 4. 添加地面參考平面const groundGeometry = new THREE.PlaneGeometry(100, 100);const groundMaterial = new THREE.MeshStandardMaterial({ color: 0x2c3e50,side: THREE.DoubleSide});const ground = new THREE.Mesh(groundGeometry, groundMaterial);ground.rotation.x = -Math.PI / 2;ground.position.y = -height / 2;scene.add(ground);// 5. 添加光源const ambientLight = new THREE.AmbientLight(0x404040);scene.add(ambientLight);const directionalLight = new THREE.DirectionalLight(0xffffff, 0.8);directionalLight.position.set(10, 20, 10);scene.add(directionalLight);// 6. 設置相機位置camera.position.set(10, 10, 10);camera.lookAt(0, 0, 0);// 7. 添加控制器controls = new OrbitControls(camera, renderer.domElement);controls.enableDamping = true;controls.dampingFactor = 0.05;// 8. 初始化GUIgui = new GUI();const fogParams = {color: '#cccccc',density: 0.01,type: 'exp2'};gui.addColor(fogParams, 'color').onChange(value => {scene.fog.color.set(value);scene.background.set(value);});gui.add(fogParams, 'density', 0, 0.1).onChange(value => {if (scene.fog instanceof THREE.FogExp2) {scene.fog.density = value;}});gui.add(fogParams, 'type', ['linear', 'exp2']).onChange(value => {if (value === 'linear') {scene.fog = new THREE.Fog(parseInt(fogParams.color.replace('#', '0x')), 5, 50);} else {scene.fog = new THREE.FogExp2(parseInt(fogParams.color.replace('#', '0x')), fogParams.density);}});// 9. 動畫循環const animate = () => {requestAnimationFrame(animate);controls.update();renderer.render(scene, camera);};animate();// 10. 窗口大小調整const onWindowResize = () => {camera.aspect = window.innerWidth / window.innerHeight;camera.updateProjectionMatrix();renderer.setSize(window.innerWidth, window.innerHeight);};window.addEventListener('resize', onWindowResize);// 11. 清理資源onUnmounted(() => {window.removeEventListener('resize', onWindowResize);gui?.destroy();controls?.dispose();renderer.dispose();container.value?.removeChild(renderer.domElement);});
});
</script><style scoped>
.three-container {position: fixed;top: 0;left: 0;width: 100%;height: 100%;overflow: hidden;margin: 0;padding: 0;
}
</style>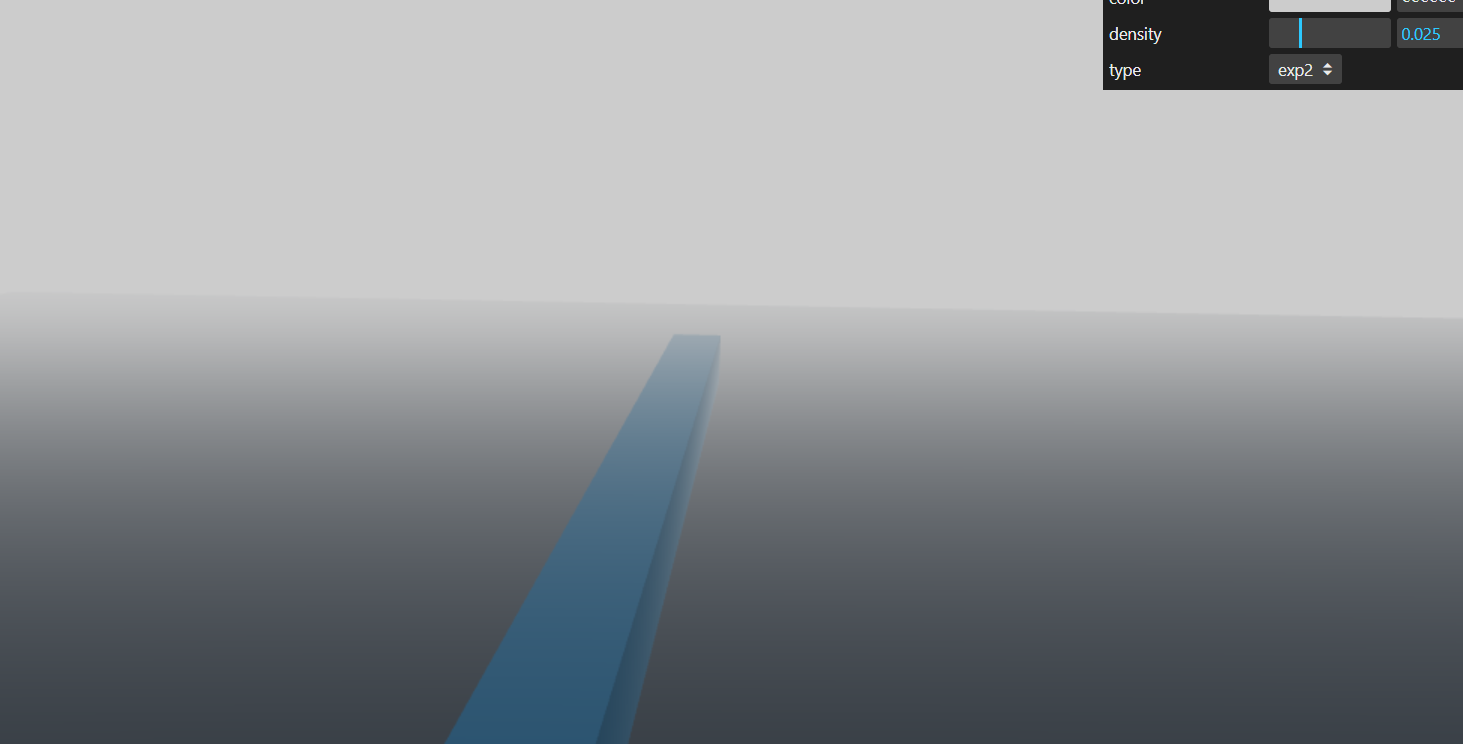
五.GLTF加載器
GLTFLoader – three.js docs?
glTF(gl傳輸格式)是一種開放格式的規范 (open format specification), 用于更高效地傳輸、加載3D內容。該類文件以JSON(.gltf)格式或二進制(.glb)格式提供, 外部文件存儲貼圖(.jpg、.png)和額外的二進制數據(.bin)。一個glTF組件可傳輸一個或多個場景, 包括網格、材質、貼圖、蒙皮、骨架、變形目標、動畫、燈光以及攝像機。
可以去下面鏈接獲取3D模型:Log in to your Sketchfab account - Sketchfab
1.標準 GLTF 模型加載(未壓縮)
import { GLTFLoader } from 'three/addons/loaders/GLTFLoader.js';const loader = new GLTFLoader();loader.load(// 參數1: 資源路徑'/models/character.glb',// 參數2: 加載完成回調(gltf) => {// 3.1 模型預處理const model = gltf.scene;model.scale.set(0.8, 0.8, 0.8);// 3.2 材質適配model.traverse((node) => {if (node.isMesh) {node.material.fog = true; // 啟用霧效影響node.castShadow = true;   // 啟用陰影}});scene.add(model);},// 參數3: 加載進度回調(xhr) => {console.log(`加載進度: ${(xhr.loaded / xhr.total * 100).toFixed(1)}%`);},// 參數4: 錯誤處理(error) => {console.error('加載失敗:', error);// 可在此處添加備用方案}
);
需同時有?
.gltf(JSON 描述文件) +?.bin(二進制數據) + 貼圖?
2.壓縮模型加載(.glb 格式)?
loader.load('/models/compressed/model.glb',(gltf) => {const model = gltf.scene;// 遍歷模型設置陰影和材質model.traverse((node) => {if (node.isMesh) {node.castShadow = true;node.material.metalness = 0.1; // 修改材質參數示例}});scene.add(model);},undefined, // 不顯示進度(error) => console.error(error)
);?3.DRACO 壓縮模型加載
?安裝解碼器:
npm install three/examples/jsm/libs/draco將?draco?文件夾復制到?public/libs/?下。
import { DRACOLoader } from 'three/addons/loaders/DRACOLoader.js';const loader = new GLTFLoader();
const dracoLoader = new DRACOLoader();
dracoLoader.setDecoderPath('/libs/draco/'); // 設置解碼器路徑
loader.setDRACOLoader(dracoLoader);loader.load('/models/compressed/dragon.glb', // Draco壓縮的模型(gltf) => {gltf.scene.scale.set(0.5, 0.5, 0.5);scene.add(gltf.scene);}
);
?下面是完整演示代碼:
<template><div ref="container" class="three-container"></div>
</template><script setup>
import { ref, onMounted, onUnmounted } from 'vue';
import * as THREE from 'three';
import { OrbitControls } from 'three/addons/controls/OrbitControls.js';
import { GLTFLoader } from 'three/addons/loaders/GLTFLoader.js';
import { GUI } from 'lil-gui';const container = ref(null);
let gui = null;
let controls = null;
let carModel = null; // 存儲加載的汽車模型onMounted(() => {// ==================== 1. 初始化場景 ====================const scene = new THREE.Scene();// 創建透視相機 (視野角度, 寬高比, 近裁面, 遠裁面)const camera = new THREE.PerspectiveCamera(75, window.innerWidth / window.innerHeight, 0.1, 1000);// 創建WebGL渲染器(開啟抗鋸齒)const renderer = new THREE.WebGLRenderer({ antialias: true });renderer.setSize(window.innerWidth, window.innerHeight);renderer.shadowMap.enabled = true; // 啟用陰影container.value.appendChild(renderer.domElement);// ==================== 2. 設置霧效 ====================// 使用指數霧(顏色,密度)scene.fog = new THREE.FogExp2(0xcccccc, 0.02);// 設置背景色與霧色一致scene.background = new THREE.Color(0xcccccc);// ==================== 3. 添加光源 ====================// 環境光(柔和的基礎照明)const ambientLight = new THREE.AmbientLight(0x404040, 0.5);scene.add(ambientLight);// 定向光(主光源,產生陰影)const directionalLight = new THREE.DirectionalLight(0xffffff, 1);directionalLight.position.set(5, 10, 7);directionalLight.castShadow = true;directionalLight.shadow.mapSize.width = 2048; // 陰影質量directionalLight.shadow.mapSize.height = 2048;scene.add(directionalLight);// ==================== 4. 添加地面 ====================const groundGeometry = new THREE.PlaneGeometry(20, 20);const groundMaterial = new THREE.MeshStandardMaterial({ color: 0x3a3a3a,roughness: 0.8});const ground = new THREE.Mesh(groundGeometry, groundMaterial);ground.rotation.x = -Math.PI / 2; // 旋轉使平面水平ground.receiveShadow = true; // 地面接收陰影scene.add(ground);// ==================== 5. 加載汽車模型 ====================const loader = new GLTFLoader();// 創建加載進度顯示const progressBar = document.createElement('div');progressBar.style.cssText = `position: absolute;top: 10px;left: 10px;color: white;font-family: Arial;background: rgba(0,0,0,0.7);padding: 5px 10px;border-radius: 3px;`;container.value.appendChild(progressBar);// 開始加載模型loader.load(// 模型路徑(注意:Vite會自動處理src/assets路徑)'/models/car.glb', // 加載成功回調(gltf) => {carModel = gltf.scene;// 遍歷模型所有部分carModel.traverse((child) => {if (child.isMesh) {// 確保所有網格都能投射陰影child.castShadow = true;// 確保材質受霧效影響child.material.fog = true;}});// 調整模型位置和大小carModel.position.y = 0.5; // 稍微抬高避免與地面穿插carModel.scale.set(0.8, 0.8, 0.8);// 計算模型中心點并居中const box = new THREE.Box3().setFromObject(carModel);const center = box.getCenter(new THREE.Vector3());carModel.position.sub(center);scene.add(carModel);progressBar.textContent = '汽車模型加載完成';setTimeout(() => progressBar.remove(), 2000);},// 加載進度回調(xhr) => {const percent = (xhr.loaded / xhr.total * 100).toFixed(2);progressBar.textContent = `加載進度: ${percent}%`;},// 加載失敗回調(error) => {console.error('模型加載失敗:', error);progressBar.textContent = '加載失敗: ' + error.message;progressBar.style.color = 'red';});// ==================== 6. 設置相機 ====================camera.position.set(5, 2, 5); // 相機初始位置camera.lookAt(0, 0.5, 0); // 看向模型中心// ==================== 7. 添加控制器 ====================controls = new OrbitControls(camera, renderer.domElement);controls.enableDamping = true; // 啟用阻尼慣性controls.dampingFactor = 0.05; // 阻尼系數controls.minDistance = 3; // 最小縮放距離controls.maxDistance = 20; // 最大縮放距離// ==================== 8. GUI控制面板 ====================gui = new GUI();const fogParams = {color: '#cccccc',density: 0.02,type: 'exp2'};// 霧效控制const fogFolder = gui.addFolder('霧效設置');fogFolder.addColor(fogParams, 'color').onChange(value => {scene.fog.color.set(value);scene.background.set(value);});fogFolder.add(fogParams, 'density', 0.001, 0.1, 0.001).onChange(value => {if (scene.fog instanceof THREE.FogExp2) {scene.fog.density = value;}});fogFolder.add(fogParams, 'type', ['linear', 'exp2']).onChange(value => {if (value === 'linear') {scene.fog = new THREE.Fog(parseInt(fogParams.color.replace('#', '0x')), 5, 30);} else {scene.fog = new THREE.FogExp2(parseInt(fogParams.color.replace('#', '0x')), fogParams.density);}});fogFolder.open();// ==================== 9. 動畫循環 ====================const animate = () => {requestAnimationFrame(animate);controls.update(); // 更新控制器renderer.render(scene, camera); // 渲染場景};animate();// ==================== 10. 窗口大小調整 ====================const onWindowResize = () => {camera.aspect = window.innerWidth / window.innerHeight;camera.updateProjectionMatrix();renderer.setSize(window.innerWidth, window.innerHeight);};window.addEventListener('resize', onWindowResize);// ==================== 11. 組件卸載清理 ====================onUnmounted(() => {window.removeEventListener('resize', onWindowResize);gui?.destroy();controls?.dispose();renderer.dispose();container.value?.removeChild(renderer.domElement);});
});
</script><style scoped>
.three-container {position: fixed;top: 0;left: 0;width: 100%;height: 100%;overflow: hidden;margin: 0;padding: 0;
}
</style>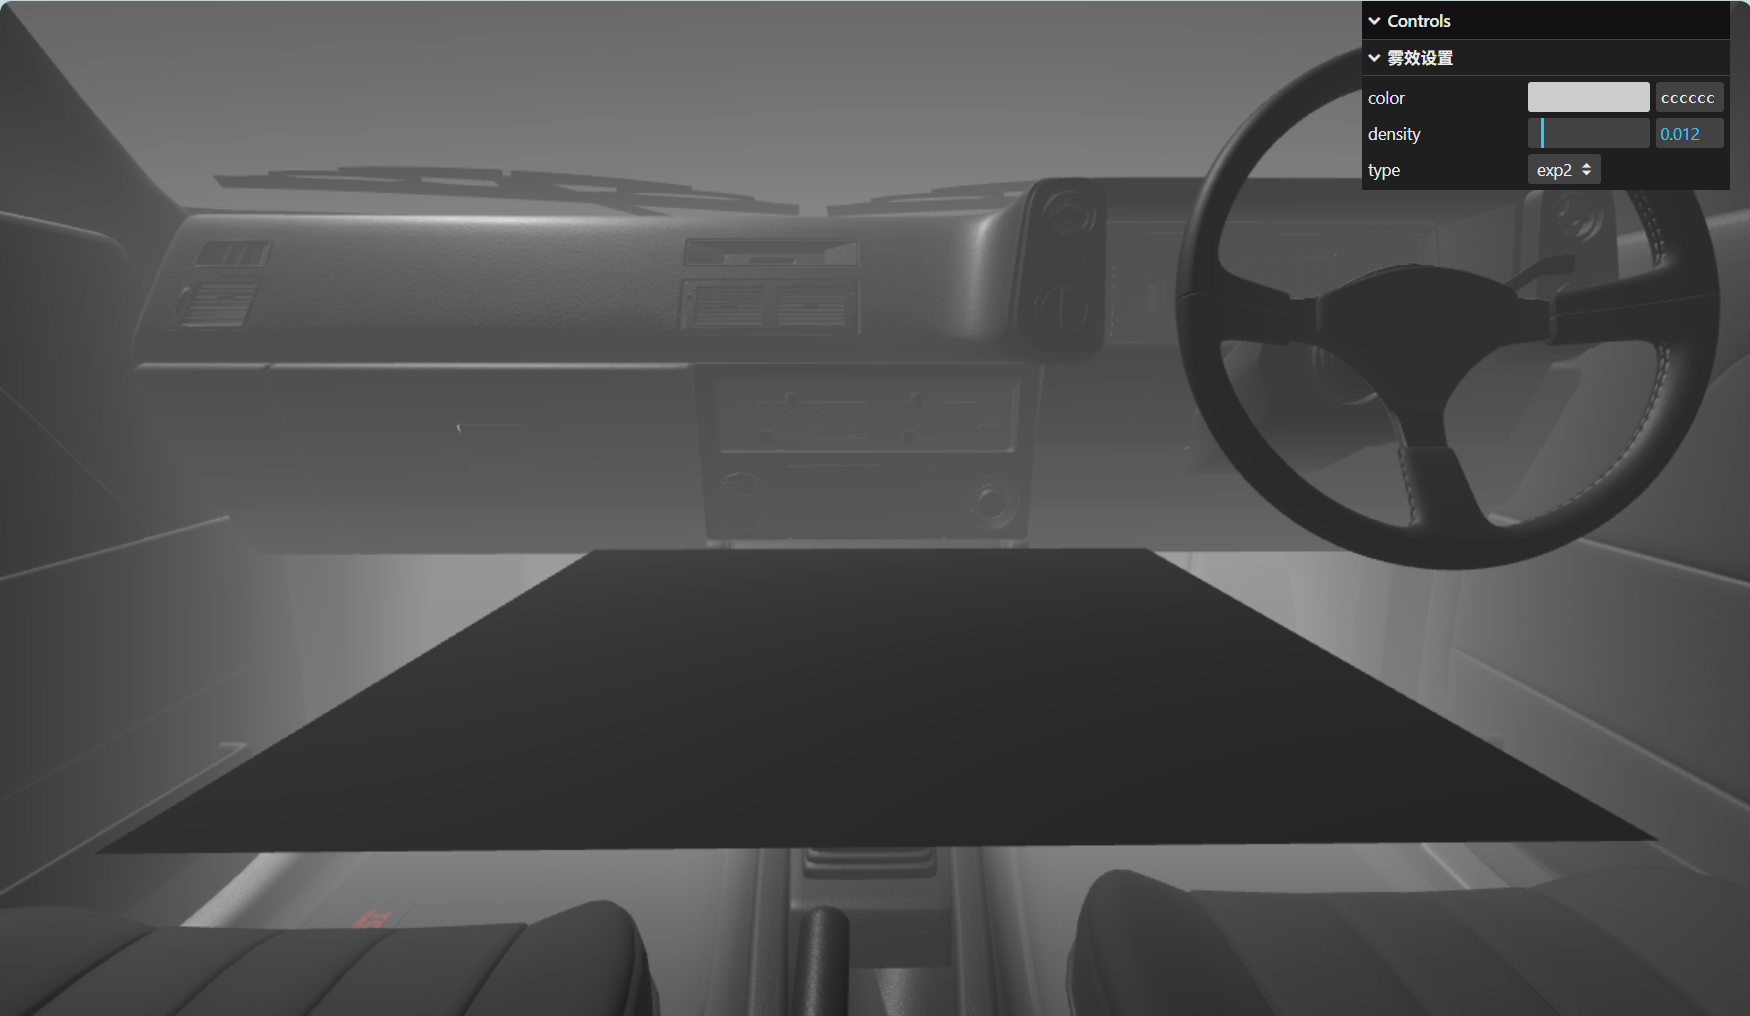
?還有一種可以觀看小車的外殼:
<template><div ref="container" class="three-container"><div v-if="loadingProgress < 100" class="loading-overlay"><div class="progress-bar"><div class="progress" :style="{ width: `${loadingProgress}%` }"></div></div><div class="progress-text">{{ loadingProgress.toFixed(0) }}%</div></div></div>
</template><script setup>
import { ref, onMounted, onUnmounted } from 'vue';
import * as THREE from 'three';
import { OrbitControls } from 'three/addons/controls/OrbitControls.js';
import { GLTFLoader } from 'three/addons/loaders/GLTFLoader.js';const container = ref(null);
const loadingProgress = ref(0);
let controls = null;
let model = null;// 自適應調整模型大小和相機位置
function fitCameraToObject(camera, object, offset = 1.5) {const boundingBox = new THREE.Box3().expandByObject(object);const center = boundingBox.getCenter(new THREE.Vector3());const size = boundingBox.getSize(new THREE.Vector3());const maxDim = Math.max(size.x, size.y, size.z);const fov = camera.fov * (Math.PI / 180);let cameraZ = Math.abs((maxDim / 2) / Math.tan(fov / 2)) * offset;// 限制最小距離cameraZ = Math.max(cameraZ, maxDim * 0.5);camera.position.copy(center);camera.position.z += cameraZ;camera.lookAt(center);// 更新控制器目標if (controls) {controls.target.copy(center);controls.maxDistance = cameraZ * 3;controls.minDistance = maxDim * 0.5;controls.update();}
}onMounted(() => {// 1. 初始化場景const scene = new THREE.Scene();scene.background = new THREE.Color(0xf0f0f0);// 2. 設置相機(使用更大的遠裁切面)const camera = new THREE.PerspectiveCamera(50, // 更小的FOV減少透視變形window.innerWidth / window.innerHeight,0.1,5000 // 增大遠裁切面);// 3. 高性能渲染器配置const renderer = new THREE.WebGLRenderer({ antialias: true,powerPreference: "high-performance"});renderer.setPixelRatio(Math.min(window.devicePixelRatio, 2));renderer.setSize(window.innerWidth, window.innerHeight);renderer.shadowMap.enabled = true;renderer.shadowMap.type = THREE.PCFSoftShadowMap;container.value.appendChild(renderer.domElement);// 4. 添加霧效(范圍更大)scene.fog = new THREE.FogExp2(0xf0f0f0, 0.002); // 更低的密度// 5. 增強光照const ambientLight = new THREE.AmbientLight(0x404040, 0.8);scene.add(ambientLight);const directionalLight = new THREE.DirectionalLight(0xffffff, 1.5);directionalLight.position.set(10, 20, 15);directionalLight.castShadow = true;directionalLight.shadow.mapSize.width = 2048;directionalLight.shadow.mapSize.height = 2048;directionalLight.shadow.camera.far = 500;scene.add(directionalLight);// 6. 添加地面網格輔助查看const gridHelper = new THREE.GridHelper(100, 50, 0x888888, 0xcccccc);scene.add(gridHelper);// 7. 加載模型(使用Vite的public目錄)const loader = new GLTFLoader();loader.load('/models/car.glb', // 替換為你的模型路徑(gltf) => {model = gltf.scene;// 7.1 啟用所有子元素的陰影model.traverse((child) => {if (child.isMesh) {child.castShadow = true;child.receiveShadow = true;// 優化大模型材質if (child.material) {child.material.side = THREE.DoubleSide;child.material.shadowSide = THREE.BackSide;}}});scene.add(model);// 7.2 自適應調整相機和控制器fitCameraToObject(camera, model);// 7.3 添加輔助線框查看邊界const bbox = new THREE.Box3().setFromObject(model);const bboxHelper = new THREE.Box3Helper(bbox, 0xffff00);scene.add(bboxHelper);loadingProgress.value = 100;},(xhr) => {loadingProgress.value = (xhr.loaded / xhr.total) * 100;},(error) => {console.error('加載失敗:', error);loadingProgress.value = -1; // 顯示錯誤狀態});// 8. 控制器配置controls = new OrbitControls(camera, renderer.domElement);controls.enableDamping = true;controls.dampingFactor = 0.05;controls.screenSpacePanning = true;controls.maxPolarAngle = Math.PI * 0.9; // 限制垂直旋轉角度// 9. 響應式處理const onWindowResize = () => {camera.aspect = window.innerWidth / window.innerHeight;camera.updateProjectionMatrix();renderer.setSize(window.innerWidth, window.innerHeight);// 如果模型已加載,重新調整相機if (model) fitCameraToObject(camera, model);};window.addEventListener('resize', onWindowResize);// 10. 動畫循環const animate = () => {requestAnimationFrame(animate);controls.update();renderer.render(scene, camera);};animate();onUnmounted(() => {window.removeEventListener('resize', onWindowResize);controls?.dispose();renderer.dispose();});
});
</script><style scoped>
.three-container {position: fixed;top: 0;left: 0;width: 100%;height: 100%;overflow: hidden;
}.loading-overlay {position: absolute;top: 50%;left: 50%;transform: translate(-50%, -50%);text-align: center;z-index: 100;
}.progress-bar {width: 300px;height: 20px;background: rgba(255,255,255,0.2);border-radius: 10px;overflow: hidden;margin-bottom: 10px;
}.progress {height: 100%;background: linear-gradient(90deg, #4facfe 0%, #00f2fe 100%);transition: width 0.3s ease;
}.progress-text {color: white;font-family: Arial, sans-serif;text-shadow: 1px 1px 2px rgba(0,0,0,0.5);
}
</style>

)
模擬娛樂篇33)


)
安裝筆記)


