第三篇
這部分接著處理用戶退出命令以及一些其他新功能;
3.1 使用Ctrl+Q退出
modifiers: event::KeyModifiers::CONTROL,
使用CONTROL替換之前的NONE值即可;
3.2 重構鍵盤輸入
讓我們重構我們的代碼,以便我們有一個用于低級按鍵讀取的函數,以及另一個用于將按鍵映射到編輯器操作的函數。
- 首先,讓我們創建一個
struct可以讀取各種按鍵的按鈕。我們將其命名為:Reader:
struct Reader;
- 然后添加一個方法來讀取關鍵事件:
impl Reader {fn read_key(&self) -> crossterm::Result<KeyEvent> {loop {if event::poll(Duration::from_millis(500))? {if let Event::Key(event) = event::read()? {return Ok(event);}}}}
}
- 現在讓我們創建一個新結構
Editor,它將是我們項目的主要主腦。
struct Editor {reader: Reader,
}impl Editor {fn new() -> Self {Self { reader: Reader }}
}
我們還創建了一個 new 方法來創建 的新 Editor 實例。
- 現在讓我們處理 返回
Reader的事件并創建一個run函數:
struct Editor {reader: Reader,
}impl Editor {fn new() -> Self {Self { reader: Reader }}fn process_keypress(&self) -> crossterm::Result<bool> {match self.reader.read_key()? {KeyEvent {code: KeyCode::Char('q'),modifiers: event::KeyModifiers::CONTROL,} => return Ok(false),_ => {}}Ok(true)}fn run(&self) -> crossterm::Result<bool> {self.process_keypress()}
}
在函數
process_keypress中 ,我們返回是否應該繼續讀取關鍵事件。如果返回 false,則表示程序應該終止,因為我們不想再次讀取關鍵事件。現在讓我們修改一下main()方法來 改用Editor.run():
fn main() -> crossterm::Result<()> {let _clean_up = CleanUp;terminal::enable_raw_mode()?;/* modify */let editor = Editor::new();while editor.run()? {}/* end */Ok(())
}
3.3 屏幕清理
在用戶輸入之前將屏幕清理干凈,這里使用一個Output的struct來處理輸出相關的內容;
struct Output;impl Output {fn new() -> Self {Self}fn clear_screen() -> crossterm::Result<()> {execute!(stdout(), terminal::Clear(ClearType::All))}fn refresh_screen(&self) -> crossterm::Result<()> {Self::clear_screen()}
}
該
clear_screen函數實際執行的操作是將轉義序列寫入終端。這些序列修改了終端的行為,并可用于執行其他操作,例如添加顏色等。
- 修改調用關系:
use crossterm::event::{Event, KeyCode, KeyEvent};
use crossterm::{event, execute, terminal};
use std::io::stdout;
use std::time::Duration; /* add this line */struct CleanUp;
struct Reader;
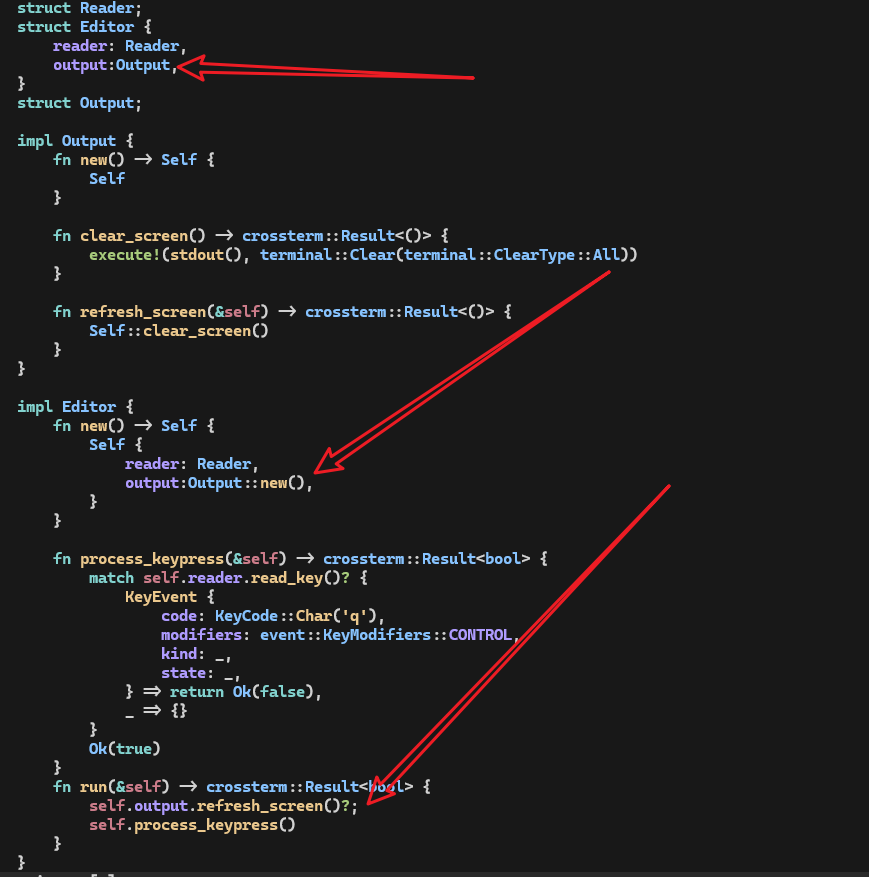
struct Editor {reader: Reader,output:Output,
}
struct Output;impl Output {fn new() -> Self {Self}fn clear_screen() -> crossterm::Result<()> {execute!(stdout(), terminal::Clear(terminal::ClearType::All))}fn refresh_screen(&self) -> crossterm::Result<()> {Self::clear_screen()}
}impl Editor {fn new() -> Self {Self {reader: Reader,output:Output::new(), }}fn process_keypress(&self) -> crossterm::Result<bool> {match self.reader.read_key()? {KeyEvent {code: KeyCode::Char('q'),modifiers: event::KeyModifiers::CONTROL,kind: _,state: _,} => return Ok(false),_ => {}}Ok(true)}fn run(&self) -> crossterm::Result<bool> {self.output.refresh_screen()?;self.process_keypress()}
}impl Drop for CleanUp {fn drop(&mut self) {terminal::disable_raw_mode().expect("Unable to disable raw mode")}
}impl Reader {fn read_key(&self) -> crossterm::Result<KeyEvent> {loop {if event::poll(Duration::from_millis(500))? {if let Event::Key(event) = event::read()? {return Ok(event);}}}}
}/// main函數
fn main() -> std::result::Result<(), std::io::Error> {let _clean_up = CleanUp;terminal::enable_raw_mode()?;let editor = Editor::new();while editor.run()? {}Ok(())
}
3.4 重新定位光標
你可能已經注意到光標未位于屏幕的左上角。這樣我們就可以從上到下繪制我們的編輯器。
use crossterm::event::*;
use crossterm::terminal::ClearType;
use crossterm::{cursor, event, execute, terminal}; /* add import*/
use std::io::stdout;
use std::time::Duration;struct CleanUp;impl Drop for CleanUp {fn drop(&mut self) {terminal::disable_raw_mode().expect("Unable to disable raw mode")}
}struct Output;impl Output {fn new() -> Self {Self}/* modify */fn clear_screen() -> crossterm::Result<()> {execute!(stdout(), terminal::Clear(ClearType::All))?;execute!(stdout(), cursor::MoveTo(0, 0))}/* end */fn refresh_screen(&self) -> crossterm::Result<()> {Self::clear_screen()}
}
3.5 退出時清屏
讓我們清除屏幕并在程序退出時重新定位光標。
如果在渲染屏幕的過程中發生錯誤,我們不希望程序的輸出留在屏幕上,也不希望將錯誤打印在光標恰好位于該點的任何位置。
所以當我們的程序成功或失敗退出時,我們會將 Cleanup 該函數用于清除屏幕:
在
Drop中新增:Output::clear_screen().expect("Error");
struct CleanUp;impl Drop for CleanUp {fn drop(&mut self) {terminal::disable_raw_mode().expect("Unable to disable raw mode");Output::clear_screen().expect("Error"); /* add this line*/}
}struct Output;impl Output {fn new() -> Self {Self}fn clear_screen() -> crossterm::Result<()> {execute!(stdout(), terminal::Clear(ClearType::All))?;execute!(stdout(), cursor::MoveTo(0, 0))}fn refresh_screen(&self) -> crossterm::Result<()> {Self::clear_screen()}
}
3.6 添加波浪號
讓我們在屏幕的左側畫一列波浪號 ( ~ ),就像 vim 一樣。在我們的文本編輯器中,我們將在正在編輯的文件末尾之后的任何行的開頭繪制一個波浪號。
struct Output;impl Output {fn new() -> Self {Self}fn clear_screen() -> crossterm::Result<()> {execute!(stdout(), terminal::Clear(ClearType::All))?;execute!(stdout(), cursor::MoveTo(0, 0))}/* add this function */fn draw_rows(&self) {for _ in 0..24 {println!("~\r");}}fn refresh_screen(&self) -> crossterm::Result<()> {Self::clear_screen()?;/* add the following lines*/self.draw_rows();execute!(stdout(), cursor::MoveTo(0, 0))/* end */}
}
draw_rows()將處理繪制正在編輯的文本緩沖區的每一行。現在,它在每行中繪制一個波浪號,這意味著該行不是文件的一部分,不能包含任何文本。繪制后,我們將光標發送回屏幕的左上角。
- 現在讓我們修改代碼以繪制正確數量的波浪號:
/* modify */
struct Output {win_size: (usize, usize),
}impl Output {fn new() -> Self {/* add this variable */let win_size = terminal::size().map(|(x, y)| (x as usize, y as usize)).unwrap(); Self { win_size }}fn clear_screen() -> crossterm::Result<()> {execute!(stdout(), terminal::Clear(ClearType::All))?;execute!(stdout(), cursor::MoveTo(0, 0))}fn draw_rows(&self) {let screen_rows = self.win_size.1; /* add this line */for _ in 0..screen_rows { /* modify */println!("~\r");}}fn refresh_screen(&self) -> crossterm::Result<()> {Self::clear_screen()?;self.draw_rows();execute!(stdout(), cursor::MoveTo(0, 0))}
}
首先,我們修改
Output以保留窗口大小,因為我們將使用窗口的大小進行多次計算。然后設置創建輸出實例時的win_size值。type中的win_size整數是usizebutterminal::size()返回一個類型(u16,16)為 的元組,因此我們必須轉換為u16usize。
也許您注意到屏幕的最后一行似乎沒有波浪號。這是因為我們的代碼中有一個小錯誤。當我們打印最終的波浪號時,我們會像在任何其他行上一樣打印一個 "\r\n" ( println!() 添加一個新行),但這會導致終端滾動以便為新的空白行騰出空間。
impl Output {fn new() -> Self {let win_size = terminal::size().map(|(x, y)| (x as usize, y as usize)).unwrap();Self { win_size }}fn clear_screen() -> crossterm::Result<()> {execute!(stdout(), terminal::Clear(ClearType::All))?;execute!(stdout(), cursor::MoveTo(0, 0))}fn draw_rows(&self) {let screen_rows = self.win_size.1;/* modify */for i in 0..screen_rows {print!("~");if i < screen_rows - 1 {println!("\r")}stdout().flush();}/* end */}fn refresh_screen(&self) -> crossterm::Result<()> {Self::clear_screen()?;self.draw_rows();execute!(stdout(), cursor::MoveTo(0, 0))}
}
3.7 追加緩沖區
由于在屏幕每次刷新時都會進行繪制,導致有閃頻的問題。
struct EditorContents {content: String,
}impl EditorContents {fn new() -> Self {Self {content: String::new(),}}fn push(&mut self, ch: char) {self.content.push(ch)}fn push_str(&mut self, string: &str) {self.content.push_str(string)}
}
impl io::Write for EditorContents {fn write(&mut self, buf: &[u8]) -> io::Result<usize> {match std::str::from_utf8(buf) {Ok(s) => {self.content.push_str(s);Ok(s.len())}Err(_) => Err(io::ErrorKind::WriteZero.into()),}}fn flush(&mut self) -> io::Result<()> {let out = write!(stdout(), "{}", self.content);stdout().flush()?;self.content.clear();out}
}
- 首先,我們將傳遞到
write函數的字節轉換為str,以便我們可以將其添加到content。- 如果字節可以轉換為字符串,則返回字符串的長度,否則返回錯誤。當我們在
EditorContents上調用flush()時,我們希望它寫入stdout,因此我們使用write!()宏,然后調用stdout.flush()。- 我們還必須清除
content,以便我們可以在下一次屏幕刷新時使用。
- 使用
EditorContents:
use crossterm::{cursor, event, execute, queue, terminal}; /* modify */struct Output {win_size: (usize, usize),editor_contents: EditorContents, /* add this line */
}impl Output {fn new() -> Self {let win_size = terminal::size().map(|(x, y)| (x as usize, y as usize)).unwrap();Self {win_size,editor_contents: EditorContents::new(),}}fn clear_screen() -> crossterm::Result<()> {execute!(stdout(), terminal::Clear(ClearType::All))?;execute!(stdout(), cursor::MoveTo(0, 0))}fn draw_rows(&mut self) { /* modify */let screen_rows = self.win_size.1;for i in 0..screen_rows {self.editor_contents.push('~'); /* modify */if i < screen_rows - 1 {self.editor_contents.push_str("\r\n"); /* modify */}}}fn refresh_screen(&mut self) -> crossterm::Result<()> { /* modify */queue!(self.editor_contents, terminal::Clear(ClearType::All), cursor::MoveTo(0, 0))?; /* add this line*/self.draw_rows();queue!(self.editor_contents, cursor::MoveTo(0, 0))?; /* modify */self.editor_contents.flush() /* add this line*/}
}
注意,我們已更改
draw_rows為使用&mut self,因此我們需要對之前的部分代碼做一下調整:
fn run(&mut self) -> crossterm::Result<bool> { /* modify */self.output.refresh_screen()?;self.process_keypress()
}
fn main() -> crossterm::Result<()> {let _clean_up = CleanUp;terminal::enable_raw_mode()?;let mut editor = Editor::new(); /* modify */while editor.run()? {}Ok(())
}
煩人的閃爍效果還有另一個可能的來源。當終端繪制到屏幕時,光標可能會在屏幕中間的某個地方顯示一瞬間。
為確保不會發生這種情況,讓我們在刷新屏幕之前隱藏光標,并在刷新完成后立即再次顯示光標。
impl Output {fn new() -> Self {let win_size = terminal::size().map(|(x, y)| (x as usize, y as usize)).unwrap();Self {win_size,editor_contents: EditorContents::new(),}}fn clear_screen() -> crossterm::Result<()> {execute!(stdout(), terminal::Clear(ClearType::All))?;execute!(stdout(), cursor::MoveTo(0, 0))}fn draw_rows(&mut self) {let screen_rows = self.win_size.1;for i in 0..screen_rows {self.editor_contents.push('~');if i < screen_rows - 1 {self.editor_contents.push_str("\r\n");}}}fn refresh_screen(&mut self) -> crossterm::Result<()> {queue!(self.editor_contents,cursor::Hide, //add thisterminal::Clear(ClearType::All),cursor::MoveTo(0, 0))?;self.draw_rows();queue!(self.editor_contents,cursor::MoveTo(0, 0),/* add this */ cursor::Show)?;self.editor_contents.flush()}
}
本期完,下期內容搶先知:
- 逐行清除
- 添加歡迎和版本信息
- 按鍵移動光標
- 方向鍵移動光標
- 光標移動溢出問題
- 分頁和首尾頁


 + Supervisor 實現多進程redis消息隊列)


