0.權限管理
前端的權限管理主要分為如下:
- 接口權限
- 路由權限
- 菜單權限
- 按鈕權限
權限是對特定資源的訪問許可,所謂權限控制,也就是確保用戶只能訪問到被分配的資源
1.項目搭建
創建vite項目
yarn create vite
配置別名
npm install path --savenpm install @types/node --save-dev
tsconfig.json
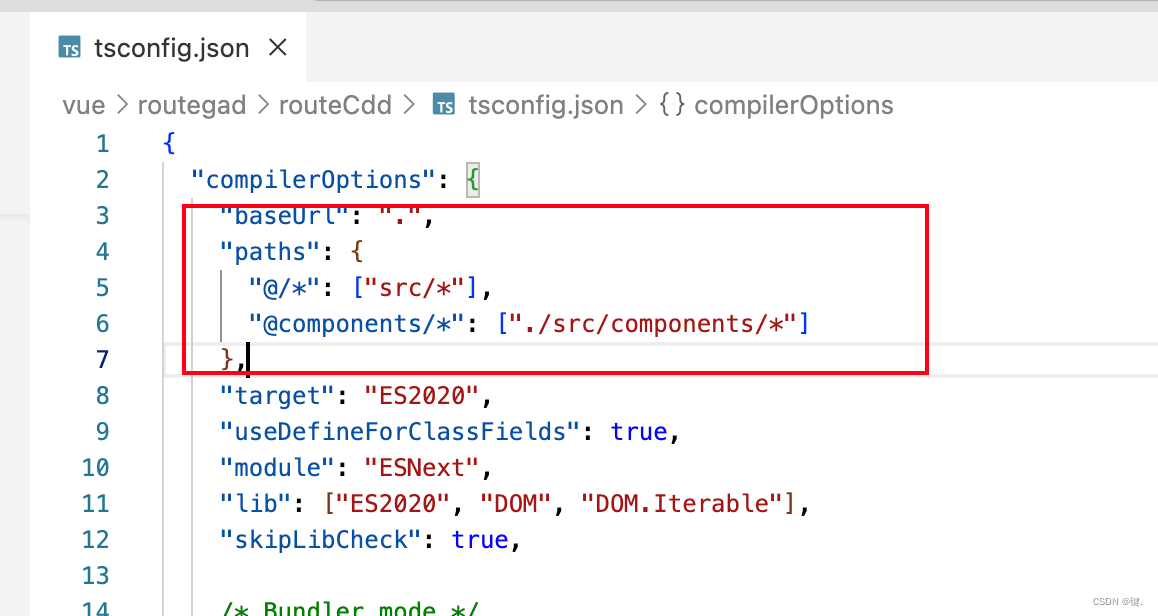
"baseUrl": ".","paths": {"@/*": ["src/*"],"@components/*": ["./src/components/*"]},
vite.config.ts
import { defineConfig } from 'vite'
import vue from '@vitejs/plugin-vue'
import path from "path";// https://vitejs.dev/config/
export default defineConfig({resolve: {// 配置路徑別名alias: {"@": path.resolve(__dirname, "./src"),"@components": path.resolve(__dirname, "./src/components"),},},plugins: [vue(),]})
創建基礎路由
npm i vue-router@4
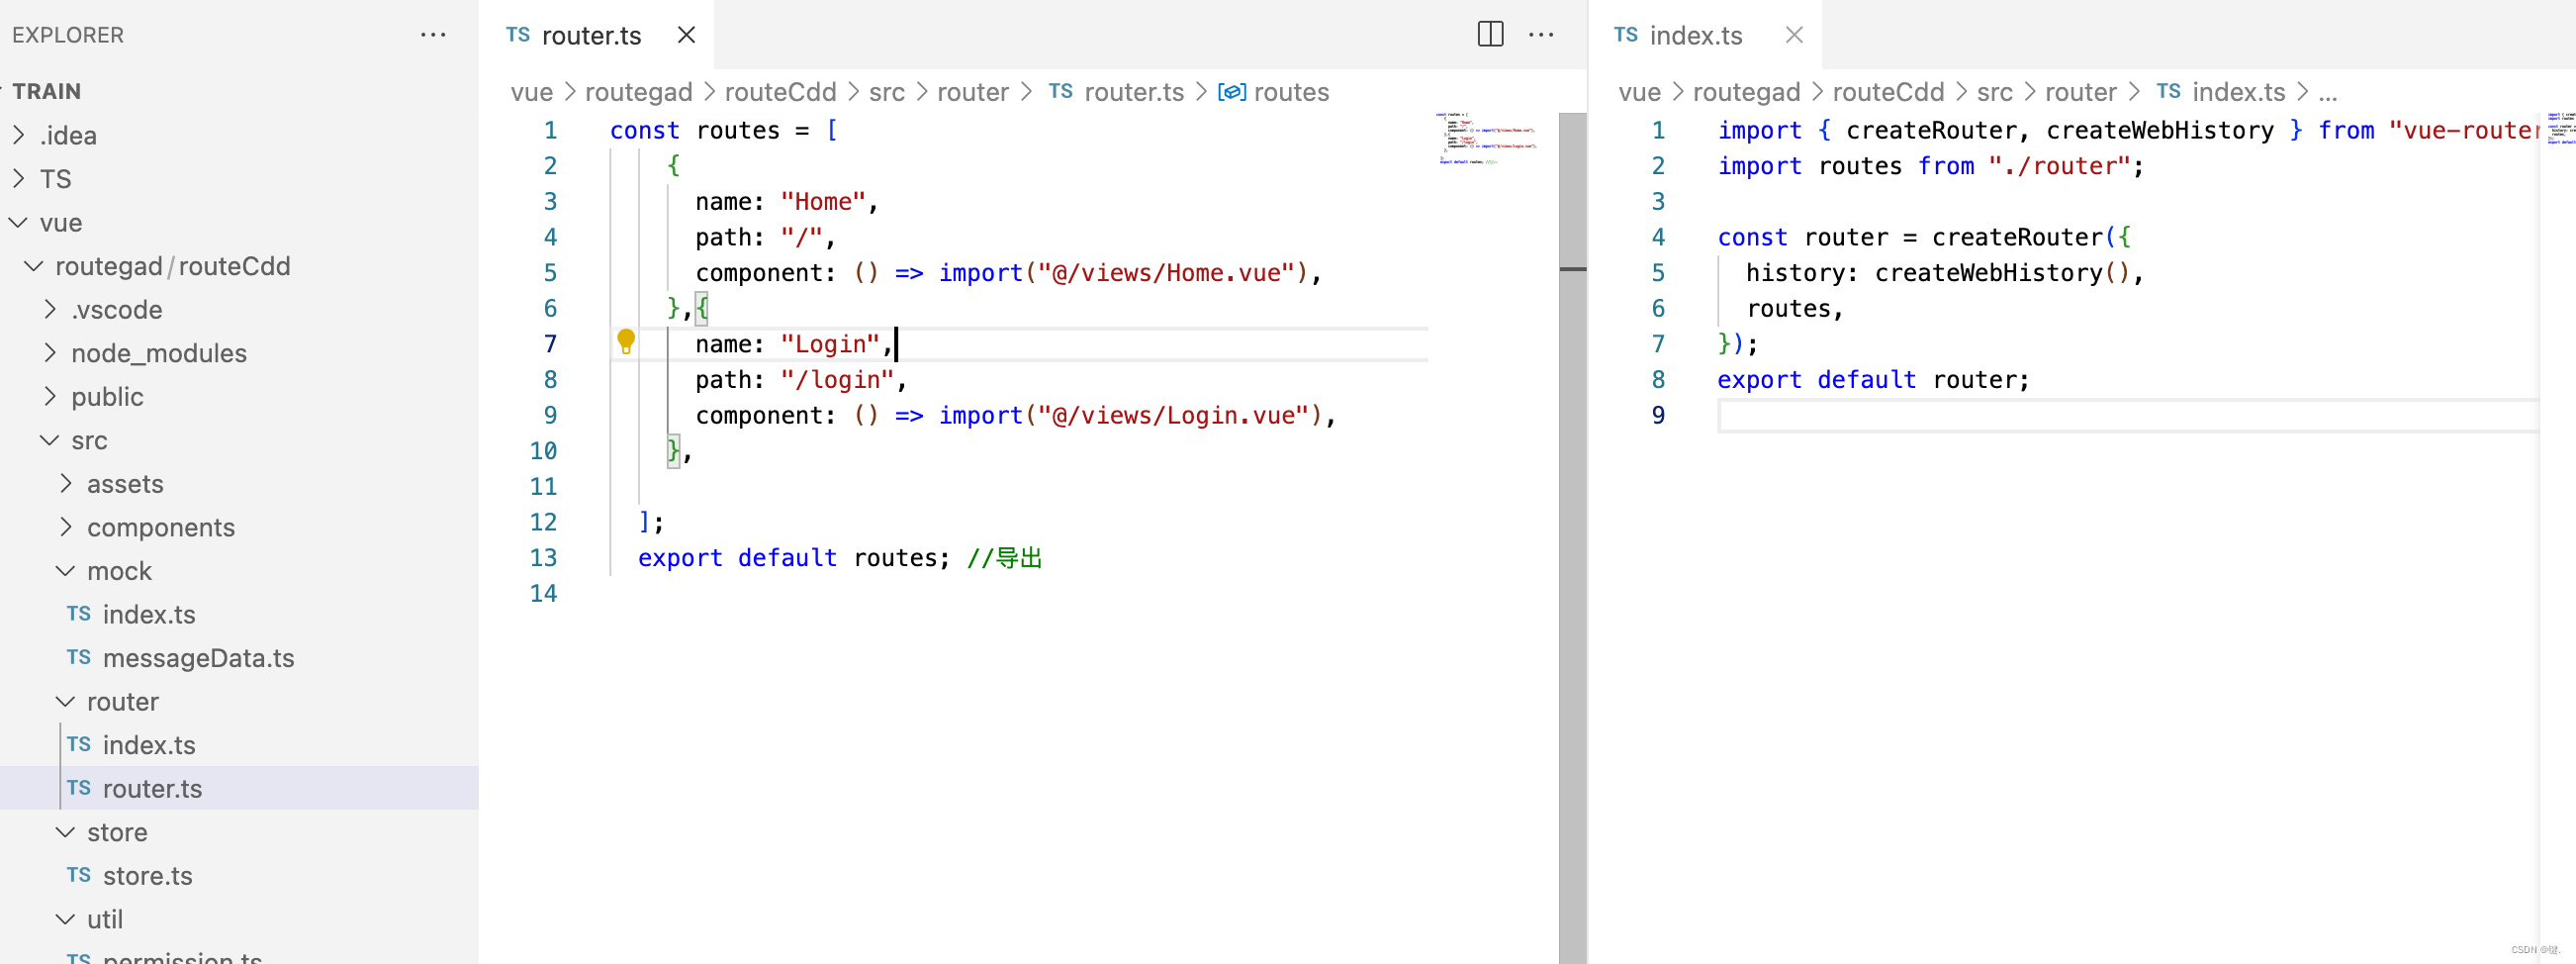
const routes = [{name: "Home",path: "/",component: () => import("@/views/Home.vue"),},];export default routes; //導出import { createRouter, createWebHistory } from "vue-router";
import routes from "./router";const router = createRouter({history: createWebHistory(),routes,
});
export default router;import { createApp } from 'vue'
import './style.css'
import App from './App.vue'
import router from './router'
const app =createApp(App)
app.use(router)
app.mount('#app')
<script setup lang="ts">
</script><template><router-view></router-view>
</template><style scoped></style>
配置mock
yarn add mockjs vite-plugin-mock -D
import { MockMethod } from 'vite-plugin-mock';
export default [{url: `/api/list`,method: 'get',response: () => {return [{name:'tom',age:16,nation:'USA'}];},},] as MockMethod[];
vite.config.ts配置
import { defineConfig } from 'vite'
import vue from '@vitejs/plugin-vue'
import path from 'path'
import { viteMockServe } from 'vite-plugin-mock'// https://vitejs.dev/config/
export default defineConfig({resolve: {// 配置路徑別名alias: {"@": path.resolve(__dirname, "./src"),"@components": path.resolve(__dirname, "./src/components"),},},plugins: [vue(),viteMockServe({mockPath: './src/mock'})]
})
使用
<script setup lang="ts">
import axios from 'axios';axios.get('/api/list').then(res=>{console.log(res.data);})
</script><template>
<h1>超市管理系統首頁</h1></template><style scoped></style>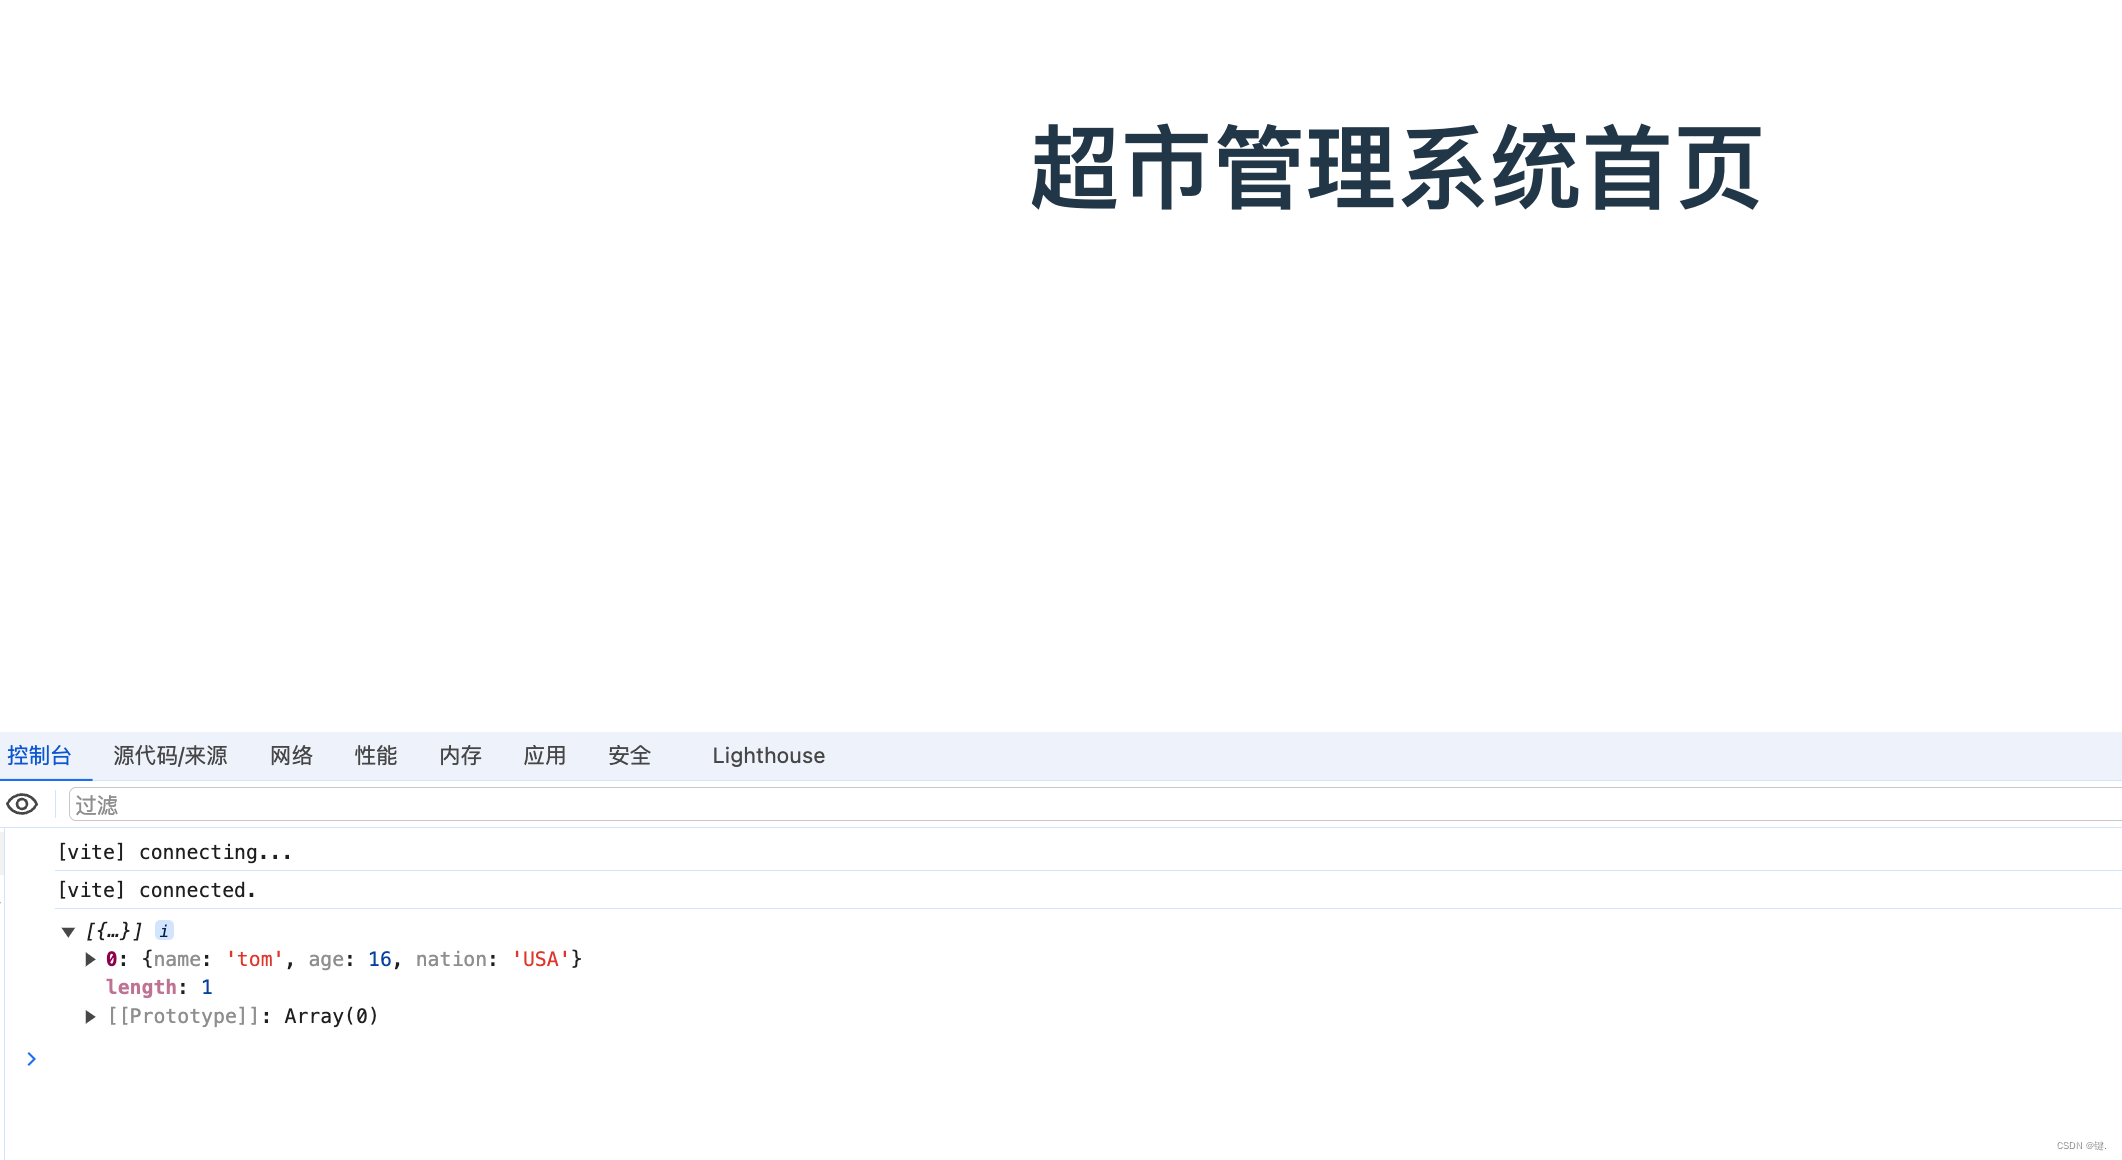
安裝pinia
yarn add pinia
import { createApp } from 'vue'
import './style.css'
import App from './App.vue'
import router from './router'
import { createPinia } from 'pinia'
const pinia = createPinia()const app =createApp(App)
app.use(router)
app.use(pinia)
app.mount('#app')
import { defineStore } from 'pinia'export const useMarkStore = defineStore('mark', {state: () => ({ count: 0 }),getters: {double: (state) => state.count * 2,},actions: {increment() {this.count++},},
})<script setup lang="ts">
import { useMarkStore } from '@/store/store';
import axios from 'axios';const store= useMarkStore()
axios.get('/api/list').then(res=>{console.log(res.data);})
</script><template>
<h1>超市管理系統首頁</h1>
<h1>{{ store.count }}</h1></template><style scoped></style>
安裝js-cookie插件
yarn add js-cookie
2.路由權限(包括菜單權限和按鈕權限)
目錄結構:
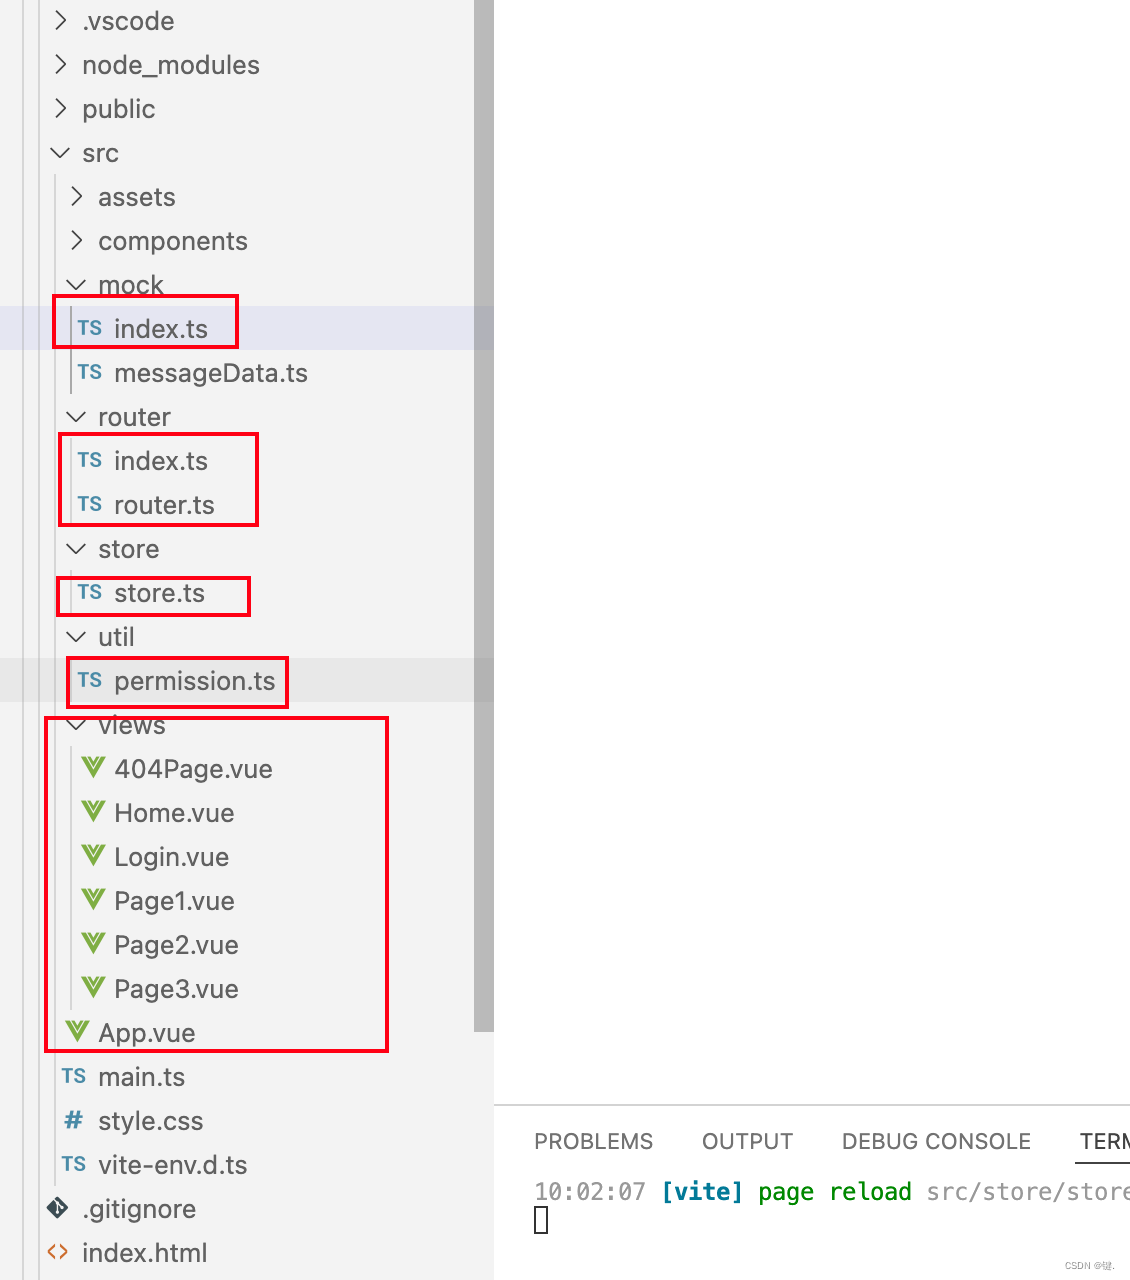
mock
import { MockMethod } from "vite-plugin-mock";
export default [{url: `/api/list`,method: "post",response: ({ body }) => {return body;},},{url: `/api/login`, //登錄邏輯method: "post",response: ({ body }) => {let data = {};if (body.username == "tom") {data = {id: "1111",token: "4566adasdqfrqwd",};} else if (body.username == "amy") {data = {id: "222",token: "45184adaczz52za",};}return data;},},{url: `/api/getRoutes`, //簡單方案:根據用戶返回不同路由,真實后端邏輯:根據登錄用戶的角色去表里查授權該角色的的菜單method: "post",response: ({ body }) => {console.log(body);const routes = [];if (body.id == "1111") {routes.push({name: "page1",path: "/page1",component: "/Page1.vue",},{name: "page2",path: "/page2",component: "/Page2.vue",});} else if (body.id == "222") {routes.push( {name: "page3",path: "/page3",component: "/Page3.vue",});}return routes;},},
] as MockMethod[];
router
store
import { defineStore } from "pinia";
import Cookies from "js-cookie";
import axios from "axios";
import routes from '@/router/router'
const modules = import.meta.glob("../views/**/*.vue");export const useMarkStore = defineStore("mark", {state: () => ({pageRoutes: <any>[], //當前頁面緩存路由asyncRoutes: <any>[],//從接口獲取到的路由數組}),getters: {},actions: {SET_ROUTES(_routes: any[]){//設置state中的值this.$state.asyncRoutes=_routesthis.$state.pageRoutes=routes.concat(_routes)},getRouter() {//從后端接口獲取到動態路由let _id = Cookies.get("id");if (_id) {return new Promise((resolve, reject) => {axios.post("/api/getRoutes", { id: _id }).then((res) => {console.log(res);let _data = res.data;let newData = this.parseRouter(_data);this.SET_ROUTES(newData)resolve(newData);});});}},parseRouter(_data: Array<any>) {//處理后端返回的路由數據=》vite項目能解析的路由格式let _newArr: Array<any> = [];_data.forEach((item: any) => {let newItem = Object.assign({}, item);let comp = item.component;newItem.component = modules[`../views${comp}`];_newArr.push(newItem);});return _newArr;},},getButtonCode(){//按鈕權限思路://1.在登錄的時候拉取按鈕權限編碼code['EXPORT_LIST','OPEN_MODAL']//2.將編碼緩存本地//3.頁面通過v-if控制按鈕或是自義定指令控制按鈕}
});
permission.ts
import router from "@/router";
import { useMarkStore } from "@/store/store";
import Cookies from "js-cookie";//獲取view下所有的vue文件
// const modules = import.meta.glob('../views/**/*.vue')//   export const getCurrRoutes=(name:string)=>{//   }// await axios.post('/api/getRoutes',{username:'tom'}).then(res=>{
//     console.log(res);
//     let _data=res.data
//     _data.forEach((item:any)=>{
//         let newItem=Object.assign({},item)
//         let comp=item.component//         newItem.component=modules[`../views${comp}`]
//         router.addRoute(newItem)
//     })// })
//白名單
const whiteList=['/about','/new','/login']//路由守衛
router.beforeEach(async(to,from,next)=>{const store= useMarkStore()const token=Cookies.get("token")console.log(token);if(token){if(to.path=='login'){next('/')}else{//判斷是否拿了路由規則if(store.asyncRoutes.length==0){//格式化好的路由const _temp:any=  await store.getRouter()_temp.forEach((item:any)=>router.addRoute(item))//繼續跳轉next(to.path)}else{if(to.matched.length!=0){next()}else{alert('無頁面權限')next(from.path)}}}}else{if(whiteList.indexOf(to.path)!= -1){next()}else{next('/login')}}
})
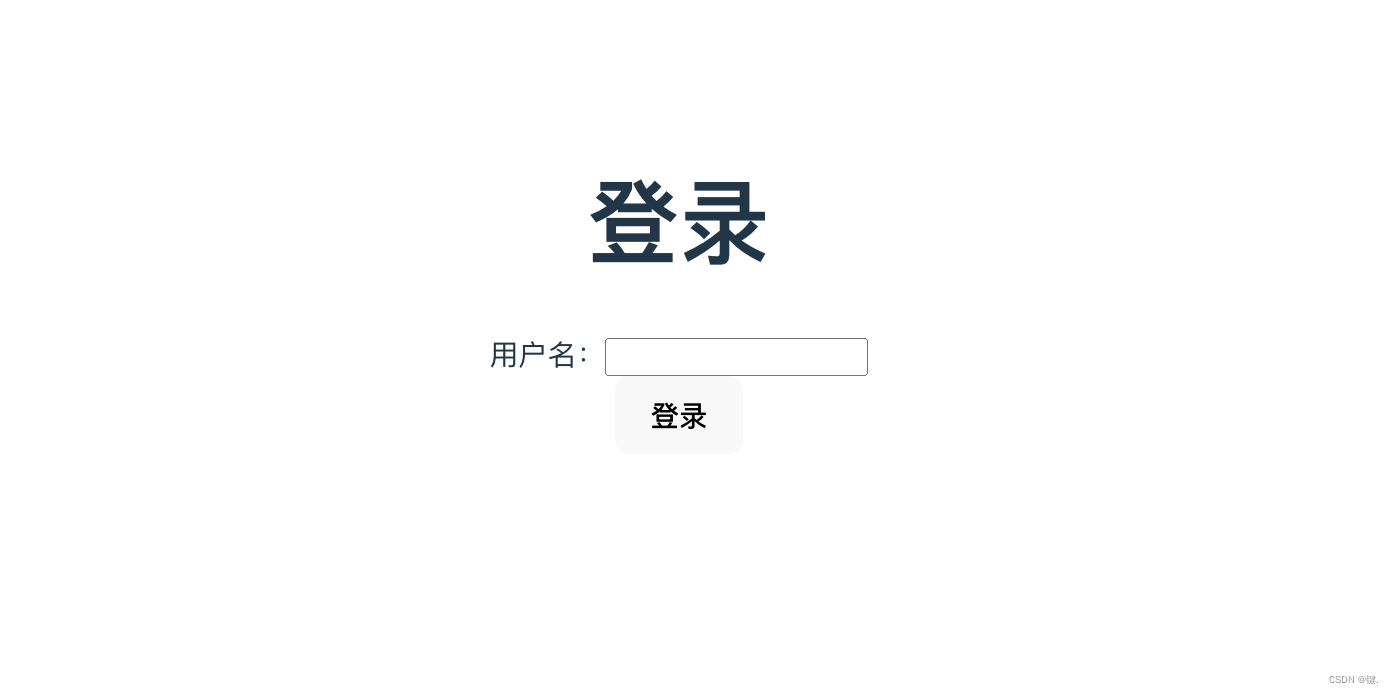
Login.vue
<script setup lang="ts">
import axios from 'axios';
import { ref } from 'vue';
import Cookies from 'js-cookie'
import { useRouter } from 'vue-router';
const router =useRouter()
const username=ref()const login=()=>{axios.post('/api/login',{username:username.value}).then(res=>{console.log(res);if(res.data.token){Cookies.set('token',res.data.token)Cookies.set('id',res.data.id)router.push('/')}})  axios.post('/api/getRoutes',{username:username.value}).then(res=>{console.log(res);})
}
</script><template>
<h1>登錄</h1>
<div>用戶名:<input type="text" v-model="username"></div>
<button @click="login">登錄</button></template><style scoped></style>
Home.vue
<script setup lang="ts">
import { useMarkStore } from '@/store/store';
import axios from 'axios';
import Cookies from 'js-cookie'const store= useMarkStore()
axios.post('/api/list',{params:{name:'aaa'}}).then(res=>{console.log(res);})import { useRouter } from 'vue-router';
const router =useRouter()
const loginout=()=>{Cookies.remove('token')Cookies.remove('id')router.push('/login')
}</script><template><div @click="loginout">登出</div>
<h1>超市管理系統首頁</h1>
<div>當前用戶{{  }}</div>
<div>當前用戶可用菜單:</div>
<div v-if="store.asyncRoutes" style="display: flex;flex-direction: column;" ><a v-for="item in store.asyncRoutes" :href="item.path">{{ item?.name }}</a>
</div></template><style scoped></style>
main.ts
import { createApp } from 'vue'
import './style.css'
import App from './App.vue'
import router from './router'
import { createPinia } from 'pinia'
import  '@/util/permission'
const pinia = createPinia()const app =createApp(App)
app.use(router)
app.use(pinia)
app.mount('#app')
按鈕權限思路
getButtonCode(){//按鈕權限思路://1.在登錄的時候拉取按鈕權限編碼code['EXPORT_LIST','OPEN_MODAL']//2.將編碼緩存本地//3.頁面通過v-if控制按鈕或是自義定指令控制按鈕}
前端控制權限
//1.在路由配置中配置白名單
{name: "Login",path: "/login",component: () => import("@/views/Login.vue"),meta:{whiteList:['admin','tom']}},//2.在路由守衛beforeEach中判斷當前用戶角色是否在meta中,是就next()
效果
tom登錄

amy登錄

3.接口權限
登錄完拿到token,將token存起來,通過axios請求攔截器進行攔截,每次請求的時候頭部攜帶token
axios.interceptors.request.use(config => {config.headers['token'] = cookie.get('token')return config
})
axios.interceptors.response.use(res=>{},{response}=>{if (response.data.code === 40099 || response.data.code === 40098) { //token過期或者錯誤router.push('/login')}
})
4.注意點
mock
const login=()=>{//這里傳參有三種方式:data,params,{}axios.post('/api/login',{username:'tom'}).then(res=>{console.log(res);})
import { MockMethod } from "vite-plugin-mock";
export default [{url: `/api/login`, //登錄邏輯method: "post",response: ({ body }) => {//獲取傳的參數使用bodyreturn body;},},] as MockMethod[];
addRoute
動態添加路由在vite中不能使用以下方法:
// 路由拼接
function loadView(view:string) {return () => import(`@/views/${view}`)
}
上面的代碼會報錯:TypeError: Failed to resolve module specifier,應該采用import.meta.glob方式
import router from "@/router";
import axios from "axios";
//獲取view下所有的vue文件
const modules = import.meta.glob('../views/**/*.vue')//這里需要將異步獲取的值改為同步
await axios.post('/api/getRoutes',{username:'tom'}).then(res=>{console.log(res);let _data=res.data_data.forEach((item:any)=>{let newItem=Object.assign({},item)let comp=item.componentnewItem.component=modules[`../views${comp}`]router.addRoute(newItem)})})
5.源碼地址
https://gitee.com/beekim/vue-route-mgr
參考:
https://cloud.tencent.com/developer/article/1794300
https://github.com/vitejs/vite/discussions/2746
https://blog.csdn.net/lucklymm/article/details/125420877
https://blog.csdn.net/weixin_43239880/article/details/129922664
https://blog.csdn.net/qq_36651686/article/details/116520731


 + Supervisor 實現多進程redis消息隊列)


)