本文將利用
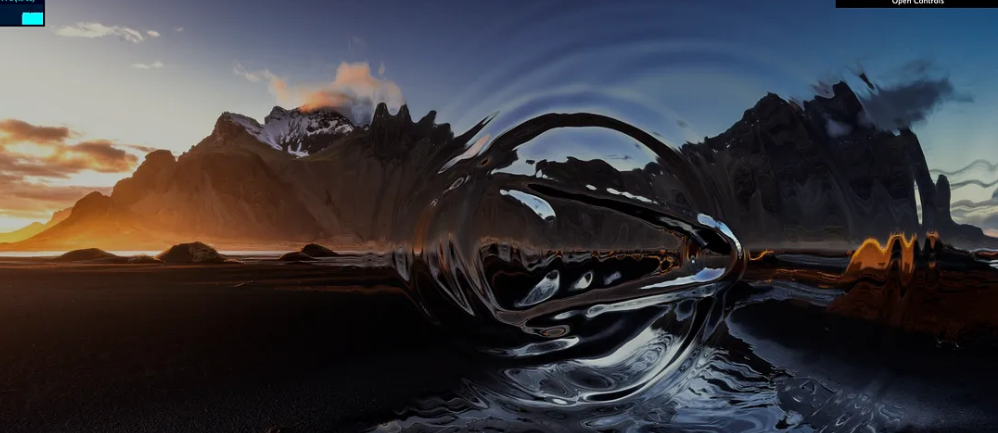
GPUComputationRenderer來實現水波紋的繪制,相似的案例可以看threejs官方的GPGPU Water示例。更多精彩內容盡在數字孿生平臺。
什么是 GPGPU
GPGPU代表通用圖形處理單元(General-Purpose Graphic Processing Unit),意思是用GPU計算圖形以外的計算任務。在 Three.js 里,指的是我們使用片段著色器來計算其他內容(例如粒子的位置或速度)的技術。通過使用 GPU(GLSL 著色器)而不是 CPU(Javascript)來進行這些計算,我們可以從并行計算中獲得巨大的性能提升。
但是我們在 Three.js 中并不經常看到這個術語,更常見的是“幀緩沖區對象”或 FBO 一詞。我們字面上稱其為 FBO 技術,因為它使用額外的渲染目標來保存你希望 GPU 執行的額外計算,而“渲染目標”本質上是一個“幀緩沖區”。幀緩沖區通常是在底層中使用的功能,請參閱文檔。
讓我們看看 GPUComputationRenderer 實際上做了什么(threejs的源代碼)。它是一個幫助類,可讓我們創建數據紋理,通過自定義片段著色器將計算結果存儲到每個紋素中的 4 個浮點數 (xyzw) 中。換句話說,每個通道 32 位,每個紋素 16 字節。
這里需要注意的是,與每個顏色通道僅存儲 8 位的普通圖像紋理相比,使用浮點數的數據紋理能夠以更高的精度存儲更大的數字。
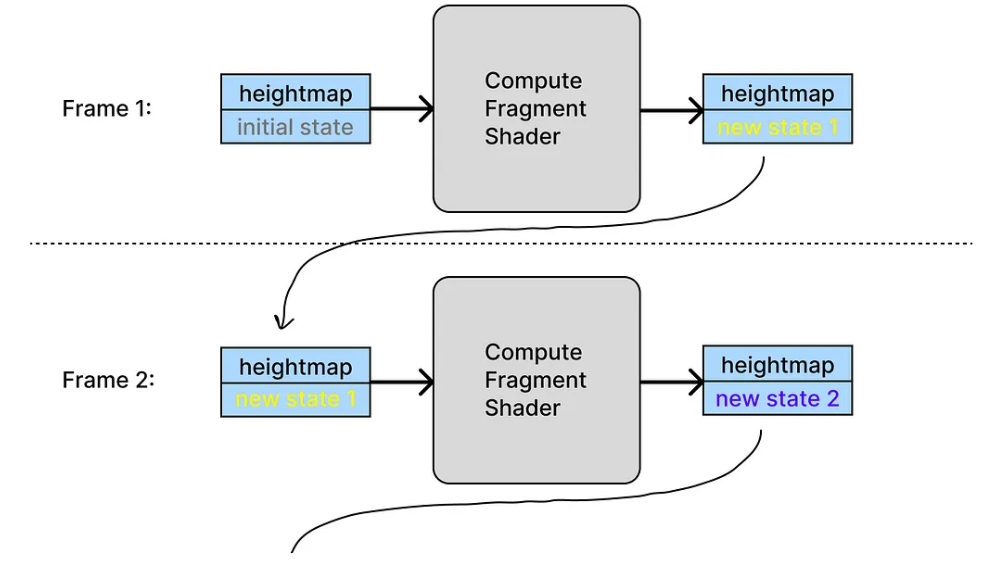
而且 GPUComputationRenderer中定義的數據紋理(稱為“變量”)可以依賴其前一幀的結果來計算下一幀;我們甚至可以設置多個相互依賴的數據紋理。
以“GPGPU Water”示例為例,它只定義了一個變量,命名為heightmap,因為它的唯一功能是計算每一幀中水波的高度圖。在第一幀中,高度圖具有初始狀態(我們偏好的隨機值),但當片段著色器完成計算后,輸出數據紋理將被分配回高度圖變量本身以供下一幀使用,并且依此類推。
具體實現
首先我們為場景添加
- 方向光,用來照亮場景
- 水的平面mesh,我們將水波高度圖應用于此
- raycaster,可以將鼠標數據傳遞到 FBO 中的計算片段著色器
- 創建 FBO 的
GPUComputationRenderer
水面Mesh
首先創建幾何和材質。
const plane = new THREE.PlaneGeometry( GEOM_WIDTH, GEOM_HEIGHT, FBO_WIDTH - 1, FBO_HEIGHT - 1 );
this.waterMat = new THREE.MeshPhongMaterial({color: new THREE.Color( 0x0040C0 )
})
然后定義了四個常量:
const FBO_WIDTH = 128
const FBO_HEIGHT = 128
const GEOM_WIDTH = 512
const GEOM_HEIGHT = 512
這里我們將平面幾何體的寬度/高度的段數指定為相應的 FBO 的寬度 - 1。這是因為我們希望幾何體的頂點數與 FBO 中的紋素數完全相同。
接下來我們通過 onBeforeCompile 擴展 Phong 材質:
this.waterMat.userData.heightmap = { value: null }this.waterMat.onBeforeCompile = (shader) => {shader.uniforms.heightmap = this.waterMat.userData.heightmapshader.vertexShader = shader.vertexShader.replace('#include <common>', `uniform sampler2D heightmap;#include <common>`)shader.vertexShader = shader.vertexShader.replace('#include <beginnormal_vertex>', `// Compute normal from heightmapvec2 cellSize = vec2( 1.0 / (${FBO_WIDTH.toFixed( 1 )}), 1.0 / ${FBO_HEIGHT.toFixed( 1 )} );vec3 objectNormal = vec3(( texture2D( heightmap, uv + vec2( - cellSize.x, 0 ) ).x - texture2D( heightmap, uv + vec2( cellSize.x, 0 ) ).x ) * ${FBO_WIDTH.toFixed( 1 )} / ${GEOM_WIDTH.toFixed( 1 )},( texture2D( heightmap, uv + vec2( 0, - cellSize.y ) ).x - texture2D( heightmap, uv + vec2( 0, cellSize.y ) ).x ) * ${FBO_HEIGHT.toFixed( 1 )} / ${GEOM_HEIGHT.toFixed( 1 )},1.0 );`)shader.vertexShader = shader.vertexShader.replace('#include <begin_vertex>', `float heightValue = texture2D( heightmap, uv ).x;vec3 transformed = vec3( position.x, position.y, heightValue );`)
}
我們在 this.waterMat.userData.heightmap 和 Shader.uniforms.heightmap 之間建立了鏈接,這樣每當從 FBO 計算出新的高度圖值時,我們就可以將其保存到材質的 userData 中,然后更新shader中的高度圖數據uniform。
可以看到,我們將網格上的 z 位置替換為高度圖的值。它是 Z 軸而不是 Y 軸,是因為我們將網格旋轉了 90 度,因此它水平面朝上。我們從高度圖紋理中獲取 x 值,這是我們存儲每個點的當前高度的槽。然后因為我們改變了高度位置,所以我們還需要重新計算法線。
最后,我們構建網格并將其添加到場景中:
this.waterMesh = new THREE.Mesh( plane, this.waterMat )
this.waterMesh.rotation.x = - Math.PI / 2
// as the mesh is static, we can turn auto update off: https://threejs.org/docs/#manual/en/introduction/Matrix-transformations
this.waterMesh.matrixAutoUpdate = false
this.waterMesh.updateMatrix()
scene.add( this.waterMesh )
Raycasting
如果我們想讓鼠標移動觸發漣漪效果,則需要Raycasting將鼠標的屏幕坐標投射到場景中,求出相交的世界坐標。
首先,我們初始化一些變量和 Raycaster:
this.mouseMoved = false
this.pointer = new THREE.Vector2()
this.raycaster = new THREE.Raycaster()
然后我們定義綁定到pointermove事件的函數:
onPointerMove( event ) {if ( event.isPrimary === false ) return// converting mouse coordinates into -1 to +1 spacethis.pointer.x = ( event.clientX / window.innerWidth ) * 2 - 1this.pointer.y = - ( event.clientY / window.innerHeight ) * 2 + 1this.mouseMoved = true
}this.container.addEventListener( 'pointermove', this.onPointerMove.bind(this) )
在每幀調用的更新函數中,我們添加以下代碼:
const hmUniforms = this.heightmapVariable.material.uniforms
if ( this.mouseMoved ) {this.raycaster.setFromCamera( this.pointer, camera )const intersects = this.raycaster.intersectObject( this.waterMesh )if ( intersects.length > 0 ) {const point = intersects[ 0 ].point// point是世界坐標hmUniforms[ 'mousePos' ].value.set( point.x, point.z )} else {hmUniforms[ 'mousePos' ].value.set( 10000, 10000 )}this.mouseMoved = false
} else {hmUniforms[ 'mousePos' ].value.set( 10000, 10000 )
}
hmUniforms 是 FBO 使用的計算片段著色器中的uniform變量。當鼠標移動時,我們計算鼠標和水網格的交點,并將該點的世界坐標保存到 hmUniforms[‘mousePos’] 中。由于計算片段著色器負責計算波高,因此我們可以很自然地將鼠標與水的交點傳遞給它。當沒有鼠標移動時,我們只需將其設置到畫布外的某個位置即可。
設置 FBO
最后是這個示例的核心部分。我們將計算片段著色器中的波浪計算位留到最后。
首先引入文件:
import { GPUComputationRenderer } from "three/examples/jsm/misc/GPUComputationRenderer"
import { SimplexNoise } from "three/examples/jsm/math/SimplexNoise"
import HeightmapFragment from "./shaders/heightmapFragment.glsl"
我們需要 SimplexNoise 來生成水網格的初始高度位置。
接下來我們定義一些用戶可更改的參數:
const params = {mouseSize: 20.0,viscosity: 0.98,waveHeight: 0.3,
}
為了初始化 GPUComputationRenderer,我們需要傳入用于存儲計算的高度圖的數據紋理的尺寸,以及我們用于場景繪制的渲染器。
this.gpuCompute = new GPUComputationRenderer( FBO_WIDTH, FBO_HEIGHT, renderer )
if ( renderer.capabilities.isWebGL2 === false ) {this.gpuCompute.setDataType( THREE.HalfFloatType )
}
我們的數據紋理的分辨率為 128 x 128,這樣每個紋素都存儲水網格上相應頂點的高度值。這也是為什么之前我們將寬度/高度段數設置為 127,因為總頂點數將為 128 x 128。
接下來我們需要創建真正的 FBO,即 this.heightmapVariable:
const heightmap0 = this.gpuCompute.createTexture()
this.fillTexture( heightmap0 )
this.heightmapVariable = this.gpuCompute.addVariable( 'heightmap', HeightmapFragment, heightmap0 )
this.gpuCompute.setVariableDependencies( this.heightmapVariable, [ this.heightmapVariable ] )
this.heightmapVariable主要存儲3個東西:
- 使用計算片段著色器渲染的虛擬/離屏網格的材質
- 此離屏渲染的渲染目標
- 對其他 FBO 的依賴
這里我們將 FBO 設置為依賴于自身,這樣我們就可以將最后一幀的高度圖位置作為輸入來計算下一幀的高度圖位置。
我們調用 this.fillTexture 方法使用 Simplex Noise 生成初始高度數據:
fillTexture( texture ) {const waterMaxHeight = 2;const simplex = new SimplexNoise()function layeredNoise( x, y ) {let multR = waterMaxHeight;let mult = 0.025;let r = 0;for ( let i = 0; i < 10; i ++ ) {r += multR * simplex.noise( x * mult, y * mult );multR *= 0.5;mult *= 2;}return r;}const pixels = texture.image.data;let p = 0;for ( let j = 0; j < FBO_HEIGHT; j ++ ) {for ( let i = 0; i < FBO_WIDTH; i ++ ) {const x = i * 128 / FBO_WIDTH;const y = j * 128 / FBO_HEIGHT;pixels[ p + 0 ] = layeredNoise( x, y );pixels[ p + 1 ] = 0;pixels[ p + 2 ] = 0;pixels[ p + 3 ] = 1;p += 4;}}
}
然后我們設置要在計算片段著色器中使用的uniform和define:
this.heightmapVariable.material.uniforms[ 'mousePos' ] = { value: new THREE.Vector2( 10000, 10000 ) }
this.heightmapVariable.material.uniforms[ 'mouseSize' ] = { value: params.mouseSize }
this.heightmapVariable.material.uniforms[ 'viscosityConstant' ] = { value: params.viscosity }
this.heightmapVariable.material.uniforms[ 'waveheightMultiplier' ] = { value: params.waveHeight }
this.heightmapVariable.material.defines.GEOM_WIDTH = GEOM_WIDTH.toFixed( 1 )
this.heightmapVariable.material.defines.GEOM_HEIGHT = GEOM_HEIGHT.toFixed( 1 )
調用init來完成初始化!
const error = this.gpuCompute.init()
if ( error !== null ) {console.error( error )
}
添加可調整參數的 GUI 控件:
const gui = new dat.GUI()
gui.add(params, "mouseSize", 1.0, 100.0, 1.0 ).onChange((newVal) => {this.heightmapVariable.material.uniforms[ 'mouseSize' ].value = newVal
})
gui.add(params, "viscosity", 0.9, 0.999, 0.001 ).onChange((newVal) => {this.heightmapVariable.material.uniforms[ 'viscosityConstant' ].value = newVal
})
gui.add(params, "waveHeight", 0.1, 2.0, 0.05 ).onChange((newVal) => {this.heightmapVariable.material.uniforms[ 'waveheightMultiplier' ].value = newVal
})
最后,在每幀調用的更新函數中,我們必須手動告訴 this.gpuCompute 計算新的高度圖數據。然后我們可以立即將計算結果傳遞給水網格的著色器:
this.gpuCompute.compute()
this.waterMat.userData.heightmap.value = this.gpuCompute.getCurrentRenderTarget( this.heightmapVariable ).texture
如何模擬波浪
現在我們進入本教程的最后部分,先來看下 heightmapFragment.glsl 里有什么。
#define PI 3.1415926538uniform vec2 mousePos;
uniform float mouseSize;
uniform float viscosityConstant;
uniform float waveheightMultiplier;void main() {vec2 cellSize = 1.0 / resolution.xy;vec2 uv = gl_FragCoord.xy * cellSize;// heightmapValue.x 為倒數第一幀的高度// heightmapValue.y 為倒數第二幀的高度vec4 heightmapValue = texture2D( heightmap, uv );// 獲取相鄰值vec4 north = texture2D( heightmap, uv + vec2( 0.0, cellSize.y ) );vec4 south = texture2D( heightmap, uv + vec2( 0.0, - cellSize.y ) );vec4 east = texture2D( heightmap, uv + vec2( cellSize.x, 0.0 ) );vec4 west = texture2D( heightmap, uv + vec2( - cellSize.x, 0.0 ) );float newHeight = ( ( north.x + south.x + east.x + west.x ) * 0.5 - heightmapValue.y ) * viscosityConstant;// 鼠標影響float mousePhase = clamp( length( ( uv - vec2( 0.5 ) ) * vec2(GEOM_WIDTH, GEOM_HEIGHT) - vec2( mousePos.x, - mousePos.y ) ) * PI / mouseSize, 0.0, PI );newHeight += ( cos( mousePhase ) + 1.0 ) * waveheightMultiplier;heightmapValue.y = heightmapValue.x;heightmapValue.x = newHeight;gl_FragColor = heightmapValue;}
resolution變量定義為數據紋理的分辨率,來自我們構建GPUComputationRenderer時傳入的寬度和高度參數。- 在我們定義了
this.heightmapVariable的自依賴之后,heightmap變量也是在這里自動定義的。它應該與this.heightmapVariable.name具有相同的名稱。
至于水波算法暫時先不講述了。


)


)


