使用segment-anything將目標檢測label轉換為語義分割label
- 一、segment-anything簡介
- 二、segment-anything安裝
- 2.1安裝方法
- 2.2預訓練模型下載
- 三、將目標檢測label轉換為語義分割label
- 3.1示例代碼
- 3.2代碼說明
一、segment-anything簡介
segment-anything是facebookresearch團隊開發的一套無須訓練,根據提示對圖像自動分割的工具,提示可以是一個點,也可以是一個矩形框。根據主頁介紹,它是使用1100萬圖片和1.1億mask訓練而成,在各類圖片分割中都有很強的性能。
研究團隊還在此基礎上開發出了Segment-Anything-Model 2,簡稱SAM2,SAM2不僅可以對圖像進行分割,還可以對視頻進行分割。
segment-anything項目Github地址為:https://github.com/facebookresearch/segment-anything,
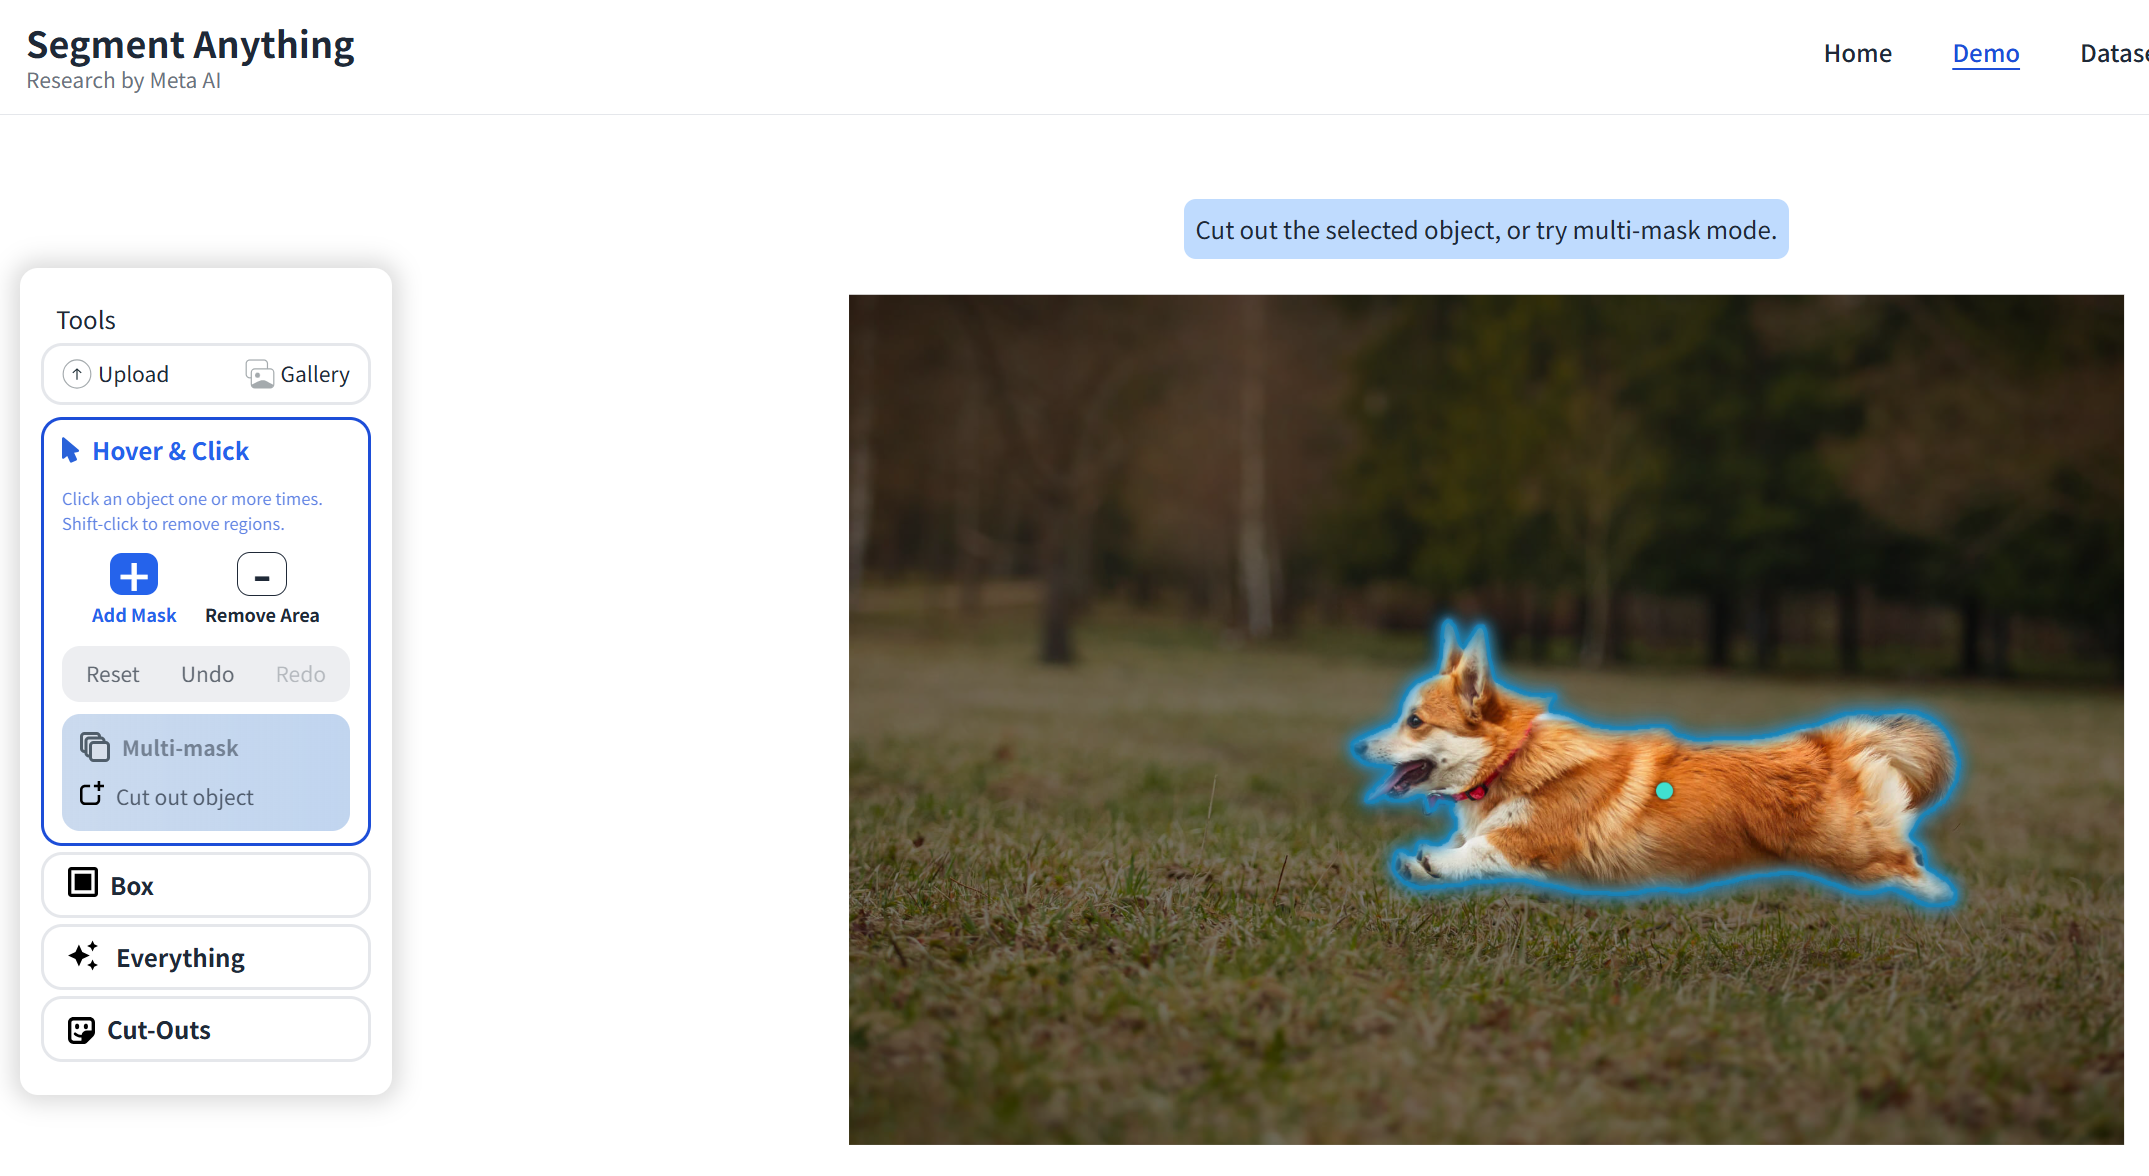
在線演示地址為:https://segment-anything.com/demo,可以在該網站上傳一張本地圖片,進行試驗:

SAM2項目Github地址為:https://github.com/facebookresearch/sam2。
二、segment-anything安裝
2.1安裝方法
segment-anything要求環境:python>=3.8,pytorch>=1.7,torchvision>=0.8。
安裝方法有兩種,一種為使用pip命令安裝,安裝命令如下:
pip install git+https://github.com/facebookresearch/segment-anything.git
一種為下載項目源代碼進行本地安裝,如下:
git clone git@github.com:facebookresearch/segment-anything.git
cd segment-anything; pip install -e .
2.2預訓練模型下載
使用segment-anything需要下載對應的預訓練模型,按照參數量從小到大分為:vit_b、vit_l、vit_h,大小分別為:360M、1.2G,2.5G。
三種模型對顯卡顯存的要求也依次增高,根據實際測試,8G顯存的顯卡可以加載運行vit_b和vit_l,無法加載vit_h模型。
模型下載官方地址如下:
vit_b:https://dl.fbaipublicfiles.com/segment_anything/sam_vit_b_01ec64.pth
vit_l:https://dl.fbaipublicfiles.com/segment_anything/sam_vit_l_0b3195.pth
vit_h:https://dl.fbaipublicfiles.com/segment_anything/sam_vit_h_4b8939.pth。
CSDN免費下載地址如下:
vit_b:https://download.csdn.net/download/weixin_46846685/91510193
vit_l:https://download.csdn.net/download/weixin_46846685/91510428,https://download.csdn.net/download/weixin_46846685/91510431(CSDN上傳文件限制,分為兩部分)
vit_h:https://download.csdn.net/download/weixin_46846685/91510458,https://download.csdn.net/download/weixin_46846685/91553916,https://download.csdn.net/download/weixin_46846685/91553931(CSDN上傳文件限制,分為三部分)
三、將目標檢測label轉換為語義分割label
目標檢測任務中的label為目標的矩形框坐標,而語義分割任務中的label為目標的輪廓。如果需要將目標檢測任務轉換為語義分割任務,那么就需要對圖片進行重新標注。
這一過程需要耗費大量時間精力,所以本文給出了使用segment-anything進行自動化轉換的代碼,用于提高工作效率,但需要注意的是,實際分割效果需要根據場景進行測試評估,檢查效果是否滿足預期。
3.1示例代碼
以YOLO的標簽格式為例,展示如何根據目標檢測的box坐標,將目標輪廓從圖片中分割出來生成對應的mask。
代碼如下:
import torch
import numpy as np
import cv2
from segment_anything import sam_model_registry, SamPredictor, SamAutomaticMaskGenerator
from PIL import Image
import os
import sysdevice = "cuda" if torch.cuda.is_available() else "cpu"
sam_checkpoint = "sam_vit_l_0b3195.pth"
model_type = "vit_l"sam = sam_model_registry[model_type](checkpoint=sam_checkpoint)
sam.to(device)imagepath = 'image.jpg'
labelpath = 'label.txt'
combine = np.zeros([256, 256])
if os.path.getsize(labelpath) > 0:with open(labelpath, 'r') as f:labels=f.readlines()boxes = []for labeldata in labels:parts = labeldata.strip().split()x_center, y_center, w, h = (float(parts[1]), float(parts[2]), float(parts[3]), float(parts[4]))gtx1 = int((x_center - w / 2) * 256)gty1 = int((y_center - h / 2) * 256)gtx2 = int((x_center + w / 2) * 256)gty2 = int((y_center + h / 2) * 256)boxes.append([gtx1, gty1, gtx2, gty2])image = cv2.imread(imagepath)image = cv2.cvtColor(image, cv2.COLOR_BGR2RGB)predictor = SamPredictor(sam)predictor.set_image(image)for box in boxes:masks, scores, logits = predictor.predict(point_coords=None,point_labels=None,box=np.array(box),multimask_output=True,)mask = masks[scores[0].argmax()]combine[np.where(mask==1)]=1mask_output_path = 'mask.png'
mask_img = Image.fromarray(combine.astype(np.uint8))
mask_img.save(mask_output_path)
3.2代碼說明
代碼整體邏輯為:
- 首先判斷label文件是否為空,如果為空說明圖片不包含目標,則生成一個全0的mask;
- 如果不為空,則讀取label的box信息,以box為提示,調用segment-anything對圖片進行分割,上述代碼假設目標只有1類,所以將目標區域填充為1,此處可根據需要進行修改;
- 最后生成的mask,背景區域灰度值為0,目標區域灰度值為1,所以直接打開mask圖片無法看到分割出的目標,如需可視化需要另做一些簡單的圖像處理。
調用segment-anything的注意事項:
- segment-anything不支持直接輸入box的列表,所以上述代碼做了一個循環,循環輸入box;
- predictor.predict_torch方法據說可以接受多個box,但是經過實際測試,發現分割出的目標位置有所偏離,目前不知是什么原因。
)

-- ( 歸并排序實質,歸并排序擴展問題:小和問題))


添加建筑glb模型,添加陰影效果,設置陰影顏色和透明度)


)


