Three.js Journey — Learn WebGL with Three.jsThe ultimate Three.js course whether you are a beginner or a more advanced developer![]() https://threejs-journey.com/?c=p3
https://threejs-journey.com/?c=p3
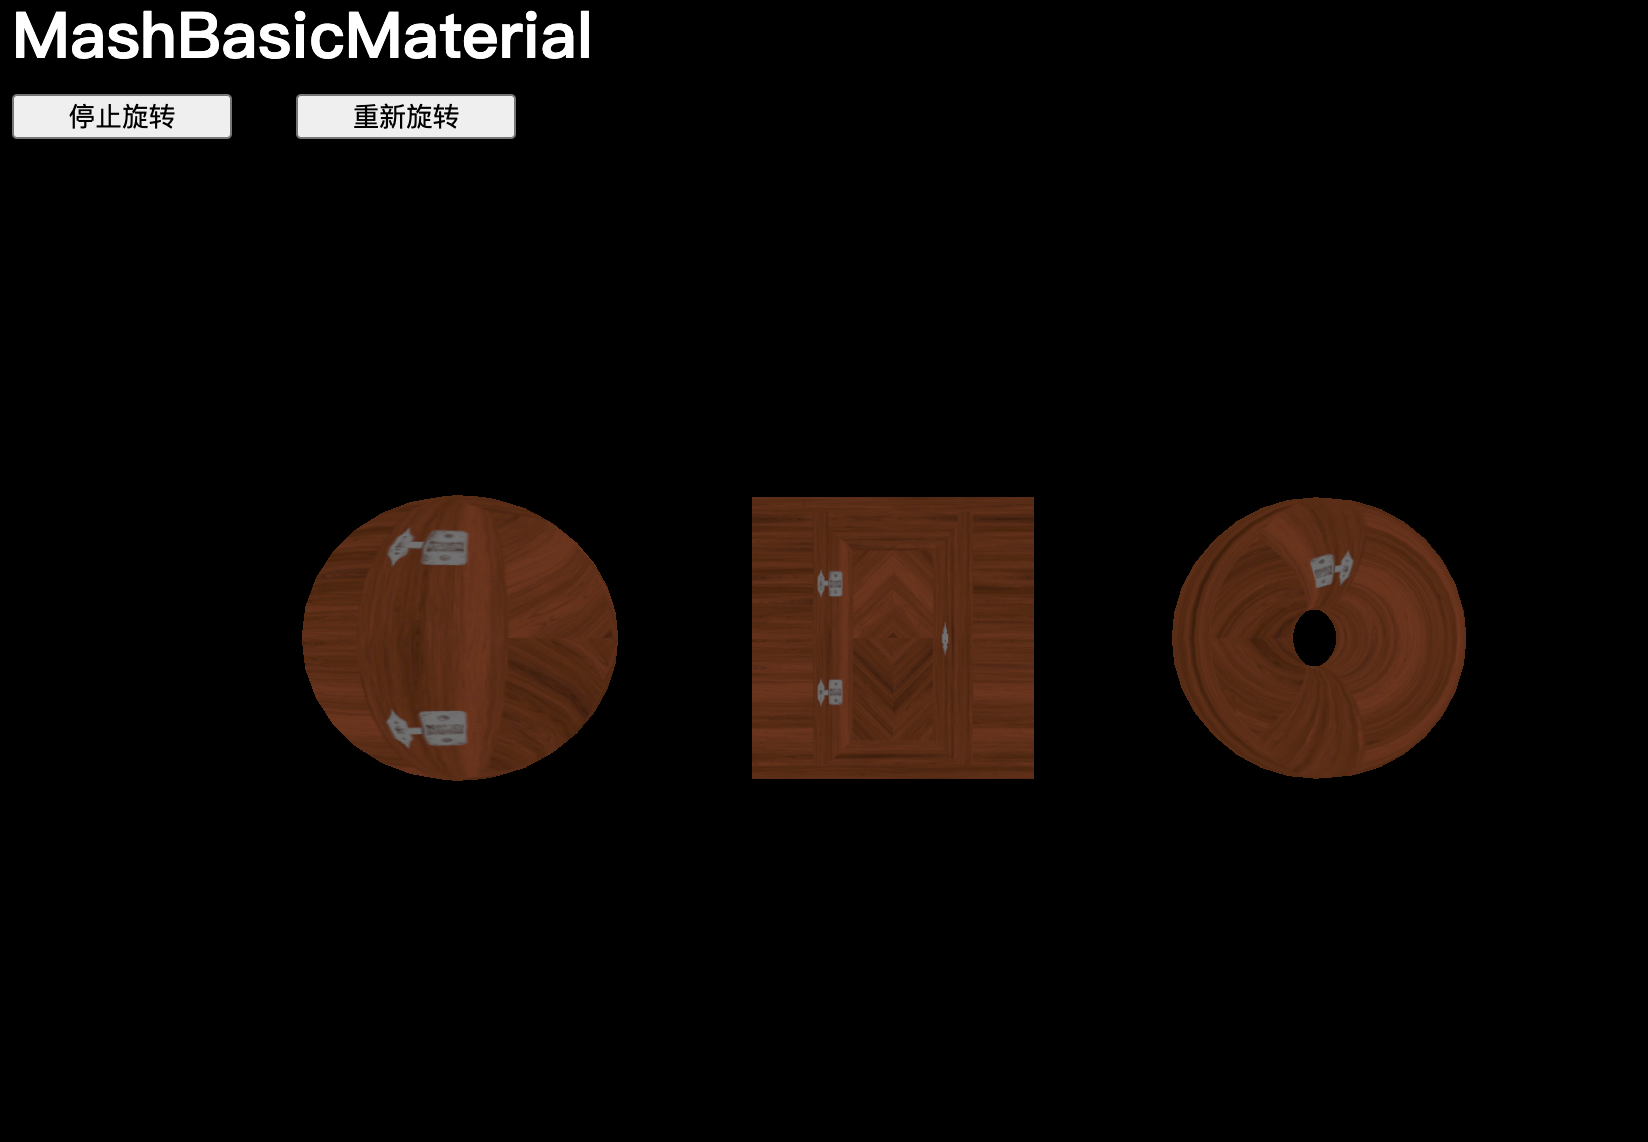
MeshBasicMaterial
添加3個網格體:
/*** Object*/
// MashBasicMaterial
const material = new THREE.MeshBasicMaterial()const sphere = new THREE.Mesh(new THREE.SphereGeometry(0.5, 16, 16),material
)const plane = new THREE.Mesh(new THREE.PlaneGeometry(1,1),material
)const torus = new THREE.Mesh(new THREE.TorusGeometry(0.3, 0.2, 16, 32),material
)sphere.position.x = -1.5
torus.position.x = 1.5scene.add(sphere, plane, torus)
在 tick 函數中旋轉對象:
/*** Animate*/
const clock = new THREE.Clock()const tick = () =>
{const elapsedTime = clock.getElapsedTime()// Update objectssphere.rotation.y = 0.1 * elapsedTimeplane.rotation.y = 0.1 * elapsedTimetorus.rotation.y = 0.1 * elapsedTimesphere.rotation.x = -0.15 * elapsedTimeplane.rotation.x = -0.15 * elapsedTimetorus.rotation.x = -0.15 * elapsedTime// ...
}tick()
【復習點】作為 `map` 和 `matcap` 使用的紋理應該以 `sRGB` 編碼
// 作為 `map` 和 `matcap` 使用的紋理應該以 `sRGB` 編碼
const matcapTexture = textureLoader.load('./textures/matcaps/1.png')
const doorColorTexture = textureLoader.load('./textures/door/color.jpg')doorColorTexture.colorSpace = THREE.SRGBColorSpace
matcapTexture.colorSpace = THREE.SRGBColorSpace
可以在材質的 map 屬性中使用所有紋理:
const material = new THREE.MeshBasicMaterial({ map: doorColorTexture })Map
map 屬性將在幾何體表面應用紋理,下面2種賦值式是相等的:
const material = new THREE.MeshBasicMaterial({map: doorColorTexture
})// Equivalent
const material = new THREE.MeshBasicMaterial()
material.map = doorColorTexture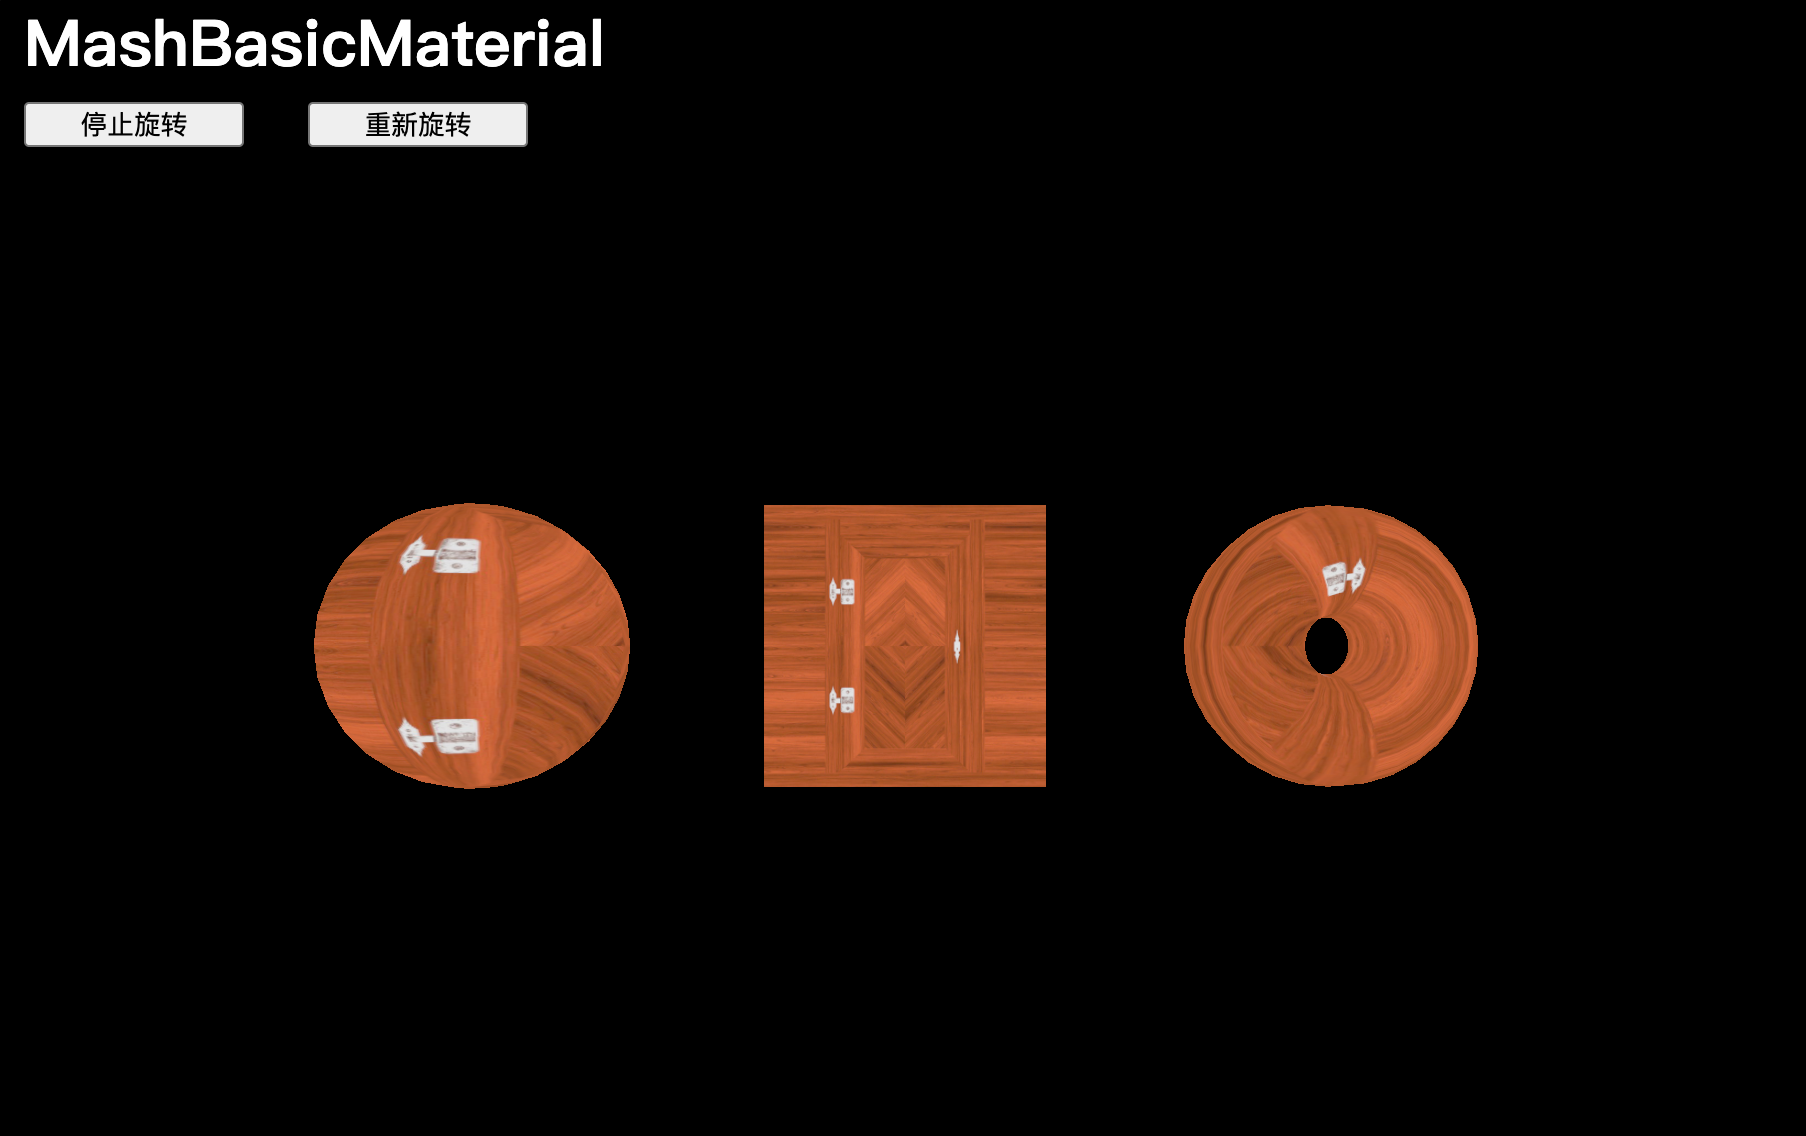
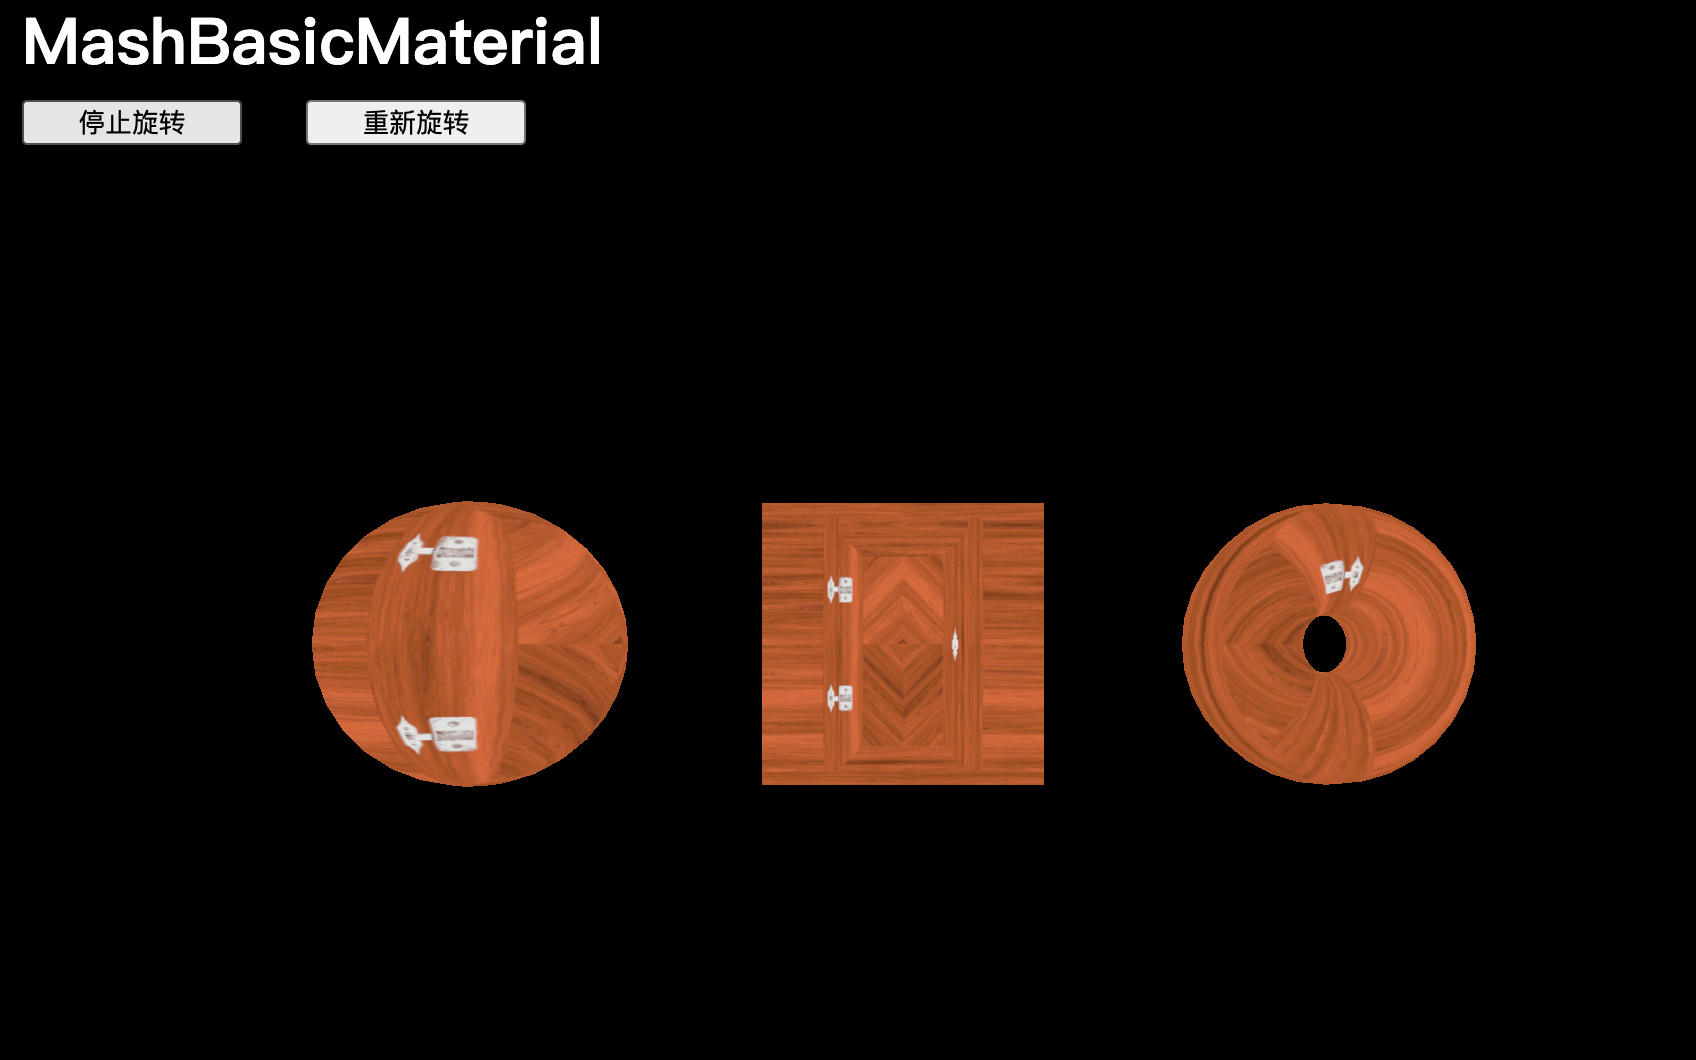
Color
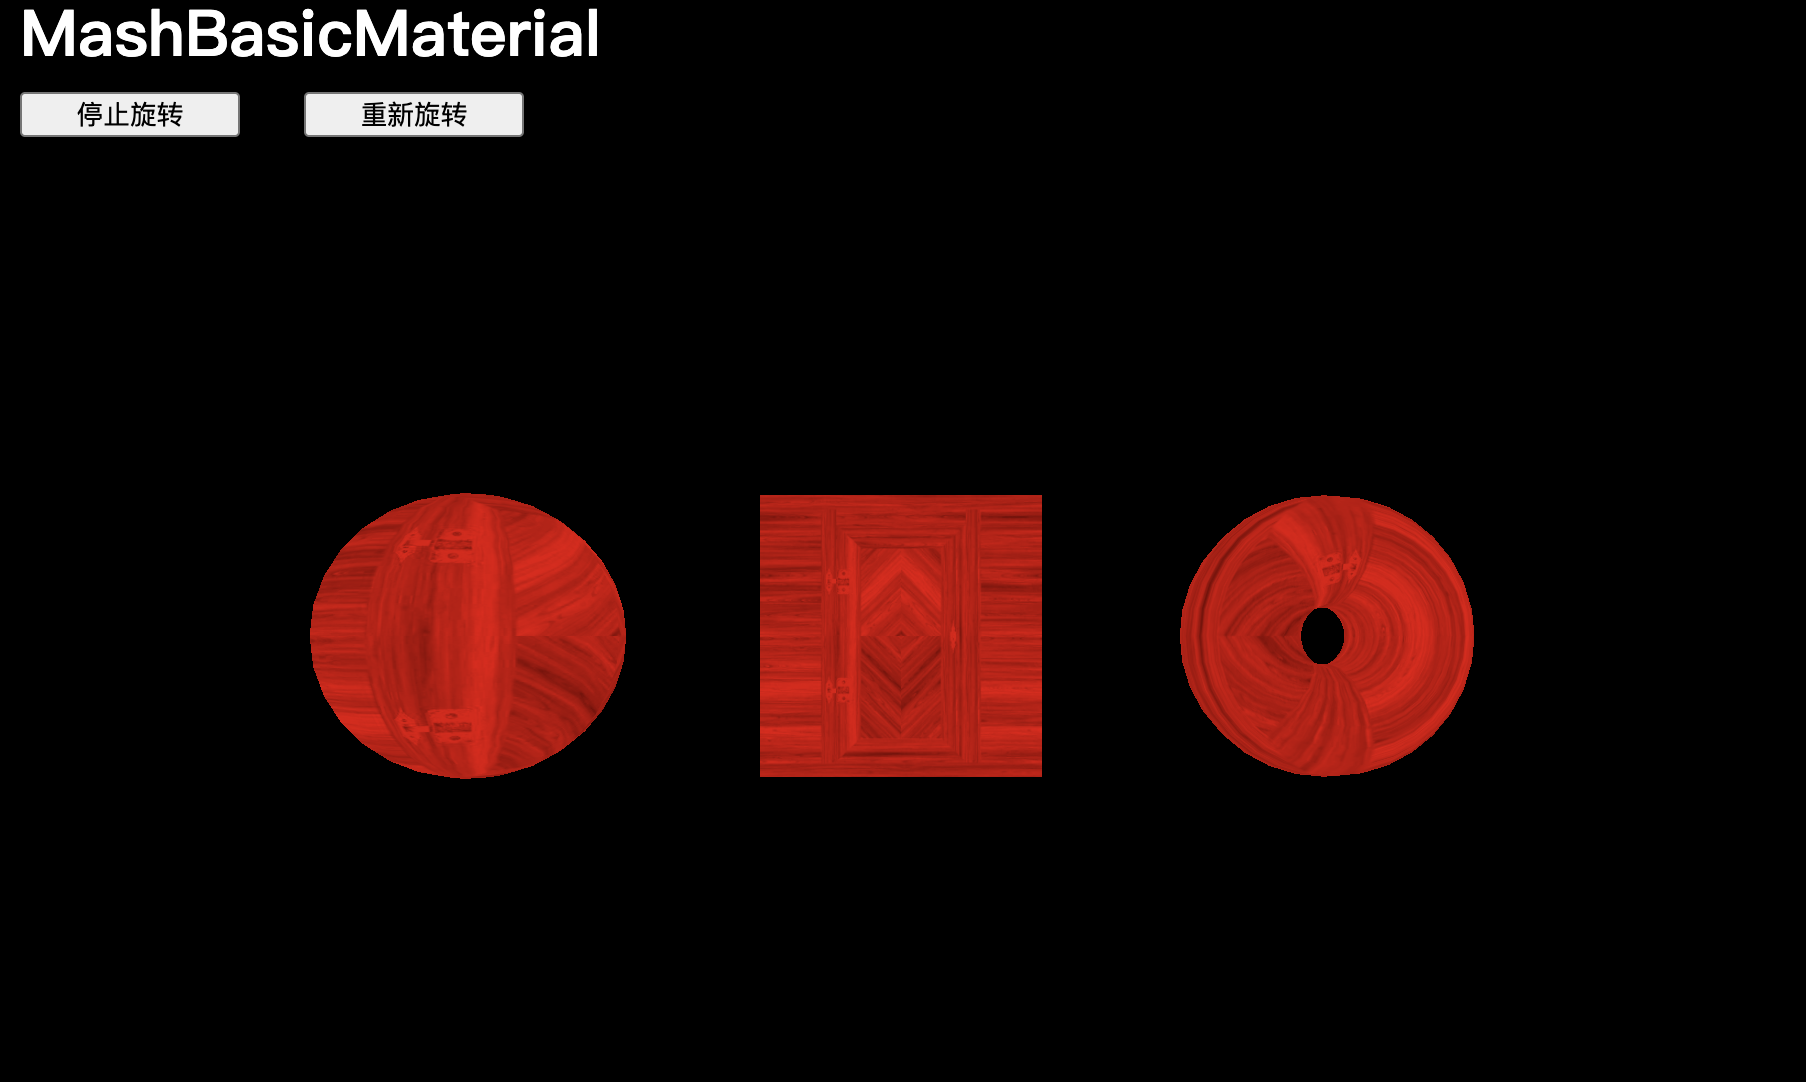
當直接更改 color 屬性時,必須實例化一個 Color 類。color 屬性將在幾何體表面應用統一顏色:
material.color = new THREE.Color('#ff0000')
material.color = new THREE.Color('#f00')
material.color = new THREE.Color('red')
material.color = new THREE.Color('rgb(255, 0, 0)')
material.color = new THREE.Color(0xff0000)
將 `color` 和 `map` 結合起來會用顏色給紋理上色:
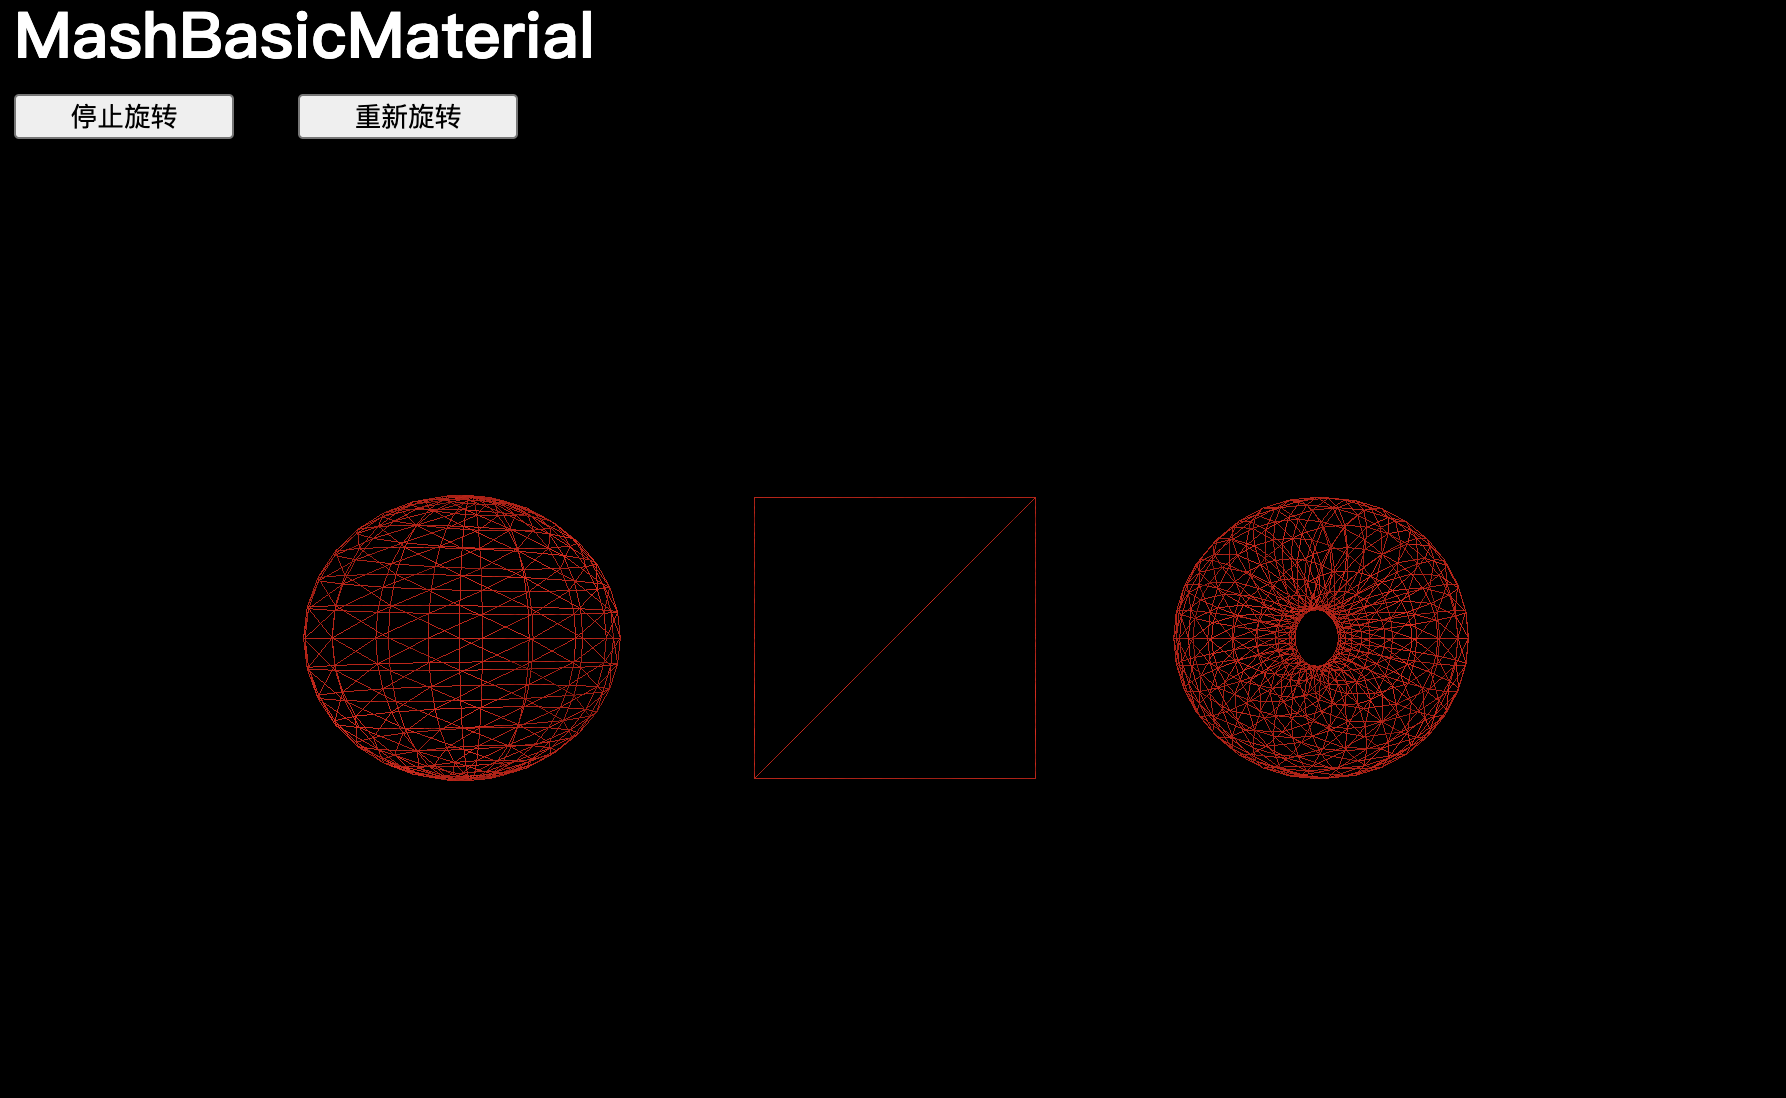
wireframe
(有些屬性,比如?wireframe?或?opacity,可以與大多數后續材質一起使用。)
線框模式,`wireframe` 屬性會以 1px 的細線顯示組成幾何體的三角形:
material.wireframe = true【注意】平面由兩個三角形組成
opacity
(有些屬性,比如?wireframe?或?opacity,可以與大多數后續材質一起使用。)
需要先將 transparent 屬性設置為 true,告知 Three.js 這種材質現在支持透明度,再用opacity 屬性控制透明度。
material.transparent = true
material.opacity = 0.5
不透明度設置為0.5:
不透明度設置為1:
AlphaMap
配合 .transparent,可以使用?alphaMap?屬性通過紋理來控制透明度:
material.transparent = true
// material.opacity = 0.5
material.alphaMap = doorAlphaTexture
Side
side 屬性決定允許哪些面的哪一面可見。盡量避免在渲染時使用?THREE.DoubleSide,因為即使這個面不可見,它也會消耗更多的資源。
正面可見 (THREE.FrontSide),背面可見 (THREE.BackSide) 或兩面可見 (THREE.DoubleSide):
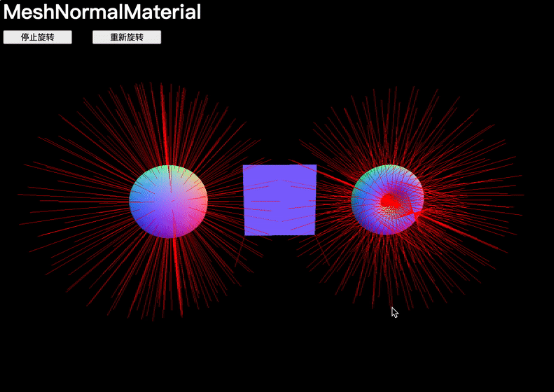
material.side = THREE.DoubleSideMeshNormalMaterial
MeshNormalMaterial與“法線”有關:
// MeshNormalMaterial
const material = new THREE.MeshNormalMaterial()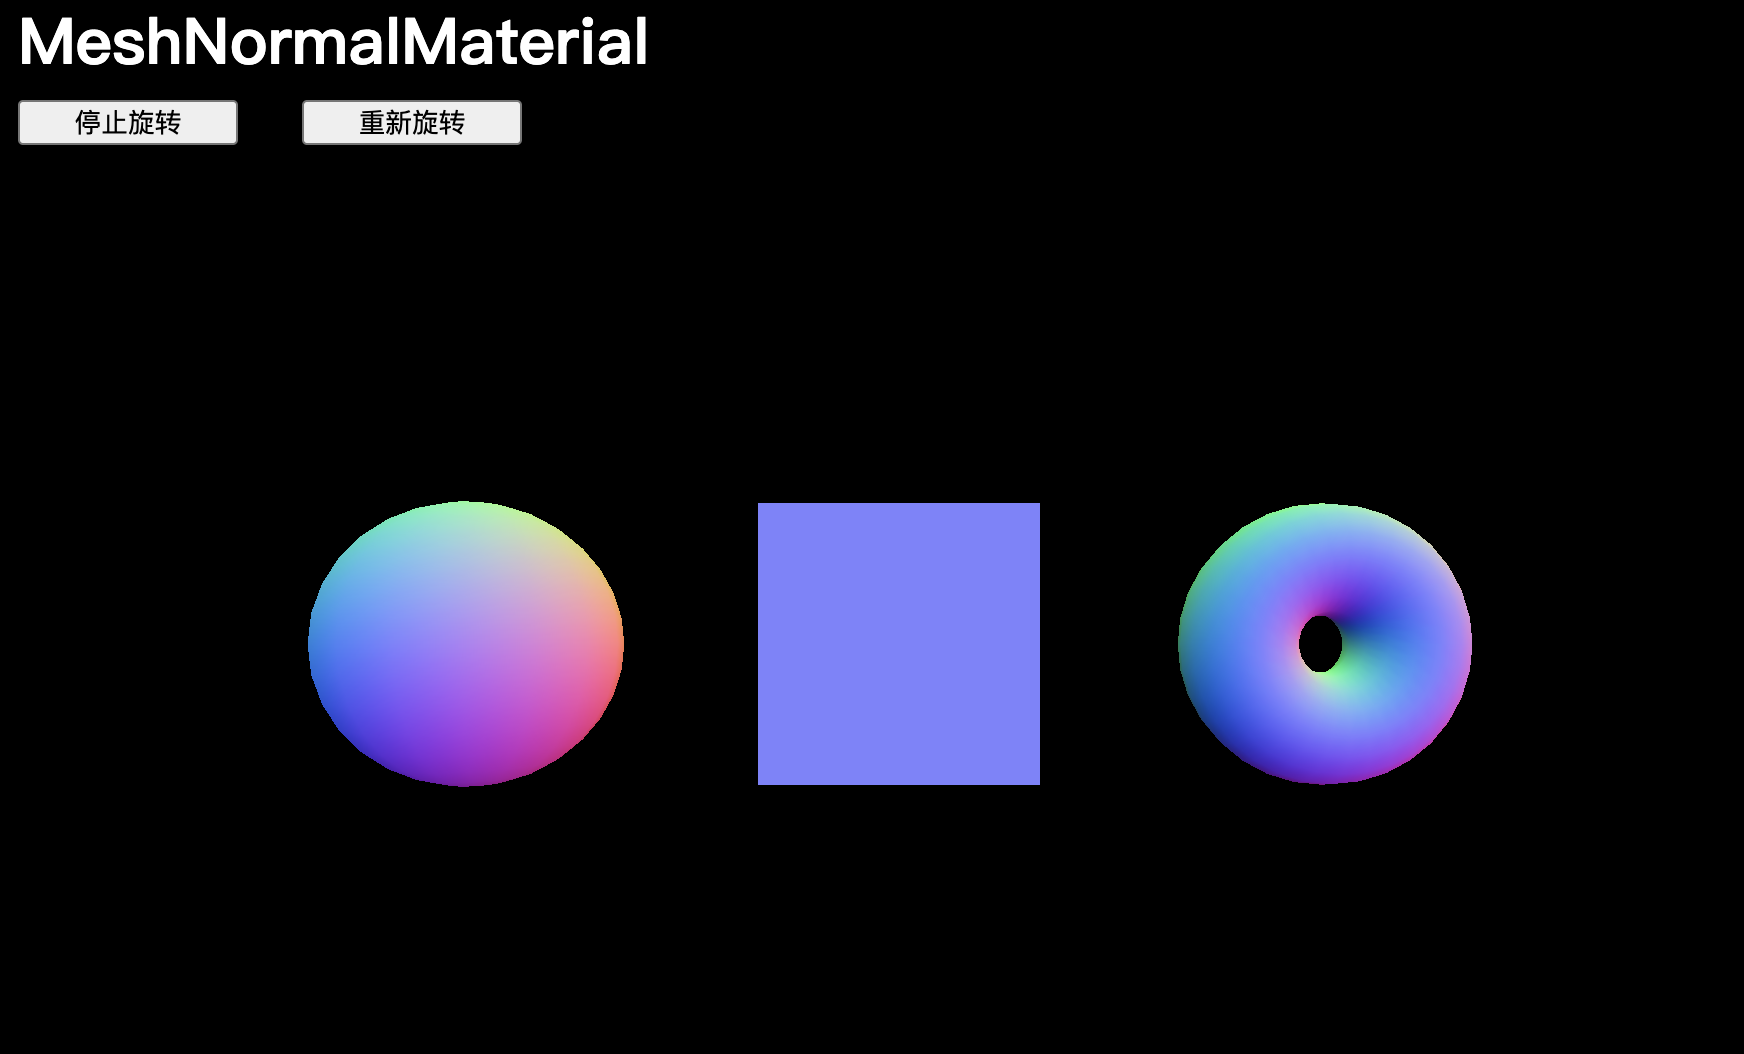
法線是編碼在每個頂點中的信息,包含了面的外法線方向。如果將這些法線顯示為箭頭,會看到從每個頂點延伸出來的直線,這些直線構成了幾何形狀。
【擴展】使用Three.js內置的VertexNormalsHelper
import { VertexNormalsHelper } from 'three/examples/jsm/helpers/VertexNormalsHelper.js';const mesh = new THREE.Mesh(geometry, material);
const normalsHelper = new VertexNormalsHelper(mesh, 1, 0xff0000);
scene.add(mesh);
scene.add(normalsHelper);
flatShading
flatShading 會使面變得平坦,這意味著法線不會在頂點之間進行插值。
material.flatShading = true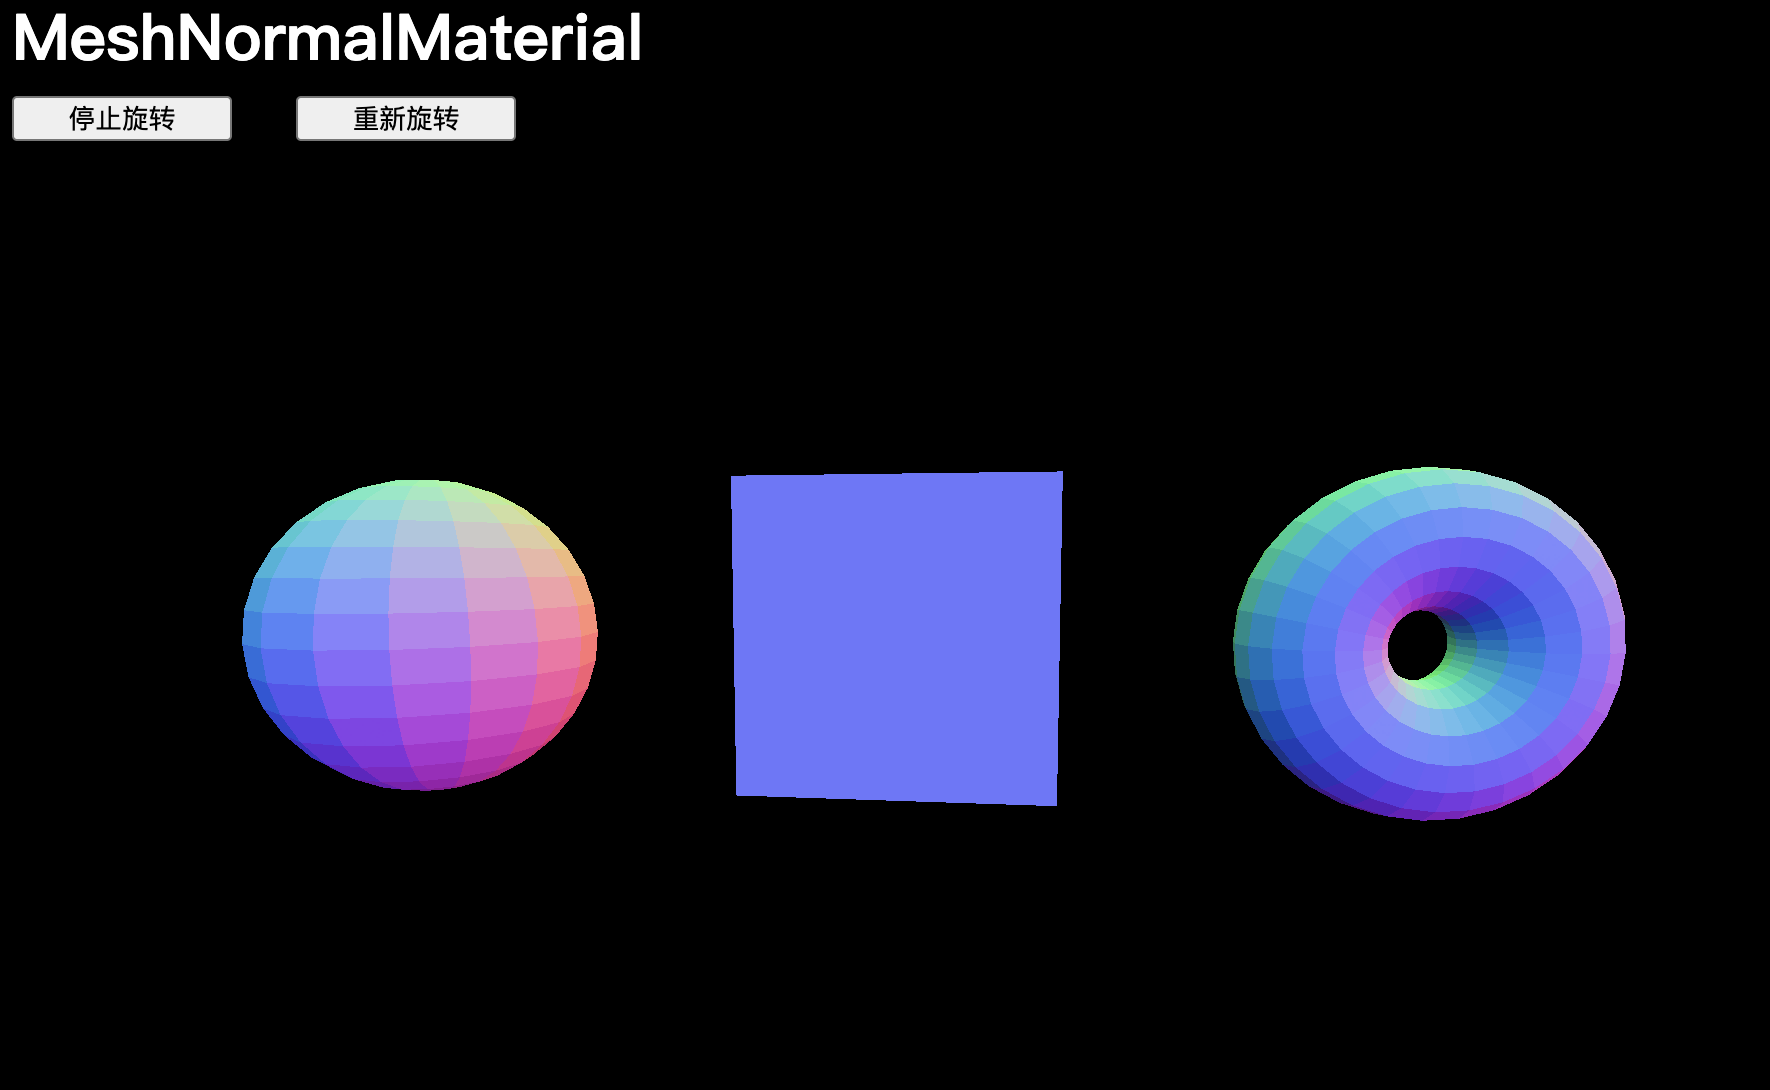
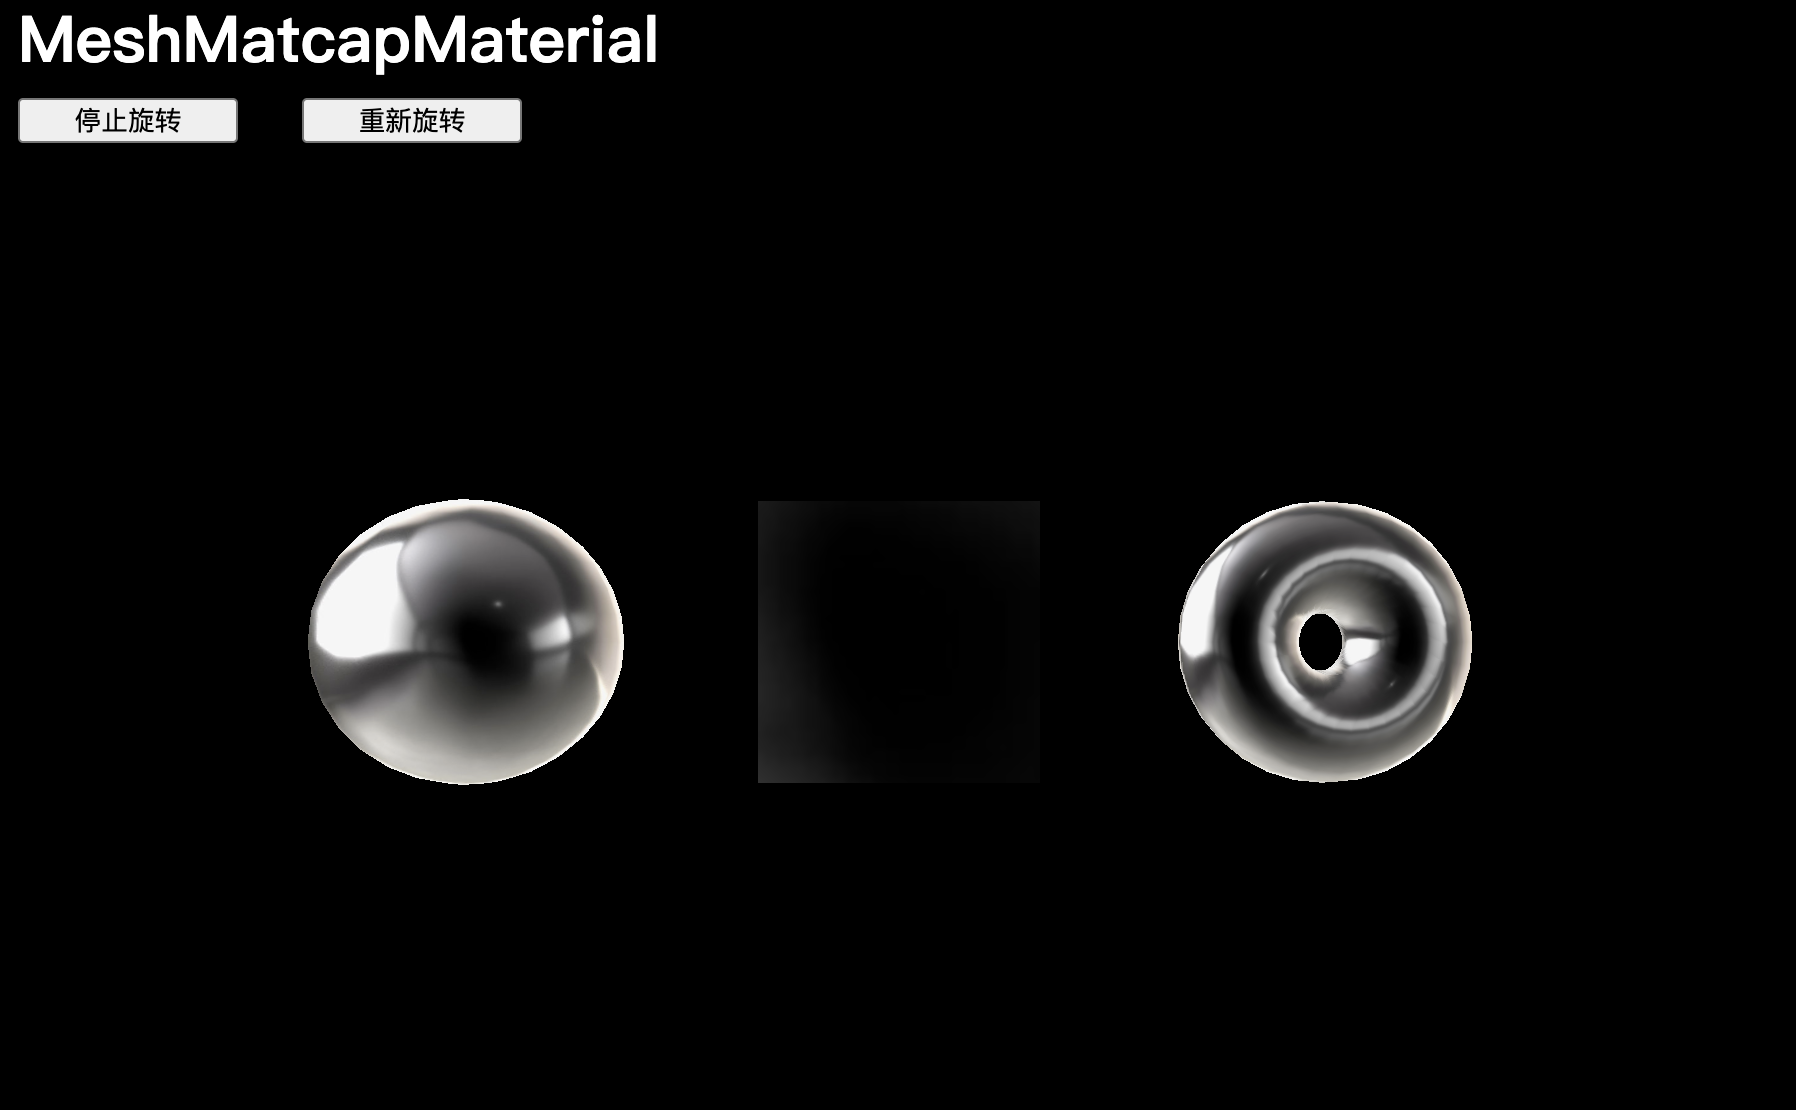
MeshMatcapMaterial
MeshMatcapMaterial 在保持高性能的同時還能呈現出極佳的效果,它需要一個看起來像球體的參考紋理:
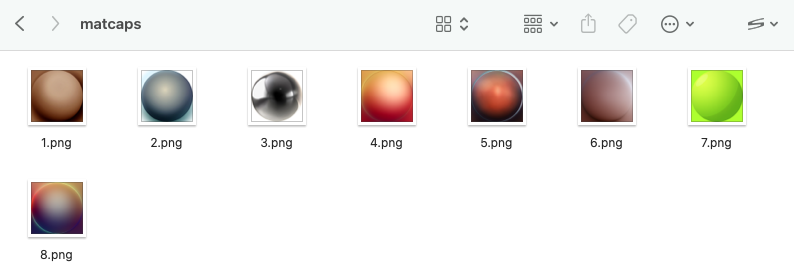
// MeshMatcapMaterial
const material = new THREE.MeshMatcapMaterial()
// 材質會根據法線相對于相機的方向從紋理中選擇顏色
material.matcap = matcapTexture
【注意】網格將顯得被照亮,但這只是由紋理創造的幻象,場景中沒有光源。
唯一的問題是,結果無論相機方向如何都相同。此外,無法更新光源,因為根本就沒有光源。
MeshDepthMaterial
MeshDepthMaterial 會將幾何體在接近相機的near值時著色為白色,在接近相機的far值時著色為黑色:
// MeshDepthMaterial
const material = new THREE.MeshDepthMaterial()
MeshLambertMaterial
MeshLambertMaterial 是列表中第一個需要光源才能看到的材質,我們需要加一些光源。
// MeshLambertMaterial
const material = new THREE.MeshLambertMaterial() // 沒有燈源,畫布漆黑
添加燈光
創建一個?AmbientLight?并將其添加到場景中:
/*** Lights*/
const ambientLight = new THREE.AmbientLight(0xffffff, 1)
scene.add(ambientLight)創建一個?PointLight?并將其添加到場景中:
/*** Lights*/
const ambientLight = new THREE.AmbientLight(0xffffff, 1)
scene.add(ambientLight)const pointLight = new THREE.PointLight(0xffffff, 30)
pointLight.position.x = 2
pointLight.position.y = 3
pointLight.position.z = 4
scene.add(pointLight)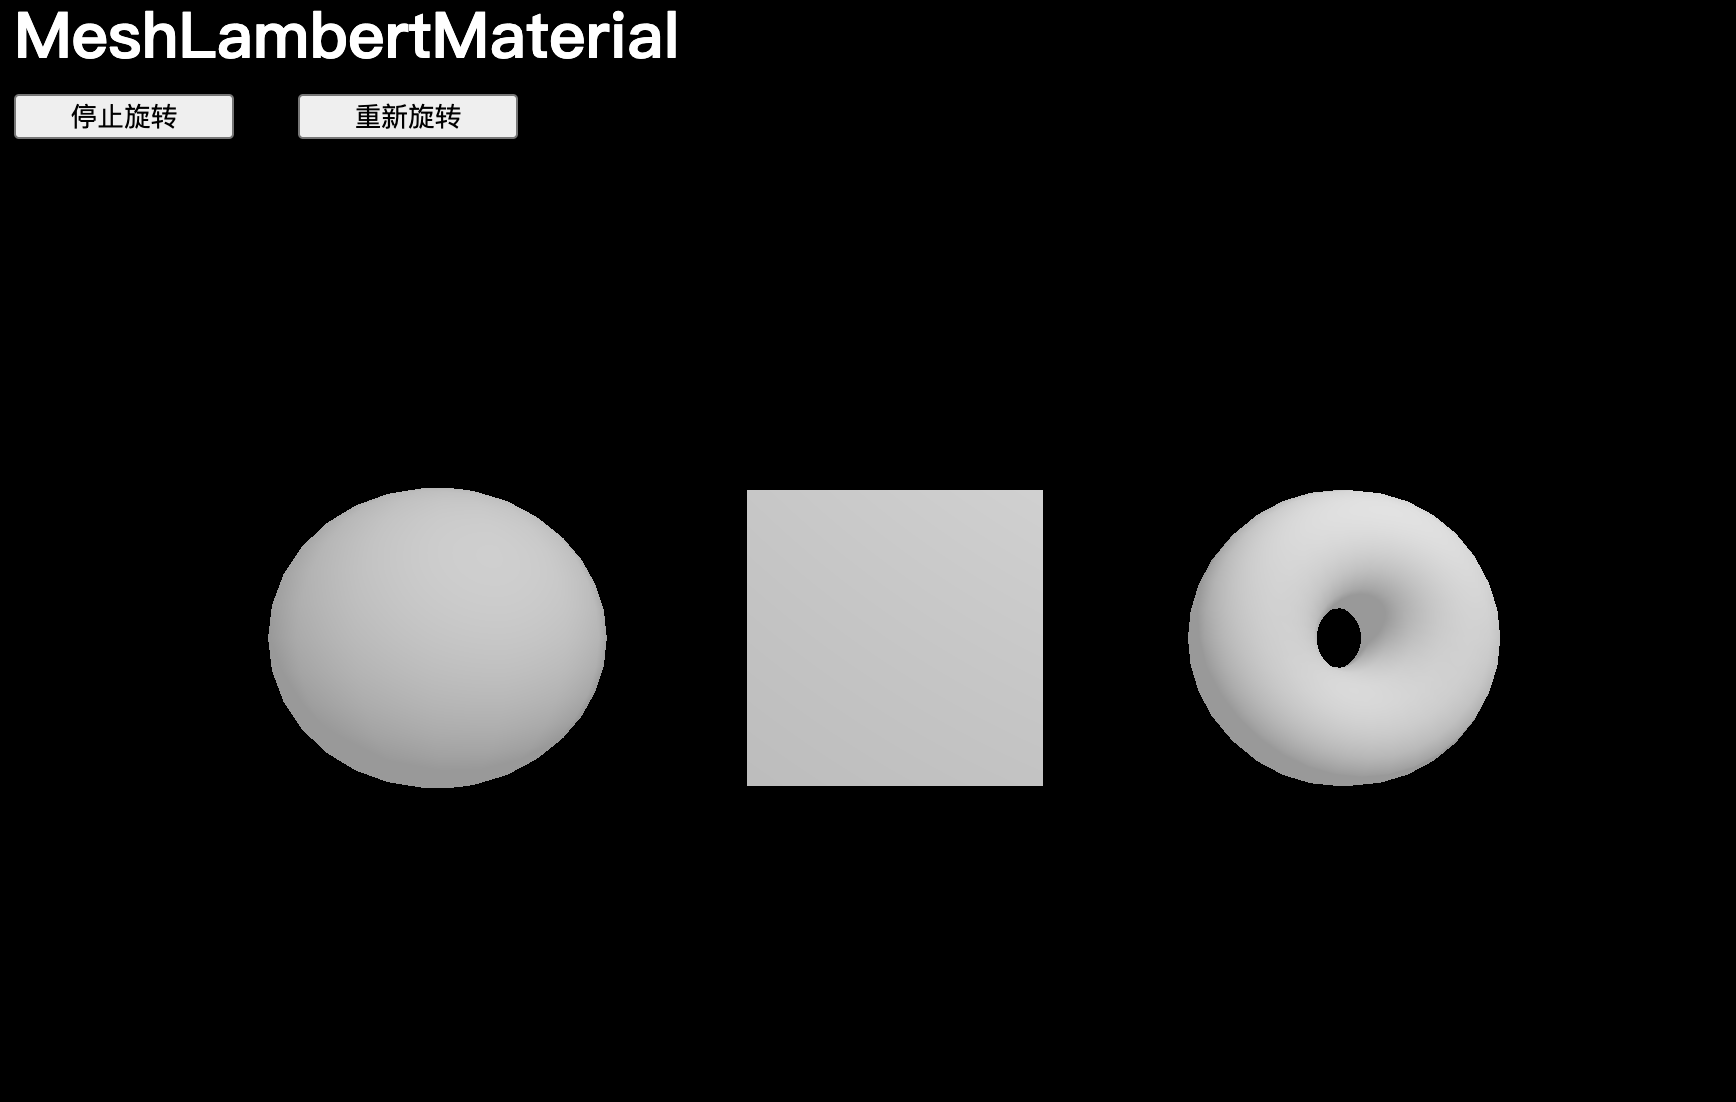
MeshPhongMaterial
MeshPhongMaterial 與 MeshLambertMaterial 非常相似,但奇怪的圖案不那么明顯,可以看到幾何體表面的光反射:
// MeshPhongMaterial
const material = new THREE.MeshPhongMaterial()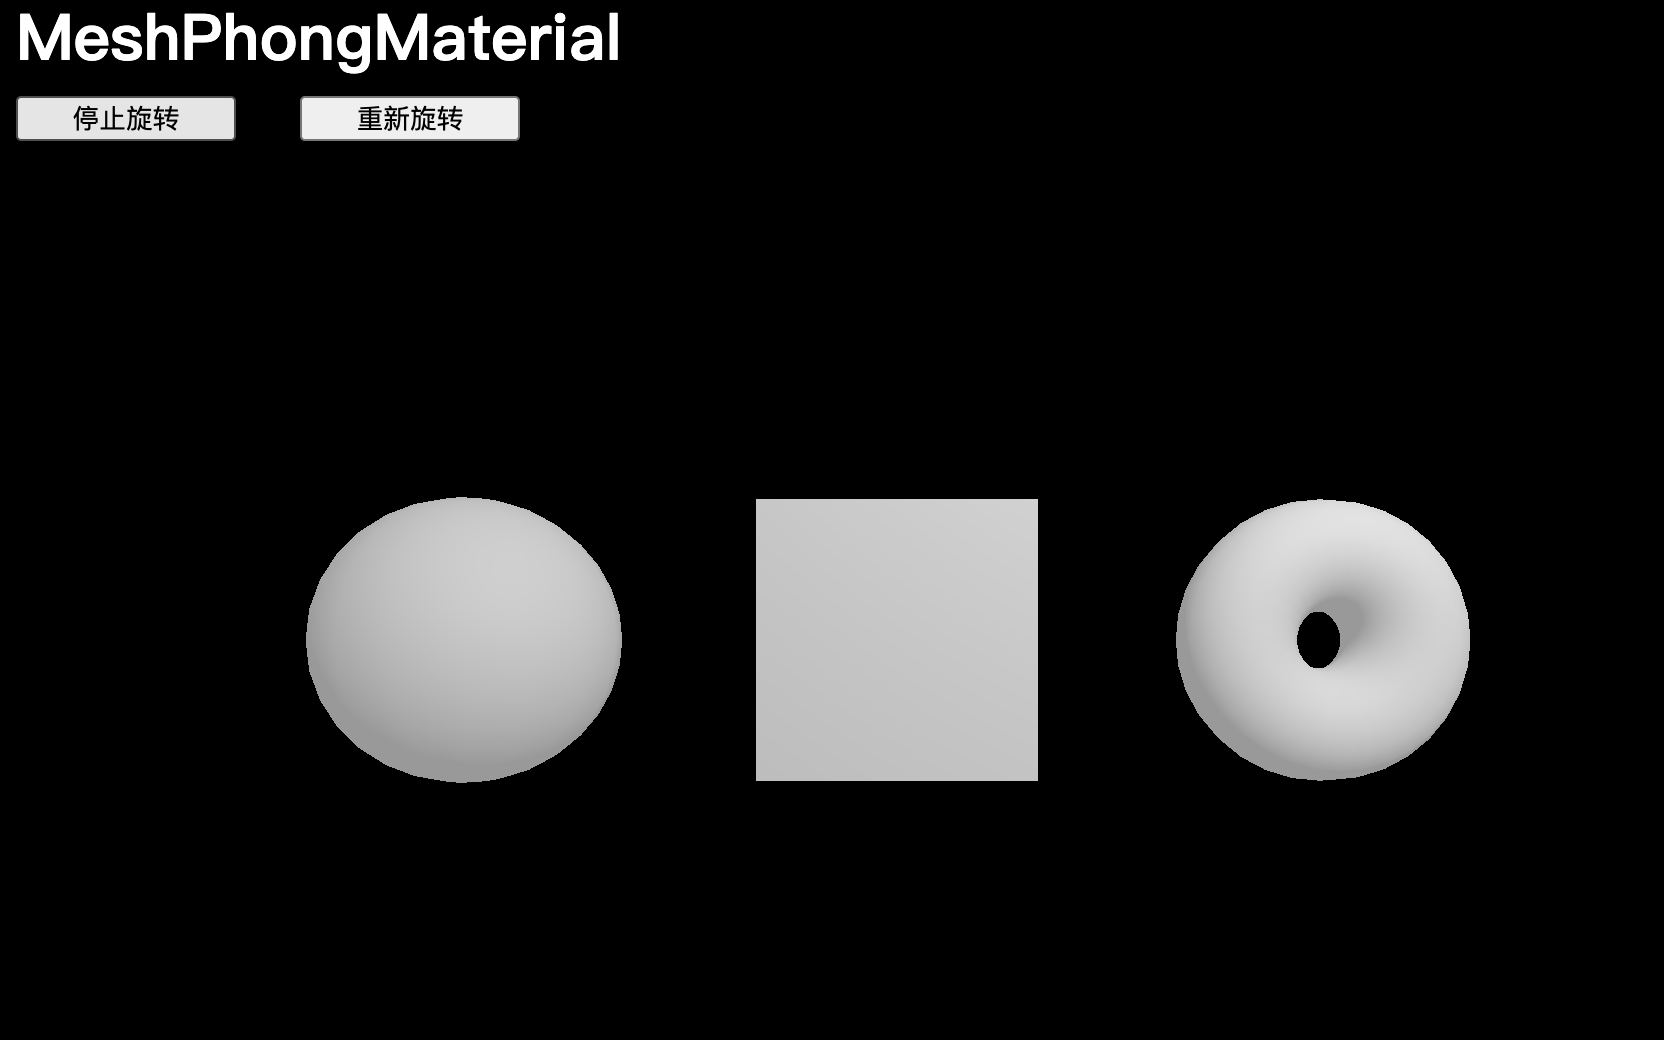
可以通過 shininess 屬性來控制光反射,數值越大,表面越光滑。
還可以通過 specular 屬性來改變反射的顏色:
// MeshPhongMaterial
const material = new THREE.MeshPhongMaterial()
material.shininess = 100
material.specular = new THREE.Color(0x1188ff)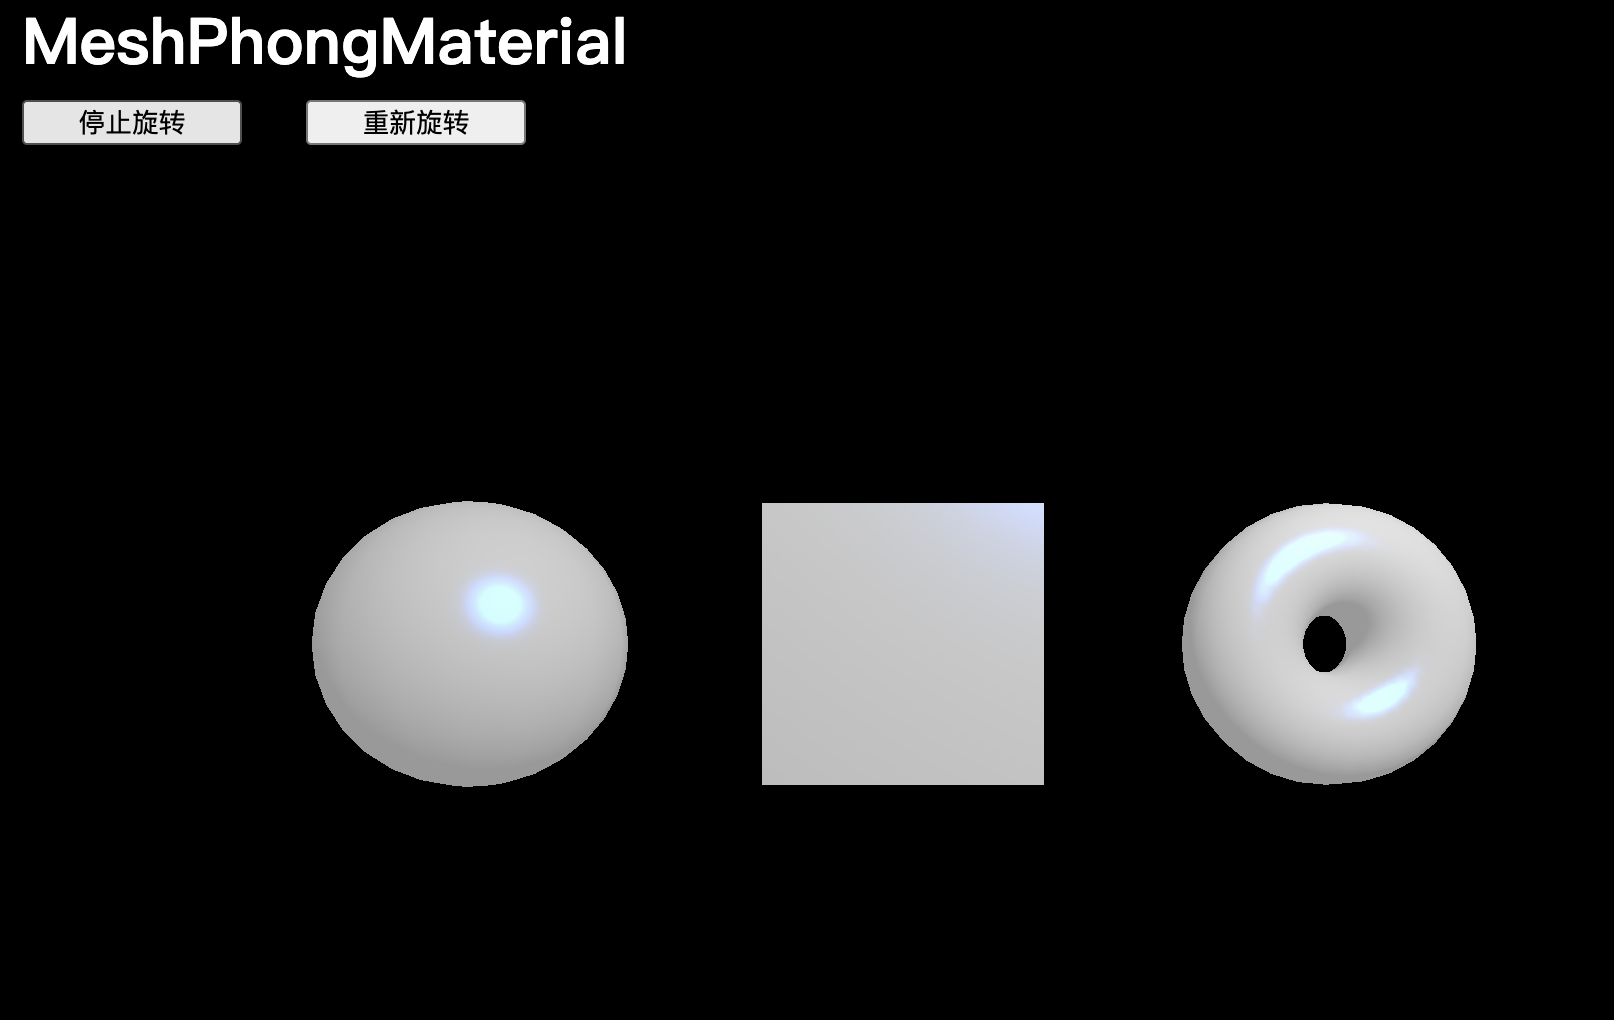
MeshToonMaterial
MeshToonMaterial 在屬性上類似于 MeshLambertMaterial,但具有卡通風格。默認情況下,只能得到兩部分著色,一部分用于陰影,另一部分用于光照。
// MeshToonMaterial
const material = new THREE.MeshToonMaterial()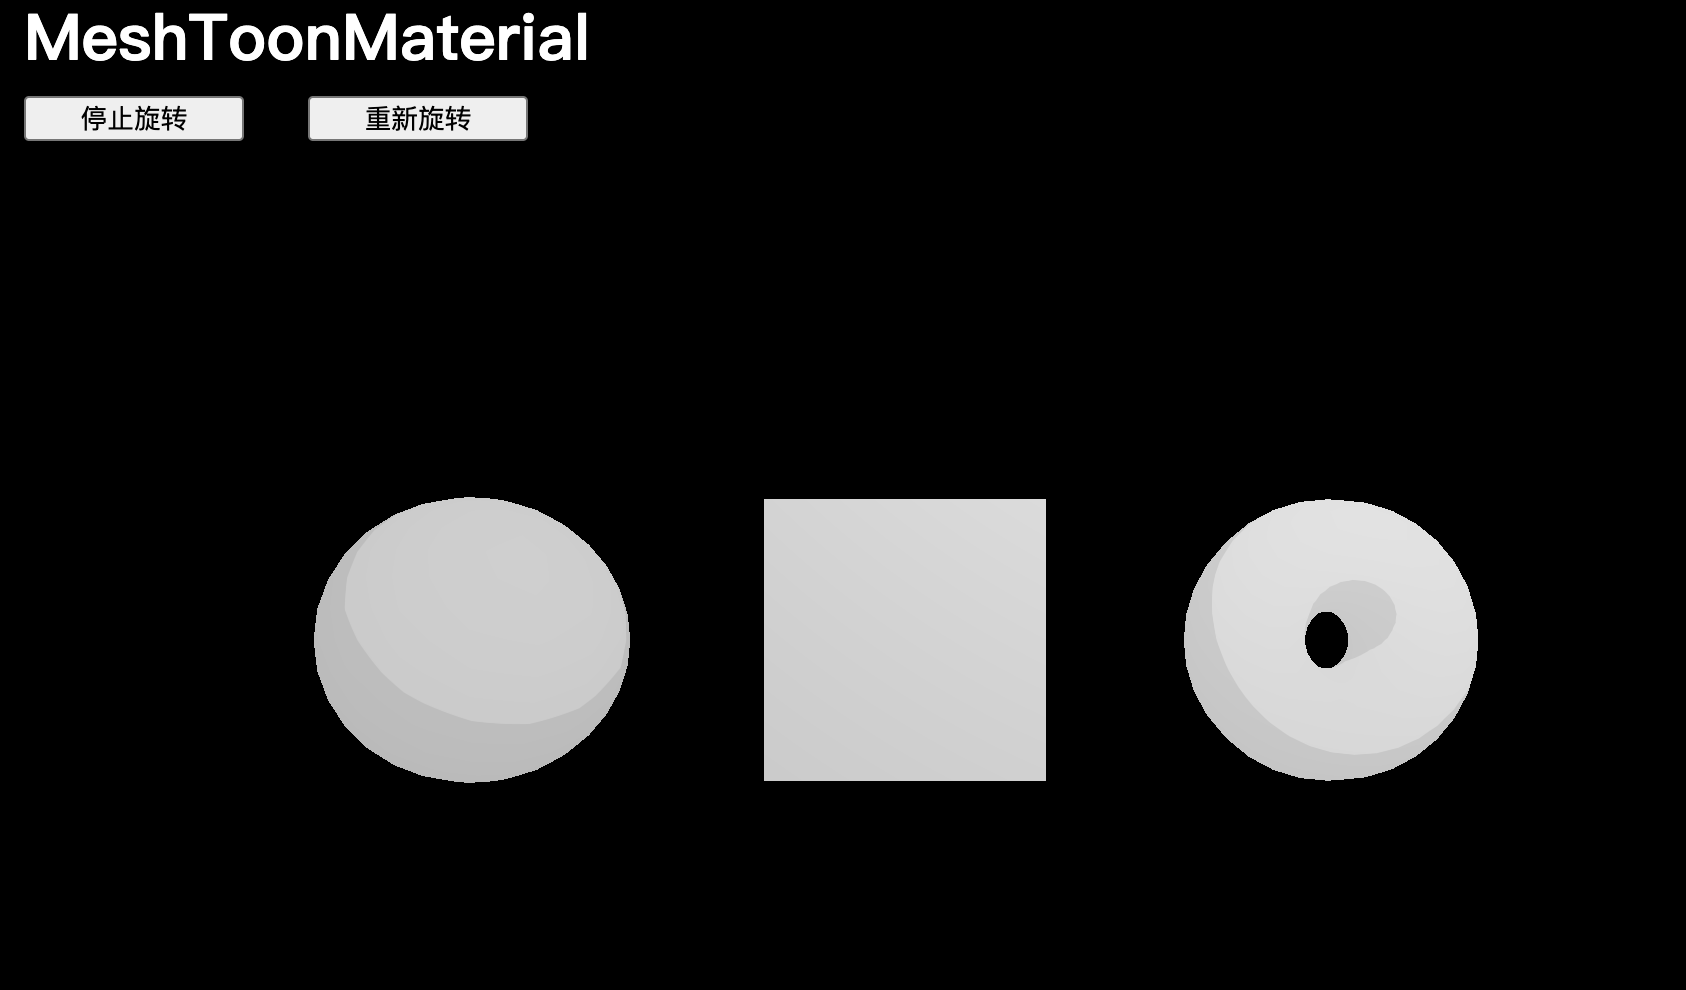
如果想增加著色的步驟,可以在 gradientMap 屬性上使用在課程開始時加載的 gradientTexture,卡通效果將不再起作用,因為 gradientTexture 實際上是一個非常非常小的 3x1 像素的紋理。從這個紋理中提取像素時,GPU 會將它們混合。
// MeshToonMaterial
const material = new THREE.MeshToonMaterial()
material.gradientMap = gradientTexture
可以通過?minFilter?和?magFilter?控制 GPU 處理這些紋理的方式,將?minFilter?和?magFilter?更改為?THREE.NearestFilter:
// MeshToonMaterial
const material = new THREE.MeshToonMaterial()
gradientTexture.minFilter = THREE.NearestFilter
gradientTexture.magFilter = THREE.NearestFilter
material.gradientMap = gradientTexture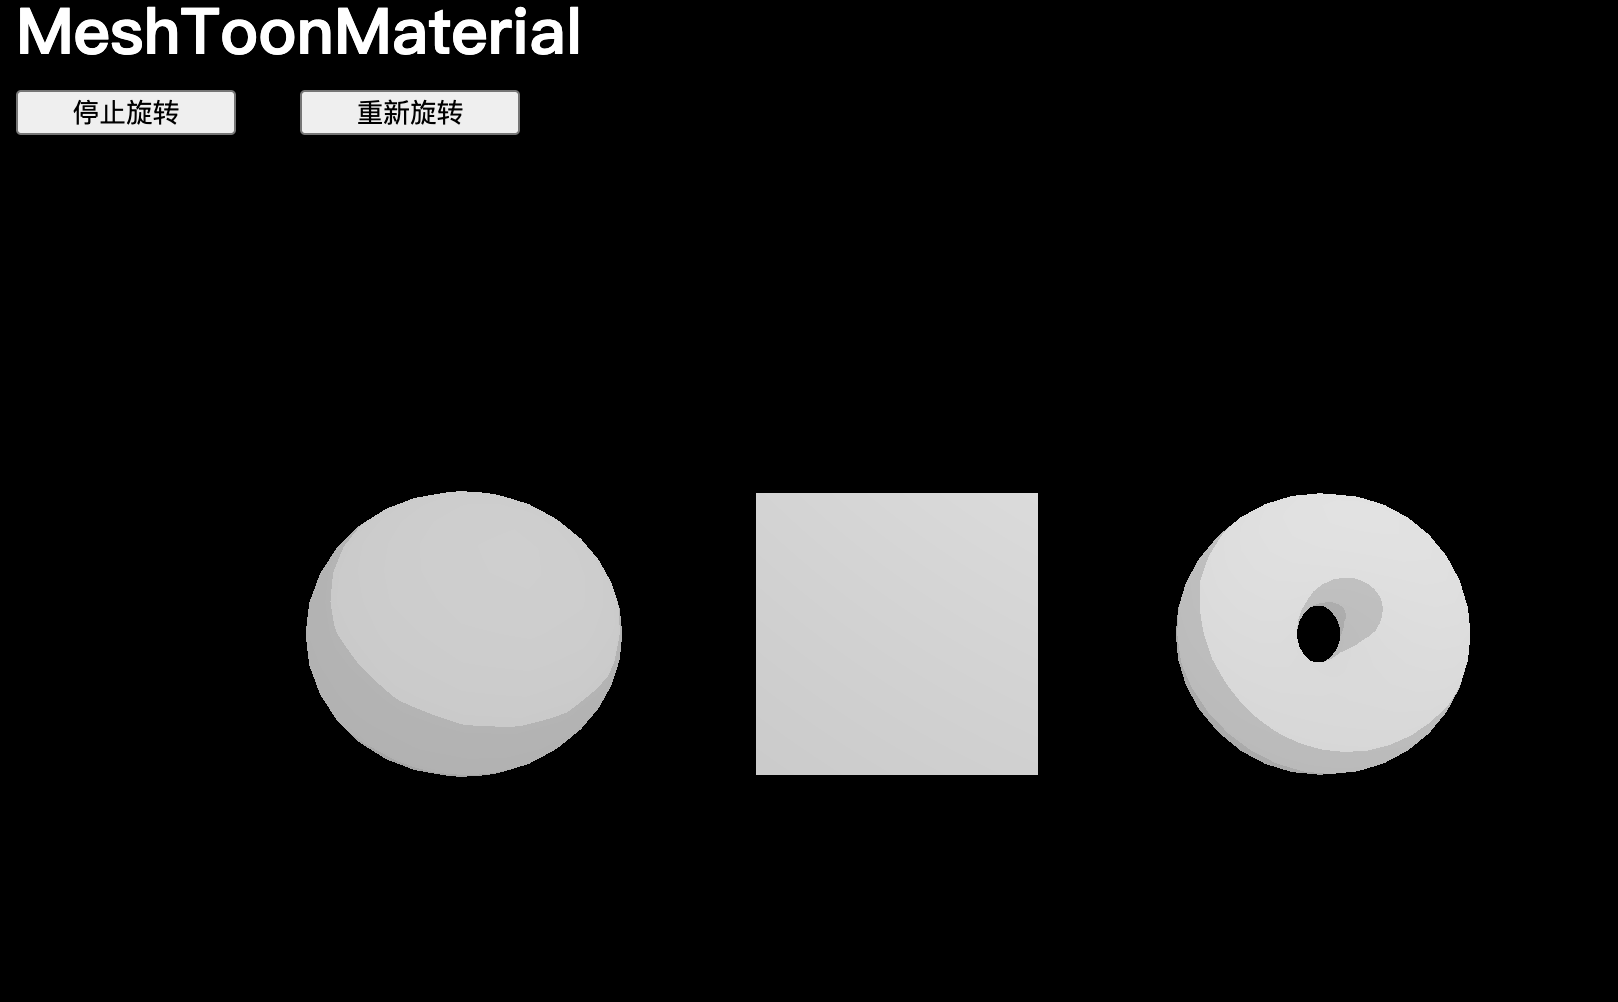
【優化】由于?THREE.NearestFilter?實際上并沒有使用任何.mipmap 版本的紋理,我們可以通過將?gradientTexture.generateMipmaps?設置為?false?來禁用 mipmaps 的生成,從而釋放一些內存:
// MeshToonMaterial
const material = new THREE.MeshToonMaterial()
gradientTexture.minFilter = THREE.NearestFilter
gradientTexture.magFilter = THREE.NearestFilter
gradientTexture.generateMipmaps = false
material.gradientMap = gradientTexture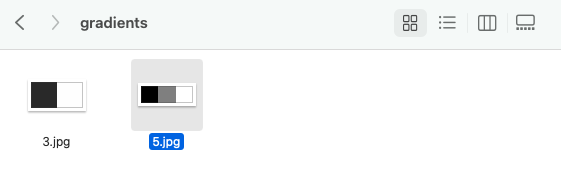
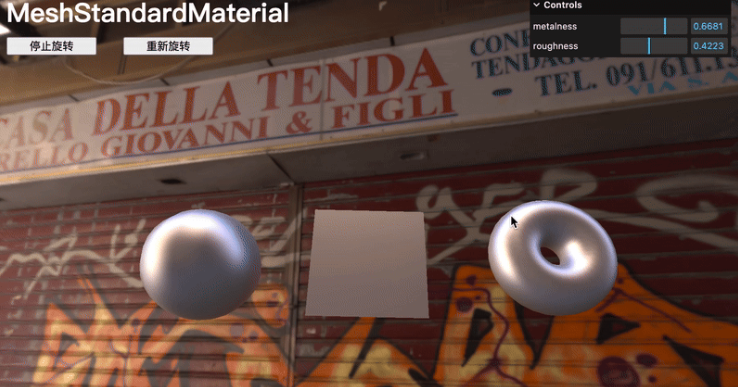
MeshStandardMaterial
MeshStandardMaterial支持光源,但使用更真實的算法和更好的參數,如粗糙度和金屬度。
因為 PBR 已經成為許多軟件、引擎和庫的標準,其目的是獲得真實的結果,并使用真實參數。
// MeshStandardMaterial
const material = new THREE.MeshStandardMaterial()
可以直接更改?粗糙度?和?金屬度?屬性:
// MeshStandardMaterial
const material = new THREE.MeshStandardMaterial()
material.metalness = 0.45
material.roughness = 0.65
添加調試界面
可以創建一個?GUI?的實例,在創建材質之后,添加調整項:
import GUI from 'lil-gui'// ...// MeshStandardMaterial
const material = new THREE.MeshStandardMaterial()
material.metalness = 0.45
material.roughness = 0.65gui.add(material, 'metalness').min(0).max(1).step(0.0001)
gui.add(material, 'roughness').min(0).max(1).step(0.0001)
RGBELoader 與 environmentMap
添加一個名為 環境貼圖 的額外功能,環境貼圖就像是場景周圍環境的圖像。可以使用它來添加反射、折射以及光照,除此之外,還可以使用當前的?DirectionalLight?和?AmbientLight。
為了加載之前提到的環境貼圖文件,需要使用?RGBELoader,接下來,需要實例化它為?rgbeLoader,并使用其?load()?方法加載?./textures/environmentMap/2k.hdr?文件。
RGBELoader 與?textureLoader?不同,我們需要將回調函數作為第二個參數傳遞,我們可以在該函數的參數中獲取加載的環境貼圖。
(由于環境貼圖已經足夠,可以移除或注釋掉?AmbientLight?和?PointLight)
import { RGBELoader } from 'three/examples/jsm/loaders/RGBELoader.js'// ...// MeshStandardMaterial
const material = new THREE.MeshStandardMaterial()
material.metalness = 0.7
material.roughness = 0.2gui.add(material, 'metalness').min(0).max(1).step(0.0001)
gui.add(material, 'roughness').min(0).max(1).step(0.0001)/*** Environment map*/
const rgbeLoader = new RGBELoader()
rgbeLoader.load('./textures/environmentMap/2k.hdr', (environmentMap) =>
{environmentMap.mapping = THREE.EquirectangularReflectionMappingscene.background = environmentMapscene.environment = environmentMap
})
MeshStandardMaterial?的其他屬性
Map
該屬性允許應用一個簡單的紋理:
// MeshStandardMaterial
const material = new THREE.MeshStandardMaterial()
material.metalness = 0.7
material.roughness = 0.2
material.map = doorColorTexture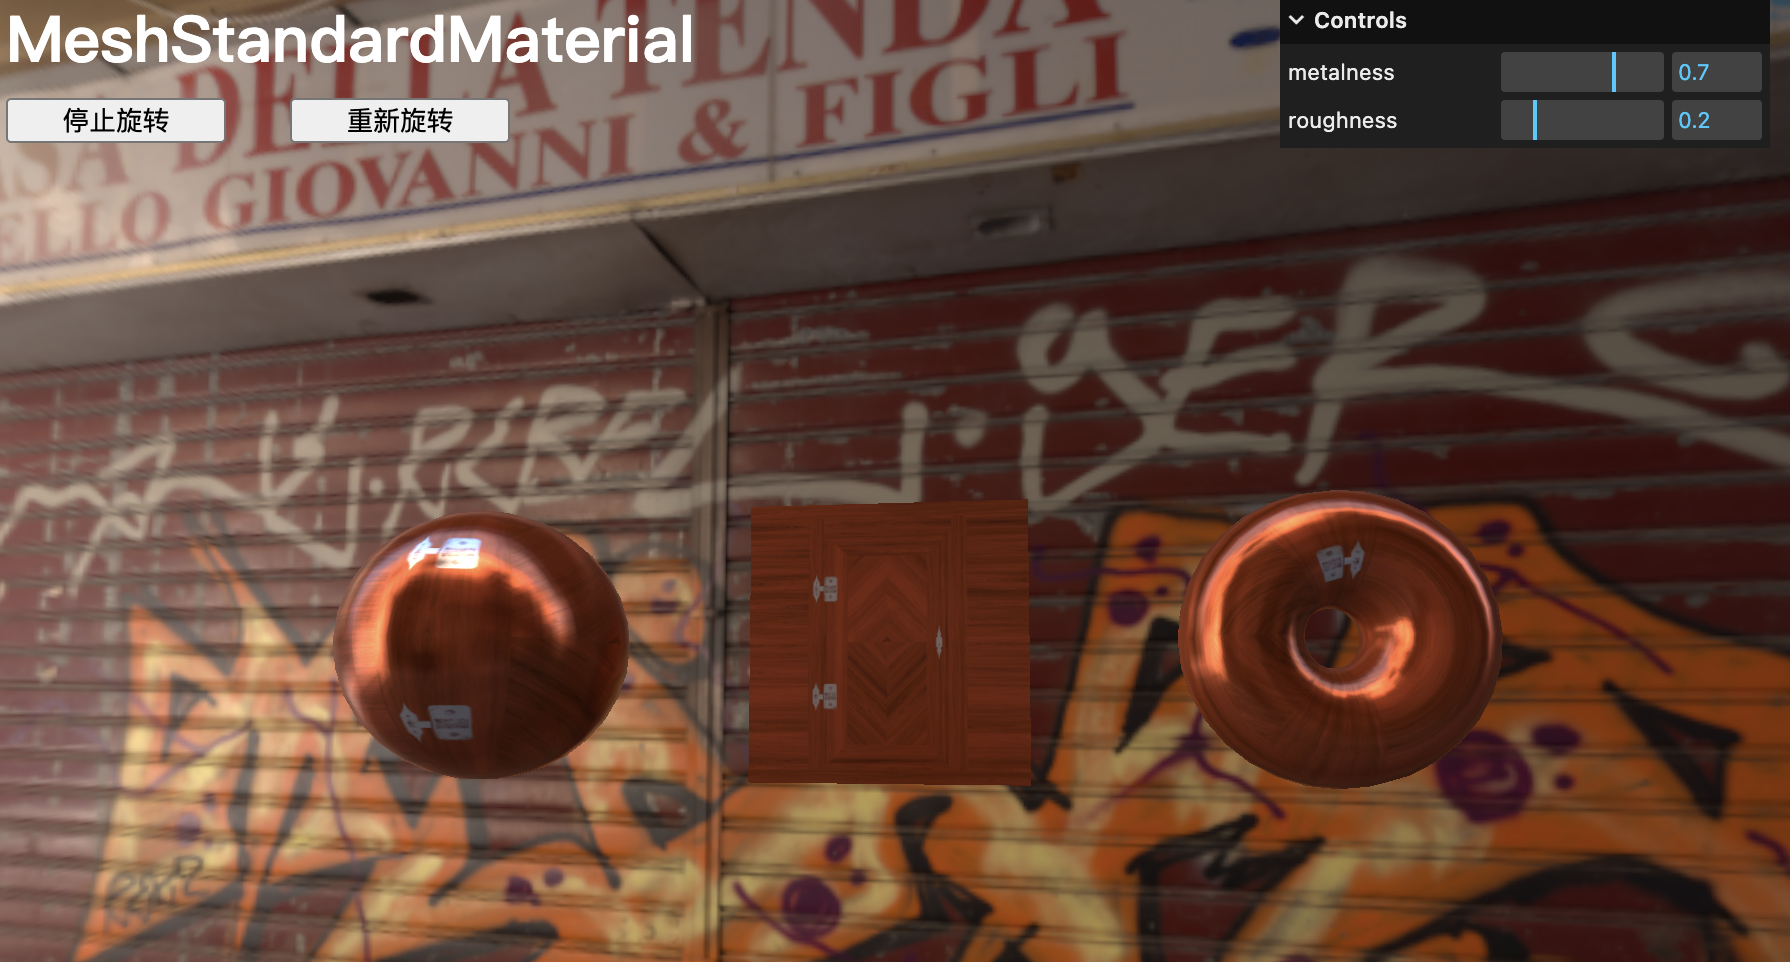
aoMap
直譯為“環境遮擋圖”,會在紋理較暗的地方添加陰影。
aoMap 只會影響由 AmbientLight、環境貼圖以及 HemisphereLight 創建的光線。
使用 doorAmbientOcclusionTexture 紋理添加 aoMap,并通過 aoMapIntensity 屬性控制其強度:
// MeshStandardMaterial
const material = new THREE.MeshStandardMaterial()
material.metalness = 0.7
material.roughness = 0.2
material.map = doorColorTexture
material.aoMap = doorAmbientOcclusionTexture
material.aoMapIntensity = 1
displacementMap
該屬性會移動頂點以創建真實的浮雕效果,因為我們的幾何體頂點數量不足,且浮雕效果過于強烈,現在增加幾何體的細分層級,再使用 displacementScale 屬性來控制這一點:
// MeshStandardMaterial
const material = new THREE.MeshStandardMaterial()
material.metalness = 0.7
material.roughness = 0.2
material.map = doorColorTexture
material.aoMap = doorAmbientOcclusionTexture
material.aoMapIntensity = 1
material.displacementMap = doorHeightTexture
material.displacementScale = 0.1// ... const sphere = new THREE.Mesh(new THREE.SphereGeometry(0.5, 64, 64),material
)const plane = new THREE.Mesh(new THREE.PlaneGeometry(1, 1, 100, 100),material
)const torus = new THREE.Mesh(new THREE.TorusGeometry(0.3, 0.2, 64, 128),material
)
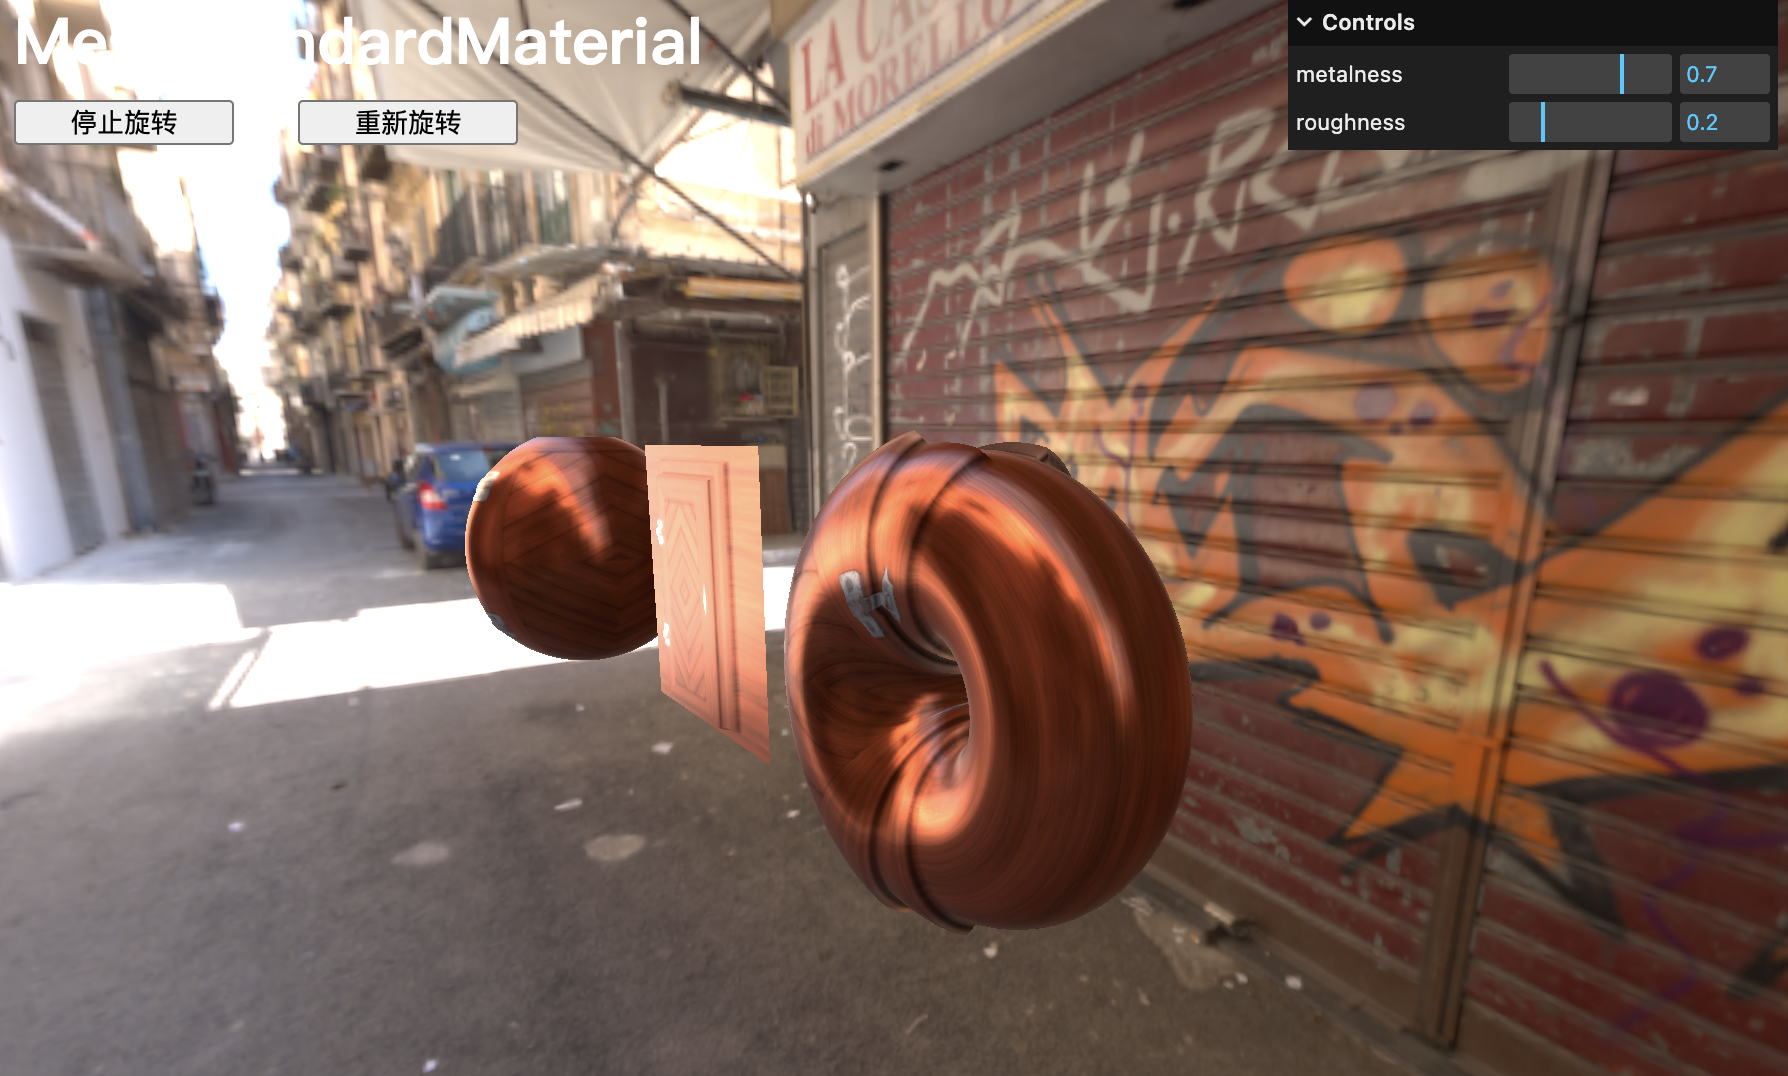
metalnessMap與roughnessMap
我們不需要為整個幾何體指定統一的?metalness?和?roughness,而是可以使用?metalnessMap?和?roughnessMap。
由于?metalness?和?roughness?屬性仍然會影響?metalnessMap?和?roughnessMap,需要將?metalness?和?roughness?都設置為?1:
terial.metalness = 1
material.roughness = 1
material.map = doorColorTexture
material.aoMap = doorAmbientOcclusionTexture
material.aoMapIntensity = 1
material.displacementMap = doorHeightTexture
material.displacementScale = 0.1
material.metalnessMap = doorMetalnessTexture
material.roughnessMap = doorRoughnessTexture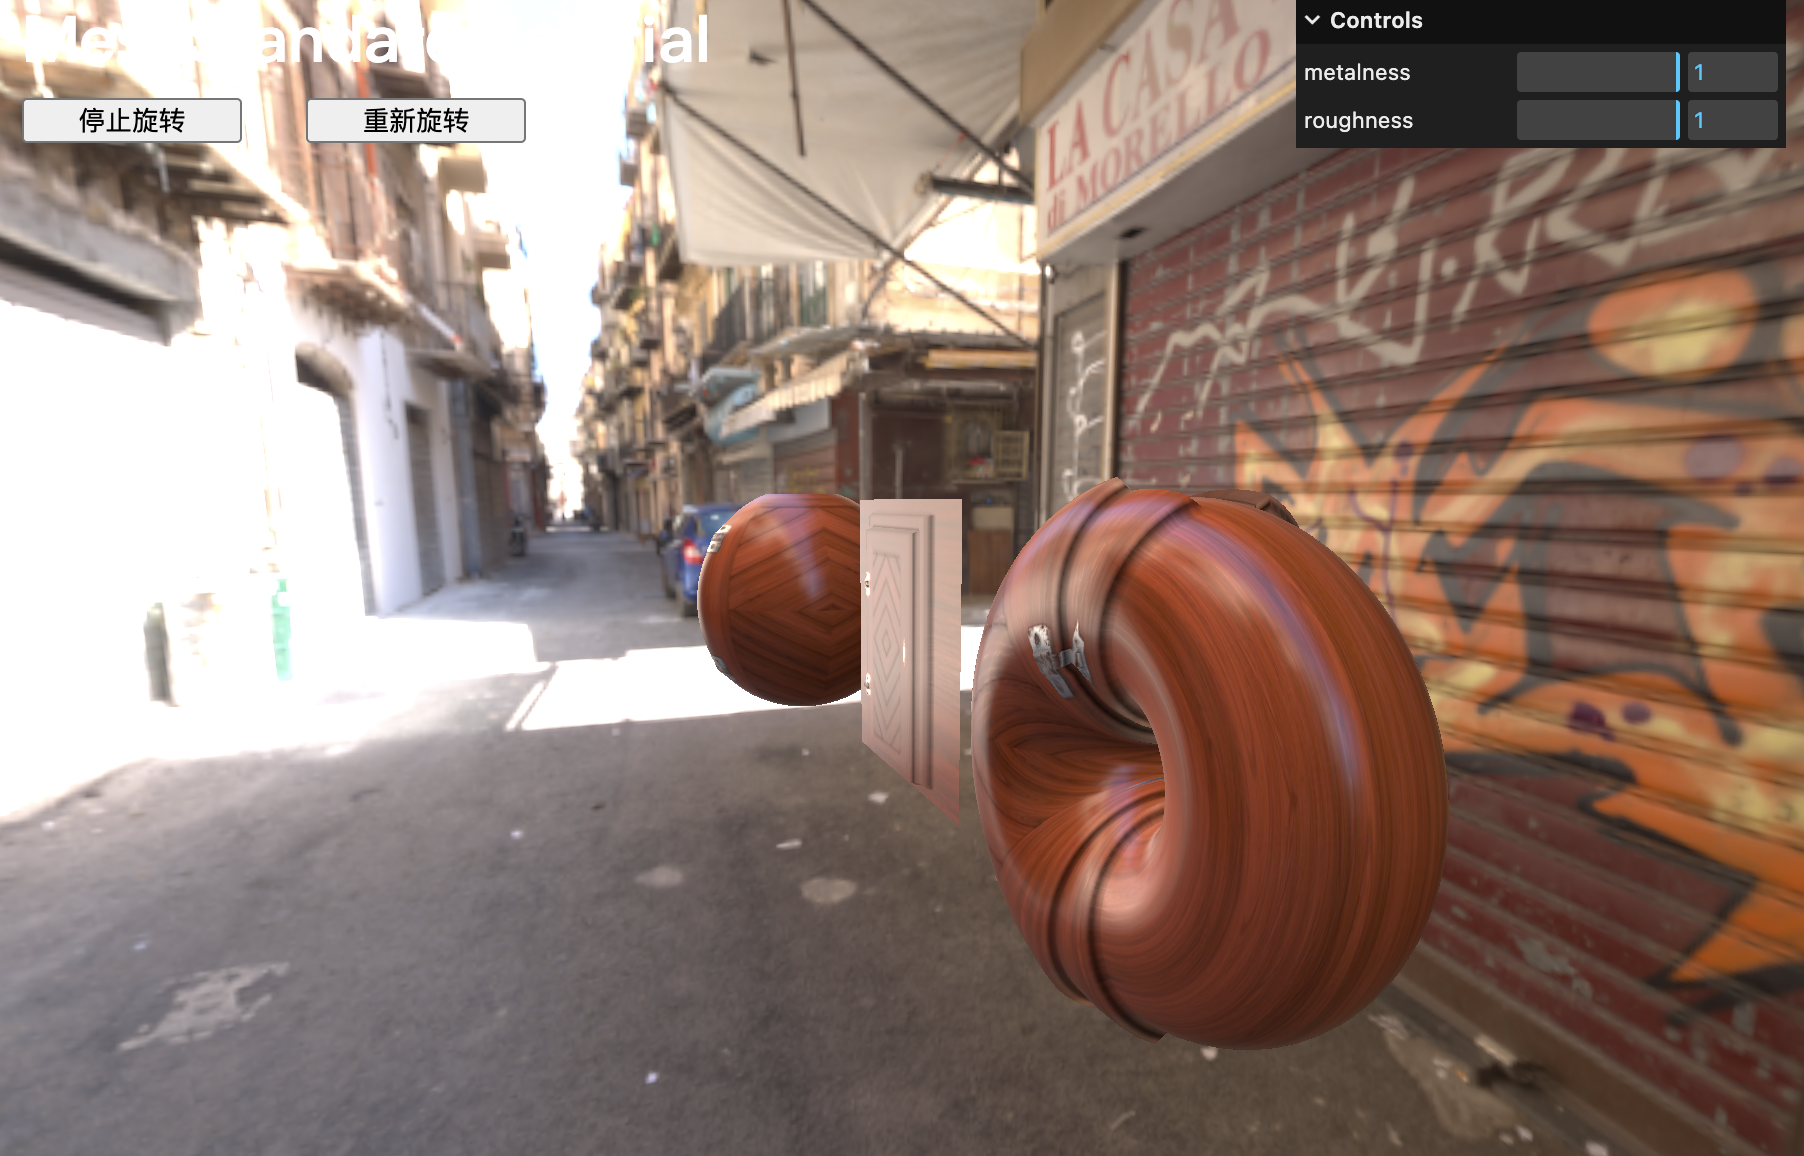
normalMap
通過 .normalMap 可以在門的金屬部分增加反射效果,normalMap 將模擬法線方向并在細分無關的情況下為表面添加細節,可以使用 normalScale 屬性更改法線強度。請注意,這個值是 Vector2:
// MeshStandardMaterial
const material = new THREE.MeshStandardMaterial()
material.metalness = 1
material.roughness = 1
material.map = doorColorTexture
material.aoMap = doorAmbientOcclusionTexture
material.aoMapIntensity = 1
material.displacementMap = doorHeightTexture
material.displacementScale = 0.1
material.metalnessMap = doorMetalnessTexture
material.roughnessMap = doorRoughnessTexture
material.normalMap = doorNormalTexture
material.normalScale.set(0.5, 0.5)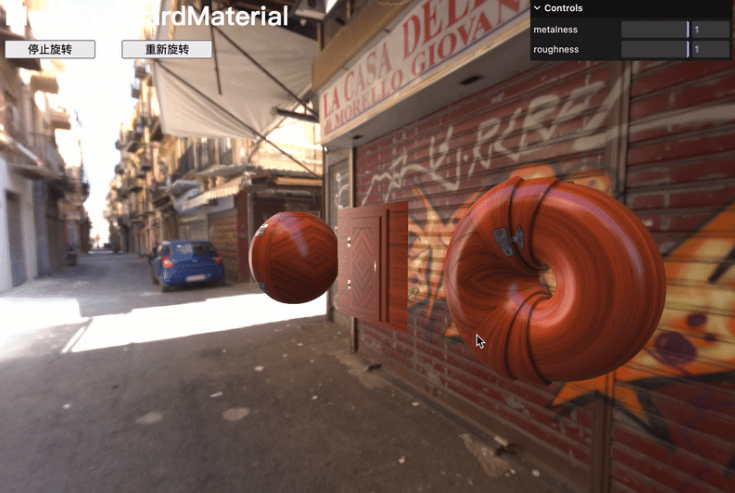
alphaMap
可以使用 alphaMap 屬性來控制透明度,前提是將 transparent 屬性設置為 true:
// MeshStandardMaterial
const material = new THREE.MeshStandardMaterial()
material.metalness = 1
material.roughness = 1
material.map = doorColorTexture
material.aoMap = doorAmbientOcclusionTexture
material.aoMapIntensity = 1
material.displacementMap = doorHeightTexture
material.displacementScale = 0.1
material.metalnessMap = doorMetalnessTexture
material.roughnessMap = doorRoughnessTexture
material.normalMap = doorNormalTexture
material.normalScale.set(0.5, 0.5)material.transparent = true
material.alphaMap = doorAlphaTexture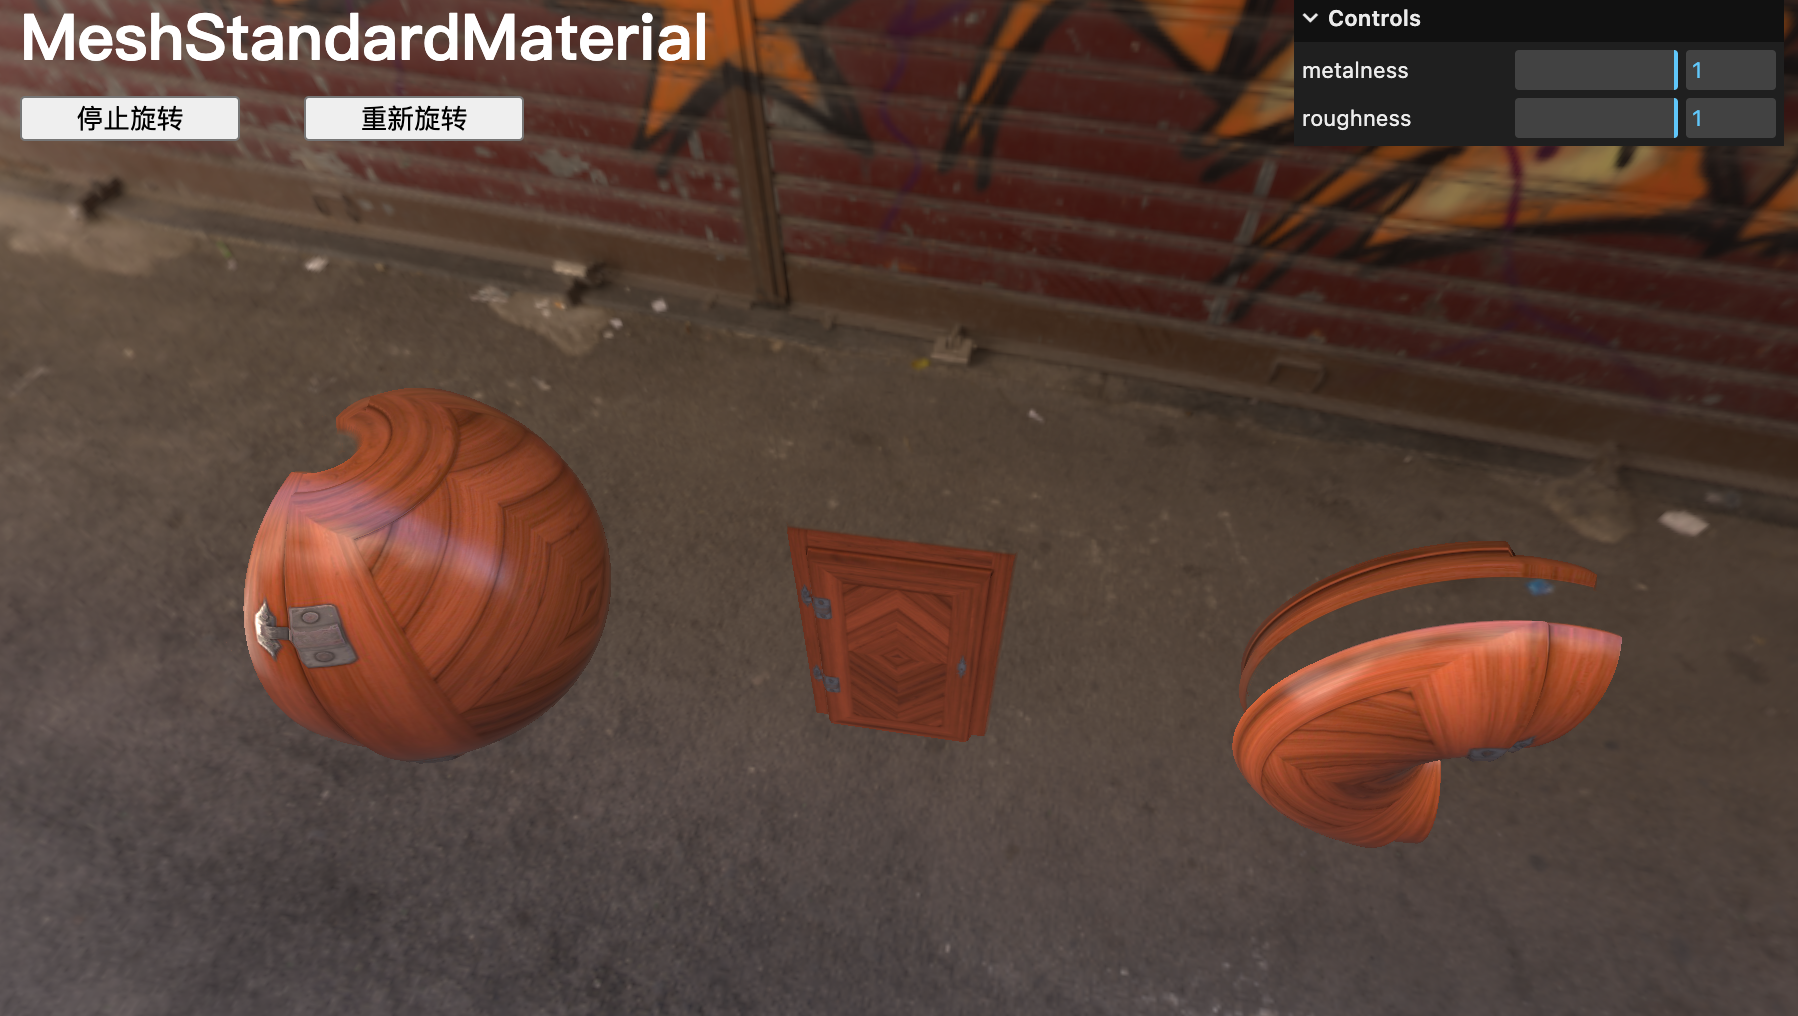
MeshPhysicalMaterial
MeshPhysicalMaterial 與 MeshStandardMaterial 類似,但支持額外的效果,如清漆、光澤、彩虹色和透射。
Clearcoat 清漆
// Clearcoat
material.clearcoat = 1
material.clearcoatRoughness = 0gui.add(material, 'clearcoat').min(0).max(1).step(0.0001)
gui.add(material, 'clearcoatRoughness').min(0).max(1).step(0.0001)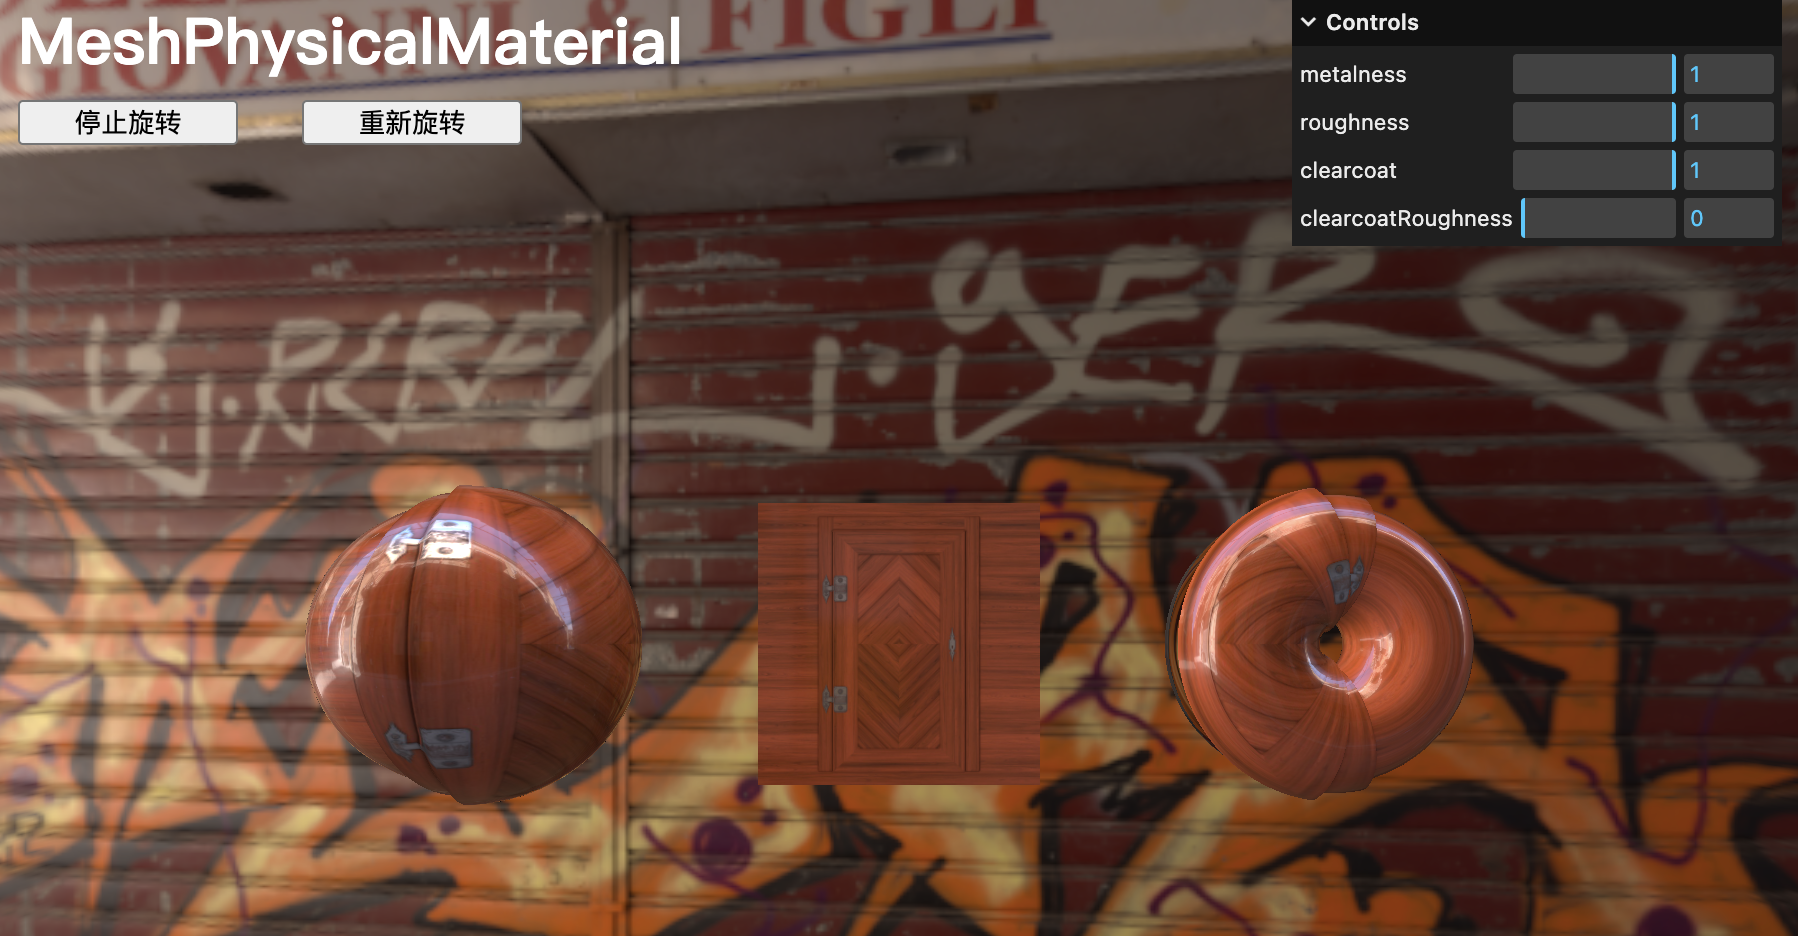
sheen 光澤度
當從狹窄的角度觀察時,光澤會突出材料的質感,通常可以在像織物這樣的蓬松材料上看到這種效果。
注釋掉清漆部分,添加?sheen、sheenRoughness?和?sheenColor?屬性及其相應的調整:
// Sheen
material.sheen = 1
material.sheenRoughness = 0.25
material.sheenColor.set(1, 1, 1)gui.add(material, 'sheen').min(0).max(1).step(0.0001)
gui.add(material, 'sheenRoughness').min(0).max(1).step(0.0001)
gui.addColor(material, 'sheenColor')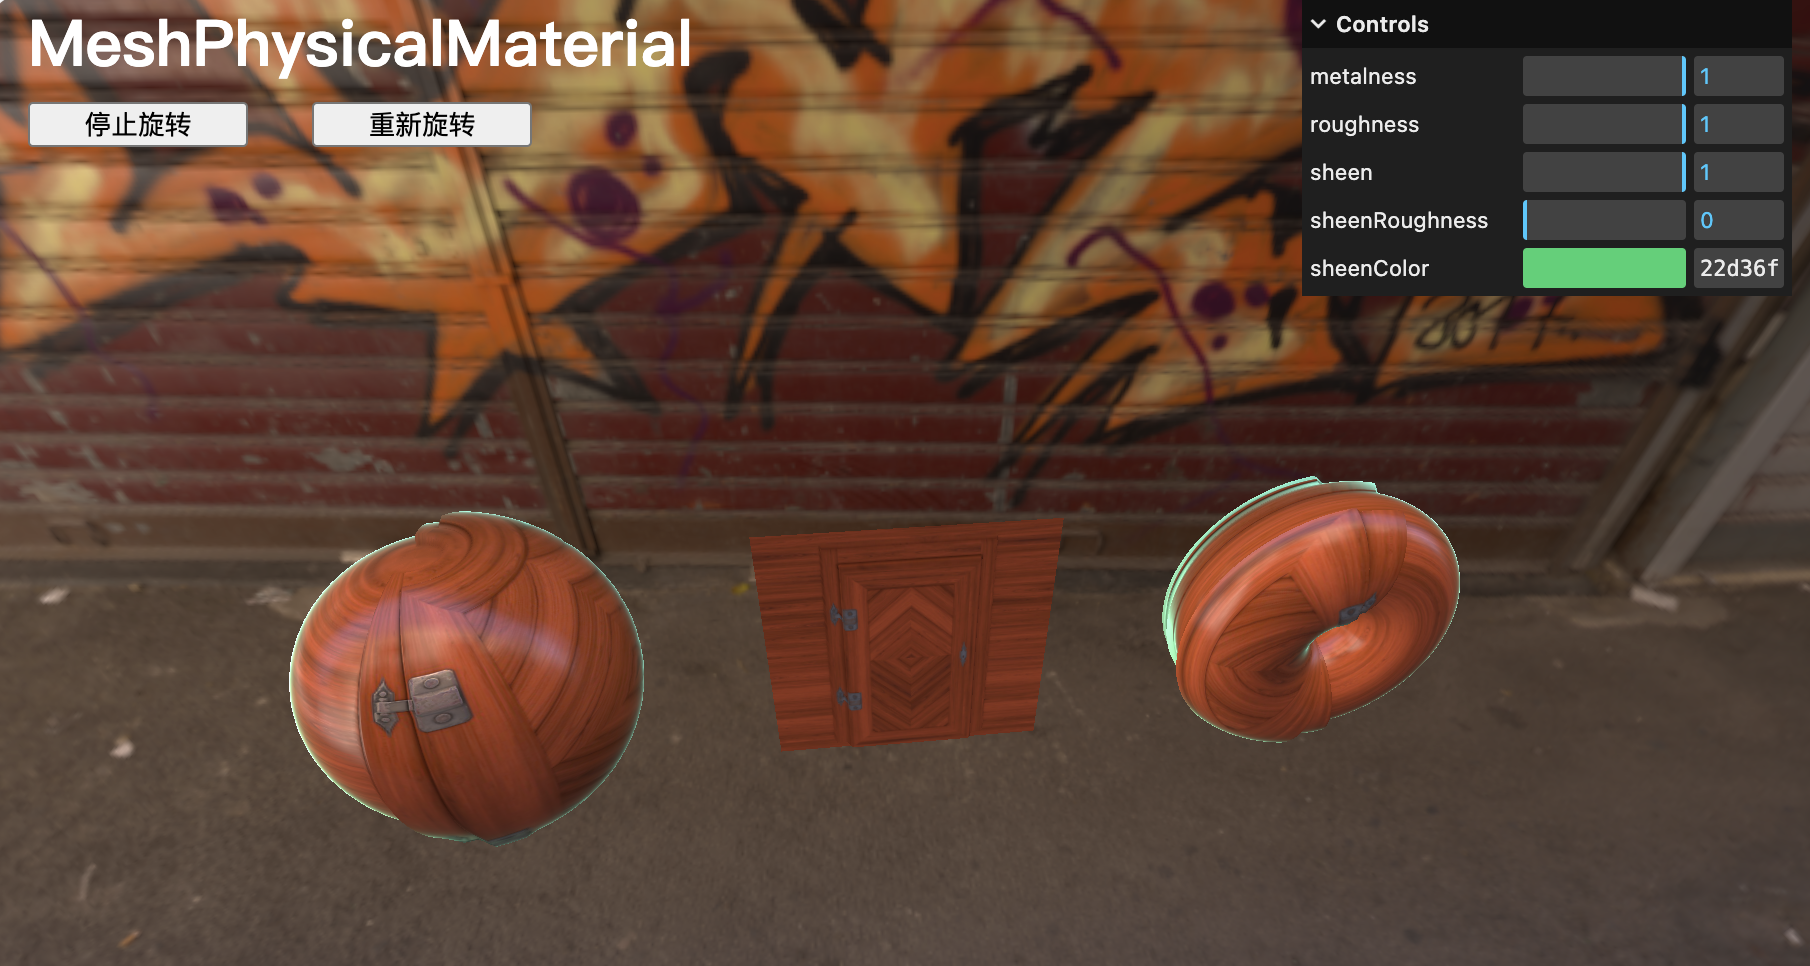
iridescence 彩虹色效果
彩虹色效果是指可以看到類似燃料油池、肥皂泡、激光影碟的效果,這些顏色的偽影。就像前兩個效果一樣,當從狹窄的角度觀察時,光澤主要在材質上可見。
添加?iridescence、iridescenceIOR?和?iridescenceThicknessRange?屬性及其相應的調整:
// Iridescence
material.iridescence = 1
material.iridescenceIOR = 1
material.iridescenceThicknessRange = [ 100, 800 ]gui.add(material, 'iridescence').min(0).max(1).step(0.0001)
gui.add(material, 'iridescenceIOR').min(1).max(2.333).step(0.0001)
gui.add(material.iridescenceThicknessRange, '0').min(1).max(1000).step(1)
gui.add(material.iridescenceThicknessRange, '1').min(1).max(1000).step(1)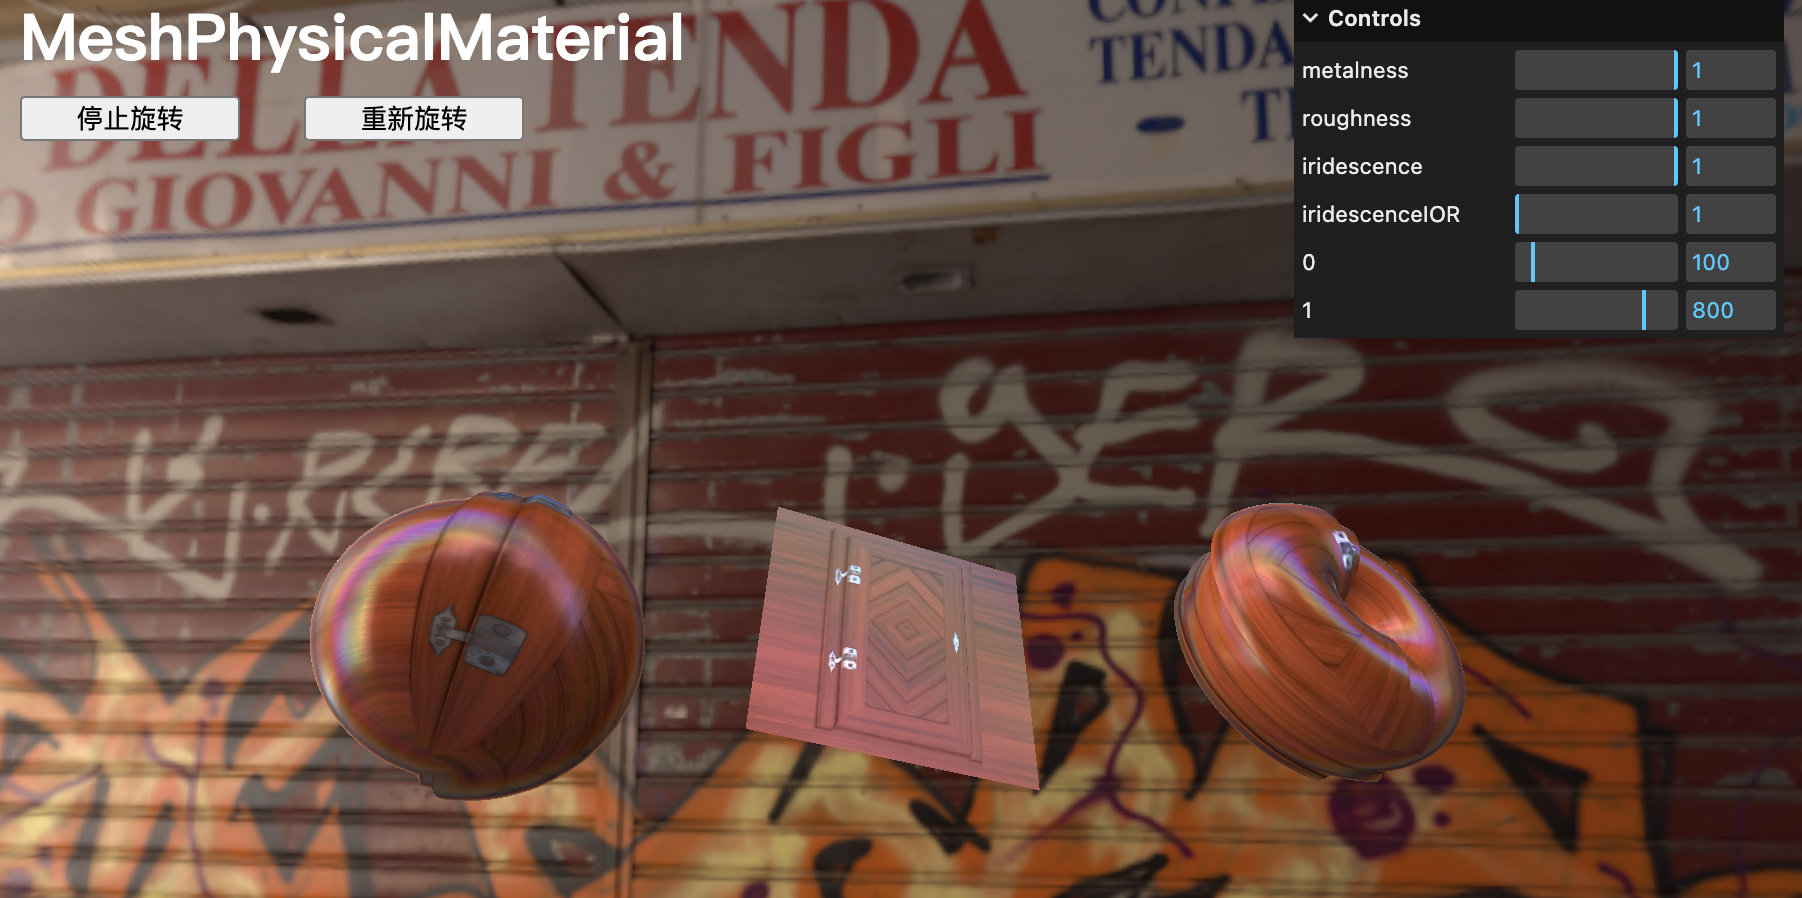
Transmission 透射
投射,傳輸將使光線穿過材料。這不僅僅是透明度,帶有?opacity?時,因為對象后面的圖像會被變形。
添加?transmission、ior?和?thickness?屬性及其相應的調整:
// Transmission
material.transmission = 1
material.ior = 1.5
material.thickness = 0.5gui.add(material, 'transmission').min(0).max(1).step(0.0001)
gui.add(material, 'ior').min(1).max(10).step(0.0001)
gui.add(material, 'thickness').min(0).max(1).step(0.0001)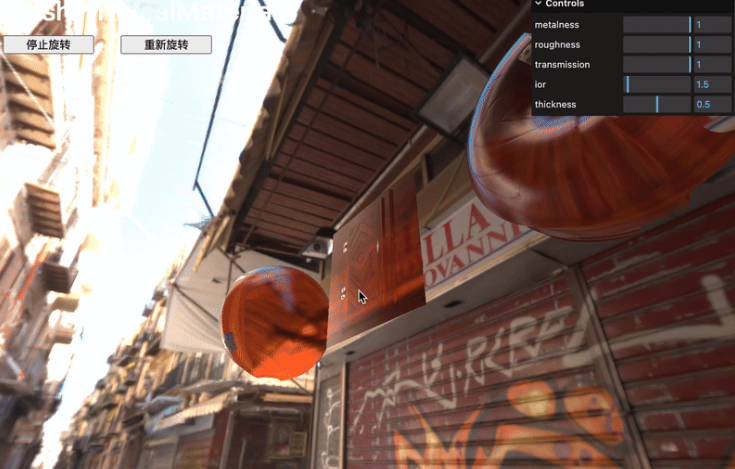
ior?表示折射率,取決于你想要模擬的材料類型。
鉆石的?ior?為?2.417,水的?ior?為?1.333,而空氣的?ior?為?1.000293。
厚度是一個固定值,并未考慮對象的實際厚度。
目前,很多地圖干擾了我們的材質,但純材質的透傳效果非常好。
移除或注釋所有地圖,并將金屬度?metalness?和粗糙度?roughness?設置為?0(仍然可以調整?粗糙度?并得到光澤效果):
const material = new THREE.MeshPhysicalMaterial()
material.metalness = 0
material.roughness = 0
// material.map = doorColorTexture
// material.aoMap = doorAmbientOcclusionTexture
// material.aoMapIntensity = 1
// material.displacementMap = doorHeightTexture
// material.displacementScale = 0.1
// material.metalnessMap = doorMetalnessTexture
// material.roughnessMap = doorRoughnessTexture
// material.normalMap = doorNormalTexture
// material.normalScale.set(0.5, 0.5)
// material.transparent = true
// material.alphaMap = doorAlphaTexture// Transmission
material.transmission = 1
material.ior = 1.5
material.thickness = 0.5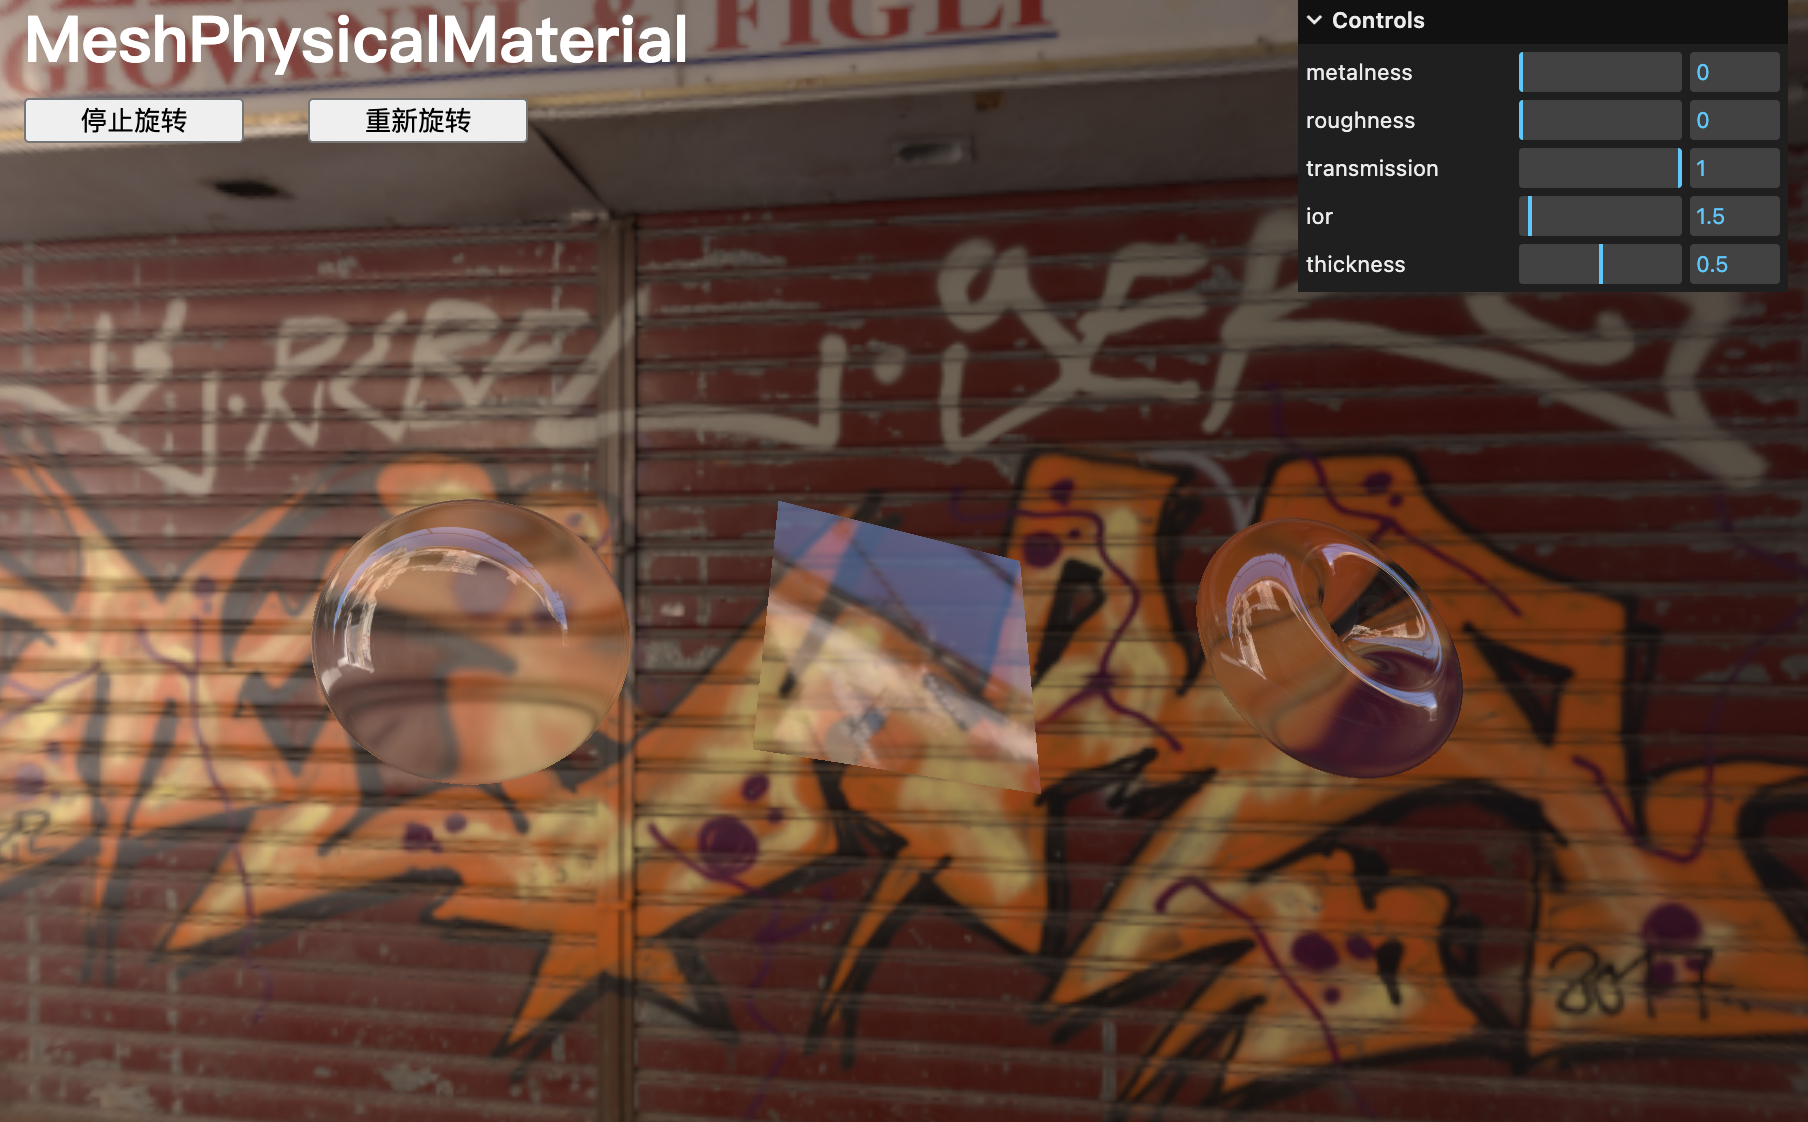
【完整代碼】
// Texture Link: https://polyhaven.com/a/metal_plateimport * as THREE from 'three'
import { OrbitControls } from 'three/examples/jsm/controls/OrbitControls.js'
import { EXRLoader } from 'three/examples/jsm/loaders/EXRLoader.js';
import gsap from 'gsap'
import GUI from 'lil-gui'
// import { VertexNormalsHelper } from 'three/examples/jsm/helpers/VertexNormalsHelper.js';
import { RGBELoader } from 'three/examples/jsm/loaders/RGBELoader.js'
// const mesh = new THREE.Mesh(geometry, material);/*** Debug*/
const gui = new GUI()// Canvas
const canvas = document.querySelector('canvas.webgl')// Scene
const scene = new THREE.Scene()/*** Textures*/
const textureLoader = new THREE.TextureLoader()// doorColorTexture,作為 `map` 和 `matcap` 使用的紋理應該以 `sRGB` 編碼
const doorColorTexture = textureLoader.load('./textures/door/color.jpg')
const doorAlphaTexture = textureLoader.load('./textures/door/alpha.jpg')
const doorAmbientOcclusionTexture = textureLoader.load('./textures/door/ambientOcclusion.jpg')
const doorHeightTexture = textureLoader.load('./textures/door/height.jpg')
const doorNormalTexture = textureLoader.load('./textures/door/normal.jpg')
const doorMetalnessTexture = textureLoader.load('./textures/door/metalness.jpg')
const doorRoughnessTexture = textureLoader.load('./textures/door/roughness.jpg')
// matcapTexture,作為 `map` 和 `matcap` 使用的紋理應該以 `sRGB` 編碼
const matcapTexture = textureLoader.load('./textures/matcaps/3.png')
const gradientTexture = textureLoader.load('./textures/gradients/5.jpg')doorColorTexture.colorSpace = THREE.SRGBColorSpace
matcapTexture.colorSpace = THREE.SRGBColorSpace/*** Object*/// MashBasicMaterial
// 方式一
// const material = new THREE.MeshBasicMaterial({ map: doorColorTexture })// 方式二
// const material = new THREE.MeshBasicMaterial()
// `map` 屬性將在幾何體表面應用紋理
// material.map = textures.diffTexture// `color` 屬性將在幾何體表面應用統一顏色
// material.color = new THREE.Color('#f00')// 線框模式
// material.wireframe = true// 透明度
// material.transparent = true
// material.opacity = 0.5
// 現在透明效果已經生效,可以使用 alphaMap 屬性通過紋理來控制透明度
// material.alphaMap = doorAlphaTexture // 此處代碼沒有 alpha 材質// Side 可決定哪些面可見,THREE.FrontSide 正面可見,THREE.BackSide 背面, THREE.DoubleSide 兩面皆可
// 【注意】盡量避免在渲染時使用 THREE.DoubleSide,因為即使這個面不可見,它實際上也會消耗更多的資源
// material.side = THREE.DoubleSide// MeshNormalMaterial
// const material = new THREE.MeshNormalMaterial()
// material.flatShading = true// MeshNormalMaterial 可以使用 MeshBasicMaterial 中的一些屬性,比如 `wireframe`、`transparent`、`opacity` 和 `side`
// `flatShading` 會使面變得平坦,這意味著法線不會在頂點之間進行插值
// material.flatShading = true// MeshMatcapMaterial
// const material = new THREE.MeshMatcapMaterial()
// material.matcap = matcapTexture// MeshMatcapMaterial
// const material = new THREE.MeshMatcapMaterial()
// // 材質會根據法線相對于相機的方向從紋理中選擇顏色
// material.matcap = matcapTexture// MeshDepthMaterial
// const material = new THREE.MeshDepthMaterial()// MeshLambertMaterial
// const material = new THREE.MeshLambertMaterial()// MeshPhongMaterial
// const material = new THREE.MeshPhongMaterial()
// material.shininess = 100
// material.specular = new THREE.Color(0x1188ff)// MeshToonMaterial
// const material = new THREE.MeshToonMaterial()
// gradientTexture.minFilter = THREE.NearestFilter
// gradientTexture.magFilter = THREE.NearestFilter
// gradientTexture.generateMipmaps = false
// material.gradientMap = gradientTexture// MeshStandardMaterial
// const material = new THREE.MeshStandardMaterial()
// material.metalness = 1
// material.roughness = 1
// material.map = doorColorTexture
// material.aoMap = doorAmbientOcclusionTexture
// material.aoMapIntensity = 1
// material.displacementMap = doorHeightTexture
// material.displacementScale = 0.1
// material.metalnessMap = doorMetalnessTexture
// material.roughnessMap = doorRoughnessTexture
// material.normalMap = doorNormalTexture
// material.normalScale.set(0.5, 0.5)// material.transparent = true
// material.alphaMap = doorAlphaTexture/*** MeshPhysicalMaterial*/
// Base material
const material = new THREE.MeshPhysicalMaterial()
material.metalness = 0
material.roughness = 0
// material.map = doorColorTexture
// material.aoMap = doorAmbientOcclusionTexture
// material.aoMapIntensity = 1
// material.displacementMap = doorHeightTexture
// material.displacementScale = 0.1
// material.metalnessMap = doorMetalnessTexture
// material.roughnessMap = doorRoughnessTexture
// material.normalMap = doorNormalTexture
// material.normalScale.set(0.5, 0.5)gui.add(material, 'metalness').min(0).max(1).step(0.0001)
gui.add(material, 'roughness').min(0).max(1).step(0.0001)// Clearcoat
// material.clearcoat = 1
// material.clearcoatRoughness = 0// gui.add(material, 'clearcoat').min(0).max(1).step(0.0001)
// gui.add(material, 'clearcoatRoughness').min(0).max(1).step(0.0001)// Sheen
// material.sheen = 1
// material.sheenRoughness = 0.25
// material.sheenColor.set(1, 1, 1)// gui.add(material, 'sheen').min(0).max(1).step(0.0001)
// gui.add(material, 'sheenRoughness').min(0).max(1).step(0.0001)
// gui.addColor(material, 'sheenColor')// Iridescence
// material.iridescence = 1
// material.iridescenceIOR = 1
// material.iridescenceThicknessRange = [ 100, 800 ]// gui.add(material, 'iridescence').min(0).max(1).step(0.0001)
// gui.add(material, 'iridescenceIOR').min(1).max(2.333).step(0.0001)
// gui.add(material.iridescenceThicknessRange, '0').min(1).max(1000).step(1)
// gui.add(material.iridescenceThicknessRange, '1').min(1).max(1000).step(1)// Transmission
// material.transmission = 1
// material.ior = 1.5
// material.thickness = 0.5// gui.add(material, 'transmission').min(0).max(1).step(0.0001)
// gui.add(material, 'ior').min(1).max(10).step(0.0001)
// gui.add(material, 'thickness').min(0).max(1).step(0.0001)/*** Environment map*/
const rgbeLoader = new RGBELoader()
rgbeLoader.load('./textures/environmentMap/2k.hdr', (environmentMap) =>
{environmentMap.mapping = THREE.EquirectangularReflectionMappingscene.background = environmentMapscene.environment = environmentMap
})const sphere = new THREE.Mesh(new THREE.SphereGeometry(0.5, 64, 64),material
)const plane = new THREE.Mesh(new THREE.PlaneGeometry(1, 1, 100, 100),material
)const torus = new THREE.Mesh(new THREE.TorusGeometry(0.3, 0.2, 64, 128),material
)sphere.position.x = -1.5
torus.position.x = 1.5scene.add(sphere, plane, torus)// const normalsHelper1 = new VertexNormalsHelper(sphere, 1, 0xff0000);
// const normalsHelper2 = new VertexNormalsHelper(plane, 1, 0xff0000);
// const normalsHelper3 = new VertexNormalsHelper(torus, 1, 0xff0000);
// scene.add(normalsHelper1,normalsHelper2,normalsHelper3);/*** Lights*/
// const ambientLight = new THREE.AmbientLight(0xffffff, 1)
// scene.add(ambientLight)// const pointLight = new THREE.PointLight(0xffffff, 30)
// pointLight.position.x = 2
// pointLight.position.y = 3
// pointLight.position.z = 4
// scene.add(pointLight)/*** Sizes*/
const sizes = {width: window.innerWidth,height: window.innerHeight
}/*** Camera*/// 自定義控制
const camera = new THREE.PerspectiveCamera(75, sizes.width / sizes.height, 1, 1000)
camera.position.z = 3
scene.add(camera)/*** Controls*/
const controls = new OrbitControls(camera, canvas)
controls.enableDamping = true/*** Renderer*/
const renderer = new THREE.WebGLRenderer({canvas: canvas
})
renderer.setSize(sizes.width, sizes.height)
renderer.setPixelRatio(Math.min(window.devicePixelRatio, 2))
renderer.render(scene, camera)/*** Animate*/
const clock = new THREE.Clock()
let isRotate = true
let pauseTime = 0 // 記錄暫停時的時間
let totalPausedTime = 0 // 記錄總共暫停的時間const tick = () => {let elapsedTimeif (isRotate) {// 如果是恢復旋轉,調整時間計算elapsedTime = clock.getElapsedTime() - totalPausedTime// update objectsphere.rotation.y = 0.1 * elapsedTimeplane.rotation.y = 0.1 * elapsedTimetorus.rotation.y = 0.1 * elapsedTimesphere.rotation.x = -0.15 * elapsedTimeplane.rotation.x = -0.15 * elapsedTimetorus.rotation.x = -0.15 * elapsedTime} else {// 如果是第一次暫停,記錄暫停時間if (pauseTime === 0) {pauseTime = clock.getElapsedTime()}// 保持對象旋轉為0sphere.rotation.y = 0plane.rotation.y = 0torus.rotation.y = 0sphere.rotation.x = 0plane.rotation.x = 0torus.rotation.x = 0}// Update controlscontrols.update()renderer.render(scene, camera)window.requestAnimationFrame(tick)
}
tick()window.addEventListener('resize', () => {// 1. 更新 sizessizes.width = window.innerWidthsizes.height = window.innerHeight// 2.1 更新 camera aspect 縱橫比camera.aspect = sizes.width / sizes.height// 2.2 更新 aspect 時要配合更新投影矩陣 updateProjectionMatrixcamera.updateProjectionMatrix()// 3. 更新 rendererrenderer.setSize(sizes.width, sizes.height)renderer.setPixelRatio(Math.min(window.devicePixelRatio, 2))})window.addEventListener('dblclick', () => {// 注釋原來的雙擊全屏if (!document.fullscreenElement) {canvas.requestFullscreen();} else {document.exitFullscreen();}})// 生成頁面大標題
let labelIndex = 8
const headerArr = ['MashBasicMaterial', 'MeshNormalMaterial', 'MeshMatcapMaterial', 'MeshDepthMaterial', 'MeshLambertMaterial', 'MeshPhongMaterial', 'MeshToonMaterial', 'MeshStandardMaterial', 'MeshPhysicalMaterial']
const headerHTML = `
<div class="action-buttons" style="position: absolute; left: 16px;">${headerArr.map((label, index) => {if (labelIndex == index) {return `<h1 class="action-btn" style="color: #fff;">${label}</h1>`}
}
).join('')}
</div>
`;
// 添加到文檔
document.body.insertAdjacentHTML('beforeend', headerHTML);// 生成按鈕,控制切換const buttonLabels = ['停止旋轉', '重新旋轉',]
const buttonsHTML = `
<div class="action-buttons" style="position: absolute; top: 36px;">${buttonLabels.map(label =>`<button class="action-btn" style="width: 110px; margin: 16px; cursor: pointer;">${label}</button>`
).join('')}
</div>
`;
// 添加到文檔
document.body.insertAdjacentHTML('beforeend', buttonsHTML);// 生成按鈕,控制切換 END// 為按鈕添加事件
document.querySelectorAll('.action-btn').forEach(btn => {btn.addEventListener('click', function () {// 停止旋轉 if (this.textContent == '停止旋轉') {if (isRotate) {// 暫停時記錄當前時間pauseTime = clock.getElapsedTime() // 如果重新開始旋轉,這個變量就用不上isRotate = !isRotate}}// 旋轉 if (this.textContent == '重新旋轉') {if (!isRotate) {// 恢復時計算總共暫停的時間// totalPausedTime += clock.getElapsedTime() - pauseTime // 從上次旋轉結束的位置開始totalPausedTime = clock.getElapsedTime() // 重新開始旋轉pauseTime = 0  // 如果重新開始旋轉,這個變量就用不上isRotate = !isRotate}}});
});
項目創建參考
01-three.js vite基礎示例_three.js示例-CSDN博客文章瀏覽閱讀400次。three.js 基本示例代碼_three.js示例https://blog.csdn.net/gaowxx/article/details/147954918?spm=1001.2014.3001.5501

![[BrowserOS] Nxtscape瀏覽器核心 | 瀏覽器狀態管理 | 瀏覽器交互層](http://pic.xiahunao.cn/[BrowserOS] Nxtscape瀏覽器核心 | 瀏覽器狀態管理 | 瀏覽器交互層)


)


—— 多元素控件)

)


:AI輔助的質檢與交付)

