💥💥????歡迎閱讀本文章????💥💥
🏆本篇文章閱讀大約耗時3分鐘。
??motto:不積跬步、無以千里
📋📋📋本文目錄如下:🎁🎁🎁
目錄
前言
賬號創建
代碼實現
?????????1、添加配置
? ? ? ? ?2、測試接口
安全校驗
章末

![]()
前言
? ? ? ? 小伙伴們大家好,上篇文章是簡單實現了常見的圖形驗證碼的使用,文章鏈接如下:
【驗證碼】??集成圖形驗證碼實現安全校驗-CSDN博客
? ? ? ? 這篇文章來看下,如何整合飛書的群機器人發送自定義消息,一切從簡(擺爛?bushi )

![]()
賬號創建
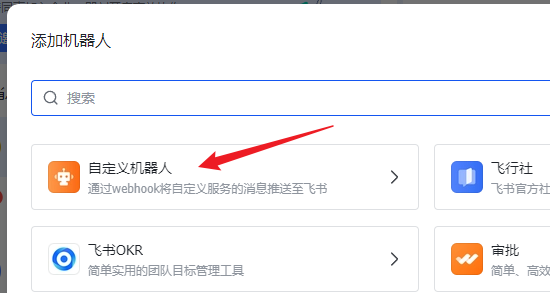
? ? ? ? 本地是在電腦端,點擊左上角的加號,選擇創建群組,之后在對應群組頁面的右上角打開設置,點擊群機器人,添加機器人,選擇下面這一個即可
? ? ? ? ?點擊創建機器人后可以獲取到對應的 webhook 地址
![]()
代碼實現
?????????1、添加配置
? ? ? ? 將 webhook 加到配置文件中,然后用配置類來讀取,將配置類交由 spring 管理
ext:larkBotConfig:webhookUrl: https://open.feishu.cn/open-apis/bot/v2/hook/3e2c19d1-8fdd-4b56-b147-b613e90064a5import lombok.Data;
import org.springframework.boot.context.properties.ConfigurationProperties;
import org.springframework.context.annotation.Configuration;/**** @author benbenhuang* @date 2025/5/18 21:13*/
@Configuration
@ConfigurationProperties(prefix = "ext")
@Data
public class ExtProperties {private final LarkBotConfig larkBotConfig = new LarkBotConfig();@Datapublic static class LarkBotConfig{private String webhookUrl;}
}? ? ? ? 2、測試接口
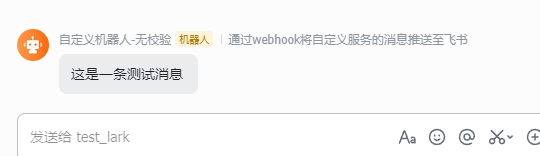
? ? ? ? 將需要發送的消息,傳遞給接口,測試下 效果如下:
import cn.hutool.http.HttpRequest;
import com.alibaba.fastjson.JSON;
import lombok.extern.slf4j.Slf4j;
import org.springframework.beans.factory.annotation.Autowired;
import org.springframework.web.bind.annotation.PostMapping;
import org.springframework.web.bind.annotation.RequestMapping;
import org.springframework.web.bind.annotation.RequestParam;
import org.springframework.web.bind.annotation.RestController;import javax.crypto.Mac;
import javax.crypto.spec.SecretKeySpec;
import java.nio.charset.StandardCharsets;
import java.security.InvalidKeyException;
import java.security.NoSuchAlgorithmException;
import java.util.Base64;
import java.util.HashMap;
import java.util.Map;/*** @author benbenhuang* @date 2025年05月18日 19:28*/
@RequestMapping("/testLark")
@RestController
@Slf4j
public class LarkController {@Autowiredprivate ExtProperties extProperties;@PostMapping("/send")public void sendLark(@RequestParam("notice") String notice){send(notice);}private void send(String notice){try {Map<String,Object> header=new HashMap();Map<String,Object> text=new HashMap();text.put("text",  notice);header.put("msg_type", "text");header.put("content", text);//發送post請求String result = HttpRequest.post(extProperties.getLarkBotConfig().getWebhookUrl()).body(JSON.toJSONString(header), "application/json;charset=UTF-8").execute().body();log.info("lark resp:{}", result);} catch (Exception e) {log.error("lark發送消息異常", e);}}}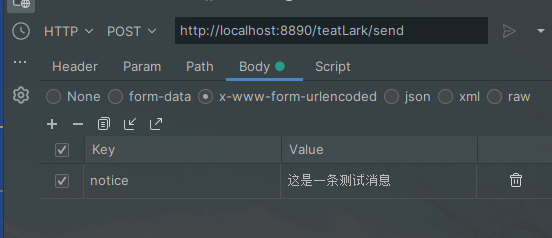
?
![]()
安全校驗
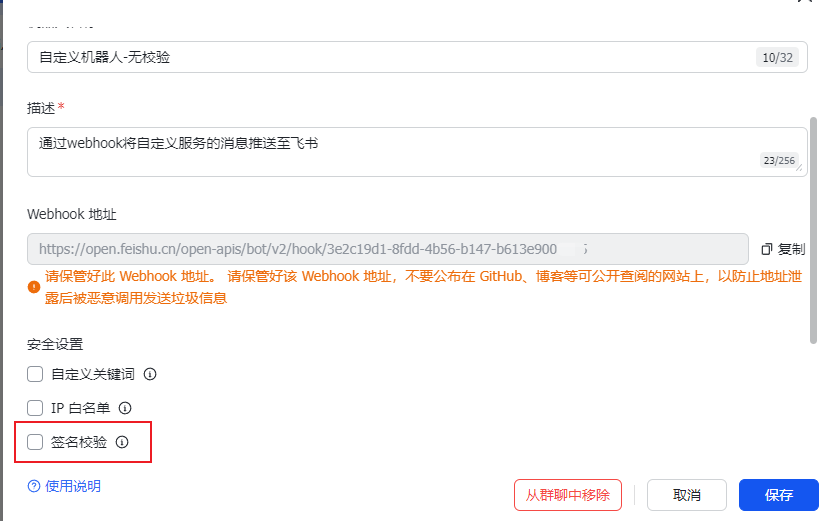
? ? ? ? 1、上面的方式是沒有加權限校驗的實現,也就是說只要獲取到 webhook 鏈接,誰都可以向這個群里發送消息,針對此情況可以開啟群機器人的 權限校驗,從這里開啟,獲取到秘鑰之后,點擊保存即可
? ? ? ? ?2、調整配置
? ? ? ? 加入秘鑰配置:


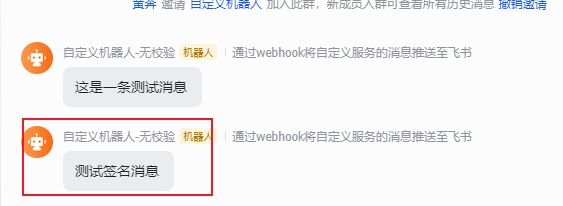
? ? ? ? 3、測試接口
? ? ? ? ?安全校驗具體到代碼層面就是,請求參數中根據官方文檔中要求的時間戳和加密后的sign值
自定義機器人使用指南 - 開發指南 - 飛書開放平臺
@RequestMapping("/teatLark")
@RestController
@Slf4j
public class LarkController {@Autowiredprivate ExtProperties extProperties;@PostMapping("/sendWithToken")public void sendLarkWithToken(@RequestParam("notice") String notice){sendWithSignature(notice);}private void sendWithSignature(String notice) {String secret = extProperties.getLarkBotConfig().getSecret(); // 從 Lark 后臺獲取String timestamp = String.valueOf(System.currentTimeMillis() / 1000); // 當前時間戳,單位秒String sign = calculateSignature(timestamp, secret);try {Map<String,Object> json=new HashMap();Map<String,Object> text=new HashMap();text.put("text",  notice);json.put("msg_type", "text");json.put("content", text);json.put("timestamp", timestamp);json.put("sign", sign);//發送post請求String result = HttpRequest.post(extProperties.getLarkBotConfig().getWebhookUrl()).body(JSON.toJSONString(json), "application/json;charset=UTF-8").execute().body();log.info("lark resp:{}", result);} catch (Exception e) {log.error("lark發送消息異常", e);}}private static String calculateSignature(String timestamp, String secret) {try {//把timestamp+"\n"+密鑰當做簽名字符串String stringToSign = timestamp + "\n" + secret;//使用HmacSHA256算法計算簽名Mac mac = Mac.getInstance("HmacSHA256");mac.init(new SecretKeySpec(stringToSign.getBytes(StandardCharsets.UTF_8), "HmacSHA256"));byte[] signData = mac.doFinal(new byte[]{});return new String(Base64.getEncoder().encodeToString(signData));} catch (Exception e) {throw new RuntimeException("sign 計算異常");}}}
![]()
章末
? ? ? ?文章到這里就結束了~

往期推薦 > > >?
?【服務器搭建】??用自己電腦搭建一個服務器!
?【IDEA】??自定義模板,自動生成類和方法注釋
?【日志鏈路】??SpringBoot 整合 TraceId 日志鏈路追蹤!


)


——4.9多協議標簽交換MPLS)


5.14)


