目錄
- 引言
- 相關閱讀
- 1. DayOfWeekRow
- 2. MonthGrid
- 3. WeekNumberColumn
- 項目結構及實現
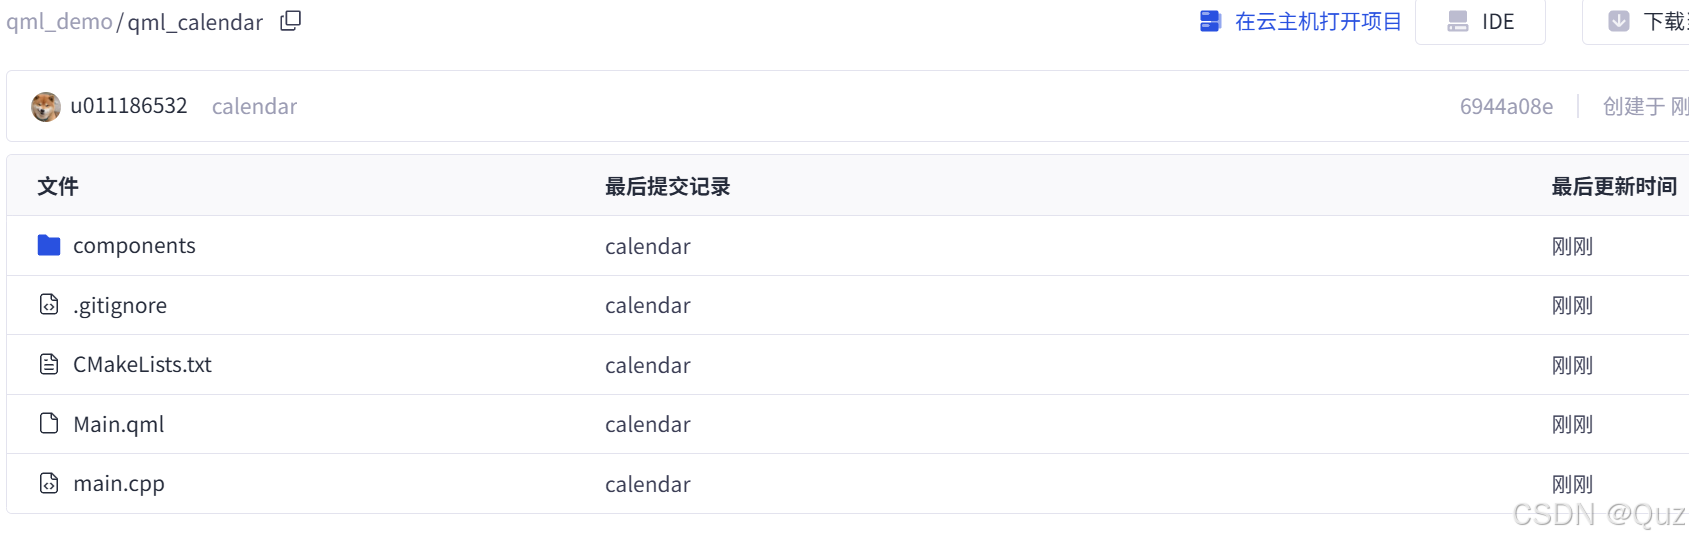
- 工程結構圖
- 代碼實現及解析
- 1. 組件封裝
- 2. 主界面實現
- 運行效果
- 總結
- 下載鏈接
引言
Qt6 Quick框架提供了一套豐富的日歷相關組件,包括 MonthGrid、DayOfWeekRow 和 WeekNumberColumn,使開發者能夠輕松實現各種日歷功能。本文將通過一個簡單的日歷應用示例,展示如何組合這些組件創建一個完整的日歷界面。
相關閱讀
在開始實現日歷應用前,我們需要了解以下幾個Qt Quick Controls中的核心日歷組件:
1. DayOfWeekRow
DayOfWeekRow是一個用于顯示星期幾標題的組件,通常作為日歷的標題行。它可以根據不同的地區設置(locale)自動調整顯示格式,支持從周日或周一開始的不同顯示方式。
主要屬性包括:
locale: 設置地區,影響星期名稱的顯示month: 設置月份(0-11)year: 設置年份delegate: 自定義每個星期標題的顯示樣式
2. MonthGrid
MonthGrid是日歷的核心組件,用于顯示一個月的日期網格。它提供了顯示日期、處理日期選擇和導航等基本功能。
主要屬性包括:
month: 設置顯示的月份(0-11)year: 設置顯示的年份locale: 設置地區,影響日期的顯示格式delegate: 自定義每個日期單元格的顯示樣式title: 月份標題
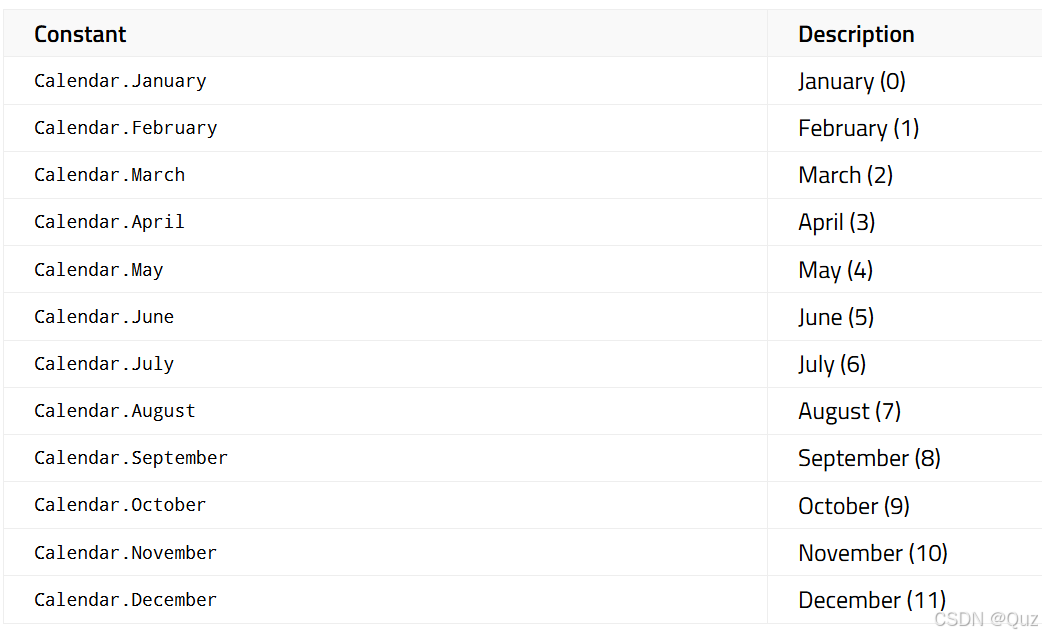
月份定義:
3. WeekNumberColumn
WeekNumberColumn用于在日歷旁邊顯示周數(第幾周),通常與MonthGrid結合使用。周數的計算方式取決于locale設置。
主要屬性包括:
month: 設置月份,與MonthGrid對應year: 設置年份,與MonthGrid對應locale: 設置地區,影響周數的計算方式delegate: 自定義周數顯示的樣式
項目結構及實現
工程結構圖
代碼實現及解析
1. 組件封裝
首先,我們將三個基礎日歷組件封裝成單獨的QML文件,便于復用和維護。
MonthGridComponent.qml
import QtQuick
import QtQuick.ControlsMonthGrid {id: monthGridlocale: Qt.locale("zh_CN")    // 本地化設置delegate: Text {              // 自定義日期顯示text: model.dayhorizontalAlignment: Text.AlignHCenterverticalAlignment: Text.AlignVCenter}
}
這個組件封裝了月份網格,設置了中文本地化,自定義了日期顯示樣式。
DayOfWeekRowComponent.qml
import QtQuick
import QtQuick.ControlsDayOfWeekRow {locale: Qt.locale("zh_CN")delegate: Text {text: model.shortNamefont.bold: truehorizontalAlignment: Text.AlignHCenter}
}
這個組件封裝了星期標題行,同樣使用中文本地化,加粗顯示星期名稱。
WeekNumberColumnComponent.qml
import QtQuick
import QtQuick.ControlsWeekNumberColumn {locale: Qt.locale("zh_CN")delegate: Text {text: model.weekNumberhorizontalAlignment: Text.AlignHCenterverticalAlignment: Text.AlignVCenter}
}
這個組件封裝了周數列,顯示每周的周數。
2. 主界面實現
Main.qml
import QtQuick
import QtQuick.Controls
import "components"ApplicationWindow {visible: truewidth: 600height: 500property date currentDate: new Date()property int currentMonth: currentDate.getMonth()property int currentYear: currentDate.getFullYear()Column {anchors.fill: parentanchors.margins: 20spacing: 10// 月份導航Row {spacing: 10anchors.horizontalCenter: parent.horizontalCenterButton {text: "<"onClicked: {if (currentMonth === 0) {currentMonth = 11currentYear--} else {currentMonth--}}}Label {text: Qt.locale().standaloneMonthName(currentMonth) + " " + currentYearfont.pixelSize: 18font.bold: true}Button {text: ">"onClicked: {if (currentMonth === 11) {currentMonth = 0currentYear++} else {currentMonth++}}}}// 日歷主體Row {spacing: 10// 周數列WeekNumberColumnComponent {width: 40height: monthGrid.heightmonth: currentMonthyear: currentYeardelegate: Rectangle {implicitWidth: 40implicitHeight: 40color: "transparent"Text {text: model.weekNumberanchors.centerIn: parentcolor: "gray"}}}Column {spacing: 5// 星期標題行DayOfWeekRowComponent {width: monthGrid.widthheight: 40delegate: Rectangle {implicitWidth: 40implicitHeight: 40color: "#f0f0f0"Text {text: model.shortNameanchors.centerIn: parentfont.bold: true}}}// 月歷網格MonthGridComponent {id: monthGridmonth: currentMonthyear: currentYeardelegate: Rectangle {implicitWidth: 40implicitHeight: 40color: {if (!model.day)return "transparent"if (model.today)return "#e6f3ff"if (model.month === monthGrid.month)return "white"return "#f9f9f9"}border.color: "#e0e0e0"Text {text: model.dayanchors.centerIn: parentcolor: {if (!model.day)return "transparent"if (model.month !== monthGrid.month)return "gray"return "black"}font.bold: model.today}MouseArea {anchors.fill: parentenabled: model.day && model.month === monthGrid.monthonClicked: console.log("選擇的日期:", model.date.toLocaleDateString())}}}}}}
}
主界面實現了以下功能:
日期屬性定義:
- 使用屬性定義當前日期、月份和年份,作為整個日歷的數據源
月份導航:
- 通過兩個按鈕實現上個月和下個月的切換功能
日歷主體布局:
- 左側是周數列(WeekNumberColumnComponent)
- 右側頂部是星期標題行(DayOfWeekRowComponent)
- 右側主體是月份網格(MonthGridComponent)
日期單元格樣式:
- 當前日期高亮顯示(淺藍色背景)
- 非當前月份的日期顯示為灰色
- 每個日期單元格都有鼠標點擊事件
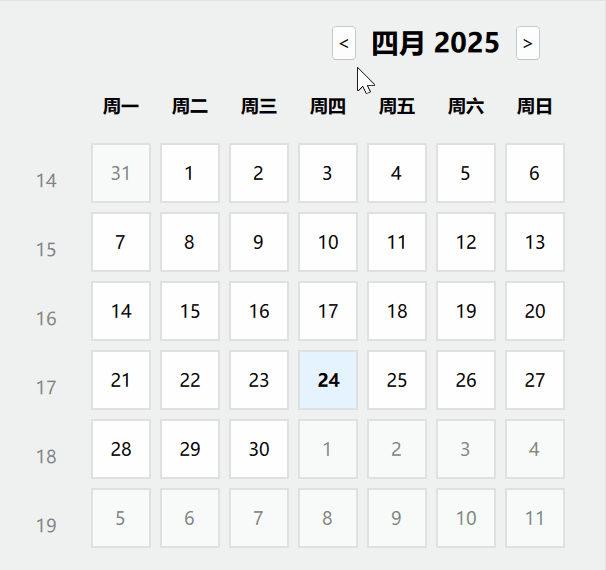
運行效果
總結
通過本文,學習了如何使用Qt Quick Controls提供的日歷組件(DayOfWeekRow、MonthGrid和WeekNumberColumn)來構建一個功能完整的日歷應用。我們將這些組件封裝成可復用的QML文件,然后在主界面中組合使用,實現了一個具有月份導航、日期顯示和選擇功能的日歷。
下載鏈接
完整的工程代碼可以從Gitcode下載:GitCode -> QML日歷示例
)


)


—過濾器》)
2022/30)


