 ?
?
目錄
前言
1、安裝
2、設置網站 URL
3、啟用 Nuxt DevTools
4、創建您的第一個Og:Image
a. 定義OG鏡像
b.?查看您的Og:Image
5、自定義NuxtSeo模板
a. 定義 NuxtSeo模板
b.?使用其他可用的社區模板
6、創建自己的模板
a. 定義組件?BlogPost.vue
b. 使用新模板
c. 傳遞可組合對象自定義
d. 放置圖片
前言
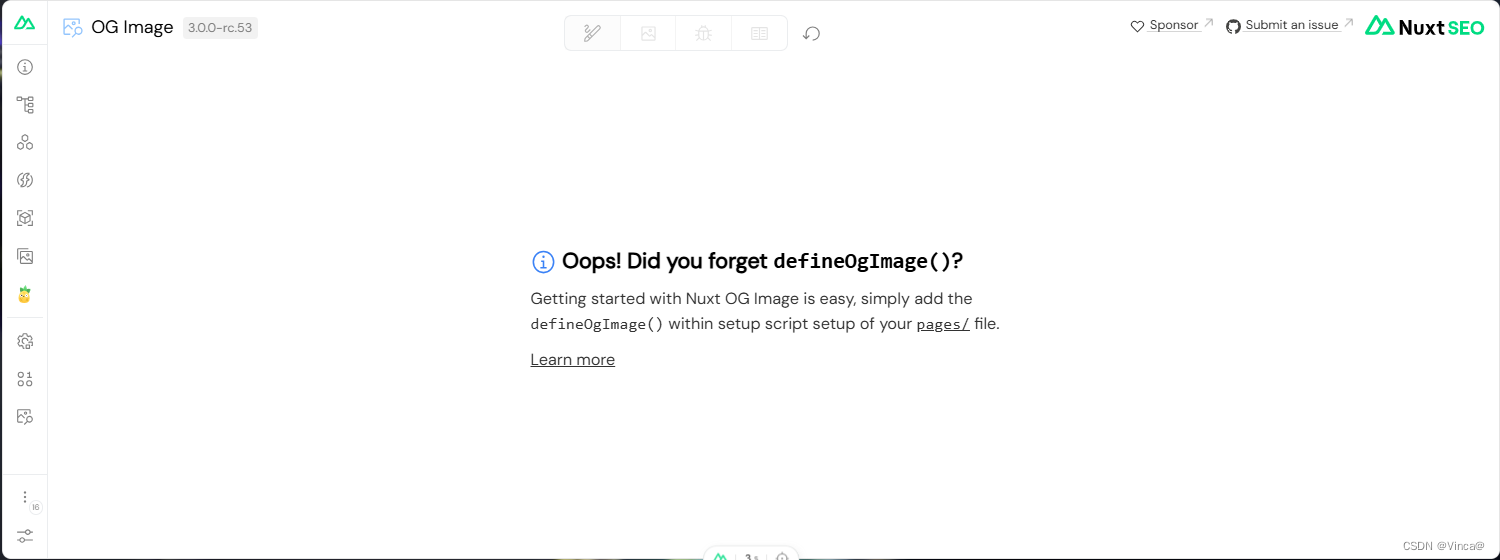
首先來一張未配置Og:image的 devtools 效果圖
?
要實現的效果

1、安裝
npx nuxi@latest module add og-image
?
2、設置網站 URL
# nuxt.config.ts
export default defineNuxtConfig({site: {// production URLurl: 'https://example.com',},
})
或者更新?.env?
NUXT_PUBLIC_SITE_URL=https://example.com
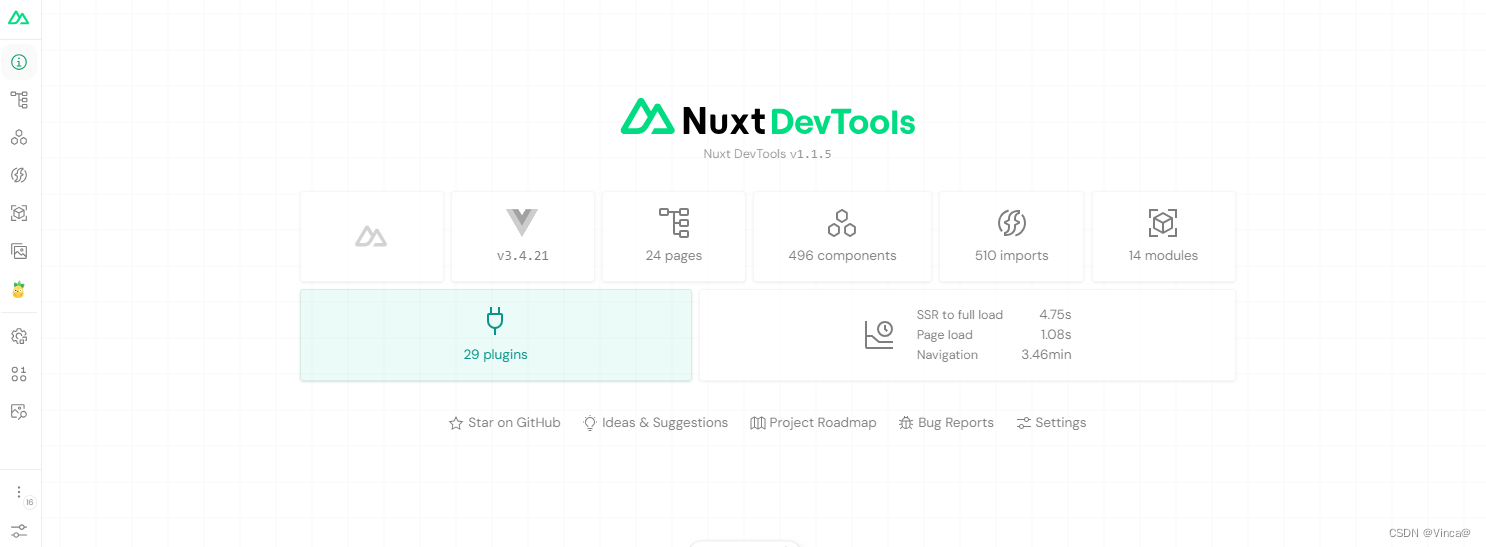
3、啟用 Nuxt DevTools
export default defineNuxtConfig({devtools: { enabled: true },
})
4、創建您的第一個Og:Image
a. 定義OG鏡像
首先,我們將使用僅限服務器的可組合對象來定義我們的主頁。
# pages/index.vue
<script lang="ts" setup>
defineOgImageComponent('NuxtSeo')
</script>
?
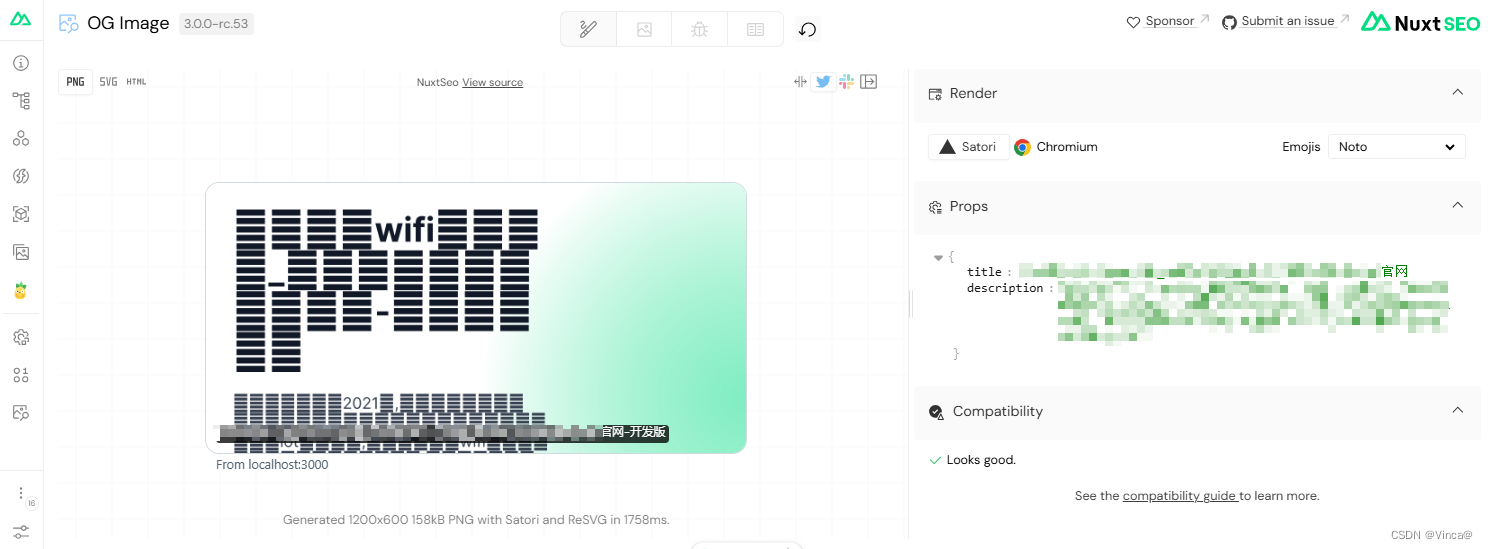
b.?查看您的OG:Image
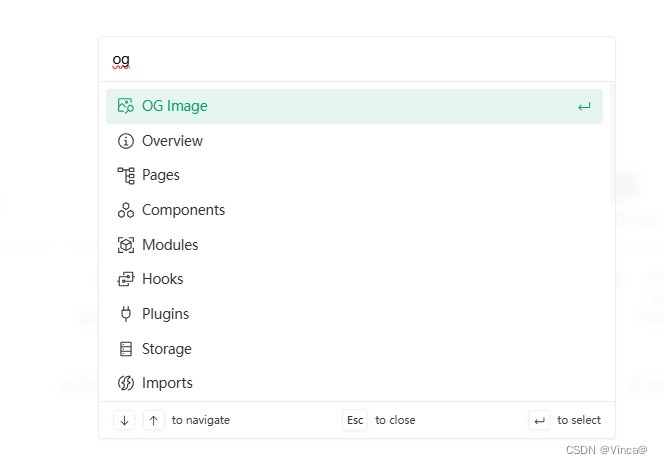
i.訪問瀏覽器中的主頁并打開 Nuxt DevTools。
?
ii.快捷鍵:Shift + Alt + D
iii.進入 Nuxt DevTools 后,可以通過打開命令面板并鍵入來導航到OG Image選項卡或快捷鍵 Ctrl + K 輸入?og,選擇OG Image:
iiii. 您現在應該看到的?OG 圖像預覽:
5、自定義NuxtSeo模板
a. 定義 NuxtSeo模板
i.在你的主要頁面添加代碼:
# pages/index.vue
defineOgImageComponent("NuxtSeo", {title: "Hello OG Image 👋",description: "Look what at me in dark mode",theme: "#ff0000",colorMode: "dark"
});
ii.點擊刷新之后,你將會看到這樣的圖像:
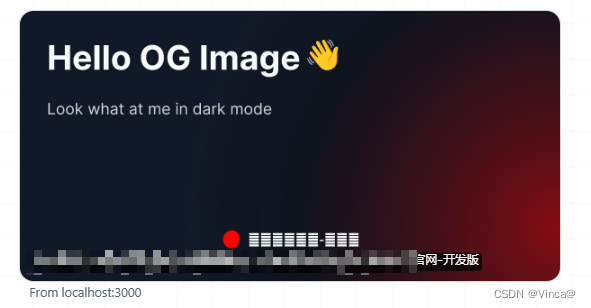
到這里,恭喜,您已經設置并自定義了您的第一個 og:image !
b.?使用其他可用的社區模板
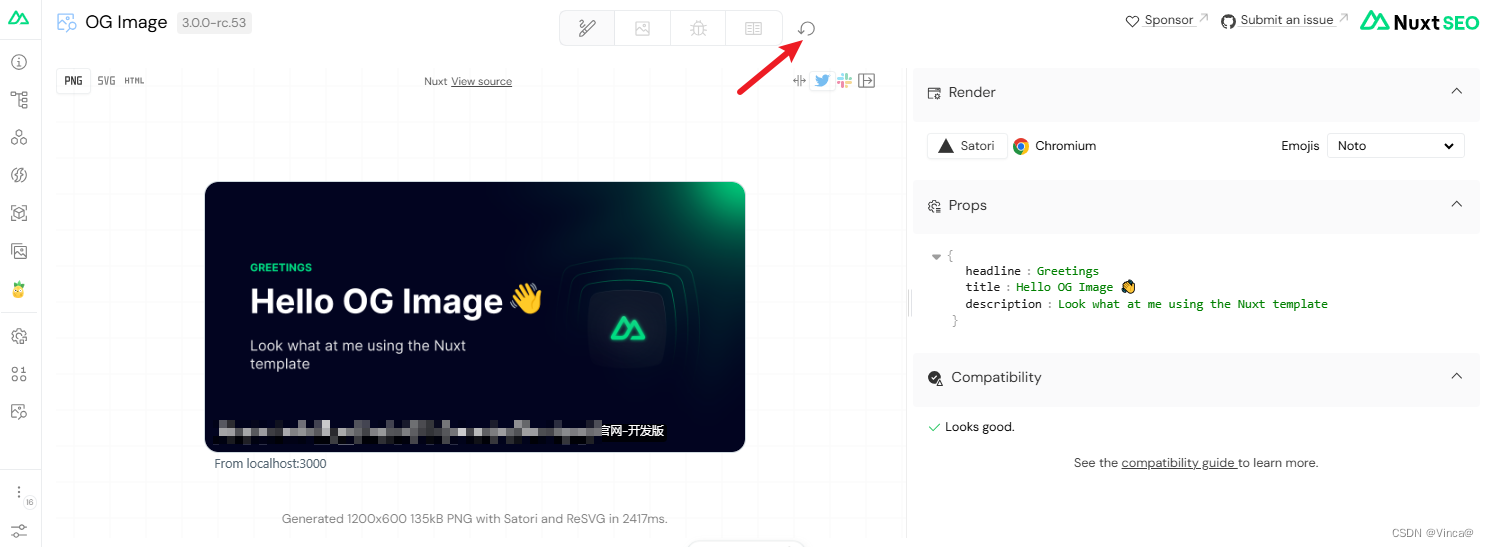
i.在你的主要頁面添加代碼:
# pages/index.vue
<script lang="ts" setup>
defineOgImageComponent('Nuxt', {headline: 'Greetings',title: 'Hello OG Image 👋',description: 'Look what at me using the Nuxt template',
})
</script>
ii. 點擊刷新按鈕 ,你將看到這樣圖像:
6、創建自己的模板
a. 定義組件?BlogPost.vue
代碼中用到了?tailwindcss ,如果沒安裝可以翻看我之前的文章。http://t.csdnimg.cn/F35TG
# components/OgImage/BlogPost.vue
<script setup lang="ts">
withDefaults(defineProps<{title?: string
}>(), {title: 'title',
})
</script><template><div class="h-full w-full flex items-start justify-start border-solid border-blue-500 border-[12px] bg-gray-50"><div class="flex items-start justify-start h-full"><div class="flex flex-col justify-between w-full h-full"><h1 class="text-[80px] p-20 font-black text-left">{{ title }}</h1><p class="text-2xl pb-10 px-20 font-bold mb-0">mycoolsite.com</p></div></div></div>
</template>
b. 使用新模板
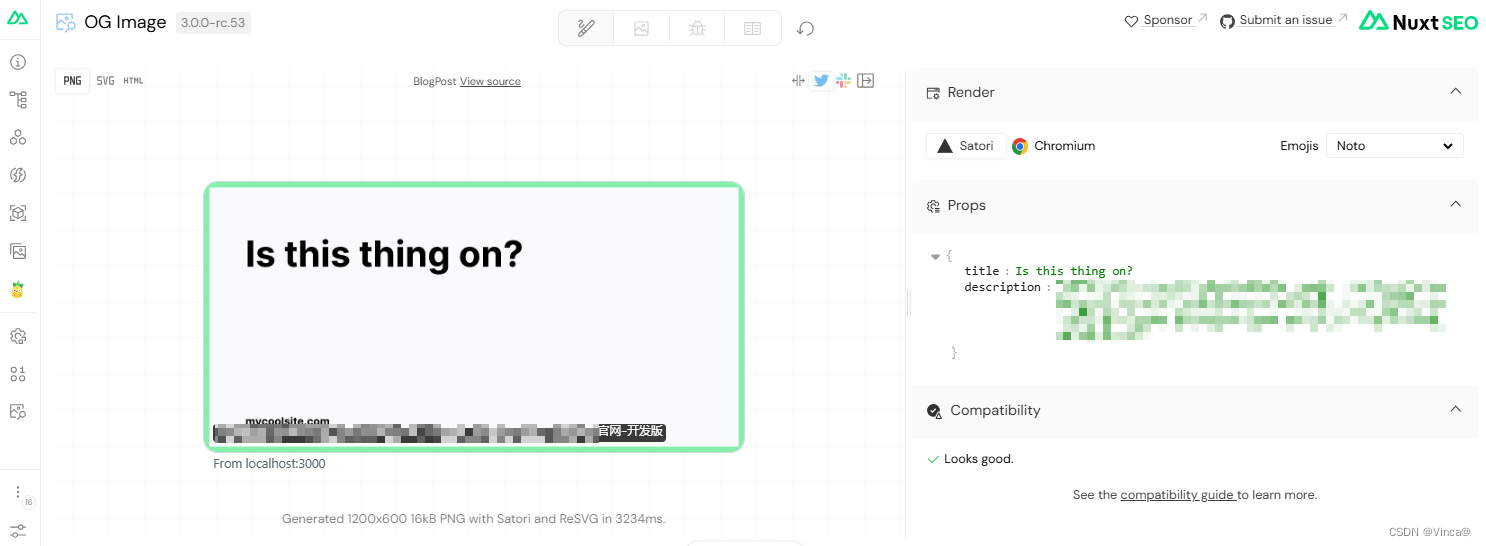
i.在你的主要頁面添加代碼:
# pages/index.vue
<script lang="ts" setup>
defineOgImageComponent('BlogPost', {title: 'Is this thing on?'
})
</script>
ii. 點擊刷新按鈕 ,你將看到這樣圖像:

c. 傳遞可組合對象自定義
i.更新你的自定義圖像組件代碼:
# components/OgImage/BlogPost.vue
<script setup lang="ts">
withDefaults(defineProps<{title?: stringborderColor?: string
}>(), {title: 'title',borderColor: 'blue-500'
})
</script><template><div :class="[`border-${borderColor}`]" class="h-full w-full flex items-start justify-start border-solid border-[12px] bg-gray-50"><div class="flex items-start justify-start h-full"><div class="flex flex-col justify-between w-full h-full"><h1 class="text-[80px] p-20 font-black text-left">{{ title }}</h1><p class="text-2xl pb-10 px-20 font-bold mb-0">mycoolsite.com</p></div></div></div>
</template>
ii. 更新你主頁面代碼
# pages/index.vue
<script lang="ts" setup>
defineOgImageComponent('BlogPost', {title: 'Is this thing on?',borderColor: 'green-300',
})
</script>
iii. 點擊刷新按鈕,你將看到這樣圖像:
邊框由原來的藍色變成綠色。
?
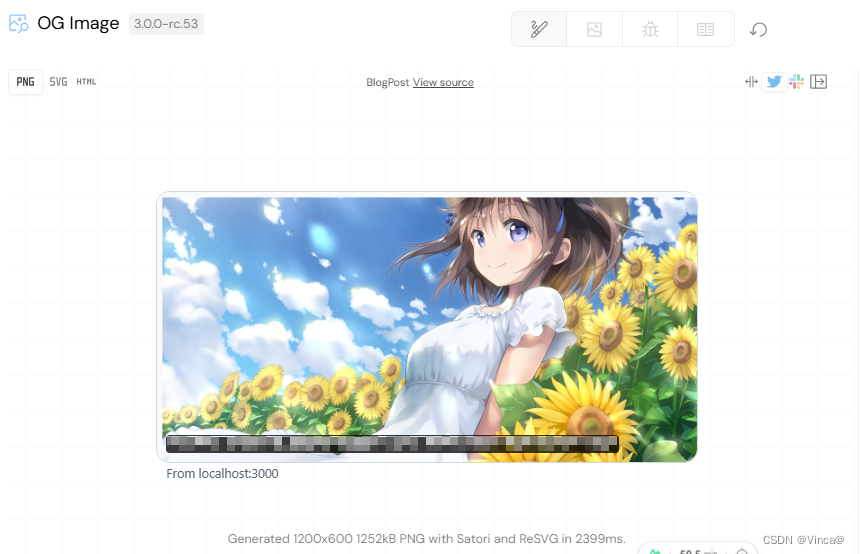
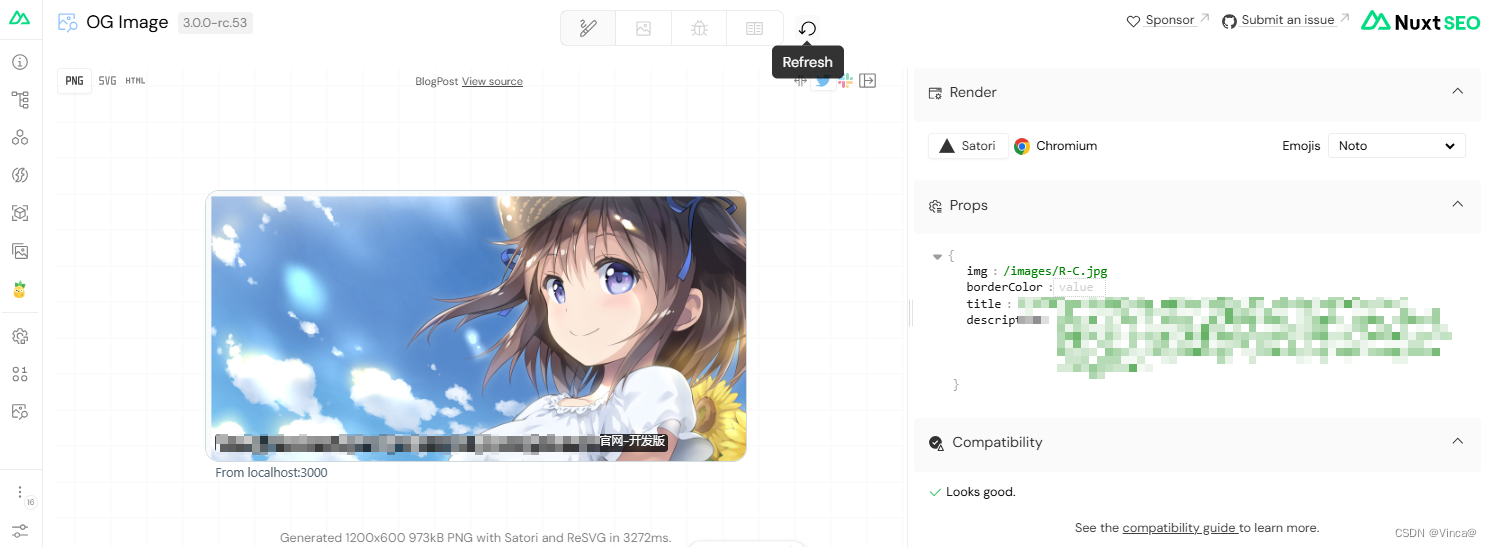
d. 放置圖片
i. 更新主頁面代碼
# pages/index.vue
defineOgImageComponent("BlogPost", {img: `${imgStaticBase}/frontend.jpg`,borderColor: ""
});
ii. 更新組件代碼
# components/OgImage/BlogPost.vue
<script setup lang="ts">
withDefaults(defineProps<{img?: string;borderColor?: string;}>(),{img: "",borderColor: ""}
);
</script><template><div:class="[`border-${borderColor}`]"class="flex h-full w-full items-start justify-start border-[12px] border-solid bg-gray-50"><div class="flex h-full items-start justify-start"><div class="flex h-full w-full flex-col items-center justify-between"><img class="w-screen object-cover" :src="img" /></div></div></div>
</template>
這里預留邊框看自己需要。
?
iii. 刷新后你將看到這樣的效果
完


)


【類的6個默認成員函數】 【零散知識點】 (萬字))


,免費參會)


