著色(Shading)
曲面細分只是地球渲染的第一步。接下來是著色——通過模擬光線與材質的相互作用,計算每個像素的最終顏色。本節先回顧基礎的光照與紋理映射,再講解虛擬地球特有的經緯網格和夜景燈光效果。
6.1 光照(Lighting)
我們從最簡“直通”著色器(Listing 1)開始,逐步加入漫反射與鏡面反射。
/*----------------List 1----------------------*/
// Vertex shader
in vec4 position;
uniform mat4 ce_modelViewPerspectiveMatrix;void main()
{gl_Position = ce_modelViewPerspectiveMatrix * position ;
}// Fragment shader
out vec3 fragmentColor;
void main() {fragmentColor = vec3(0.0, 0.0, 0.0);
}-
頂點著色器
使用自動變量ce_modelViewPerspective把頂點坐標變換到裁剪空間。
此時球體全黑。
-
光源位置
采用“眼旁點光源”:光源放在相機位置,仿佛用戶提著一盞燈。
為簡化,光照計算在世界坐標系完成(示例僅有一個坐標系)。 -
逐像素光照
在片元著色器計算 Phong 光照,可消除因插值導致的高光鋸齒,也便于后續紋理特效。
漫反射
粗糙表面散射光線,強度僅與入射角有關:
Idiffuse=max?(n^?l^,0)
I_{\text{diffuse}} = \max(\hat{\mathbf n}\cdot \hat{\mathbf l},0)
Idiffuse?=max(n^?l^,0)
其中 n^\hat{\mathbf n}n^ 為法線,l^\hat{\mathbf l}l^ 為光源方向。
球面法線可直接歸一化世界坐標得到;橢球需用 GeodeticSurfaceNormal。
鏡面反射
光滑表面產生高光,強度與視線方向有關:
Ispec=(r^?v^)α,r^=2(n^?l^)n^?l^
I_{\text{spec}} = \left(\hat{\mathbf r}\cdot \hat{\mathbf v}\right)^\alpha,\quad \hat{\mathbf r}=2(\hat{\mathbf n}\cdot\hat{\mathbf l})\hat{\mathbf n}-\hat{\mathbf l}
Ispec?=(r^?v^)α,r^=2(n^?l^)n^?l^
指數 α\alphaα 決定高光銳利度。
最終光照:
I=kdIdiffuse+ksIspec+ka
I = k_dI_{\text{diffuse}} + k_sI_{\text{spec}} + k_a
I=kd?Idiffuse?+ks?Ispec?+ka?
實現見 Listing 2(頂點)與 Listing 3(片元)。
/*-----------Listing 2--------------------*/
// Vertex shader for diffuse and specular lighting.
in vec4 position;
out vec3 worldPosition;
out vec3 positionToLight;
out vec3 positionToEye;uniform mat4 ce_modelViewPerspectiveMatrix;
uniform vec3 ce_cameraEye;
uniform vec3 ce_cameraLightPosition;void main()
{gl_Position = ce_modelViewPerspectiveMatrix * position;worldPosition = position.xyz;positioinToLight = ce_cameraLightPosition - worldPosition;positionToEye = ce_cameraEye - worldPosition;
}
/*-----------Listing 3--------------------*/
// Final Phong-lighting fragment shader.
in vec3 worldPosition;
in vec3 positionToLight;
in vec3 positionToEye;
out vec3 fragmentColor;uniform vec4 ce_diffuseSpecularAmbientShininess;float LightIntensity(vec3 normal, vec3 toLight, vec3 toEye, vec4 diffuseSpecularAmbientShininess)
{vec3 toReflectedLight = reflect(-toLight, normal);float diffuse = max(dot(toLight, normal), 0.0);float specular = max(dot(toReflectedLight, toEye), 0.0);specular = pow(specular, diffuseSpecularAmbientShininess.w);return (diffuseSpecularAmbientShininess.x * diffuse) + (diffuseSpecularAmbientShininess.y * specular) + diffuseSpecularAmbientShininess.z;
}void main()
{vec3 normal = normalize(worldPosition);float intensity = LightIntensity(normal, normalize(positionToLight), normalize(positionToEye), ce_diffuseSpecularAmbientShininess);fragmentColor = vec3(intensity, intensity, intensity);
}6.2 紋理映射(Texturing)
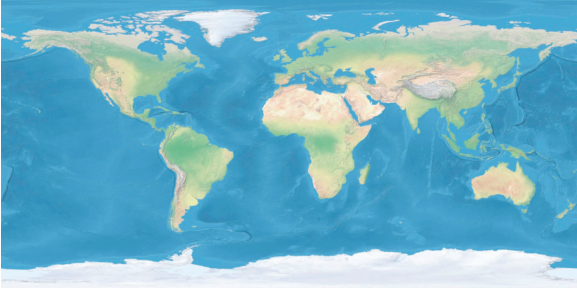
光照體現曲率,但地球真正魅力來自高分辨率影像。本節講解逐像素計算紋理坐標(假設紋理一次性裝入顯存,且 float 精度足夠)。
-
世界影像通常 2:1 寬高比,WGS84 坐標。
-
給定片元法線 n=(nx,ny,nz)∈[?1,1]\mathbf n=(n_x,n_y,n_z)\in[-1,1]n=(nx?,ny?,nz?)∈[?1,1],計算 (s,t)∈[0,1](s,t)\in[0,1](s,t)∈[0,1]:
s=atan2(ny,nx)2π+0.5,t=arcsin?nzπ+0.5. \begin{aligned} s &= \frac{\text{atan2}(n_y,n_x)}{2\pi}+0.5,\\[2pt] t &= \frac{\arcsin n_z}{\pi}+0.5. \end{aligned} st?=2πatan2(ny?,nx?)?+0.5,=πarcsinnz??+0.5.?
該公式把經緯度映射到紋理空間(Listing 4.11)。 -
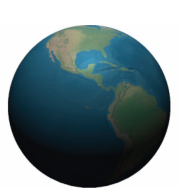
光照×顏色:
finalColor=texture(uday,(s,t))×I \text{finalColor} = \text{texture}(u_{\text{day}},(s,t)) \times I finalColor=texture(uday?,(s,t))×I
極點問題
紋理極區像素密度過高,過濾反而加劇失真。
EVE Online 采用“平面+球面”混合投影;也可改用立方體貼圖避免極點拉伸,但在每個立方體面的邊界處會引入輕微的畸變。
6.3 CPU / GPU 權衡
| 方案 | 優點 | 缺點 |
|---|---|---|
| 逐片元 計算法線/紋理坐標 | 節省顯存;無插值誤差;代碼簡潔;無 IDL 特殊處理 | GPU 反三角函數精度/速度低 |
| 逐頂點 計算并存儲 | 頂點著色器簡單;一次計算多次使用 | 頂點數據翻倍;頂點插值導致 IDL 紋理跳變(下圖) |
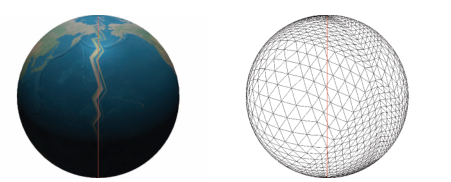
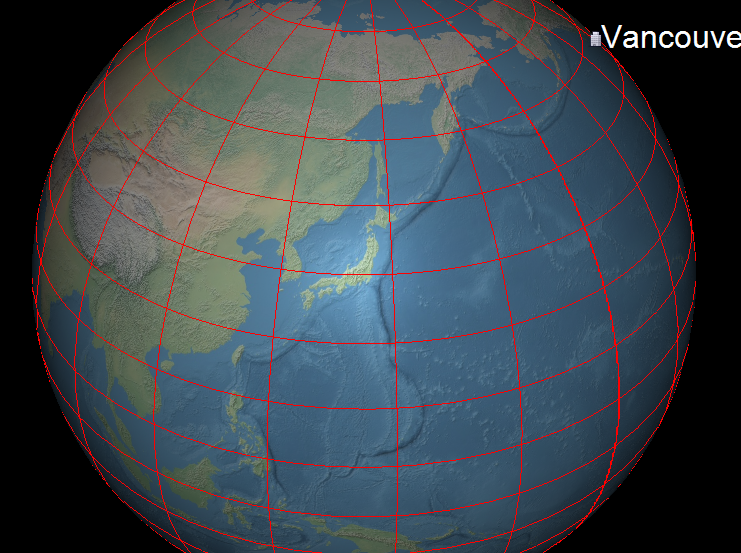
6.4 經緯網格(Latitude-Longitude Grid)
幾乎所有虛擬地球都可疊加經緯網(圖 4.13)。常見做法:
- CPU 生成折線;
- 緩存網格,視角移動時復用;
- 根據縮放級別動態增減分辨率(LOD)。
片元著色器方案
優點:
- 無 CPU 計算;
- 無額外顯存/帶寬;
- 無 Z-fighting;
- 無需額外 Pass。
缺點:
- 單 Pass 渲染耗時稍長;
- 受 32-bit float 精度限制;
- 文字標注需額外處理。
實現要點
- 通過紋理坐標
(s,t)判斷是否在網格線附近; - 用
dFdx/dFdy獲得屏幕空間梯度,實現像素恒定線寬(Listing 4); - 支持不同顏色、線寬、淡入淡出、抗鋸齒及線型。
/*------------------------Listing 4-------------------------------*/
void main()
{vec3 normal = GeodeticSurfaceNormal(worldPosition, u_globeOneOverRadiiSquared);vec2 textureCoordinate = ComputeTextureCoordinates(normal);vec2 distanceToLine = mod(textureCoordinate, u_gridResolution);vec2 dx = abs(dFdx(textureCoordinate));vec2 dy = abs(dFdy(textureCoordinate));vec2 dF = vec2(max(dx.s, dy.s), max(dx.t, dy.t)) * u_gridLineWidth;if (any(lessThan(distanceToLine, dF))){fragmentColor = vec3(1.0, 0.0, 0.0);}else{float intensity = LightIntensity(normal,normalize(positionToLight),normalize(positionToEye),ce_diffuseSpecularAmbientShininess);fragmentColor = intensity * texture(ce_texture0, textureCoordinate).rgb;}
}
LOD 控制
根據相機高度分段設置 u_gridResolution:
- 定義高度區間 → 網格分辨率映射表;
- 利用時間連續性,優先檢查上一區間,查找幾乎 O(1)。
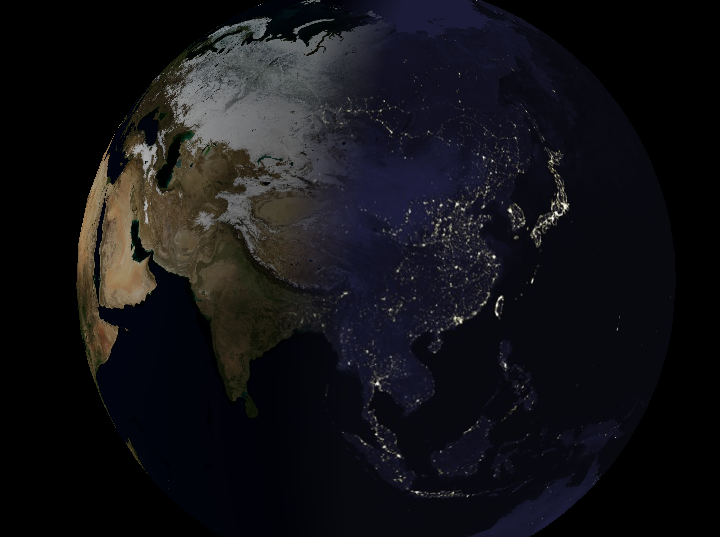
6.5 夜景燈光(Night Lights)
虛擬地球常在背陽面顯示城市燈光——經典多重紋理應用:
白天紋理 + 夜間燈光紋理,按太陽照射角度混合。
片元著色器流程
- 頂點著色器傳入太陽位置
og_sunPosition; - 新增 uniform:
u_dayTexture,u_nightTextureu_blendDuration過渡時長u_blendDurationScale = 1/(2u_blendDuration)(預計算)
- 片元著色器:
- 計算漫反射因子 d=max?(n^?l^,0)d = \max(\hat{\mathbf n}\cdot\hat{\mathbf l},0)d=max(n^?l^,0)。
- 若 d>ublendDurationd > u_{\text{blendDuration}}d>ublendDuration?:用白天紋理 + Phong 光照。
- 若 d<?ublendDurationd < -u_{\text{blendDuration}}d<?ublendDuration?:用夜間紋理,無光照。
- 介于兩者之間:線性混合晝夜顏色。
性能實驗
- 僅看晝面 vs 僅看夜面:夜面幀率更高(夜間紋理分辨率低且無光照計算)。
- 游戲常用技巧:用紋理圖集 + 旋轉/鏡像,少量紋理即可產生豐富夜景變化(EVE Online)。
多重紋理其他應用
- 云層紋理
- 水面高光貼圖(gloss map)
早期硬件不支持多重紋理時,STK 采用多 Pass 實現夜景。
參考:
- Cozi, Patrick; Ring, Kevin. 3D Engine Design for Virtual Globes. CRC Press, 2011.
(圖像拼接原理、基礎知識、單應性矩陣 + 圖像變換 + 拼接))


)


