一、明確 OCR 任務邊界
首先定義 OCR 系統的核心目標:
- 場景:印刷體(如文檔、發票)/ 手寫體(如筆記)/ 特定場景(如車牌、身份證)
- 輸入:圖像格式(JPG/PNG)、分辨率(建議≥320x320)、是否含復雜背景
- 輸出:文本內容(字符串)、位置信息(邊界框坐標)、置信度
本文以 “通用印刷體 OCR” 為例(覆蓋檢測 + 識別),技術棧采用?PyTorch(靈活性強)+?OpenCV(圖像處理)。
二、數據準備(最關鍵環節,占比 60% 工作量)
1. 數據集收集
需滿足 “多樣性”(字體、背景、光照、傾斜角度)和 “規模”(建議≥10 萬樣本):
- 公開數據集:
- 檢測:ICDAR2015(自然場景文本)、COCO-Text(圖像中的文本)
- 識別:MJSynth(合成文本,1000 萬樣本)、SynthText(復雜背景合成文本)
- 綜合:PaddleOCR 提供的通用數據集(含 18 萬標注樣本,可直接下載)
- 自建數據集:
- 工具:用 Python 腳本生成合成數據(推薦
TextRecognitionDataGenerator庫)
- 工具:用 Python 腳本生成合成數據(推薦
代碼:?
import os
import uuid
import argparse
import shutil
import random
import string
import math
from typing import Optional, Tuple, List
from PIL import Image, ImageDraw, ImageFont, ImageFilter# 確保中文顯示正常
try:# 嘗試加載系統字體import matplotlib.font_manager as fmsystem_fonts = fm.findSystemFonts()# 優先選擇中文字體chinese_fonts = [f for f in system_fonts if 'sim' in f.lower() or 'hei' in f.lower() or 'song' in f.lower()]
except ImportError:system_fonts = []chinese_fonts = []
except Exception:system_fonts = []chinese_fonts = []def check_dependencies():"""檢查必要的依賴是否安裝"""try:import PILfrom PIL import Image, ImageDraw, ImageFontexcept ImportError as e:print(f"錯誤: 缺少必要的依賴項 - {e}")print("請先安裝所需依賴:")print("pip install pillow matplotlib")exit(1)def create_directories(output_dir: str) -> bool:"""創建輸出目錄,如果目錄已存在則詢問是否清空:param output_dir: 輸出目錄路徑:return: 目錄準備完成返回True,否則返回False"""try:if os.path.exists(output_dir):response = input(f"目錄 {output_dir} 已存在,是否清空? (y/n): ")if response.lower() == 'y':# 清空目錄for filename in os.listdir(output_dir):file_path = os.path.join(output_dir, filename)try:if os.path.isfile(file_path) or os.path.islink(file_path):os.unlink(file_path)elif os.path.isdir(file_path):shutil.rmtree(file_path)except Exception as e:print(f"清空目錄時出錯: {e}")return Falseelse:# 創建目錄(包括所有父目錄)os.makedirs(output_dir, exist_ok=True)return Trueexcept Exception as e:print(f"創建目錄時出錯: {e}")return Falsedef get_available_fonts(font_dir: str) -> List[str]:"""檢查字體目錄并返回可用字體列表,若沒有則返回系統字體:param font_dir: 字體目錄路徑:return: 字體文件路徑列表"""font_extensions = ['.ttf', '.otf', '.ttc']fonts = []# 先檢查用戶提供的字體目錄if os.path.exists(font_dir):for file in os.listdir(font_dir):file_ext = os.path.splitext(file)[1].lower()if file_ext in font_extensions:fonts.append(os.path.join(font_dir, file))# 如果沒有找到字體,使用系統字體if not fonts:if chinese_fonts:fonts = chinese_fontselif system_fonts:fonts = system_fonts[:10]  # 限制系統字體數量else:# 如果沒有找到任何字體,返回空列表而不是包含None的列表print("警告: 未找到任何字體文件,將使用Pillow默認字體")return []  # 返回空列表表示沒有可用字體print(f"找到 {len(fonts)} 種可用字體")return fontsdef generate_random_text(length: int, include_chinese: bool = False) -> str:"""生成隨機文本"""# 基本字符集:字母+數字chars = string.ascii_letters + string.digits# 如果需要中文,添加一些常用中文字符if include_chinese and random.random() < 0.3:  # 30%概率生成中文chinese_chars = "的一是在不了有和人這中大為上個國我以要他時來用們生到作地于出就分對成會可主發年動同工也能下過子說產種面而方后多定行學法所民得經十三之進著等部度家電力里如水化高自二理起小物現實加量都兩體制機當使點從業本去把性好應開它合還因由其些然前外天政四日那社義事平形相全表間樣與關各重新線內數正心反你明看原又么利比或但質氣第向道命此變條只沒結解問意建月公無系軍很情者最立代想已通并提直題黨程展五果料象員革位入常文總次品式活設及管特件長求老頭基資邊流路級少圖山統接知較將組見計別她手角期根論運農指幾九區強放決西被干做必戰先回則任取據處隊南給色光門即保治北造百規熱領七海口東導器壓志世金增爭濟階油思術極交受聯什認六共權收證改清己美再采轉更單風切打白教速花帶安場身車例真務具萬每目至達走積示議聲報斗完類八離華名確才科張信馬節話米整空元況今集溫傳土許步群廣石記需段研界拉林律叫且究觀越織裝影算低持音眾書布復容兒須際商非驗連斷深難近礦千周委素技備半辦青省列習響約支般史感勞便團往酸歷市克何除消構府稱太準精值號率族維劃選標寫存候毛親快效斯院查江型眼王按格養易置派層片始卻專狀育廠京識適屬圓包火住調滿縣局照參紅細引聽該鐵價嚴首底液官德調隨病蘇失爾死講配女黃推顯談罪神藝呢席含企望密批營項防舉球英氧勢告李臺落木幫輪破亞師圍注遠字材排供河態封另施減樹溶怎止案言士均武固葉魚波視僅費緊愛左章早朝害續輕服試食充兵源判護司足某練差致板田降黑犯負擊范繼興似余堅曲輸修的故城夫夠送筆船占右財吃富春職覺漢畫功巴跟雖雜飛檢吸助升陽互初創抗考投壞策古徑換未跑留鋼曾端責站簡述錢副盡帝射草沖承獨令限阿宣環雙請超微讓控州良軸找否紀益依優頂礎載倒房突坐粉敵略客袁冷勝絕析塊劑測絲協重訴念陳仍羅鹽友洋錯苦夜刑移頻逐靠混母短皮終聚汽村云哪既距衛停烈央察燒行迅境若印洲刻括激孔搞甚室待核校散侵吧甲游久菜味舊模湖貨損預阻毫普穩乙媽植息擴銀語揮酒守拿序紙醫缺雨嗎針劉啊急唱誤訓愿審附獲茶鮮糧斤孩脫硫肥善龍演父漸血歡械掌歌沙著剛攻謂盾討晚粒亂燃矛乎殺藥寧魯貴鐘煤讀班伯香介迫句豐培握蘭擔弦蛋沉假穿執答樂誰順煙縮征臉喜松腳困異免背星福買染井概慢怕磁倍祖皇促靜補評翻肉踐尼衣寬揚棉希傷操垂秋宜氫套筆督振架亮末憲慶編牛觸映雷銷詩座居抓裂胞呼娘景威綠晶厚盟衡雞孫鳳秀么宋禁氧球岸鍵租弱吸煉顧傭袁穿苗寶旬"# 隨機選擇一些中文字符text = ''.join(random.choice(chinese_chars) for _ in range(length))return text# 生成字母數字組合return ''.join(random.choice(chars) for _ in range(length))def create_background(width: int, height: int, background_type: int) -> Image.Image:"""創建不同類型的背景"""if background_type == 0:  # 白色背景return Image.new('RGB', (width, height), color='white')elif background_type == 1:  # 灰色背景return Image.new('RGB', (width, height), color=(random.randint(200, 250),random.randint(200, 250),random.randint(200, 250)))elif background_type == 2:  # 漸變背景bg = Image.new('RGB', (width, height), color='white')draw = ImageDraw.Draw(bg)for i in range(height):color = (int(255 - i * 255 / height),int(255 - i * 200 / height),int(255 - i * 150 / height))draw.line([(0, i), (width, i)], fill=color)return bgelif background_type == 3:  # 有噪聲的背景bg = Image.new('RGB', (width, height), color=(240, 240, 240))draw = ImageDraw.Draw(bg)for _ in range(width * height // 100):  # 噪聲點數量x = random.randint(0, width - 1)y = random.randint(0, height - 1)size = random.randint(1, 2)color = (random.randint(0, 200), random.randint(0, 200), random.randint(0, 200))draw.rectangle([(x, y), (x + size, y + size)], fill=color)return bgelif background_type == 4:  # 網格背景bg = Image.new('RGB', (width, height), color='white')draw = ImageDraw.Draw(bg)step = random.randint(10, 30)color = (200, 200, 200)for x in range(0, width, step):draw.line([(x, 0), (x, height)], fill=color, width=1)for y in range(0, height, step):draw.line([(0, y), (width, y)], fill=color, width=1)return bgelse:  # 默認白色背景return Image.new('RGB', (width, height), color='white')def add_distortion(image: Image.Image, distortion_type: int) -> Image.Image:"""為圖像添加不同類型的扭曲效果"""if distortion_type == 0:  # 無扭曲return imageelif distortion_type == 1:  # 輕微模糊return image.filter(ImageFilter.GaussianBlur(radius=0.5))elif distortion_type == 2:  # 中等模糊return image.filter(ImageFilter.GaussianBlur(radius=1))elif distortion_type == 3:  # 輕微旋轉angle = random.randint(-5, 5)return image.rotate(angle, expand=True)elif distortion_type == 4:  # 透視變換(簡化版)# 簡單的上下偏移來模擬透視效果width, height = image.sizeshift = random.randint(5, 15)new_width = width + shiftnew_img = Image.new('RGB', (new_width, height), color='white')for x in range(width):for y in range(height):pixel = image.getpixel((x, y))# 計算偏移量,形成透視效果x_shift = int((x / width) * shift)if x + x_shift < new_width:new_img.putpixel((x + x_shift, y), pixel)return new_imgelif distortion_type == 5:  # 波浪效果(簡化版)width, height = image.sizenew_img = Image.new('RGB', (width, height), color='white')for x in range(width):# 波浪效果的y偏移y_offset = int(3 * math.sin(x * 0.1))for y in range(height):if 0 <= y + y_offset < height:pixel = image.getpixel((x, y))new_img.putpixel((x, y + y_offset), pixel)return new_imgelse:  # 默認無扭曲return imagedef get_text_size(text: str, font: ImageFont.FreeTypeFont) -> Tuple[int, int]:"""替代textsize()方法,獲取文本的寬度和高度:param text: 文本內容:param font: 字體對象:return: 文本的寬度和高度"""# 創建一個臨時圖像和繪圖對象temp_img = Image.new('RGB', (1, 1))draw = ImageDraw.Draw(temp_img)# 對于較新的Pillow版本,使用textbbox方法try:# 獲取文本邊界框 (left, top, right, bottom)bbox = draw.textbbox((0, 0), text, font=font)return (bbox[2] - bbox[0], bbox[3] - bbox[1])except AttributeError:# 對于較舊的Pillow版本,回退到textsize方法return draw.textsize(text, font=font)def generate_text_image(text: str,font_path: Optional[str],background_type: int = 0,distortion_type: int = 0,image_width: Optional[int] = None,image_height: Optional[int] = None
) -> Image.Image:"""生成單張文本圖像"""# 設置字體和大小font_size = 64try:if font_path:font = ImageFont.truetype(font_path, font_size)else:# 使用默認字體font = ImageFont.load_default()except Exception as e:print(f"字體加載失敗,使用默認字體: {e}")font = ImageFont.load_default()# 計算文本大小 - 使用我們自己實現的方法兼容新舊版本text_width, text_height = get_text_size(text, font)# 確定圖像大小if image_width is None:image_width = text_width + 40  # 左右邊距if image_height is None:image_height = max(text_height + 20, 80)  # 上下邊距,最小高度80# 創建背景bg = create_background(image_width, image_height, background_type)# 在背景上繪制文本draw = ImageDraw.Draw(bg)text_x = (image_width - text_width) // 2  # 水平居中text_y = (image_height - text_height) // 2  # 垂直居中# 隨機文本顏色(深色為主,確保與背景對比)text_color = (random.randint(0, 100),random.randint(0, 100),random.randint(0, 100))draw.text((text_x, text_y), text, font=font, fill=text_color)# 添加扭曲效果result = add_distortion(bg, distortion_type)# 隨機添加輕微噪聲if random.random() < 0.3:  # 30%概率添加噪聲draw = ImageDraw.Draw(result)width, height = result.sizefor _ in range(width * height // 500):  # 噪聲點數量x = random.randint(0, width - 1)y = random.randint(0, height - 1)color = (random.randint(0, 255), random.randint(0, 255), random.randint(0, 255))draw.point((x, y), fill=color)return resultdef generate_text_images(output_dir: str = "dataset/rec/train",count: int = 1000,length: int = 5,font_dir: str = "fonts/",background_type: int = 2,distortion_type: int = 1,image_width: int = None,image_height: int = None
):"""生成合成文本圖像并保存到指定目錄:param output_dir: 圖像保存目錄:param count: 生成圖像數量:param length: 每個圖像中的文本長度:param font_dir: 字體文件目錄:param background_type: 背景類型 (0-4):param distortion_type: 扭曲類型 (0-5):param image_width: 圖像寬度,None為自動:param image_height: 圖像高度,None為自動"""# 檢查并準備輸出目錄if not create_directories(output_dir):print("無法準備輸出目錄,程序退出")return# 獲取可用字體fonts = get_available_fonts(font_dir)try:print(f"開始生成 {count} 張文本圖像...")# 生成并保存圖像for i in range(1, count + 1):# 生成隨機文本text = generate_random_text(length, include_chinese=True)# 隨機選擇字體(處理沒有可用字體的情況)font_path = Noneif fonts:  # 只有當字體列表非空時才進行隨機選擇font_path = random.choice(fonts)# 隨機變化一些參數增加多樣性current_bg_type = background_type if background_type != -1 else random.randint(0, 4)current_distortion_type = distortion_type if distortion_type != -1 else random.randint(0, 5)# 生成圖像img = generate_text_image(text=text,font_path=font_path,background_type=current_bg_type,distortion_type=current_distortion_type,image_width=image_width,image_height=image_height)# 生成唯一文件名filename = f"{text}_{uuid.uuid4()}.jpg"file_path = os.path.join(output_dir, filename)# 保存圖像img.save(file_path)# 顯示進度if i % 100 == 0 or i == count:print(f"已生成 {i}/{count} 張圖像")print(f"所有圖像已成功生成并保存到 {output_dir}")except Exception as e:print(f"生成圖像時出錯: {e}")exit(1)def main():# 解析命令行參數parser = argparse.ArgumentParser(description='生成合成文本圖像用于OCR訓練')parser.add_argument('--output-dir', type=str, default='dataset/rec/train',help='圖像保存目錄')parser.add_argument('--count', type=int, default=1000,help='生成圖像數量')parser.add_argument('--length', type=int, default=5,help='每個圖像中的文本長度')parser.add_argument('--font-dir', type=str, default='fonts/',help='字體文件目錄')parser.add_argument('--background-type', type=int, default=-1,help='背景類型 (0-4,-1表示隨機)')parser.add_argument('--distortion-type', type=int, default=-1,help='扭曲類型 (0-5,-1表示隨機)')args = parser.parse_args()# 檢查依賴check_dependencies()# 生成圖像generate_text_images(output_dir=args.output_dir,count=args.count,length=args.length,font_dir=args.font_dir,background_type=args.background_type,distortion_type=args.distortion_type)if __name__ == "__main__":main()
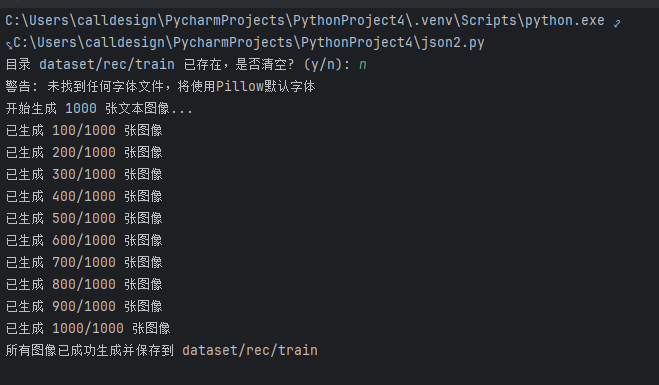
運行結果:
?
2. 數據預處理與增強
- 預處理:
- 圖像歸一化:統一尺寸(如檢測輸入 640x640,識別輸入 32x100)
- 灰度化:減少通道數(OCR 對顏色不敏感,單通道可加速訓練)
- 去噪:用 OpenCV 的
cv2.medianBlur()去除椒鹽噪聲
- 增強(關鍵!提升模型魯棒性)
代碼:
import cv2
import numpy as npdef augment_image(img):# 1. 隨機旋轉(-15°~15°)angle = np.random.uniform(-15, 15)h, w = img.shape[:2]M = cv2.getRotationMatrix2D((w/2, h/2), angle, 1)img = cv2.warpAffine(img, M, (w, h), borderValue=(255,255,255))  # 白色填充# 2. 隨機縮放(0.8~1.2倍)scale = np.random.uniform(0.8, 1.2)img = cv2.resize(img, (int(w*scale), int(h*scale)))# 3. 隨機加噪(高斯噪聲)if np.random.random() < 0.3:noise = np.random.normal(0, 10, img.shape).astype(np.uint8)img = cv2.add(img, noise)# 4. 隨機亮度調整img = cv2.cvtColor(img, cv2.COLOR_BGR2HSV)img[:, :, 2] = img[:, :, 2] * np.random.uniform(0.5, 1.5)img = np.clip(img, 0, 255).astype(np.uint8)img = cv2.cvtColor(img, cv2.COLOR_HSV2BGR)return img
三、模型設計(文本檢測 + 文本識別雙模塊)
1. 文本檢測模型(定位圖像中的文字區域)
推薦?DB(Differentiable Binarization,可微分二值化)?模型(速度快、精度高,適合實時場景):
- 原理:通過 CNN 生成文本區域的概率圖和閾值圖,動態計算二值化結果,解決傳統二值化閾值固定的問題。
- 網絡結構:
- backbone:ResNet-18(輕量)/ResNet-50(高精度)
- 頸部:FPN(特征金字塔網絡,融合多尺度特征)
- 頭部:輸出概率圖(文本區域得分)、閾值圖(二值化閾值)、近似二值圖(最終文本區域)
- 核心代碼(PyTorch):
import torch
import torch.nn as nn
from torchvision.models import resnet18class DBHead(nn.Module):def __init__(self, in_channels=256):super().__init__()self.conv1 = nn.Conv2d(in_channels, 64, 3, padding=1)self.relu = nn.ReLU()self.conv_prob = nn.Conv2d(64, 1, 1)  # 概率圖(1通道)self.conv_thresh = nn.Conv2d(64, 1, 1)  # 閾值圖(1通道)self.sigmoid = nn.Sigmoid()def forward(self, x):x = self.relu(self.conv1(x))prob = self.sigmoid(self.conv_prob(x))  # 概率圖(0~1)thresh = self.sigmoid(self.conv_thresh(x))  # 閾值圖(0~1)# 計算近似二值圖(公式來自DB論文)binary = torch.reciprocal(1 + torch.exp(-50 * (prob - thresh)))return prob, thresh, binary# 完整DB模型
class DBModel(nn.Module):def __init__(self):super().__init__()# 加載ResNet18作為backbone,取前4個stage的輸出self.backbone = resnet18(pretrained=True)self.layer1 = self.backbone.layer1  # 1/4分辨率self.layer2 = self.backbone.layer2  # 1/8self.layer3 = self.backbone.layer3  # 1/16self.layer4 = self.backbone.layer4  # 1/32# FPN融合多尺度特征self.fpn = nn.ModuleList([nn.Conv2d(256, 256, 1),  # 融合layer1輸出(256通道)nn.Conv2d(512, 256, 1),  # 融合layer2輸出(512通道)nn.Conv2d(1024, 256, 1), # 融合layer3輸出(1024通道)nn.Conv2d(2048, 256, 1)  # 融合layer4輸出(2048通道)])self.db_head = DBHead()def forward(self, x):#  backbone輸出x = self.backbone.conv1(x)x = self.backbone.bn1(x)x = self.backbone.relu()x = self.backbone.maxpool(x)c1 = self.layer1(x)  # 1/4c2 = self.layer2(c1) # 1/8c3 = self.layer3(c2) # 1/16c4 = self.layer4(c3) # 1/32# FPN融合(上采樣到1/4分辨率)f1 = self.fpn[0](c1)f2 = nn.functional.interpolate(self.fpn[1](c2), size=f1.shape[2:], mode='bilinear')f3 = nn.functional.interpolate(self.fpn[2](c3), size=f1.shape[2:], mode='bilinear')f4 = nn.functional.interpolate(self.fpn[3](c4), size=f1.shape[2:], mode='bilinear')fpn_out = f1 + f2 + f3 + f4  # 融合特征# DB頭輸出prob, thresh, binary = self.db_head(fpn_out)return prob, thresh, binary
2. 文本識別模型(將文本區域轉換為字符串)
推薦?CRNN(Convolutional Recurrent Neural Network)?+?CTC Loss(適合不定長文本,無需對齊標注):
- 原理:
- CNN 提取文本圖像的特征序列(如 32x100 的圖像→512x25 的特征序列)
- RNN(LSTM/GRU)建模序列上下文依賴
- CTC Loss 解決輸入序列(特征)與輸出序列(文本)的對齊問題
代碼:
class CRNN(nn.Module):def __init__(self, num_classes=37): # 36個字符(0-9,A-Z)+1個空白符super().__init__()# CNN部分(輸入1x32x100的灰度圖)self.cnn = nn.Sequential(nn.Conv2d(1, 64, 3, 1, 1), # 64x32x100nn.ReLU(),nn.MaxPool2d(2, 2), # 64x16x50nn.Conv2d(64, 128, 3, 1, 1),# 128x16x50nn.ReLU(),nn.MaxPool2d(2, 2), # 128x8x25nn.Conv2d(128, 256, 3, 1, 1),# 256x8x25nn.BatchNorm2d(256),nn.ReLU(),nn.Conv2d(256, 256, 3, 1, 1),# 256x8x25nn.ReLU(),nn.MaxPool2d((2,2), (2,1), (0,1)), # 256x4x25nn.Conv2d(256, 512, 3, 1, 1),# 512x4x25nn.BatchNorm2d(512),nn.ReLU(),nn.Conv2d(512, 512, 3, 1, 1),# 512x4x25nn.ReLU(),nn.MaxPool2d((2,2), (2,1), (0,1)), # 512x2x25nn.Conv2d(512, 512, 2, 1, 0),# 512x1x25(序列長度25)nn.BatchNorm2d(512),nn.ReLU())# RNN部分(雙向LSTM)self.rnn = nn.LSTM(input_size=512,hidden_size=256,num_layers=2,bidirectional=True,batch_first=True)# 輸出層(映射到字符類別)self.fc = nn.Linear(512, num_classes) # 雙向LSTM輸出512(256*2)def forward(self, x):# x: (batch_size, 1, 32, 100)x = self.cnn(x) # (batch_size, 512, 1, 25)x = x.squeeze(2) # (batch_size, 512, 25)x = x.permute(0, 2, 1) # (batch_size, 25, 512),序列長度25# RNNx, _ = self.rnn(x) # (batch_size, 25, 512)# 輸出層x = self.fc(x) # (batch_size, 25, 37)return x補充知識:?
這里顯示一個1D——CNN的處理序列:
代碼如下:
import torch #導入PyTorch深度學習框架
import torch.nn as nn #導入PyTorch的神級網絡模塊#Torch提供了張量計算和GPU加速功能,nn模塊包含了構建神經網路的基本組件# 定義1D-CNN處理序列
class SequenceCNN(nn.Module): #定義繼承nn.Module的模型類(PyTorch模型的標準寫法)def __init__(self, input_dim, hidden_dim, kernel_size=3): #初始化方法,定義模型參數super().__init__() #調用父類nn.Module的初始 方法,必須寫# 輸入:(batch_size, seq_len, input_dim) → 需轉置為 (batch_size, input_dim, seq_len)self.conv1d = nn.Conv1d(in_channels=input_dim, # 輸入特征維度(如詞嵌入維度)每個序列元素特征數out_channels=hidden_dim, # 輸出特征維度 卷積后每個位置特征數kernel_size=kernel_size, # 卷積核長度(局部窗口大小)padding=1 # 保持輸出序列長度與輸入一致,確保卷積后序列長度不變) # input_dim:輸入序列中每個元素特征維度 , hidden_dim:卷積后每個元素特征維度 kernel_size=3表示每次滑動會覆蓋序列連續3個元素,提取局部關鍵特征self.relu = nn.ReLU() #激活函數,引入非線性特征def forward(self, x): #前向傳播方法,定義數據流動路徑# x shape: (batch_size, seq_len, input_dim) → 轉置為1D-CNN要求的格式x = x.transpose(1, 2) # 轉置后形狀(batch_size, input_dim, seq_len)x = self.conv1d(x) # 經過ID卷積后形狀(batch_size, hidden_dim, seq_len)x = self.relu(x) # 應用激活函數,形狀不變return x.transpose(1, 2) # 轉回原始序列格式 (batch_size, seq_len, hidden_dim)# 測試:處理長度為10的序列,每個元素維度為5
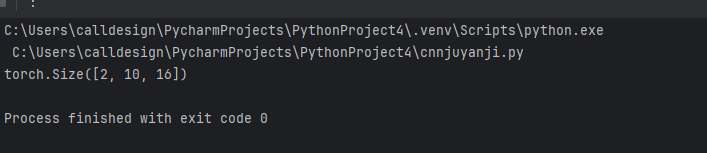
seq = torch.randn(2, 10, 5) # ,形狀:(batch_size=2, seq_len=10, input_dim=5)
model = SequenceCNN(input_dim=5, hidden_dim=16) # 實例化模型,參數匹配輸入
output = model(seq) #前向傳播,得到輸出
print(output.shape) # 輸出:(2, 10, 16) → 保留序列長度,特征維度變為16運行結果:
?

(IIC驅動開發))


GameMode之PlayerController)
與客戶端渲染(CSR)的區別及解決方案)


NDK進階及性能優化)


)
