文章目錄
- AI(學習筆記第六課) 使用langchain進行AI開發 load documents(csv和文件夾)
- 學習內容:
- 1.load documents(csv)
- 1.1 學習`url`
- 1.2 `load csv`文件
- 1.2.1 默認`load`
- 1.2.2 `csv`文件內容
- 1.2.2 執行`csv`文件的`load`
- 1.3 Customizing the CSV parsing and loading(自定義`loader`)
- 1.3.1 實現代碼
- 1.3.2 代碼執行
- 1.4 Specify a column to identify the document source(執行列來標明`source`)
- 1.4.1 實現`source`指定的代碼
- 1.4.2 執行`source`指定的代碼
- 1.3 使用`python`的`tempfile`
- 1.3.1 `tempfile`使用的代碼
- 1.3.2 代碼執行
- 2.load documents(from directory)
- 2.1 準備數據文件夾
- 2.2 文件夾`load`的代碼
- 2.3 `trouble shooting`
- 2.3.1 出現的問題
- 2.3.2 使用`git bash`進行安裝
- 2.4 執行文件夾`load`的代碼
AI(學習筆記第六課) 使用langchain進行AI開發 load documents(csv和文件夾)
- 使用
langchain如何解析csv文件
學習內容:
- 從
csv中load文件 - 從文件夾中
loader文件
1.load documents(csv)
1.1 學習url
- langchain的load documents(csv)文檔
- csv文件示例
1.2 load csv文件
1.2.1 默認load
from langchain_community.document_loaders.csv_loader import CSVLoader
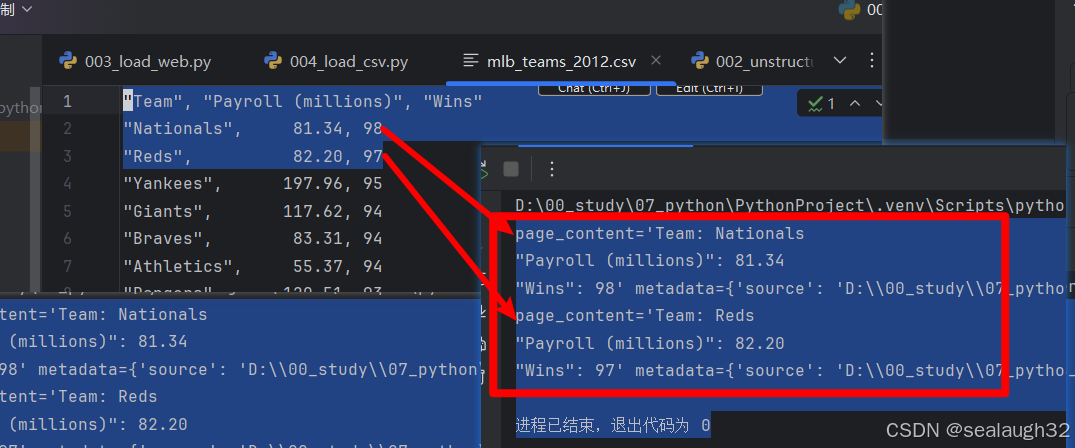
import asynciofile_path = r'D:\00_study\07_python\PythonProject\src' \r'\document_loaders\examples\mlb_teams_2012.csv'async def load_csv():loader = CSVLoader(file_path=file_path)data = loader.load()for record in data[:2]:print(record)asyncio.run(load_csv())
1.2.2 csv文件內容
這里的示例csv文件
"Team", "Payroll (millions)", "Wins"
"Nationals",     81.34, 98
"Reds",          82.20, 97
"Yankees",      197.96, 95
"Giants",       117.62, 94
"Braves",        83.31, 94
"Athletics",     55.37, 94
"Rangers",      120.51, 93
"Orioles",       81.43, 93
"Rays",          64.17, 90
"Angels",       154.49, 89
"Tigers",       132.30, 88
"Cardinals",    110.30, 88
"Dodgers",       95.14, 86
"White Sox",     96.92, 85
"Brewers",       97.65, 83
"Phillies",     174.54, 81
"Diamondbacks",  74.28, 81
"Pirates",       63.43, 79
"Padres",        55.24, 76
"Mariners",      81.97, 75
"Mets",          93.35, 74
"Blue Jays",     75.48, 73
"Royals",        60.91, 72
"Marlins",      118.07, 69
"Red Sox",      173.18, 69
"Indians",       78.43, 68
"Twins",         94.08, 66
"Rockies",       78.06, 64
"Cubs",          88.19, 61
"Astros",        60.65, 55
1.2.2 執行csv文件的load
對解析出來的data的前兩行的輸出。
1.3 Customizing the CSV parsing and loading(自定義loader)
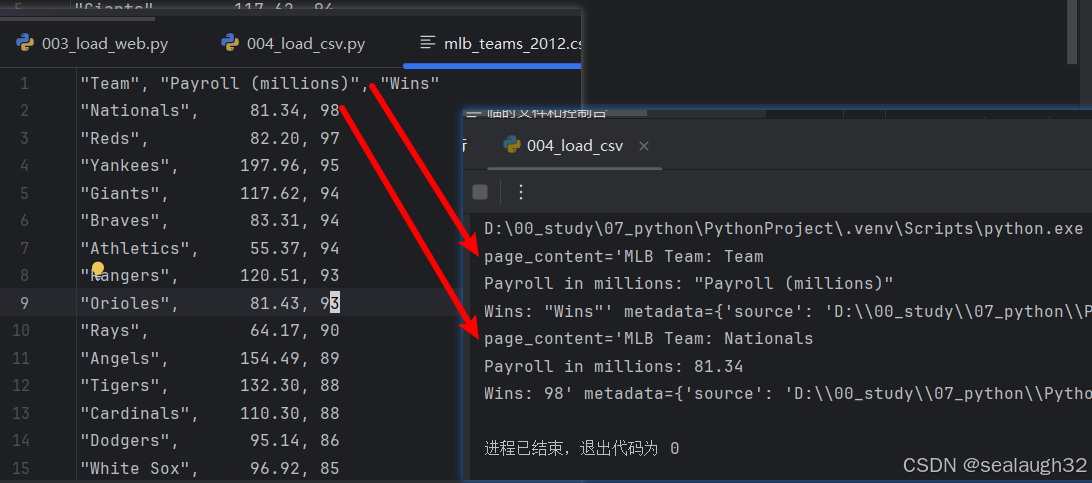
1.3.1 實現代碼
async def load_customized_csv():loader = CSVLoader(file_path=file_path,csv_args={"delimiter": ",","quotechar": '"',"fieldnames": ["MLB Team", "Payroll in millions", "Wins"],},)data = loader.load()for record in data[:2]:print(record)asyncio.run(load_customized_csv())
1.3.2 代碼執行
1.4 Specify a column to identify the document source(執行列來標明source)
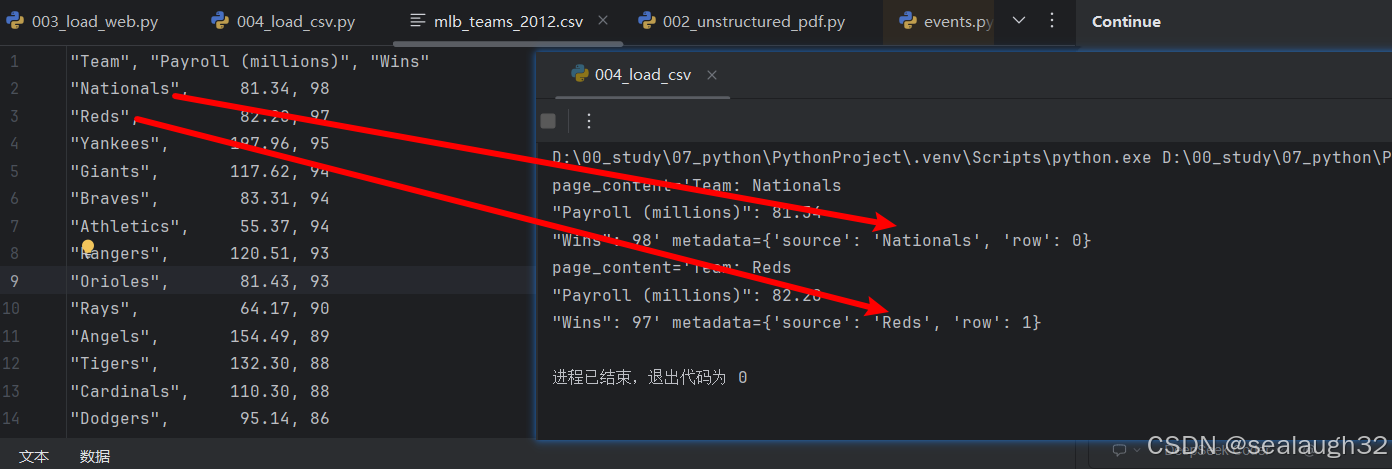
上面的例子看出,metadata中的source都是這個csv的所在文件的絕對路徑,那么如果想使用某一個column作為source也是可以的。
1.4.1 實現source指定的代碼
async def load_specify_source():loader = CSVLoader(file_path=file_path,source_column="Team")data = loader.load()for record in data[:2]:print(record)asyncio.run(load_specify_source())
1.4.2 執行source指定的代碼
1.3 使用python的tempfile
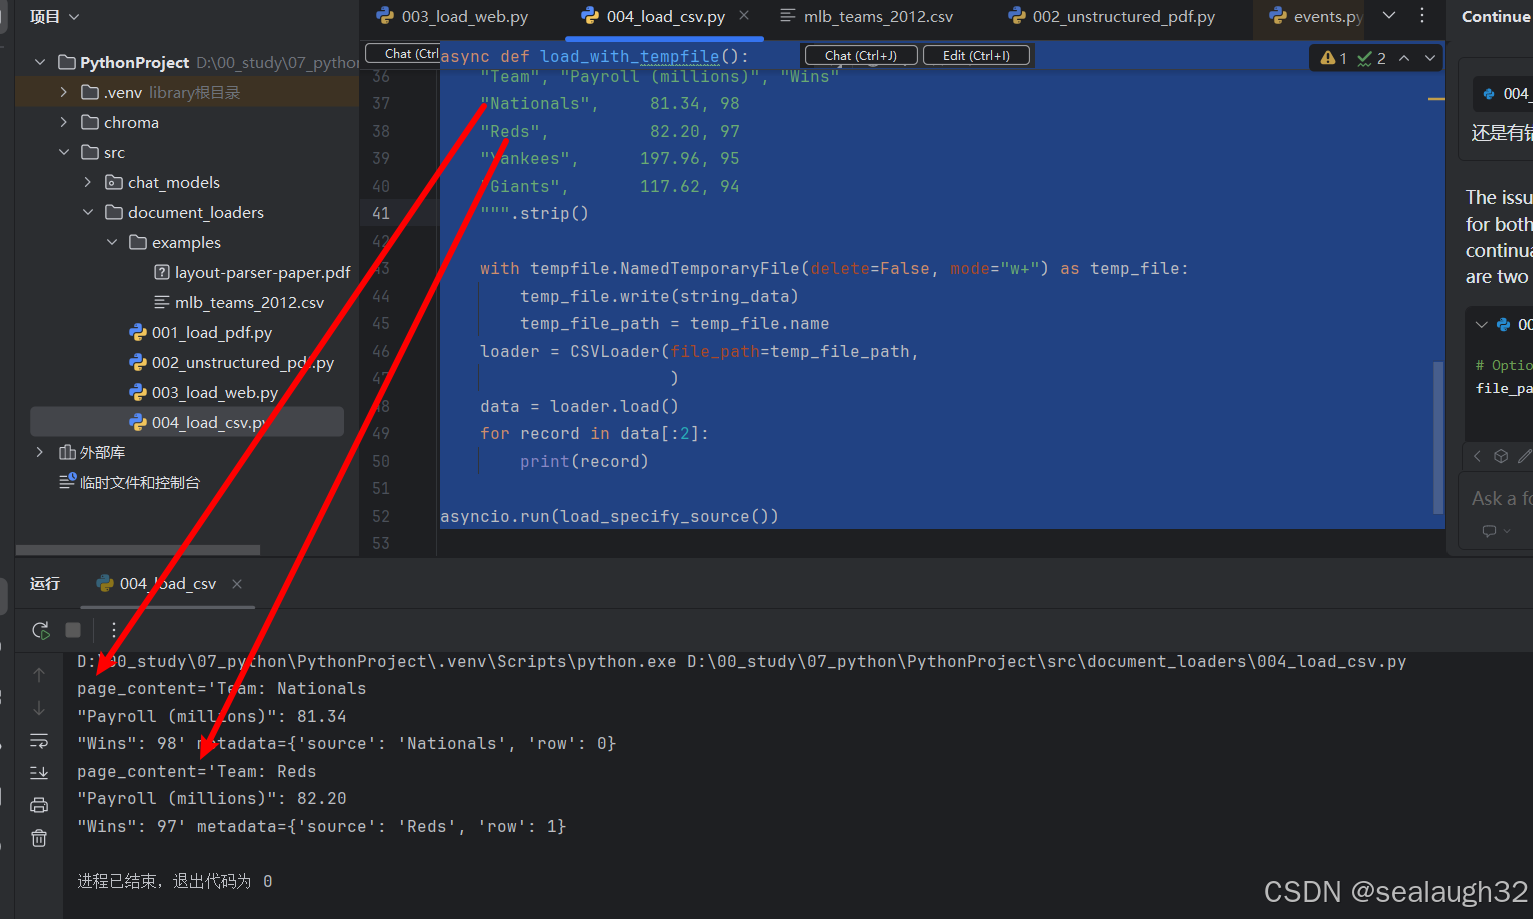
如果沒有文件,臨時使用內存變量進行模擬csv文件,進行load
1.3.1 tempfile使用的代碼
async def load_with_tempfile():string_data = """"Team", "Payroll (millions)", "Wins""Nationals", 81.34, 98"Reds", 82.20, 97"Yankees", 197.96, 95"Giants", 117.62, 94""".strip()with tempfile.NamedTemporaryFile(delete=False, mode="w+") as temp_file:temp_file.write(string_data)temp_file_path = temp_file.nameloader = CSVLoader(file_path=temp_file_path,)data = loader.load()for record in data[:2]:print(record)asyncio.run(load_specify_source())
1.3.2 代碼執行
2.load documents(from directory)
2.1 準備數據文件夾
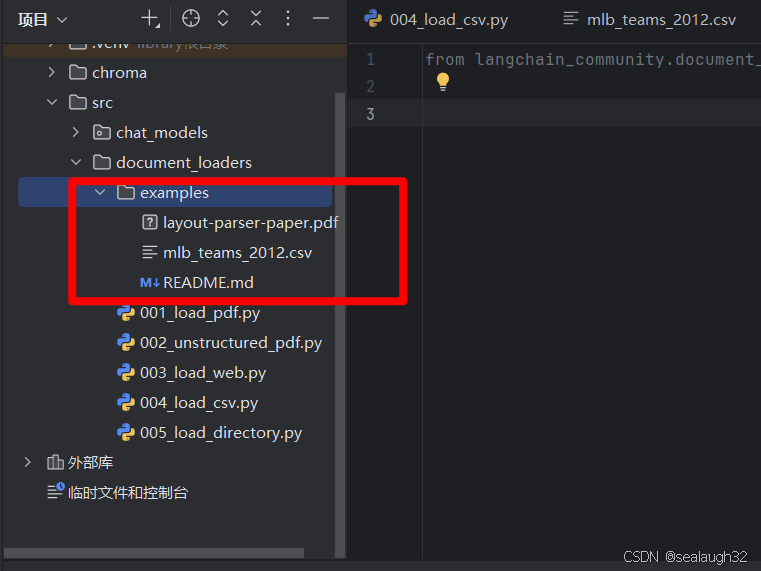
雖然這個文件夾就兩個文件,但是使用這個作為練習的目標文件夾。
2.2 文件夾load的代碼
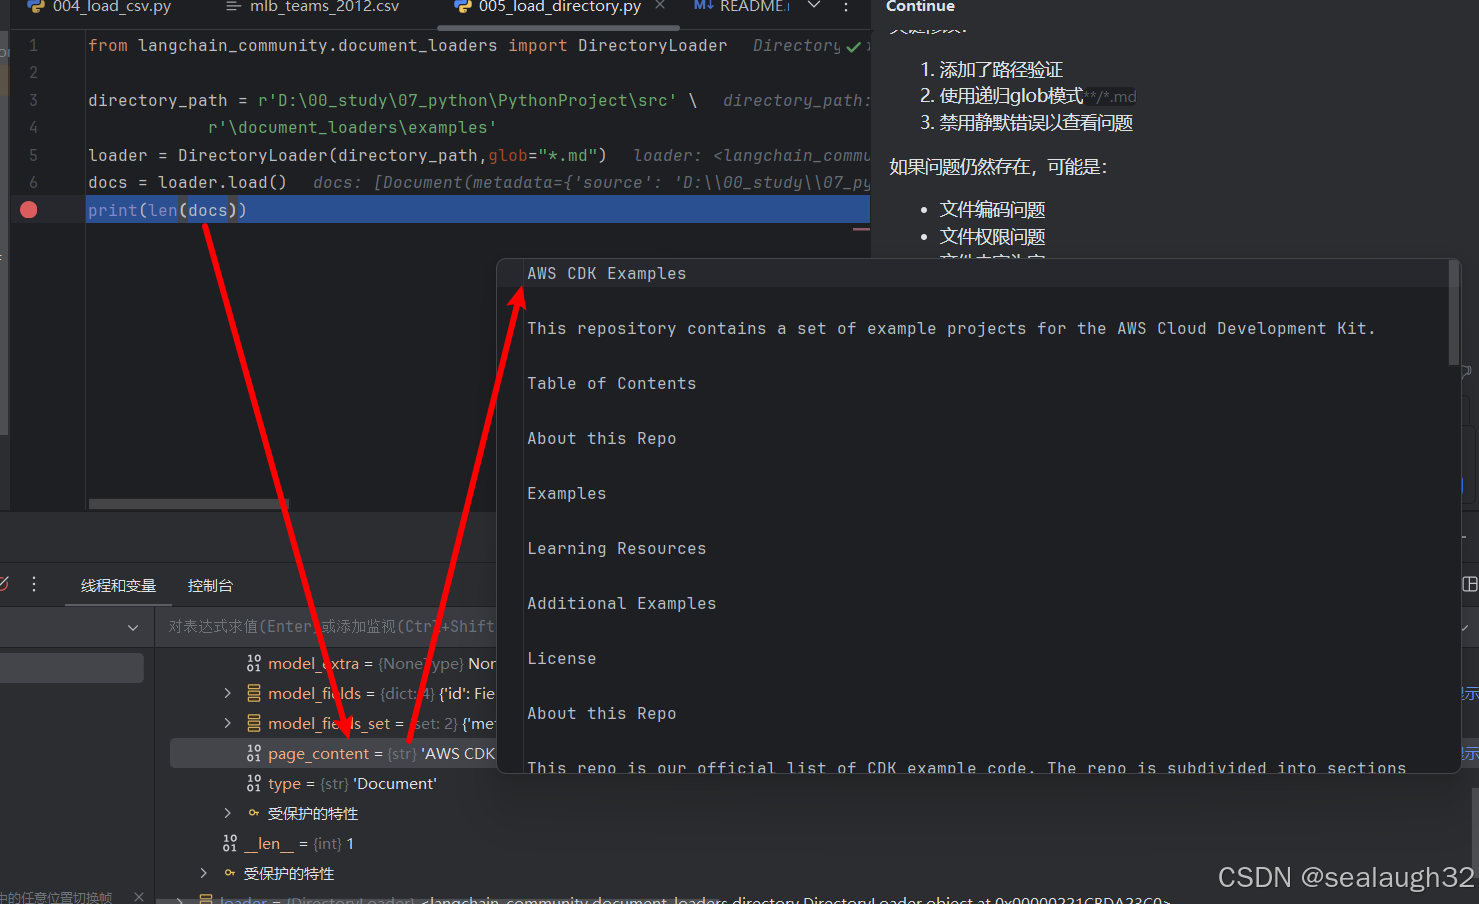
from langchain_community.document_loaders import DirectoryLoaderdirectory_path = r'D:\00_study\07_python\PythonProject\src' \r'\document_loaders\examples'
loader = DirectoryLoader(directory_path,glob="**/*.md")
docs = loader.load()
print(len(docs))
2.3 trouble shooting
2.3.1 出現的問題
這里,執行的時候發現出現錯誤,讓執行pip install "unstructured[md]",這時候通過pycharm的包管理的界面已經搜索不到了。
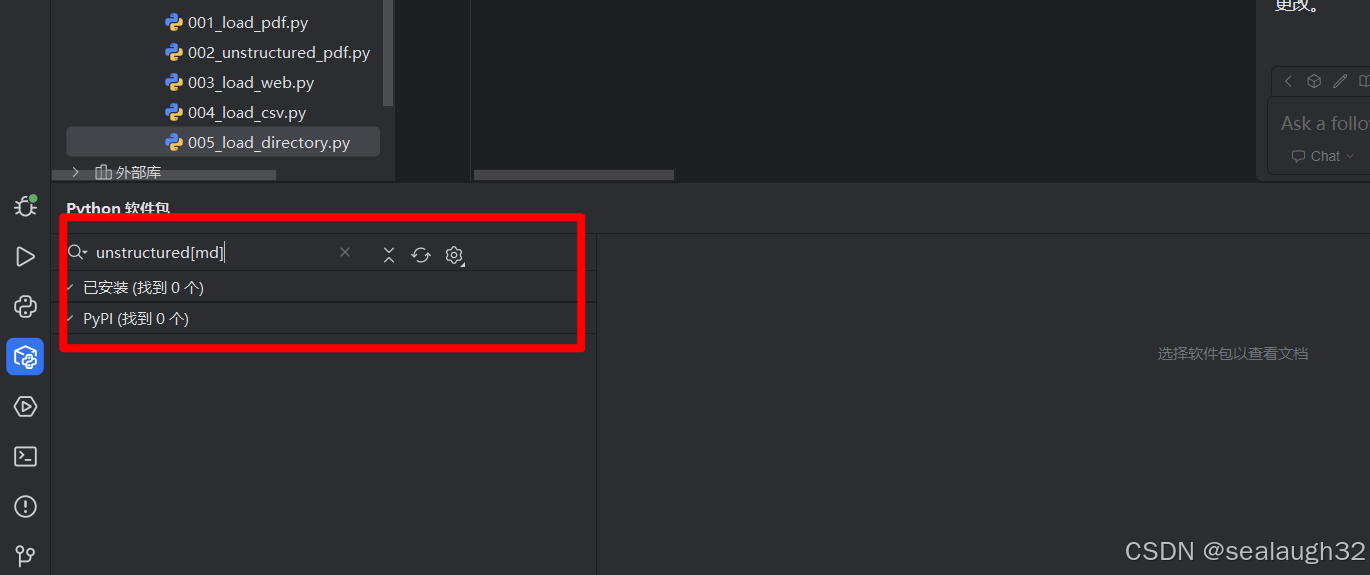
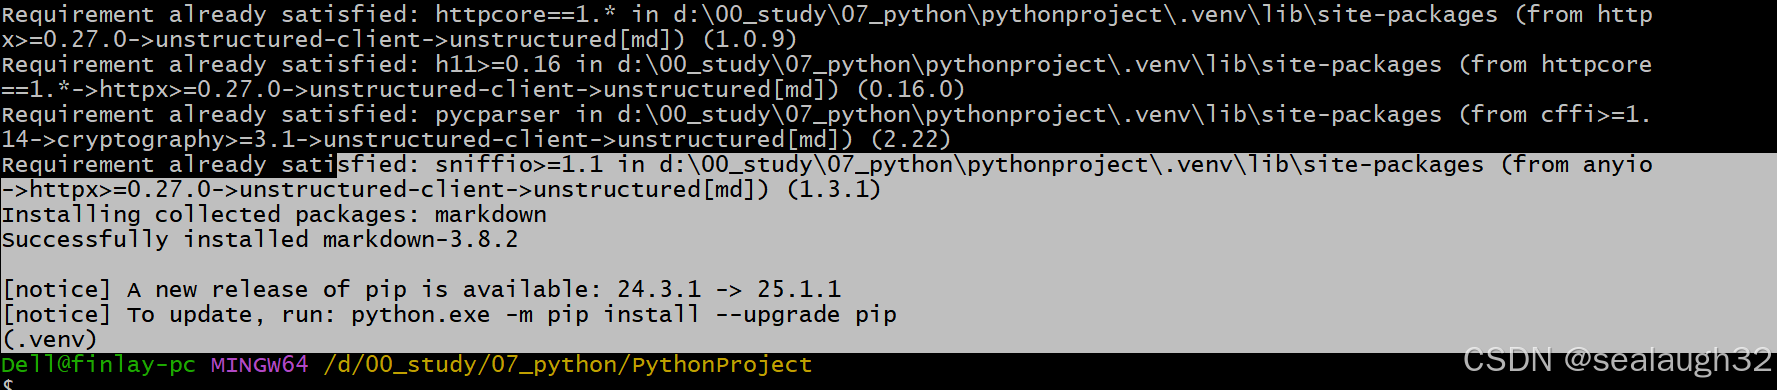
2.3.2 使用git bash進行安裝
沒有辦法,只能進行命令行的pip install "unstructured"。注意,這里的雙引號不能省略
- 進入
git bash - 激活
venvcd /d/00_study/07_python/PythonProject source ./venv/Scripts/activate - 檢查是
pip還是pip3
環境不同,有時候需要執行pip install,有時候需要執行pip3,所以需要檢查一下。
這里很清楚,如果為虛擬$ where pip C:\Users\Dell\AppData\Local\Microsoft\WindowsApps\pip.exe (.venv) Dell@finlay-pc MINGW64 /d/00_study/07_python/PythonProject$ where pip3 D:\00_study\07_python\PythonProject\.venv\Scripts\pip3.exe C:\Users\Dell\AppData\Local\Microsoft\WindowsApps\pip3.exe (.venv)python環境venv安裝需要的包,那么執行pip3 install - 執行
pip3 install
注意,安裝完畢之后,切換到pip3 install "unstructured[md]"pycharm的畫面,可以看到pycharm也在加載,自動進行更新
2.4 執行文件夾load的代碼
debug模式執行代碼,可以看到md文件已經被成功load。
)


)


![git fork的項目遠端標準協作流程 倉庫設置[設置成upstream]](http://pic.xiahunao.cn/git fork的項目遠端標準協作流程 倉庫設置[設置成upstream])
![[FFmpeg] 輸入輸出訪問 | 管道系統 | AVIOContext 與 URLProtocol | 門面模式](http://pic.xiahunao.cn/[FFmpeg] 輸入輸出訪問 | 管道系統 | AVIOContext 與 URLProtocol | 門面模式)


)


