引言
人工智能(AI)技術的迅猛發展推動了各行各業的數字化轉型。圖像分類,作為計算機視覺領域的核心技術之一,能夠讓機器自動識別圖像中的物體、場景或特征,已廣泛應用于醫療診斷、安防監控、自動駕駛和電子商務等領域。
與此同時,.NET 平臺憑借其高效性、跨平臺能力和強大的 C# 編程語言支持,成為開發者構建企業級應用的首選技術棧。將 AI 圖像分類模型與 .NET 技術結合,不僅能充分發揮兩者的優勢,還能為開發者提供一種高效、直觀的實現方式。
本文將詳細介紹如何在 .NET 環境下使用 C# 部署和調用 AI 圖像分類模型。我們將從環境搭建、模型選擇,到模型調用,再到實際應用場景,逐步展開講解,并提供豐富的代碼示例和實踐指導,幫助開發者快速上手并應用到實際項目中。
準備工作
在開始實現圖像分類之前,我們需要準備必要的開發環境和工具。以下是所需的軟件和庫:
- Visual Studio:Visual Studio 2022。
- .NET SDK:安裝 .NET 6.0 或更高版本,確保支持最新的功能和性能優化。
- ML.NET:微軟提供的開源機器學習框架,專為 .NET 開發者設計,支持模型訓練和推理。
- 模型文件:我們將使用預訓練的圖像分類模型 tensorflow_inception_graph.pb。
安裝步驟
創建項目并添加依賴:在命令行中運行以下命令,創建一個控制臺應用程序并安裝必要的 NuGet 包:
dotnet new console -n ImageClassificationDemo
cd ImageClassificationDemo
dotnet add package Microsoft.ML
dotnet add package Microsoft.ML.ImageAnalytics
dotnet add package Microsoft.ML.TensorFlow
dotnet add package SciSharp.TensorFlow.Redist
完成以上步驟后,你的環境就準備好了。接下來,我們將選擇一個合適的圖像分類模型。
圖像分類模型的選擇
圖像分類模型是基于監督學習的神經網絡,其目標是將輸入圖像分配到預定義的類別中。在選擇模型時,我們需要考慮模型的性能、計算復雜度和適用場景。以下是幾種常見的圖像分類模型:
- 卷積神經網絡(CNN):如 LeNet、AlexNet 和 VGGNet,適合基本的圖像分類任務,但層數較深時可能面臨梯度消失問題。
- 殘差網絡(ResNet):通過引入殘差連接(skip connections),解決了深層網絡的訓練難題,適用于高精度分類任務。
- EfficientNet:通過平衡網絡深度、寬度和分辨率,提供高效的性能,適合資源受限的場景。
模型訓練與導出
考慮到時間和資源成本,我們將直接使用預訓練的 tensorflow_inception_graph.pb 模型。如果你有自定義需求,可以使用以下步驟訓練并導出模型:
- 數據準備:收集并標注圖像數據集,分為訓練集和驗證集。
- 訓練模型:使用 TensorFlow 或 PyTorch 等框架訓練模型。
- 導出模型:利用框架提供的導出工具導出模型。
在本文中,我們選擇 tensorflow_inception_graph.pb 作為示例模型,這是一種由Google開發的高性能卷積神經網絡(CNN)架構。
該模塊通過并行使用不同大小的卷積核(如1x1、3x3、5x5)和池化層,提取圖像的多尺度特征。這種設計提高了模型在圖像分類任務中的表現,同時保持了計算效率。支持 1000 個類別的分類,且可以輕松集成到 .NET 中。
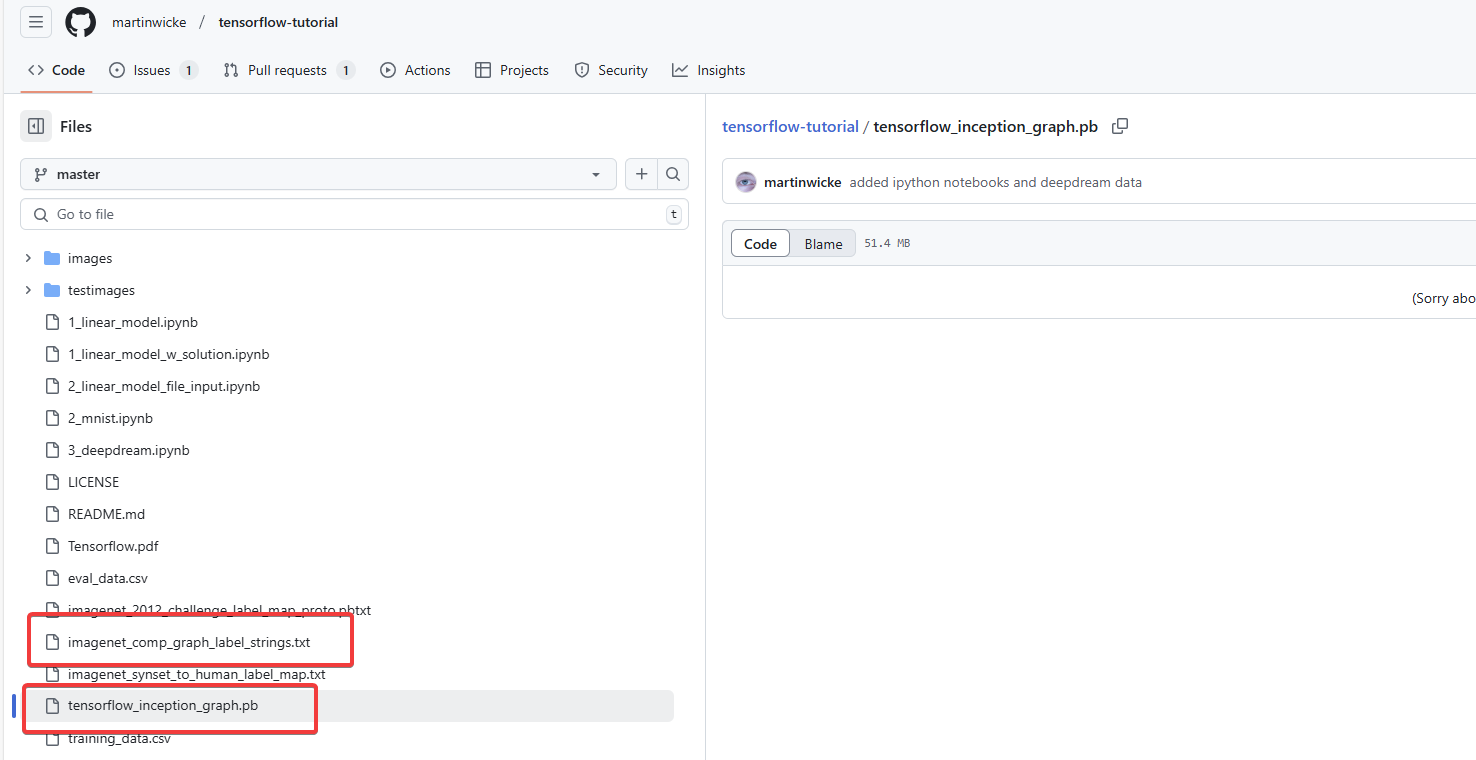
大家可以直接點擊 tensorflow_inception_graph.pb 下載(文章最后也有下載方式)預訓練的模型文件和分類文件,并將其放入項目目錄中。
也可以到github上下載(文章最后也有下載方式),里面的內容相對來說也更豐富些。
在 .NET 中調用模型
現在,我們進入核心部分:在 .NET 中調用 tensorflow_inception_graph.pb。以下是逐步實現的過程。
1. 創建 .NET 項目
使用命令行創建一個控制臺應用,項目基本結構如下:
ImageClassificationDemo/
├── ImageClassificationDemo.csproj
├── Program.cs
├── assets/inputs/inception/tensorflow_inception_graph.pb
├── assets/inputs/inception/imagenet_comp_graph_label_strings.txt
2. 定義輸入和輸出數據結構
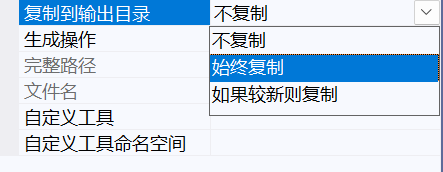
如果在運行的時候報錯說找不到模型或者label文件,可以進行如下操作:
輸入類中定義數據的結構如下,后續會使用 TextLoader 加載數據時引用該類型。此處的類名為 ImageNetData:
public class ImageNetData{[LoadColumn(0)]public string ImagePath;[LoadColumn(1)]public string Label;public static IEnumerable<ImageNetData> ReadFromCsv(string file, string folder){return File.ReadAllLines(file).Select(x => x.Split('\t')).Select(x => new ImageNetData { ImagePath = Path.Combine(folder, x[0]), Label = x[1] } );}}public class ImageNetDataProbability : ImageNetData{public string PredictedLabel;public float Probability { get; set; }}
需要強調的是,ImageNetData 類中的標簽在使用 TensorFlow 模型進行評分時并沒有真正使用。而是在測試預測時使用它,這樣就可以將每個樣本數據的實際標簽與 TensorFlow 模型提供的預測標簽進行比較。
輸出類的結構如下:
public class ImageNetPrediction
{[ColumnName(TFModelScorer.InceptionSettings.outputTensorName)]public float[] PredictedLabels;
}
Inception 模型還需要幾個傳入的默認參數:
public struct ImageNetSettings
{public const int imageHeight = 224;public const int imageWidth = 224;public const float mean = 117;public const bool channelsLast = true;
}
3. 定義 estimator 管道
在處理深度神經網絡時,必須使圖像適應網絡期望的格式。這就是圖像被調整大小然后轉換的原因(主要是像素值在所有R,G,B通道上被歸一化)。
var pipeline = mlContext.Transforms.LoadImages(outputColumnName: "input", imageFolder: imagesFolder, inputColumnName: nameof(ImageNetData.ImagePath)).Append(mlContext.Transforms.ResizeImages(outputColumnName: "input", imageWidth: ImageNetSettings.imageWidth, imageHeight: ImageNetSettings.imageHeight, inputColumnName: "input")).Append(mlContext.Transforms.ExtractPixels(outputColumnName: "input", interleavePixelColors: ImageNetSettings.channelsLast, offsetImage: ImageNetSettings.mean)).Append(mlContext.Model.LoadTensorFlowModel(modelLocation).ScoreTensorFlowModel(outputColumnNames: new[] { "softmax2" }, inputColumnNames: new[] { "input" },addBatchDimensionInput:true));
運行代碼后,模型將被成功加載到內存中,接下來我們可以調用它進行圖像分類。
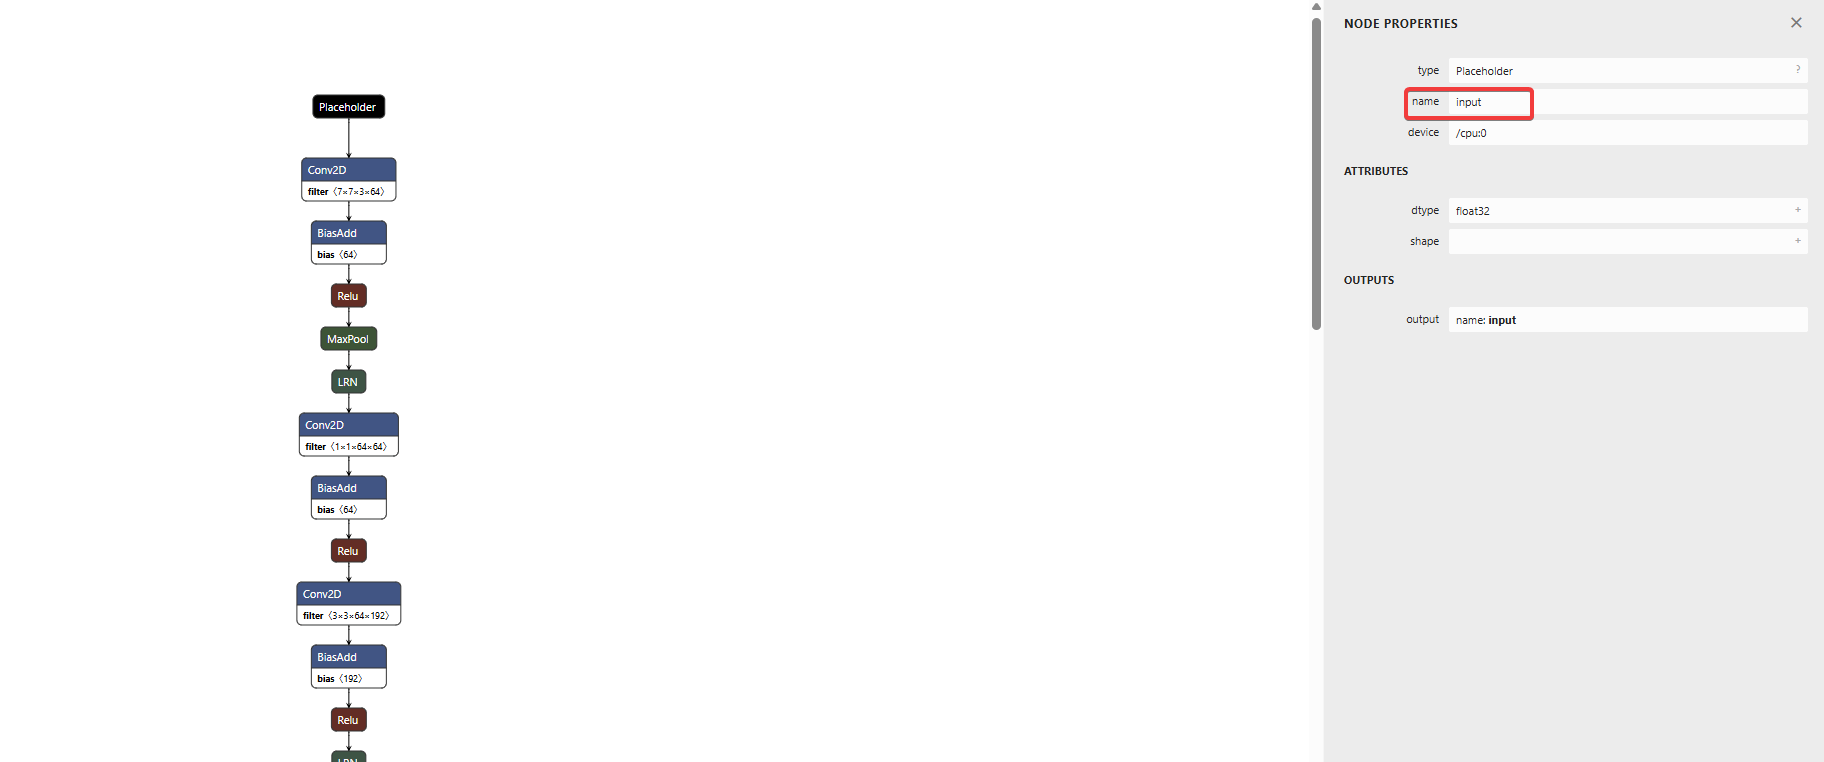
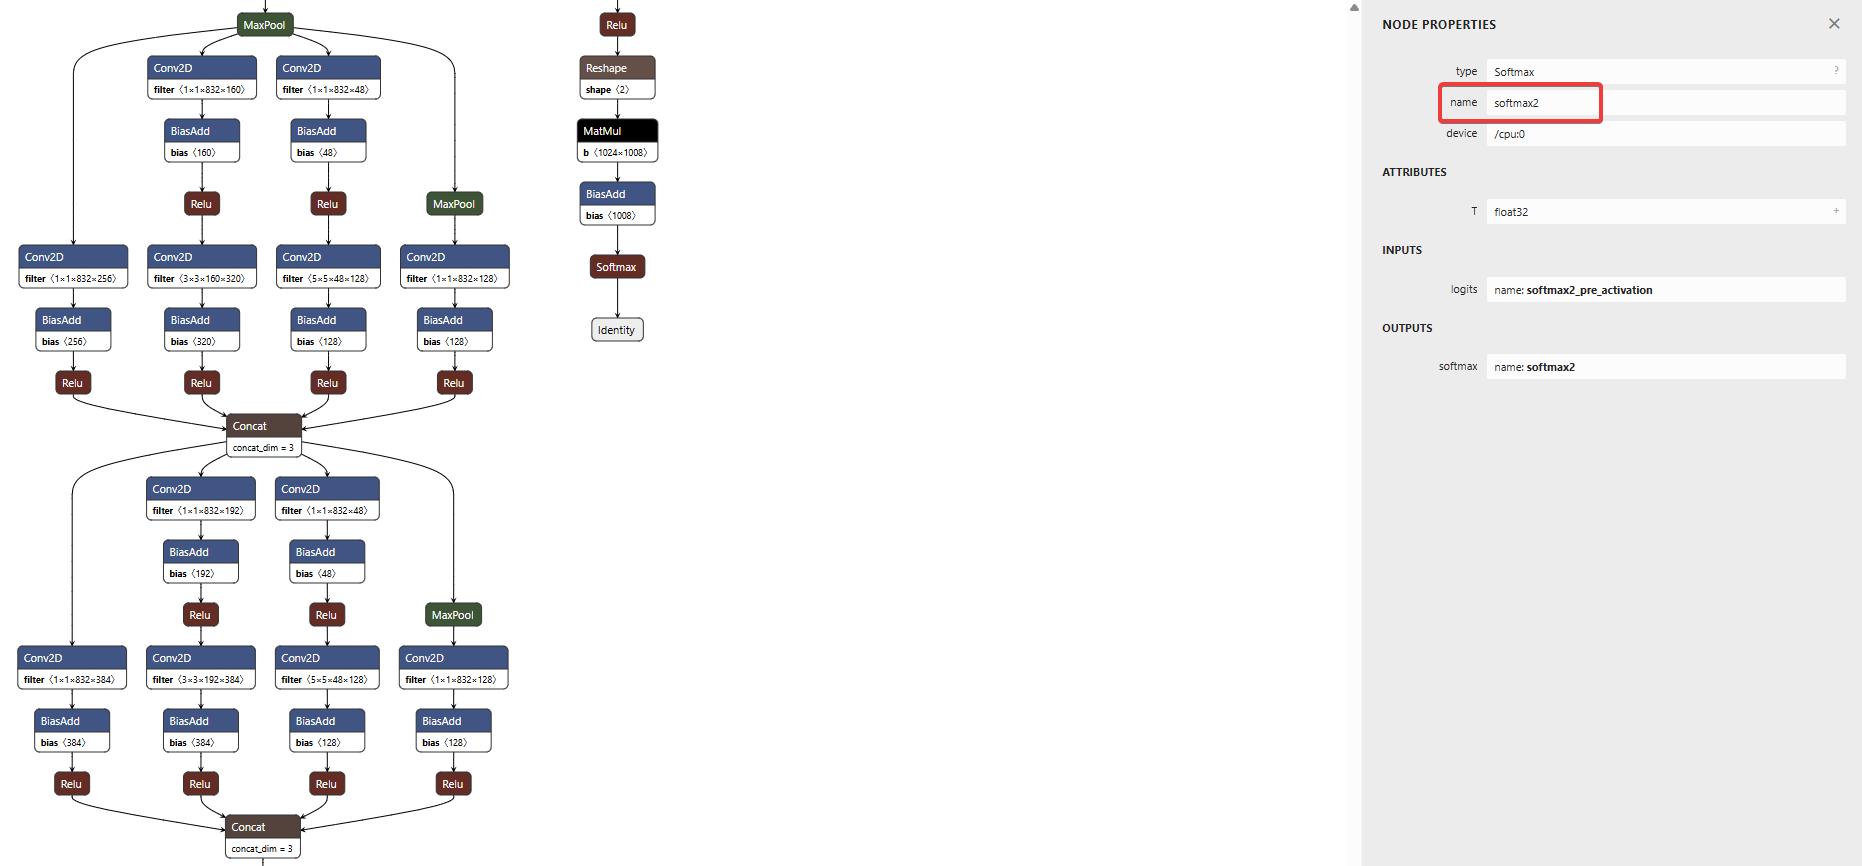
通常情況下,這里經常報的錯就是輸入/輸出節點的名稱不正確,你可以通過 Netron (https://netron.app/)工具查看輸入/輸出節點的名稱。
因為這兩個節點的名稱后面會在 estimator 的定義中使用:在 inception 網絡的情況下,輸入張量命名為 ‘input’,輸出命名為 ‘softmax2’。
下圖是通過 Netron 讀取的 tensorflow_inception_graph.pb 模型分析圖:
4. 提取預測結果
填充 estimator 管道
ITransformer model = pipeline.Fit(data);
var predictionEngine = mlContext.Model.CreatePredictionEngine<ImageNetData, ImageNetPrediction>(model);
當獲得預測結果后,我們會在屬性中得到一個浮點數數組。數組中的每個位置都會分配到一個標簽。
例如,如果模型有5個不同的標簽,則數組將為length = 5。數組中的每個位置都表示標簽在該位置的概率;所有數組值(概率)的和等于1。
然后,您需要選擇最大的值(概率),并檢查配給了該位置的那個以填充 estimator 管道標簽。
調用模型進行圖像分類
接下來我們需要編寫代碼來加載圖像、進行預測并解析結果。
1. 準備素材與分類文件
定義圖像文件夾目錄和圖像分類目錄。以下代碼加載并預處理圖像:
string assetsRelativePath = @"../../../assets";
string assetsPath = GetAbsolutePath(assetsRelativePath);string tagsTsv = Path.Combine(assetsPath, "inputs", "images", "tags.tsv");
string imagesFolder = Path.Combine(assetsPath, "inputs", "images");
string inceptionPb = Path.Combine(assetsPath, "inputs", "inception", "tensorflow_inception_graph.pb");
string labelsTxt = Path.Combine(assetsPath, "inputs", "inception", "imagenet_comp_graph_label_strings.txt");
2. 加載模型
private PredictionEngine<ImageNetData, ImageNetPrediction> LoadModel(string dataLocation, string imagesFolder, string modelLocation)
{ConsoleWriteHeader("Read model");Console.WriteLine($"Model location: {modelLocation}");Console.WriteLine($"Images folder: {imagesFolder}");Console.WriteLine($"Training file: {dataLocation}");Console.WriteLine($"Default parameters: image size=({ImageNetSettings.imageWidth},{ImageNetSettings.imageHeight}), image mean: {ImageNetSettings.mean}");var data = mlContext.Data.LoadFromTextFile<ImageNetData>(dataLocation, hasHeader: true);var pipeline = mlContext.Transforms.LoadImages(outputColumnName: "input", imageFolder: imagesFolder, inputColumnName: nameof(ImageNetData.ImagePath)).Append(mlContext.Transforms.ResizeImages(outputColumnName: "input", imageWidth: ImageNetSettings.imageWidth, imageHeight: ImageNetSettings.imageHeight, inputColumnName: "input")).Append(mlContext.Transforms.ExtractPixels(outputColumnName: "input", interleavePixelColors: ImageNetSettings.channelsLast, offsetImage: ImageNetSettings.mean)).Append(mlContext.Model.LoadTensorFlowModel(modelLocation).ScoreTensorFlowModel(outputColumnNames: new[] { "softmax2" },inputColumnNames: new[] { "input" }, addBatchDimensionInput:true));ITransformer model = pipeline.Fit(data);var predictionEngine = mlContext.Model.CreatePredictionEngine<ImageNetData, ImageNetPrediction>(model);return predictionEngine;
}
3. 解析輸出結果
protected IEnumerable<ImageNetData> PredictDataUsingModel(string testLocation, string imagesFolder, string labelsLocation, PredictionEngine<ImageNetData, ImageNetPrediction> model)
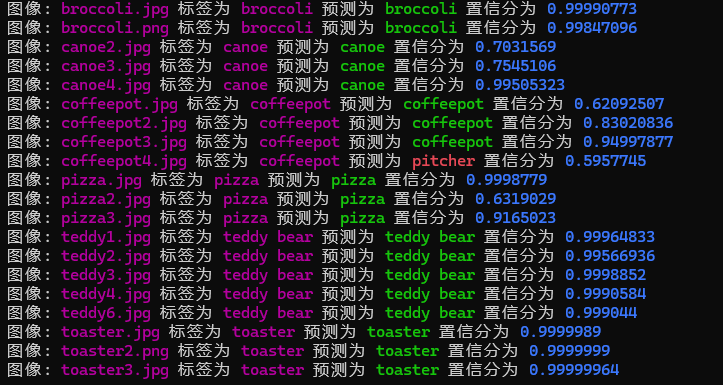
{ConsoleWriteHeader("Classify images");Console.WriteLine($"Images folder: {imagesFolder}");Console.WriteLine($"Training file: {testLocation}");Console.WriteLine($"Labels file: {labelsLocation}");var labels = ReadLabels(labelsLocation);var testData = ImageNetData.ReadFromCsv(testLocation, imagesFolder);foreach (var sample in testData){var probs = model.Predict(sample).PredictedLabels;var imageData = new ImageNetDataProbability(){ImagePath = sample.ImagePath,Label = sample.Label};(imageData.PredictedLabel, imageData.Probability) = GetBestLabel(labels, probs);imageData.ConsoleWrite();yield return imageData;}
}
在 Main 方法中調用,完整代碼如下:
static void Main(string[] args)
{string assetsRelativePath = @"../../../assets";string assetsPath = GetAbsolutePath(assetsRelativePath);string tagsTsv = Path.Combine(assetsPath, "inputs", "images", "tags.tsv");string imagesFolder = Path.Combine(assetsPath, "inputs", "images");string inceptionPb = Path.Combine(assetsPath, "inputs", "inception", "tensorflow_inception_graph.pb");string labelsTxt = Path.Combine(assetsPath, "inputs", "inception", "imagenet_comp_graph_label_strings.txt");try{TFModelScorer modelScorer = new TFModelScorer(tagsTsv, imagesFolder, inceptionPb, labelsTxt);modelScorer.Score();}catch (Exception ex){ConsoleHelpers.ConsoleWriteException(ex.ToString());}ConsoleHelpers.ConsolePressAnyKey();
}
運行程序后,你將看到類似以下的輸出:
其他實現方式
在實際應用中,我們也可以使用ONNX模型,此處不做額外敘述。由于模型的性能和效率至關重要,只是提供一些優化建議:
- 模型量化:使用 ONNX Runtime 的量化工具,將模型從浮點數(FP32)轉換為整數(INT8),減少模型大小和推理時間。
- 硬件加速:結合 ONNX Runtime 的 GPU 支持,利用 CUDA 或 DirectML 加速推理。
- 批處理:如果需要處理多張圖像,可以將輸入組織為批次(batch),提高吞吐量。例如:
var inputs = new List<ImageInput> { input1, input2, input3 };
var batchPrediction = mlContext.Data.LoadFromEnumerable(inputs);
var predictions = model.Transform(batchPrediction);
- 緩存機制:對于頻繁使用的模型,保持預測引擎的單例實例,避免重復加載。
通過這些優化,模型可以在 .NET 環境中實現更高的性能,滿足實時應用的需求。
實際應用場景
圖像分類模型在 .NET 應用中有廣泛的用途,以下是幾個典型場景:
-
醫療影像分析
在醫療系統中,部署圖像分類模型可以輔助醫生識別 X 光片或 MRI 圖像中的異常。例如,檢測肺部結節或腫瘤。 -
智能安防
在監控系統中,模型可以實時識別可疑物體或行為,如檢測闖入者或遺留物品。 -
電子商務
在商品管理系統中,自動分類上傳的商品圖像,提升搜索和推薦的準確性。
挑戰與解決方案
- 數據隱私:通過加密傳輸和本地推理保護用戶數據。
- 模型更新:定期從云端下載新模型,并使用版本控制管理。
- 計算資源:在資源受限的設備上,使用輕量化模型(如 MobileNet)。
結論
本文詳細介紹了如何在 .NET 環境下使用 C# 部署和調用 AI 圖像分類模型。從環境搭建到模型選擇、部署與調用,再到性能優化和應用場景,我們提供了一套完整的實踐指南。通過 ML.NET 和預測模式的支持,開發者可以輕松地將強大的 AI 能力集成到 .NET 應用中。
隨著 AI 技術的不斷進步和 .NET 平臺的持續發展,二者的結合將為開發者帶來更多可能性。無論是構建智能桌面應用、Web 服務還是跨平臺解決方案,圖像分類模型都能為項目增添創新價值。希望本文能為你的 AI 之旅提供啟發和幫助!
參考資料
- 素材下載地址: https://storage.googleapis.com/download.tensorflow.org/models/inception5h.zip
- Netron工具地址: https://netron.app/
- 224x224圖像素材: https://www.kaggle.com/datasets/abhinavnayak/catsvdogs-transformed/data
- tensorflow教程及模型文件和label文件: https://github.com/martinwicke/tensorflow-tutorial
- Image Classification - Scoring sample: https://github.com/dotnet/machinelearning-samples/blob/main/samples/csharp/getting-started/DeepLearning_ImageClassification_TensorFlow/README.md
- ML.NET 官方文檔: https://dotnet.microsoft.com/apps/machinelearning-ai/ml-dotnet
- ONNX Model Zoo: https://github.com/onnx/models


)


整合提示詞(Prompt))


)