1.Requests模塊的使用
requests模塊的介紹與安裝
作用:發送網絡請求,返回響應數據。
中文文檔:https://requests.readthedocs.io/projects/cn/zh_CN/latest/
對于爬蟲任務,使用 requests模塊基本能夠解決絕大部分的數據抓取的任務。所以用好 requests至關重要
模塊安裝
安裝命令:
pip install requests -i https://pypi.tuna.tsinghua.edu.cn/simple
requests功能特性
Keep-Alive& 連接池- 國際化域名和
URL - 帶持久
Cookie的會話 - 瀏覽器式的
SSL認證 - 自動內容解碼
- 基本/摘要式的身份認證
- 優雅的
key/value Cookie - 自動解壓
Unicode響應體HTTP(S)代理支持- 文件分塊上傳
- 流下載
- 連接超時
- 分塊請求=-
- 支持
.netrc
requests發送網絡請求以及常用屬性
需求:通過 requests向百度首頁發送請求,獲取百度首頁數據
import requestsurl = "https://www.baidu.com"response = requests.get(url=url)print("---狀態碼如下---")
print(response.status_code)print("---bytes類型數據:---")
print(response.content)print("---str類型數據---")
print(response.text)print("---str類型數據(utf-8)---")
print(response.content.decode("utf-8"))
常用屬性如下:
response.text響應體str類型respones.content響應體bytes類型response.status_code響應狀態碼response.request.headers響應對應的請求頭response.headers響應頭response.request.headers.get('cookies')響應對應請求的cookieresponse.cookies響應的cookie(經過了set-cookie動作)response.url請求的URL
text與 content方法區別
response.text- 類型:
str - 解碼類型:
requests模塊根據HTTP頭部對響應的編碼推測文本編碼類型 - 修改編碼方式:
response.encoding = 'gbk'
- 類型:
response.content- 類型:
bytes - 解碼類型:沒有指定
- 修改編碼方式:
response.content.decode('utf-8')
- 類型:
獲取網頁源碼的通用方式:
response.encoding = 'utf-8'response.content.decode('utf-8')response.text
以上三種方式從前往后依次嘗試,百分百可以解決網頁編碼問題。
import requestsr = requests.get("https://www.baidu.com")print("-----requests一般能夠根據響應自動解碼-----")
print(r.text)print("-----如果不能夠解析出想要的真實數據,可以通過設置解碼方式-----")
r.encoding = "utf-8"
print(r.text)
下載網絡圖片
需求:將百度 logo下載到本地
思路分析:
logo的url地址:https://www.baidu.com/img/bd_logo1.png- 利用
requests模塊發送請求并獲取響應 - 使用二進制寫入的方式打開文件并將
response響應內容寫入文件內
import requests# 圖片的url
url = 'https://ywww.baidu.com/img/bd_logo1.png'# 響應本身就是一個圖片,并且是二進制類型
r = requests.get(url)# print(r.content)# 以二進制+寫入的方式打開文件
with open('baidu.png', 'wb') as f:# r.content bytes二進制類型f.write(r.content)
iter_content方法
如果下載一個較大的資源,例如一個視頻,可能需要的下載時間較長,在這個較長的下載過程中程序是不能做別的事情的(當然可以使用多任務來解決),如果在不是多任務的情況下,想要知道下載的進度,此時就可以通過類似迭代的方式下載部分資源。
- 使用
iter_content
在獲取數據時,設置屬性 stream=True
r = requests.get('https://www.baidu.com', stream=True)with open('test.html', 'wb') as f:for chunk in r.iter_content(chunk_size=100):f.write(chunk)
stream=True說明
- 如果設置了
stream=True,那么在調用iter_content方法時才會真正下載內容 - 如果沒設置
stream屬性則調用requests.get就會耗費時間下載
- 顯示視頻下載進度
import requestsdef download_video(url, save_path):response = requests.get(url, stream=True)total_size = int(response.headers.get('content-length', 0))downloaded_size = 0with open(save_path, 'wb') as file:for chunk in response.iter_content(chunk_size=1024):if chunk:file.write(chunk)downloaded_size += len(chunk)percent = (downloaded_size / total_size) * 100print(f"下載進度: {percent:.2f}%")print("下載完成...")# 調用下載函數
video_url = "http://v3-web.douyinvod.com/dbb2c985b18e9a2b6089ada19767525f/659692f3/video/tos/cn/tos-cn-ve-15c001-alinc2/oQblva95AUnIpA9DeieFkQmqAIu0IgBVD2iNTA/?a=6383&ch=5&cr=3&dr=0&lr=all&cd=0%7C0%7C0%7C3&cv=1&br=1161&bt=1161&cs=0&ds=4&ft=LjhJEL998xIouEkmD0P5H4eaciDXtVzxF_QEePMkzijD1Inz&mime_type=video_mp4&qs=0&rc=NTYzOGVlZmZpaDo6M2loM0BpM3VseGQ6ZnM2bjMzNGkzM0BgYDQuXi5iNS8xXmBgMDNfYSMvbmZocjQwL2RgLS1kLWFzcw%3D%3D&btag=e00038000&dy_q=1704362620&feature_id=46a7bb47b4fd1280f3d3825bf2b29388&l=202401041803391CCB1AB5D5A9E107FA68"
path = "video.mp4"
download_video(video_url, path)
發送請求時需要攜帶請求頭
在請求某些網址時根據不同的瀏覽器會返回不同的響應內容,所以此時就需要根據需求來修改或添加請求頭信息
獲取請求頭與響應頭
import requestsr = requests.get("https://www.baidu.com")print(r.headers)  # 響應頭
print(r.request.headers)  # 請求頭
添加
User-Agent
headers = {"User-Agent": "Mozilla/5.0 (Windows NT 10.0; Win64; x64) AppleWebKit/537.36 (KHTML, like Gecko) Chrome/54.0.2840.99 Safari/537.36"}requests.get(url, headers=headers)
攜帶
User-Agent請求百度
import requestsurl = 'https://www.baidu.com'headers = {"User-Agent": "Mozilla/5.0 (Windows NT 10.0; Win64; x64) AppleWebKit/537.36 (KHTML, like Gecko) Chrome/54.0.2840.99 Safari/537.36"
}# 在請求頭中帶上User-Agent,模擬瀏覽器發送請求
# r = requests.get(url)
r = requests.get(url, headers=headers)# 打印請求頭信息
print(r.request.headers)# 響應內容
print(r.text)
發送帶有 URL參數的請求
我們在使用百度搜索的時候經常發現 url地址中會有一個 ?,那么該問號后邊的就是請求參數,又叫做查詢字符串。如果想要做到自動搜索,就應該讓發送出去的 url攜帶參數。
示例地址:https://www.baidu.com/s?wd=python
# 1. 設置需要攜帶的查詢字符串參數
kw = {'wd': 'java'}# 2. 發送請求
response = requests.get('https://www.baidu.com/s', params=kw)# 3.查看發送的URL
print(response.url)
當前查詢字符串參數可以直接寫到 url地址中:
import requestsheaders = {"User-Agent": "Mozilla/5.0 (Windows NT 10.0; Win64; x64) AppleWebKit/537.36 (KHTML, like Gecko) Chrome/54.0.2840.99 Safari/537.36"}url = 'https://www.baidu.com/s?wd=python'# url中包含了請求參數,所以此時無需params
response = requests.get(url, headers=headers)print("請求的URL:", response.url)
print("響應內容如下:", response.content)
使用 requests發送 post請求
在 HTTP請求中,GET和 POST是使用最為頻繁的請求方式。
GET:獲取數據POST:提交數據
發送
post請求
requests模塊中能發送多種請求,例如:GET、POST、PUT、DELETE等等
發送 post請求代碼示例:
# 網站首頁:http://www.cninfo.com.cn/new/commonUrl?url=disclosure/list/notice#szse
# api地址:http://www.cninfo.com.cn/new/disclosureimport requests# 獲取到url
url = 'http://www.cninfo.com.cn/new/disclosure'
headers = {'User-Agent': 'Mozilla/5.0 (Windows NT 10.0; Win64; x64) AppleWebKit/537.36 (KHTML, like Gecko) Chrome/104.0.0.0 Safari/537.36'
}
data = {'column':'szse_latest','pageNum':'2','pageSize':'30','sortName':'','sortType':'','clusterFlag':'true',
}response = requests.post(url, headers=headers, data=data)
print(response.json())
過程分析:
- 通過瀏覽器開發者工具獲取當前網站數據
API - 查詢載荷選項卡中的表單數據
- 構建表單數據
- 發送
post請求
代碼練習:百度翻譯
import requests# 當前請求的地址為移動端地址
url = 'https://fanyi.baidu.com/basetrans'headers = {"User-Agent": "Mozilla/5.0 (iPhone; CPU iPhone OS 13_2_3 like Mac OS X) AppleWebKit/605.1.15 ""(KHTML, like Gecko) Version/13.0.3 Mobile/15E148 Safari/604.1","Cookie": 'BIDUPSID=07953C6101318E05197E77AFF3A49007; PSTM=1695298085; ''ZFY=jAXoBNlaBGlHggda:BLlW8x7pEMyEhiZUIRbuQnnavss:C; ''APPGUIDE_10_6_5=1; REALTIME_TRANS_SWITCH=1; ''FANYI_WORD_SWITCH=1; HISTORY_SWITCH=1; ''SOUND_SPD_SWITCH=1; SOUND_PREFER_SWITCH=1; ''BAIDUID=37927E8274D89B902DEB6F1A024B3860:FG=1; ''BAIDUID_BFESS=37927E8274D89B902DEB6F1A024B3860:FG=1; ''RT="z=1&dm=baidu.com&si=ba30f04e-d552-4a5a-864f-1b2b222ff176&ss=lne882ji&sl=2&tt=1''ju&bcn=https%3A%2F%2Ffclog.baidu.com%2Flog%2Fweirwood%3Ftype%3Dperf&ld=3pn&nu=''1dzl78ujc&cl=3bd&ul=61c&hd=622"; BA_HECTOR=a12g8ka22421al2k80ak21a31ihvc081o; ''BDORZ=B490B5EBF6F3CD402E515D22BCDA1598; ''Hm_lvt_64ecd82404c51e03dc91cb9e8c025574=1695476554,1696577209; ''Hm_lvt_afd111fa62852d1f37001d1f980b6800=1695476565,1696577271; ''Hm_lpvt_afd111fa62852d1f37001d1f980b6800=1696577271; Hm_lpvt_64e''cd82404c51e03dc91cb9e8c025574=1696577271; ab_sr=1.0.1_MjZiYjAyZTQ4OTZkNWU0Y2M''5YjQxMzZiOTE4Y2ZkOWNmMmI2MTNiMzhlOWQ0MTE4MzU0NDg5Njc5ZWU1ZDVkN2E4ZmM2Zjg3NjA5N2IwYWQ3OG''I3ZDBlYWJlMmFmODM3Y2FhZmJkYzgxY2EzZmI1NWRiZDgxNWMxOTU3ZjNhZTk3NzE0ZDg1OGY1MGM4YTM2ZjA1''ZTY4MGViOTI2OTlhYQ=='
}post_data = {'query': 'happy','from': 'en','to': 'zh','token': '5ff0092d623c21bdb9b429187512af44','sign': '221212.492333'
}response = requests.post(url, headers=headers, data=post_data).json()
print(response['trans'][0]['dst'])
注意:當前示例中的 cookie參數與表單參數需要自行獲取。
requests處理 cookie
引入
為了能夠通過爬蟲獲取到登錄后的頁面,或者是解決通過 cookie的反爬,需要使用 request來處理 cookie相關的請求。
爬蟲中使用
cookie的利弊
- 帶上
cookie的好處- 能夠訪問登錄后的頁面
- 能夠實現部分反反爬
- 帶上
cookie的壞處- 一套
cookie往往對應的是一個用戶的信息,請求太頻繁有更大的可能性被對方識別為爬蟲 - 那么上面的問題如何解決?使用多個賬號
- 一套
發送請求時添加
cookie
cookie字符串放在headers中
# 將cookie添加到headers中
headers = {"User-Agent": "Mozilla/5.0 (iPhone; CPU iPhone OS 13_2_3 like Mac OS X) AppleWebKit/605.1.15 ""(KHTML, like Gecko) Version/13.0.3 Mobile/15E148 Safari/604.1","Cookie": 'BIDUPSID=07953C6101318E05197E77AFF3A49007; PSTM=1695298085; ''ZFY=jAXoBNlaBGlHggda:BLlW8x7pEMyEhiZUIRbuQnnavss:C; ''APPGUIDE_10_6_5=1; REALTIME_TRANS_SWITCH=1; ''FANYI_WORD_SWITCH=1; HISTORY_SWITCH=1; ''SOUND_SPD_SWITCH=1; SOUND_PREFER_SWITCH=1; ''BAIDUID=37927E8274D89B902DEB6F1A024B3860:FG=1; ''BAIDUID_BFESS=37927E8274D89B902DEB6F1A024B3860:FG=1; ''RT="z=1&dm=baidu.com&si=ba30f04e-d552-4a5a-864f-1b2b222ff176&ss=lne882ji&sl=2&tt=1''ju&bcn=https%3A%2F%2Ffclog.baidu.com%2Flog%2Fweirwood%3Ftype%3Dperf&ld=3pn&nu=''1dzl78ujc&cl=3bd&ul=61c&hd=622"; BA_HECTOR=a12g8ka22421al2k80ak21a31ihvc081o; ''BDORZ=B490B5EBF6F3CD402E515D22BCDA1598; ''Hm_lvt_64ecd82404c51e03dc91cb9e8c025574=1695476554,1696577209; ''Hm_lvt_afd111fa62852d1f37001d1f980b6800=1695476565,1696577271; ''Hm_lpvt_afd111fa62852d1f37001d1f980b6800=1696577271; Hm_lpvt_64e''cd82404c51e03dc91cb9e8c025574=1696577271; ab_sr=1.0.1_MjZiYjAyZTQ4OTZkNWU0Y2M''5YjQxMzZiOTE4Y2ZkOWNmMmI2MTNiMzhlOWQ0MTE4MzU0NDg5Njc5ZWU1ZDVkN2E4ZmM2Zjg3NjA5N2IwYWQ3OG''I3ZDBlYWJlMmFmODM3Y2FhZmJkYzgxY2EzZmI1NWRiZDgxNWMxOTU3ZjNhZTk3NzE0ZDg1OGY1MGM4YTM2ZjA1''ZTY4MGViOTI2OTlhYQ=='
}
headers中的 cookie格式:
- 使用分號
;隔開 - 分號兩邊的類似
a=b形式的表示一條cookie a=b中,a表示鍵name,b表示值value- 在
headers中僅僅使用了cookie的name和value
- 把
cookie字典傳給請求方法的cookies參數接收
cookies = {"cookie的name": "cookie的value"}requests.get(url, headers=headers, cookies=cookie_dict)
- 使用
requests提供的session模塊(后面講解)
獲取響應時提取
cookie
使用 requests獲取的 resposne對象,具有 cookies屬性,能夠獲取對方服務器設置在本地的 cookie,但是如何使用這些 cookie呢?
使用 requests模塊提供的 response.cookies方法。
response.cookies是CookieJar類型- 使用
requests.utils.dict_from_cookiejar,能夠實現把cookiejar對象轉化為字典
import requestsurl = "https://www.baidu.com"
# 發送請求,獲取resposne
response = requests.get(url)
print(type(response.cookies))# 使用方法從cookiejar中提取數據
cookies = requests.utils.dict_from_cookiejar(response.cookies)
print(cookies)
重定向與歷史請求
測試代碼
import requestsheaders = {"User-Agent": "Mozilla/5.0 (iPhone; CPU iPhone OS 13_2_3 like Mac OS X) AppleWebKit/605.1.15 (KHTML, like Gecko) Version/13.0.3 Mobile/15E148 Safari/604.1"
}r = requests.get("http://www.baidu.com", headers=headers)
print(r.url)# 以上代碼打印結果為:https://m.baidu.com/?from=844b&vit=fps
思考:為什么打印出來的 URL不是請求的 URL呢?
想要搞清楚這個問題,就要知道 requests的重定向問題。
Requests的默認情況
默認情況下,requests發送的請求除了方式為 HEAD之外,其余的請求例如 GET、POST等都是能自動進行重定向的
這也就是為什么上面明明訪問的是 http://www.baidu.com而打印出來之后是 https://m.baidu.com/?from=844b&vit=fps的原因
取消自動重定向
在發送請求的時候,可以通過如下的設置,取消 requests模塊的自動重定向功能
requests.get(url, allow_redirects=False)
示例代碼:
import requestsheaders = {"User-Agent": "Mozilla/5.0 (iPhone; CPU iPhone OS 13_2_3 like Mac OS X) AppleWebKit/605.1.15 (KHTML, like Gecko) Version/13.0.3 Mobile/15E148 Safari/604.1"
}r = requests.get("http://www.baidu.com", headers=headers, allow_redirects=False)print(r.status_code)
print(r.url)
默認情況下獲取歷史請求
通過 response.history可以獲取到請求的歷史記錄
import requestsheaders = {"User-Agent": "Mozilla/5.0 (iPhone; CPU iPhone OS 13_2_3 like Mac OS X) AppleWebKit/605.1.15 (KHTML, like Gecko) Version/13.0.3 Mobile/15E148 Safari/604.1"
}r = requests.get("http://www.360buy.com", headers=headers)print("歷史請求過程信息:")
print(r.history)
for one_info in r.history:print(one_info.status_code, one_info.url, one_info.headers)print("\n\n最后一次的請求信息:")
print(r.status_code, r.url, r.headers)
SSL證書錯誤
在瀏覽網頁時,可能會遇到以下這種情況:
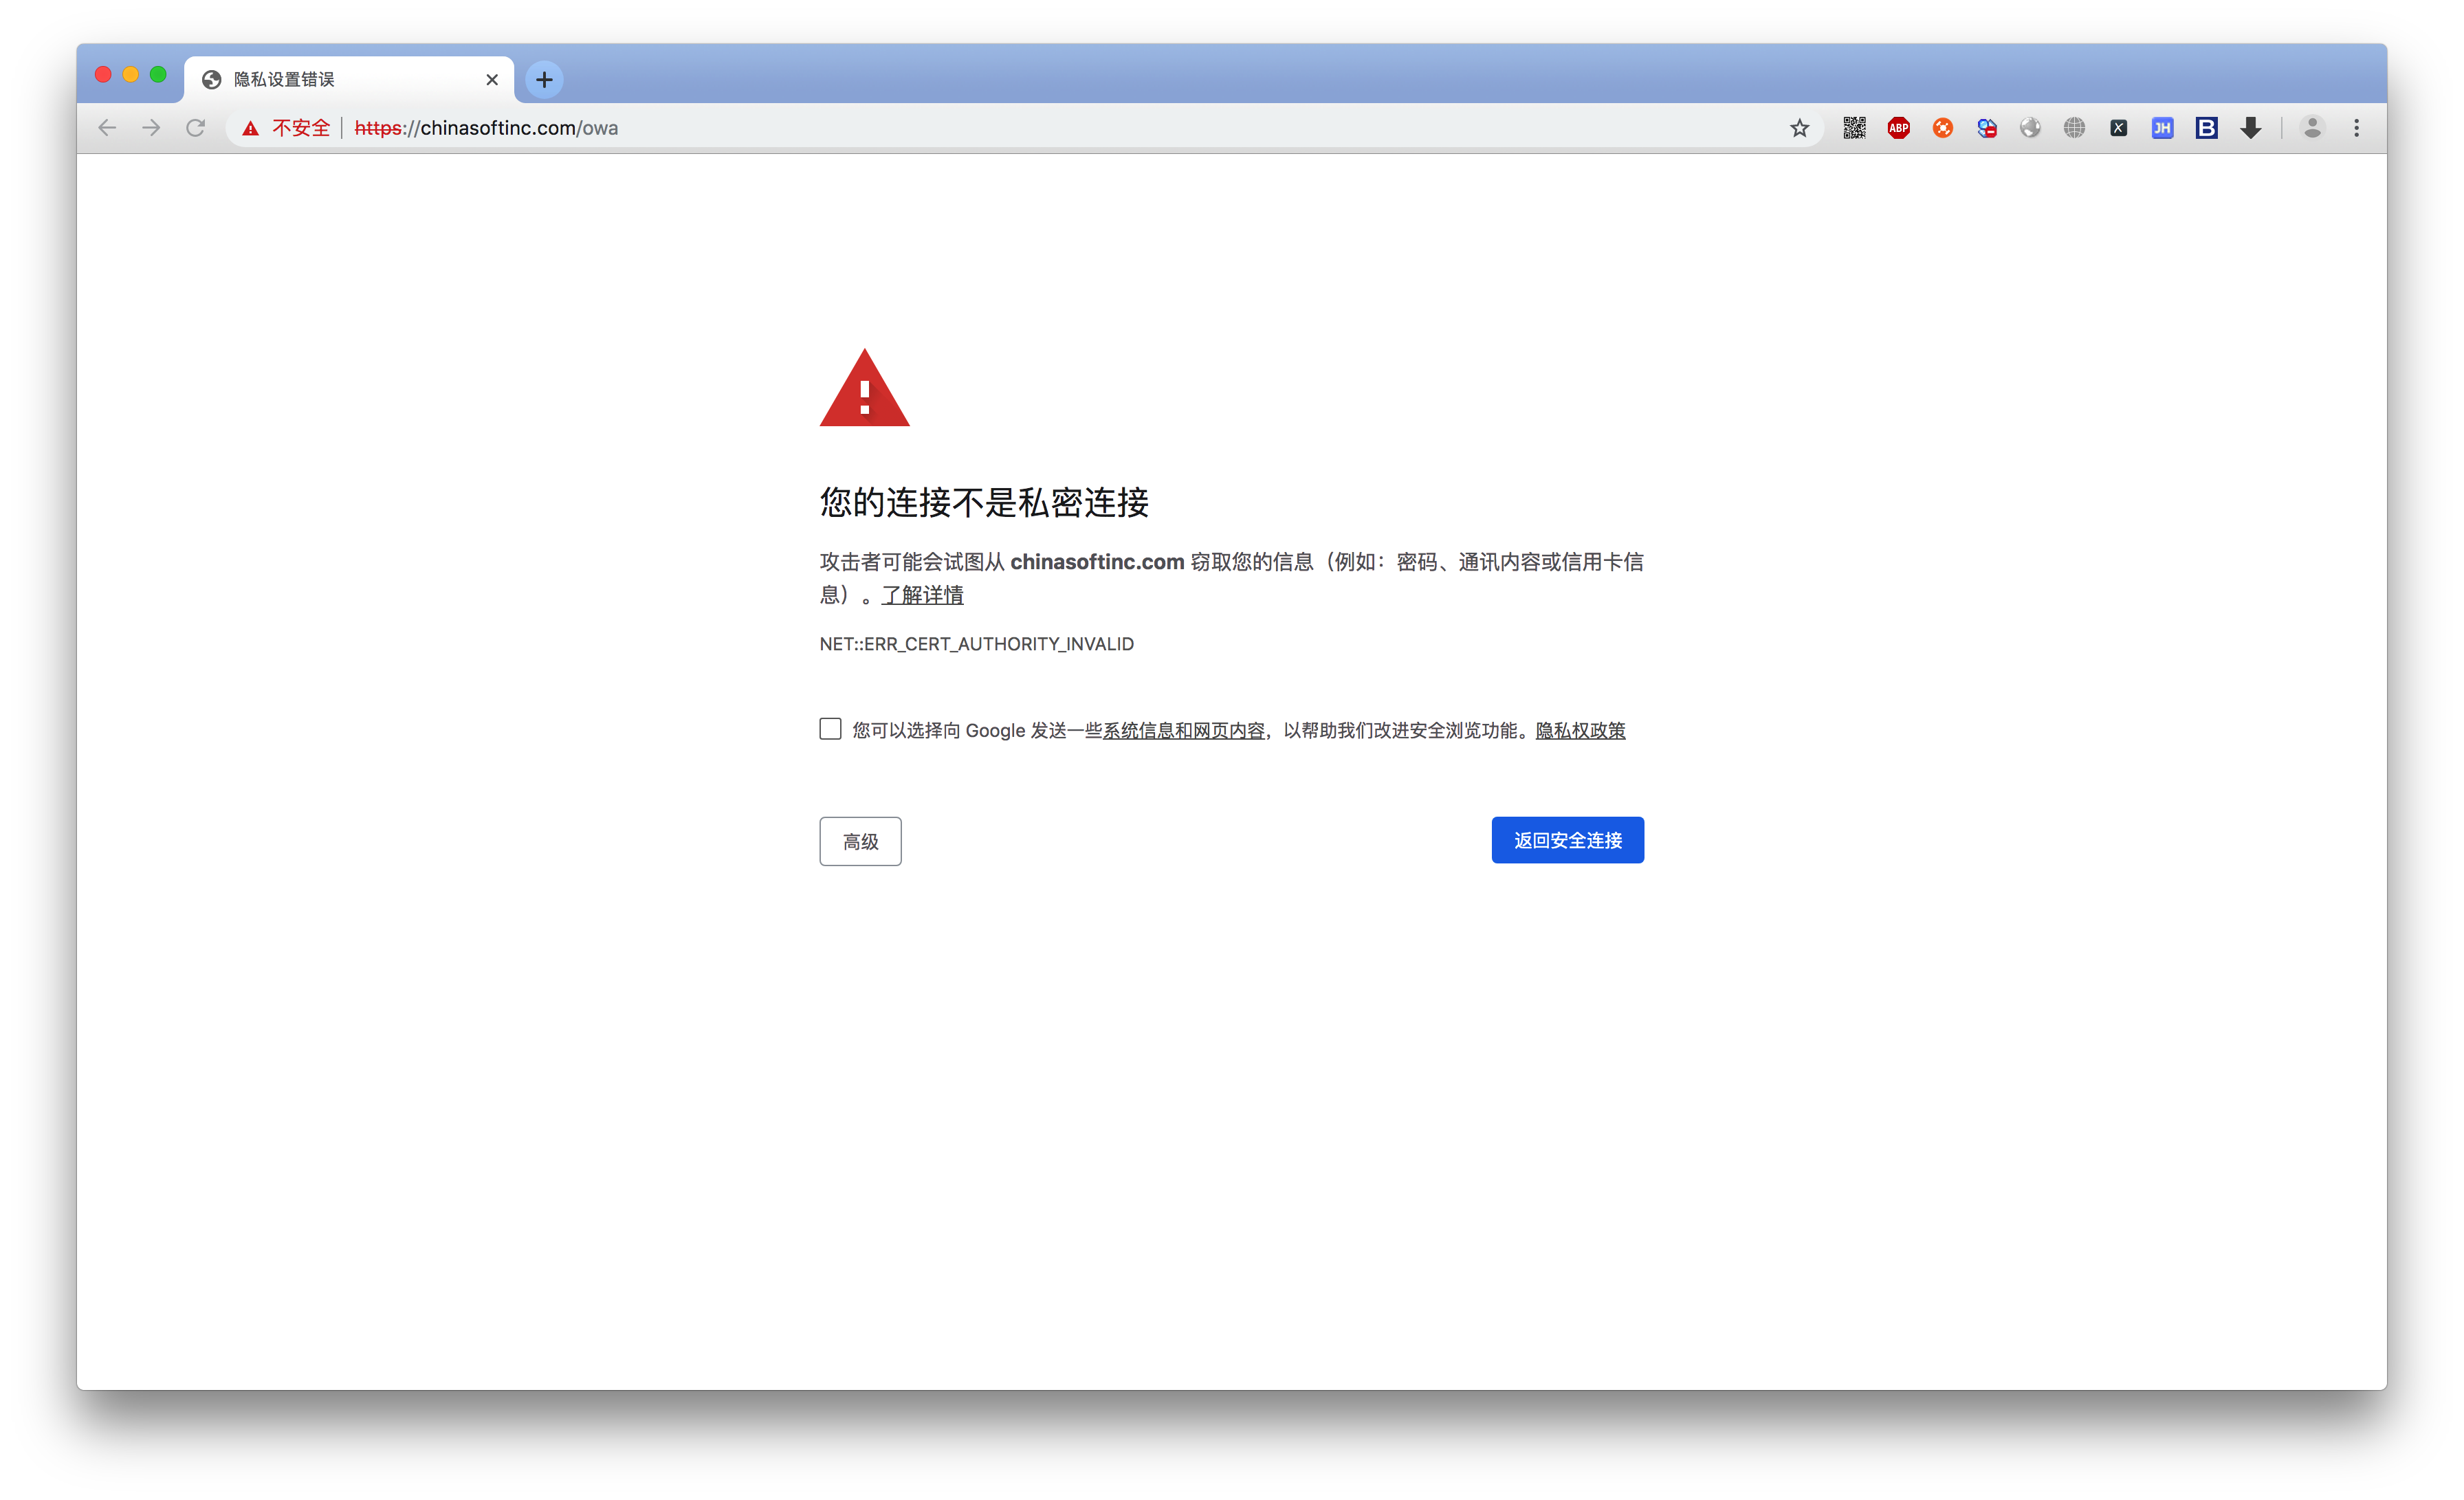
出現這個問題的原因是:ssl的證書不安全導致。
在代碼中發起請求的效果
import requestsurl = "https://chinasoftinc.com/owa"
response = requests.get(url)# 當前程序報錯:ssl.CertificateError...
解決方案
在代碼中設置 verify參數
import requestsurl = "https://12306.cn/mormhweb/"
response = requests.get(url, verify=False)
請求超時
在爬蟲中,一個請求很久沒有結果,就會讓整個項目的效率變得非常低。這個時候我們就需要對請求進行強制要求,讓他必須在特定的時間內返回結果,否則就報錯。
超時參數的使用
r = requests.get(url, timeout=3)
通過添加 timeout參數,能夠保證在3秒鐘內返回響應,否則會報錯。
import requests# url = "https://www.baidu.com"
url = "https://www.google.com"response = requests.get(url=url, timeout=1)
這個方法還能夠拿來檢測代理 ip(代理會在后面講解)的質量,如果一個代理 ip在很長時間沒有響應,那么添加超時之后也會報錯,對應的這個 ip就可以從代理 ip池中刪除。
retrying模塊的使用
使用超時參數能夠加快我們整體的運行速度。但是在普通的生活中當我們使用瀏覽器訪問網頁時,如果發生速度很慢的情況,我們會做的選擇是刷新頁面。那么在代碼中,我們是否也可以刷新請求呢?
在本小節中我們使用 retrying模塊來完成需求。
retrying模塊的使用
模塊地址:https://pypi.org/project/retrying/
安裝指令如下:pip install retrying -i https://pypi.tuna.tsinghua.edu.cn/simple
作用:
- 使用
retrying模塊提供的retry模塊 - 通過裝飾器的方式使用,讓被裝飾的函數反復執行
retry中可以傳入參數stop_max_attempt_number,讓函數報錯后繼續重新執行,達到最大執行次數的上限,如果每次都報錯,整個函數報錯,如果中間有一個成功,程序繼續往后執行
import timefrom retrying import retrynum = 1@retry(stop_max_attempt_number=3)
def test():global numprint("num=", num)num += 1time.sleep(1)for i in 100:print("i", i)if __name__ == '__main__':try:test()except Exception as ret:print("產生異常...")print(ret)else:print("沒有異常")
retrying和requests的簡單封裝
實現一個發送請求的函數,每次爬蟲中直接調用該函數即可實現發送請求
- 使用
timeout實現超時報錯 - 使用
retrying模塊實現重試
示例代碼:
import requests
from retrying import retrynum = 1@retry(stop_max_attempt_number=3)
def _parse_url(url):global numprint("第%d次嘗試" % num)num += 1headers = {"User-Agent": "Mozilla/5.0 (iPhone; CPU iPhone OS 13_2_3 like Mac OS X) AppleWebKit/605.1.15 (KHTML, like Gecko) Version/13.0.3 Mobile/15E148 Safari/604.1"}# 超時的時候會報錯并重試response = requests.get(url, headers=headers, timeout=3)# 狀態碼不是200,也會報錯并重試assert response.status_code == 200  # 此語句是"斷言",如果assert后面的條件為True則呈現繼續運行,否則拋出異常return responsedef parse_url(url):# 進行異常捕獲try:response = _parse_url(url)except Exception as e:print("產生異常:", e)# 報錯返回Noneresponse = Nonereturn responseif __name__ == '__main__':url = "https://chinasoftinc.com/owa"# url = "https://www.baidu.com"print("----開始----")r = parse_url(url=url)print("----結束----", "響應內容為:", r)
發送 json格式數據
當我們發送 POST請求的時候,一般會攜帶數據,之前在學習 POST時,可以通過給 data賦值,從而能夠完成傳遞 form表單數據。
requests.post(url, data={"kw": "python"})
但有很多時候,要向服務器發送的是 json數據,此時應該怎么辦呢?
requests.post(url, json={"kw": "python"})
在請求方法中設置 json參數即可。
代碼示例:
import requestsheaders = {"User-Agent": "Mozilla/5.0 (iPhone; CPU iPhone OS 13_2_3 like Mac OS X) AppleWebKit/605.1.15 (KHTML, like Gecko) Version/13.0.3 Mobile/15E148 Safari/604.1"
}r = requests.post("https://fanyi.baidu.com/sug", headers=headers, json={"kw": "python"}, timeout=3)
print("請求頭是:", r.request.headers)
print("請求體是:", r.request.body)
Session會話
當我們在爬取某些頁面的時候,服務器往往會需要 cookie,而想要得到 cookie就需要先訪問某個 URL進行登錄,服務器接收到請求之后驗證用戶名以及密碼在登錄成功的情況下會返回一個響應,這個響應的 header中一般會有一個 set-cookie的信息,它對應的值就是要設置的 cookie信息。
雖然我們再之前可以通過 requests.utils.dict_from_cookiejar(r.cookies)提取到這個響應信息中設置的新 cookie,但在下一個請求中再攜帶這個數據的過程較為麻煩,所以 requests有個高級的方式 - 會話 Session
Session的作用
Session能夠跨請求保持某些參數,也會在同一個 Session實例發出的所有請求之間保持 cookie
會話保持有兩個內涵:
- 保存
cookie,下一次請求會自動帶上前一次的cookie - 實現和服務端的長連接,加快請求速度
使用方法
# 1. 創建一個session實例對象
s = requests.Session()# 2. 使用上一步創建的對象發起請求
r = s.get(url1, headers)
r = s.get(url2, headers)
r = s.get(url3, headers)
r = s.get(url4, headers)
session對象在請求了一個網站后,對方服務器設置在本地的 cookie會保存在 session對象中,下一次再使用 session對象請求對方服務器的時候,會自動帶上前一次的 cookie
代碼示例:
import requestssession = requests.Session()headers = {"User-Agent": "Mozilla/5.0 (iPhone; CPU iPhone OS 13_2_3 like Mac OS X) AppleWebKit/605.1.15 (KHTML, like Gecko) Version/13.0.3 Mobile/15E148 Safari/604.1"
}# 發送第一個請求
response = session.get('https://www.baidu.com', headers=headers)
print("第一次請求的請求頭為:", response.request.headers)
print("響應頭:", response.headers)
print("設置的cookie為:", requests.utils.dict_from_cookiejar(response.cookies))# 發送第二個請求
response = session.get("https://www.baidu.com")
print("第二次請求的請求頭為:", response.request.headers)
代理
使用代理的原因
當在爬某個網站的時候,如果對方進行了封鎖例如將我們電腦的公網 ip封鎖了,那么也就意味著只要是這個 ip發送的所有請求這個網站都不會進行響應;此時我們就可以使用代理,繞過它的封鎖從而實現繼續爬取數據
基本原理
在當前用戶電腦中連接其他區域的電腦,每臺電腦因為區域不同所以分配的 ip也不相同。使用其他區域的電腦幫助我們發送想要發送的請求。
基本使用
將代理地址與端口配置成字典并使用 proxies參數傳遞
proxies = {"http": "http://10.10.1.10:3128","https": "http://10.10.1.10:1080",
}requests.get("https://example.org", proxies=proxies)
如何獲取代理
- 百度查詢
免費代理ip,但一般情況下都不太好用 - 付費代理:https://www.zmhttp.com/?have_open_ok=1
對于免費代理大部分都是不可用的,建議可以使用付費代理。例如:芝麻代理、快代理等等。
代理案例
import requests# http代理
ip = "127.0.0.1"
port = 7890proxies = {"http": "http://%s:%d" % (ip, port),"https": "http://%s:%d" % (ip, port)
}# 請求頭
headers = {"User-Agent": "Mozilla/5.0 (Macintosh; Intel Mac OS X 10_15_3) AppleWebKit/537.36 ""(KHTML, like Gecko) Chrome/86.0.4240.183 Safari/537.36"
}url = "http://httpbin.org/ip"response = requests.get(url=url, headers=headers, proxies=proxies, timeout=10)
print(response.text)


![[特殊字符] 如何在比賽前調整到最佳狀態:科學與策略結合的優化指](http://pic.xiahunao.cn/[特殊字符] 如何在比賽前調整到最佳狀態:科學與策略結合的優化指)

)
book-management)
、LSH、K-means)


